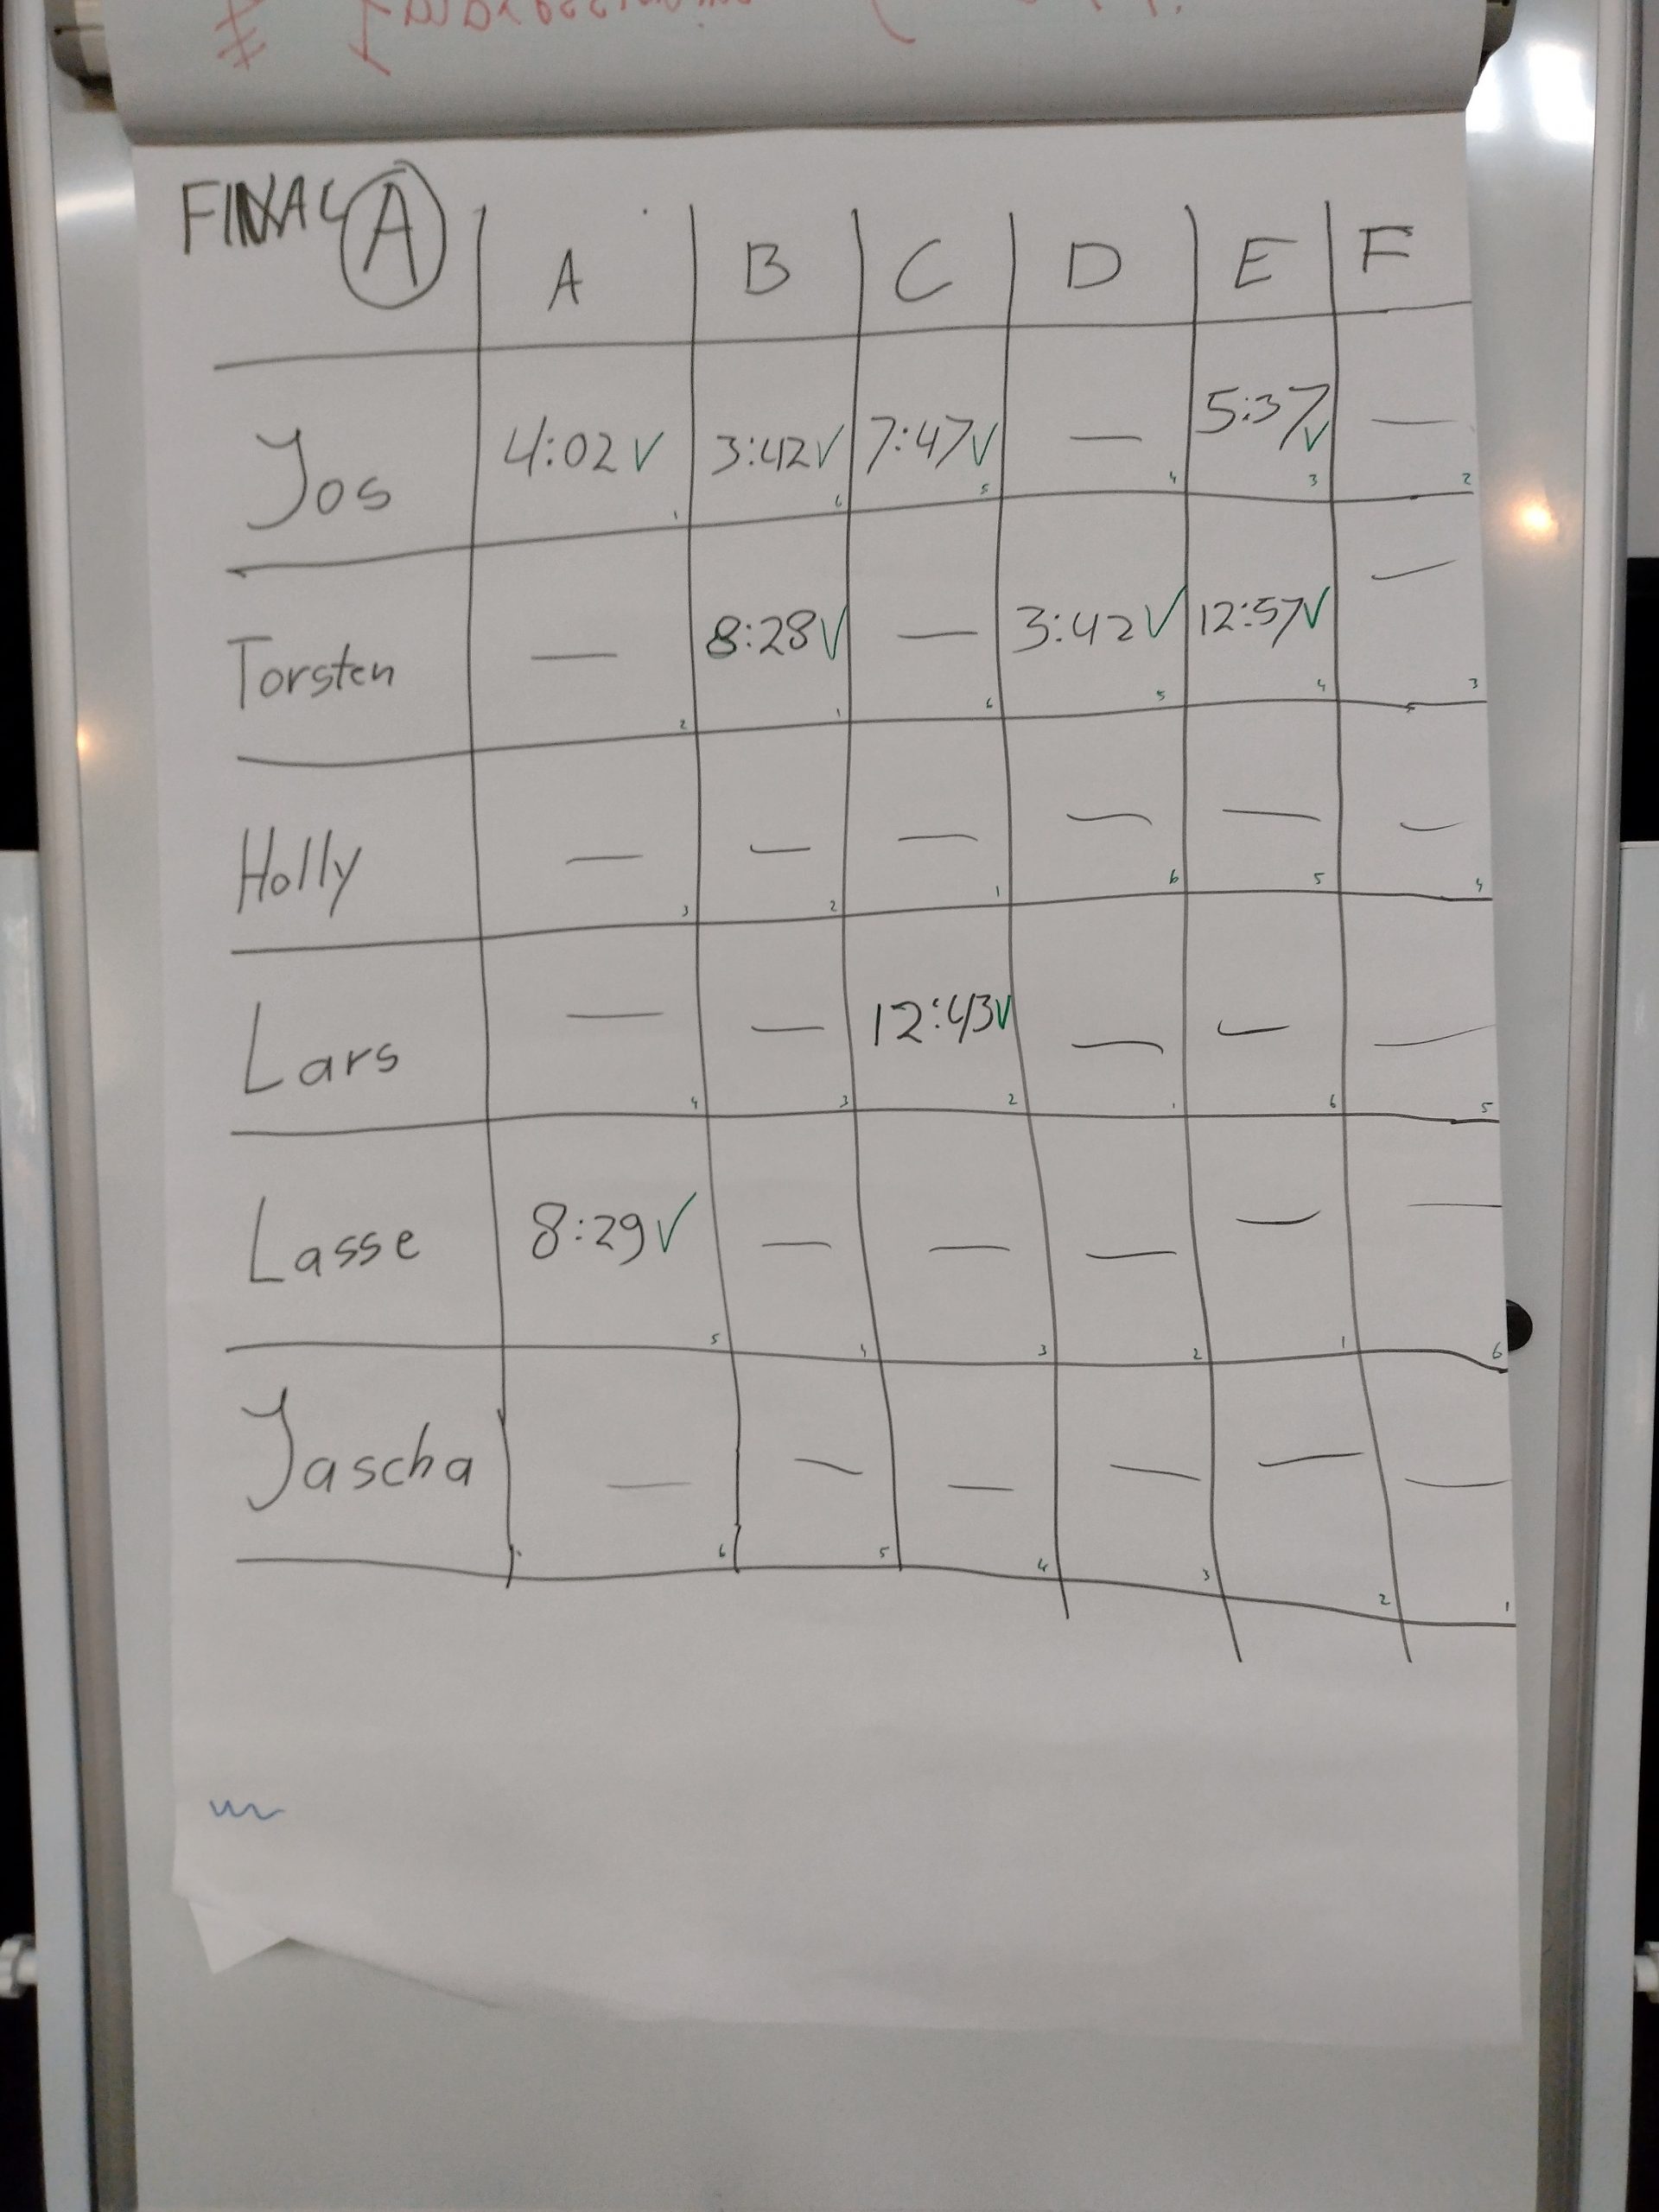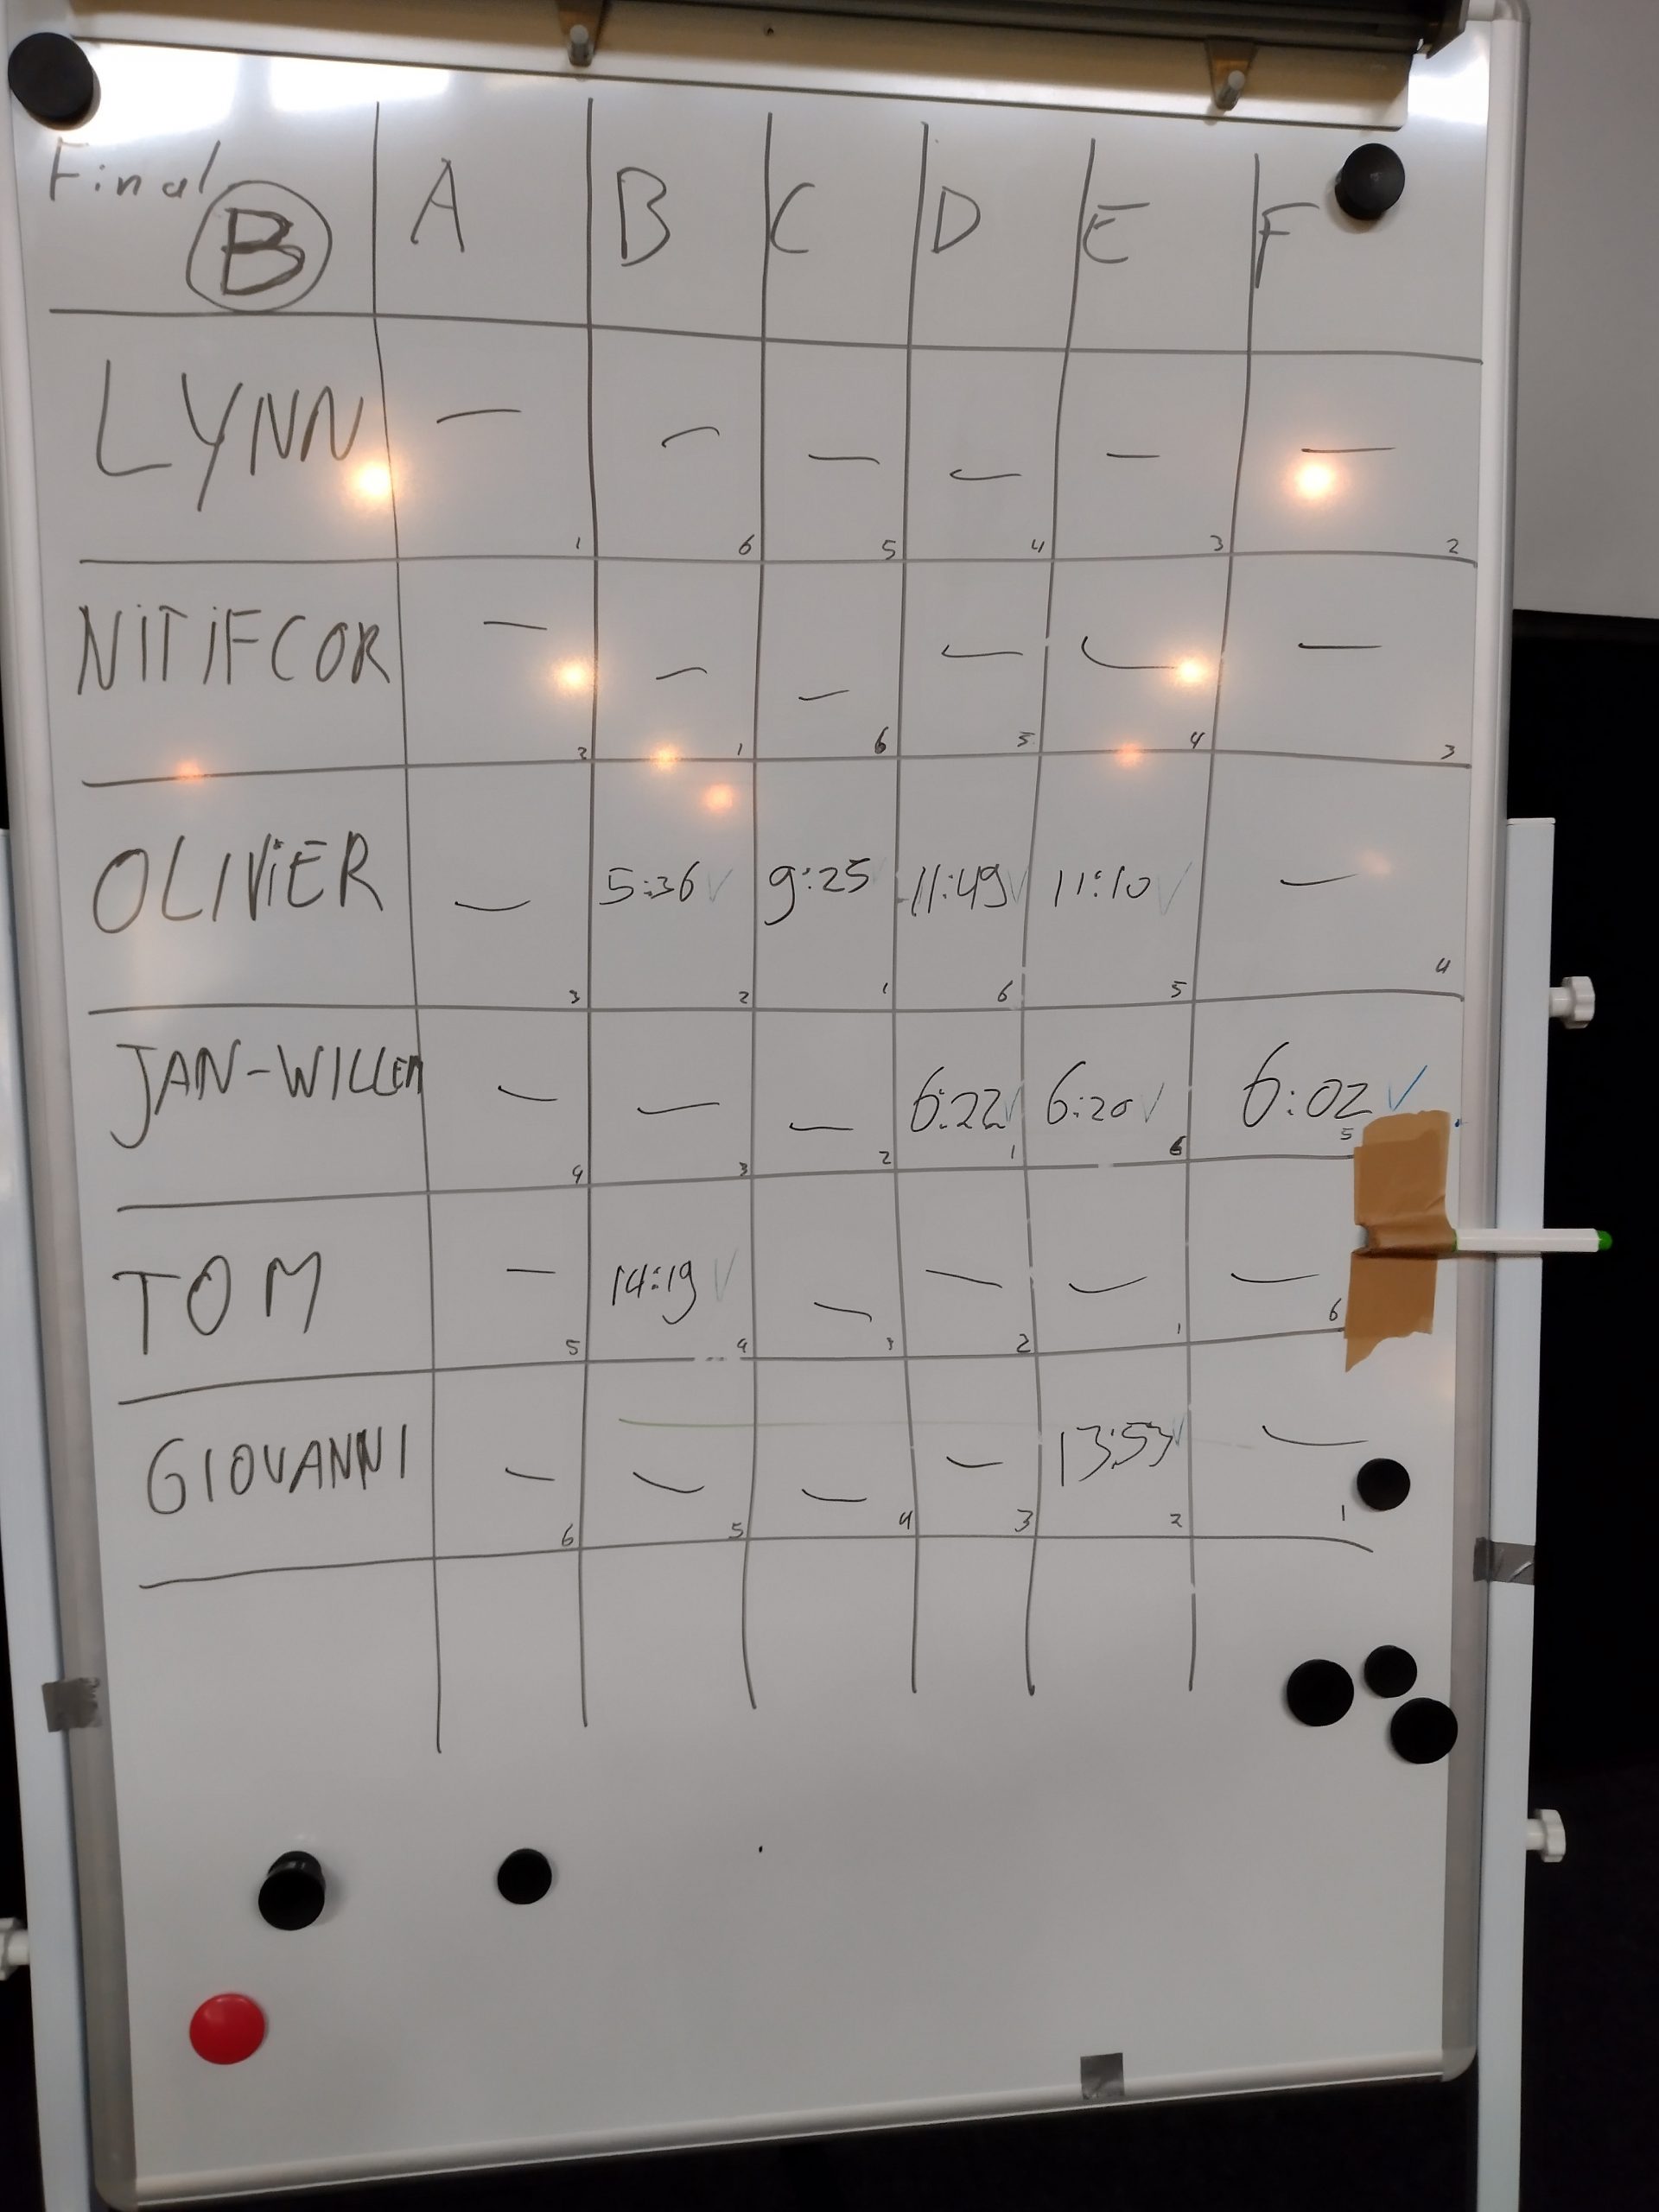
Impressioning competition are all about opening the most locks in the least amount of time. Quite often, every second counts. As we have been playing the game for a couple of decades, it wouldn’t surprise you that the locks become harder, the times have been getting faster, and the openings more consistent.
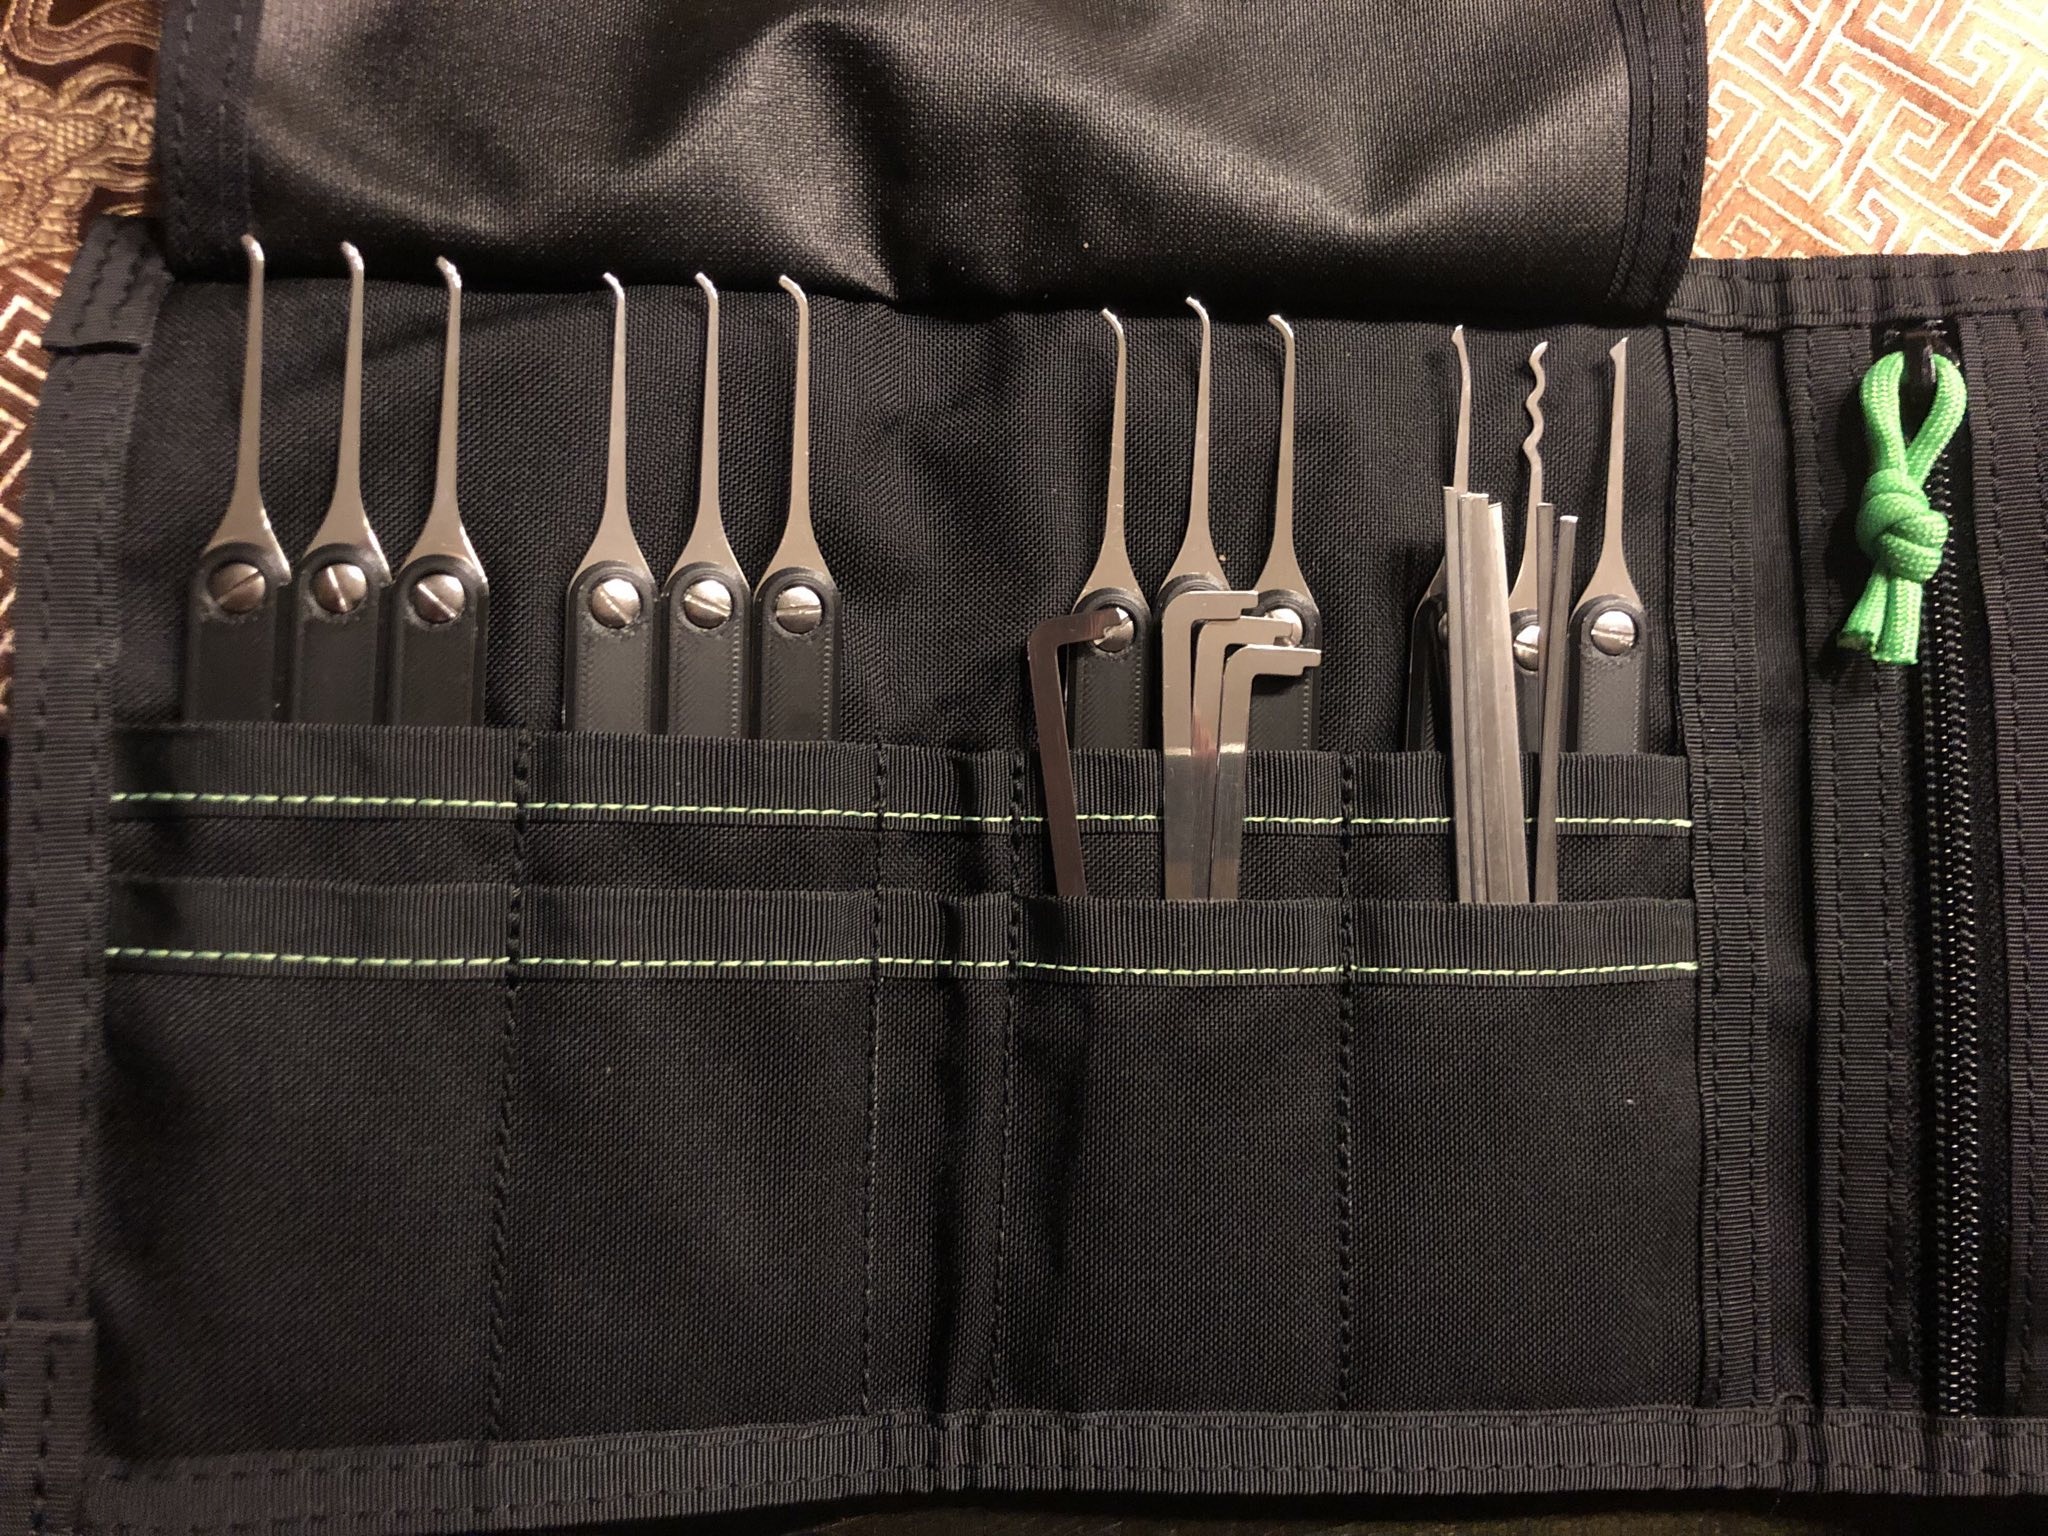
Most of the players have reinvented their setup multiple times. I’ve seen 3D printed attributes for key marking, and often see the newest inventions. To keep it fair, however, you require sharing the idea before the competition, as to prevent an unfair advantage.
My first improvements have been to watch the masters work, and to copy what they do. Whereas my last improvements are much more subtle. I’ve, for example, reduced the distance between the lock, lamp, and table. And improved my handling process to save seconds here and there. I don’t believe we are done, either, as I’m trying to find a better way of placing my file when I’m not using it.
The tool idea of this blog isn’t a new one. It has, in fact, existed over a decade in use. We have blogged about it back then: When every second counts: formula 1 impressioning tool. It’s however, still relevant.
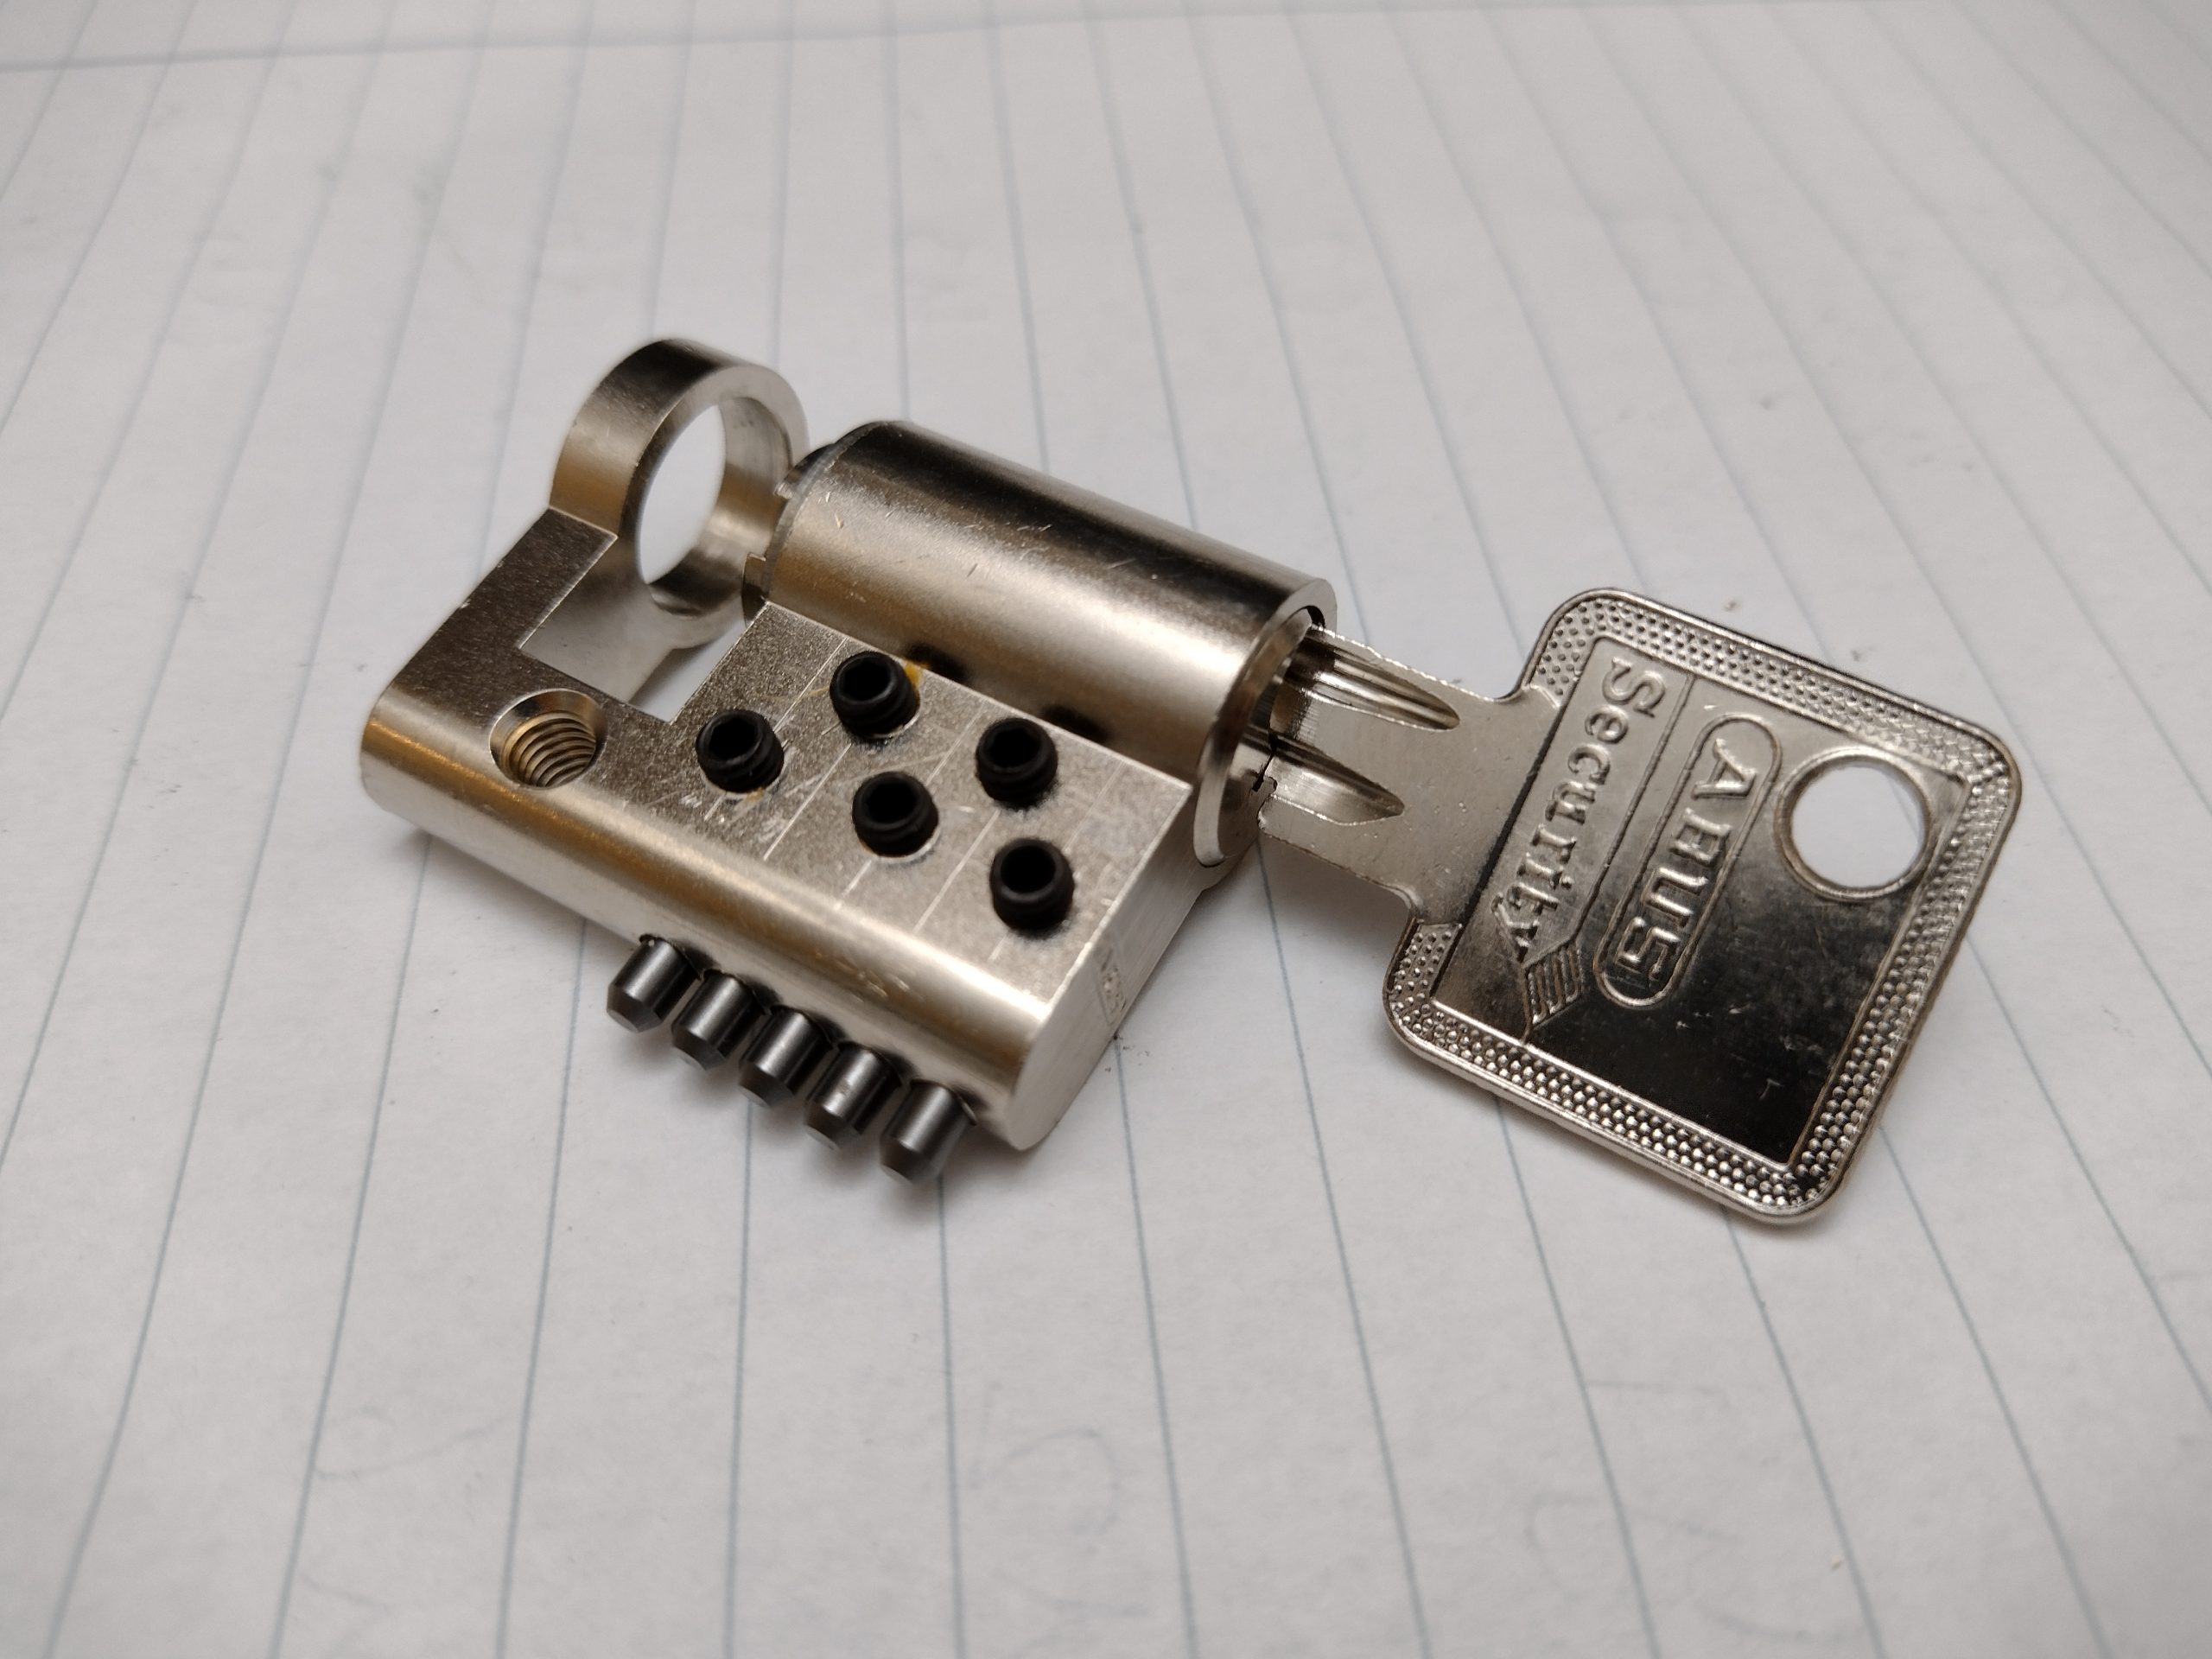
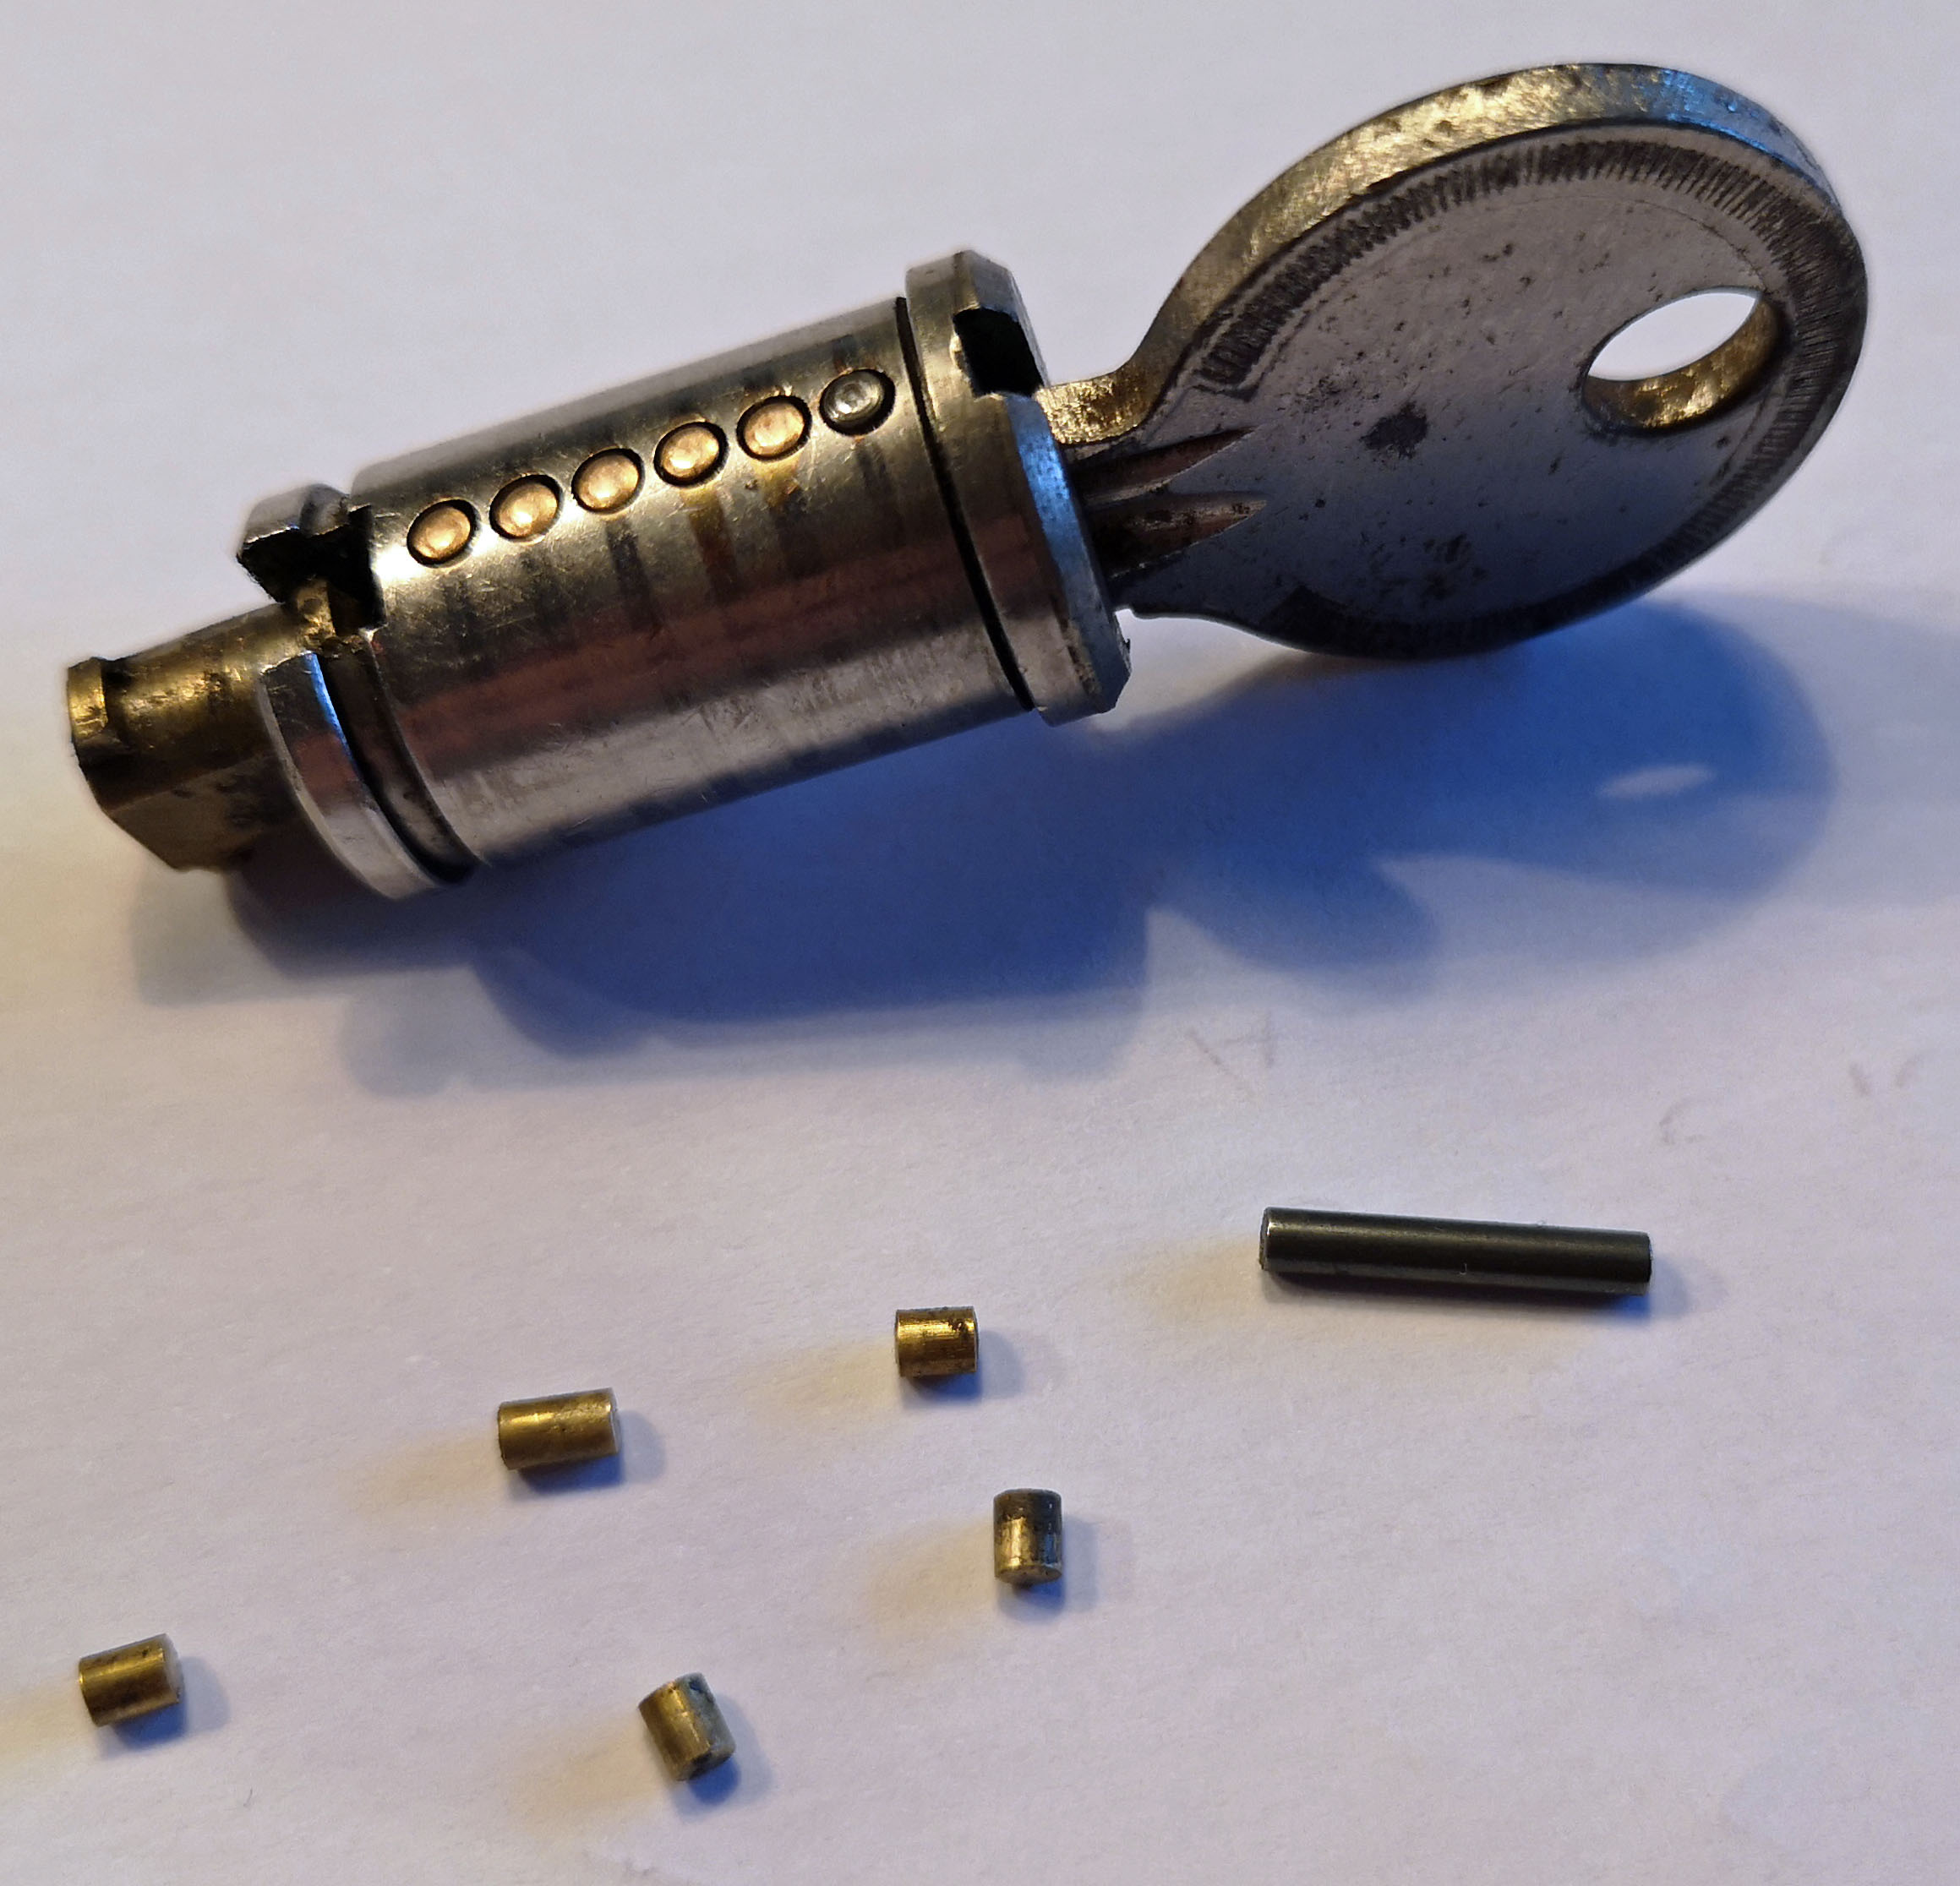
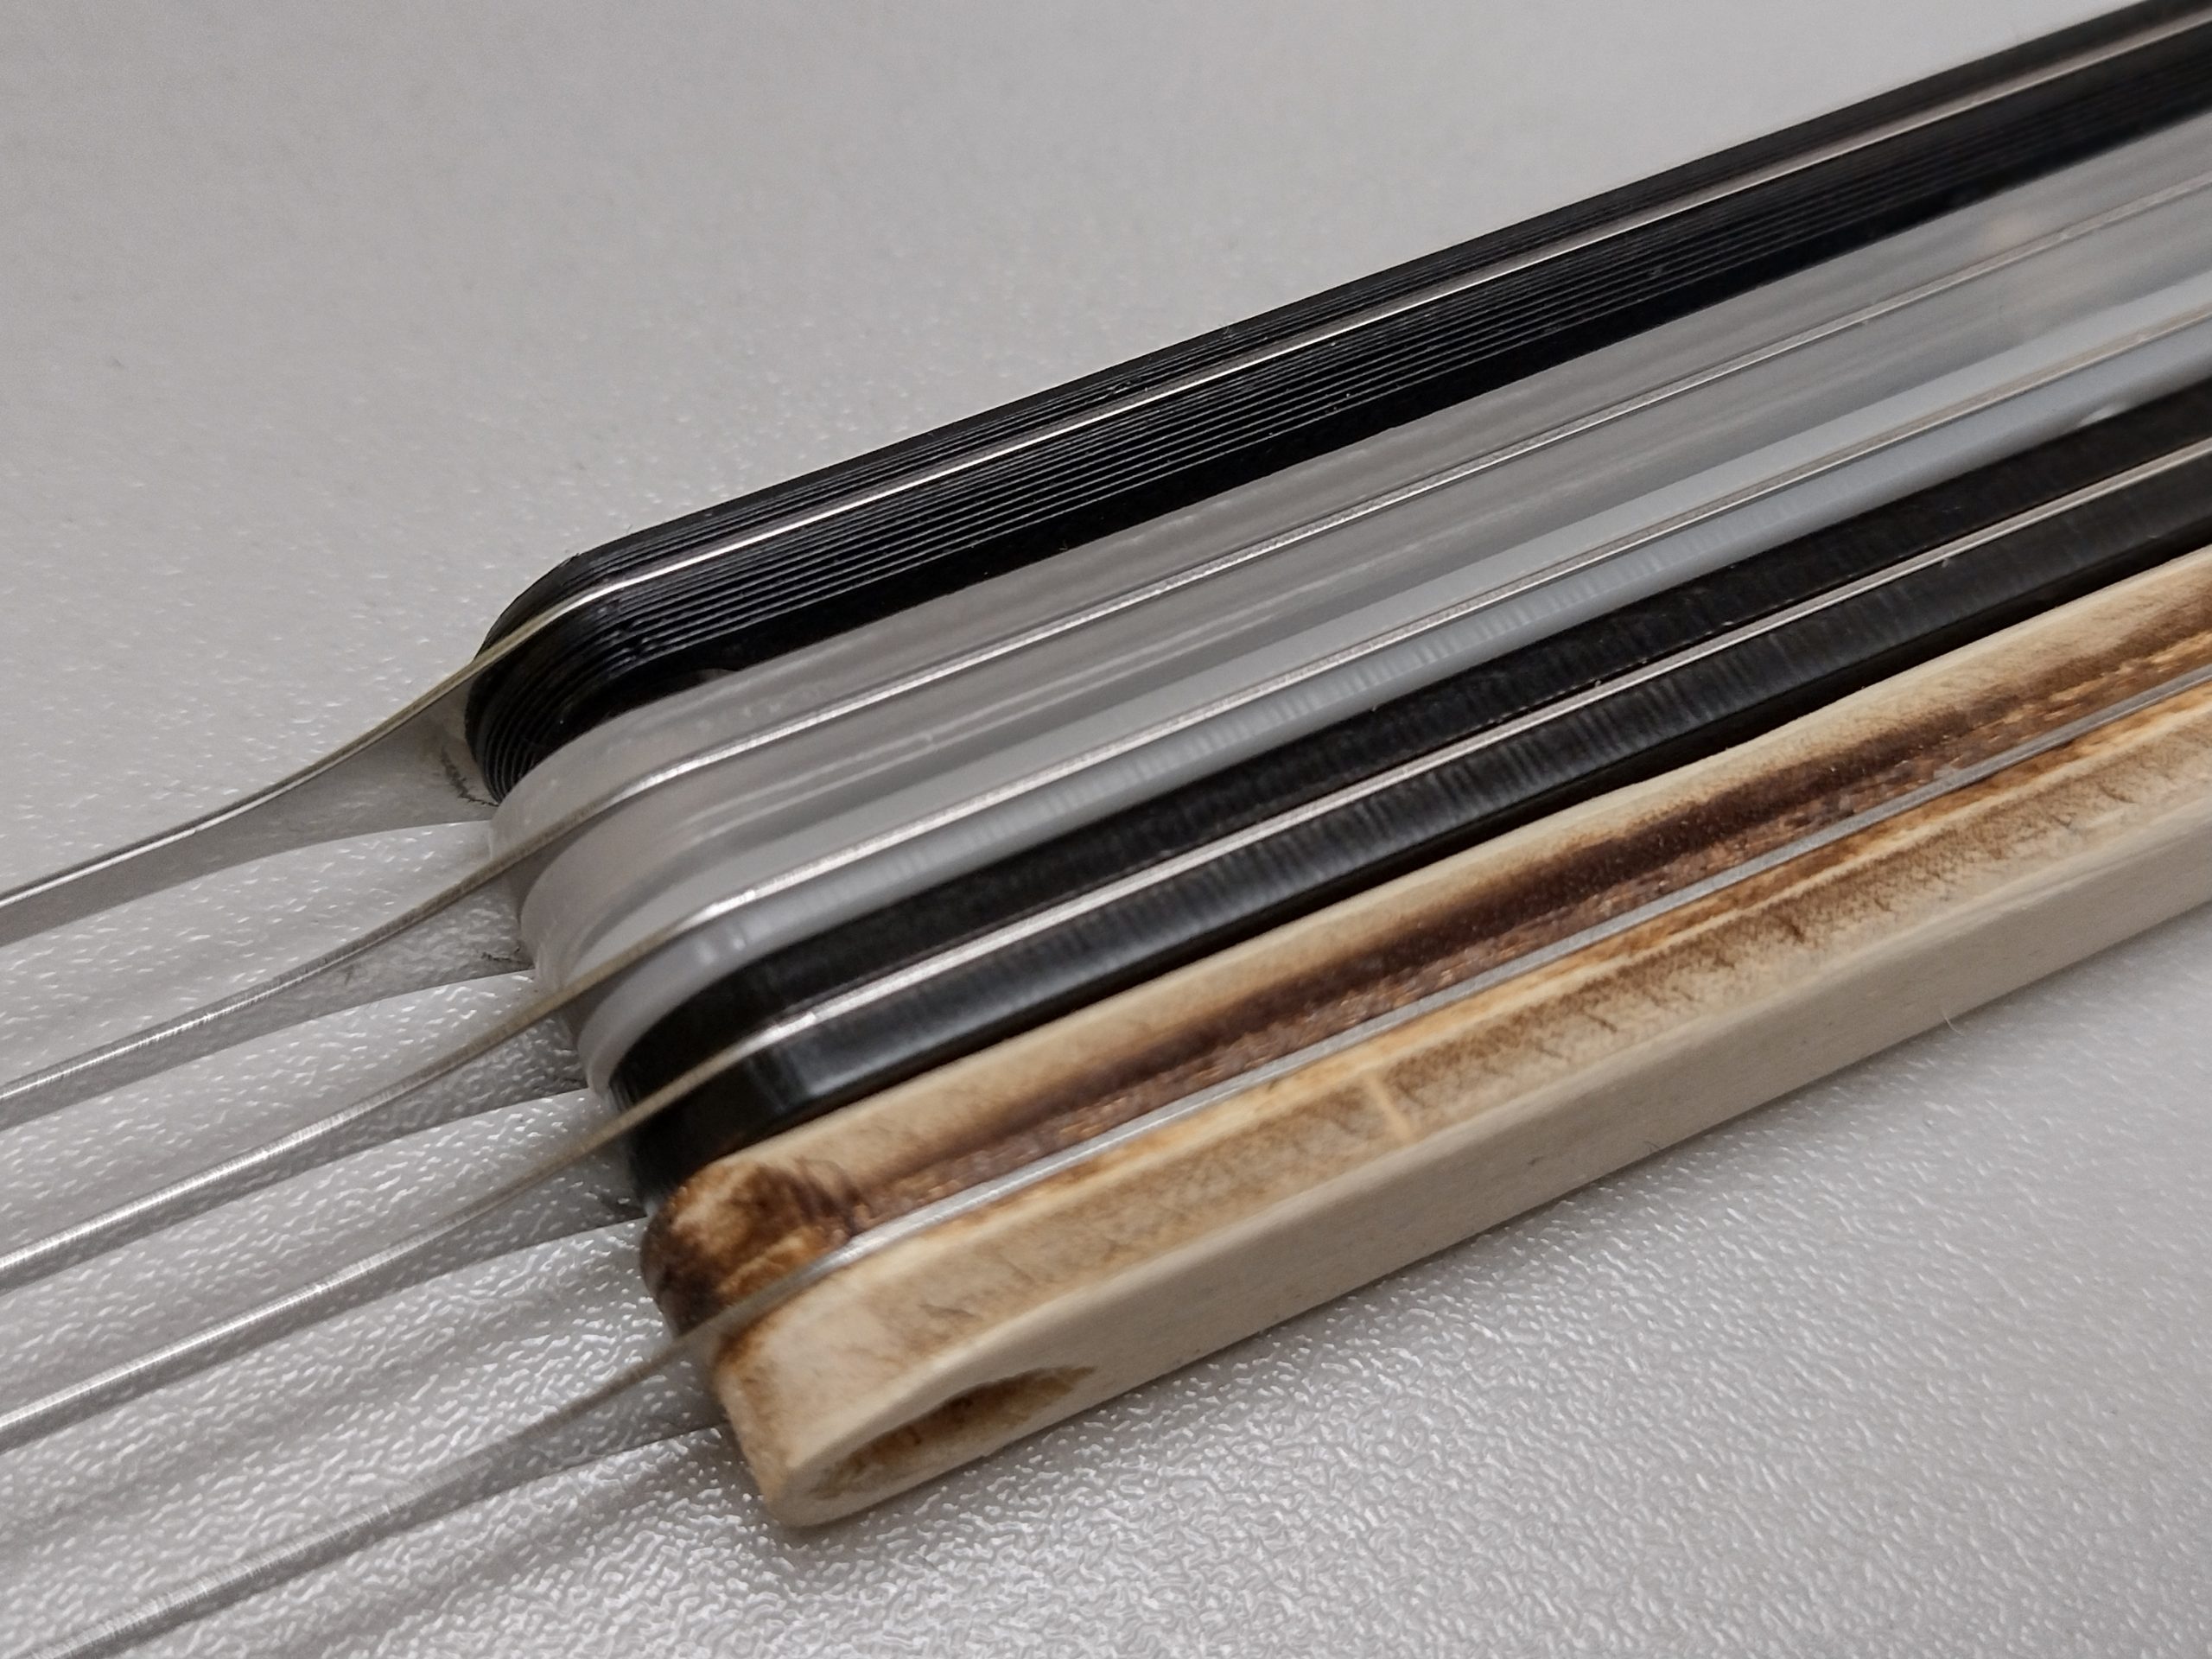
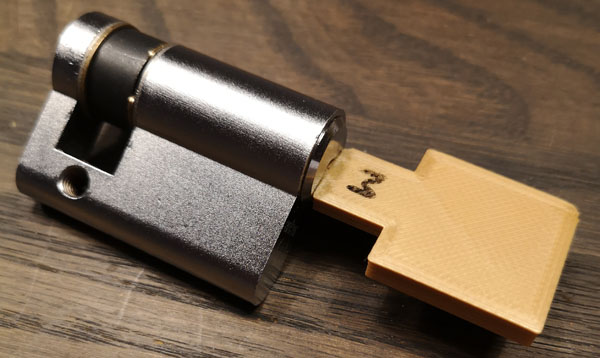
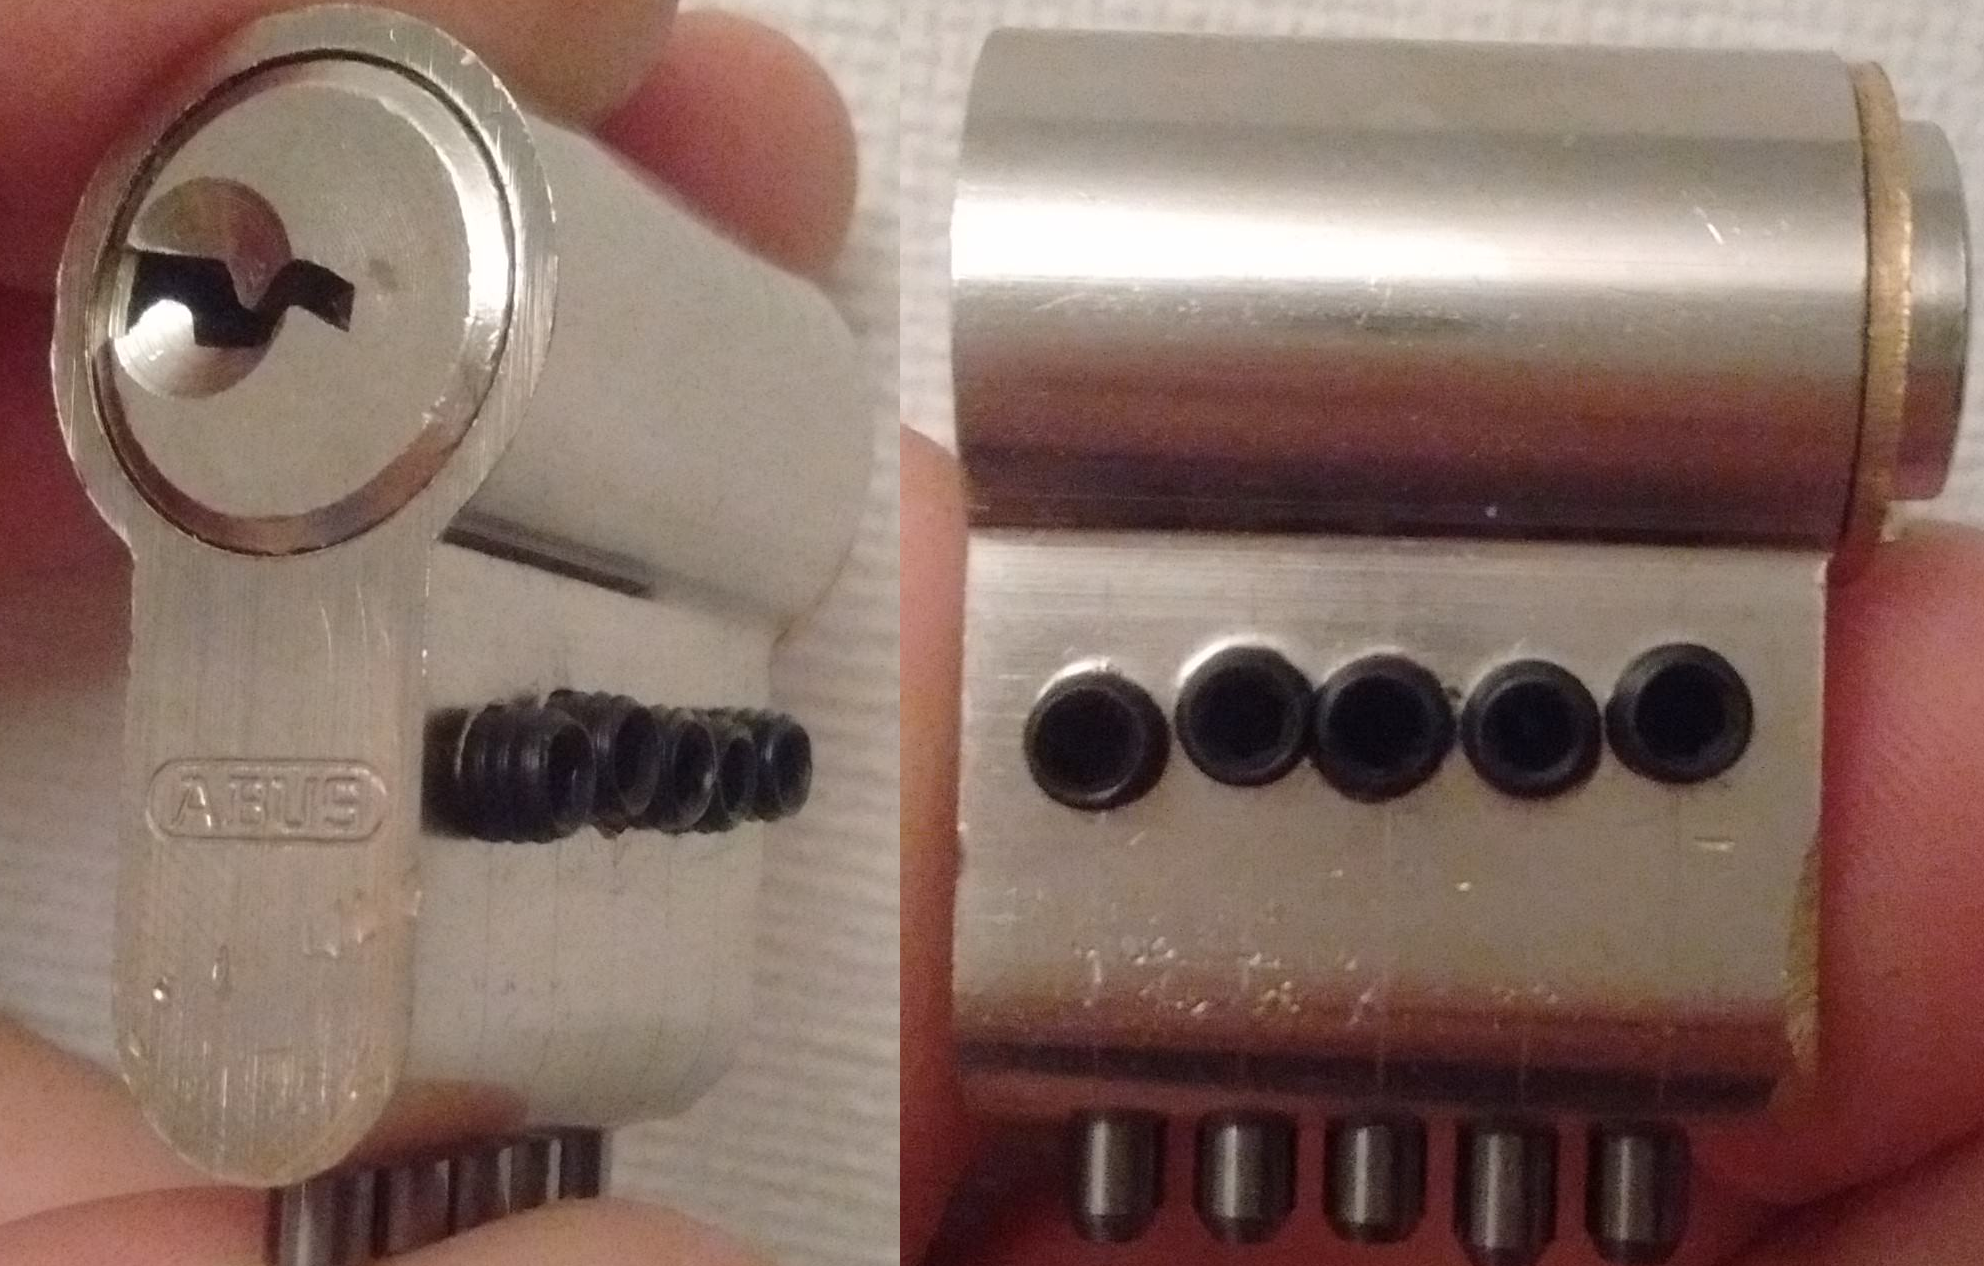
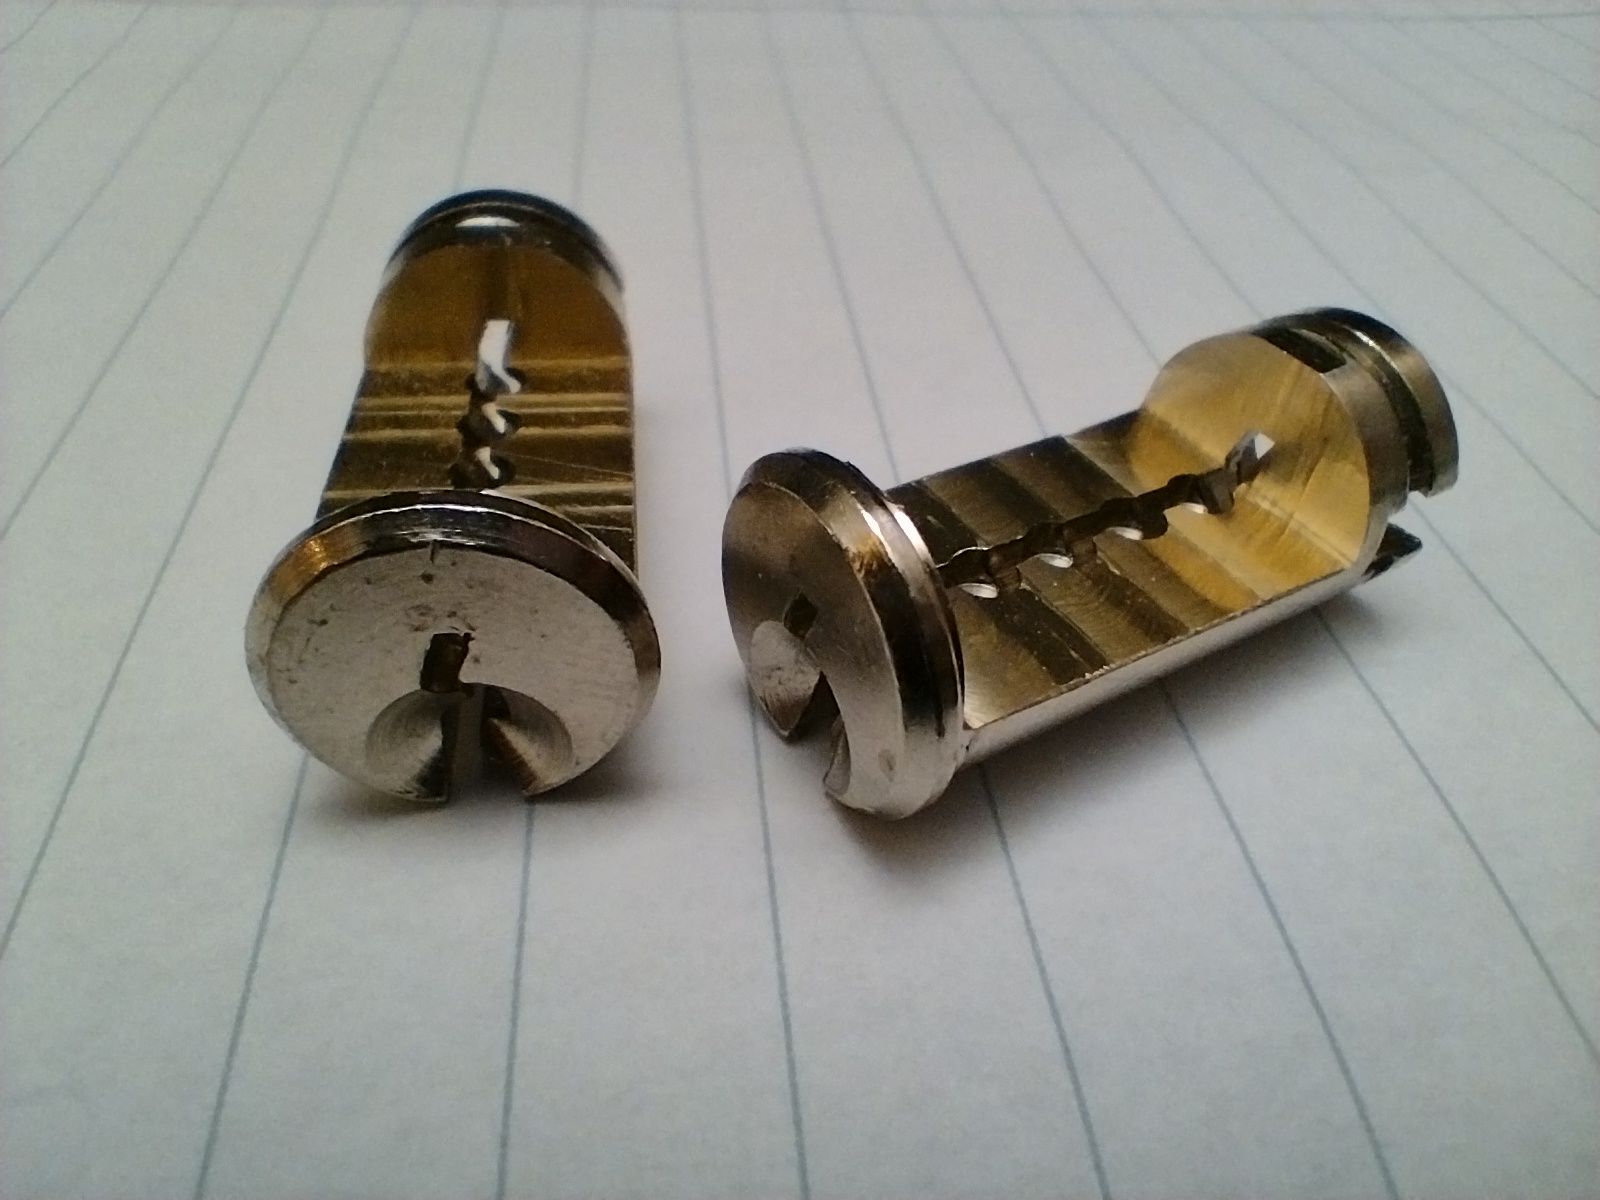
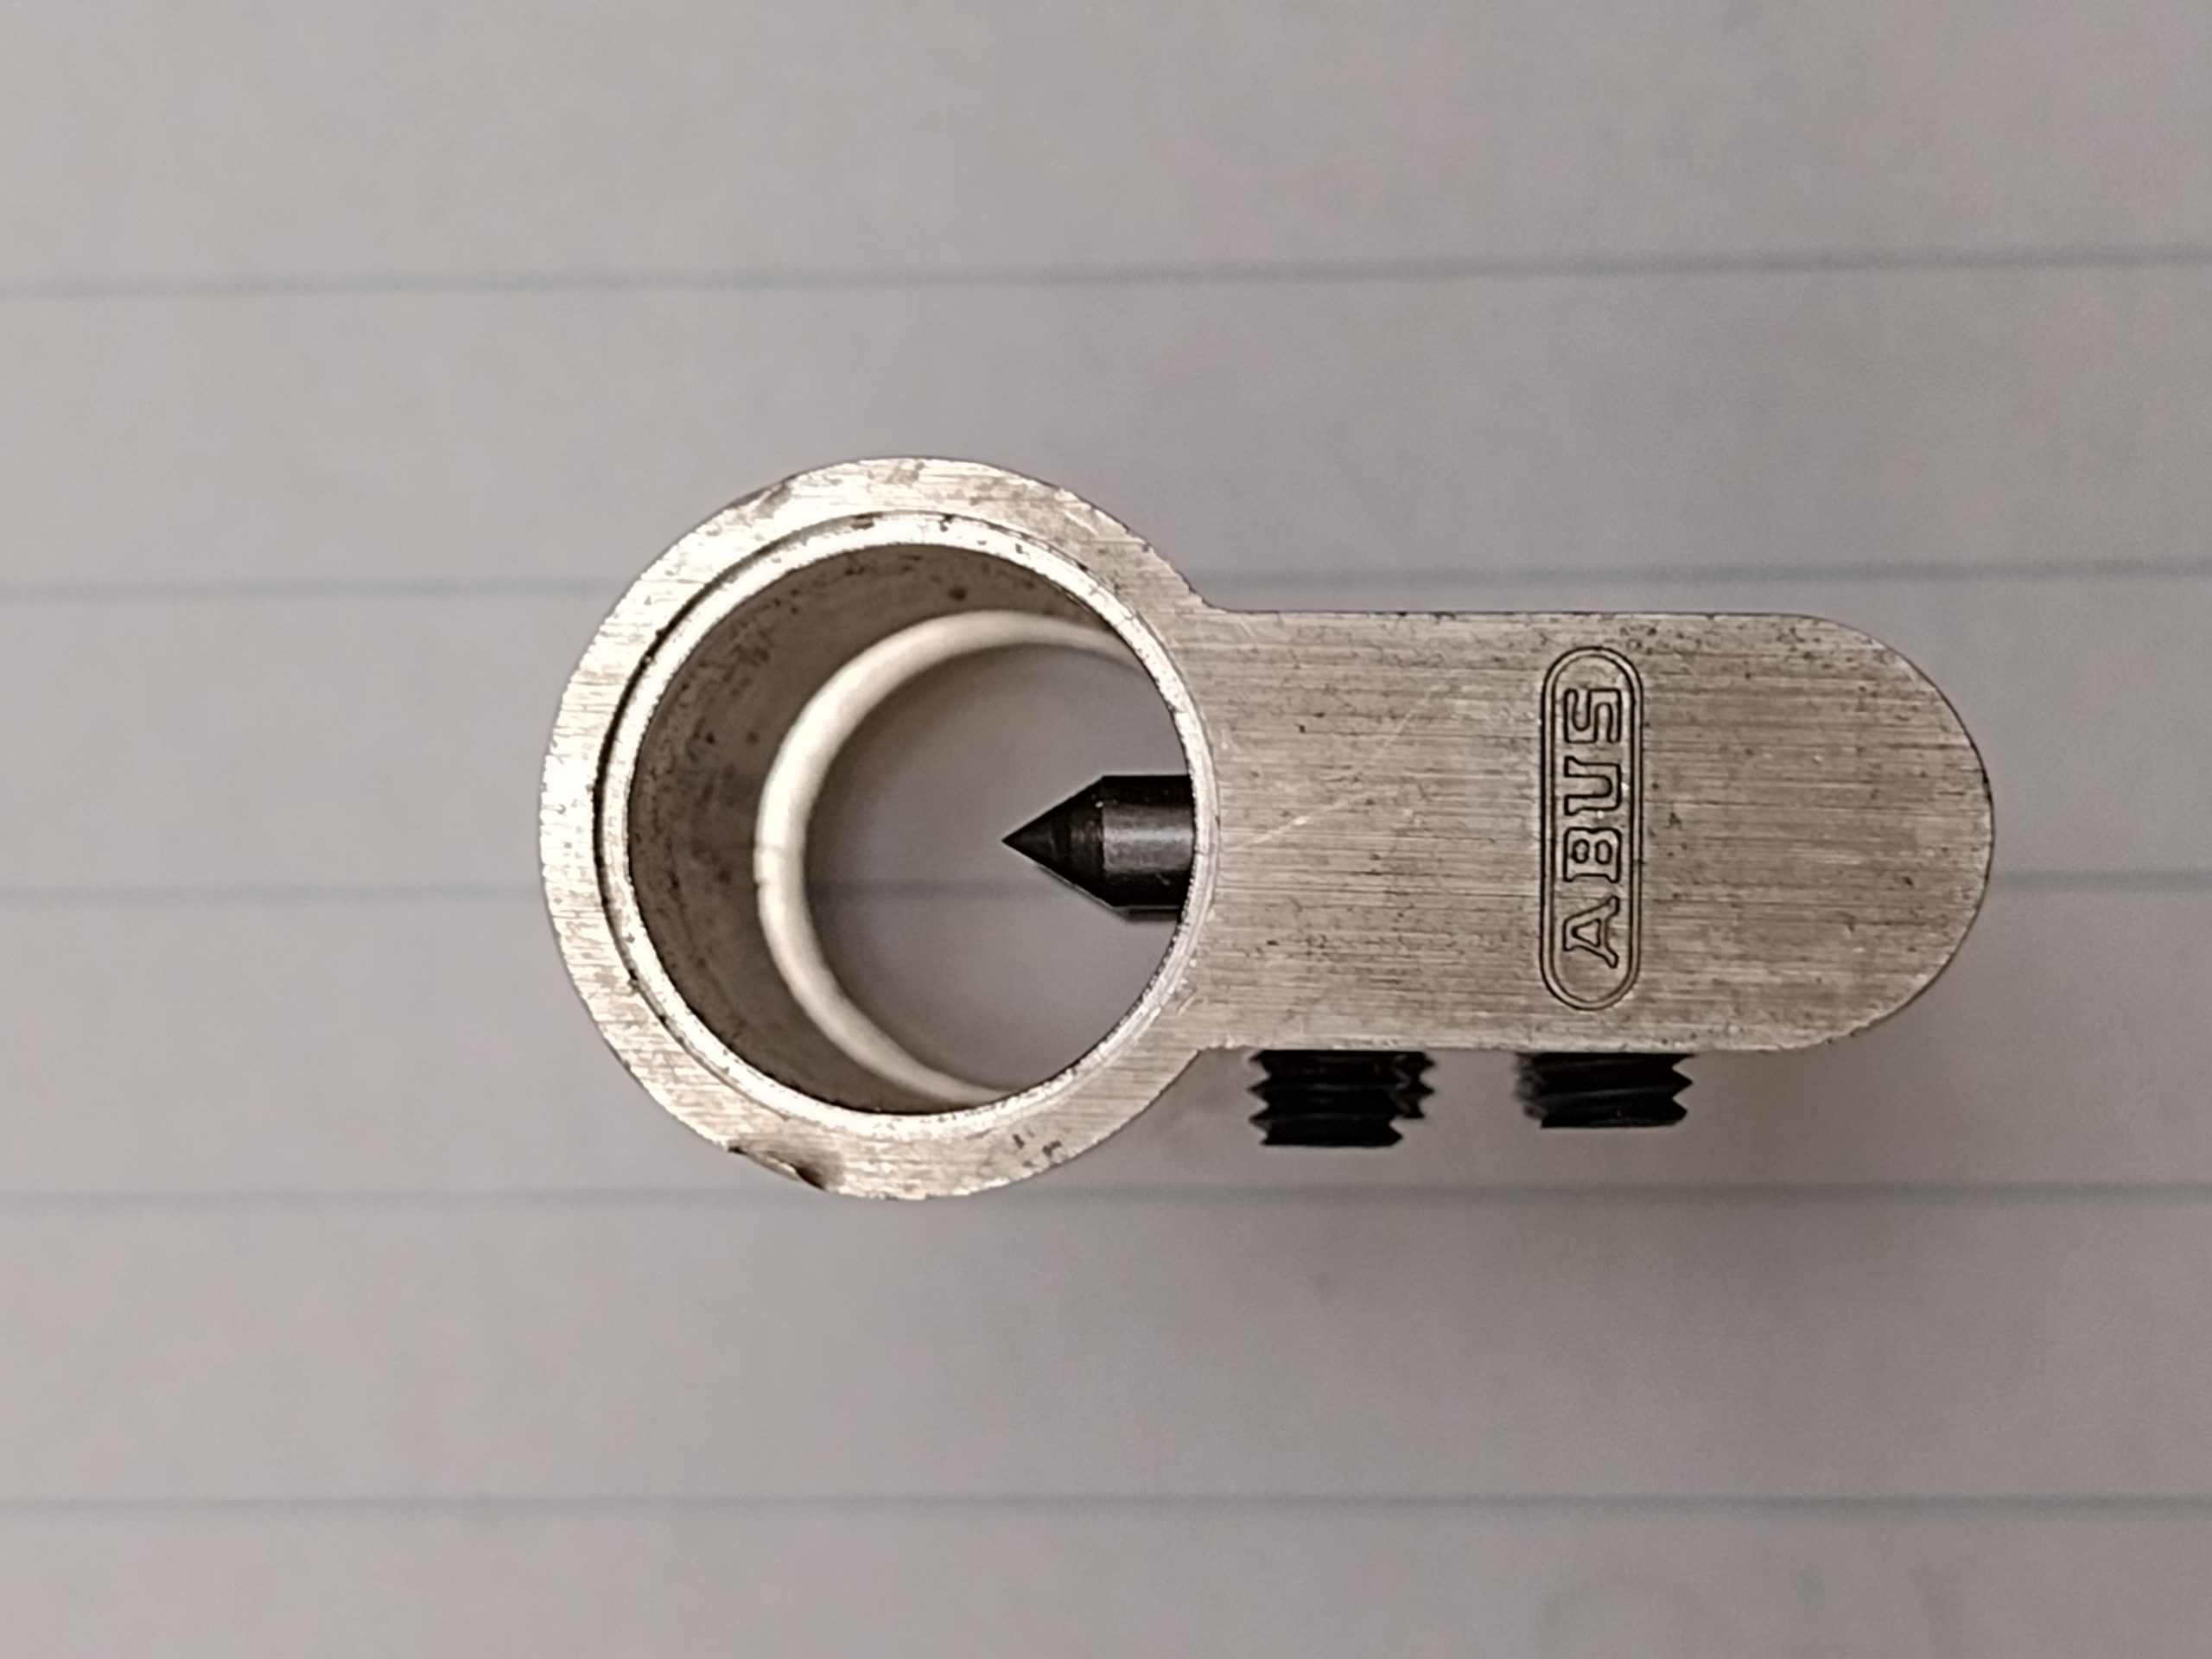
What is it? It’s a modified cylinder where the pins are replaced by sharp carbide rods. By pressing a key into the pins, the pin positions are marked on the key. Which, in turn, allows a key of all depths one to be made. The process takes a second, instead of preparing a blank with sand paper, a filling jig, or marking the positions one by one with a scribe. To be completely honest, it might not save me too much time, I just like it as a convenience tool.
I’ve built my first version after I impressioned my first lock, early 2018. It’s not the prettiest, but it worked for over a thousand keys. At that time, I impressioned a lock a day for every day in January. At UKlocksport forum, this is known as the January challenge. I’ve got some good stories about it, including a friend that just never stopped and has a streak in the thousands. (Please, Toni, remind me to write a blog about it.)
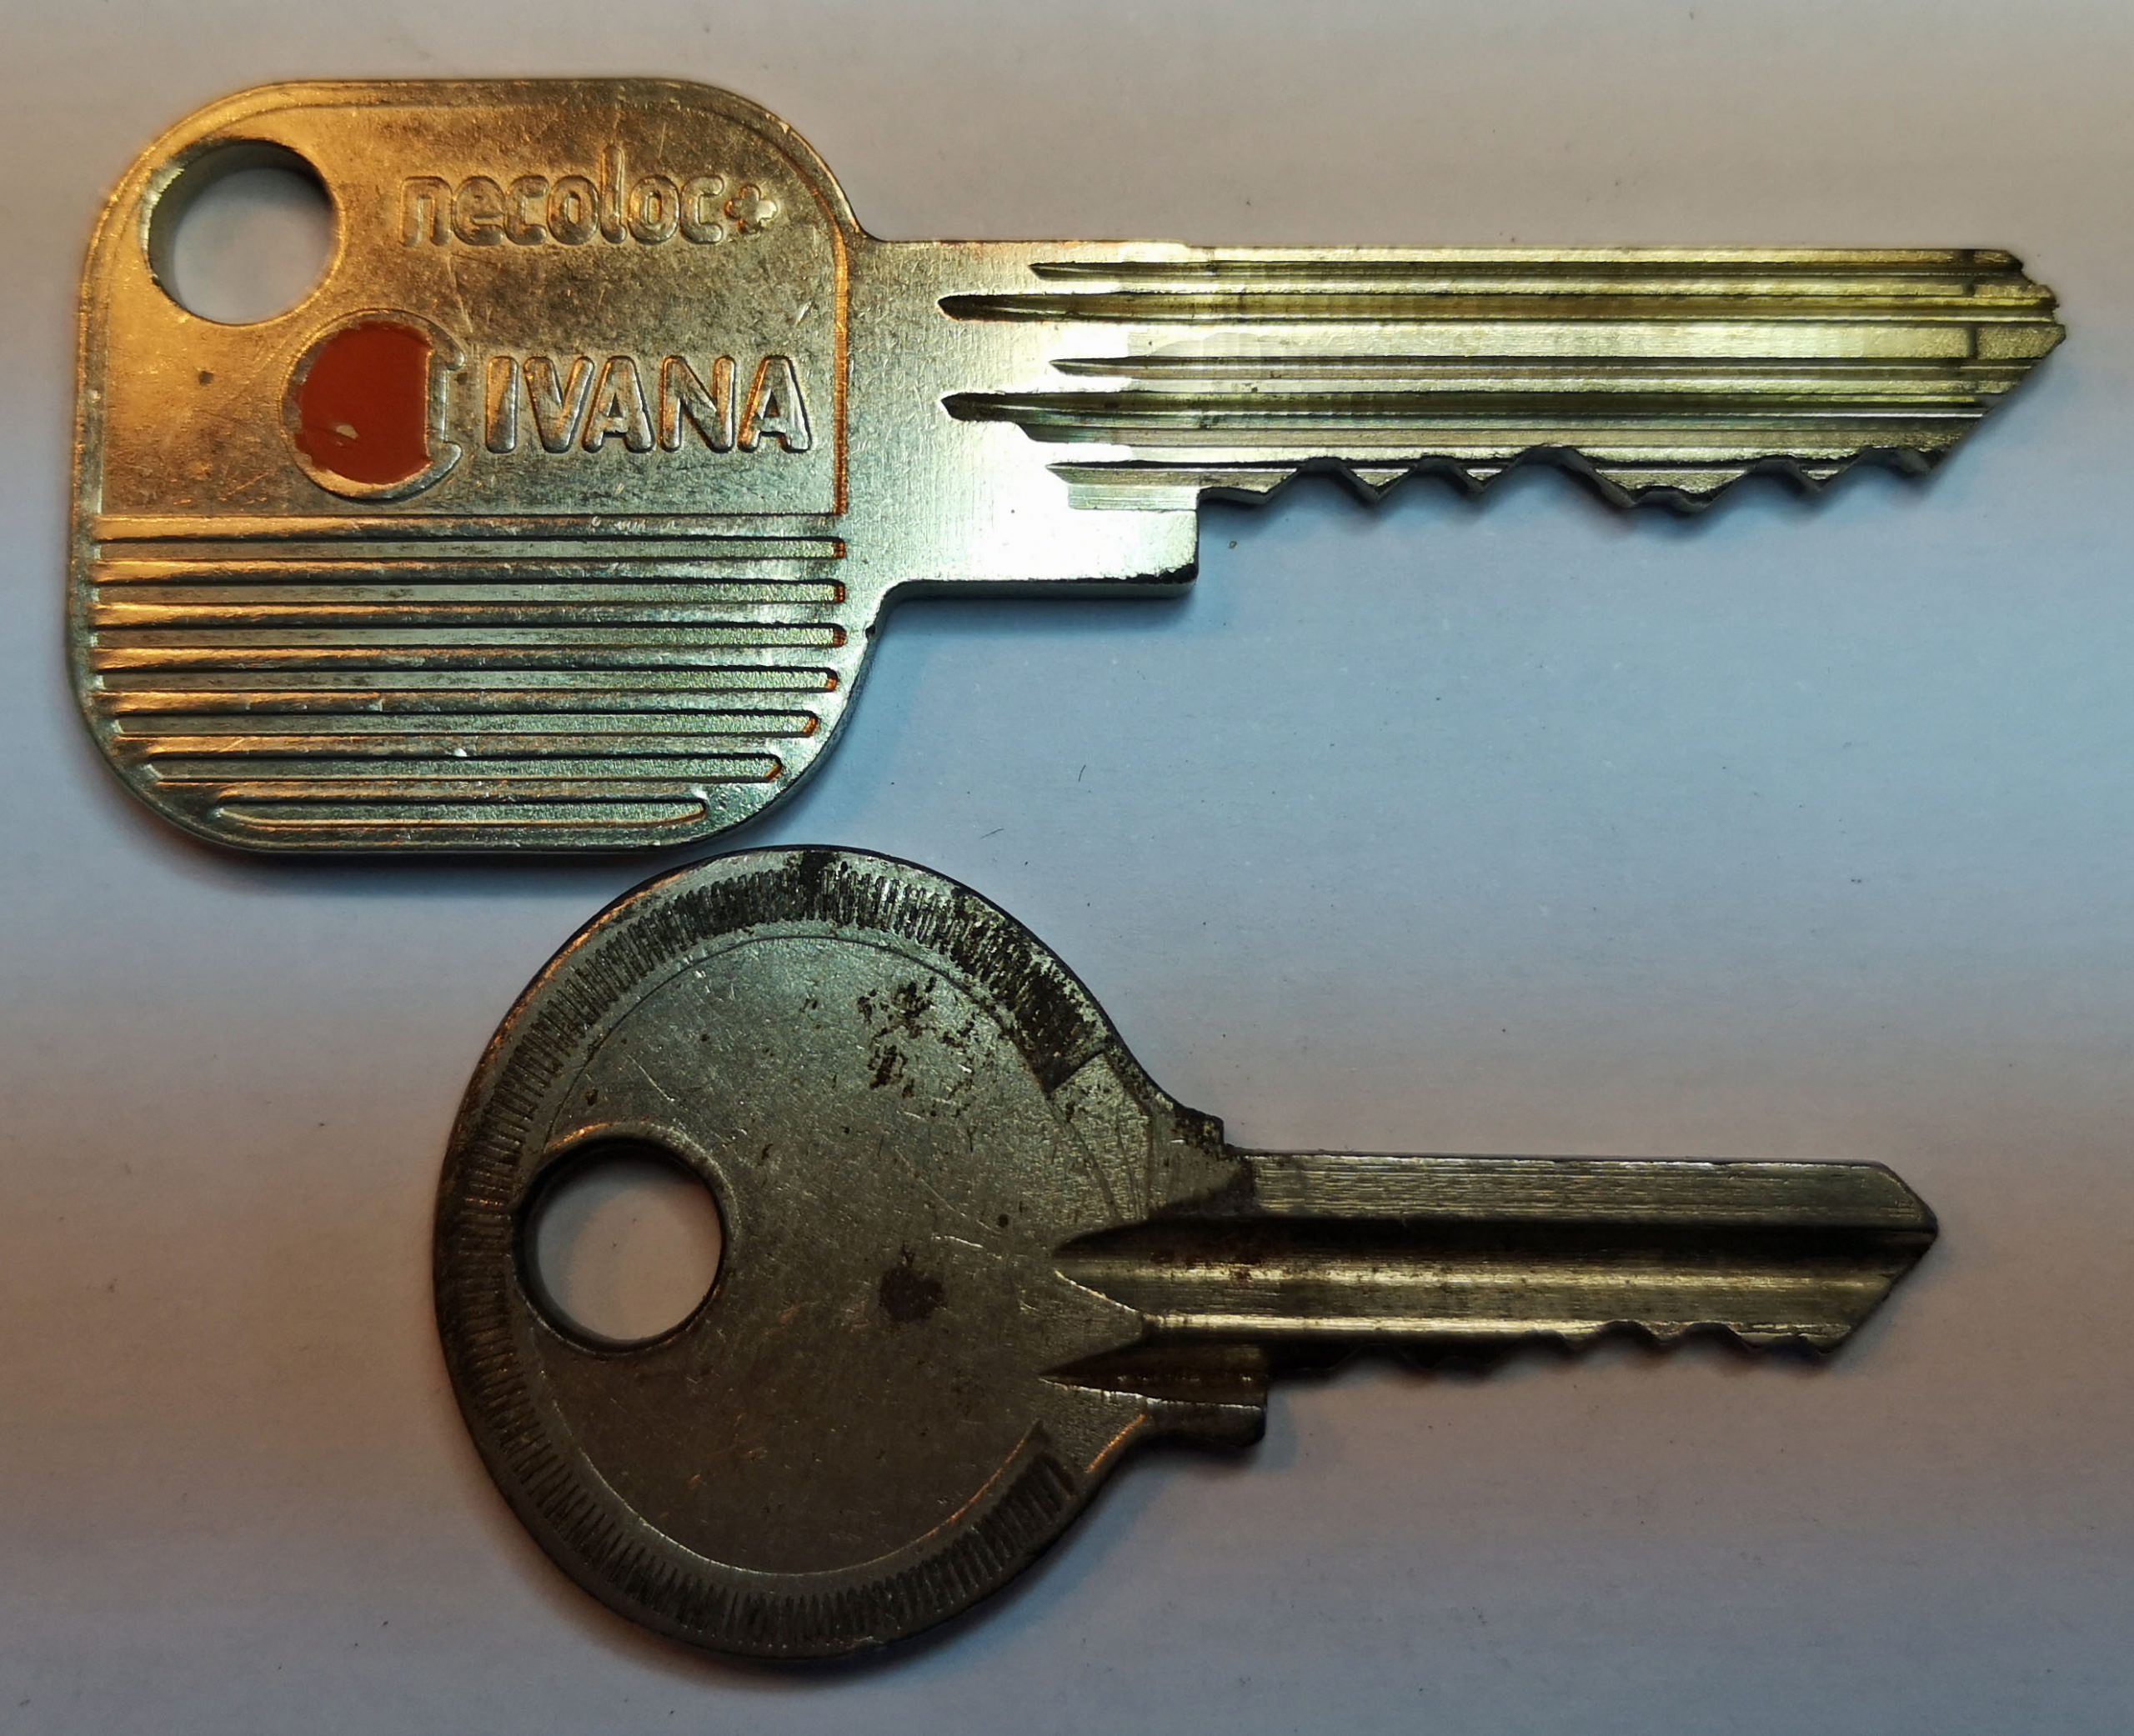
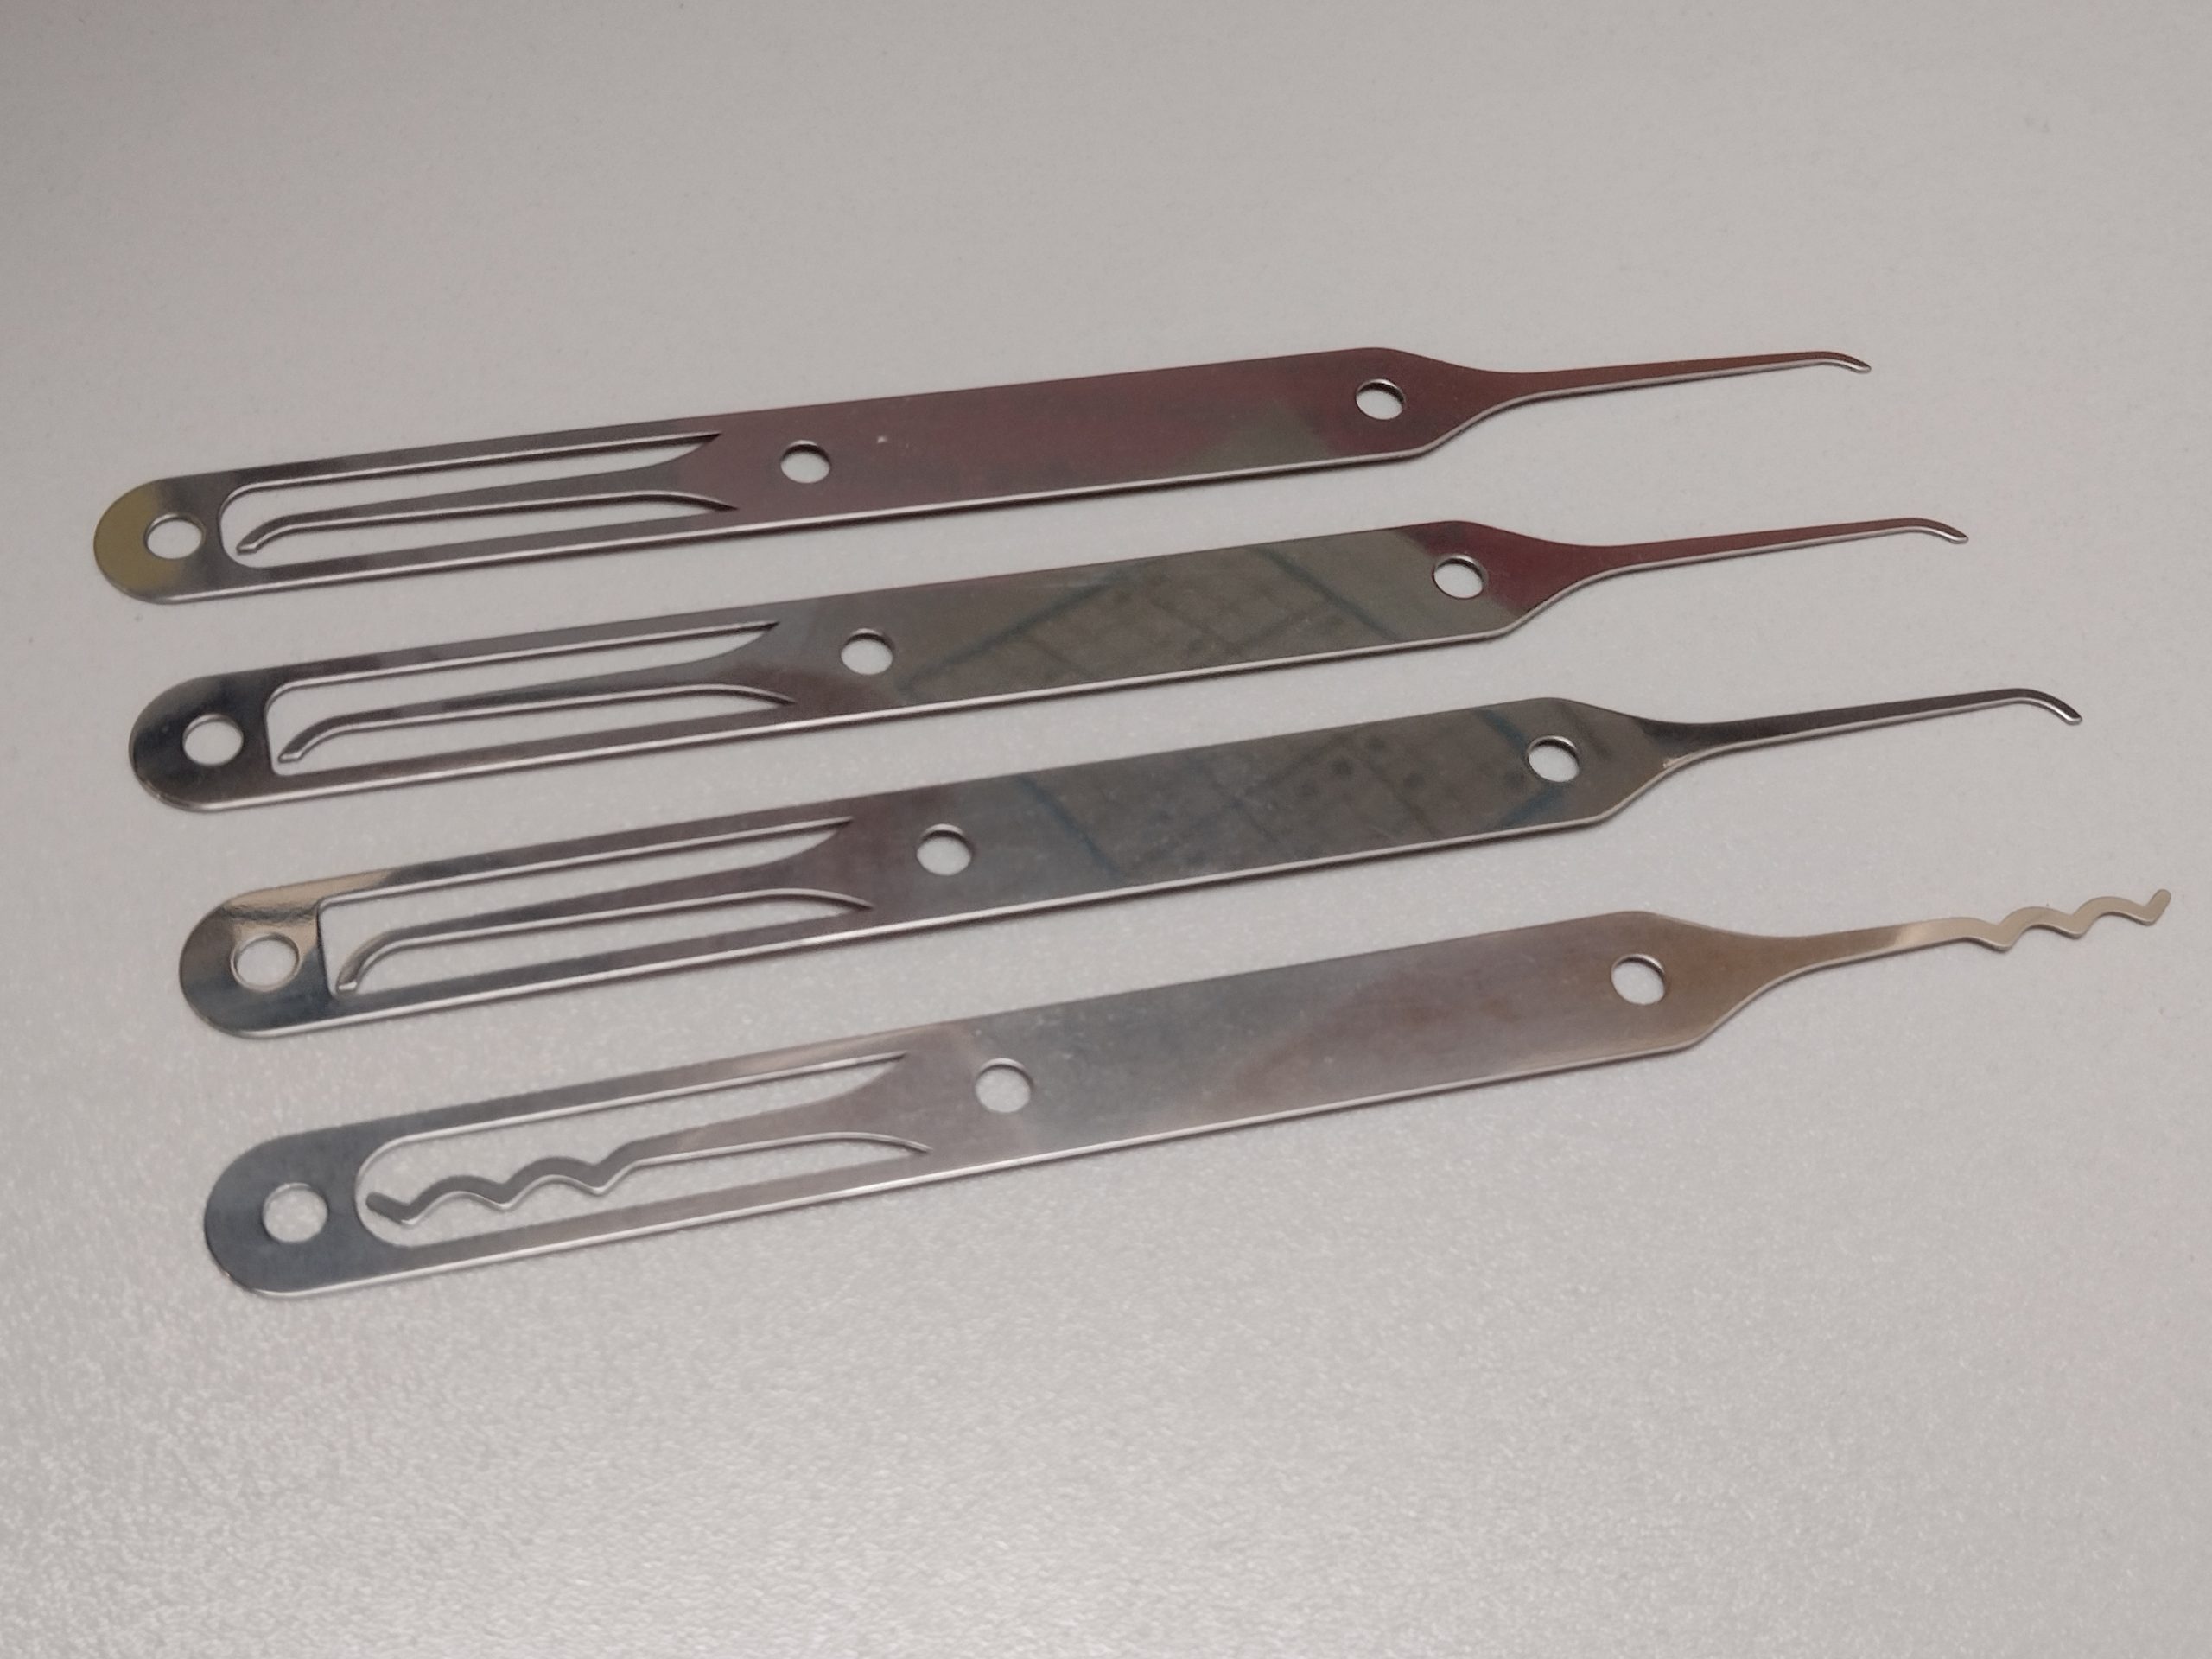
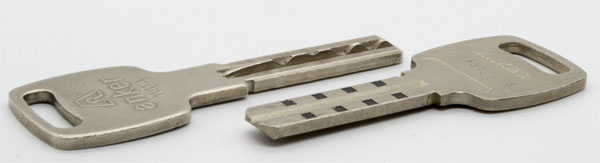
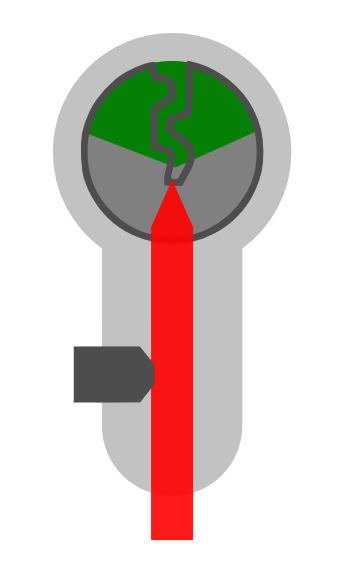
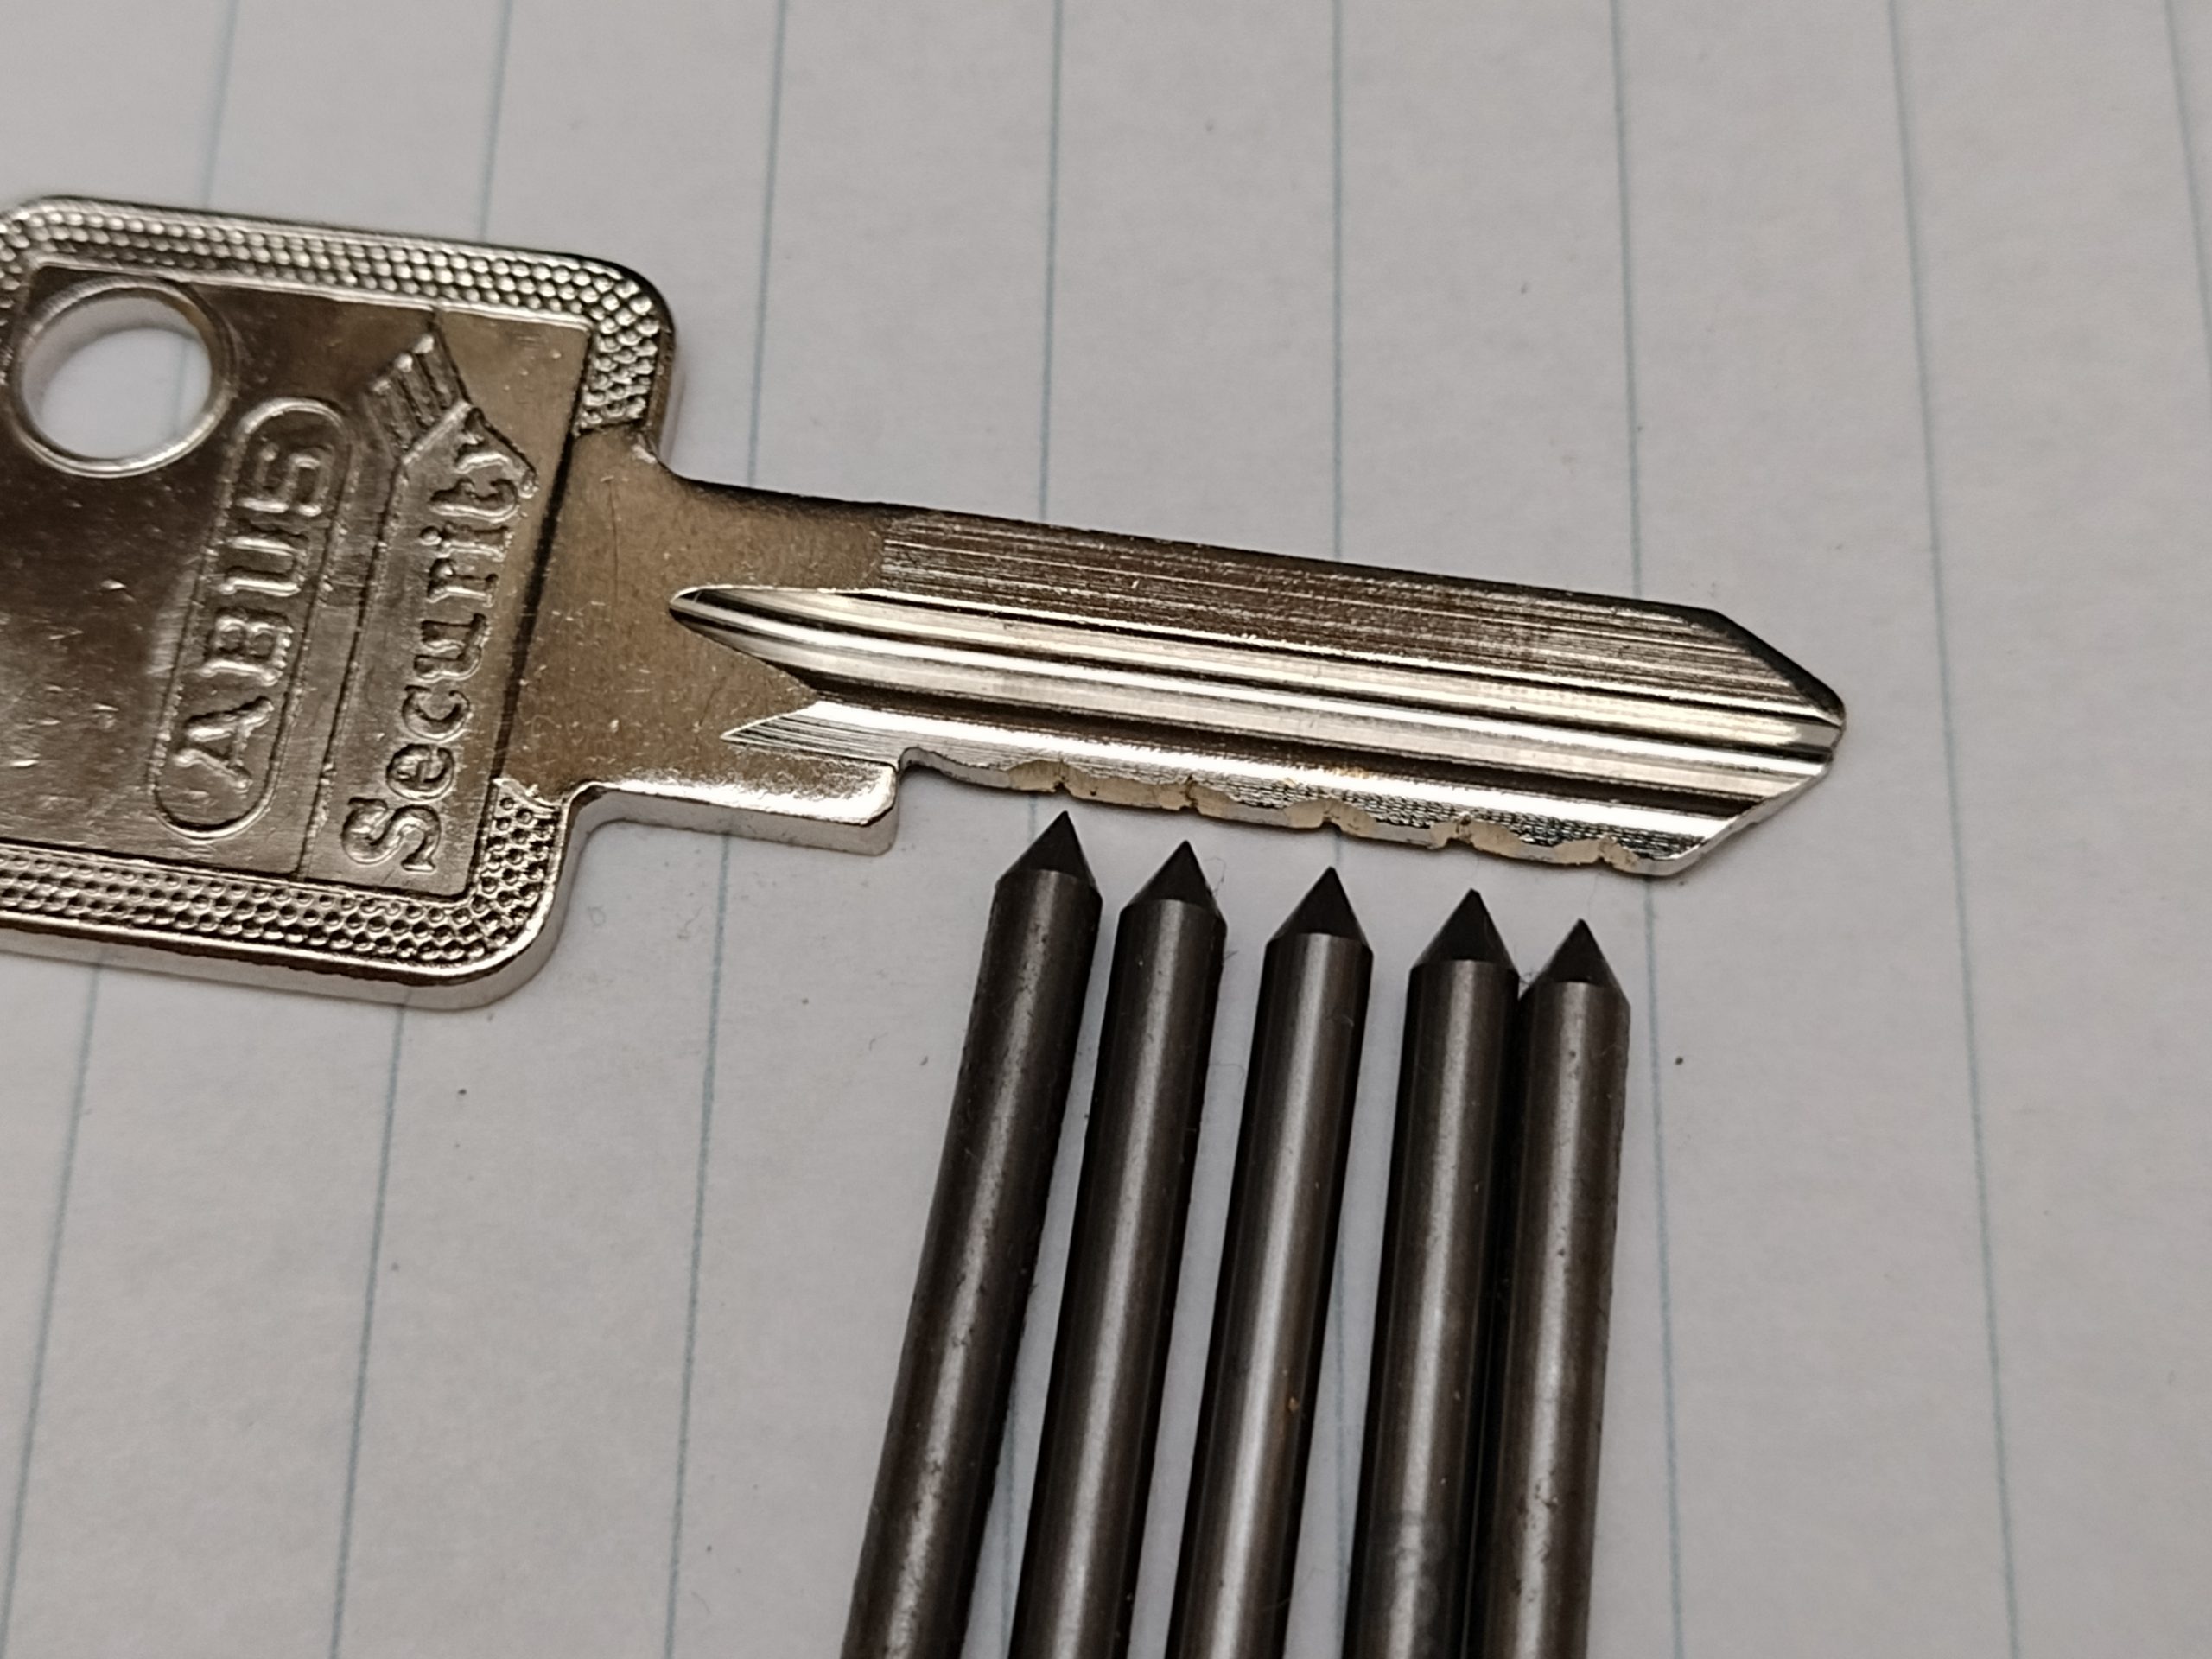
The key below shows the principle of operation. The scribe replacement tips scratch the surface of the key. For this one, the scratches are deeper than I like, but it shows the idea. You want a mark, but not too deep.
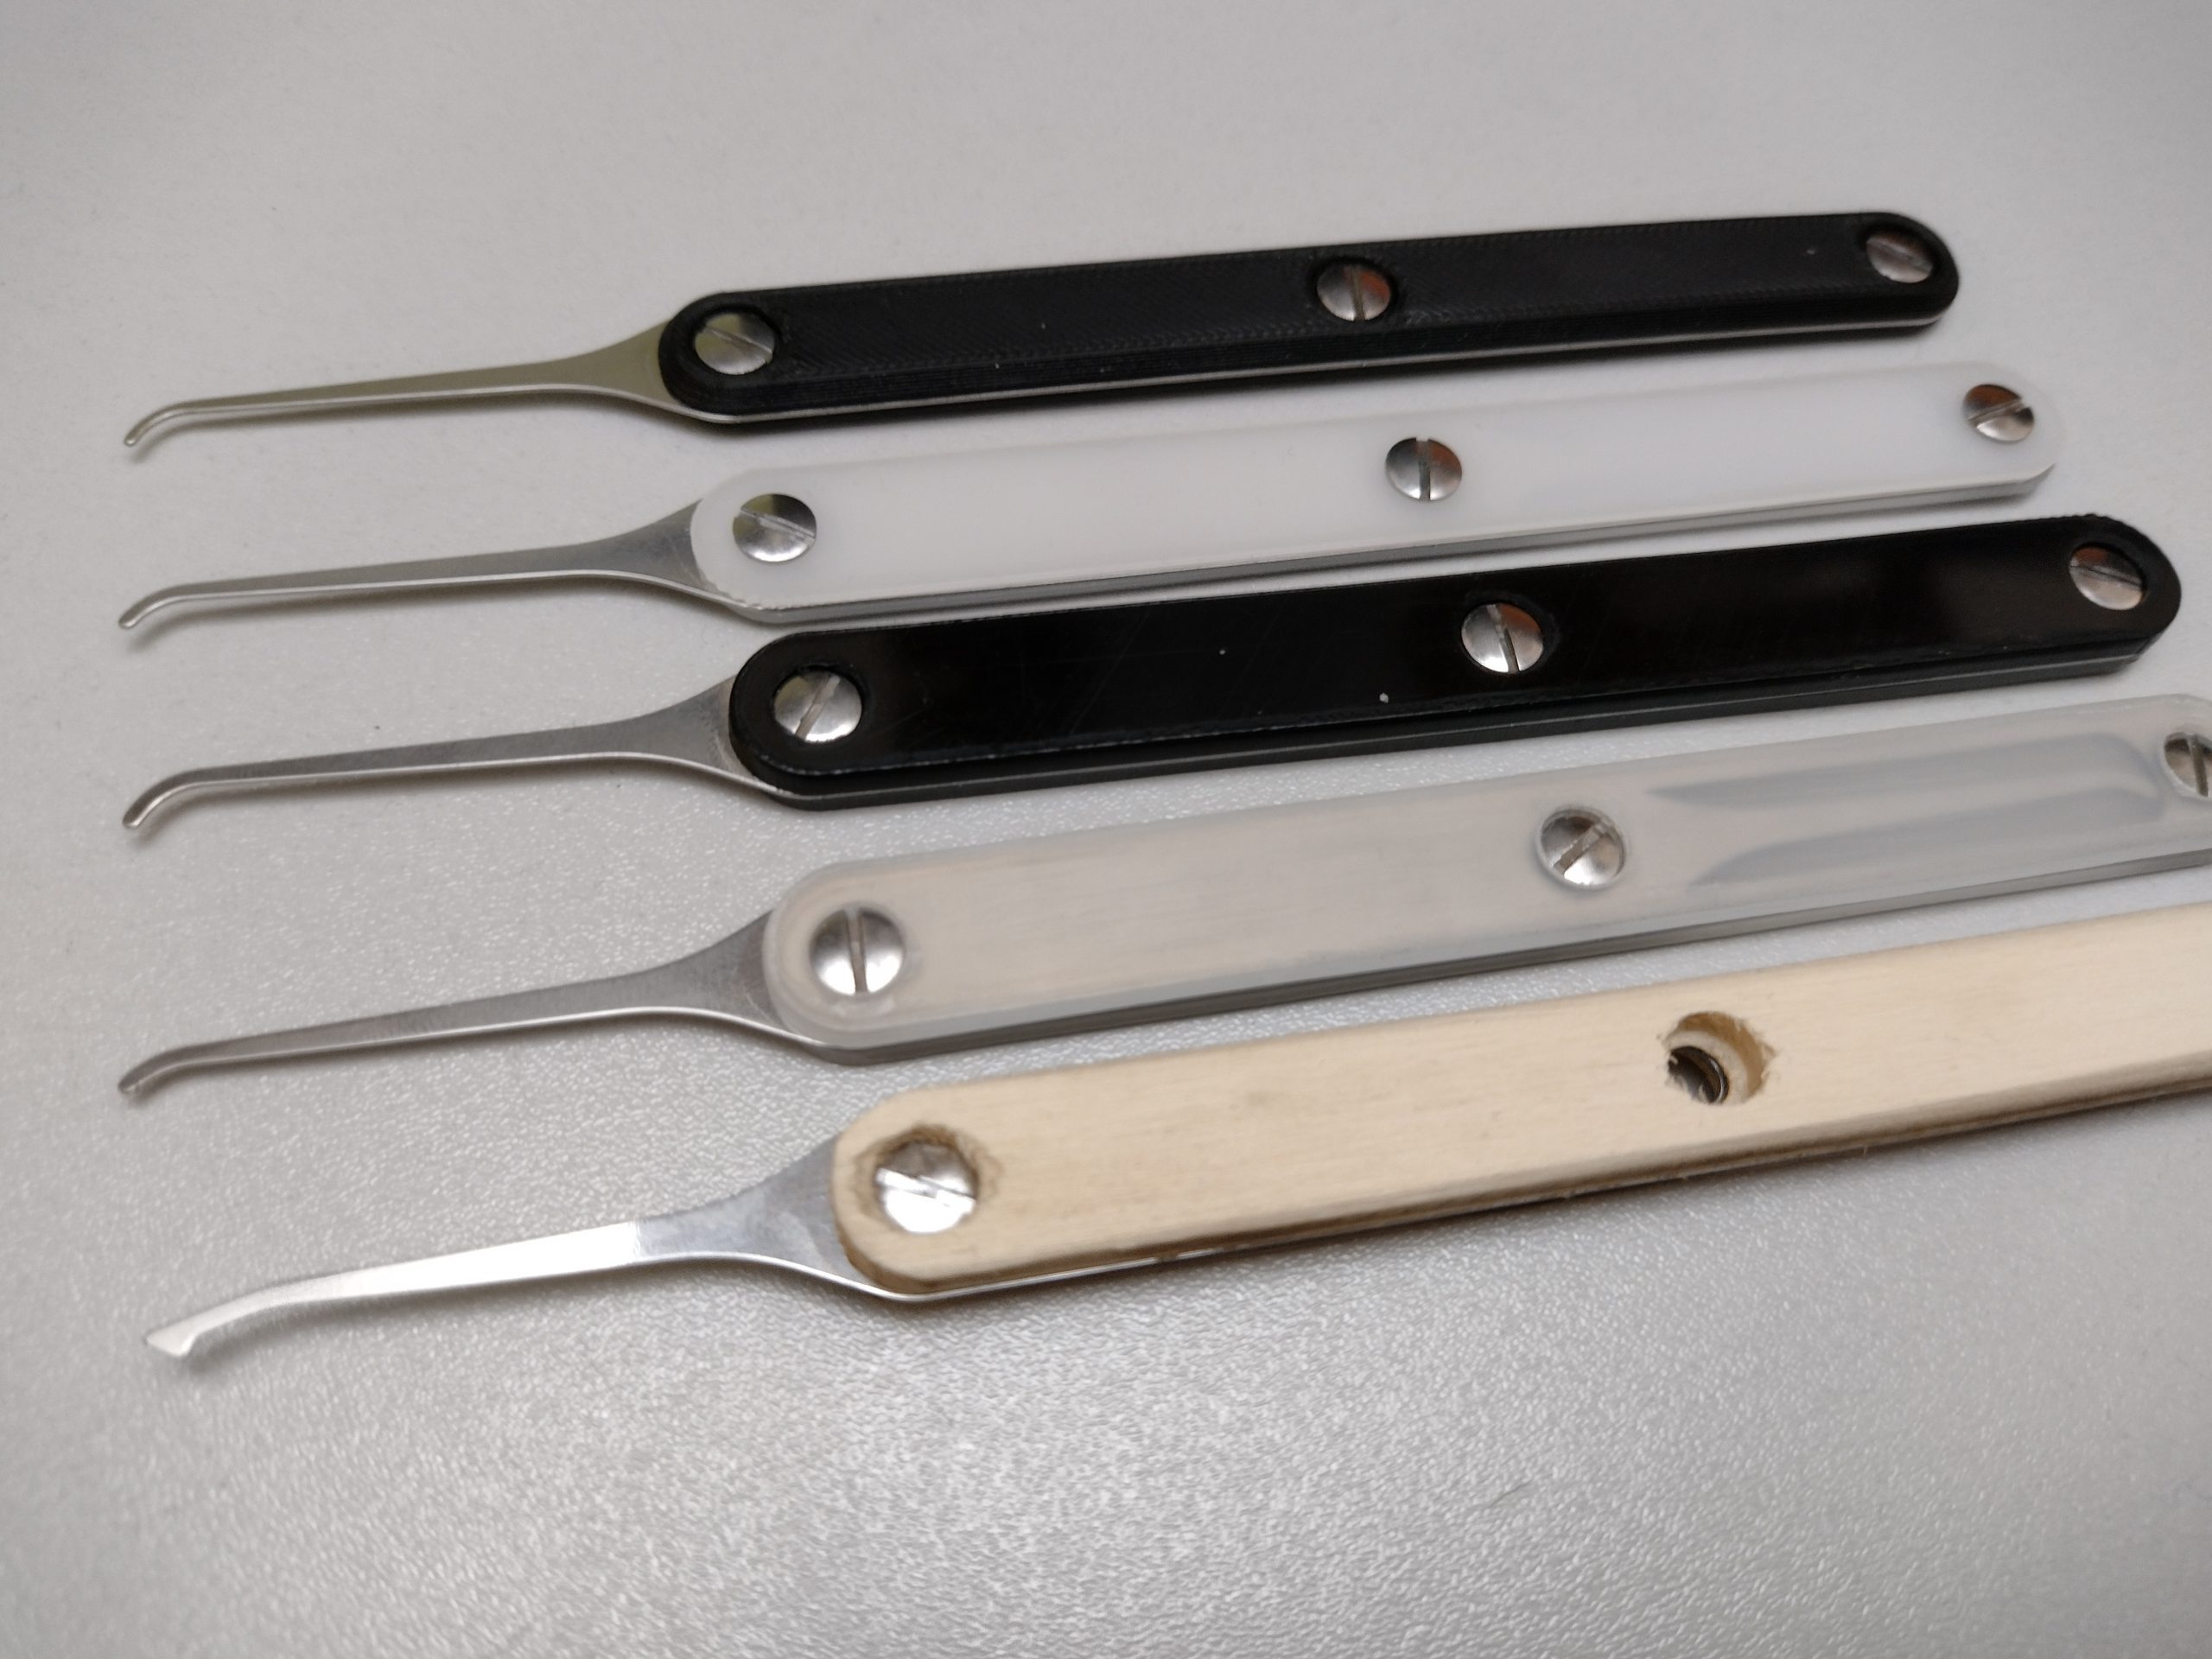
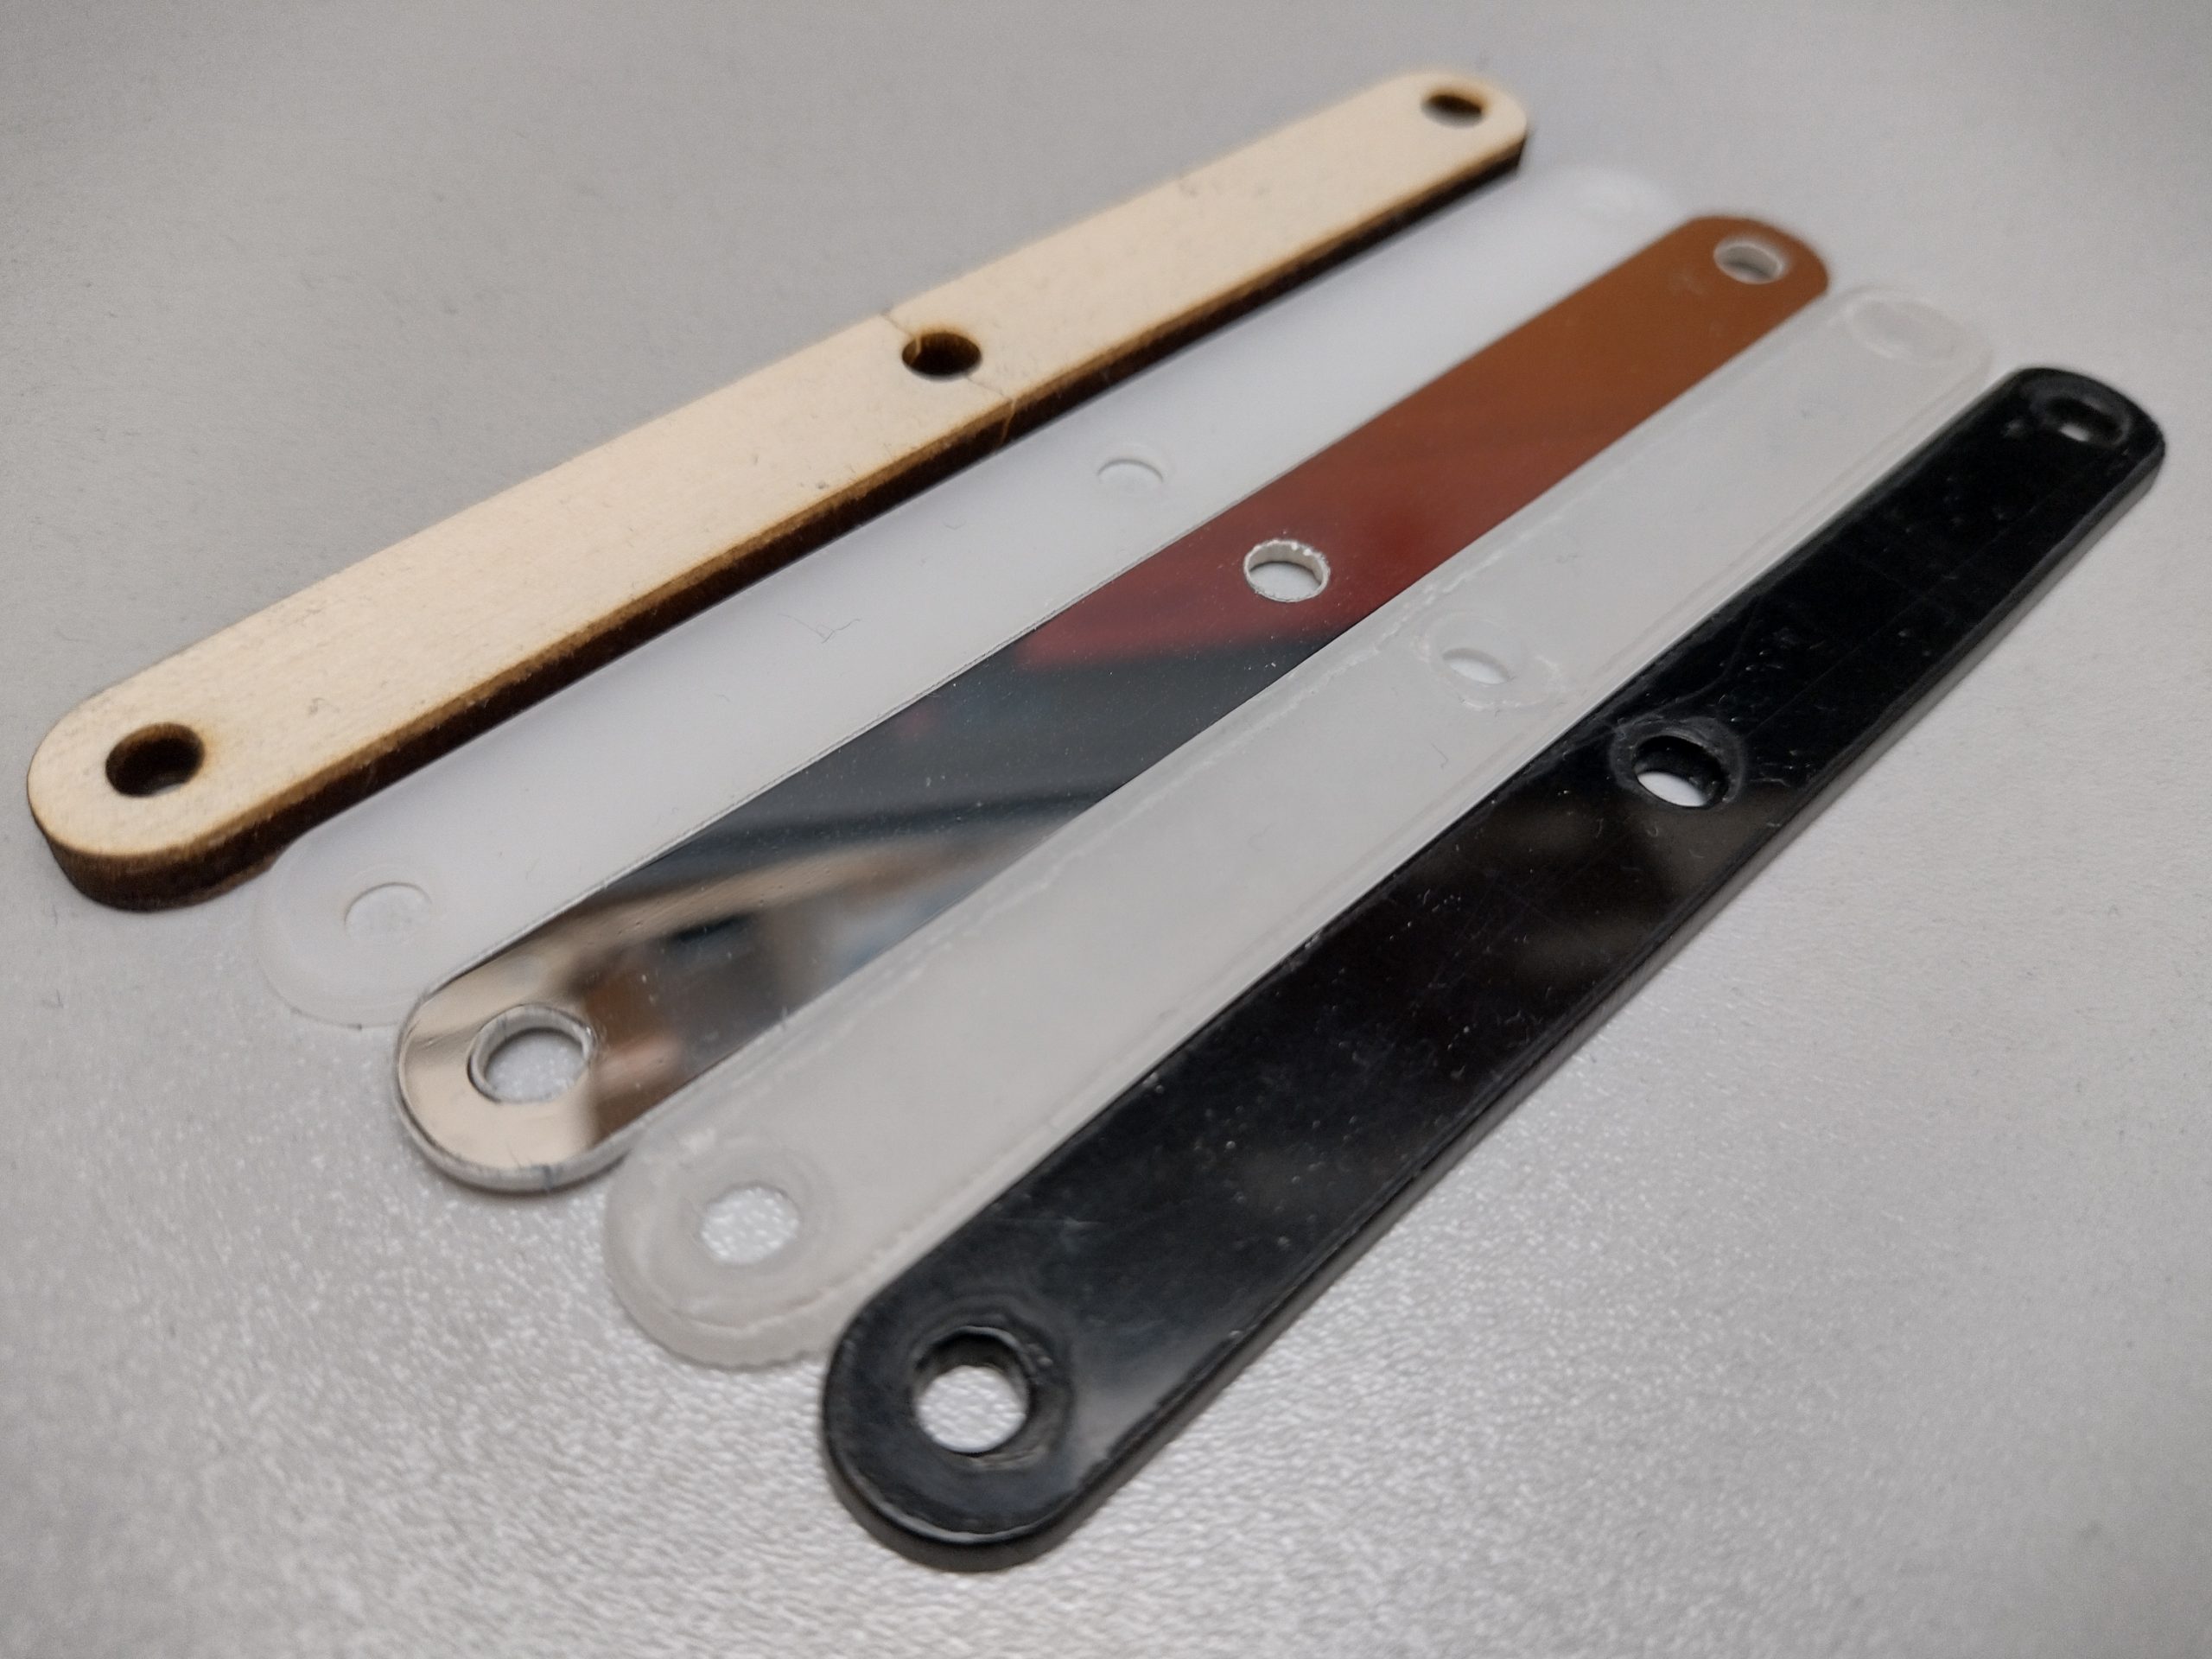
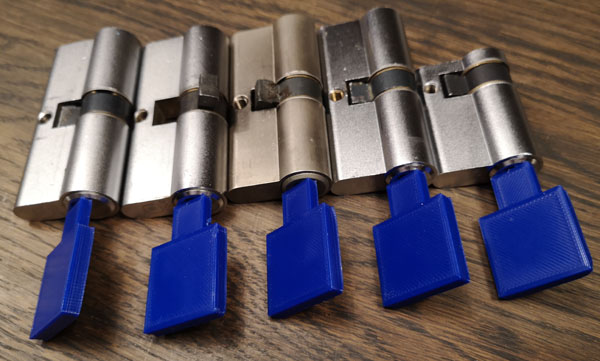
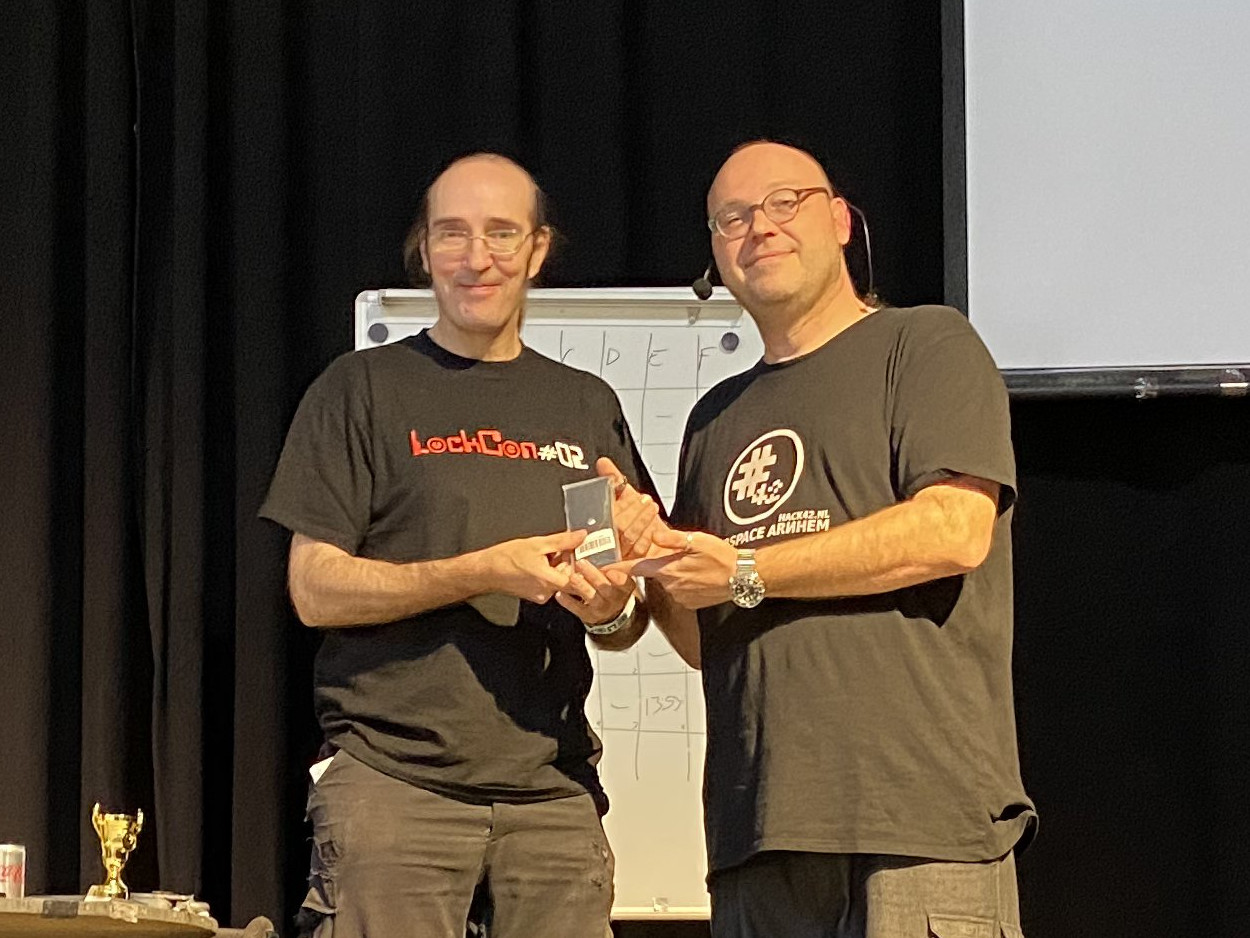
The current version, as shown in the pictures below, are from a small series production I’ve made for LockCon 2022. It was well received, and I’ve helped many of my friends with one of them. Making them commercially is very much not worth it. But if you want one, or the bits to make one, I might have some.

Please remember, even with all the impressioning gadgets, it’s not going to make a difference if you didn’t put in the hours. Consistency is key.
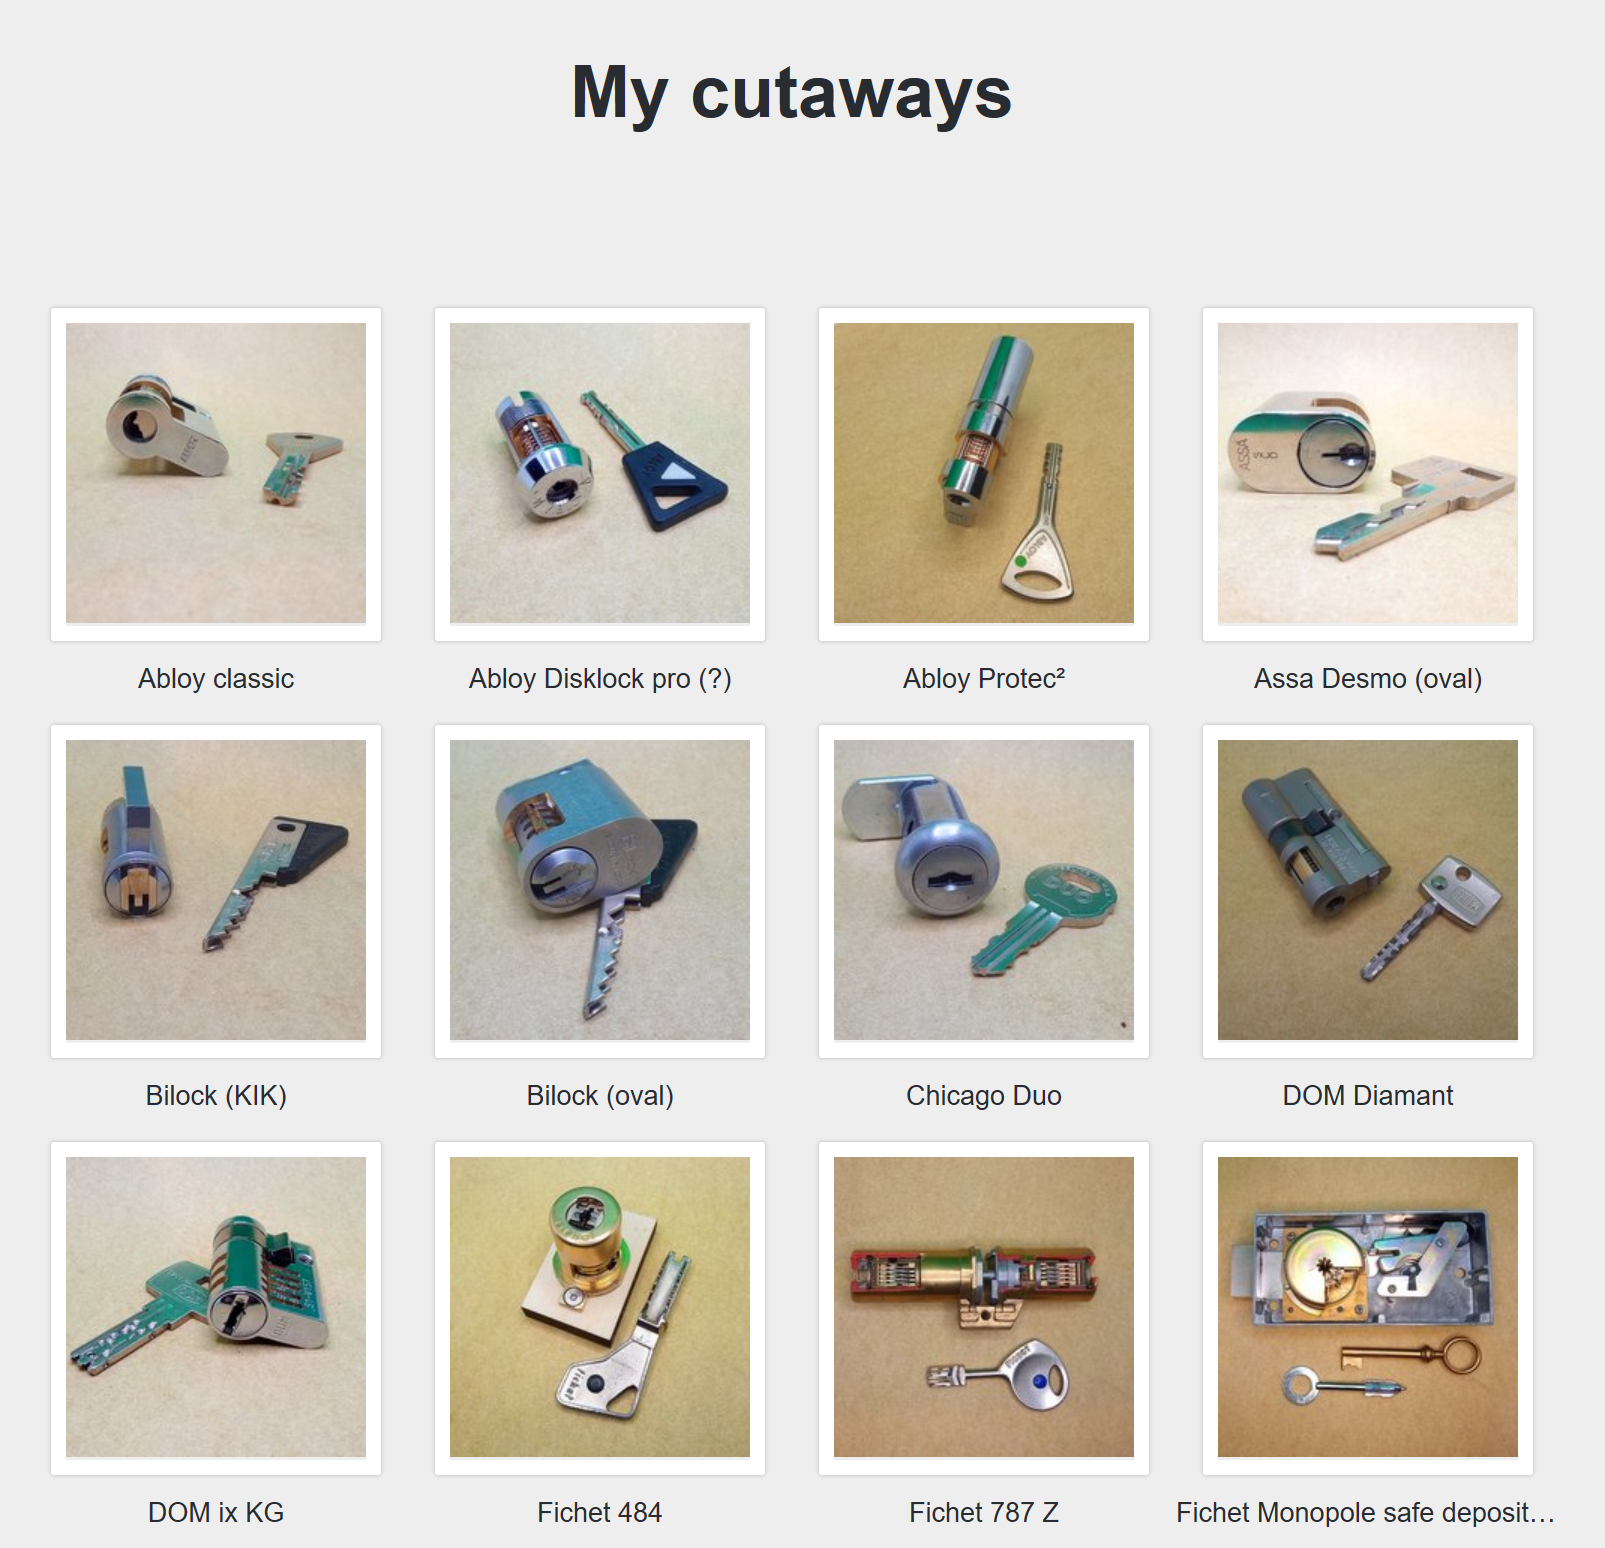
Pictures are copyright CCBY4.0 Jan-Willem Markus @ Blackbag.
 I’ve only attempted cutting an F3D when I got a couple of broken ones. This was a good idea, because the first 3 attempts were failures.