
In the summer of 2020 Jan-Willem decided to photograph his impressioning handles. Not only are pictures easier to share than the handles themselves, most of them are not worth keeping as they don’t work as well as advertised. This will hopefully be a short series of blogs on impressioning handles. This is the first one about DIY handles and handle experiments by Jan-Willem. Hopefully this post will inspire you to pick up impressioning or to motivate you to build your own impressioning handles; really you can do a lot better then most of the handles in this post.
What makes an impressioning handle an impressioning handle? It has a few requirements:
- To hold a key for impressioning.
- Facilitating the motion of impressioning; rotational torque while moving the handle up and down.
- optional: Comfortable to hold. (This will come in at another blog on improvised handles.)
- Preferably to reduce strain on the arm by applying rotational torque with one hand and the up and down movement with the other.
This post is solely about the handles not about impressioning itself. Missed out on this marvelous way of defeating locks? Maybe you can find videos on YouTube. I believe Jos Weyers has a few videos on the subject. 🙂
Disclaimer: I’m not a machinist and most of these handles are mostly build with simple tools and from scrap metal.
After lockCon Jan-Willem was inspired to build his own Impressioning handle. This is the first iteration. Build from scrap laying around in the workshop. The handle works very well and the form factor is great. Mostly as you can’t torque and move the handle up & down with the same hand teaching good impressioning habits from the start.

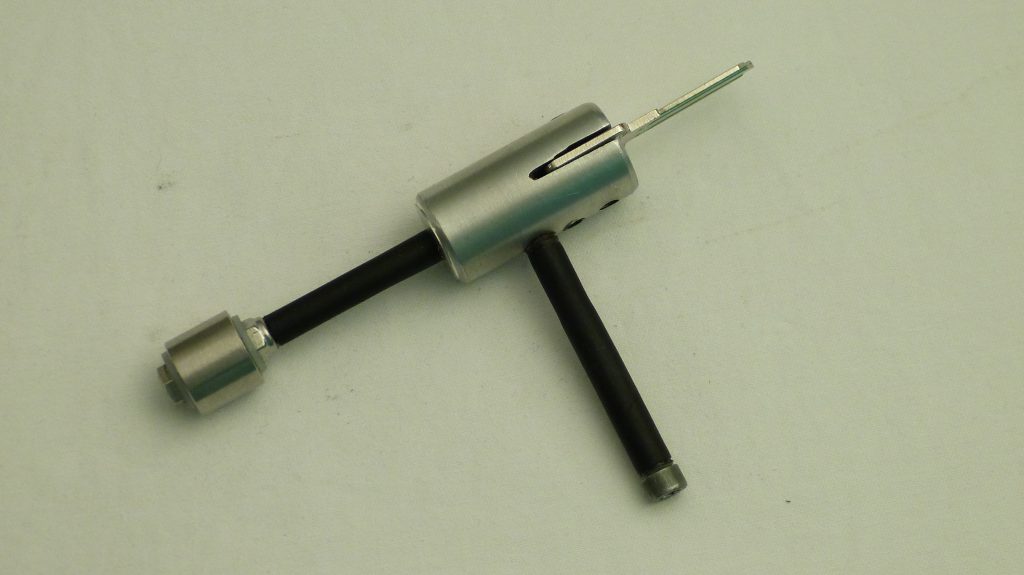
This is the second impressioning handle. It’s from 25mm or about 1/2″ aluminum round stock with a slot for the key and a few screws to keep the key in place. The long screw was kept in place to help with rotational torque. The blue covering is for racing bike handlebars and is, apart from looks, completely useless. The covering gives the illusion of grip. People unfamiliar with impressioning tent to think impressioning must require a lot of torque and thus break more keys when starting out.
This model was quite successful and about 20 of them where made. Jan-Willem still uses them, without the handle. Toool has a bunch as well for impressioning workshops, two of these are still traveling the UK, and the rest are sold to friends starting out with impressioning.
Impressioning handles three and thereafter are made to save as much cost as possible. They can be made with simple tools out of inexpensive material but still work reasonably well.
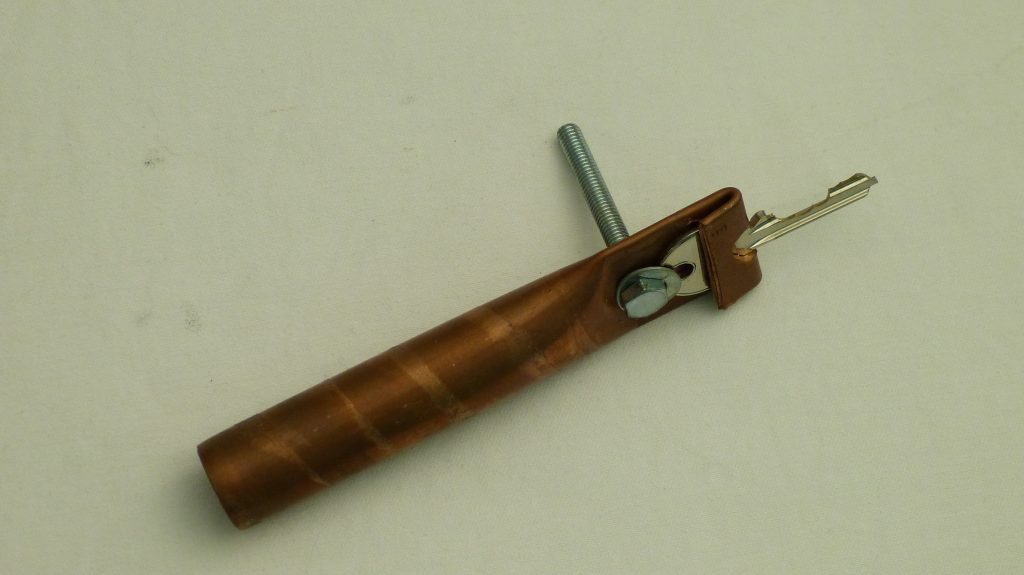
The first two are made from partially flattened copper pipes. The ends are bend up to keep the key in place. While the design works it has a few obvious drawbacks like replacing the blank is an hassle on both of them.
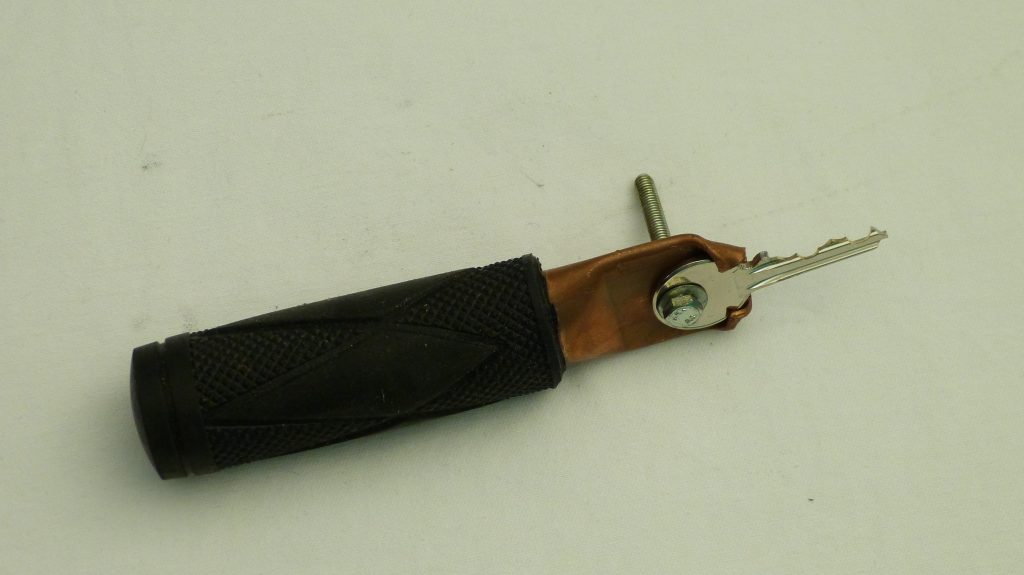
This design works a lot better than handle 3. But it’ll not work for all keys as the hole in the blank is used for mounting. It was also an experiment using bicycle handles for grip. It works almost as well as it looks.

This concept is the cheapest of them all. It’s a PVC tube with a wooden dowel/insert clamping the key with friction. It works well but changing the blanks can be a hassle. The rings of dust around it are where it used to have the race bike handle covering. That has been removed and hence the ugly stripes.
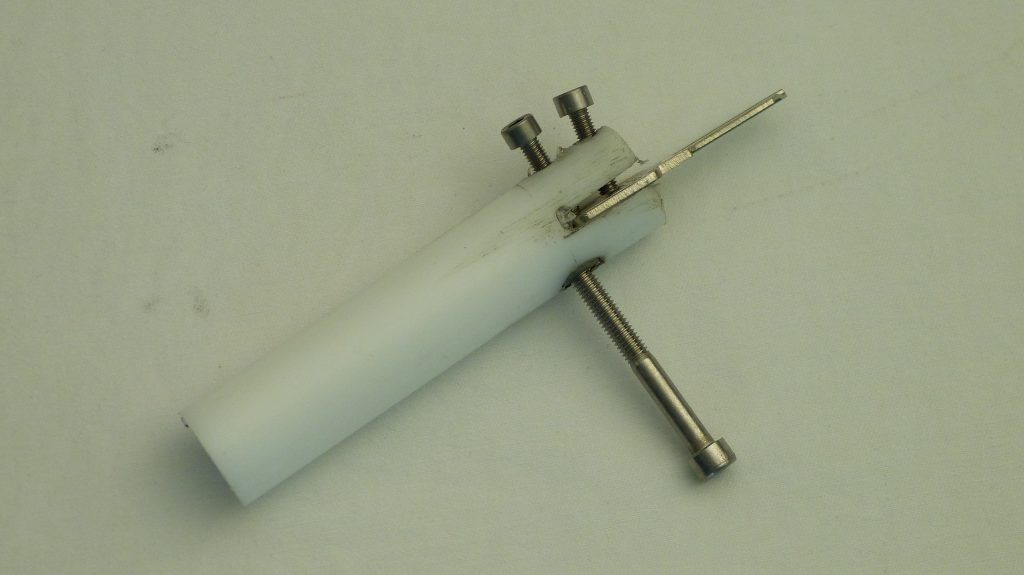
The last design I want to show is a failure. This is made from POM (Brandless Delrin) rod and is similar to handle two of this article. The POM is not stiff enough for gripping the key tightly.
In a future blog post we will hopefully discuss more impressioning handles. A few ideas for future blogs: Why you might or might not want to pickup professionally designed impressioning handles for hobby use, Things that can hold a key but where never designed to, and more DIY handles from other people in the community.
Feel free to steal ideas or use the photos. The ideas are free the photos are CCBY4.0 Jan-Willem Markus, Toool Blackbag. If you create your own impressioning handle design, please share it with us and we will add it to the DIY impressioning handles in a future blog.
Would you happen to have an additional picture for number 5? I’m struggling to wrap my head around what the wooden part is looking like and how it would work. (It’s also the most likely one I could easily make and use, hence the questions!) Thanks!
Hi there Jeff,
The tube has an inner diameter of about 20mm. I’ve cut a dowel that was slightly smaller and cut it in two parts.
Then the key fits in between these half moon shapes and press fit in the tube.
If this explanation does not work I’ll make more pictures and update the blog accordingly.