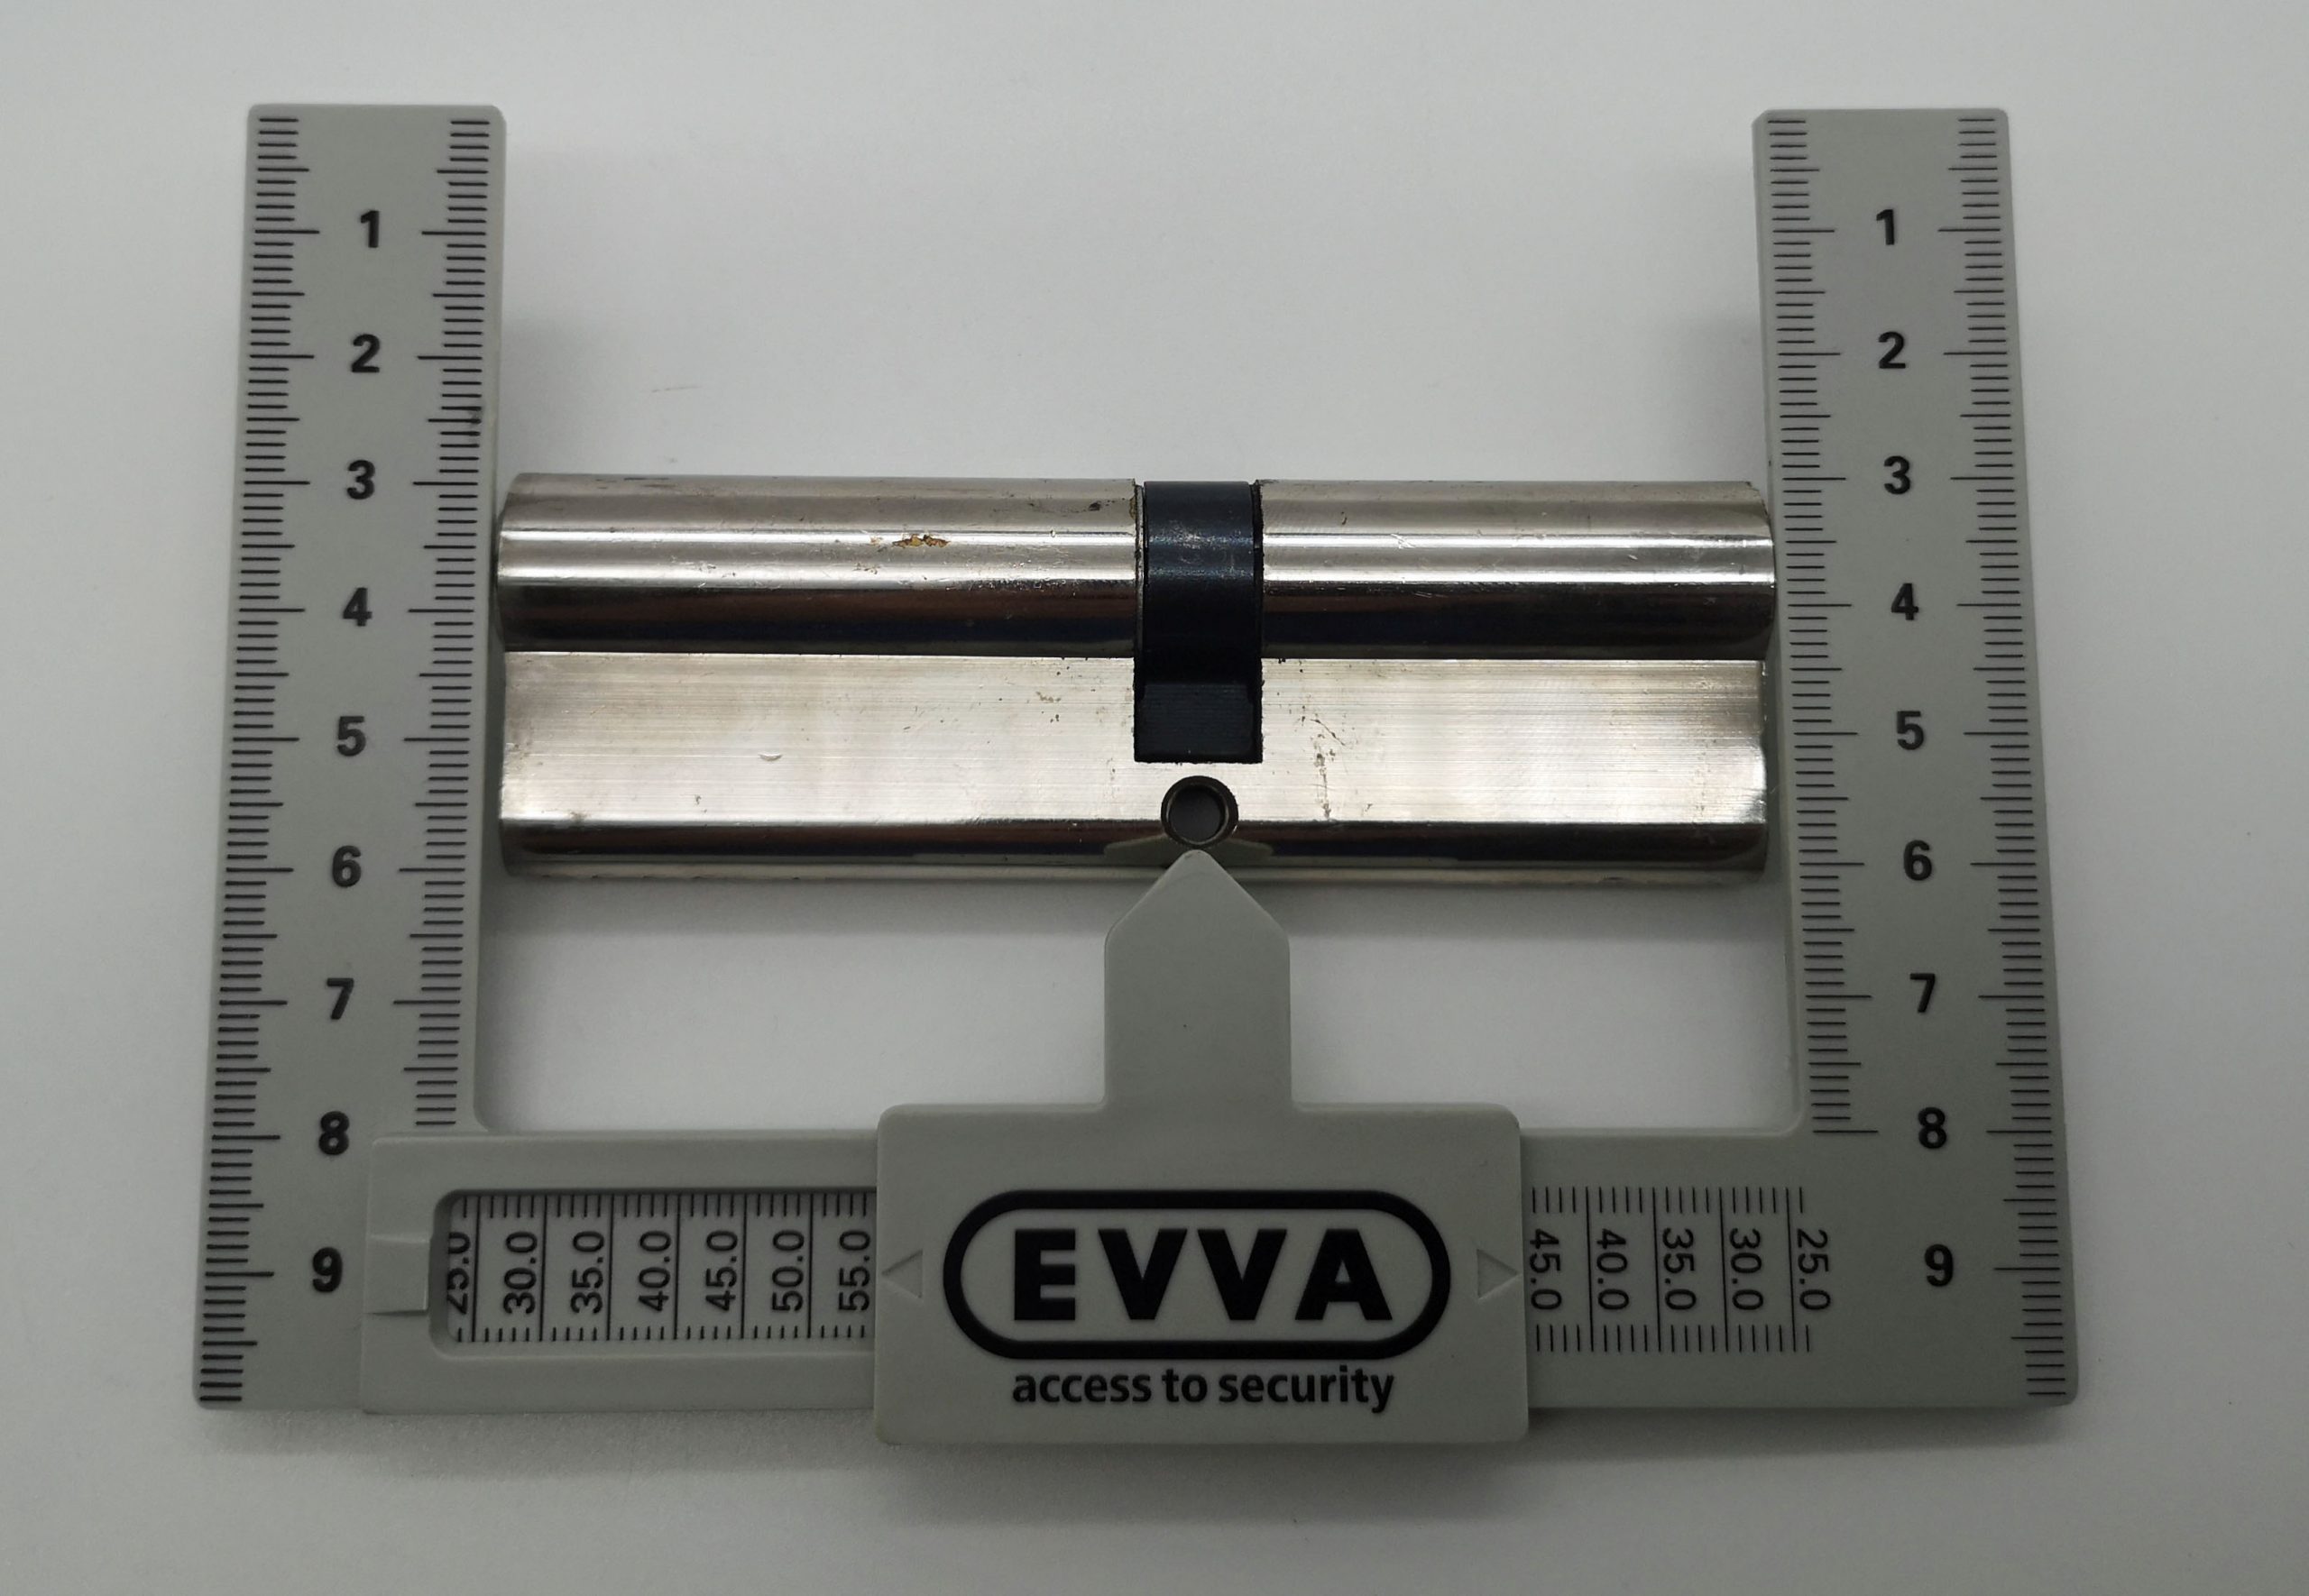
Eurocylinders have a standard form factor, but they come in different sizes. In the middle is the cam and the screw to attach the cylinder to the door. Measuring the lengths from the center of the cam to both ends gives you the length, for instance, 30/30 is a popular size. This means both ends are 30mm or 3cm for a total length of 6cm.
Although sizes of 30mm and 35mm (or combinations with 10mm for half cylinders) are pretty normal, there’s quite a variation in lengths, especially if you go to Belgium for instance.
A 45/55 cylinder
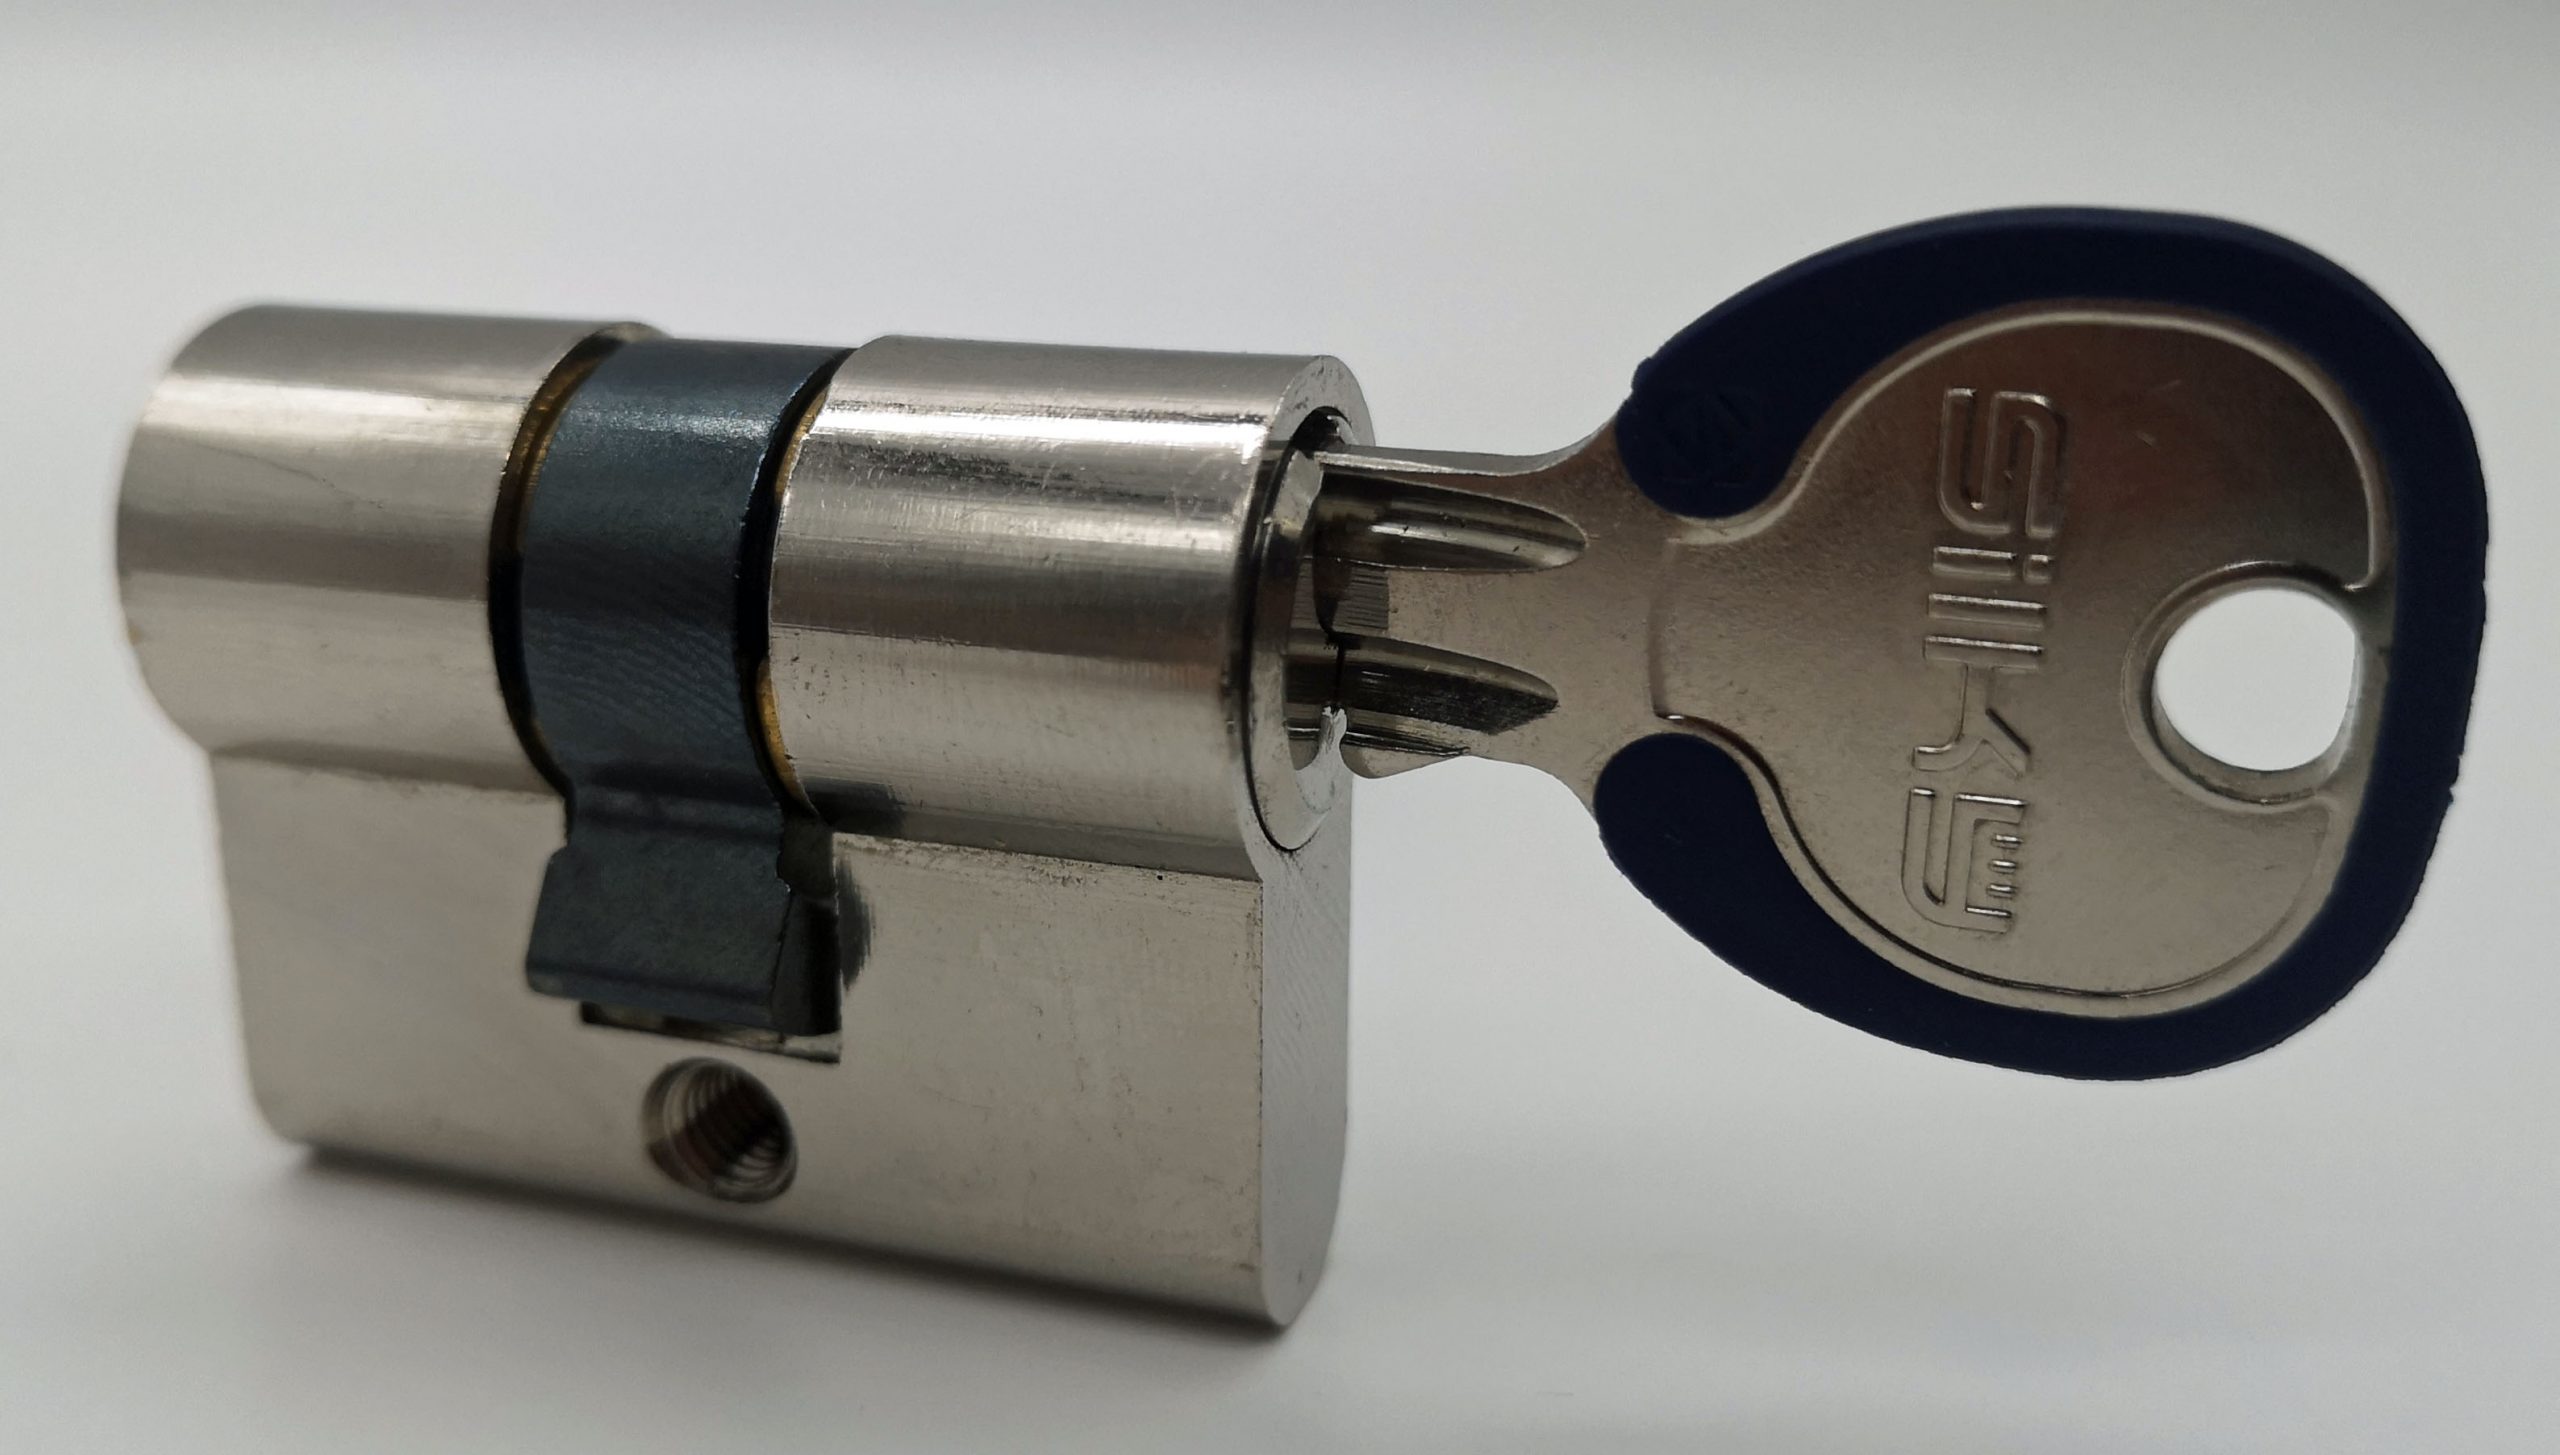
Very long ones such as the 45/55 above, are quite rare. Ones shorter than 30 are also rare. I had come across a 25/25 once, but a while ago, my favourite locksmith from Oostende (Birger) gave me a 20/20 cylinder.
A 20/20 cylinder
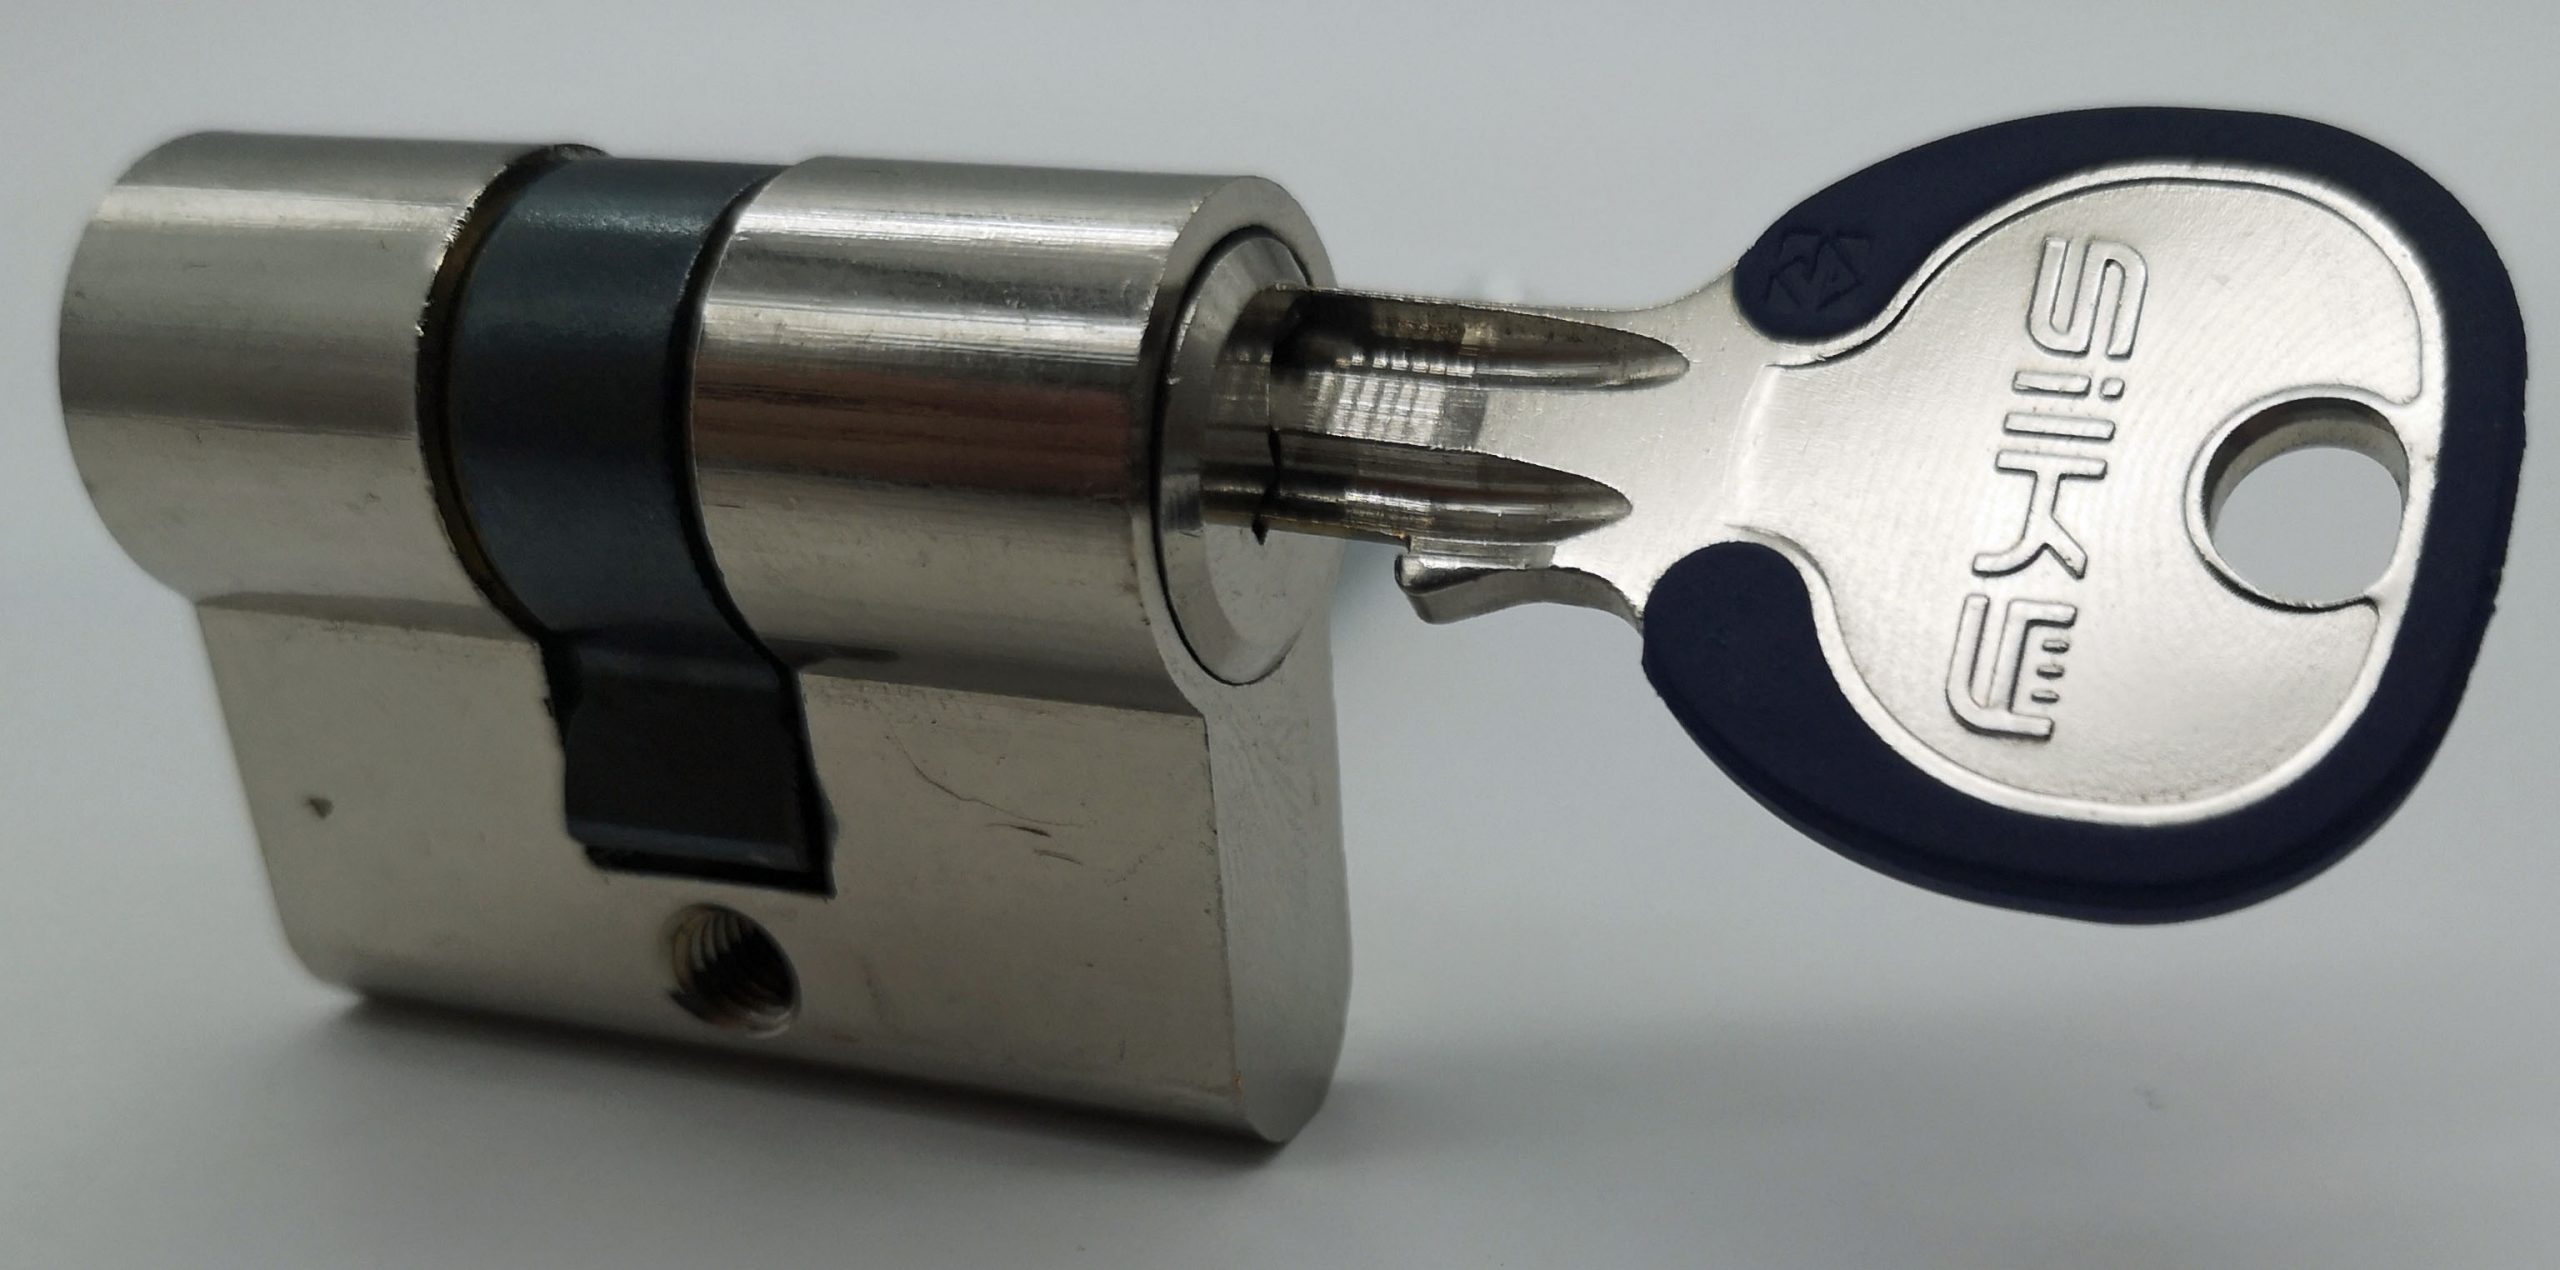
It did not come with a key. The cylinder only has one pin! This means that any key that fits the keyway can be used to open it: just insert the slope of the key just far enough to push the pin to the shear line.
By not inserting the key fully, we can pick the one pin
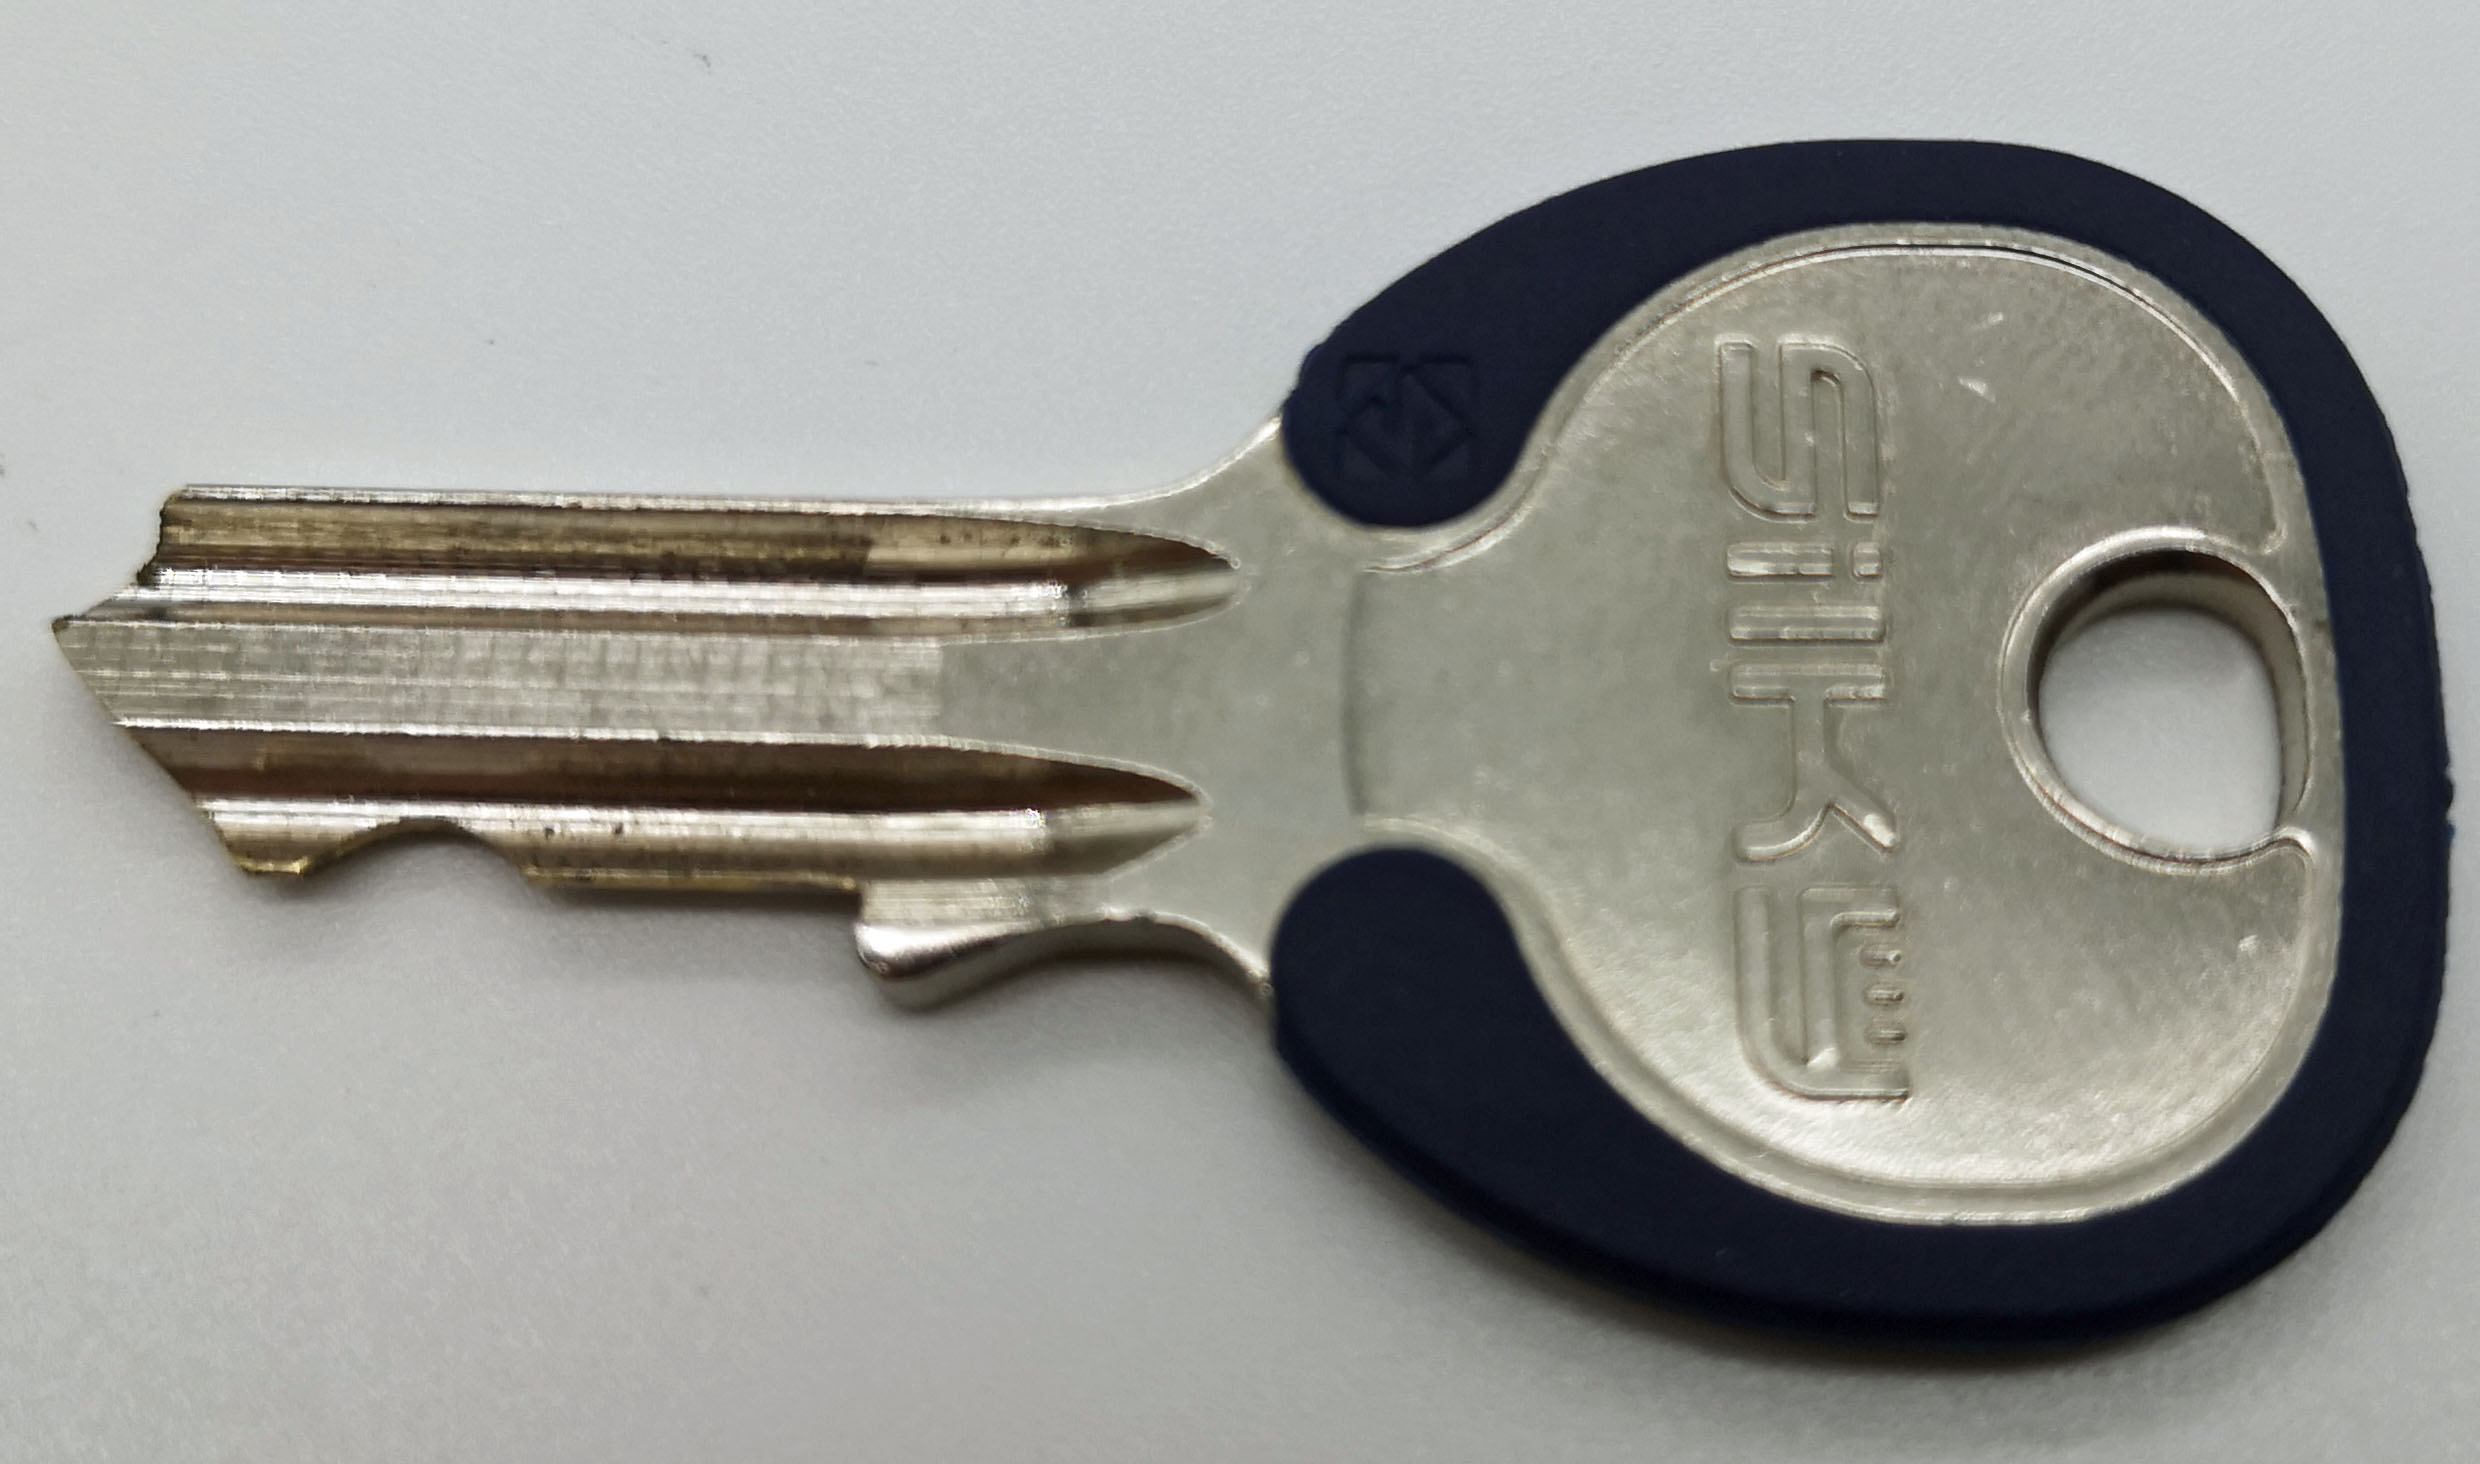
The cylinder did not come with a key, so I used impressioning to make one.
I (Walter) have created a geocache that requires some RSA hacking and subsequently lockpicking. I bought an Abus Titalium 64TI/40 padlock to be picked. Several people were able to find it by teaming up together. The feedback I got was that people spent considerable time on the lock, sometimes several hours (in separate sessions).
Geocacher #15 was unable to lockpick the lock, even though he had practiced on an identical lock at home. I offered to go with him to give advice. He couldn’t open it. Also I couldn’t (quickly) open it. I took the original key and that would not open it. By not fully inserting the key and wiggling, I succeeded in opening. (I let the geocacher pick his own lock and allowed him to log the cache.)
Once home, I decided to take a look at the lock. Although only a very limited number of people had worked on it, it was completely shot. I took a video comparing showing a new padlock and then the one from the cache:
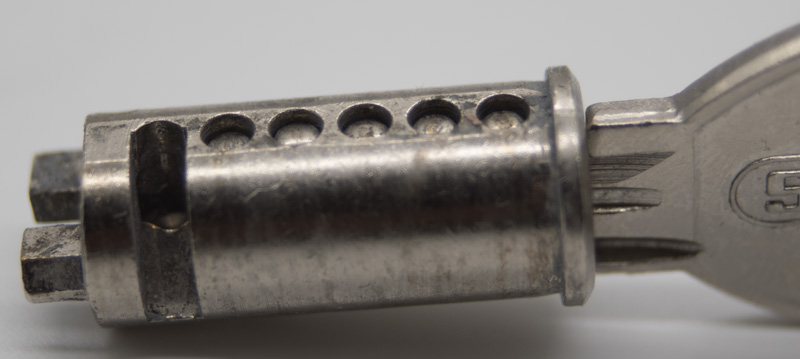
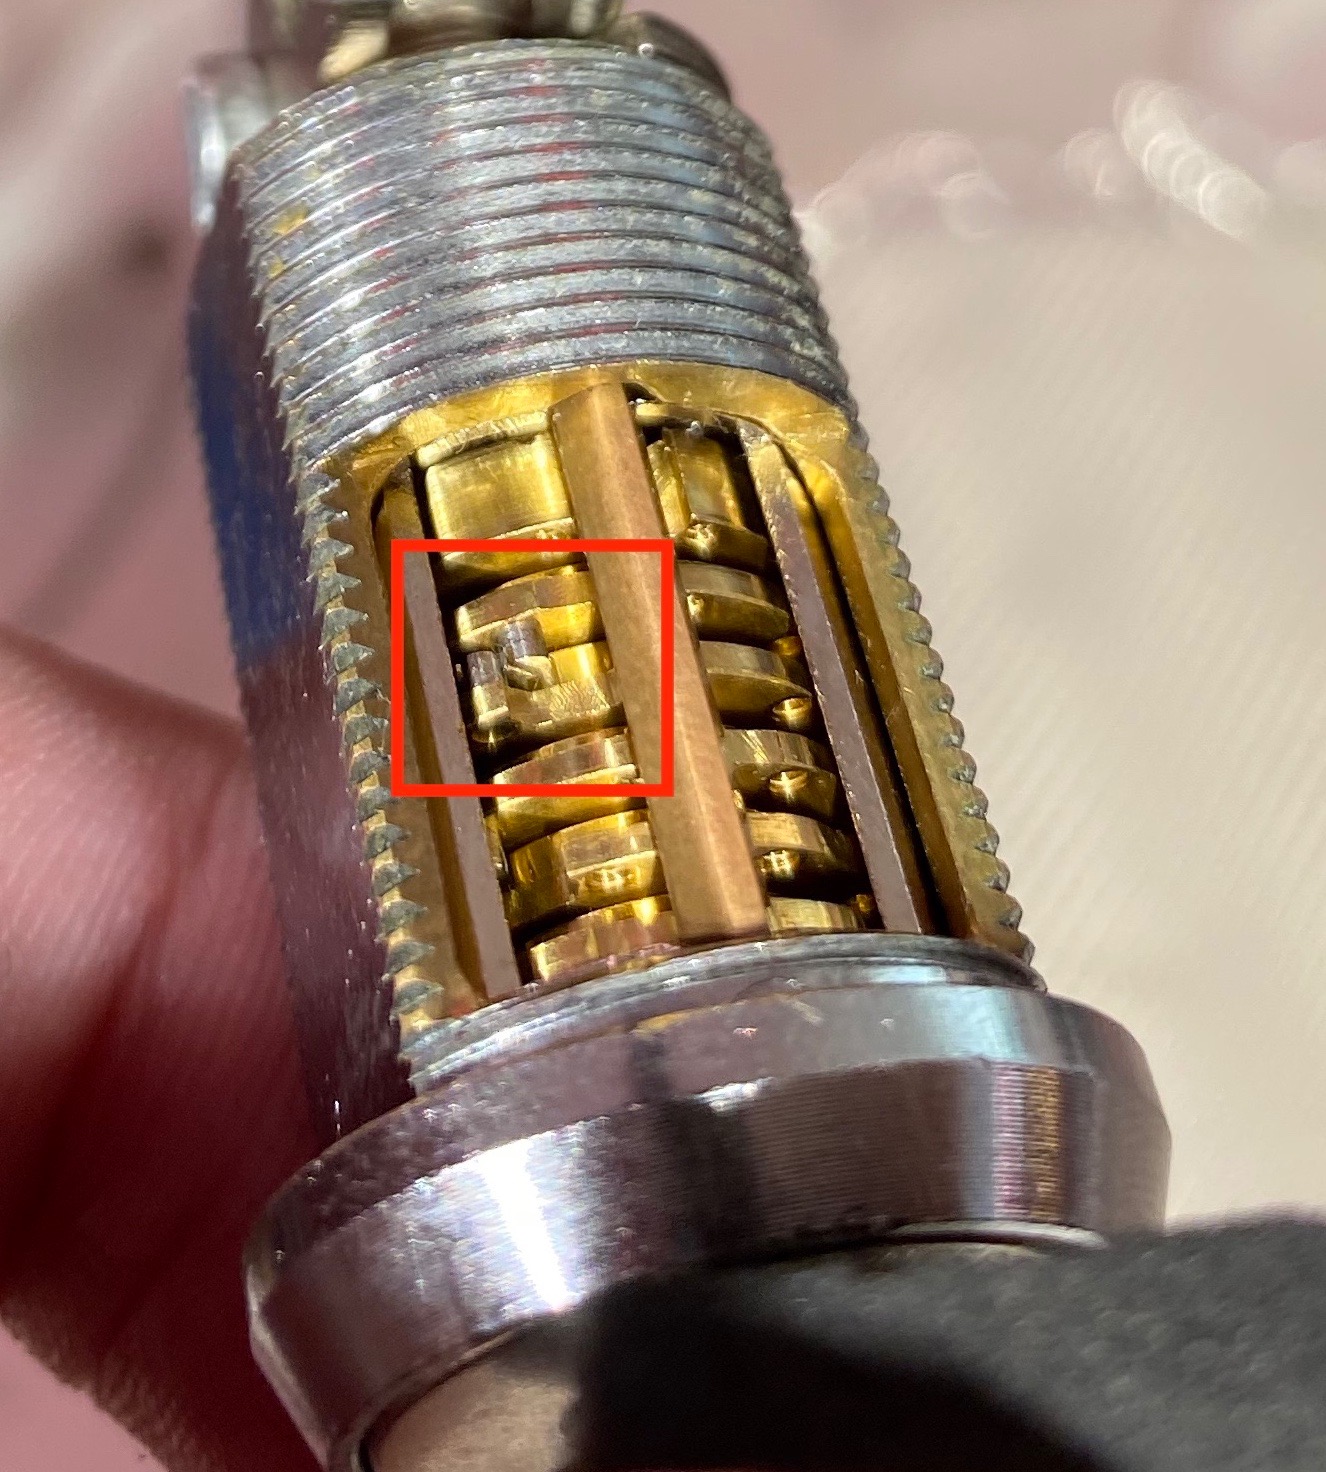
I’ve taken apart the lock to have a look at the pins. We always say that picking a lock will leave tiny traces on the pins (and other parts of the lock) that can be found during a forensic investigation. Well, in this case, the naked eye was enough to see the abuse.
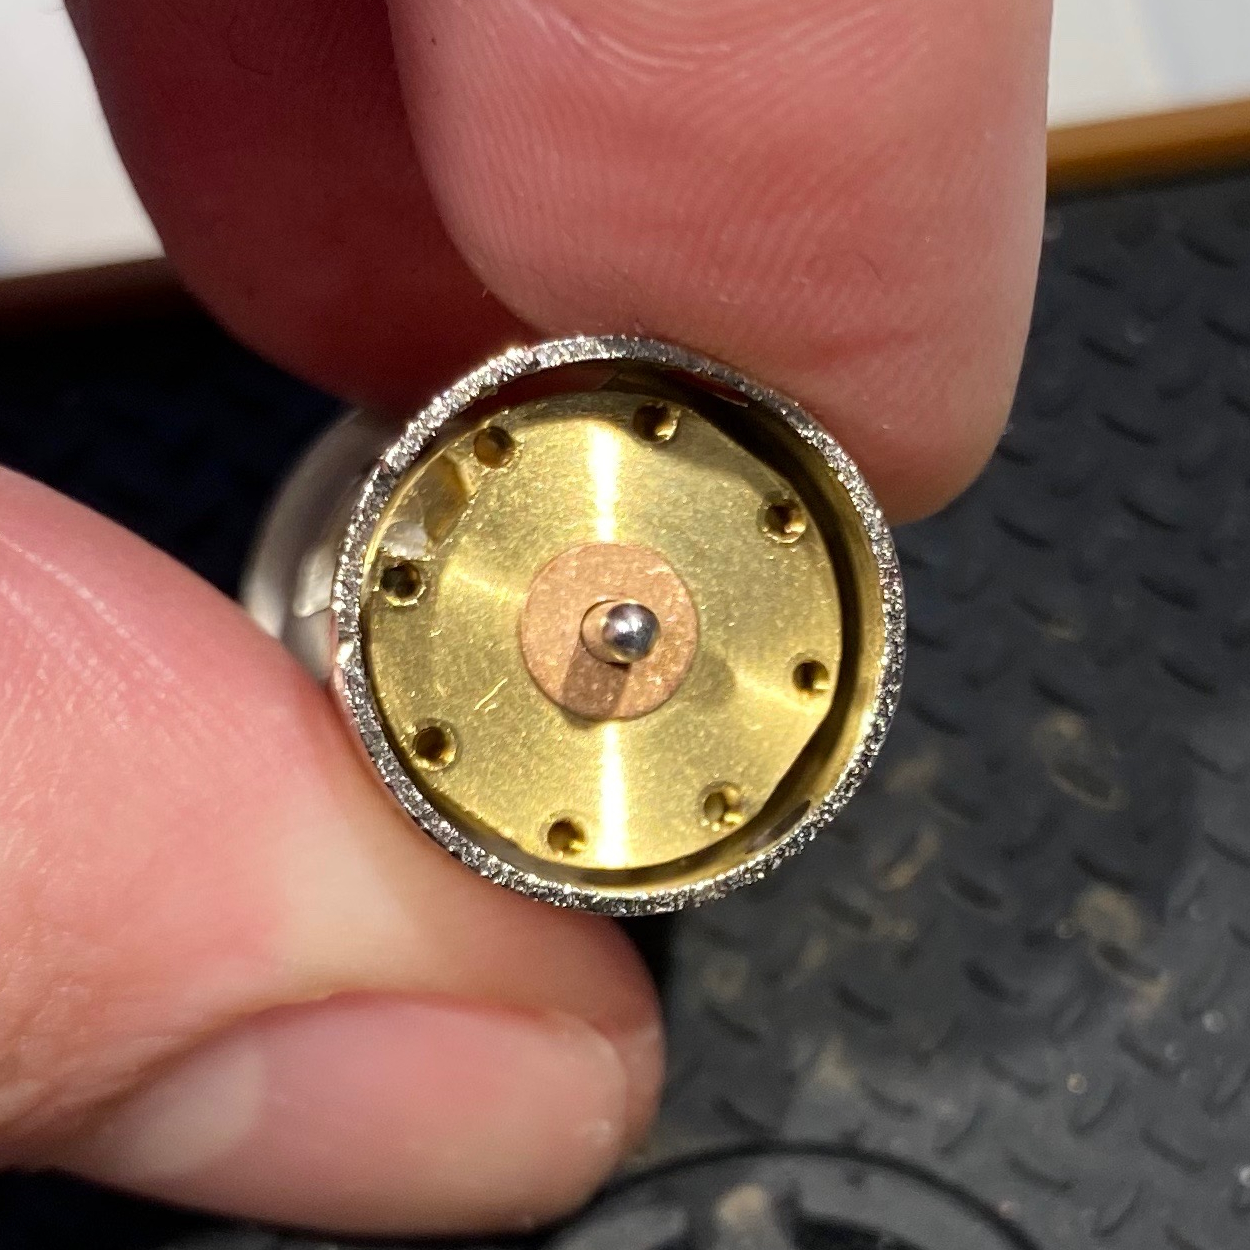
Here’s the plug with the key inserted. Note how the pins have shortened. This causes the key to no longer work.
This also explains why taking out the key a bit and wiggling opened it.
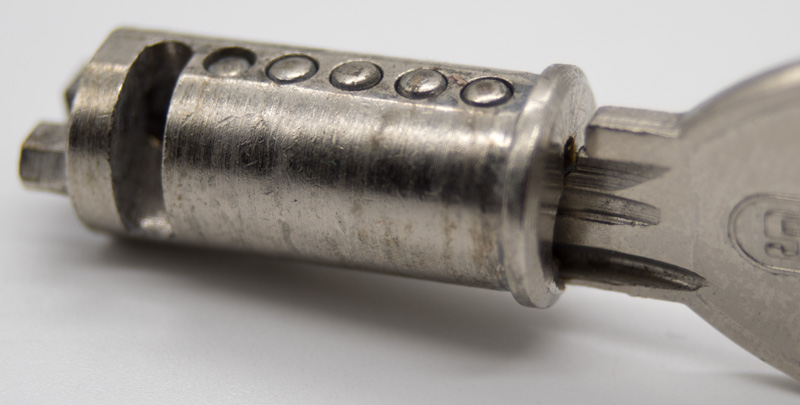
Here’s a view of the pins:
There’s now a new padlock in place. You can’t really tell from the picture here, but the pins are made out of aluminium, which kind of explains the wear on them. I bought the lock as it is marketed as being weather proof. But resisting weather is different from resisting lockpicks.
This is a proof of concept for a manipulation method for the RKS. At least a passing familiarity with safe combination lock manipulation is assumed.
As far as I know this is the first public manipulation for the RKS – or at least it was when I did the actual manipulation some months before writing this post. Please do let me know if you know of others before me.
editors note: Pics or it didn’t happen, no hearsay allowed. 🙂
RKS operating principle
I’ll provide a quick rundown of how the RKS lock works, but I’d suggest reading Han Fey’s excellent writeup for more in-depth information. Note that there are some differences between what’s detailed in the doc versus the lock I have, but the general idea is the same.
The RKS cam lock innards resemble a hybrid of a fixed drive pin combination lock and a disk detainer lock. Like both disk detainers and combination locks, it has several disks with gates on them (ie. wheels in combination lock terms, but the RKS doc uses “disk” so I’ve stuck to the same terminology) – 5 in my version – and a drive disk which is equivalent to the cam. Like in combination locks, the gates can use the full 360° of the disk. Each disk including the drive disk has multiple false gates in addition to the true gate, but they’re equally spaced. Like in a disk detainer cam lock, the plug is prevented from rotating by a sidebar that fits into the gates on the disks. The combination is changed by changing the position of a drive pin on the edge of each disk, similarly to screw change combination locks although it seemed like only the “bottom” or dialer side pin is changeable – or possibly the ones I tried were just very tight, but I didn’t want to force them considering how tiny the screws are.
The drive disk is at the “far” or cam end of the lock, and it’s driven by a drive shaft that goes through the disk pack and is connected to a detachable dialer, either manual (which I have) or electronic. In effect this gives us a 5 wheel combination lock with each number in the combination between 0 – 63 which is opened like a fixed drive pin lock: you always track the previous number, so if the combination starts L30 R7 L28 … you need to pass L30 5 times (ie stop on the 6th), then dialing R7 you need to pass 30 4 times before stopping on R7, then going to L28 you need to pass 7 three times etc etc. After you’ve dialed the combination you apply counterclockwise tension to the edge of the dialer to rotate the plug itself (ie you don’t rotate the “dialing part” of the dial so the drive disk doesn’t move), which then forces the sidebar to slide down into the gates and allows the plug to rotate.
Note: I’ll use the same numbering scheme for the disks as with combination locks, so disk 1 (abbreviated to d1) is the one closest to the dialer and disk 5 (d5) the one furthest away from it, right next to the drive disk.
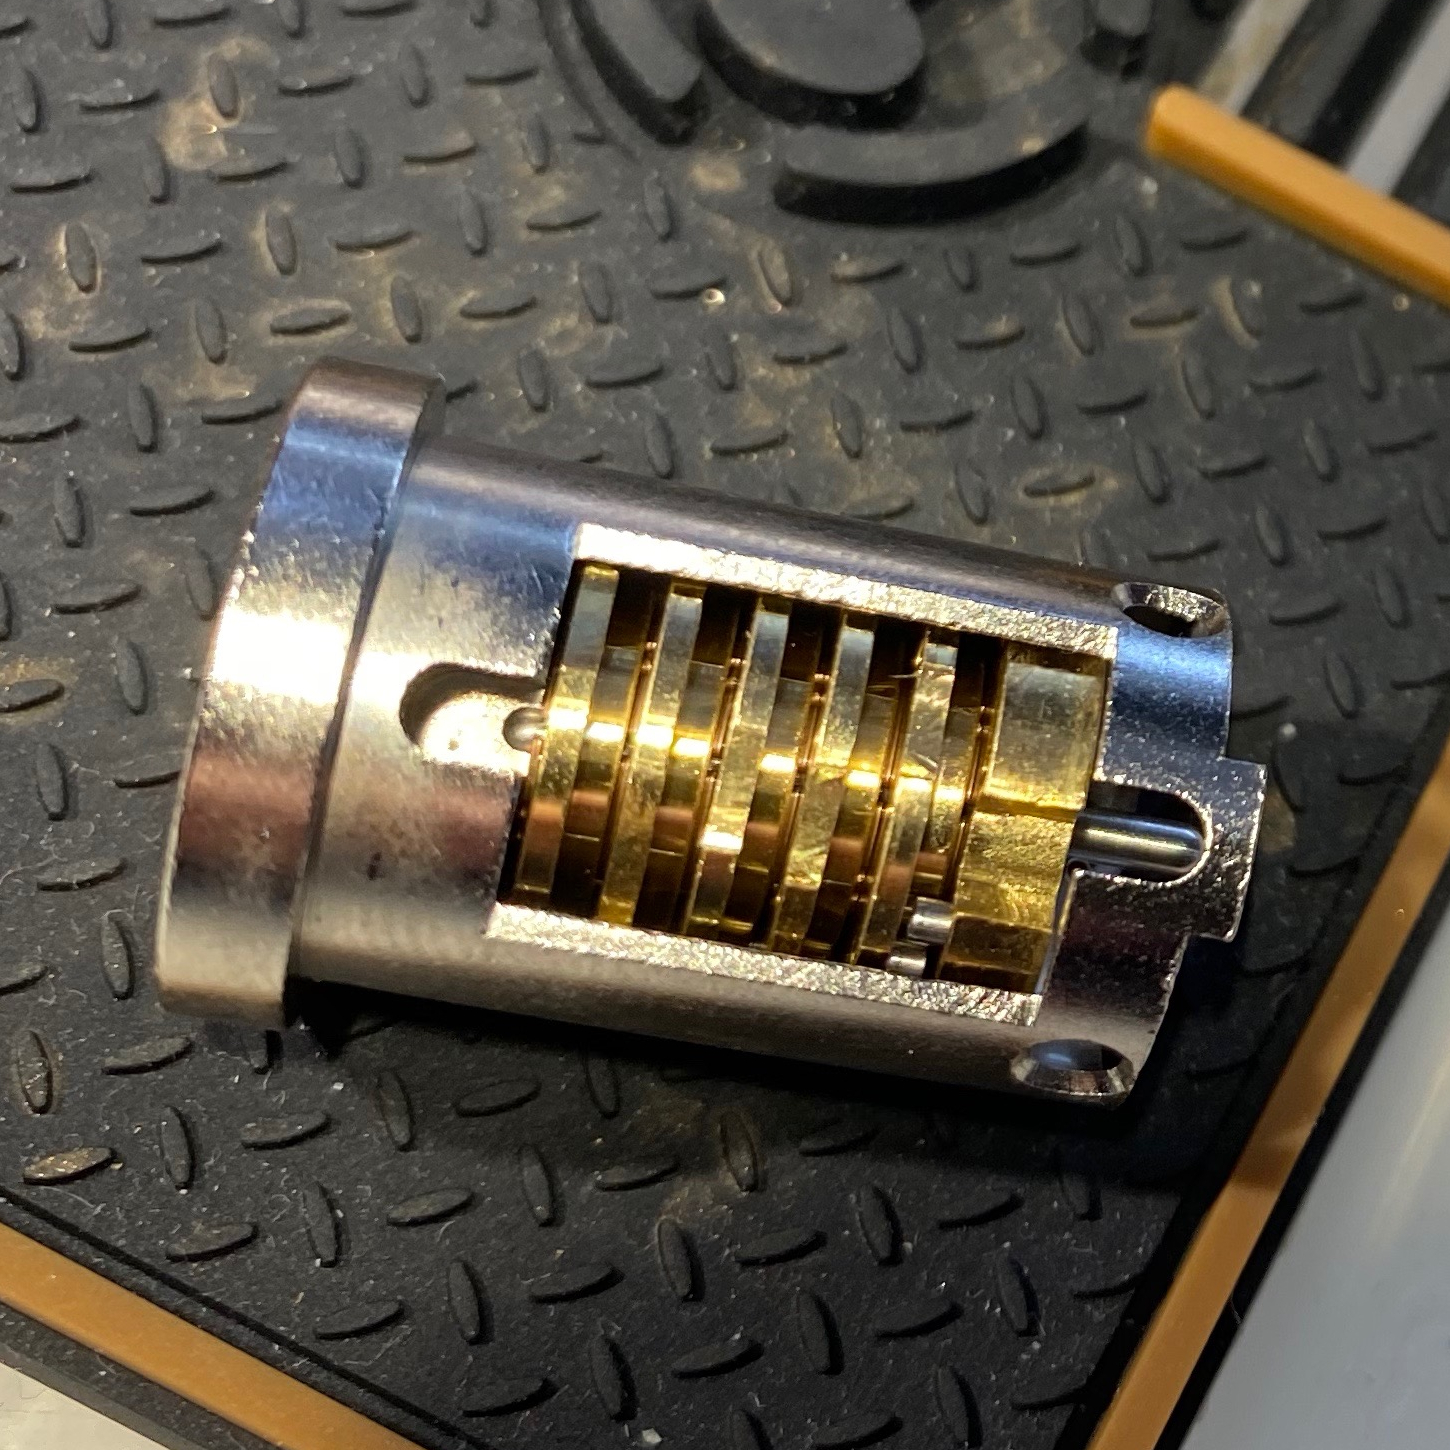
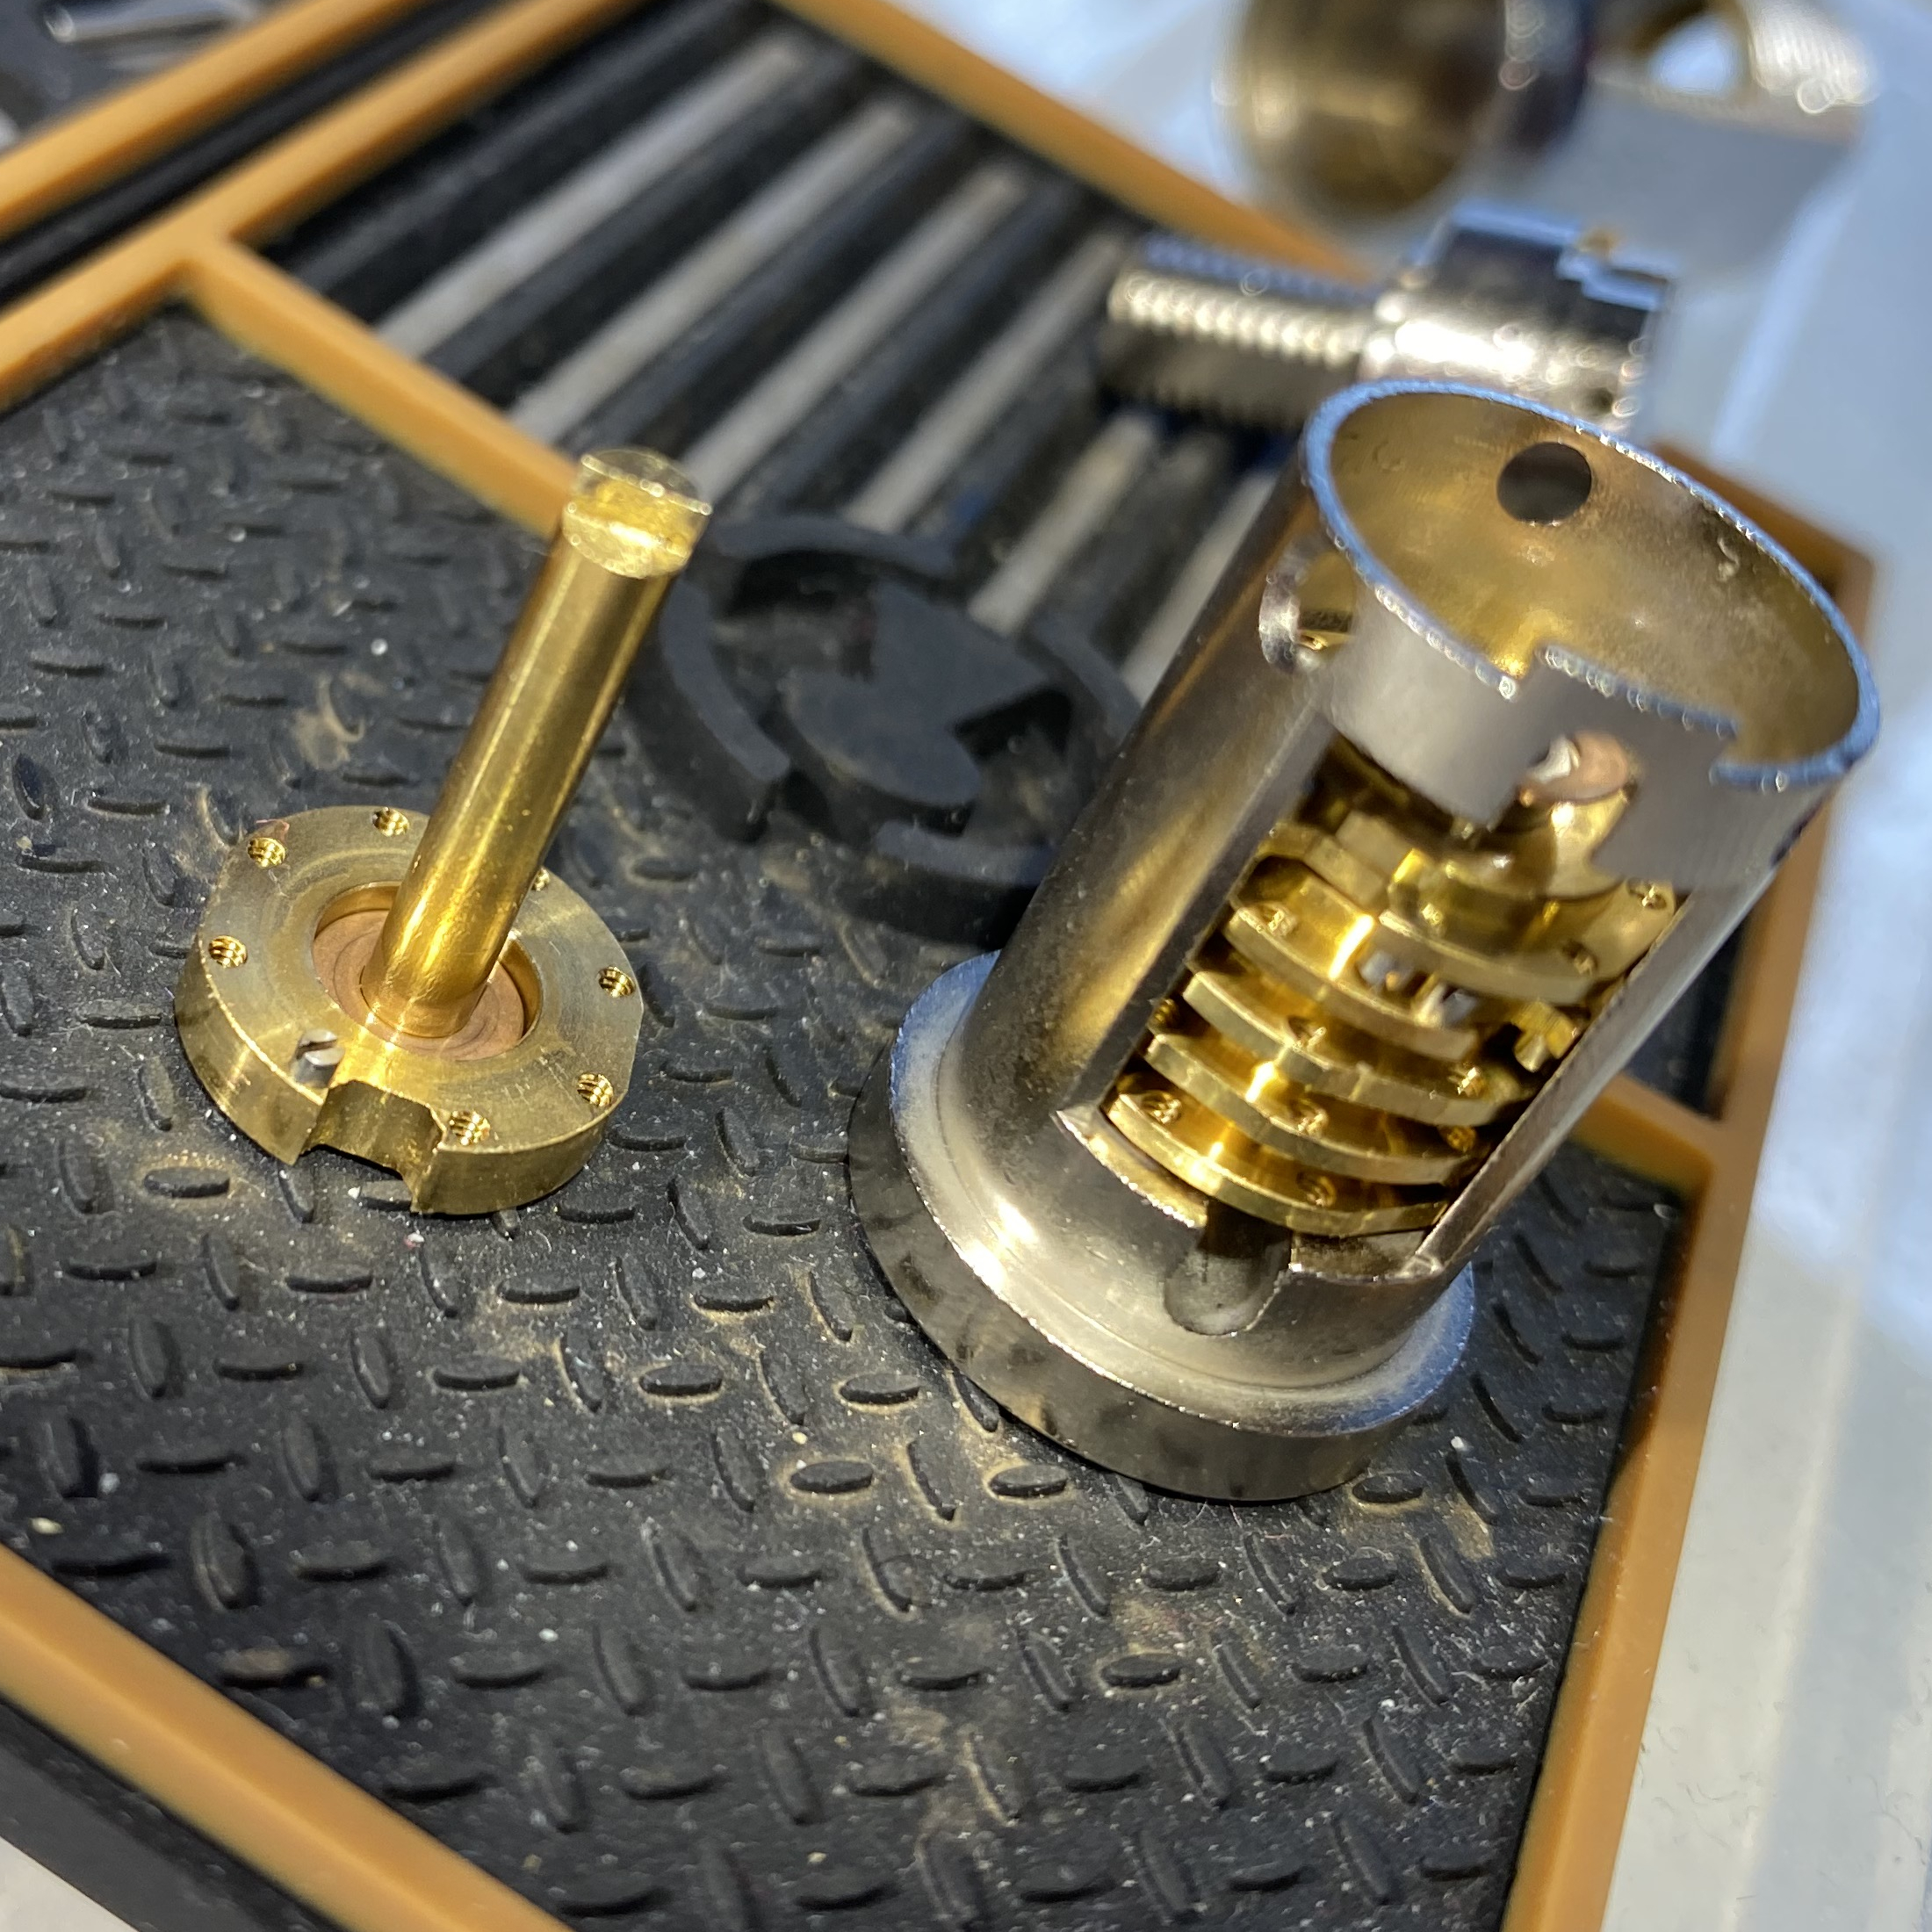
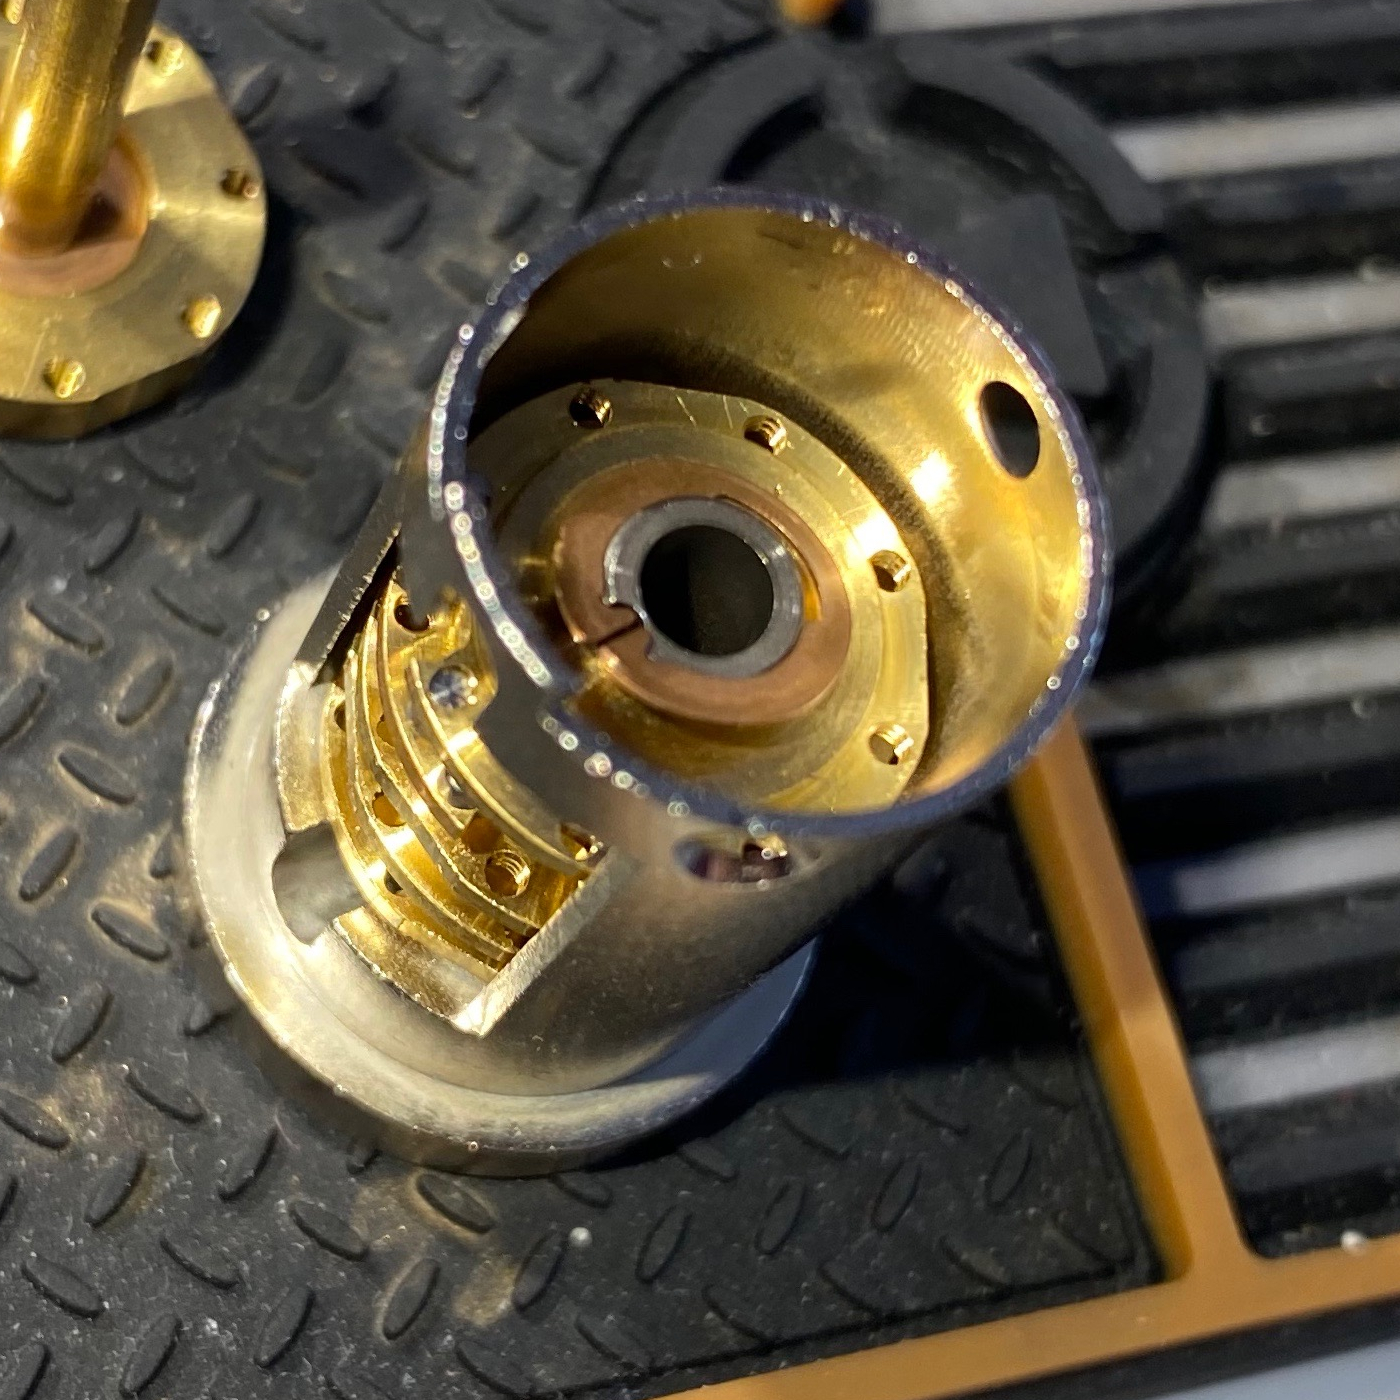
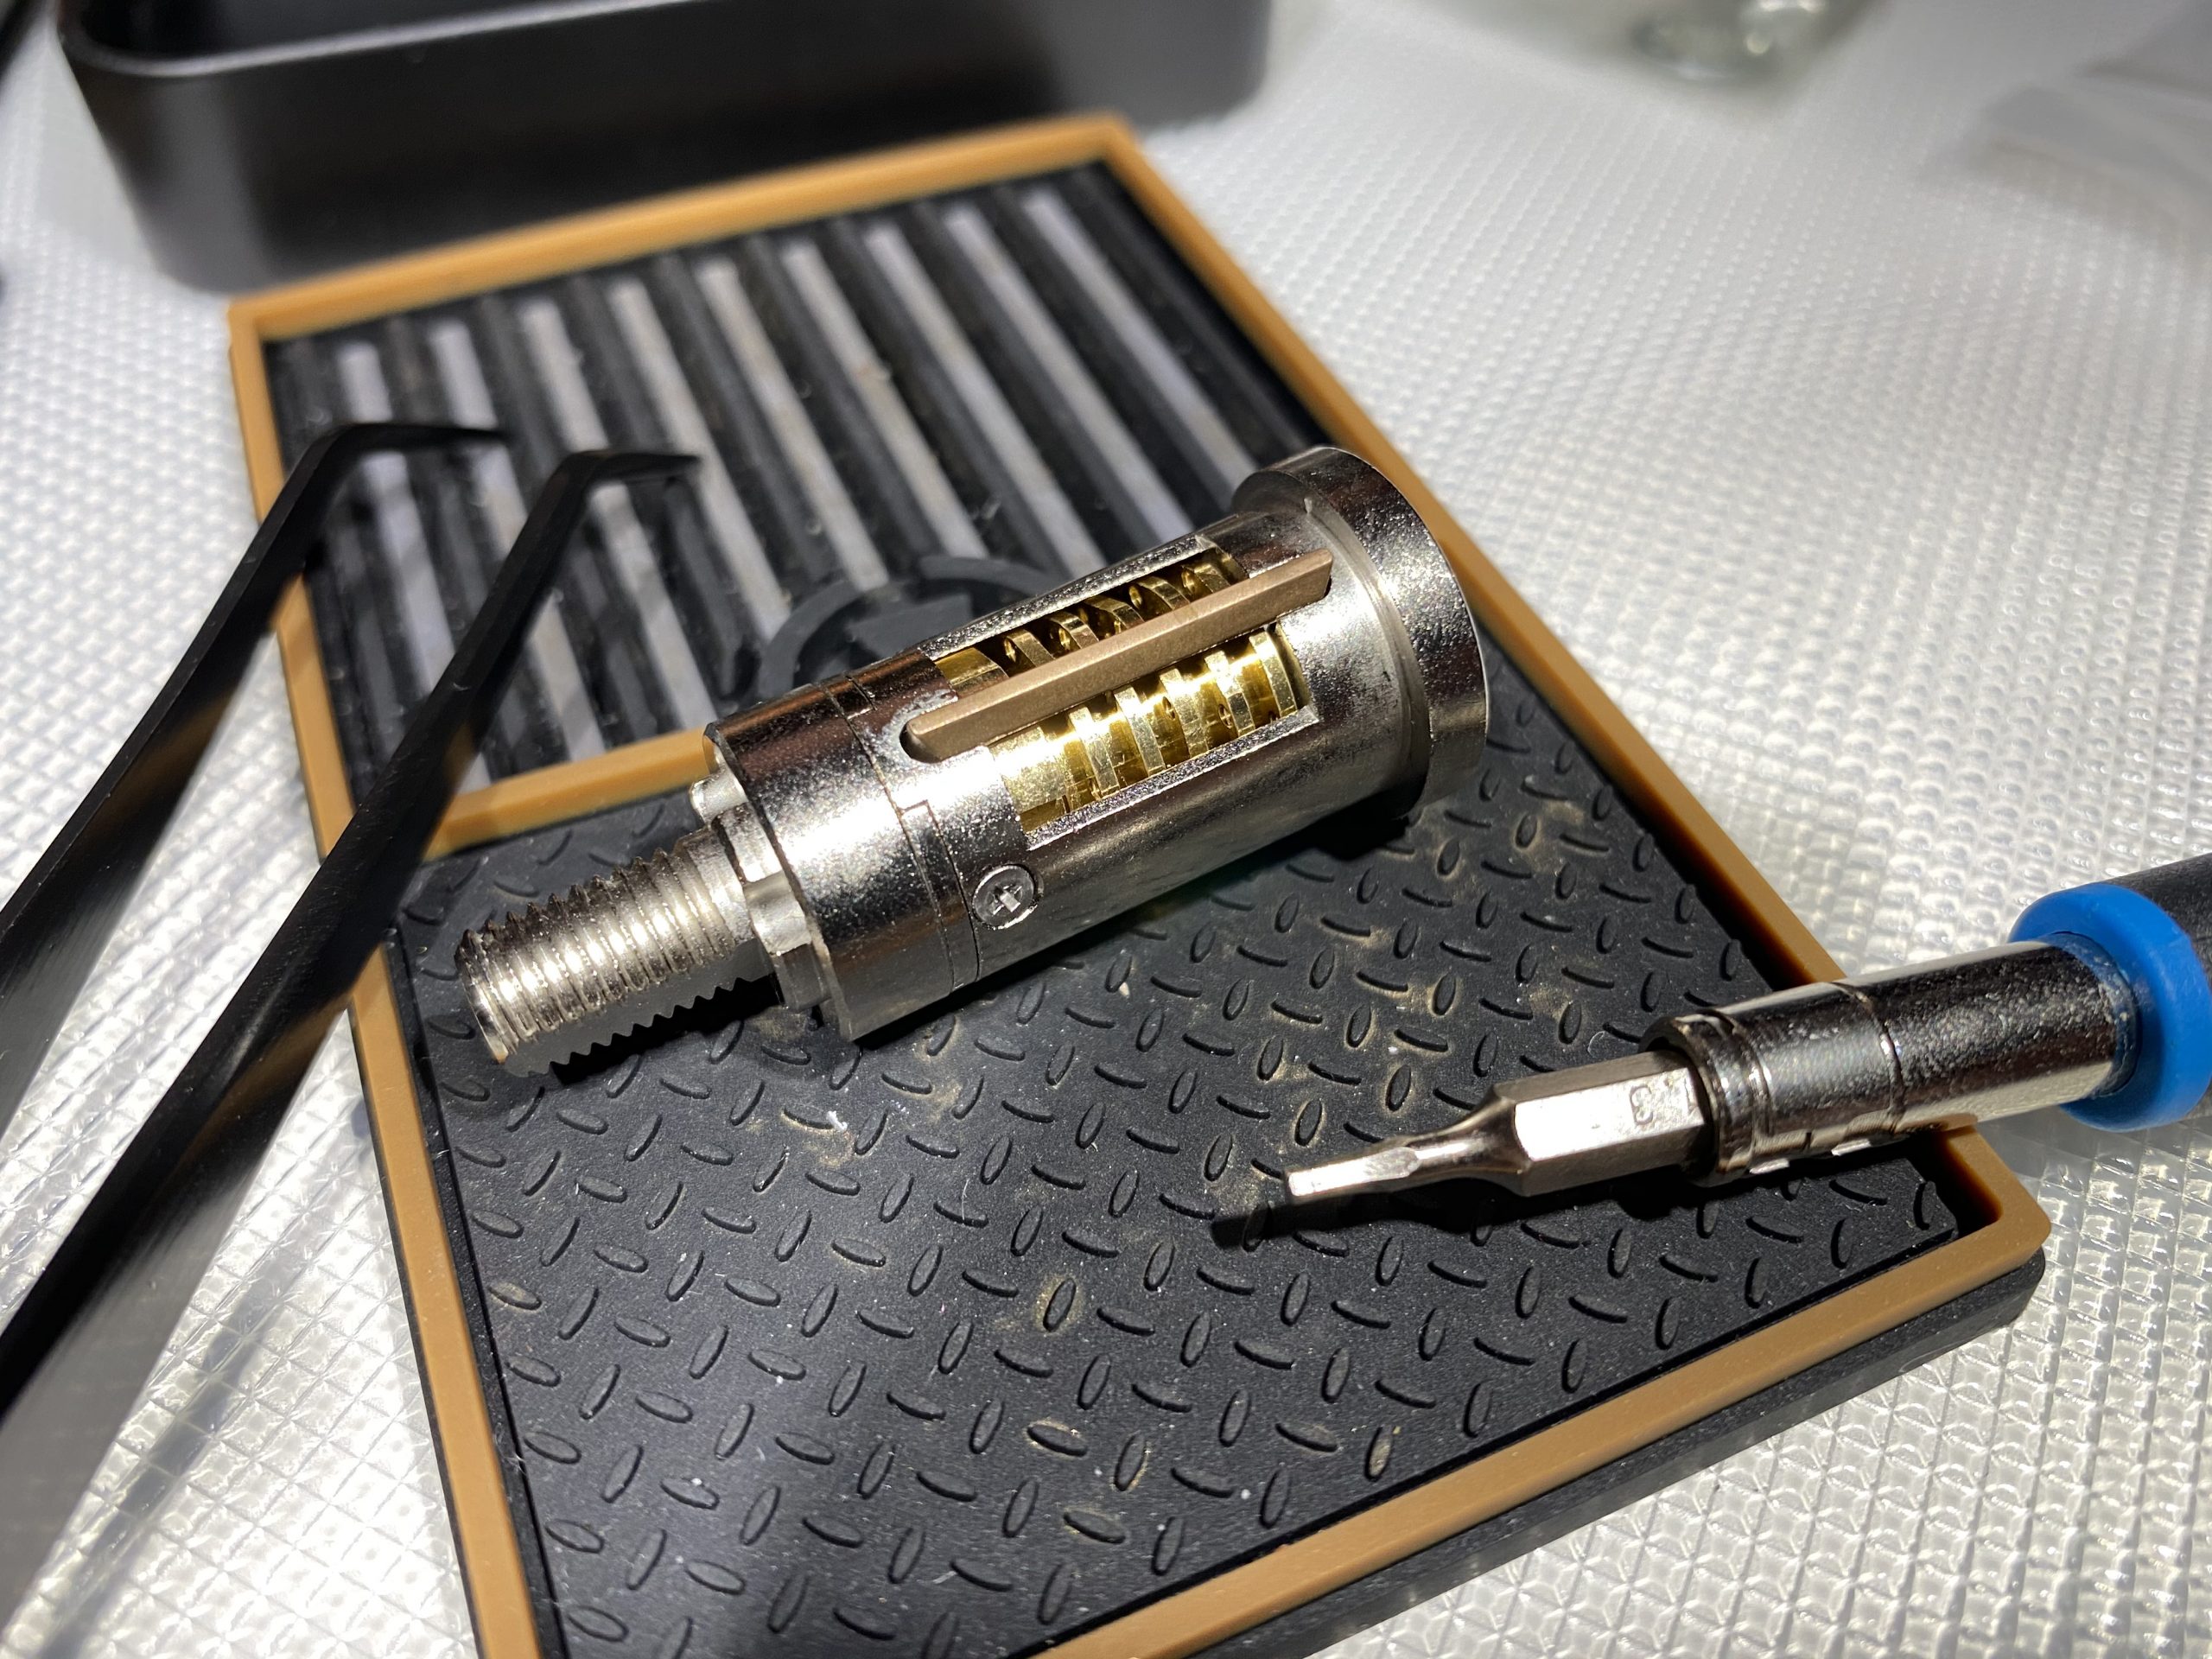
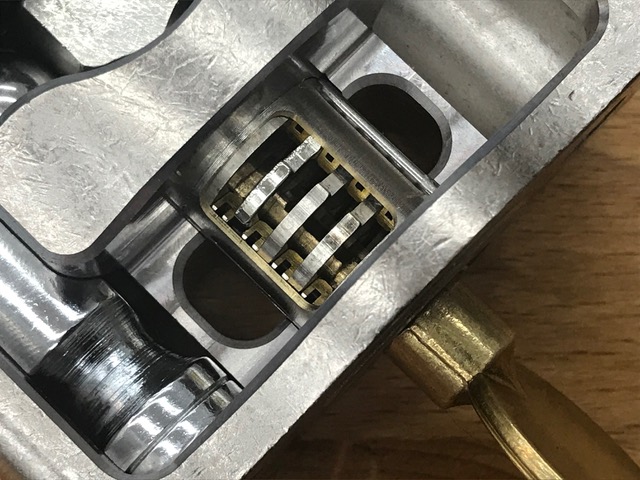
The cutaway lock, sidebar and disks visible. The drive disk is the one on the right, followed by d5, then d4 etc.
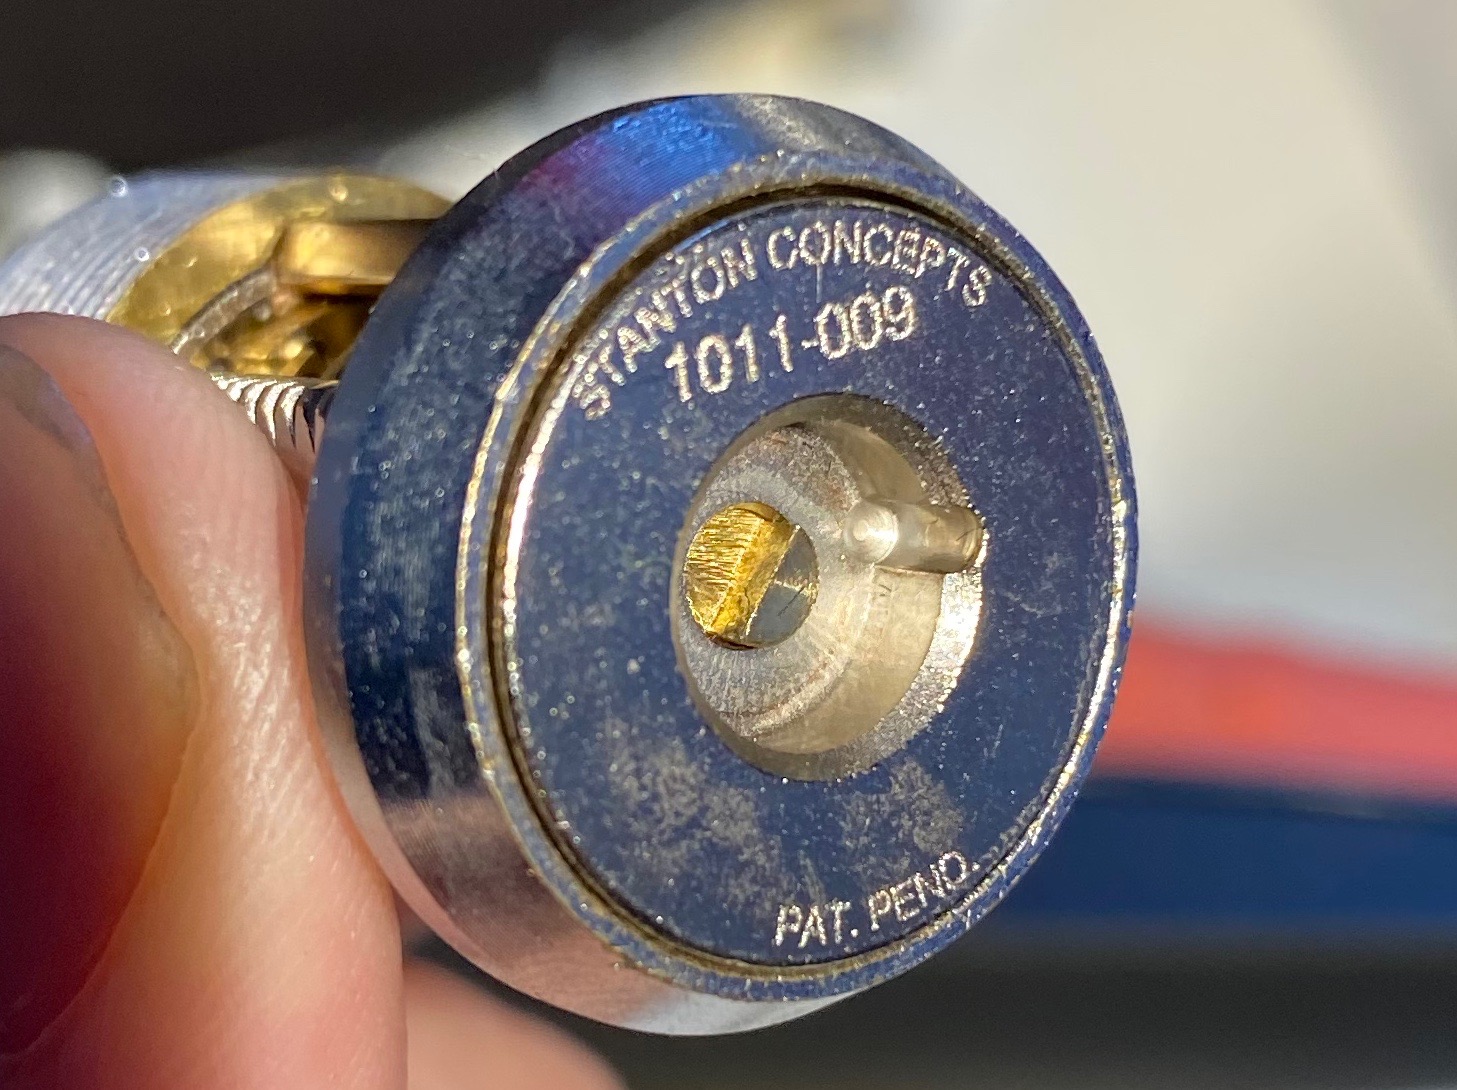
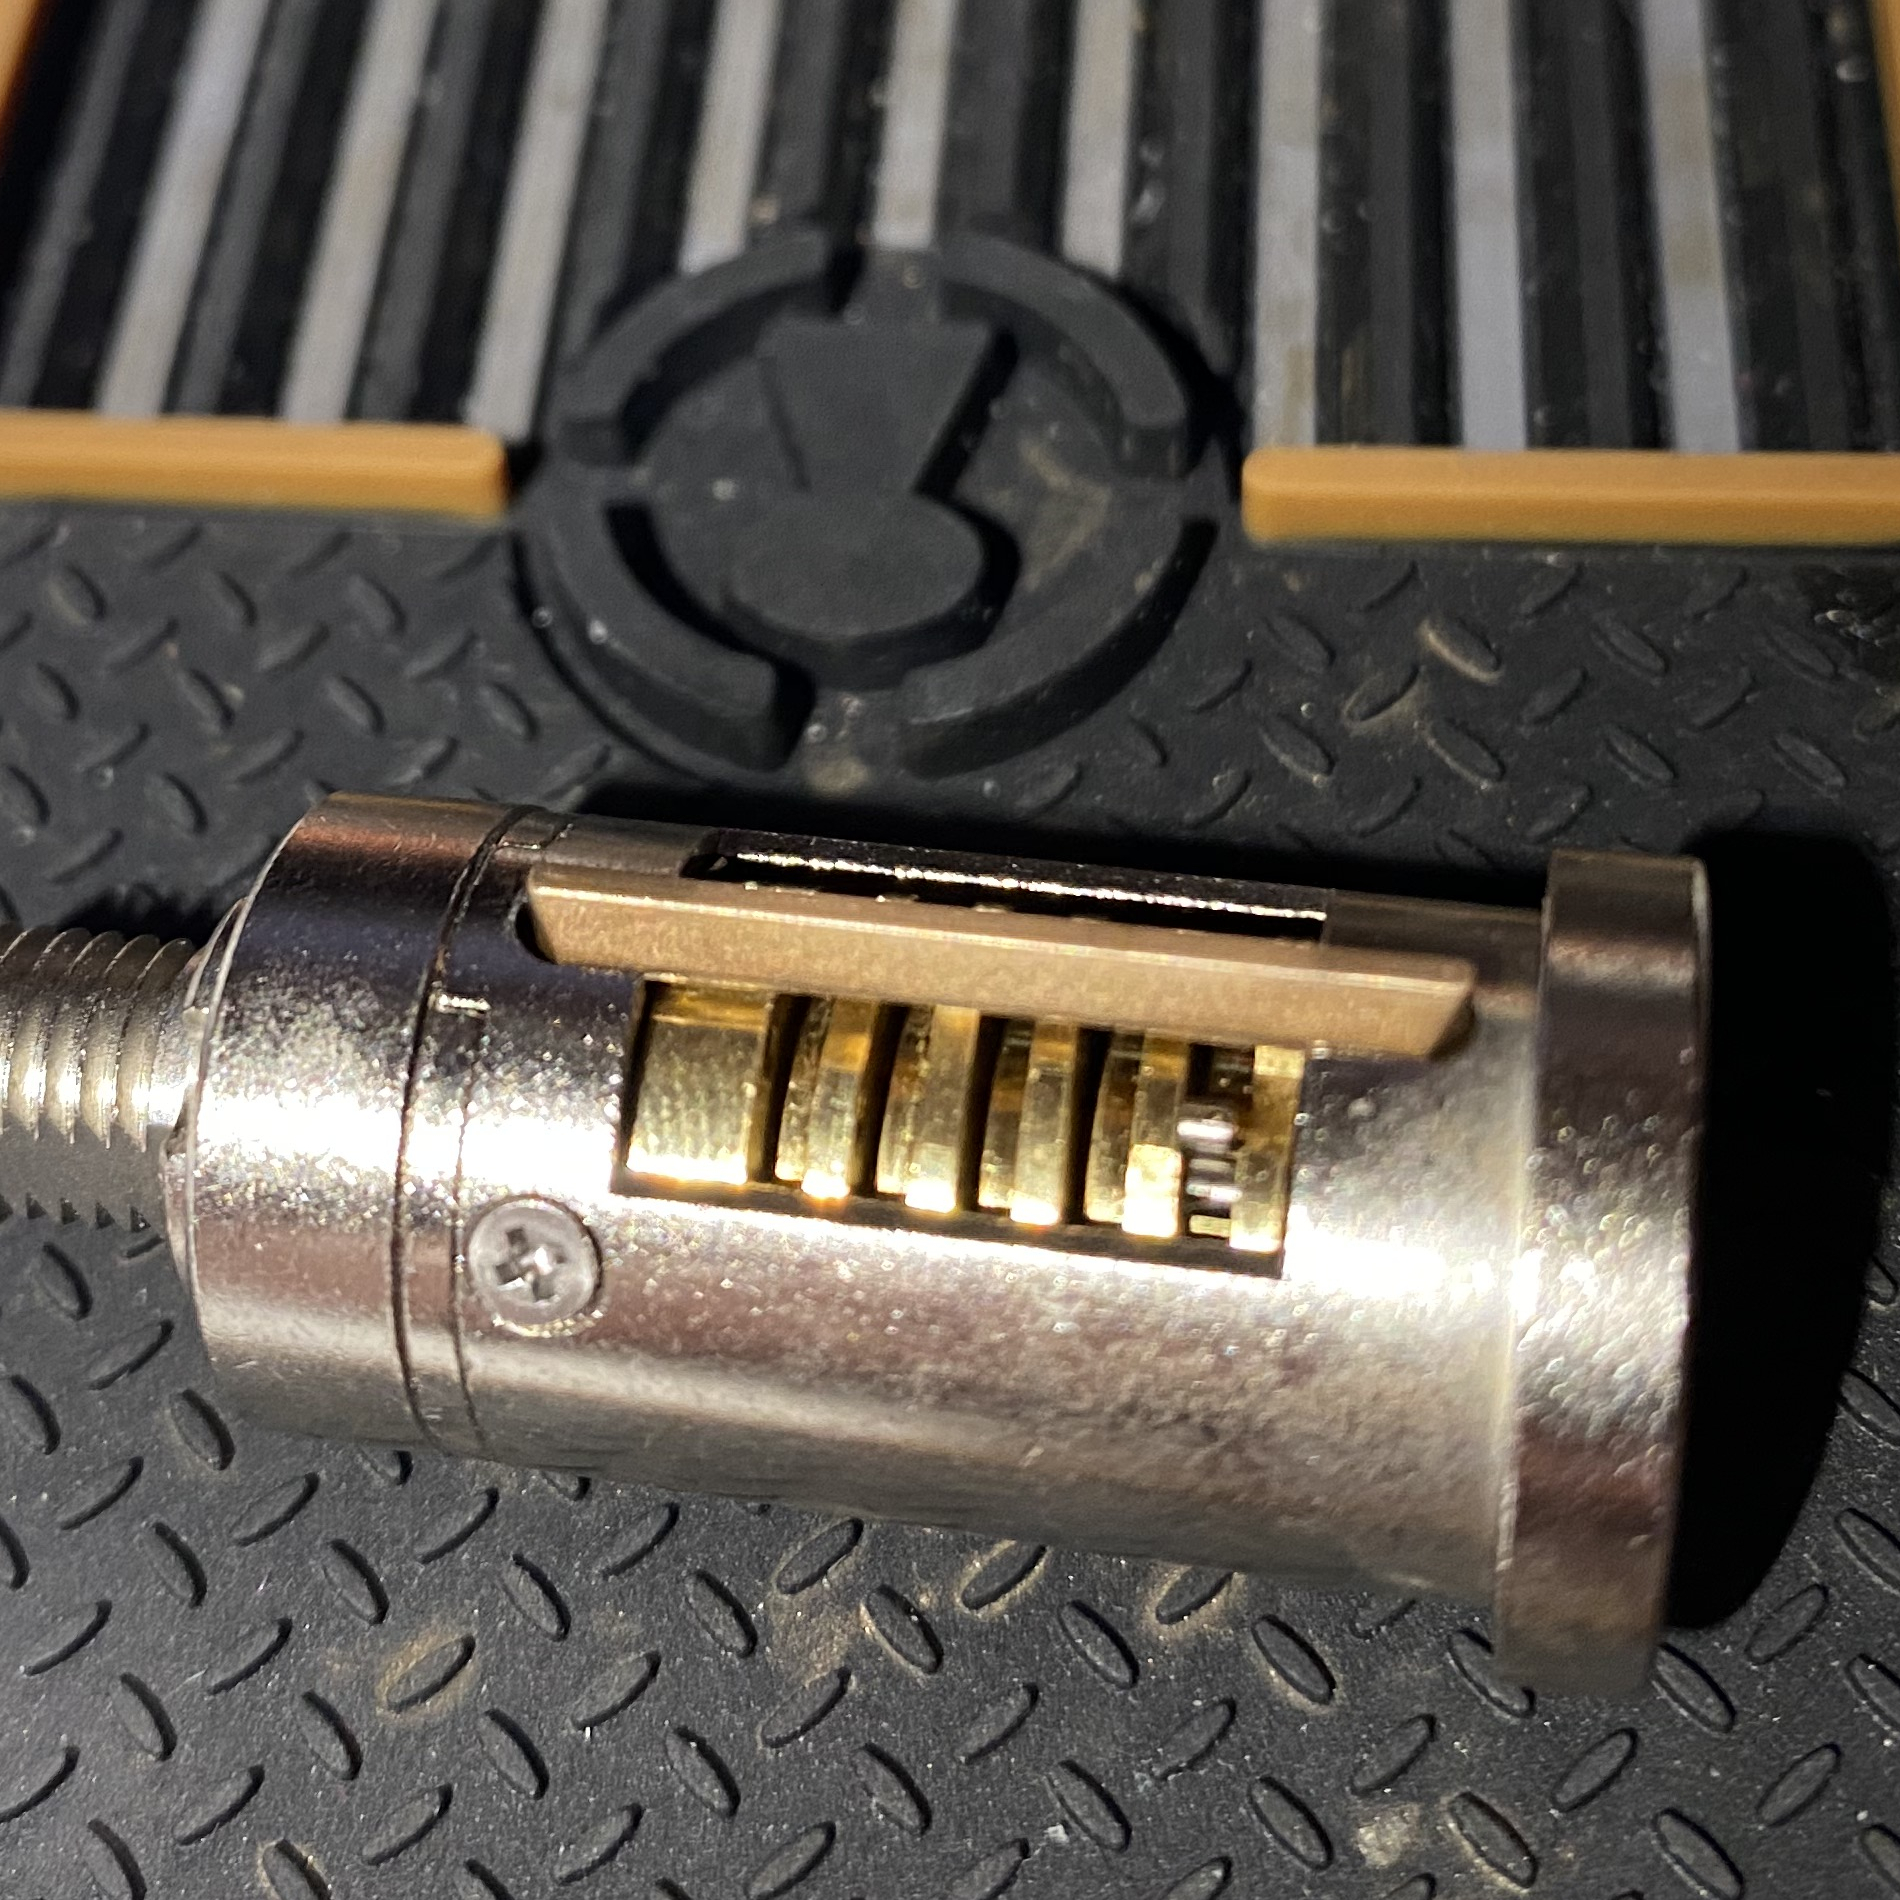
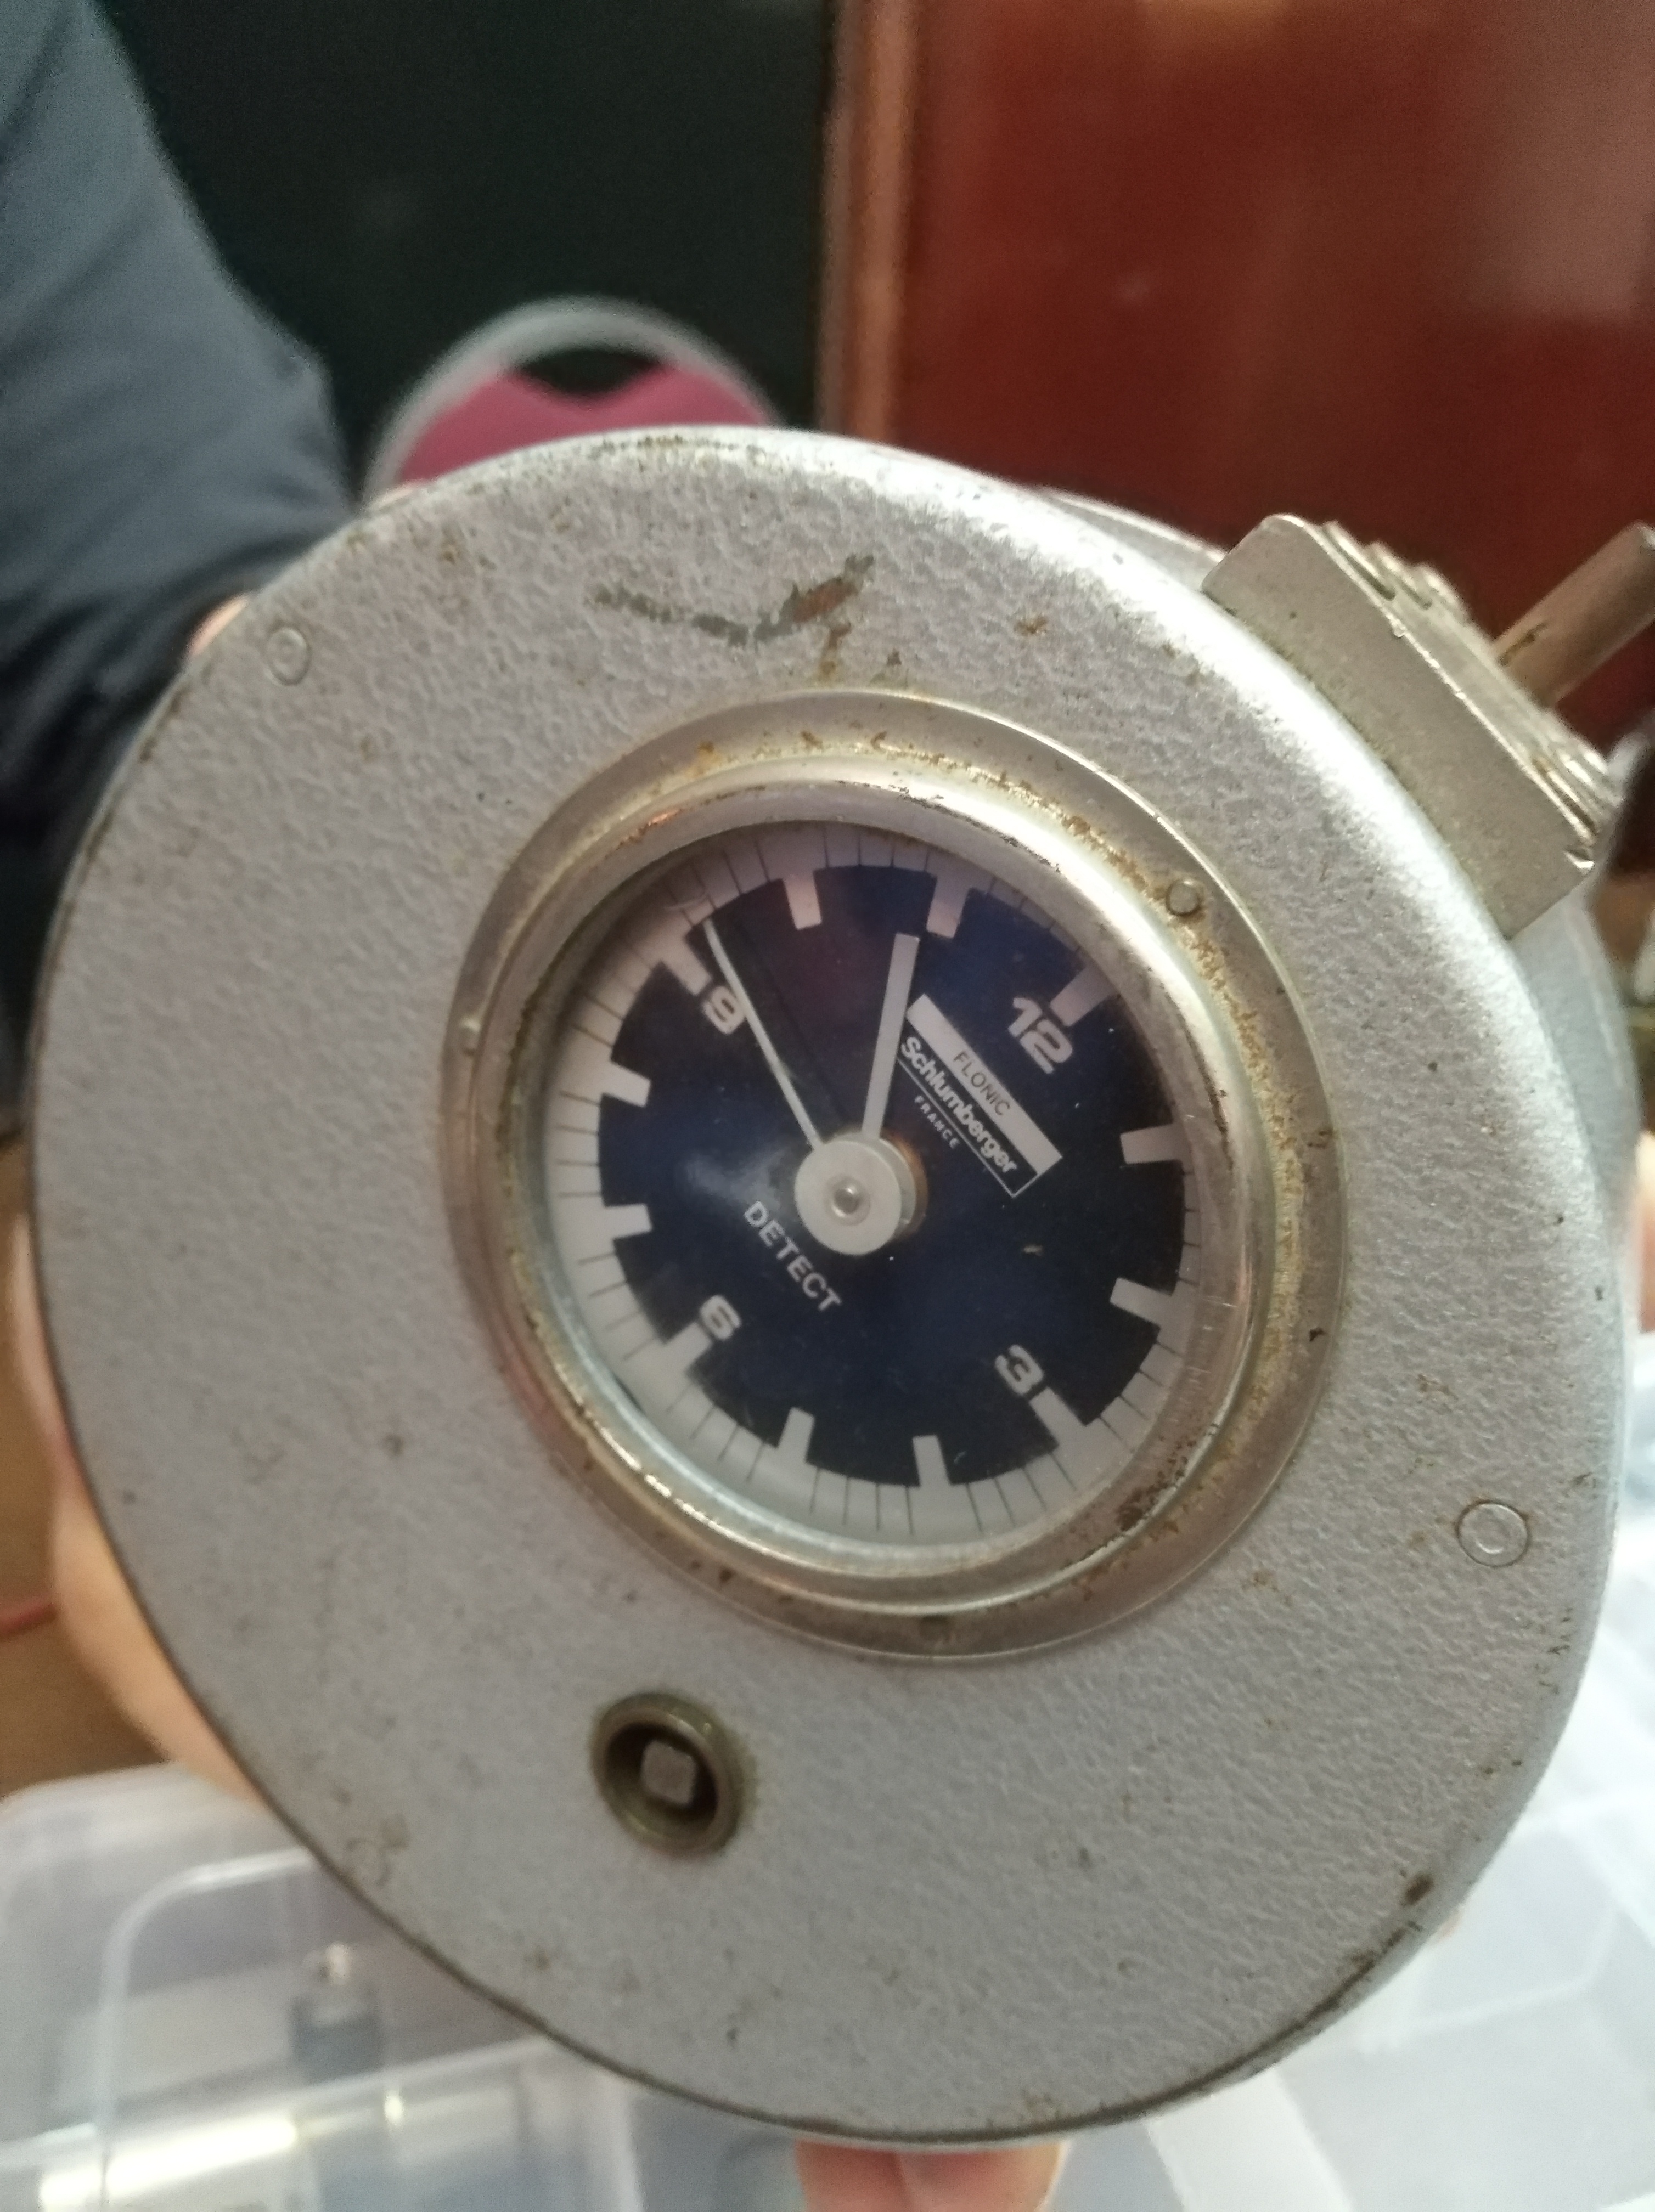
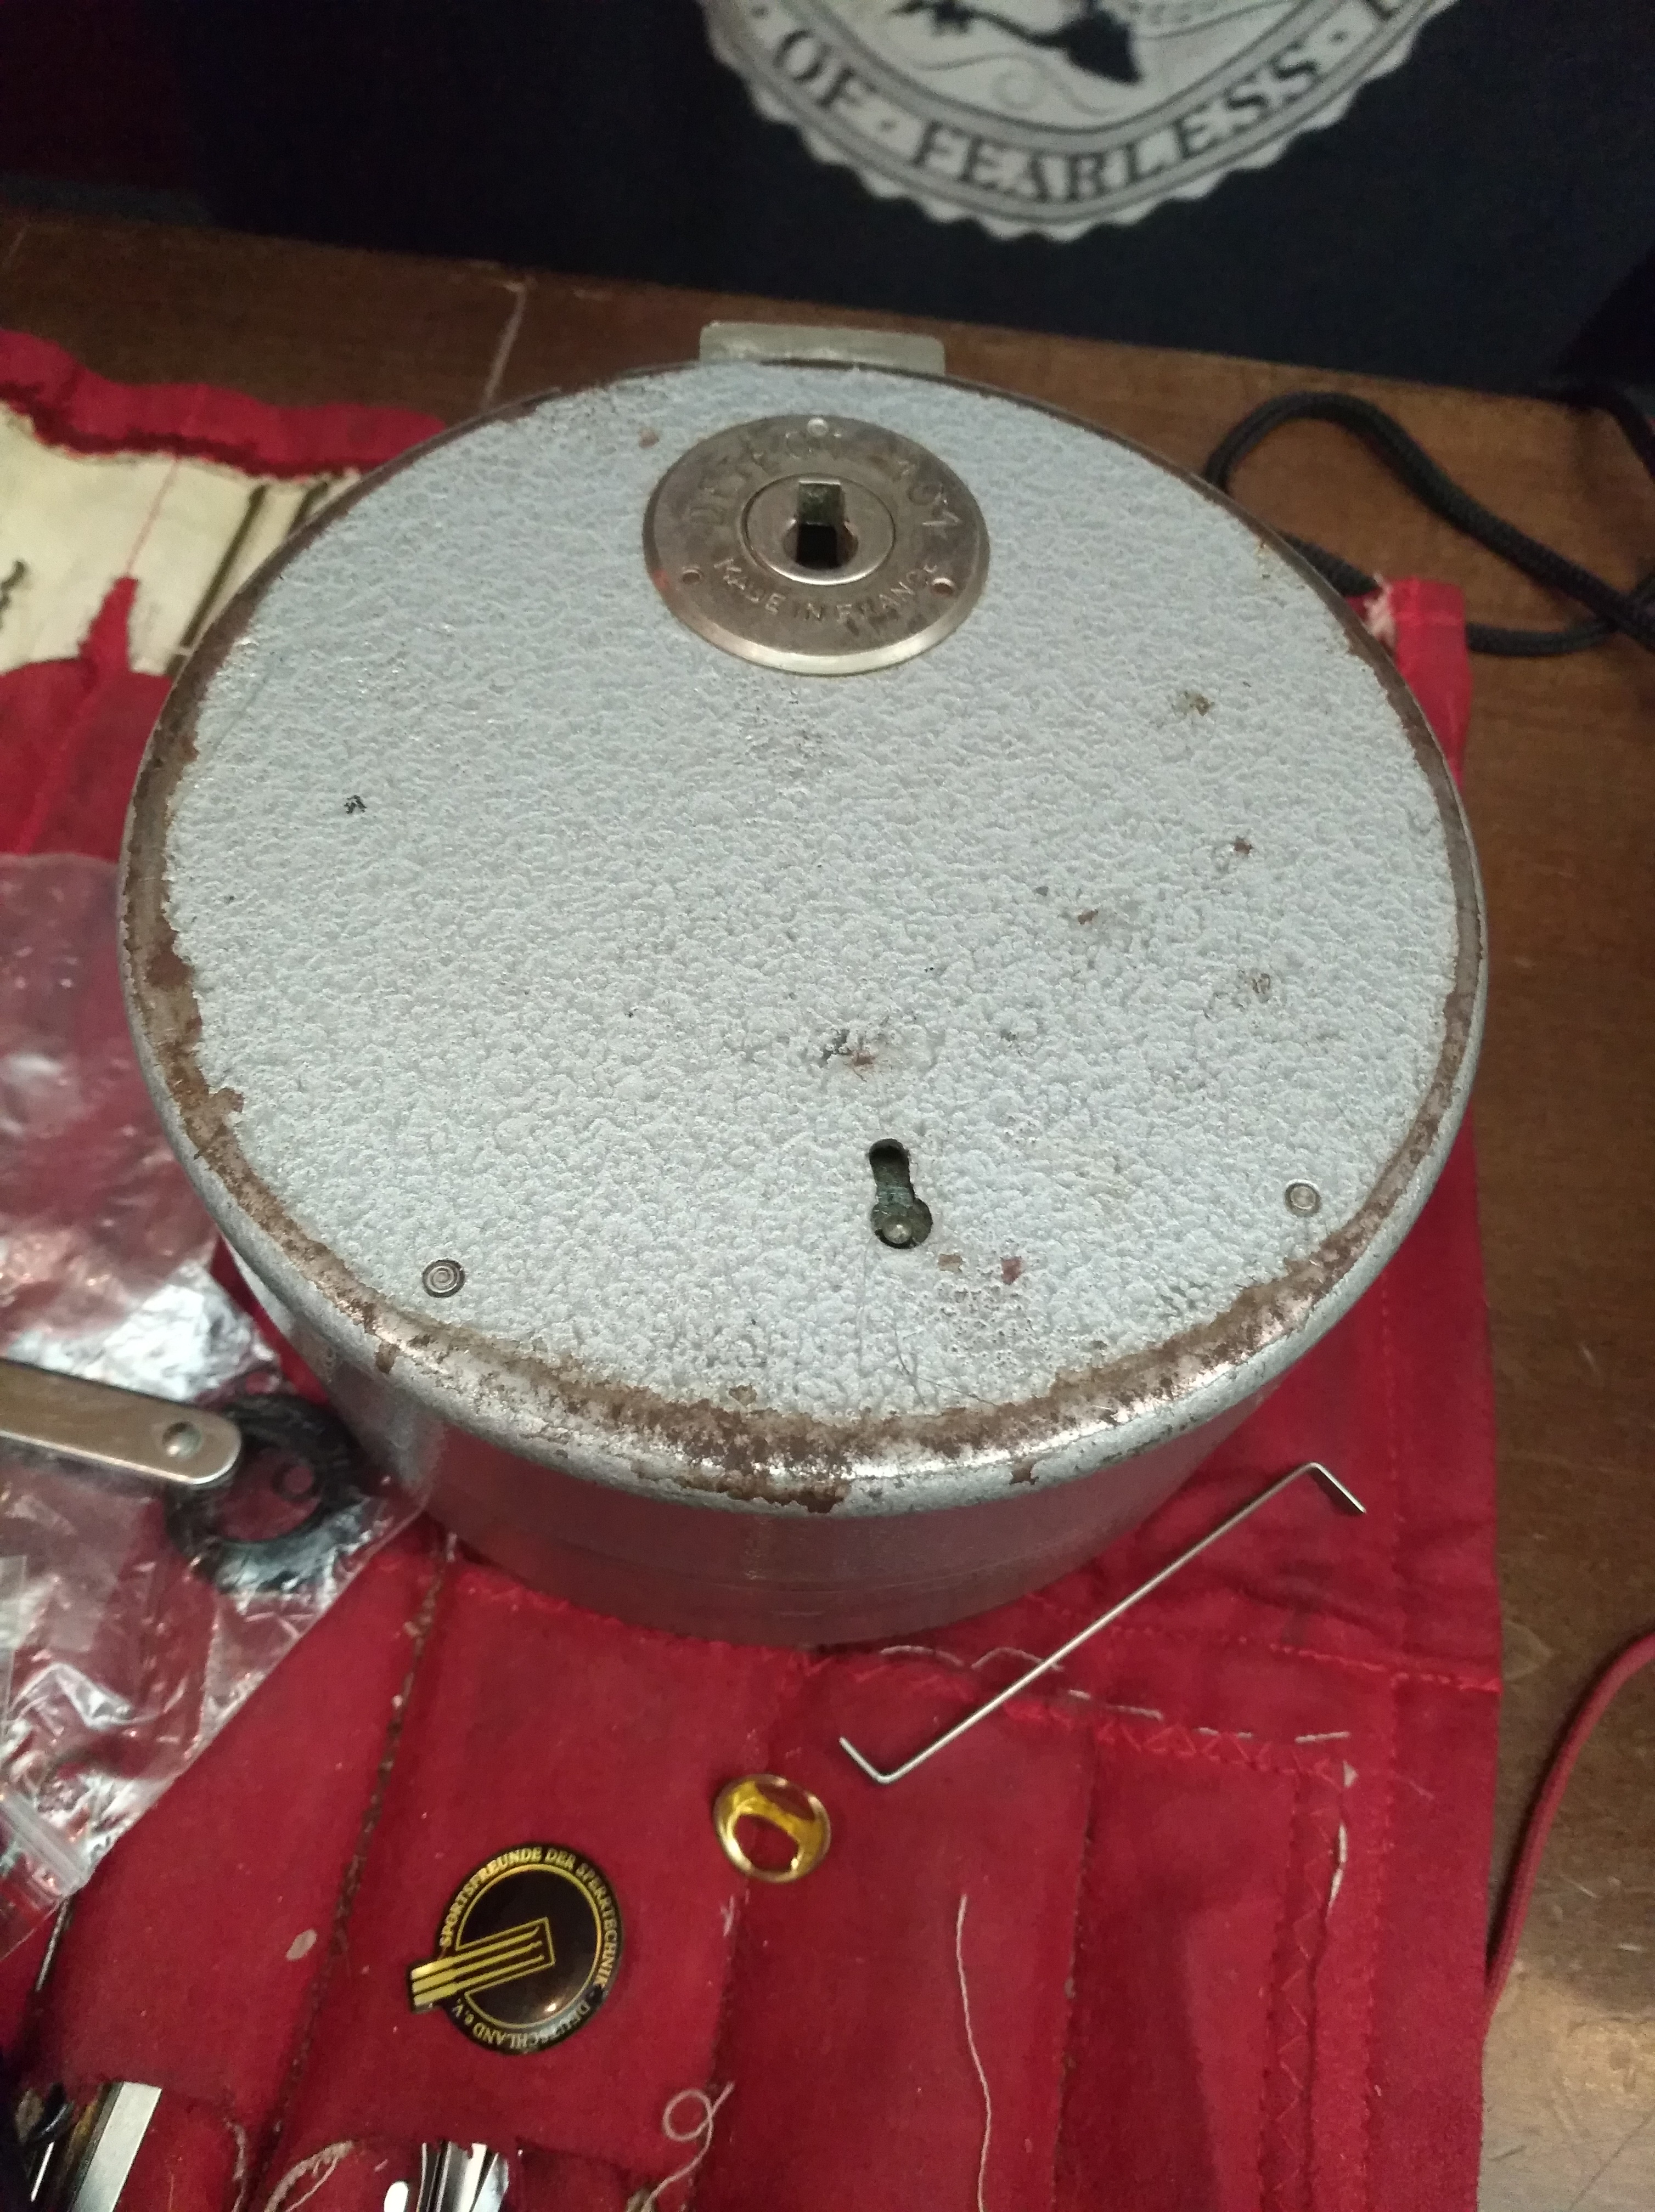
View of the “keyway”
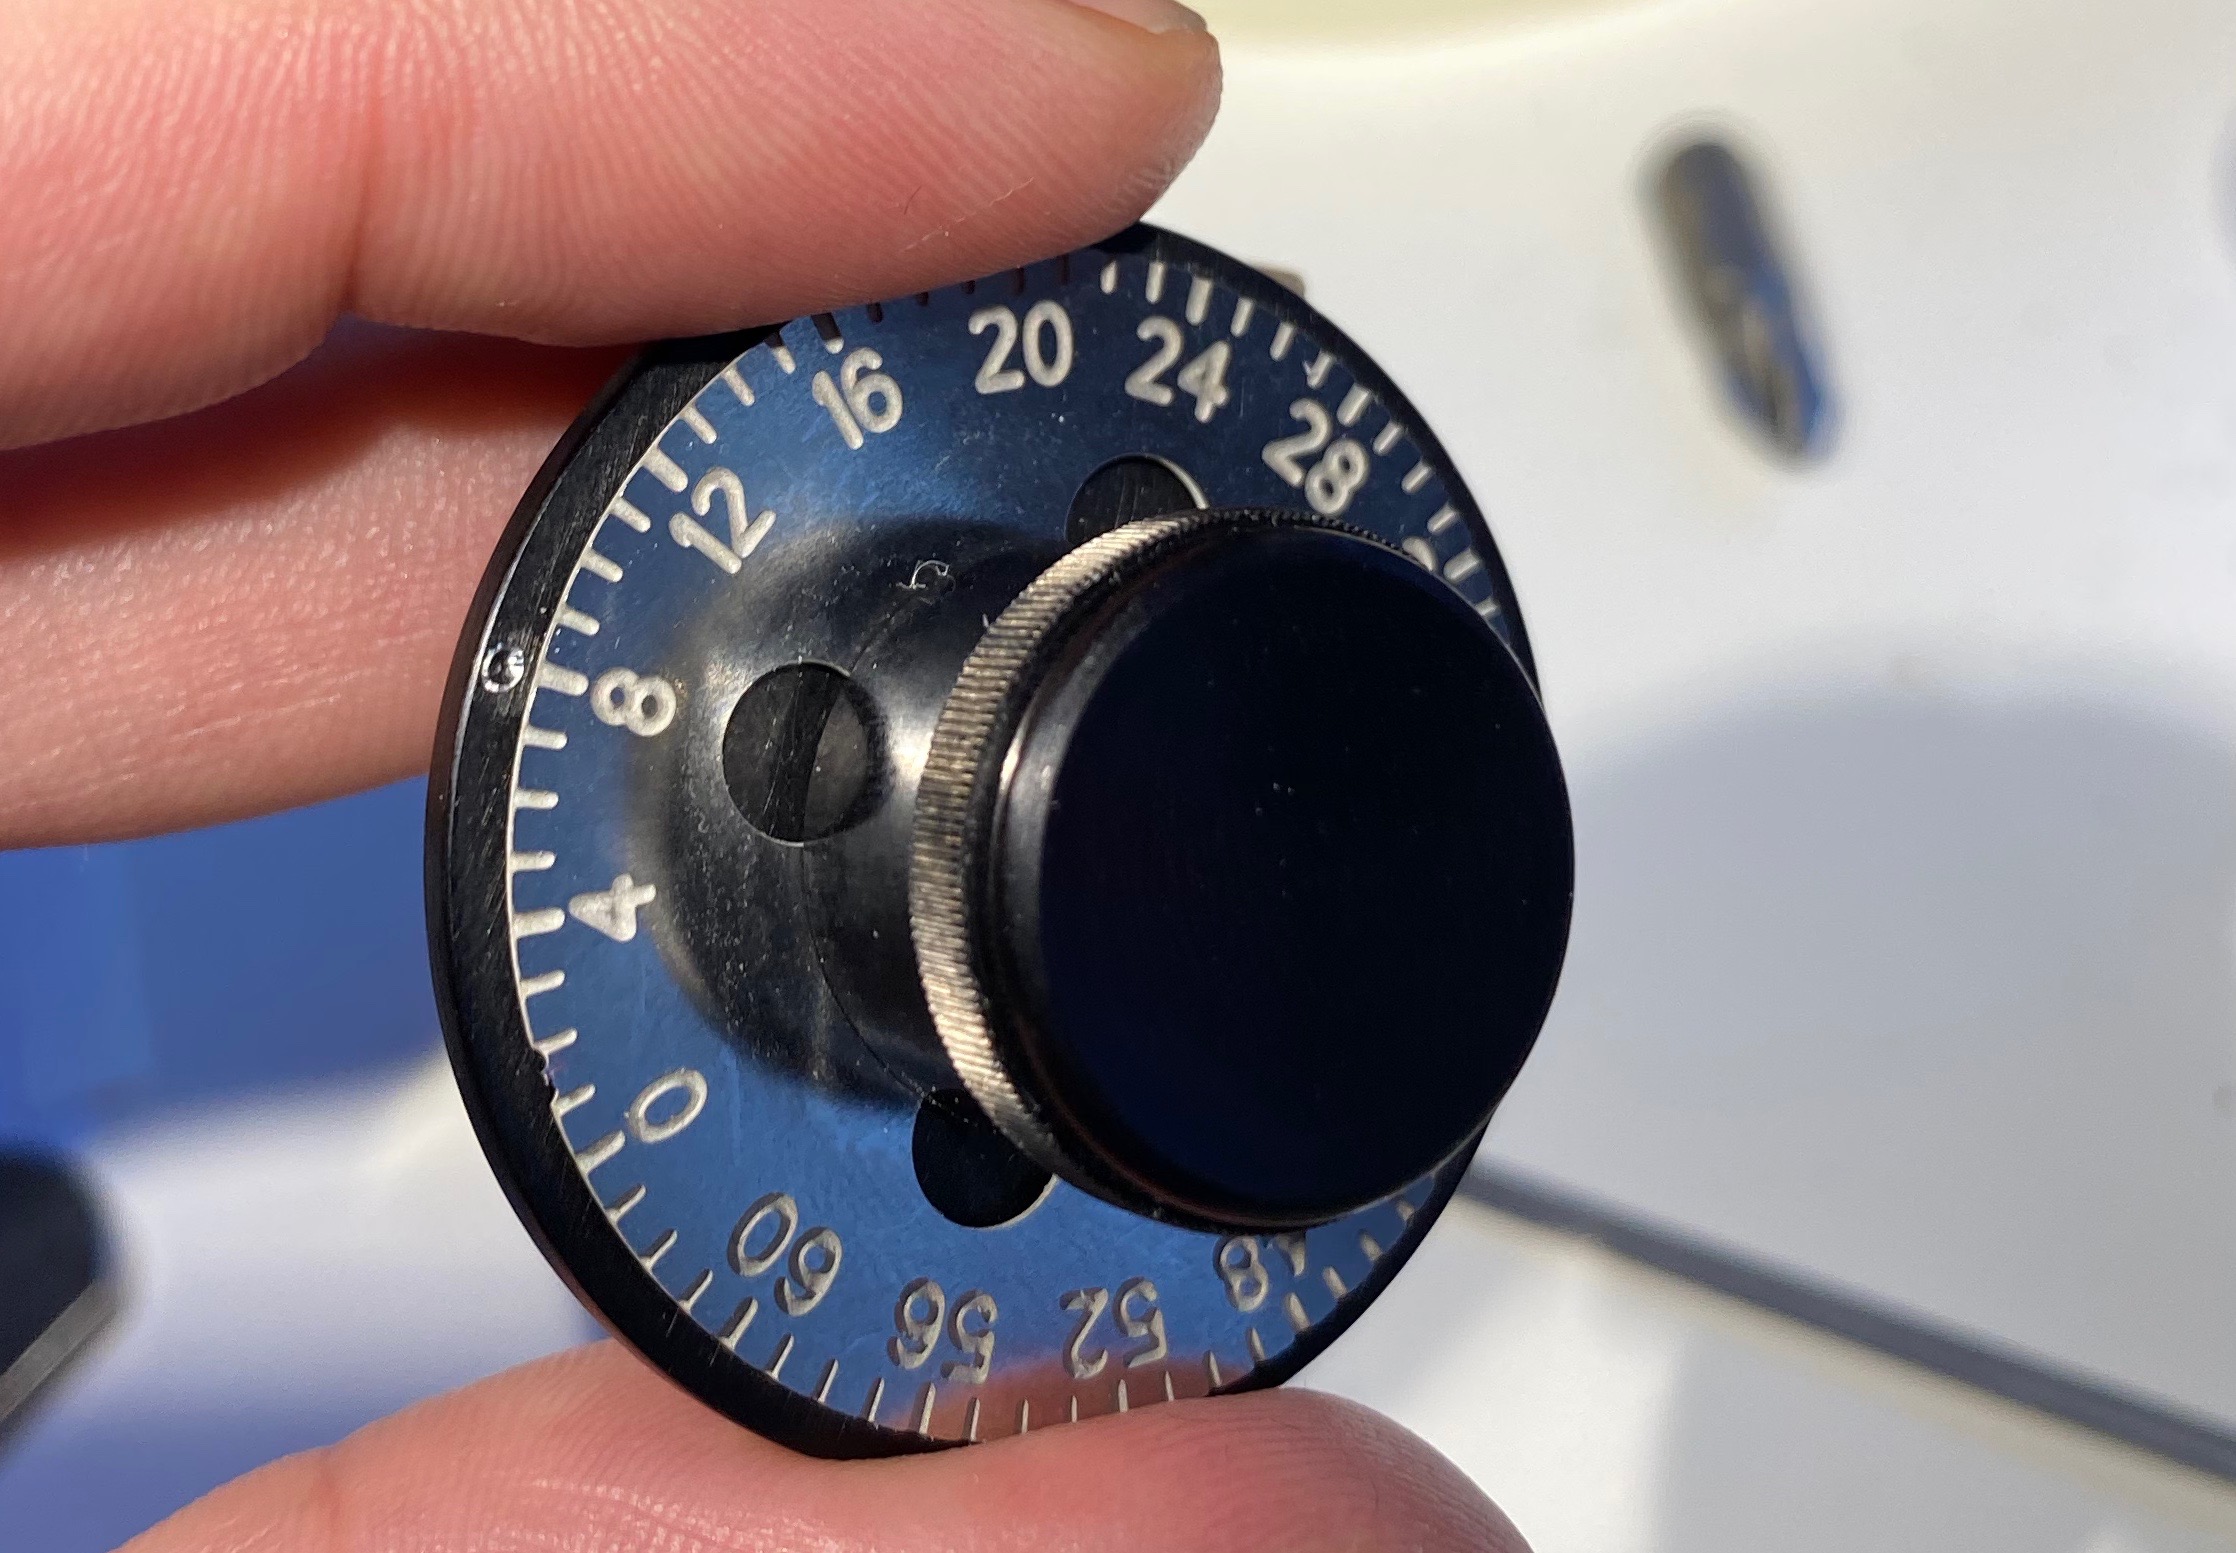
Manual dialer. The dial itself is rotated with the knob, and torquing the body / edge (the black part) of the dialer counterclockwise is used to actually open the lock
Manual dialer, underside. The black screw visible on the right side of the body of the dialer makes it click to increments when dialing
Measurements
number range 0 – 63, meaning 5.625° per increment
5 disks and a drive disk
4 gates per disk (including drive), 3 of which false at 16 increments or 90° apart
8 drive pin holes per disk, at both edges of each gate
gates are ~5 (28°) increments wide, including the drive disk. Measured by looking at the cutaway from the top and moving the edge of the sidebar from one side of a gate to another
gate binding (or, rather, lack thereof) can be felt for ~6 increments
drive pin width is ~2 increments, 11.25°
sidebar ~2.2mm
Top and under side of disks with default “0” pinning. Each disk’s three false gates are a bit poorly visible in this picture, but all gates are 90° from each other.
Figuring out a manipulation method
To even get started I had to slightly modify the dialer; normally it clicks in place to number increments, but that would stop me from getting useful feedback. I removed the screw that does this, meaning I got a free-spinning dial. Unfortunately that made accurate dialing very hard since the dial moves if you so much as look at it wrong.
My initial thought was to approach the RKS like a DD lock; I first turned all disks left or counterclockwise (“ADL”, i.e. same as AWL or all wheels left for regular combination locks) to L0, then started to apply tension while turning the dial to the right, feeling for gates on d5 passing under the sidebar. However, this method has some fairly obvious problems. First of all, you get feedback from the gates (false or otherwise) of every disk that’s rotating, including the drive disk. Even on d5 you’ve got the drive disk gates and d5’s own gates in play, and it only gets worse the further down the disk pack you go. I did feel the gates (true & false) on d5, and while I thought I could distinguish false ones from the true but that seems to have just been confirmation bias.
Like with safe combination locks, some disks are also “shadowed” by others due to manufacturing tolerances, meaning that a very slightly bigger disk (or one that sits slightly higher on the drive shaft) will block feedback from smaller disks. This means that simply turning all disks in one direction won’t necessarily give you the gate positions on all disks.
So, obviously this wasn’t a viable manipulation method, at least by itself.
“Well, it’s sort of like a safe lock?”
Maybe I should have approached it more like a safe lock?
My reasoning was that when there’s a gate under the sidebar, applying tension with the drive disk gate (think “cam gate”) also under the sidebar should allow the sidebar to descend slightly lower than otherwise, meaning I should be able to measure the width of the area where the sidebar doesn’t bind near the drive disk gate when I apply torque to the dialer’s edges to make the sidebar drop down – this is the RKS’s equivalent of the contact area and contact points you deal with on safe combination locks.
Unsurprisingly this method turned out to be the proverbial ticket, but to actually get good results I had to refine it. I had problems with consistent torque when tensioning, poor choice of initial disk positions when starting graphs, slop / play in the dial, and the sheer amount of dialing that would have to be done unless I cut down on the number of measurements I had to do.
Tensioning
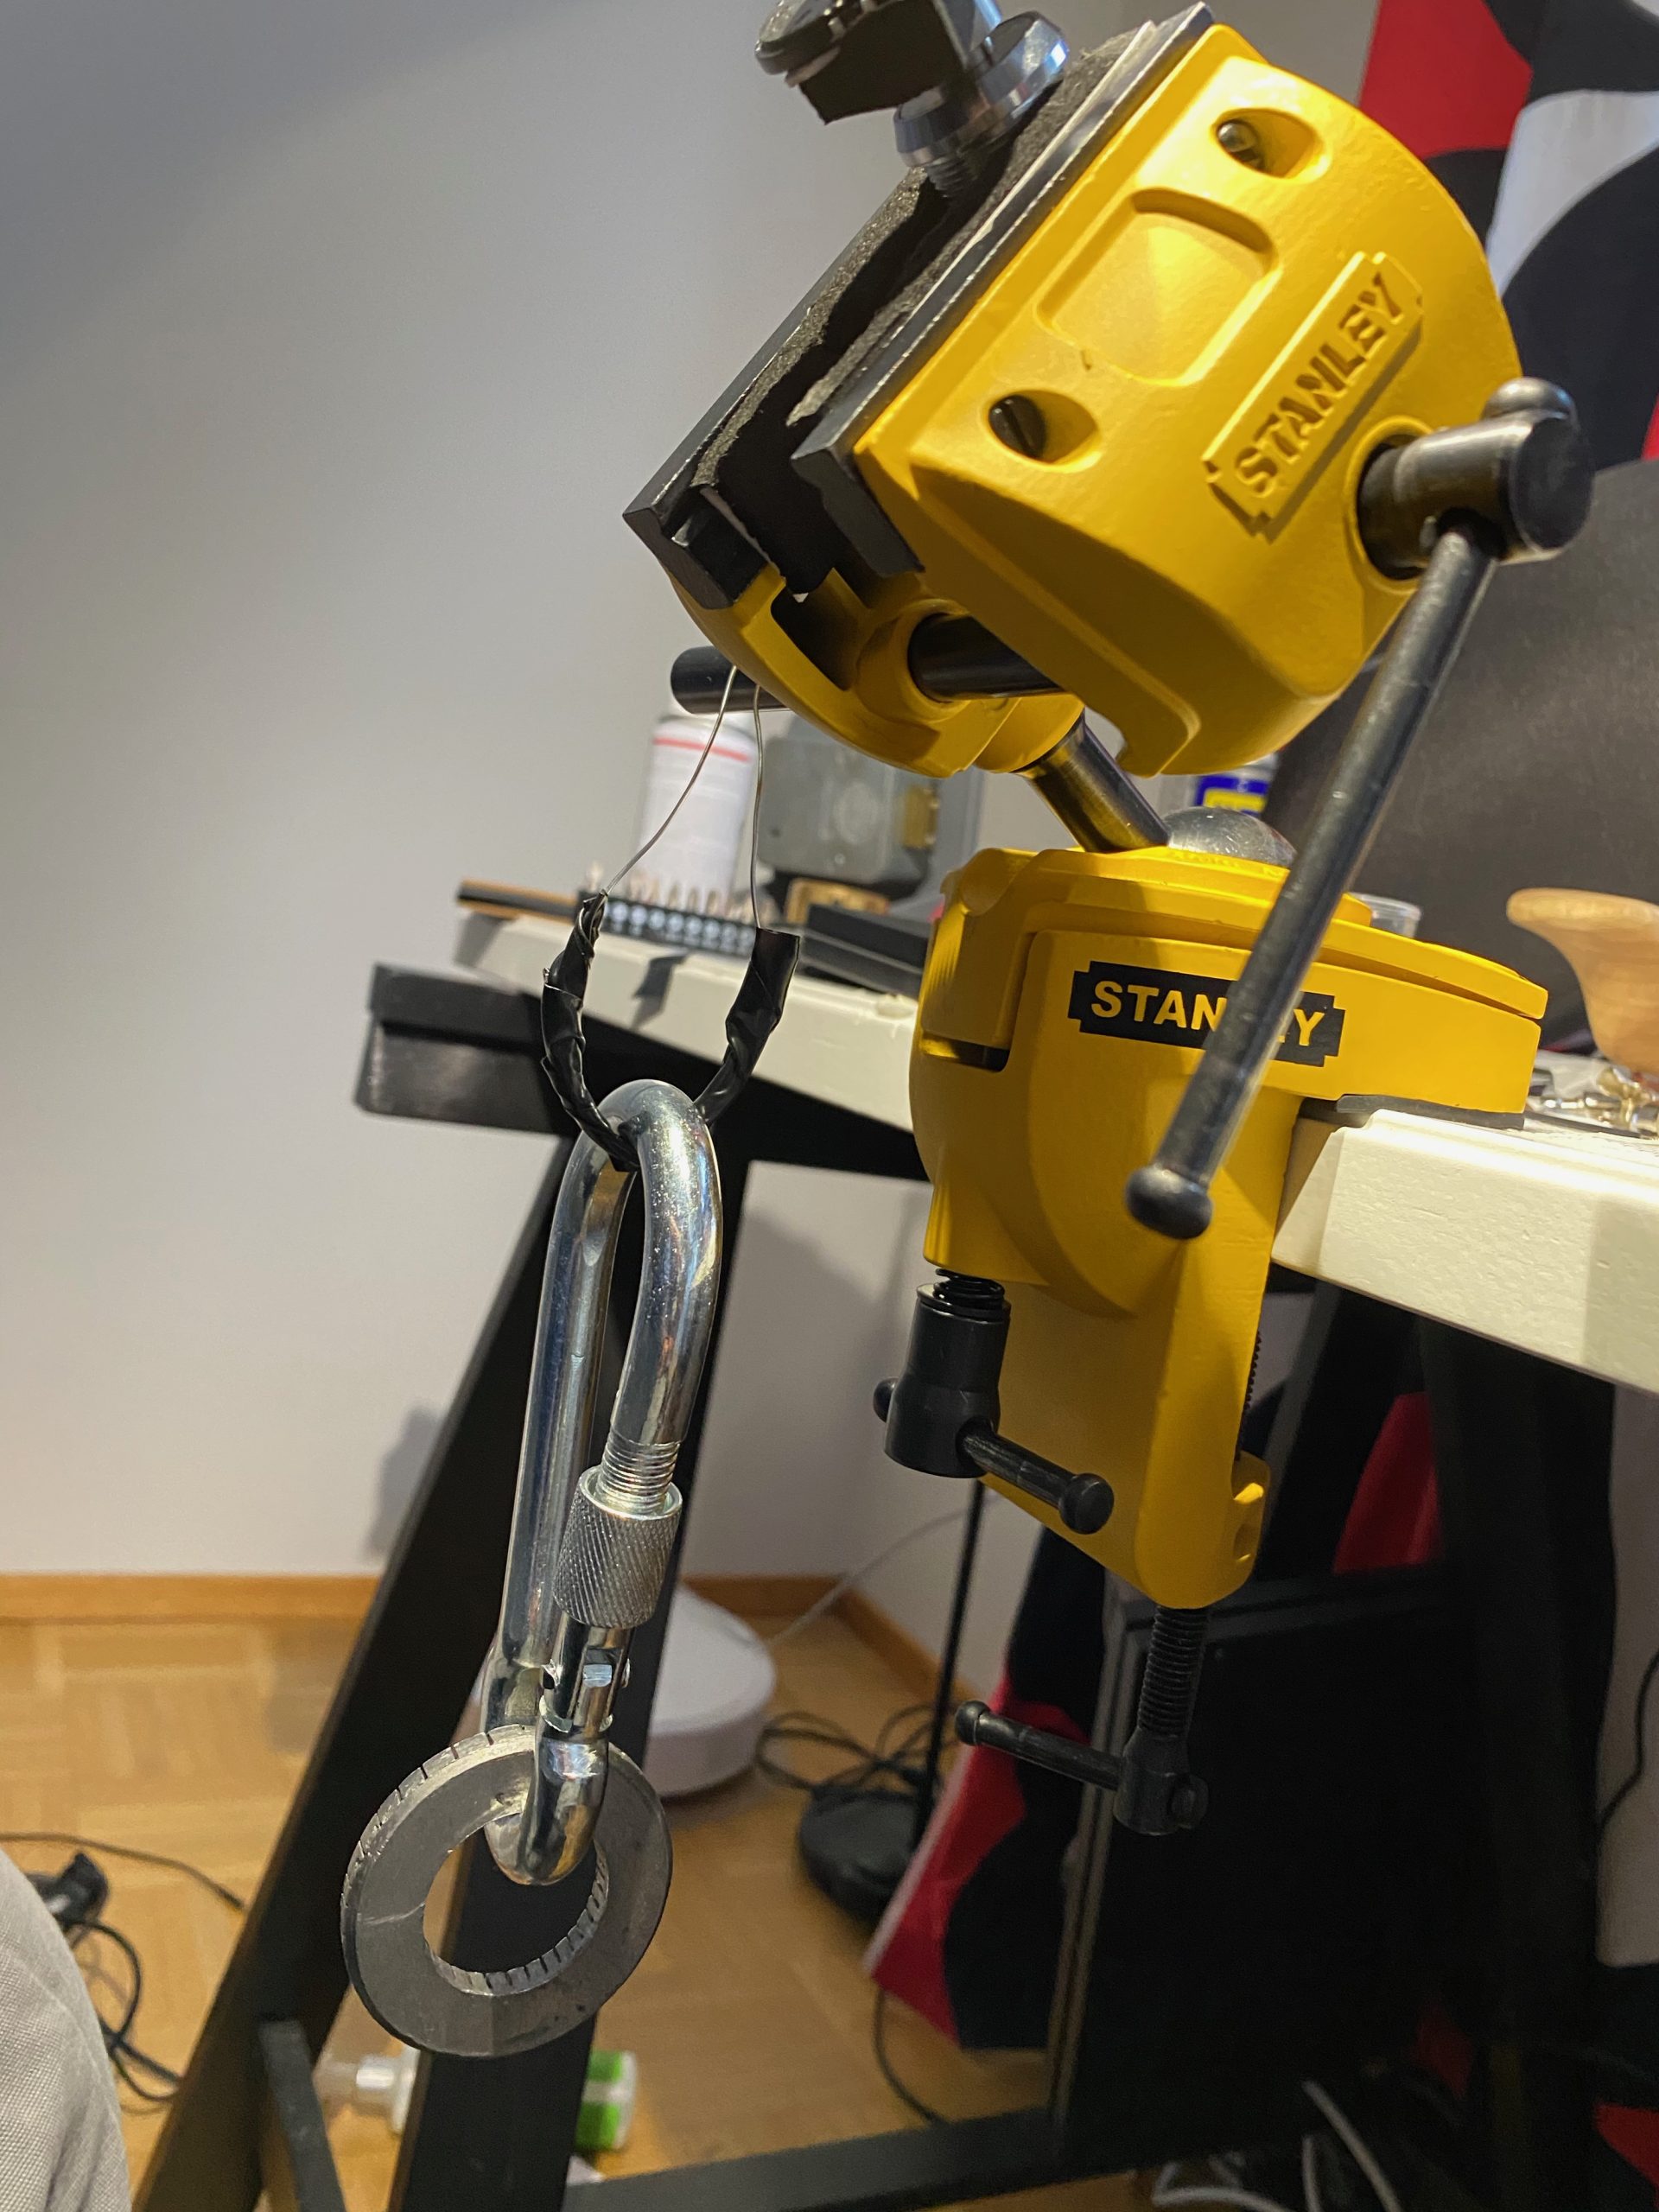
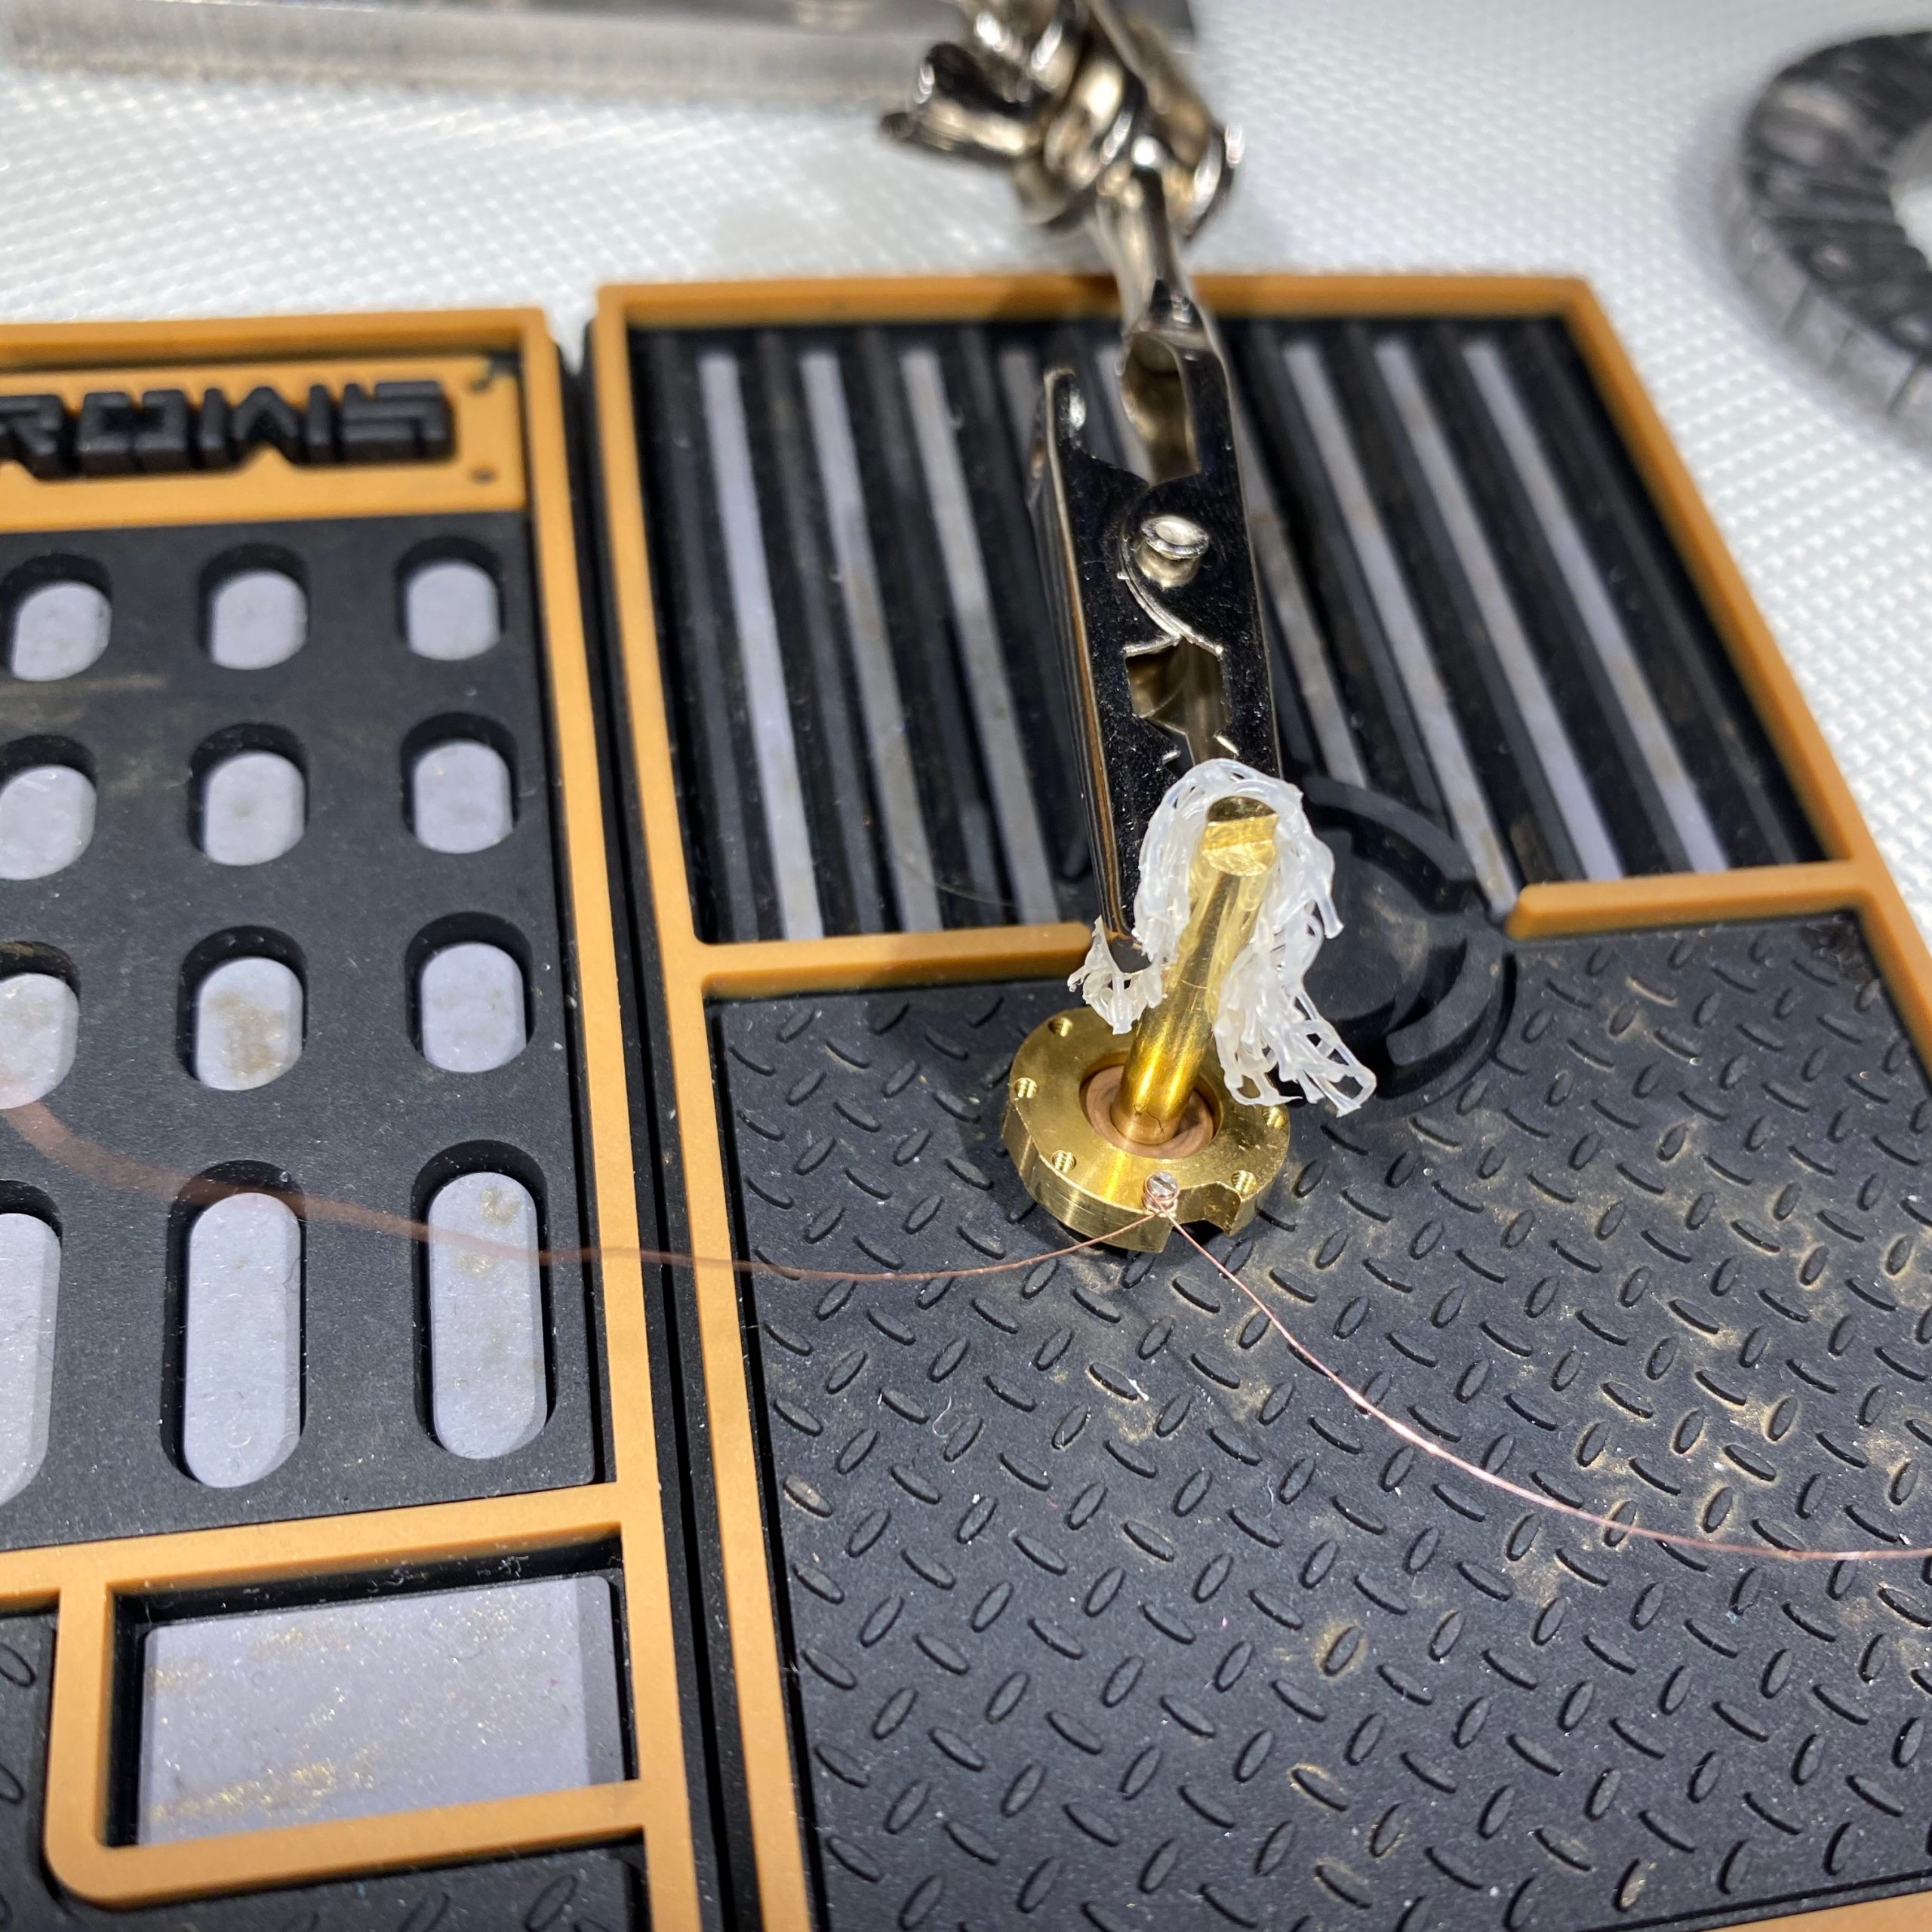
Getting consistent readings was hard since I was tensioning using my fingers – the torque I was applying was variable, which meant that the sidebar lowered different amounts every time I took measurements. So to even get started I needed to come up with a way to provide consistent torque when tensioning, and I experimented with a few different methods. Since this is a proof of concept I eventually gave up and ended up cheating a bit and tensioning by hanging some weight from the cam itself, but something similar-ish should be doable on the dialer side albeit with more work.
Tensioner attachment on the cam.
Tensioner weight (and yes that’s a Manifoil lead shield)
Initial disk positions
I started my first graphs with ADL. However I soon realized why this is a bad idea.
When going ADL, the drive pin of the previous disk ends up in the gate, meaning that it blocks the sidebar from descending and therefore gives you much narrower and shallower gate signatures.
Going ADR leaves the gates open.
Dialing
Dialing with a modified free-spinning manual dialer is extremely fiddly and liable to drive you insane, and since there’s 5 disks the amount of dialing that would have to be done with a “naïve” approach would be ridiculous.
However, the fact that gates are always 90° apart can be exploited to radically cut down on the amount of dialing. This means that when you find one position where the drive disk doesn’t bind, you know that the other gates are n * 16 increments (1 <= n <= 3) apart from it. Since gates can be felt over about 6 increments, you can then map out the edges of one gate and therefore figure out the edges of all gates.
Also, as I went along it turned out that I was getting indications in order starting from d5; my assumption is that this was due to the fact that I was tensioning the lock from the rear which meant that the sidebar would be at a very slight angle so that it’s lower on the d5 end and higher on the d1 end. After some playing around I noted the same phenomenon but reversed if I tensioned using the dialer (like it would “really” be done), so d1 would read first, then d2 and so on. This meant that once you successfully find the position of a disk’s gate you can figure out how many increments from that position the next disk’s gate will be at a minimum, and start your next graph from that position so you wouldn’t waste time graphing a spot where it’s impossible to have a gate. You can do this by using the fact that there’s a fixed amount of drive pin positions; when going right the minimum distance is - (pin distance + pin width * 2) , and left is pin distance - pin width, both modulo 64 (proof is left as an exercise to the reader).
Graphs
Graphs for this method end up looking slightly different from safe combination locks since a lot of the time you’re not actually getting any binding on the drive disk due to shadowing, so for some indices you can’t get any contact point readings.
I generally kept the cutaway “window” covered, but since this was a proof of concept I occasionally peeked to verify theories or make sure I dialed a number right.
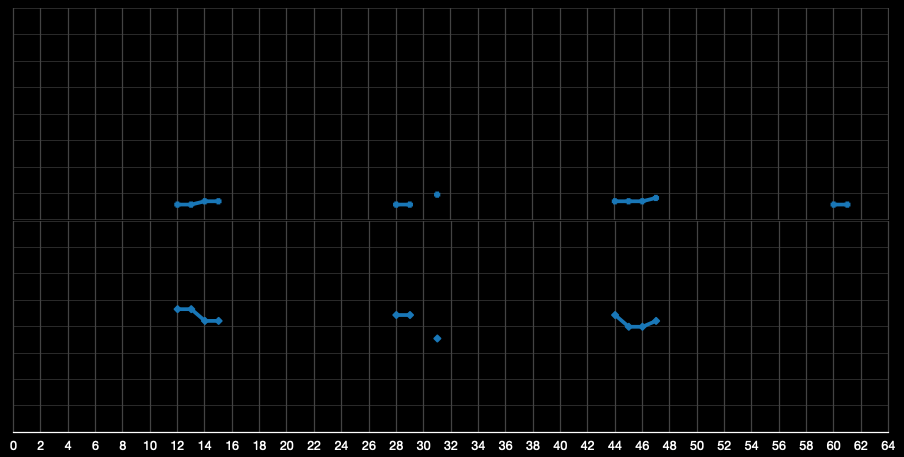
I’ll showcase the graphs for the first 3 disks here since they’re the most interesting.
ADL
As I said, I started off with ADL before realizing it’s a bad idea. This is what the first graph where I used the tensioning tool but with ADL looked like (left contact on the bottom):
So I found the gates, but I couldn’t tell the true gate apart from the false ones.
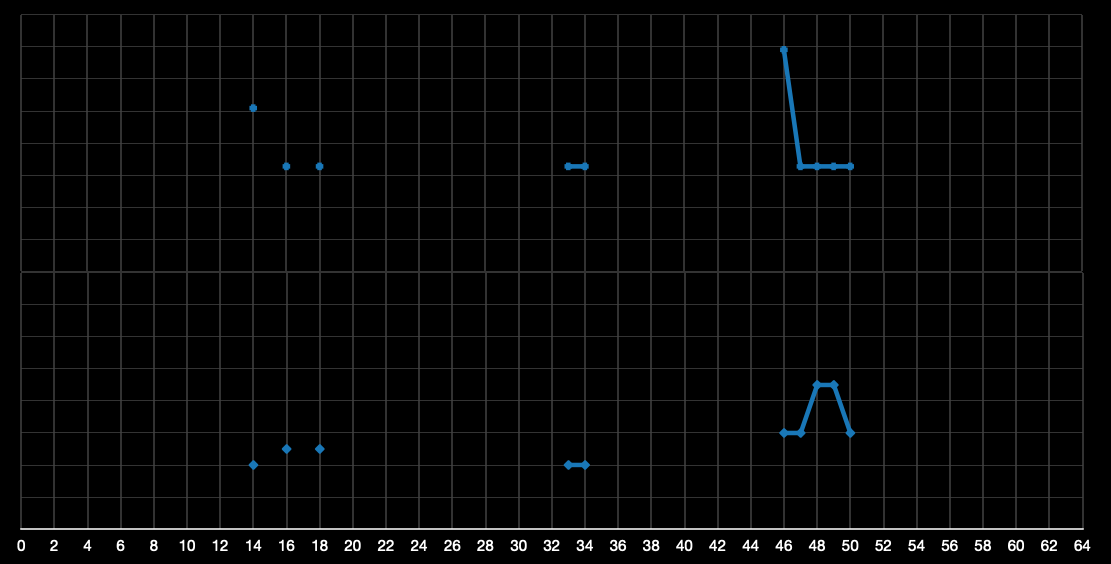
First ADR, disk 5
Switching to ADR gave this graph. Note that only 3 gates are visible; one of them was shadowed entirely by a disk further down the pack.
The gate with midpoint R49 gave the deepest reading with the sharpest edges. My theory was that since the false gates are so shallow, that’d be the true gate on some disk. I used my Mk I Eyeball on the cutaway window and noted that it was the gate for d5, so now I could be fairly confident that I should be able to tell the true gate apart from the false ones.
To actually verify this, I started by moving d5 a bit to the left and checked for sidebar binding. After I got worse binding for that, I did the same for d4 and got good binding, then d3 and still got good binding (ie. I essentially did a lo test but with only 3 disks). This satisfied me that I’d probably found the number for d5: R49 / L46
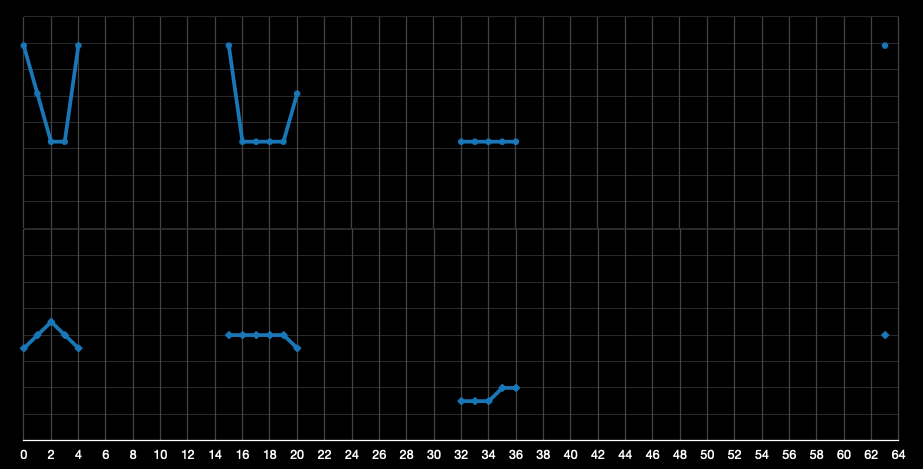
Disk 4
I started the next graph assuming that I’d probably be getting indications from d4, so I dialed d5 to L46 and then the rest to R38 which should be close to the first possible index for the true gate on d4.
Note that gate edges are about 2 increments – ie. drive pin width – off from the gates on d5: there’s a gate edge at R20 here but it’s R18 on d5, there’s a gate edge at R36 here but R34 on d5 etc. This means that this graph is most likely for d4.
The gate with midpoint R2 has the sharpest profile, so I assume that’s the true gate. I do a lo test with just d4 and get worse results, so I figure that my assumption about this being d4 was right.
Disk 4 rotational conversion
I initially tried doing rotational conversion with my estimation of the drive pin width plus some simple math, but I kept having problems with it so I end up doing it with graphs. This is what the graph looked like for d4 R2, determining the gate midpoint is at L59:
Lucky disk 3
After finding the gate for d4, I dialed d5 @ R49, d4 @ L59, and the rest ADR to R60 which would be the first possible index for the gate on d3:
After measuring a few points around R60 I realized I probably hit the true gate right off the bat since the gate signature was so sharp and deep. I took readings from the midpoints of all the other gates and noted that they weren’t as deep as the one at R60, and after a quick lo test I declared d3 to be R60.
Disks 2 and 1 held no surprises and graphed as the first 3 had.
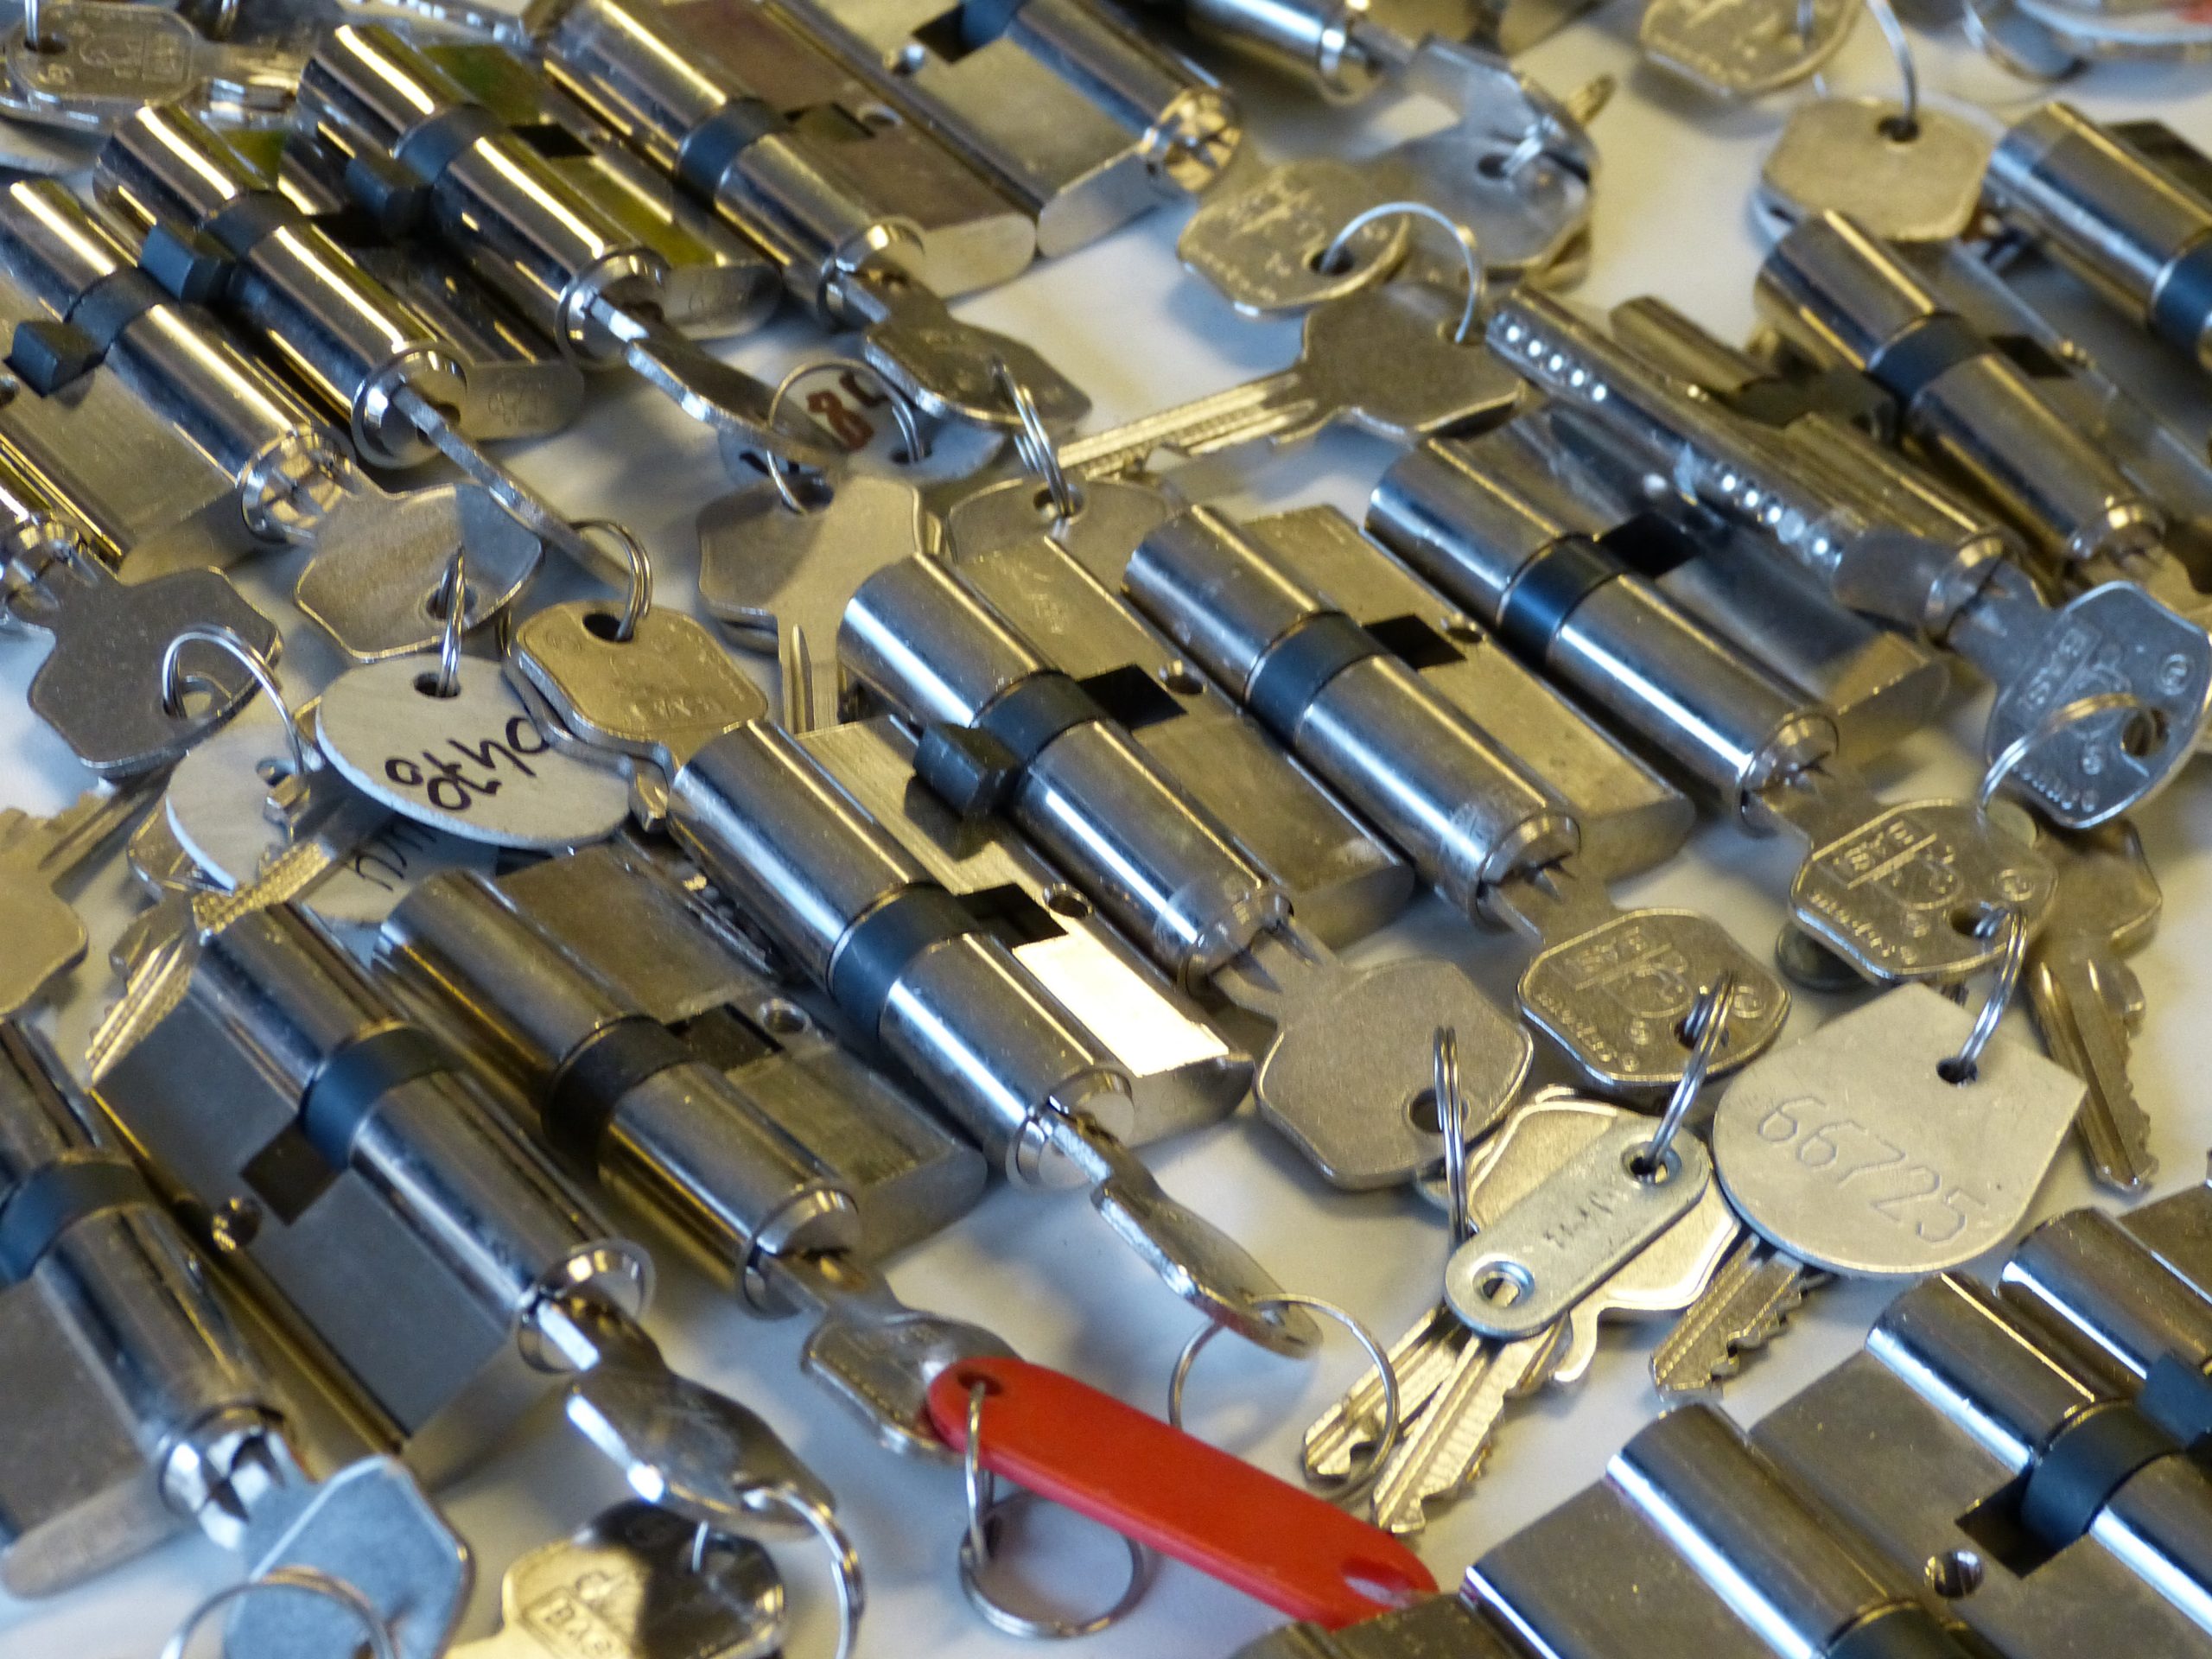
Once in a while we find locks for sale in bulk. Either as a large bucket or just a pile of brass. Most of the times it’s not worth the time and effort. (sorting and cleaning takes loooong). While other times the deal is just too good to pass on.
We bought a batch last week: Sold as 70kg of recycling brass. Seemed alight as it was not too expensive and the locks looked clean. It was also clear from the pictures that there wasn’t much high security or ‘expensive’ locks in there.
A few of these boxes/crates full of locks doesn’t look much until you need to carry them home.Nicely sorted Basi.All the locks!
In total it’s about 400 locks: 20% BASI, 20% MD, 40% DESTIL, 15% other (DOM, Corbin, Nemef, CES, S^2, etc etc.), and about 5% trash (tags, screws, actual trash). There are very few jewels in the box: Anker necoloc, DOM sigma, and a keyed alike Zi-ikon set with one key.
Most will be put to restocking the lockpicking village kits. The Basi will make very nice progressive locks. The Destil, however, are (re-branded?) Corbin locks and always a pain to pick. Therefore a lot less useful for teaching lockpicking. (Maybe keep a few for teaching humility or patience?). All other locks will be saved for the Dutch open at the next LockCon.
As always the picture of the bucket looked more promising than the outcome. However, the easy locks will come in very useful. It’s just not as fun as finding a EVVA MCS in the crap bin. Maybe there will be one in the next one…
Posted in Locks | Comments Off on Bought 70kg of locks, now what?
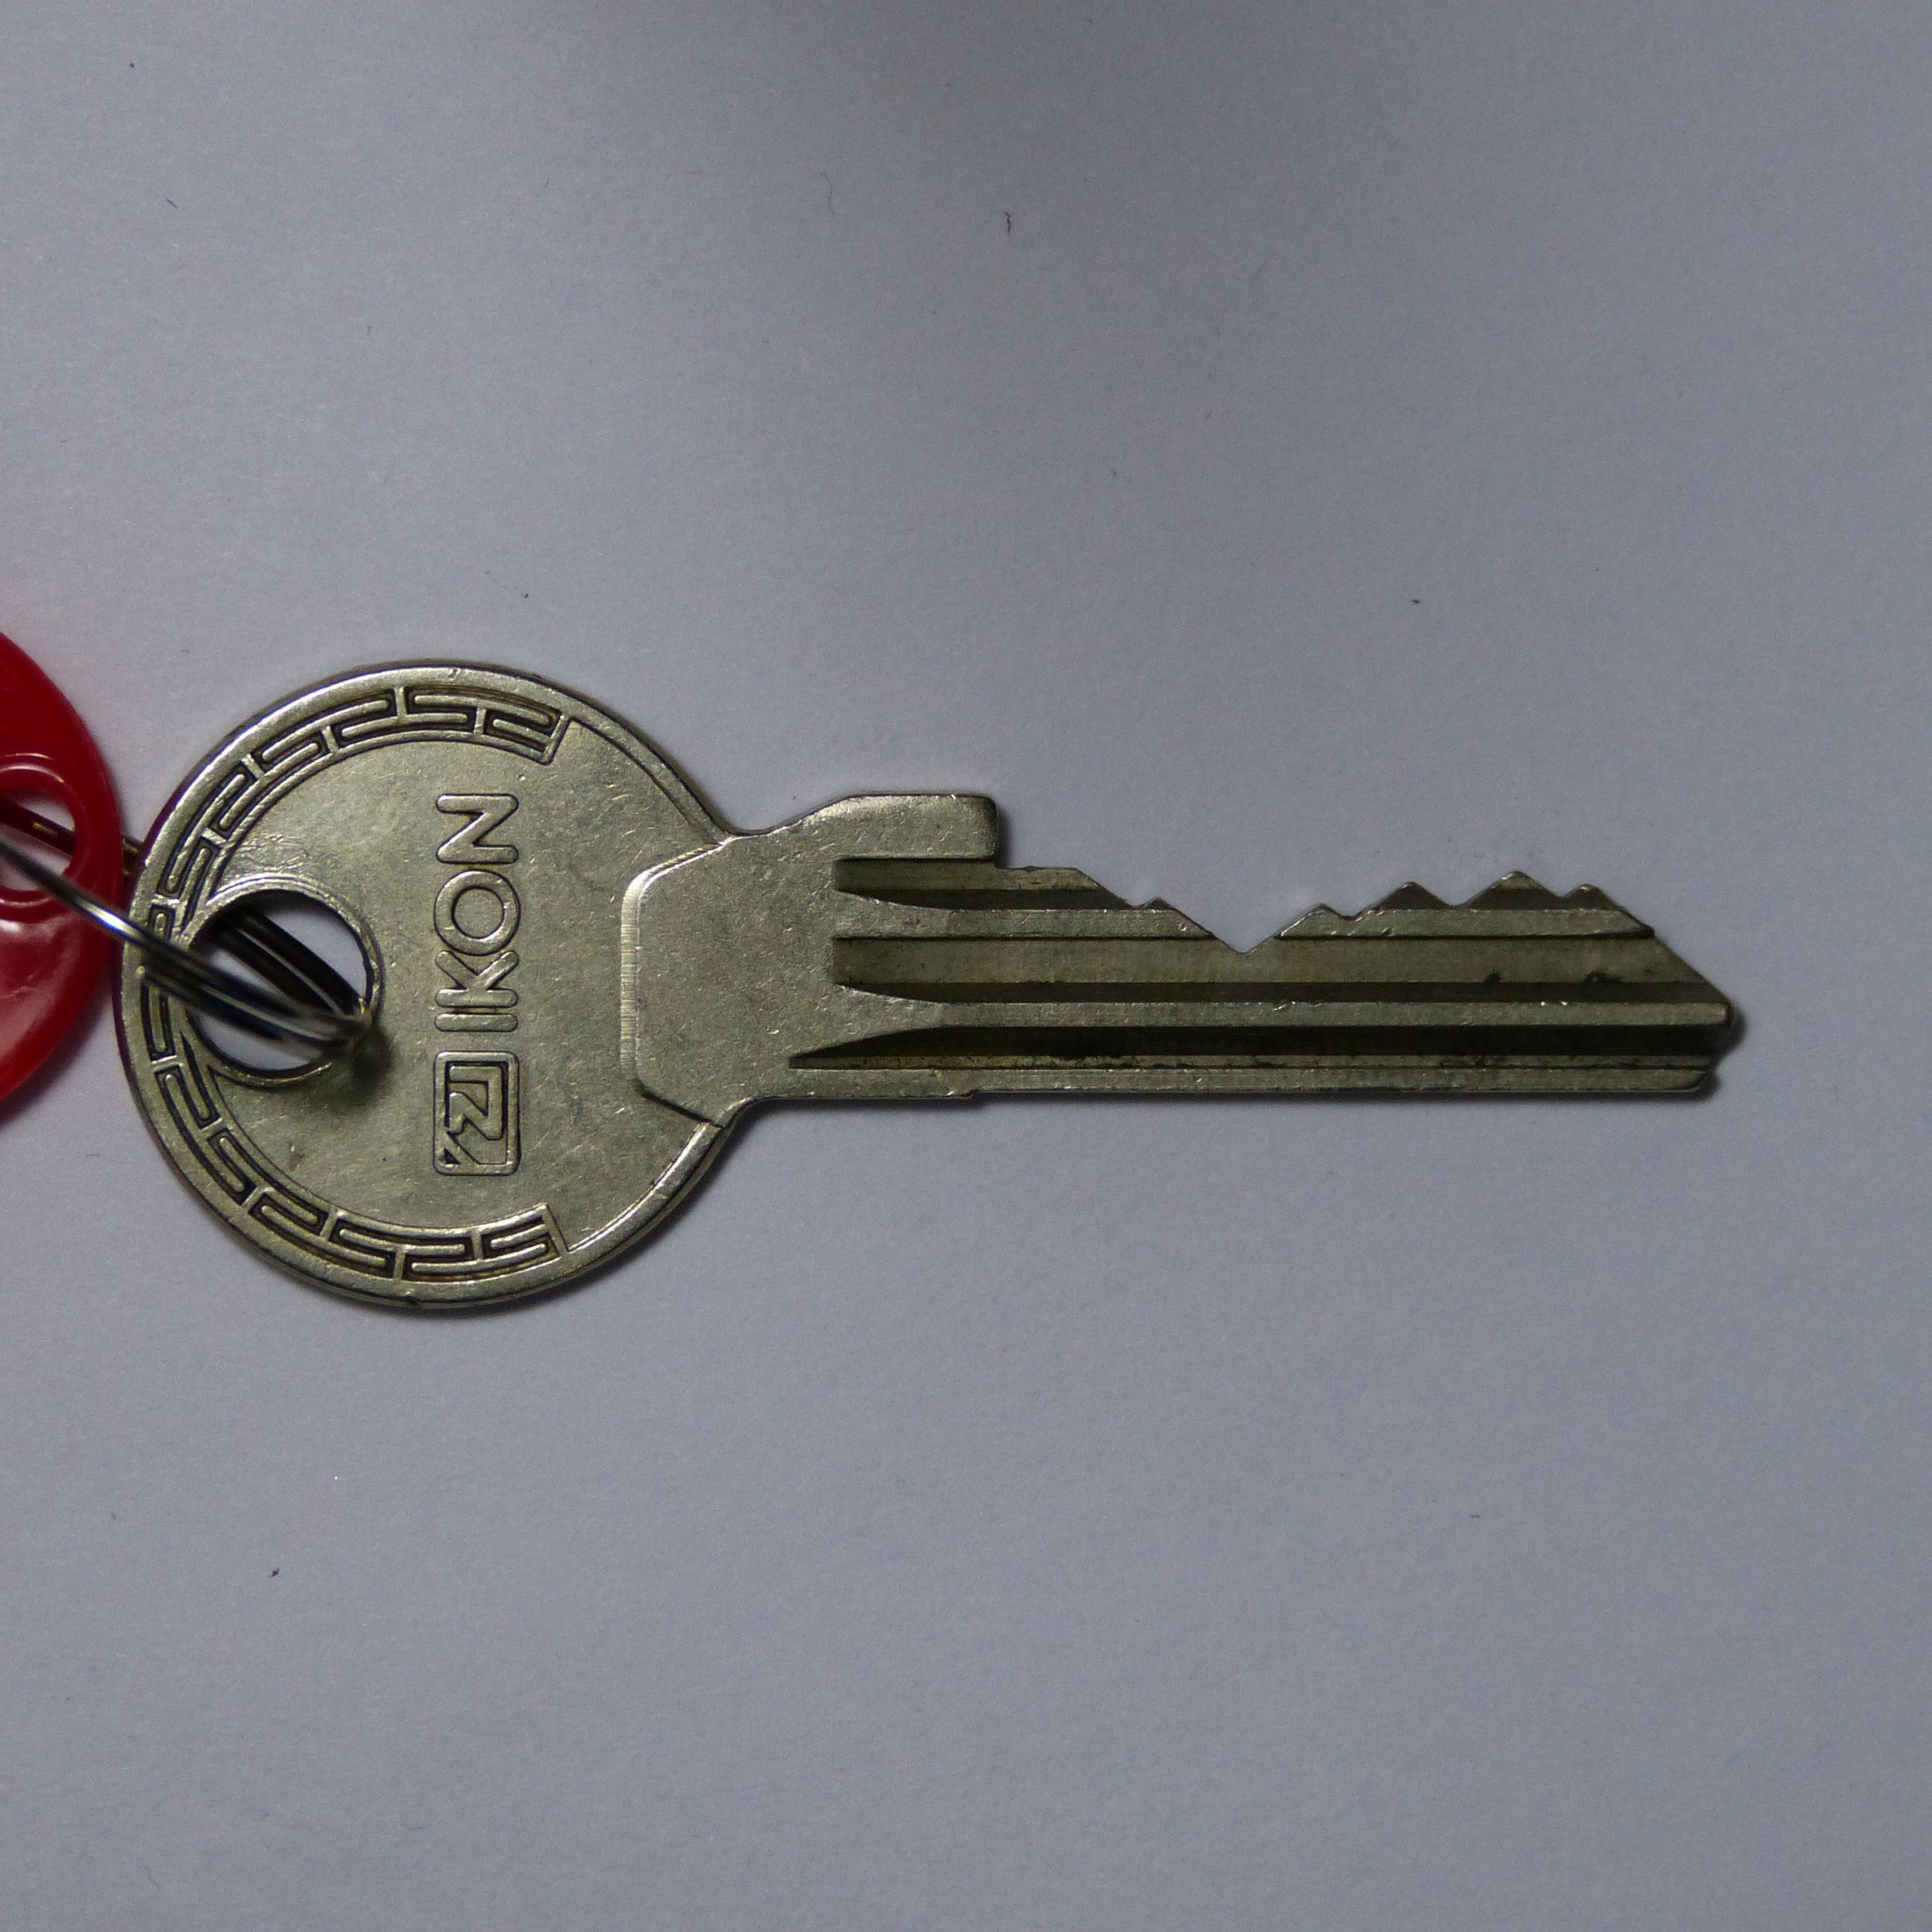
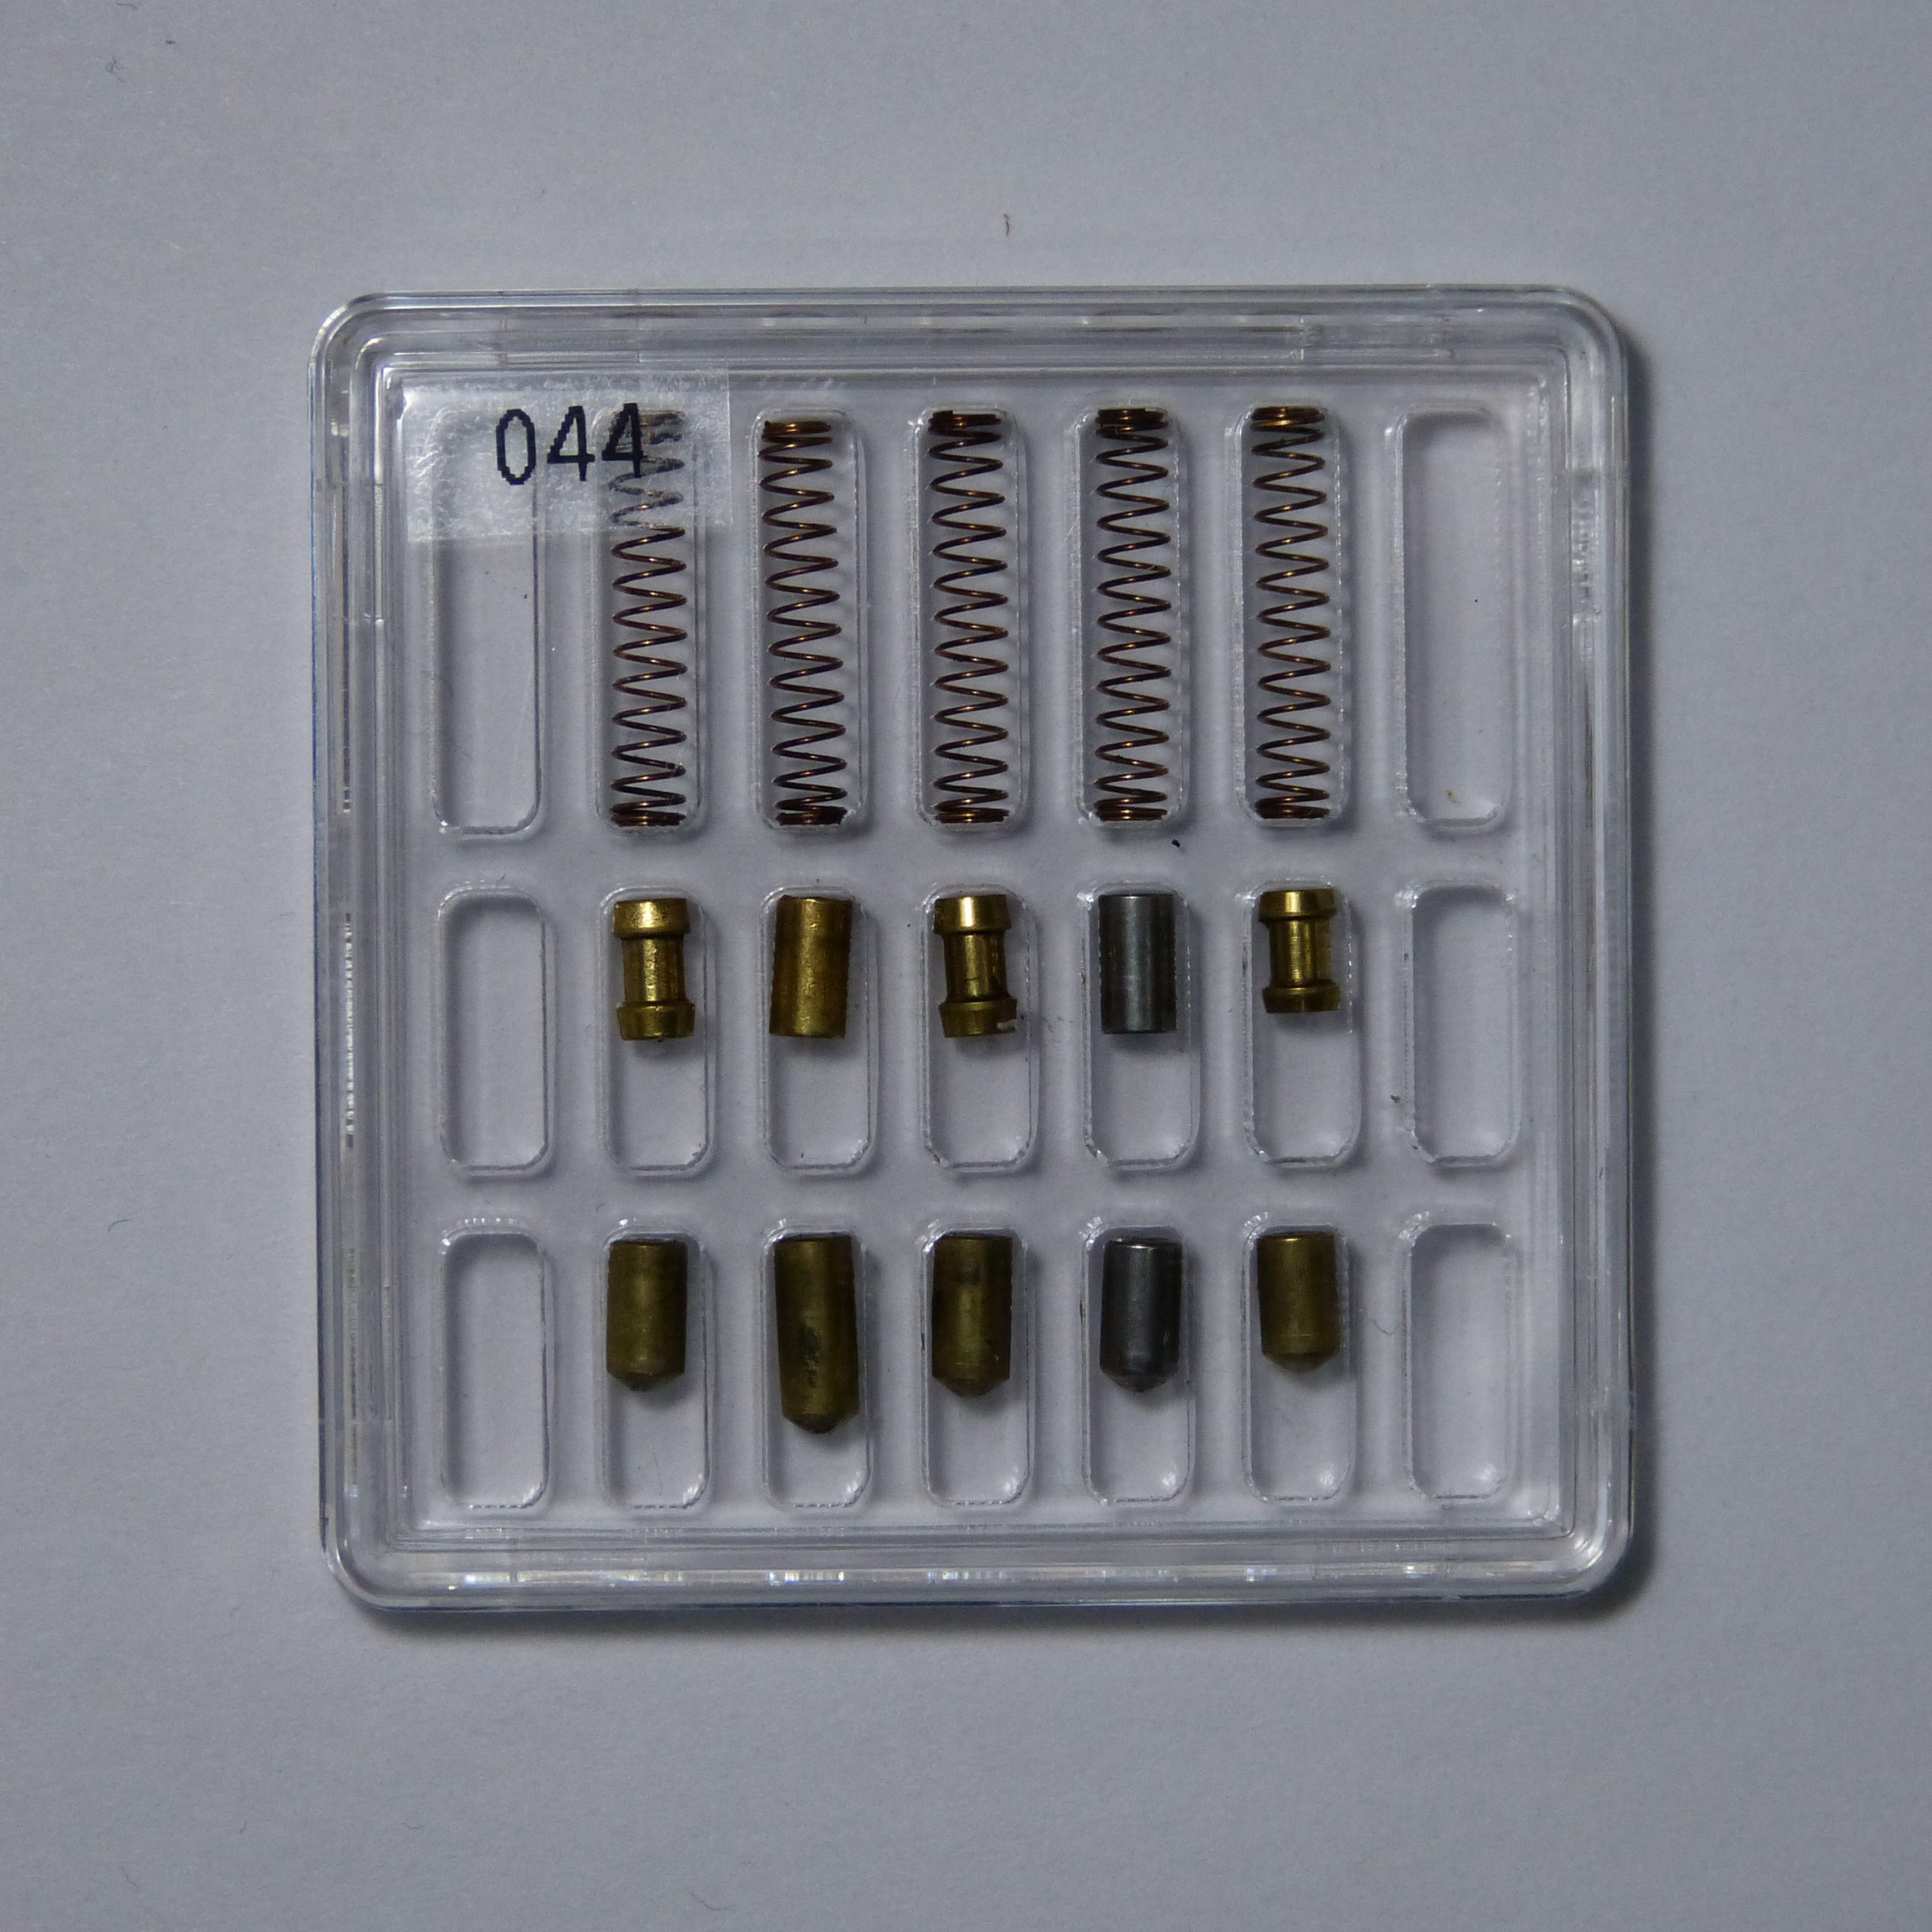
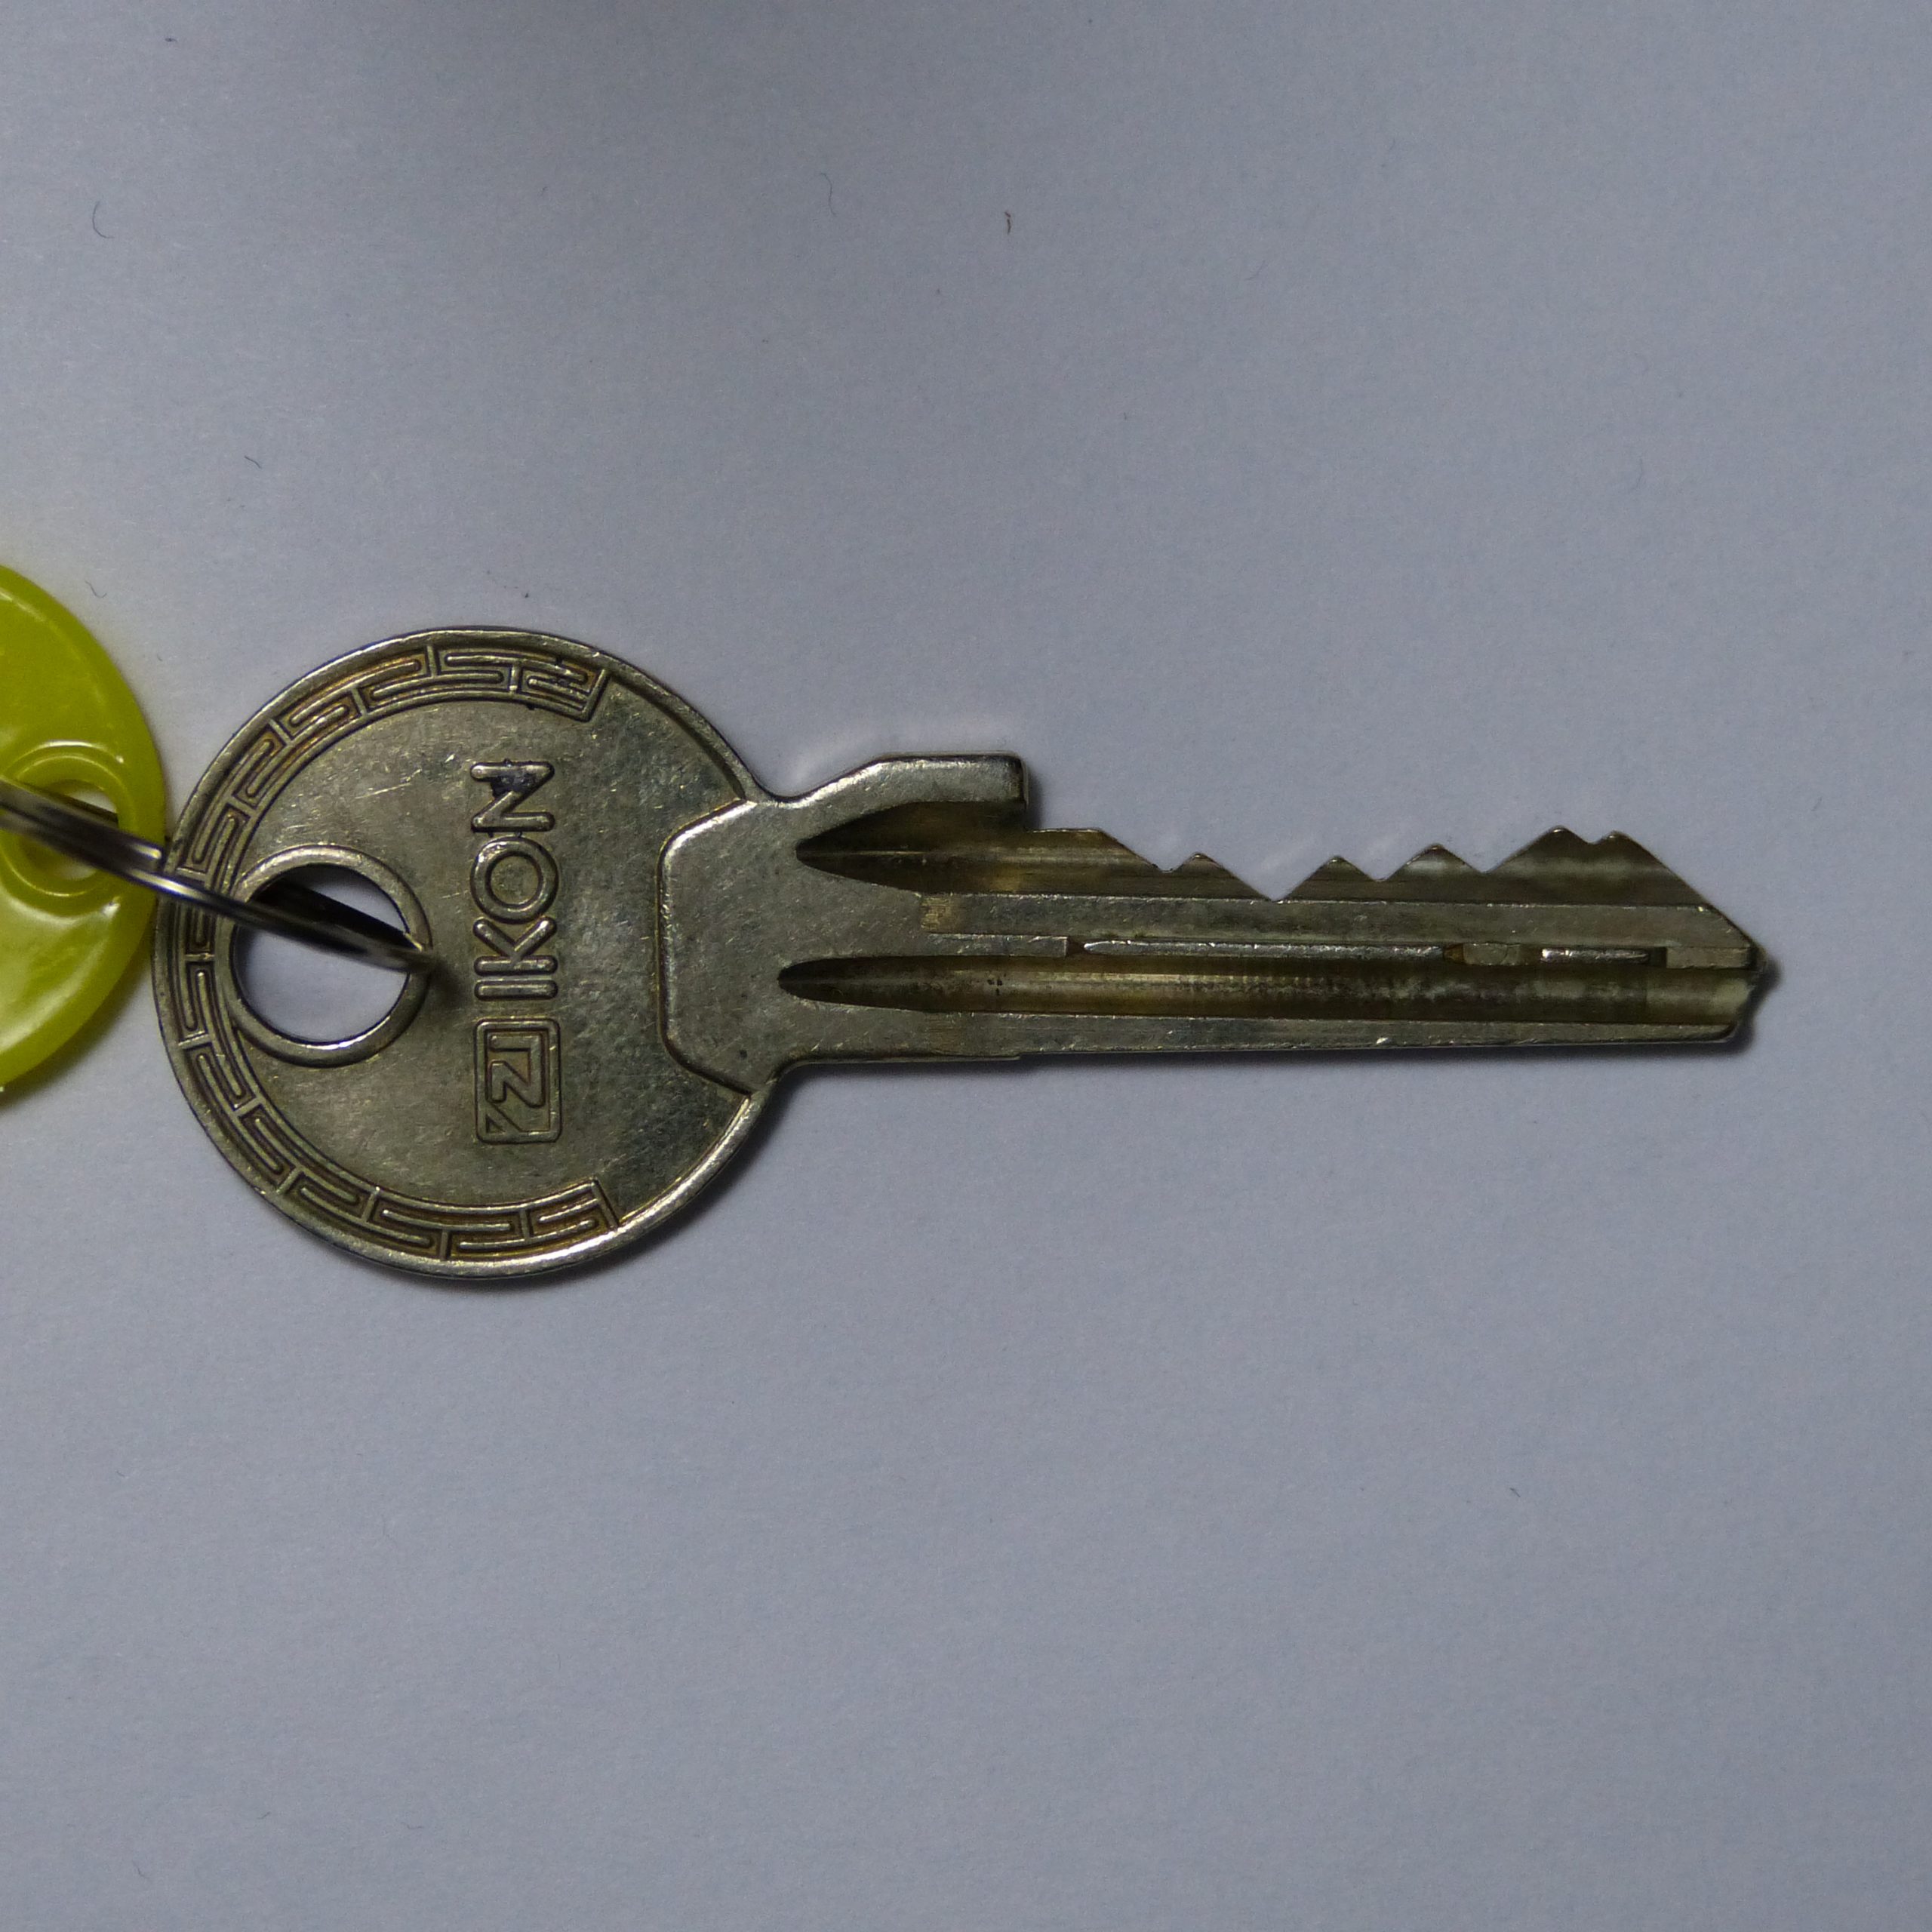
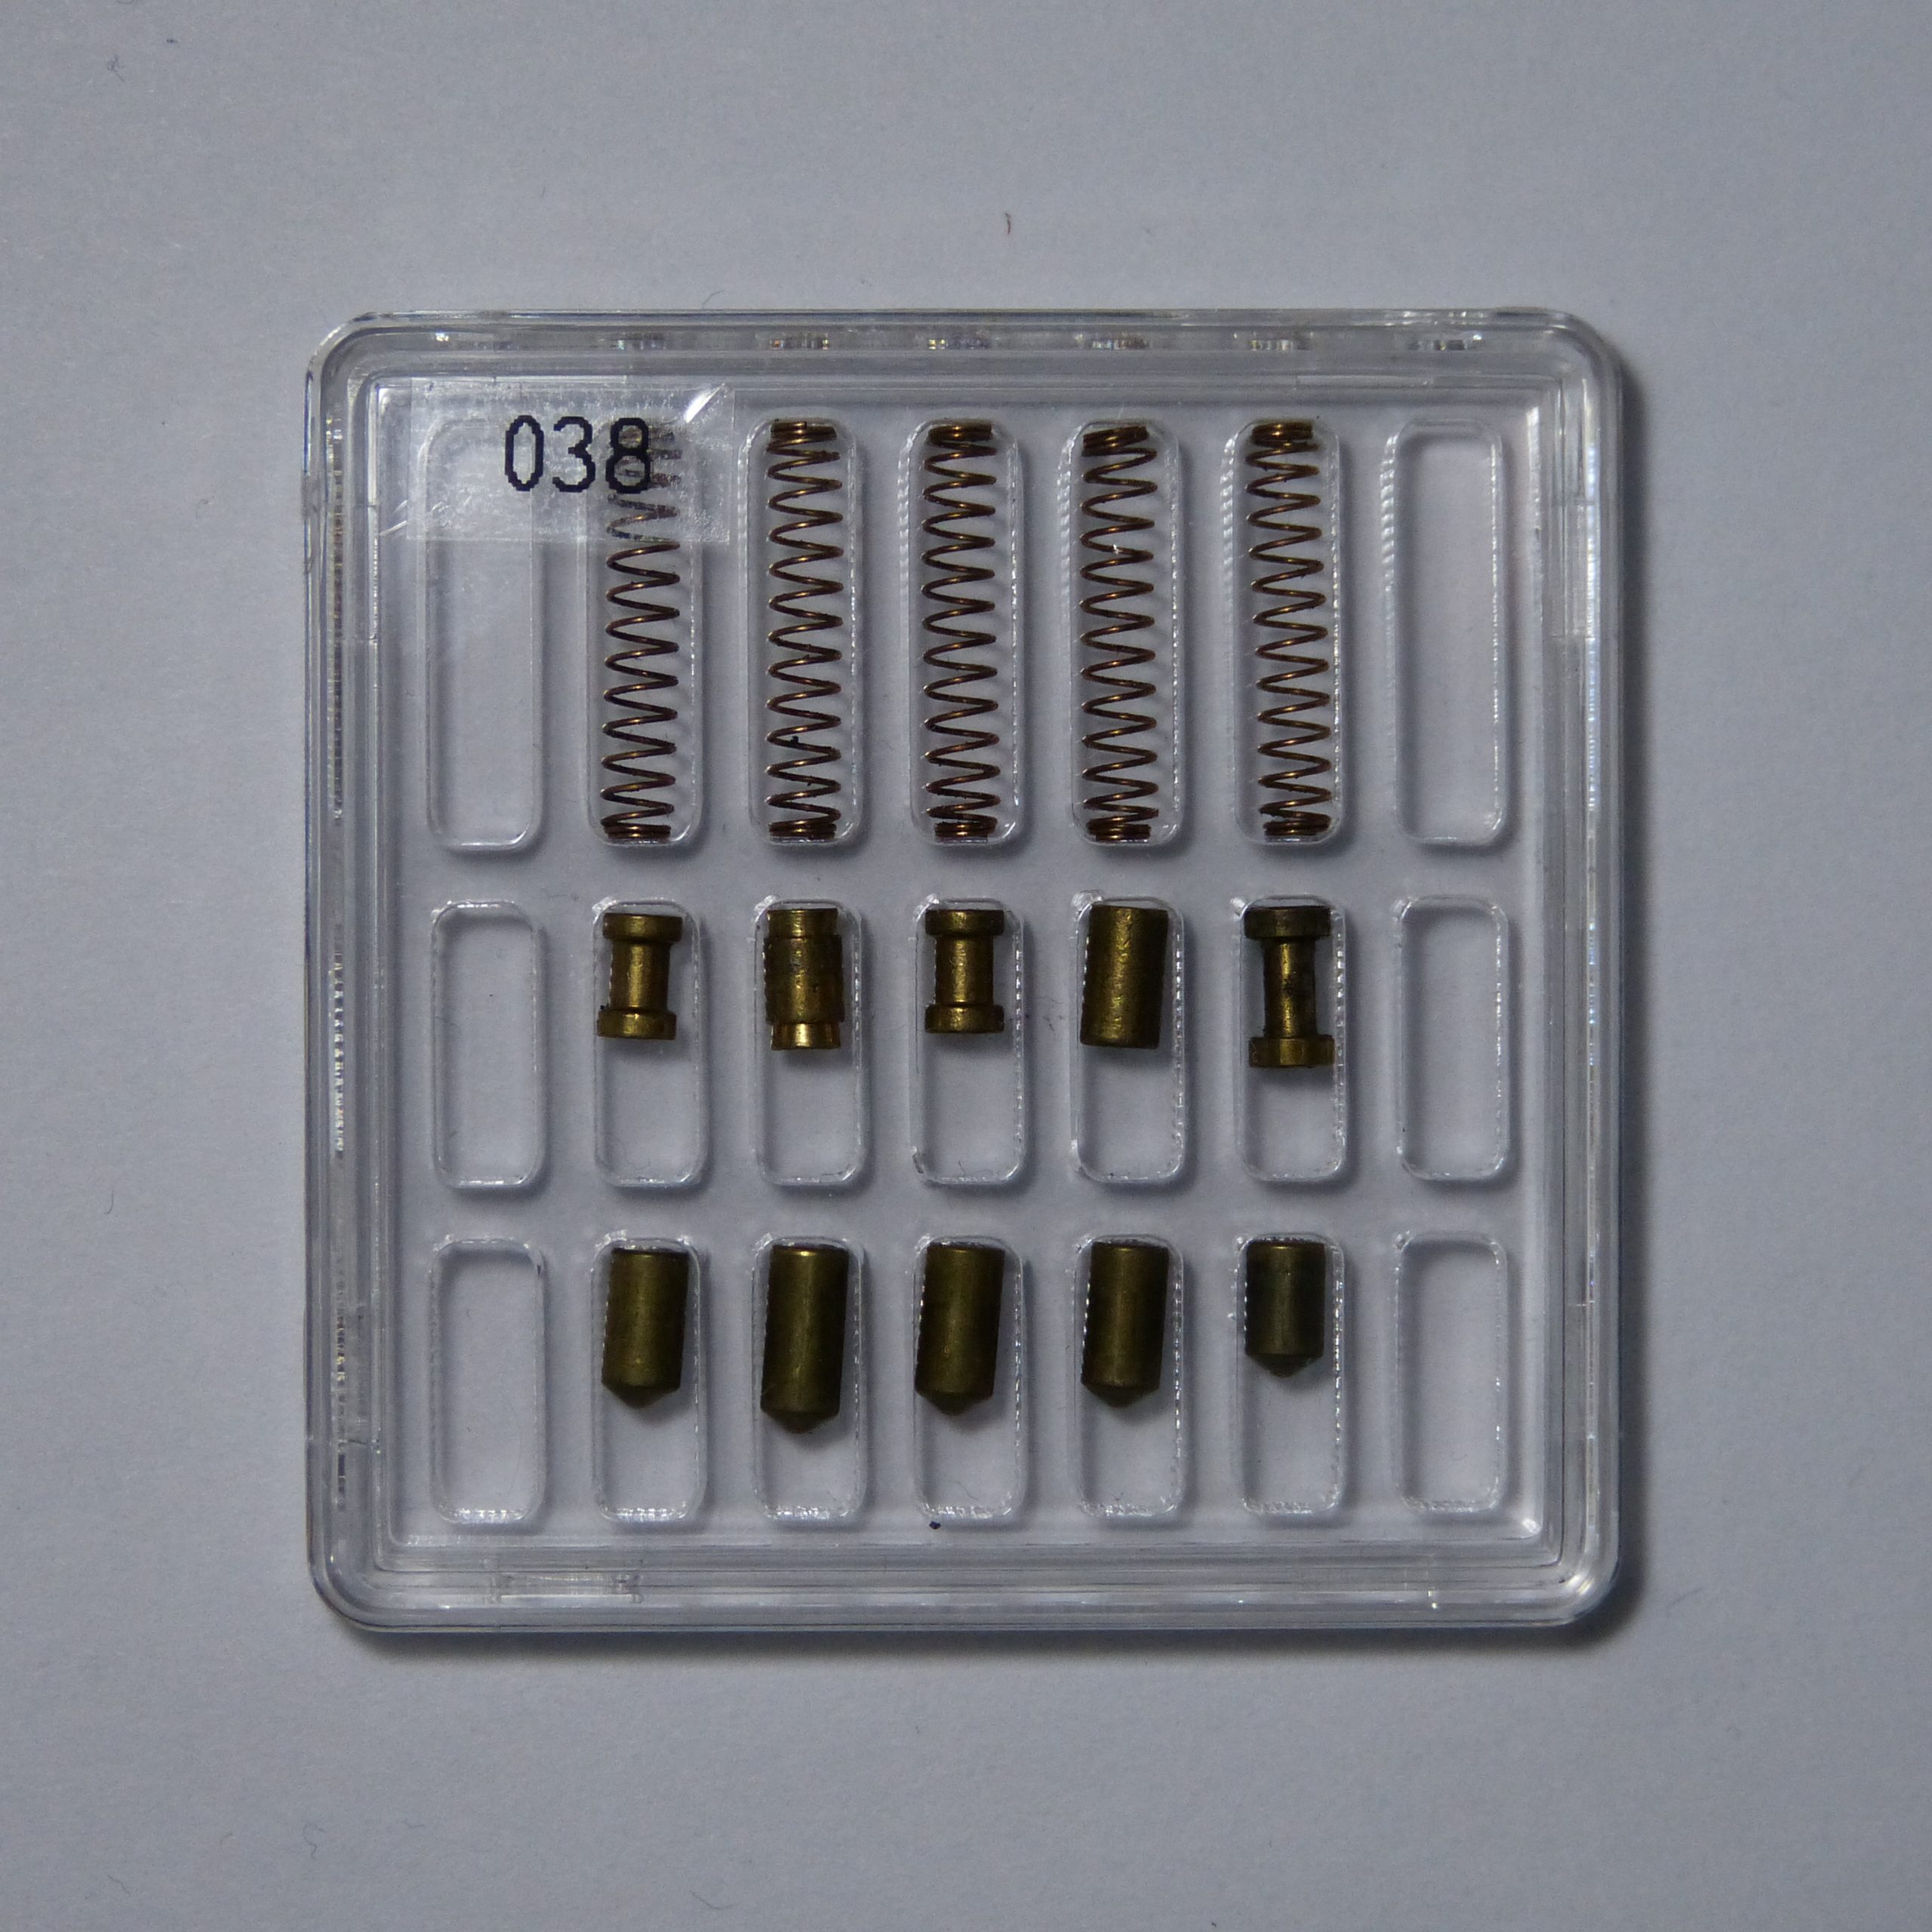
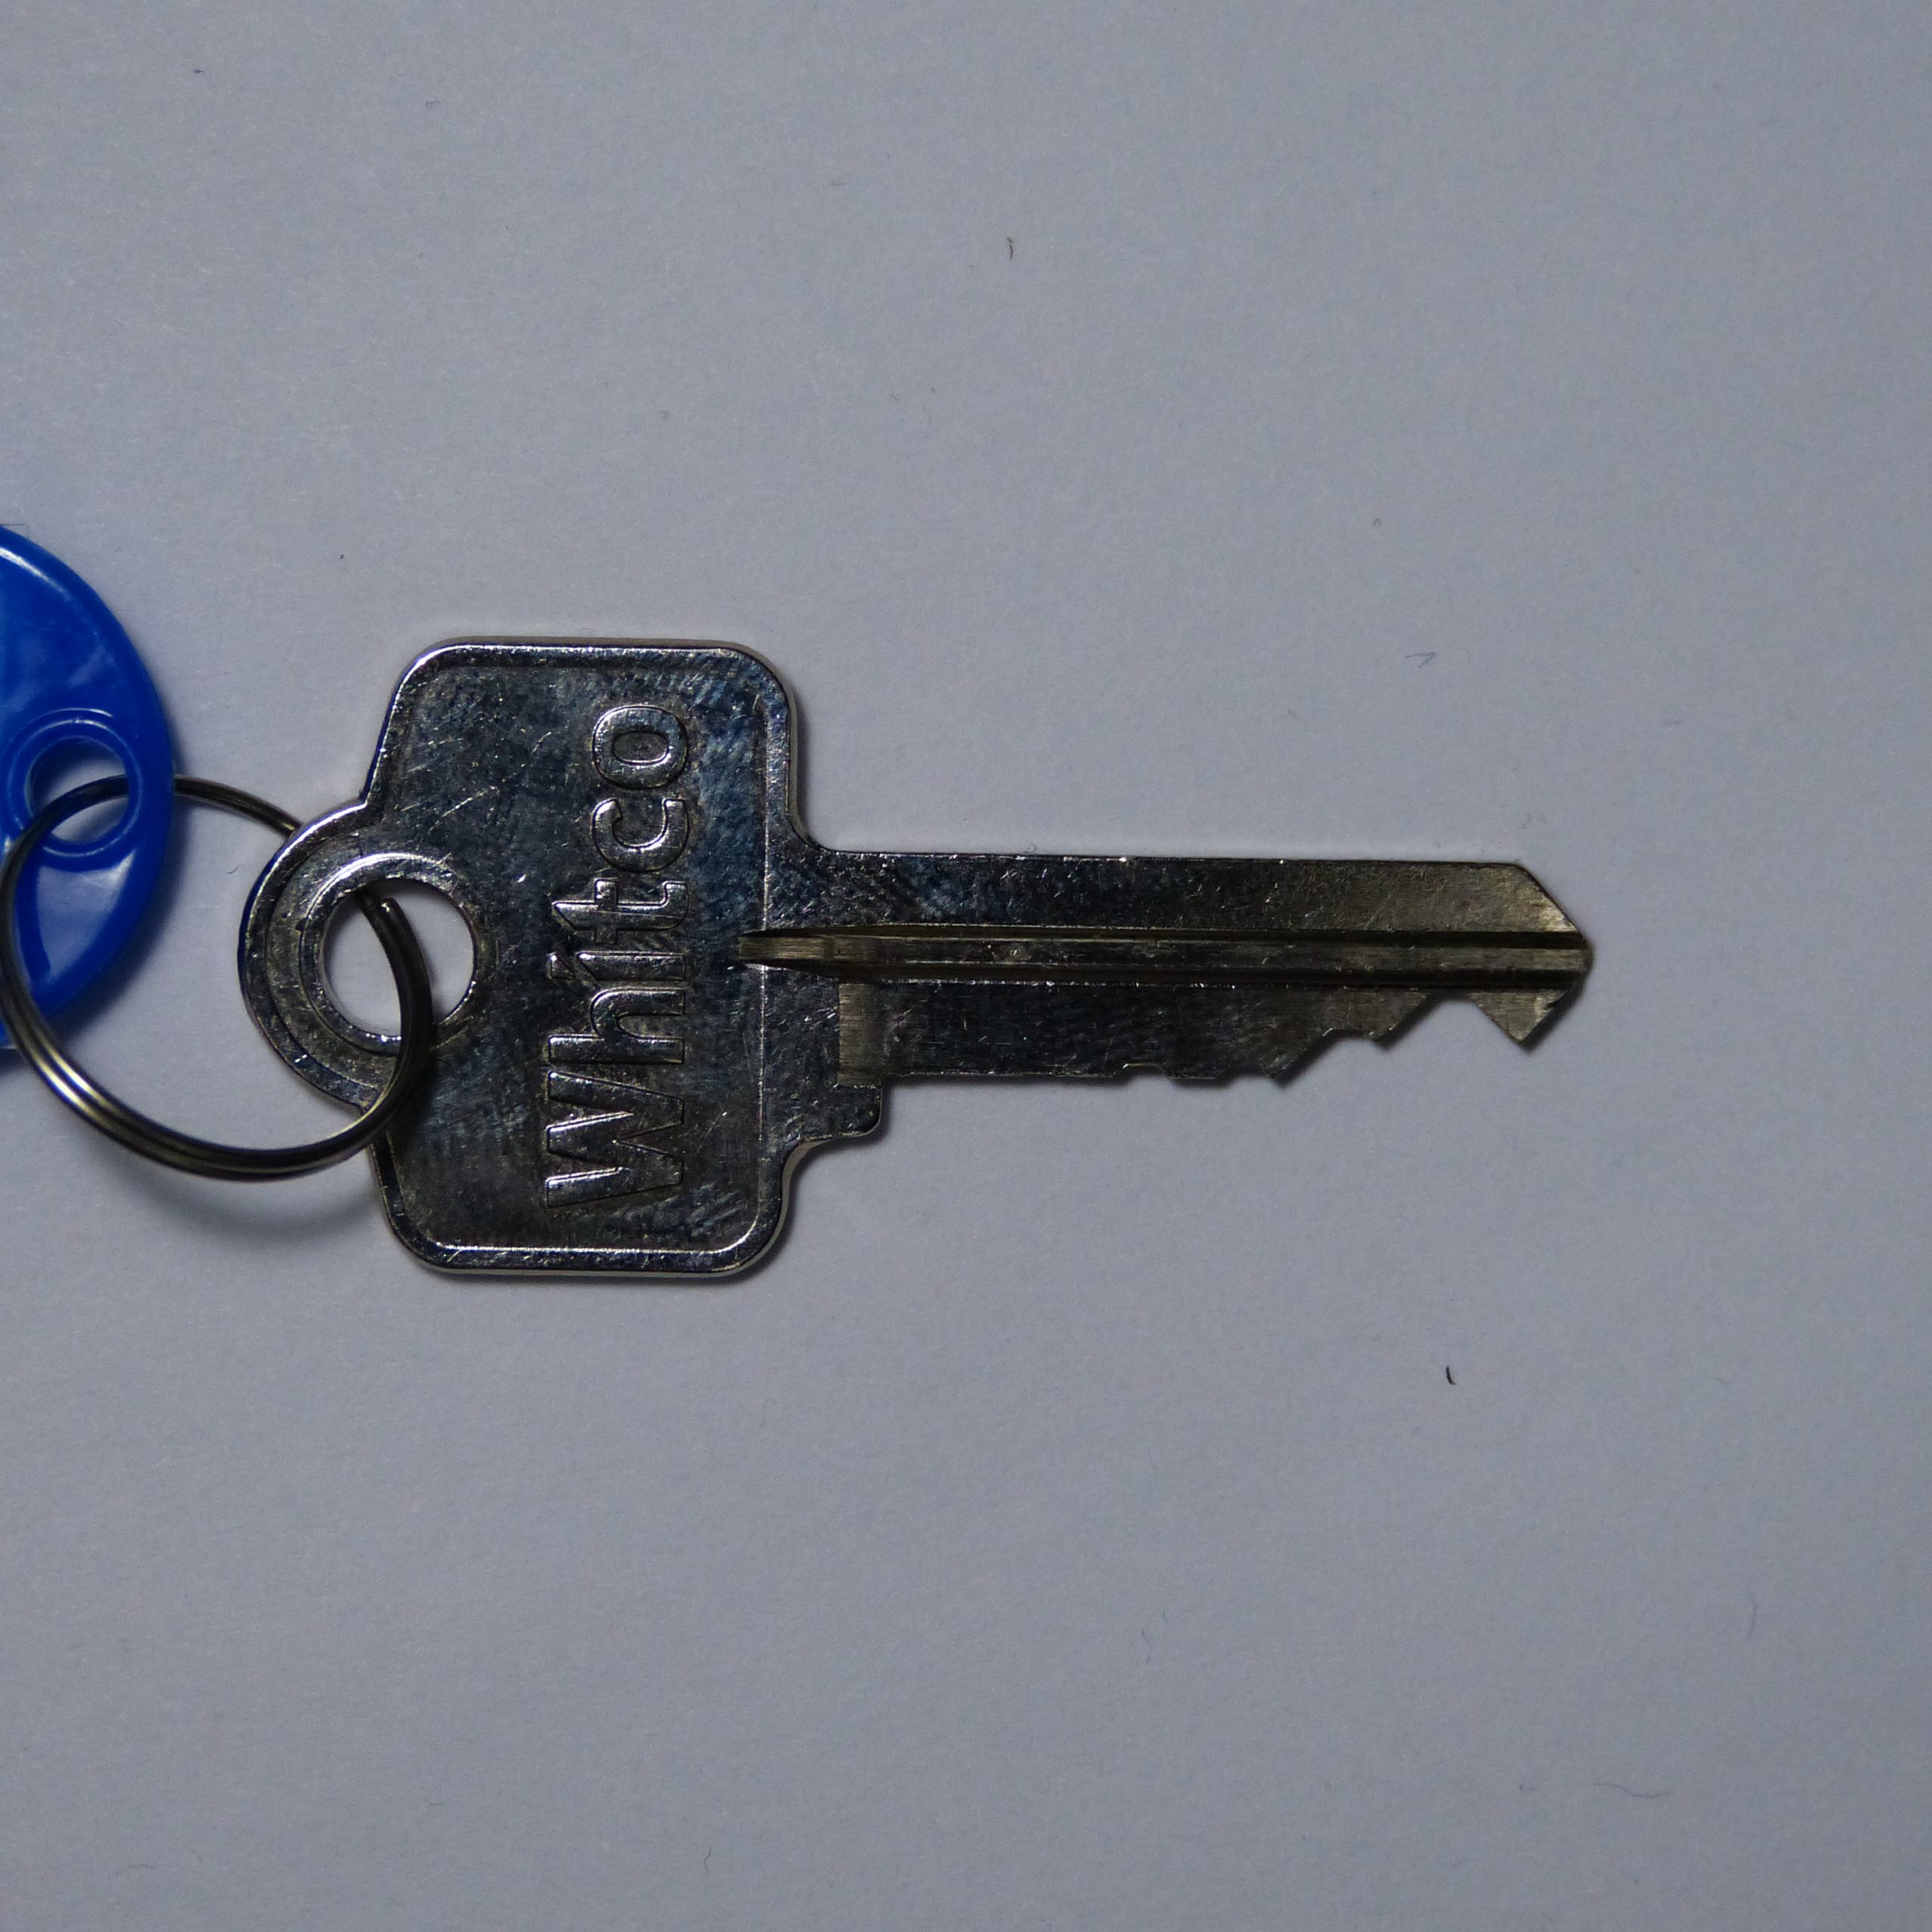
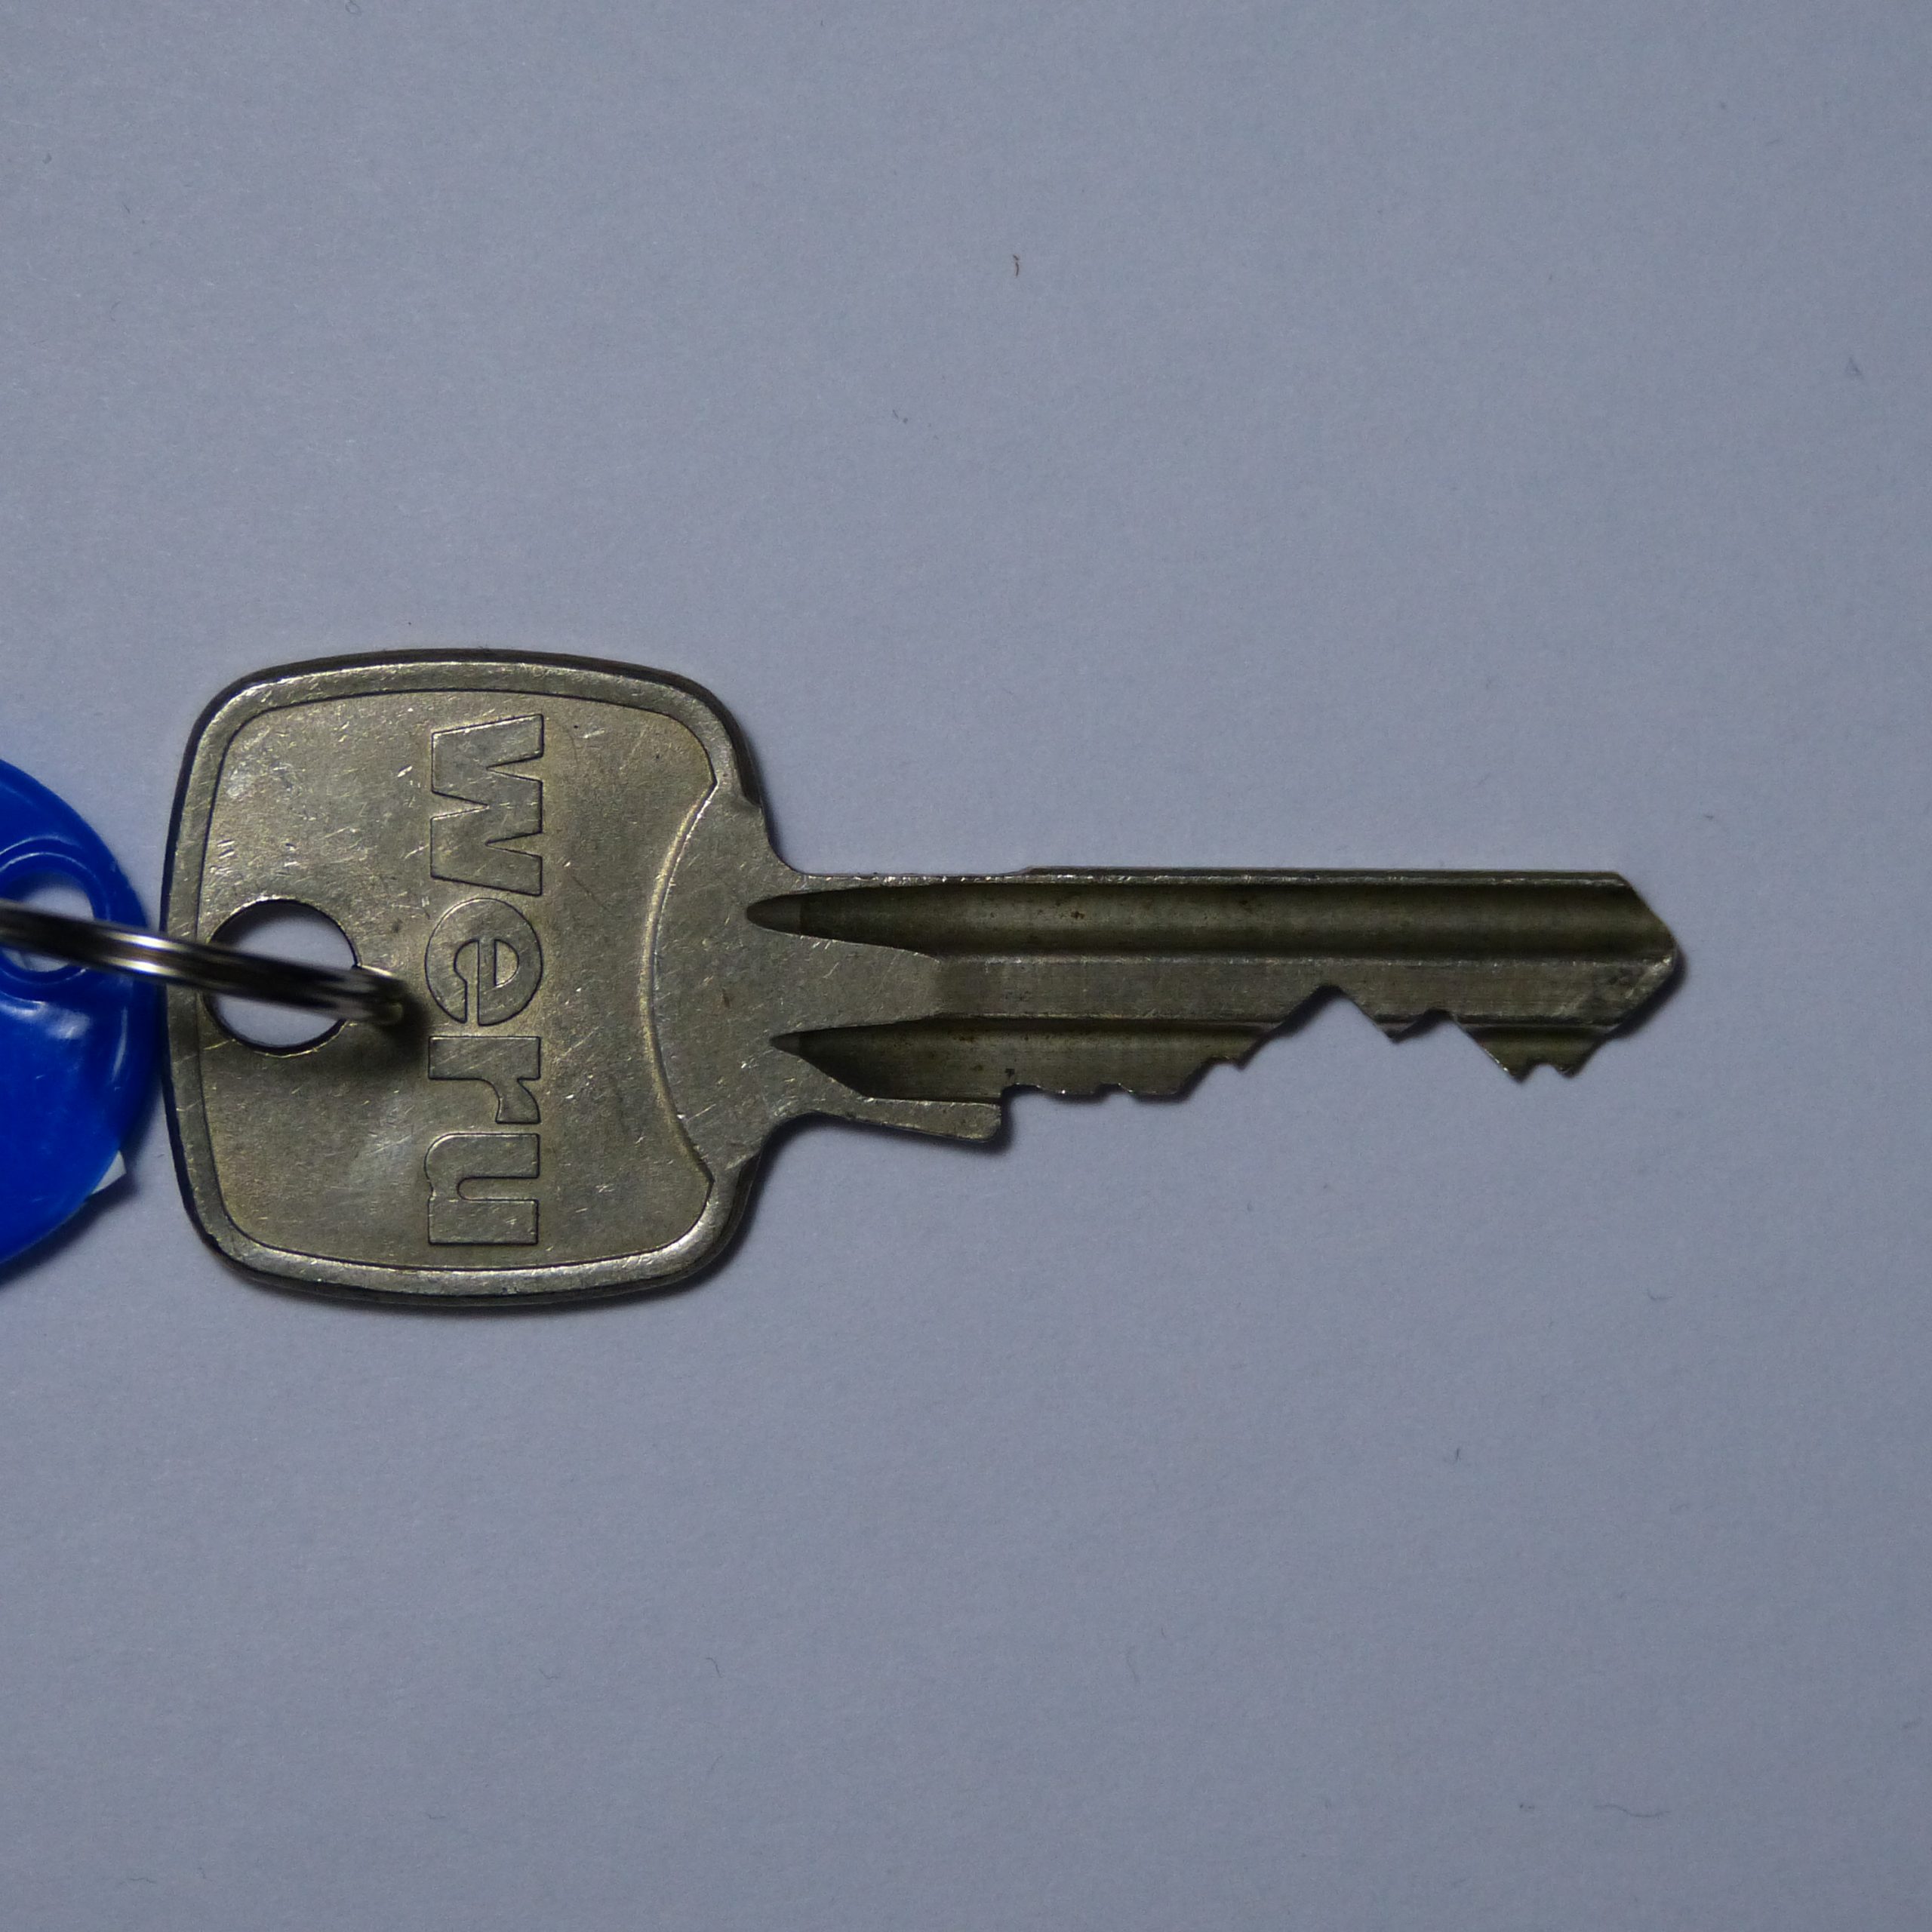
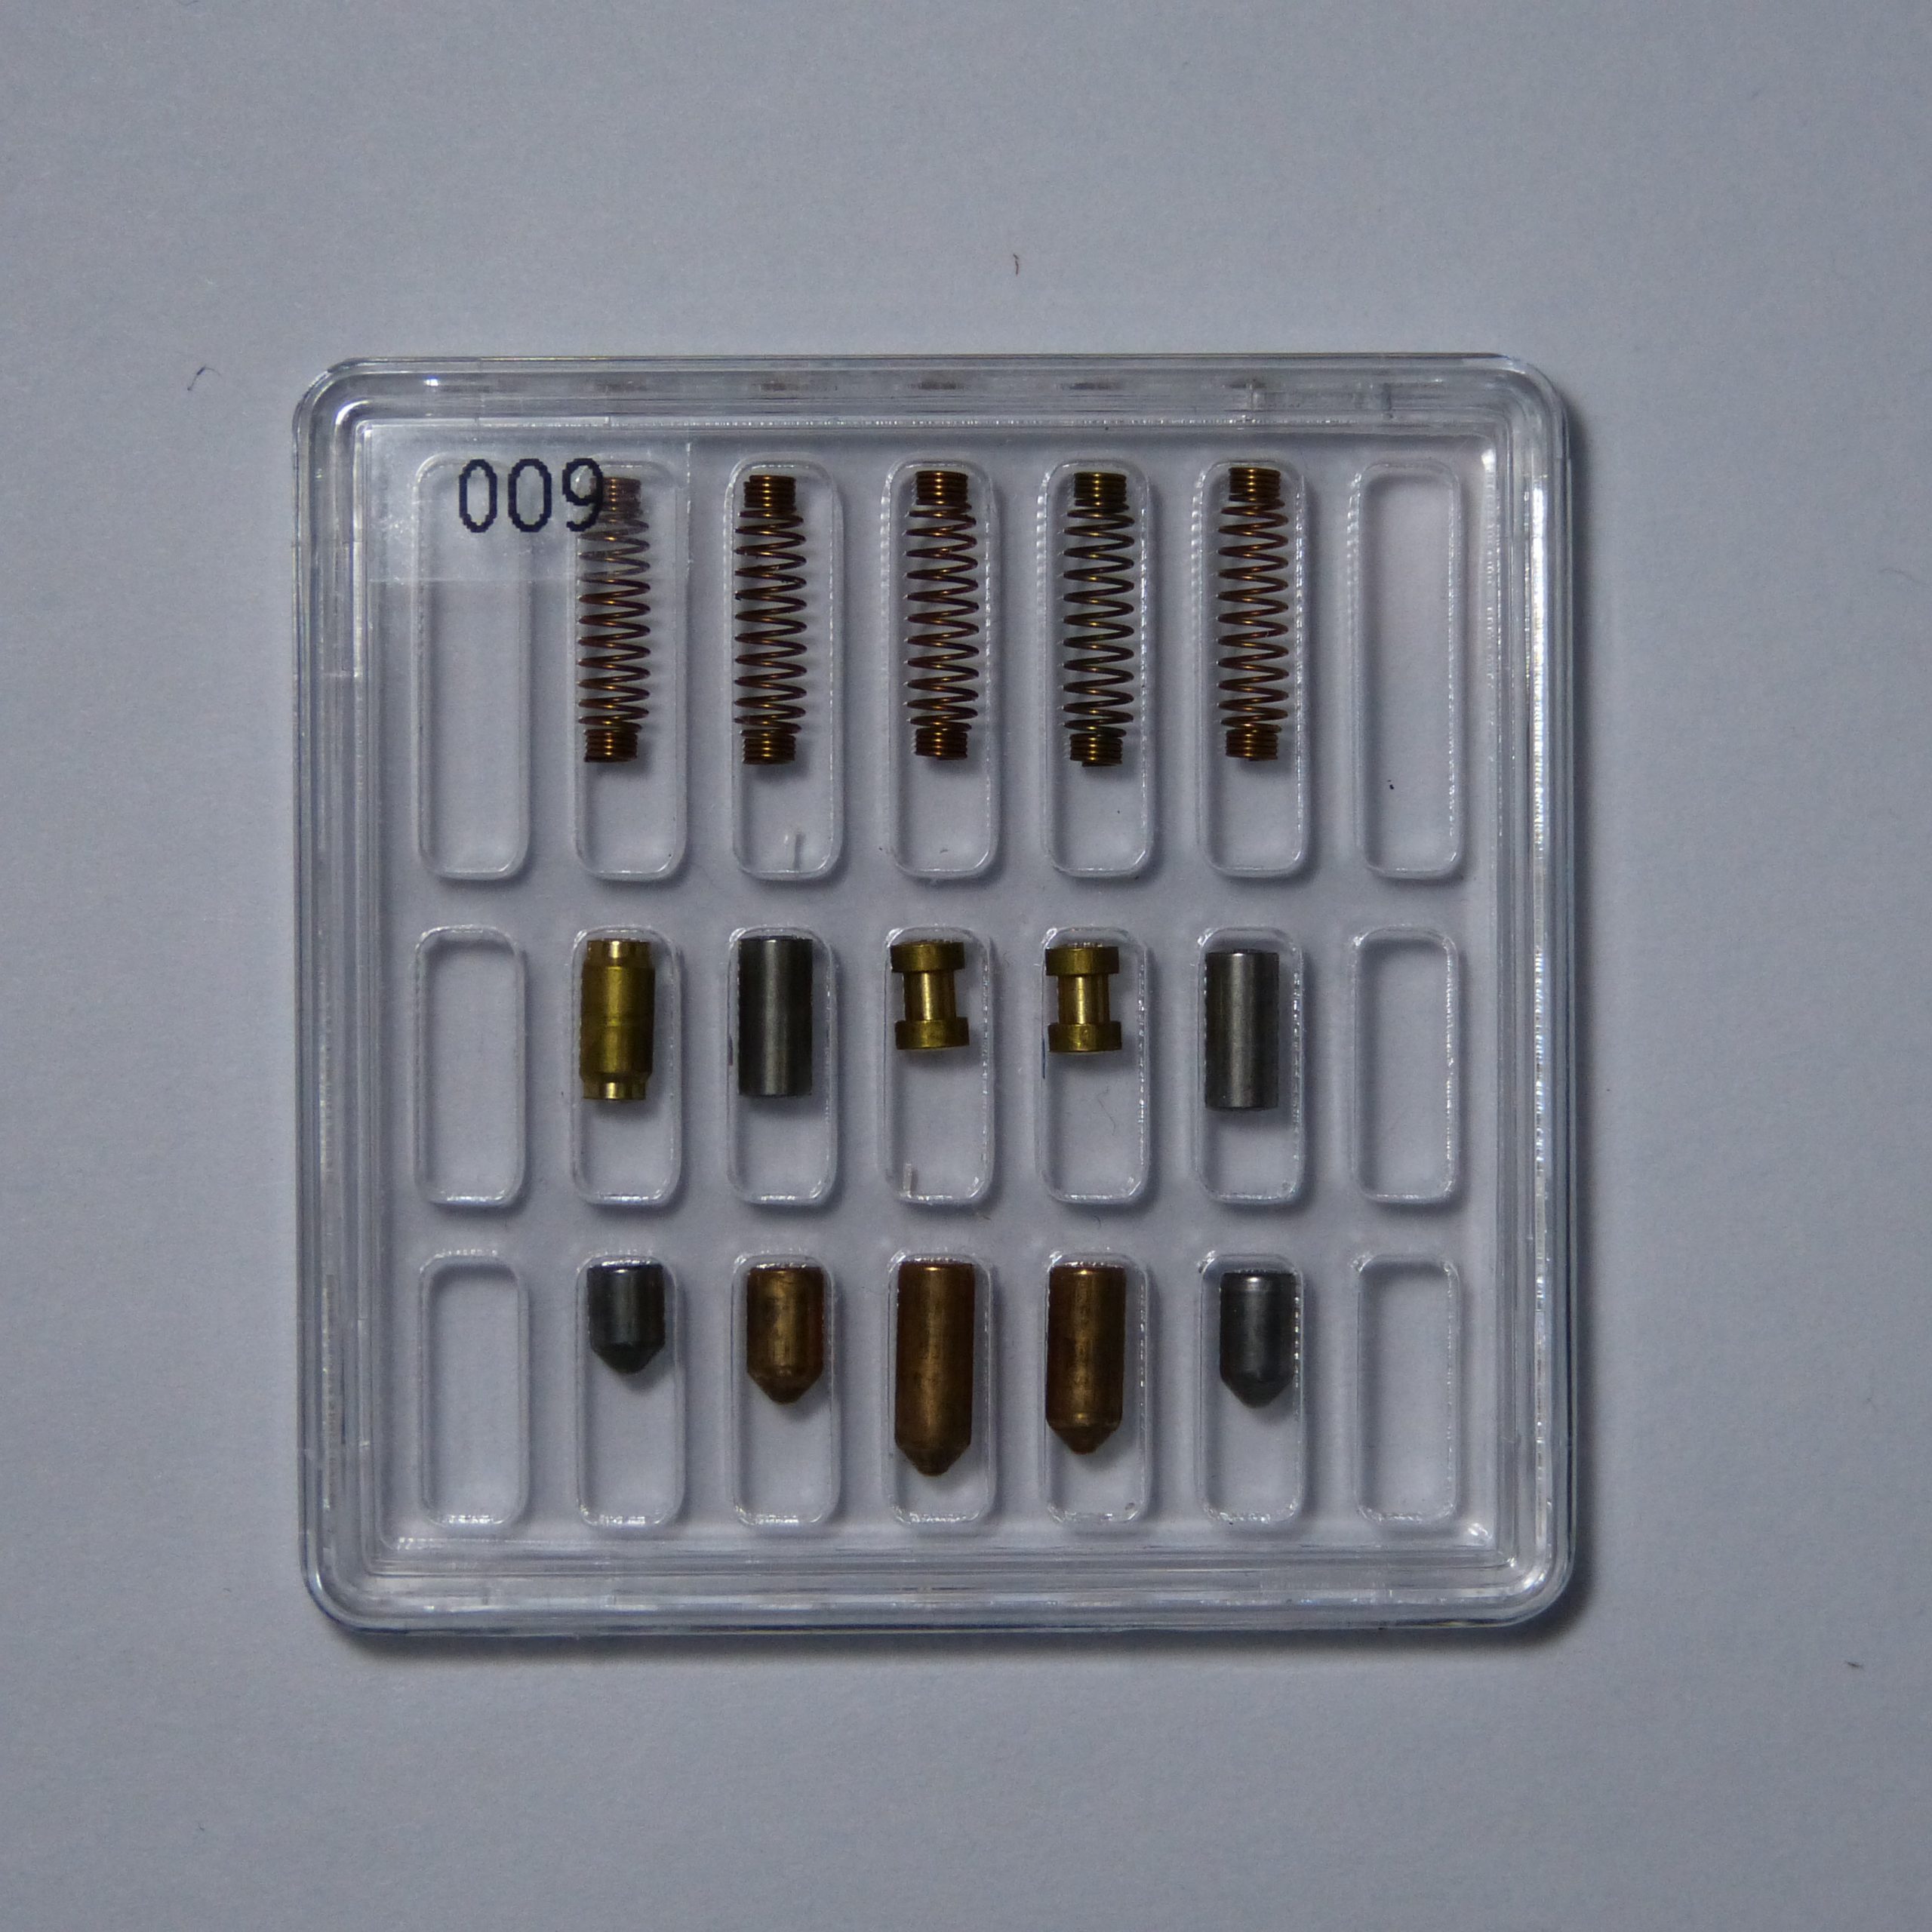
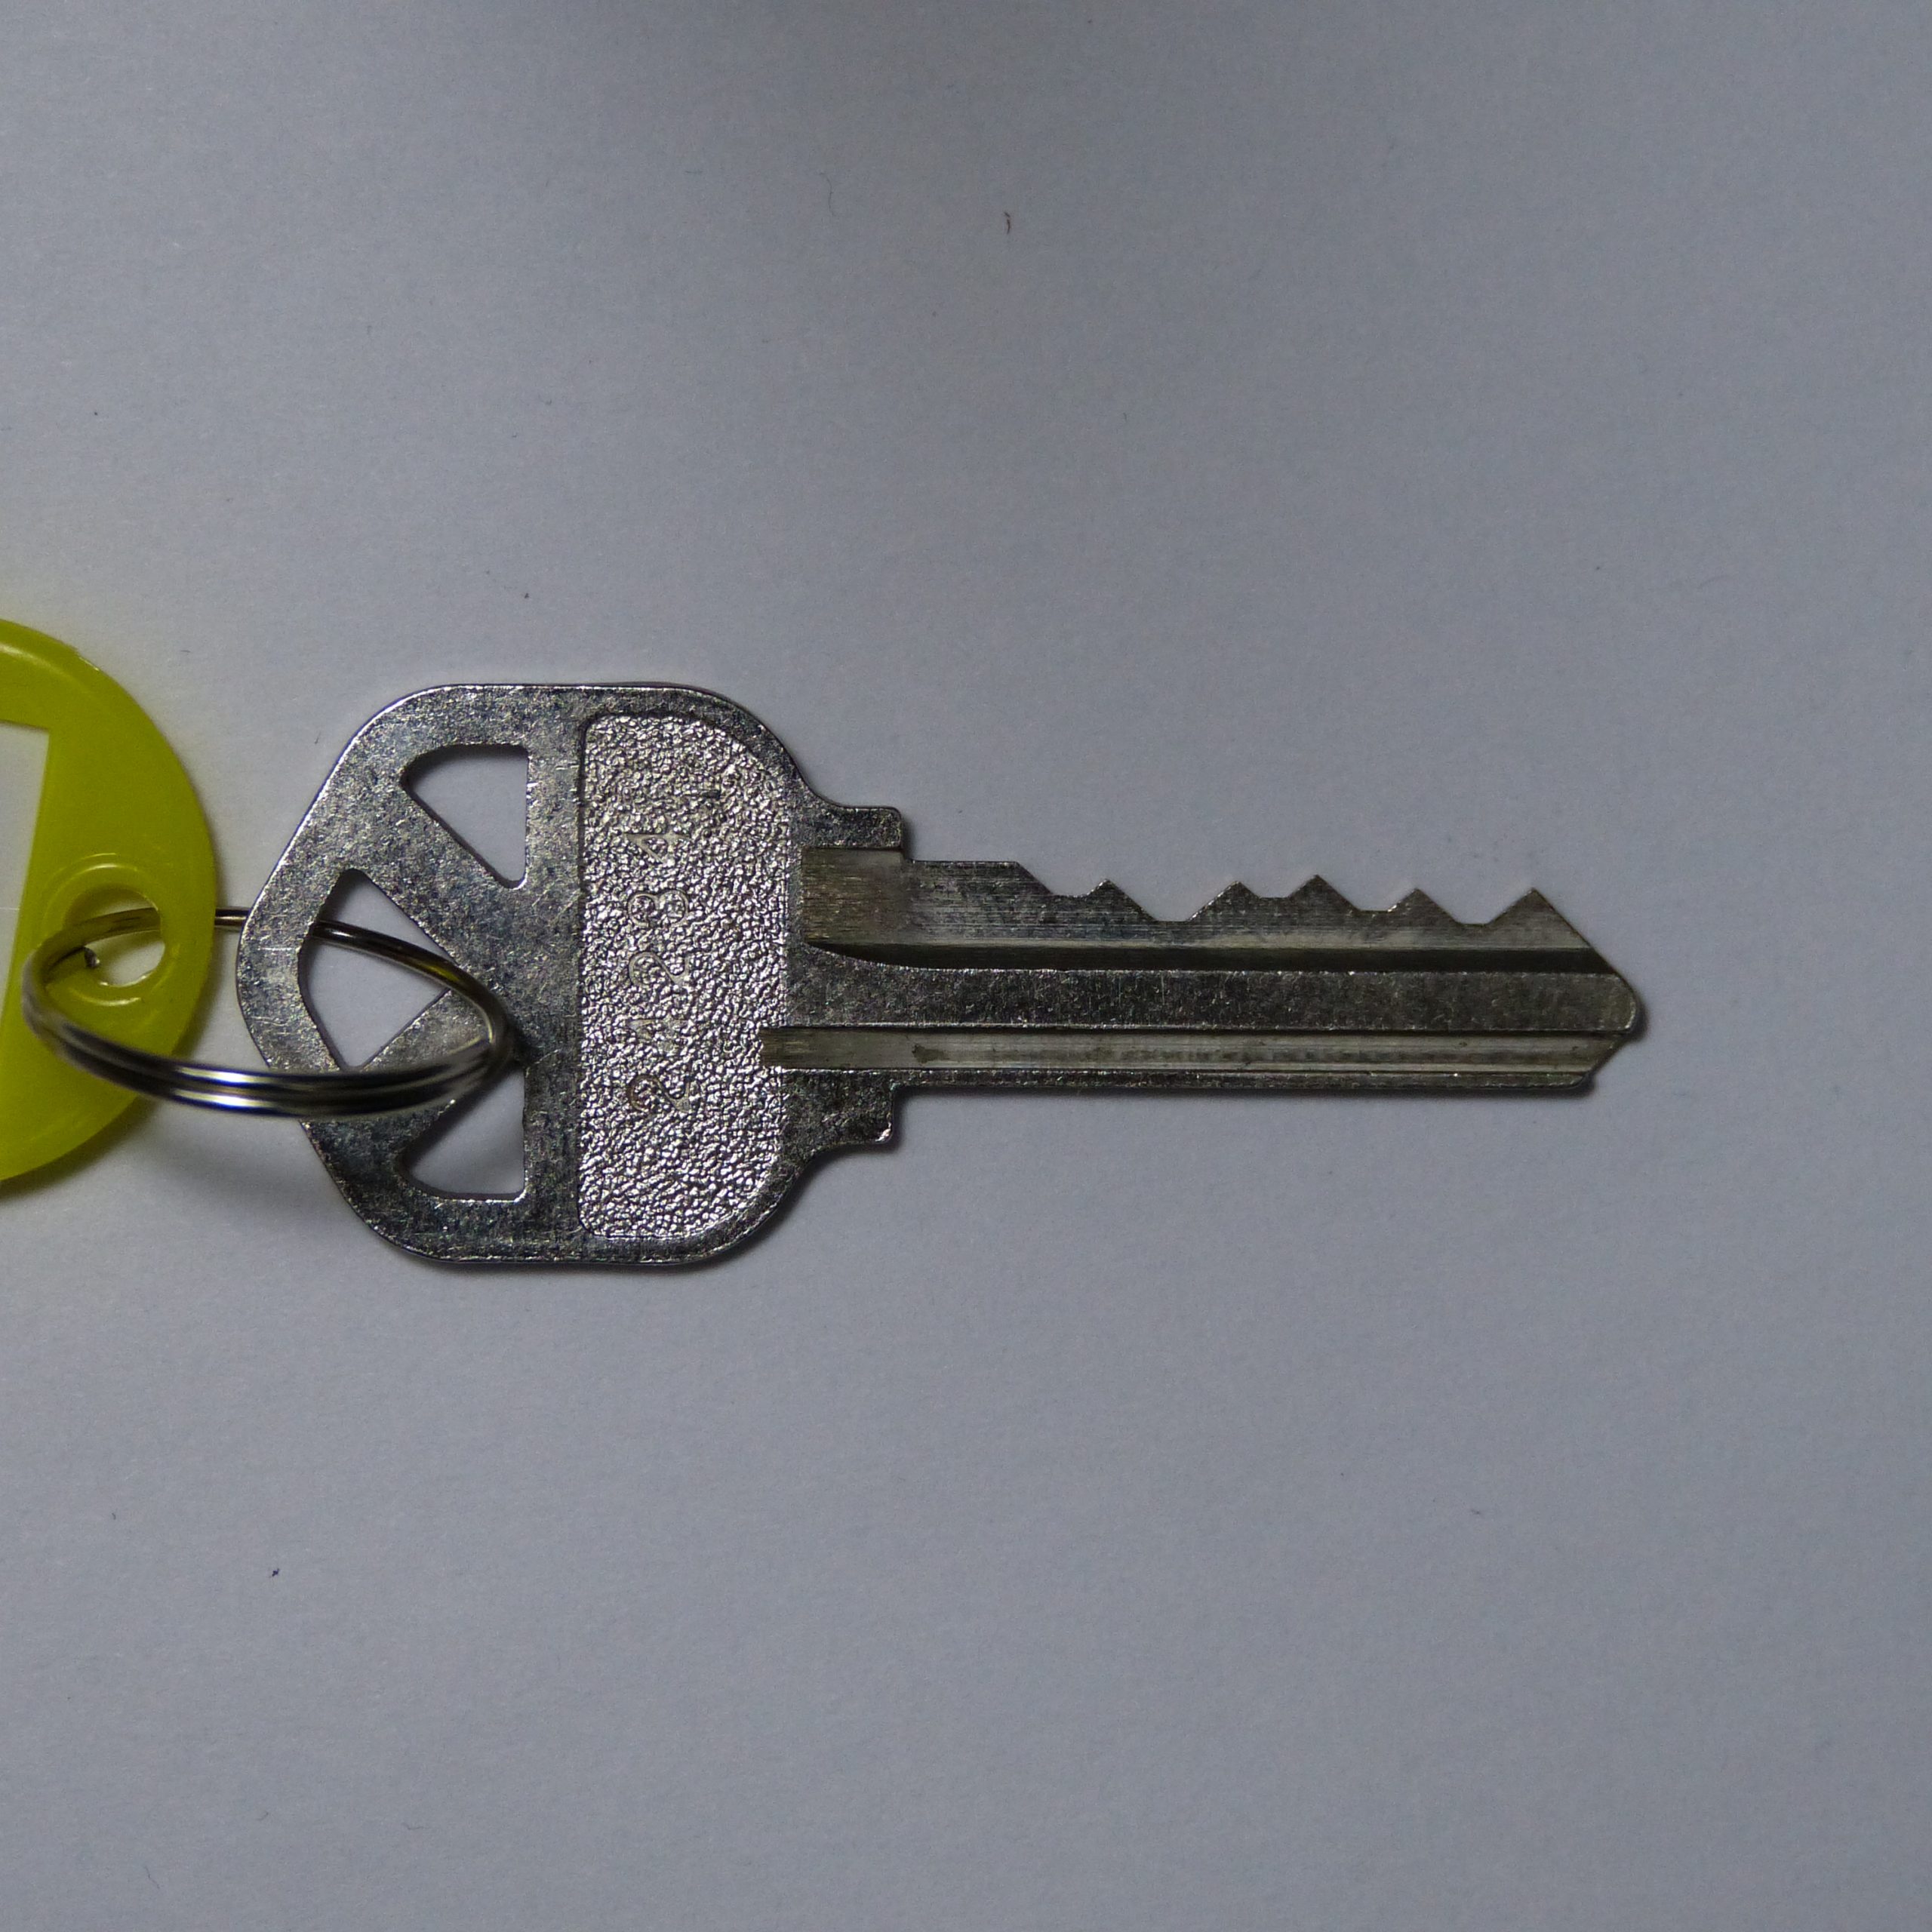
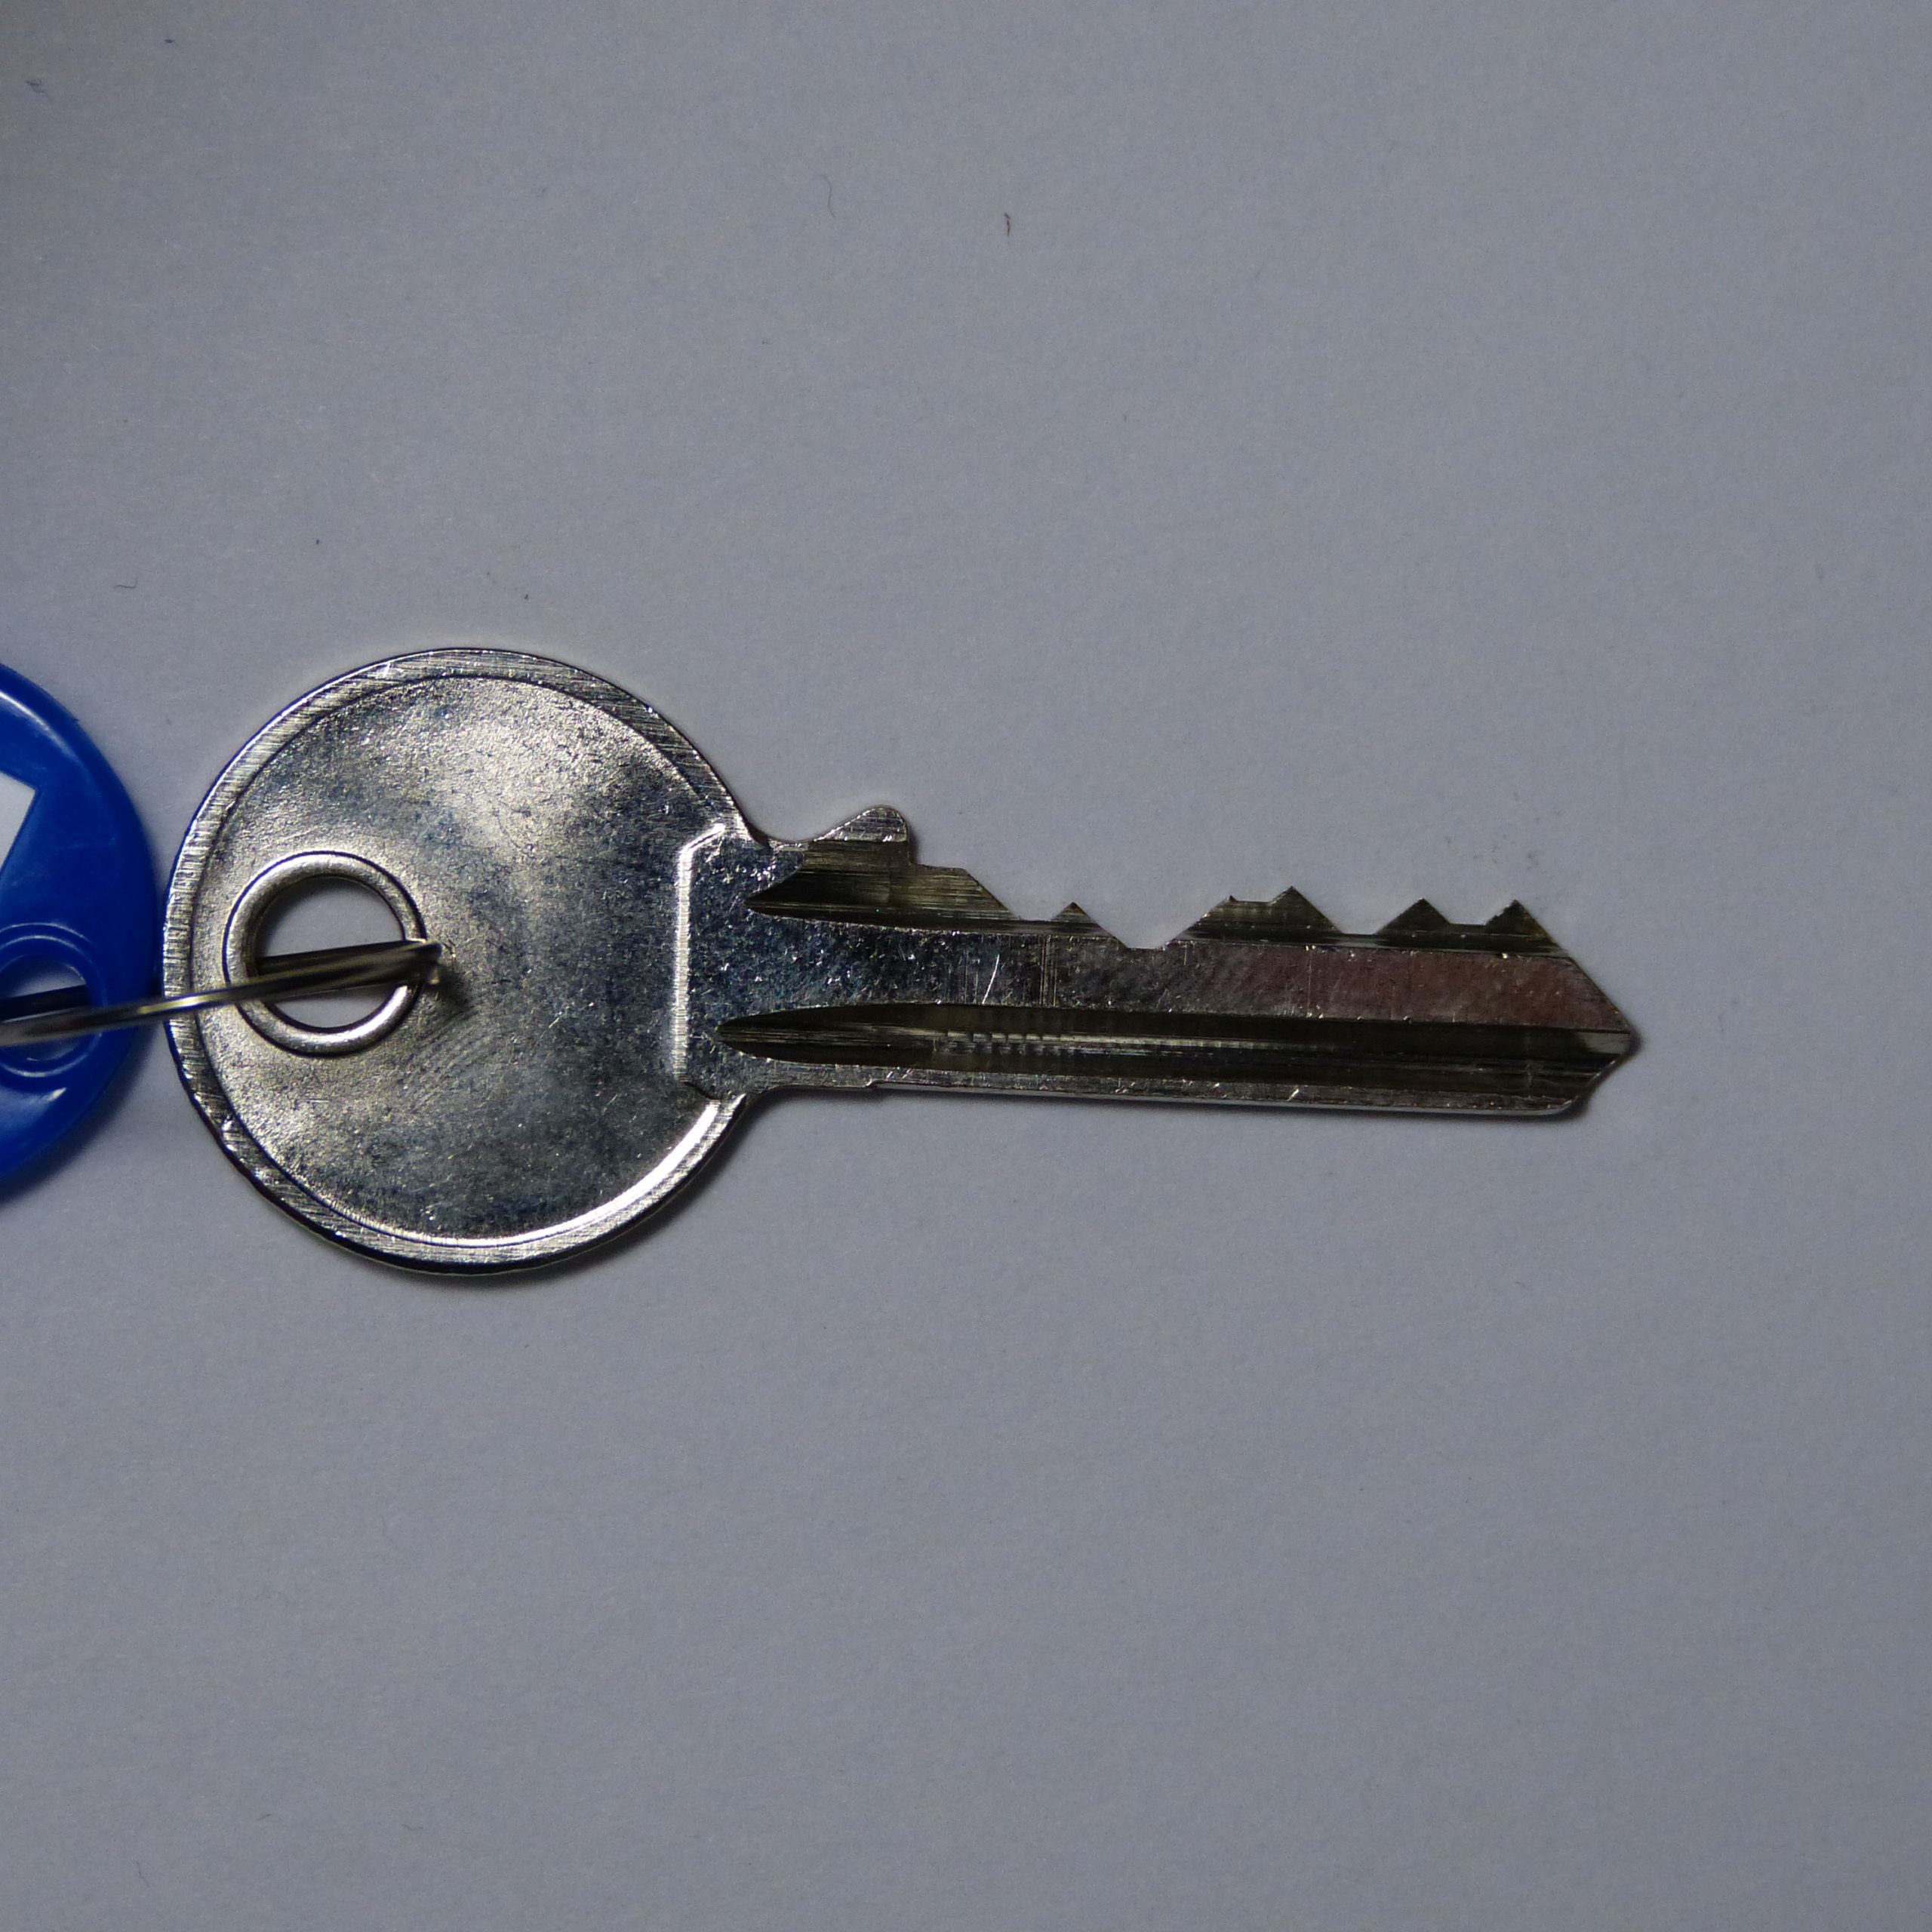
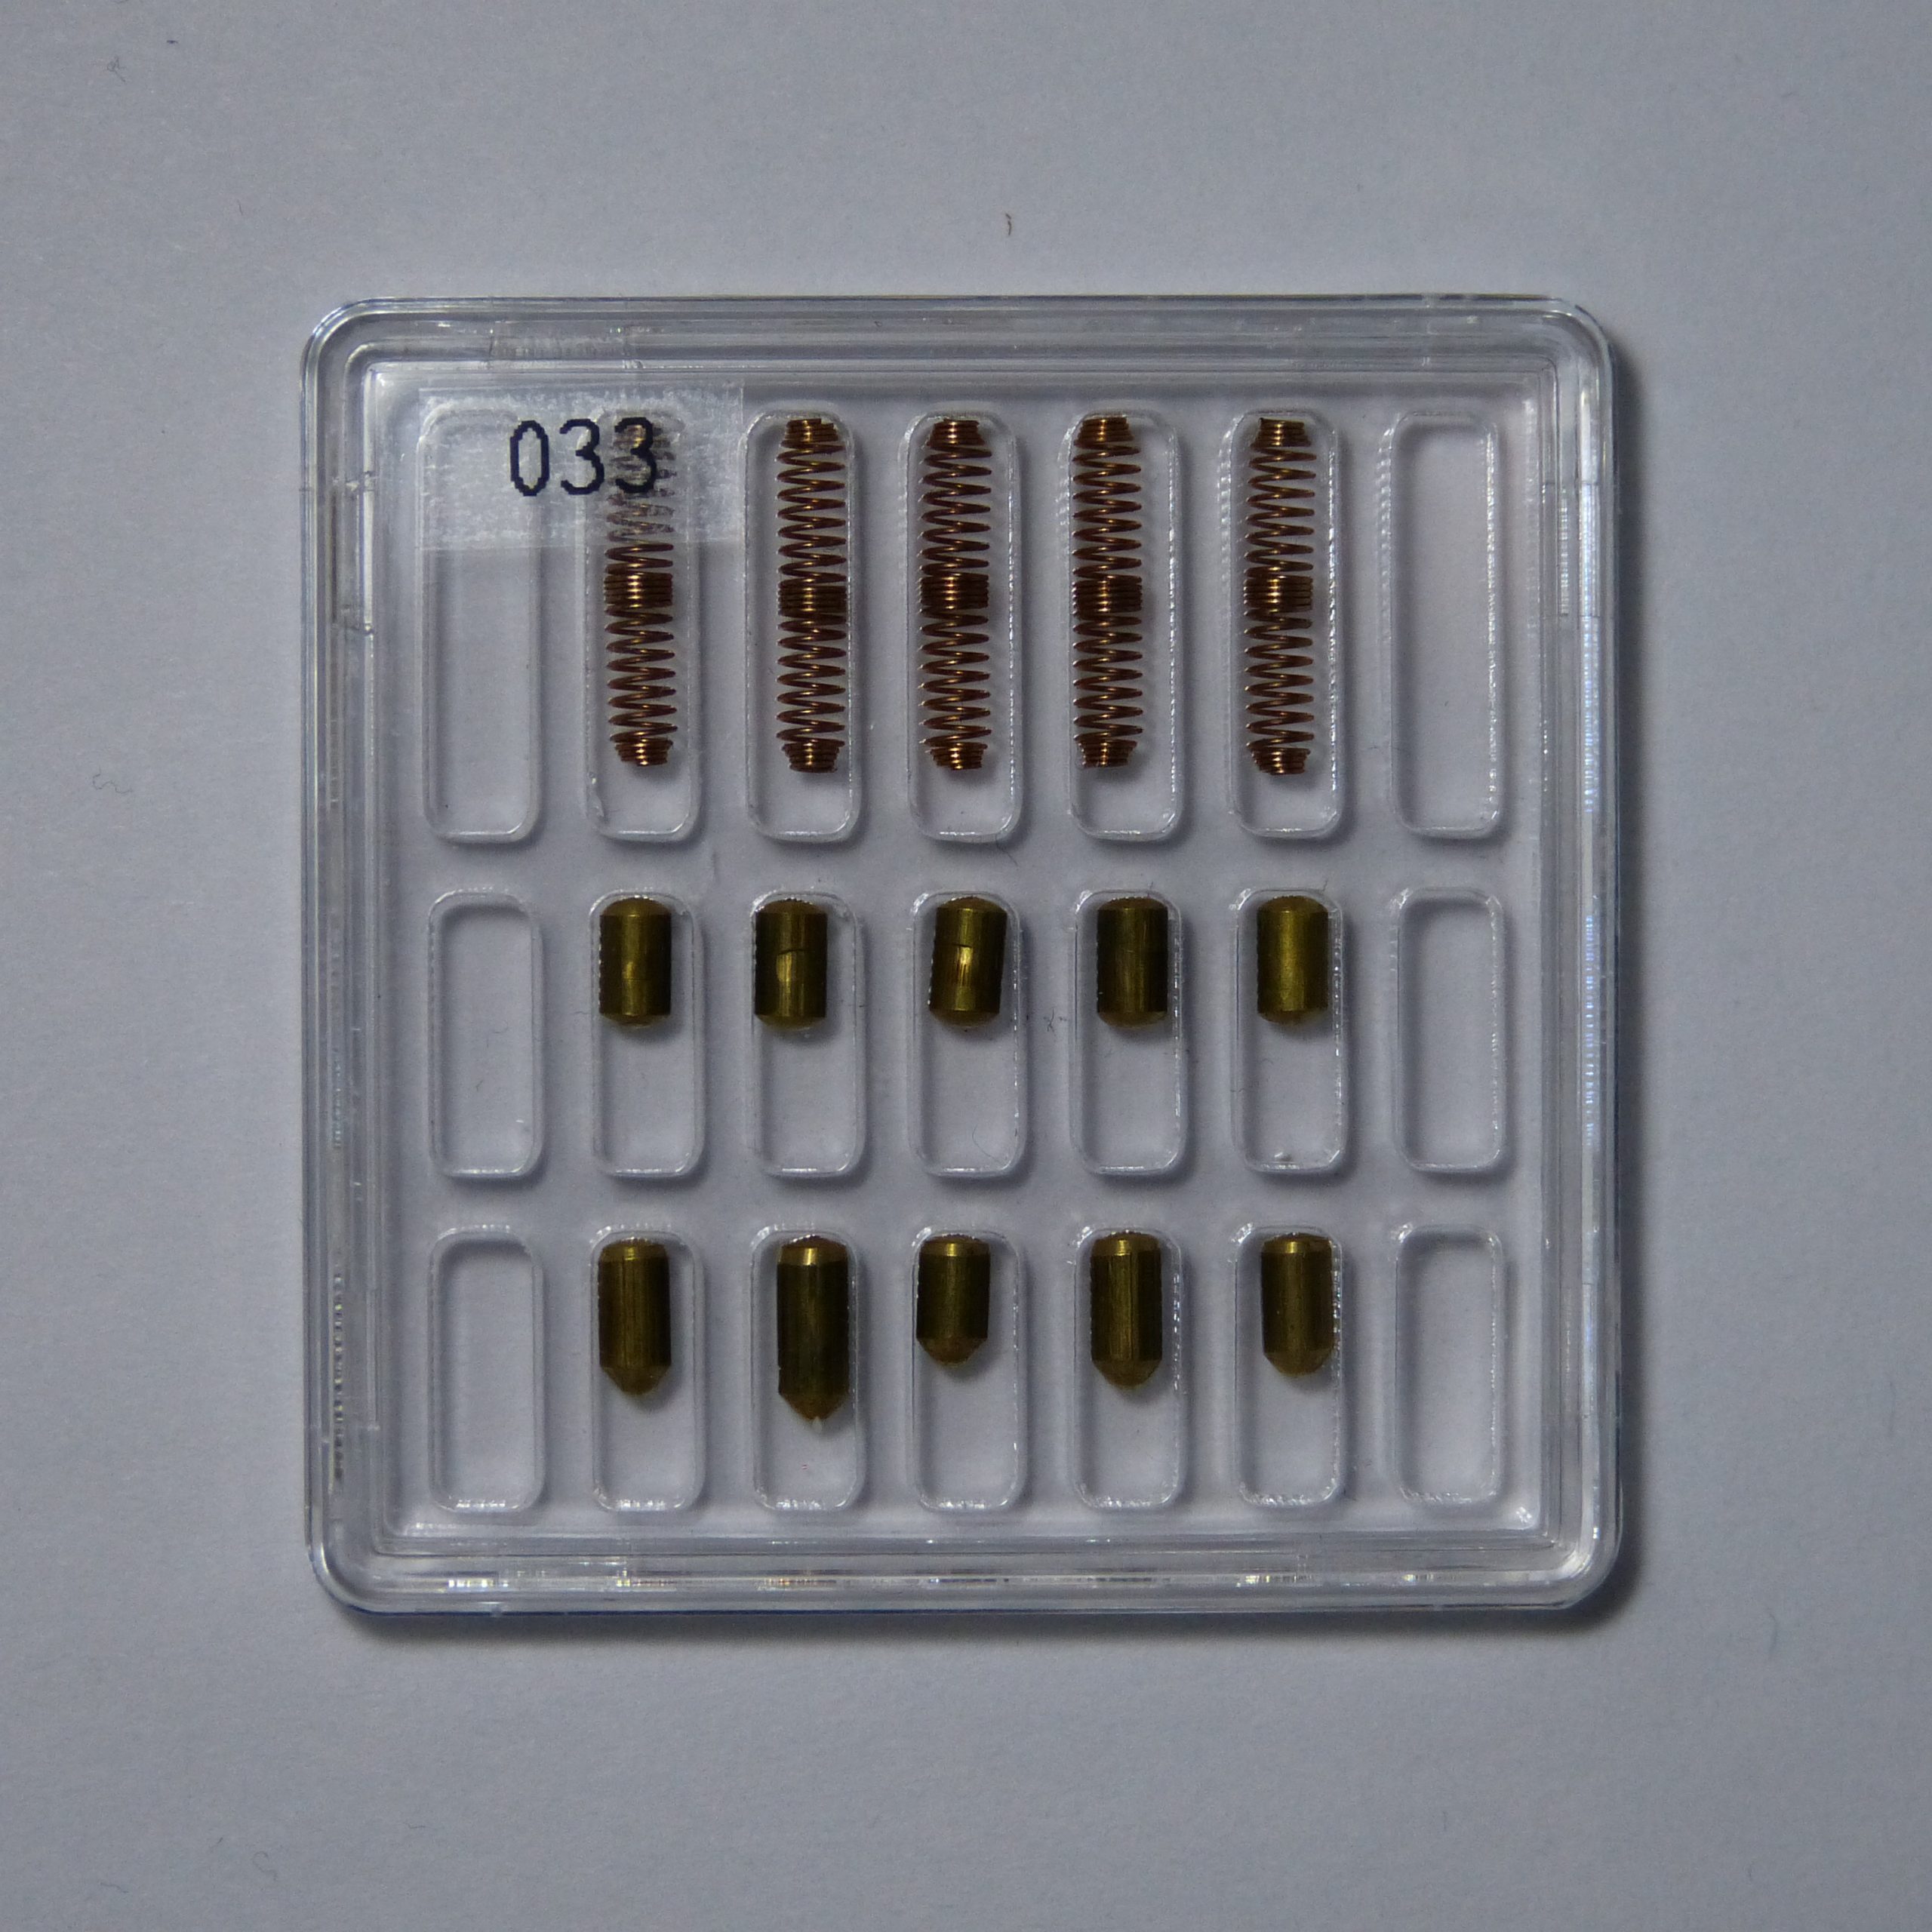
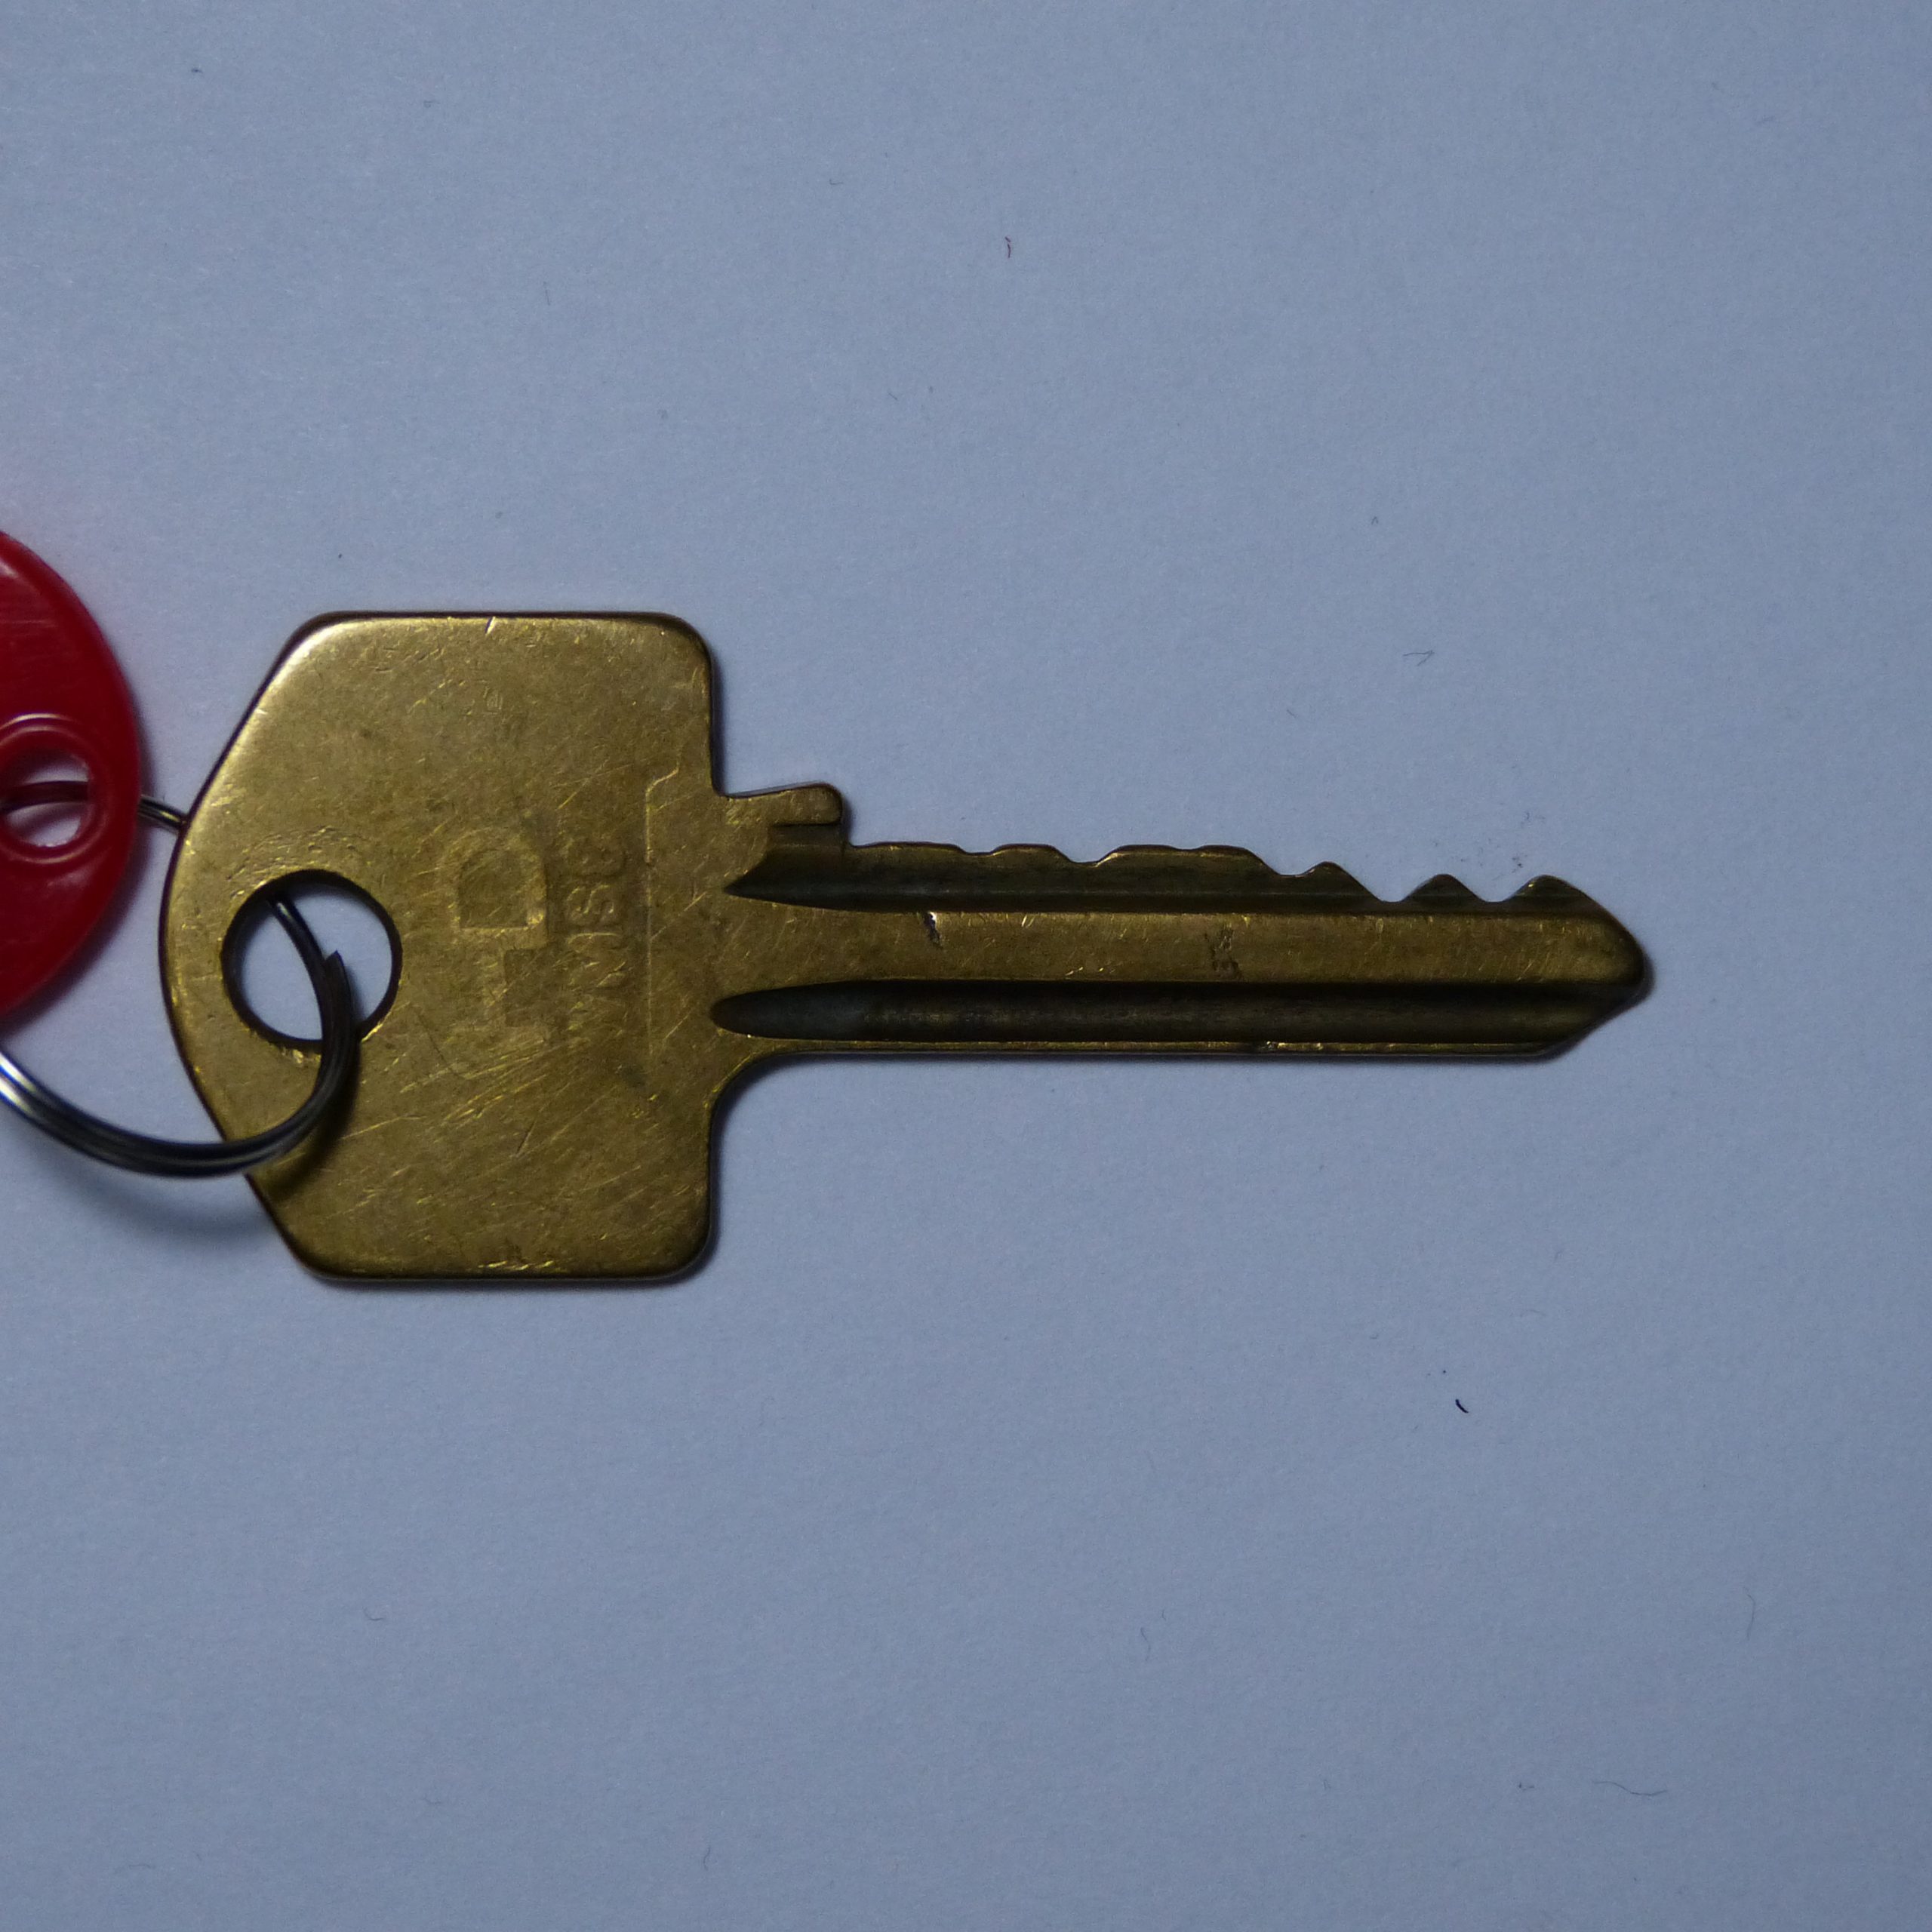
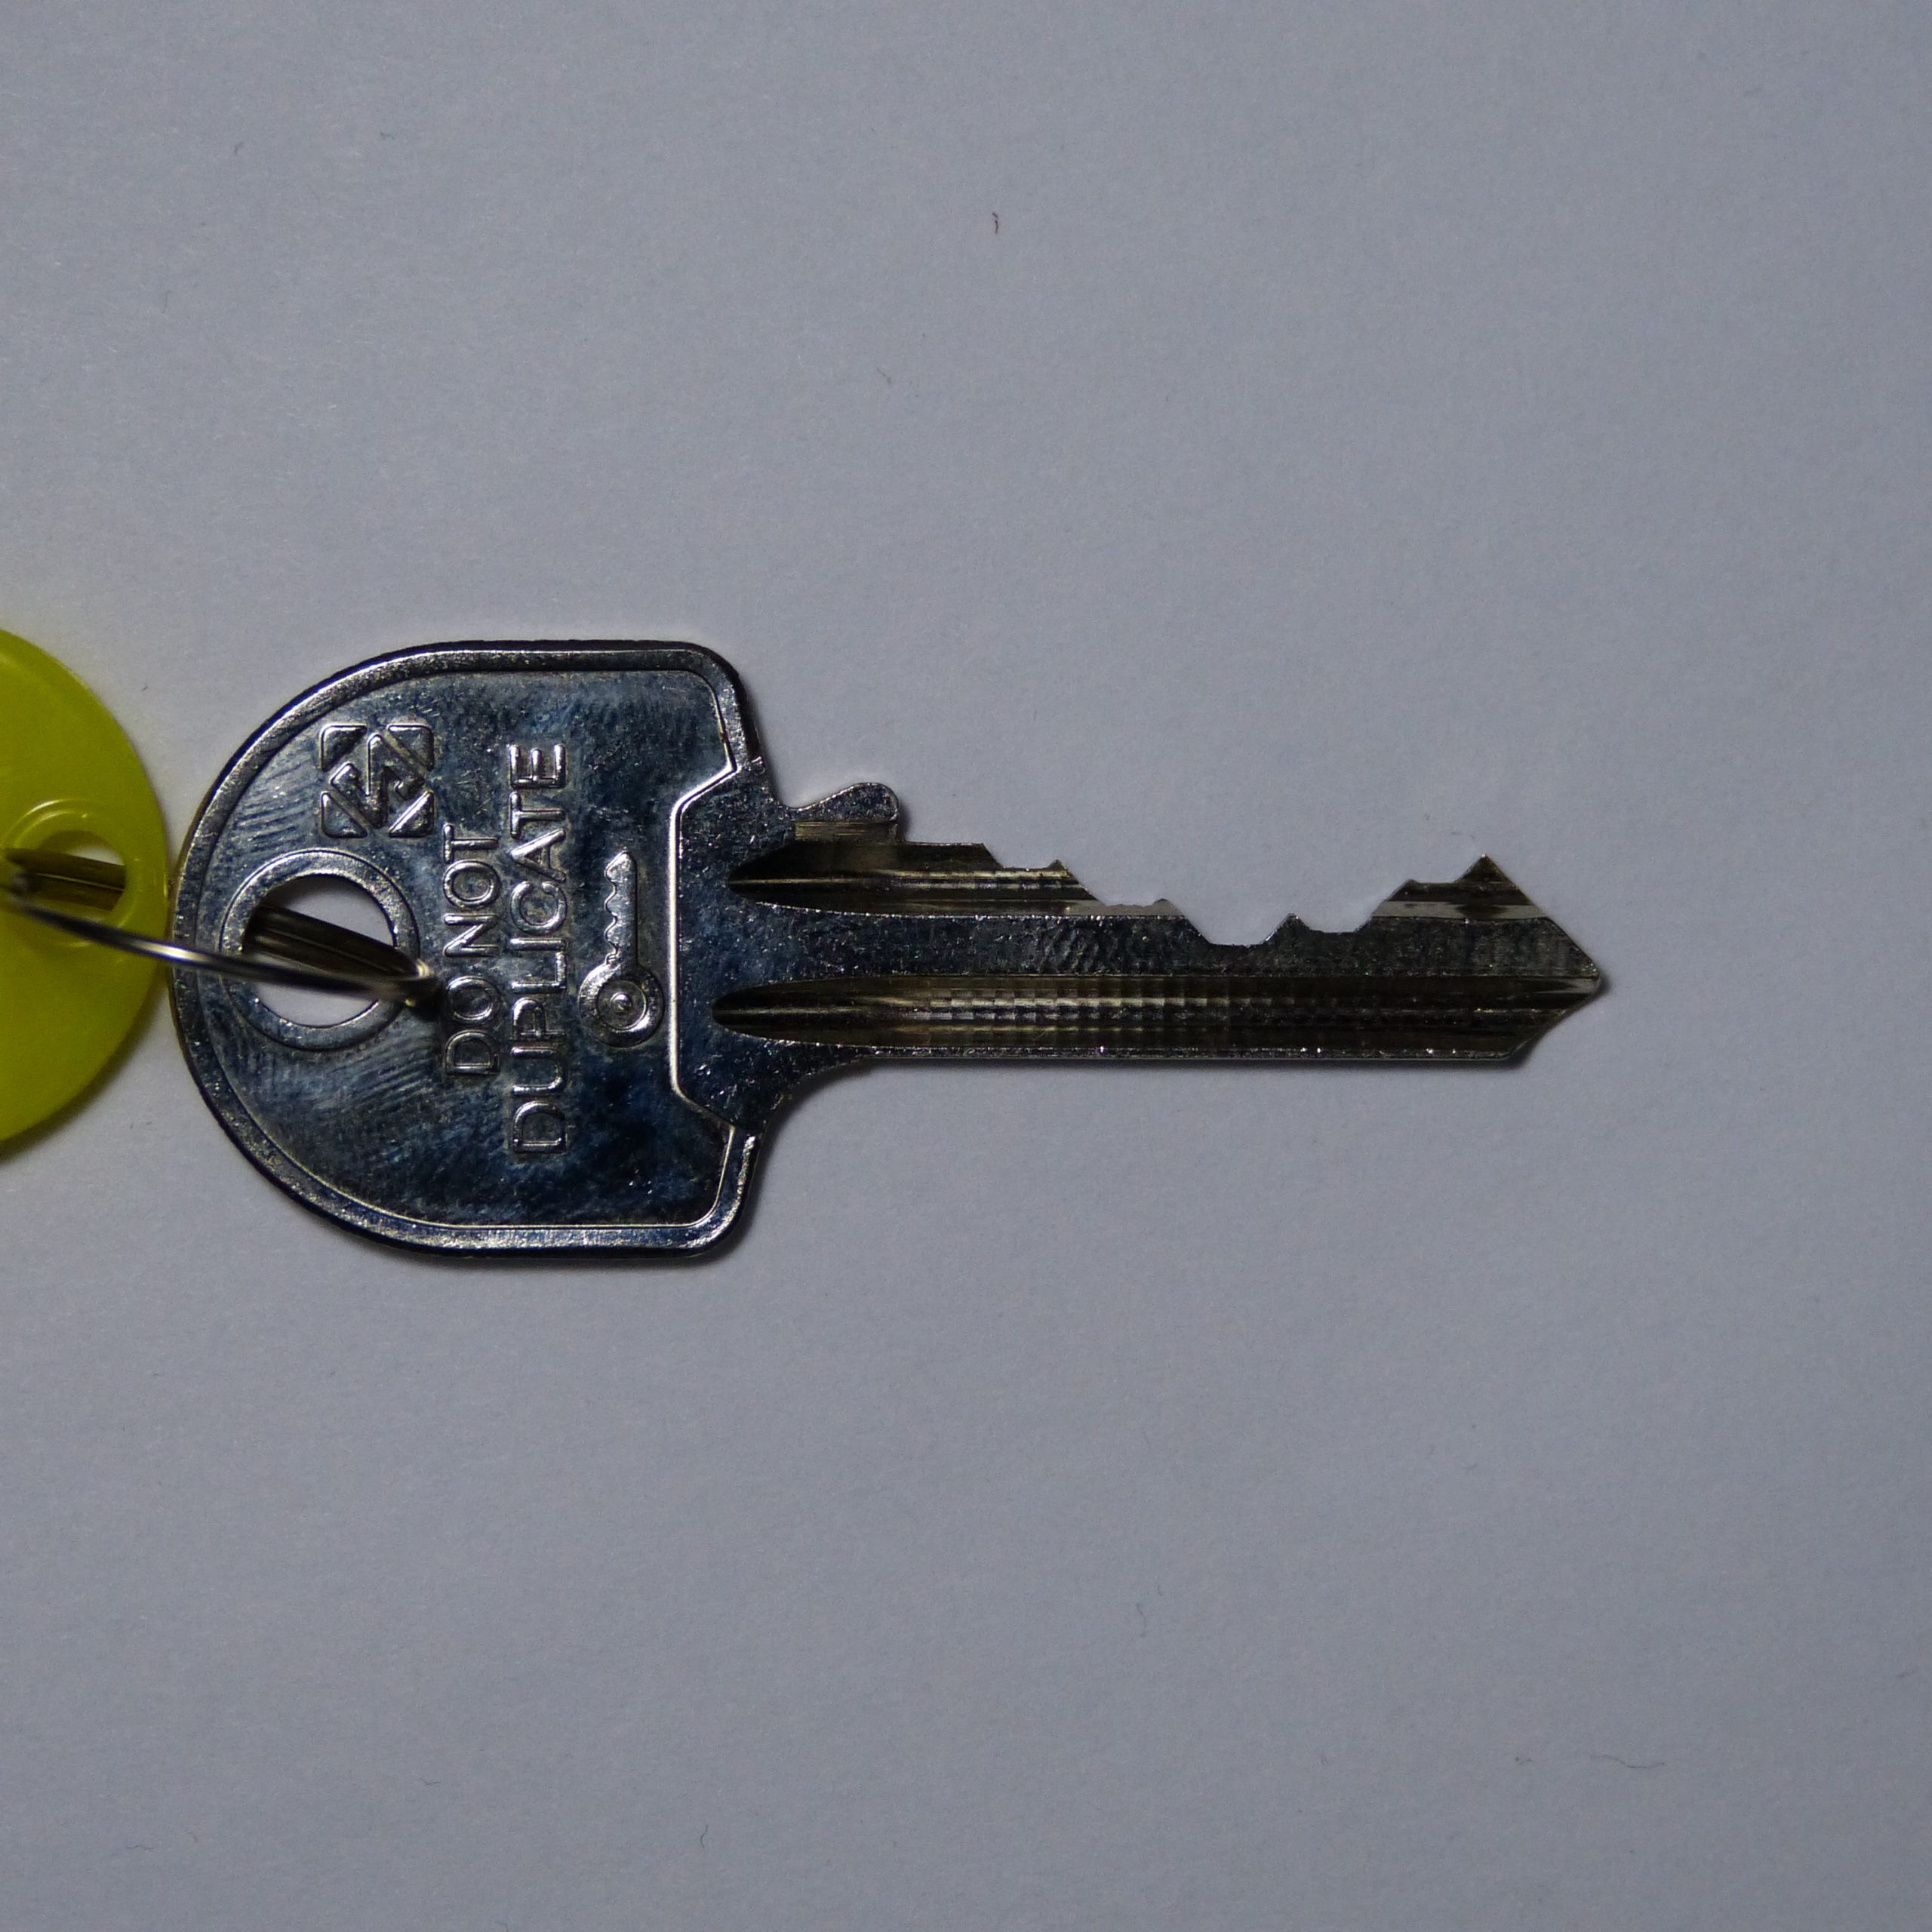
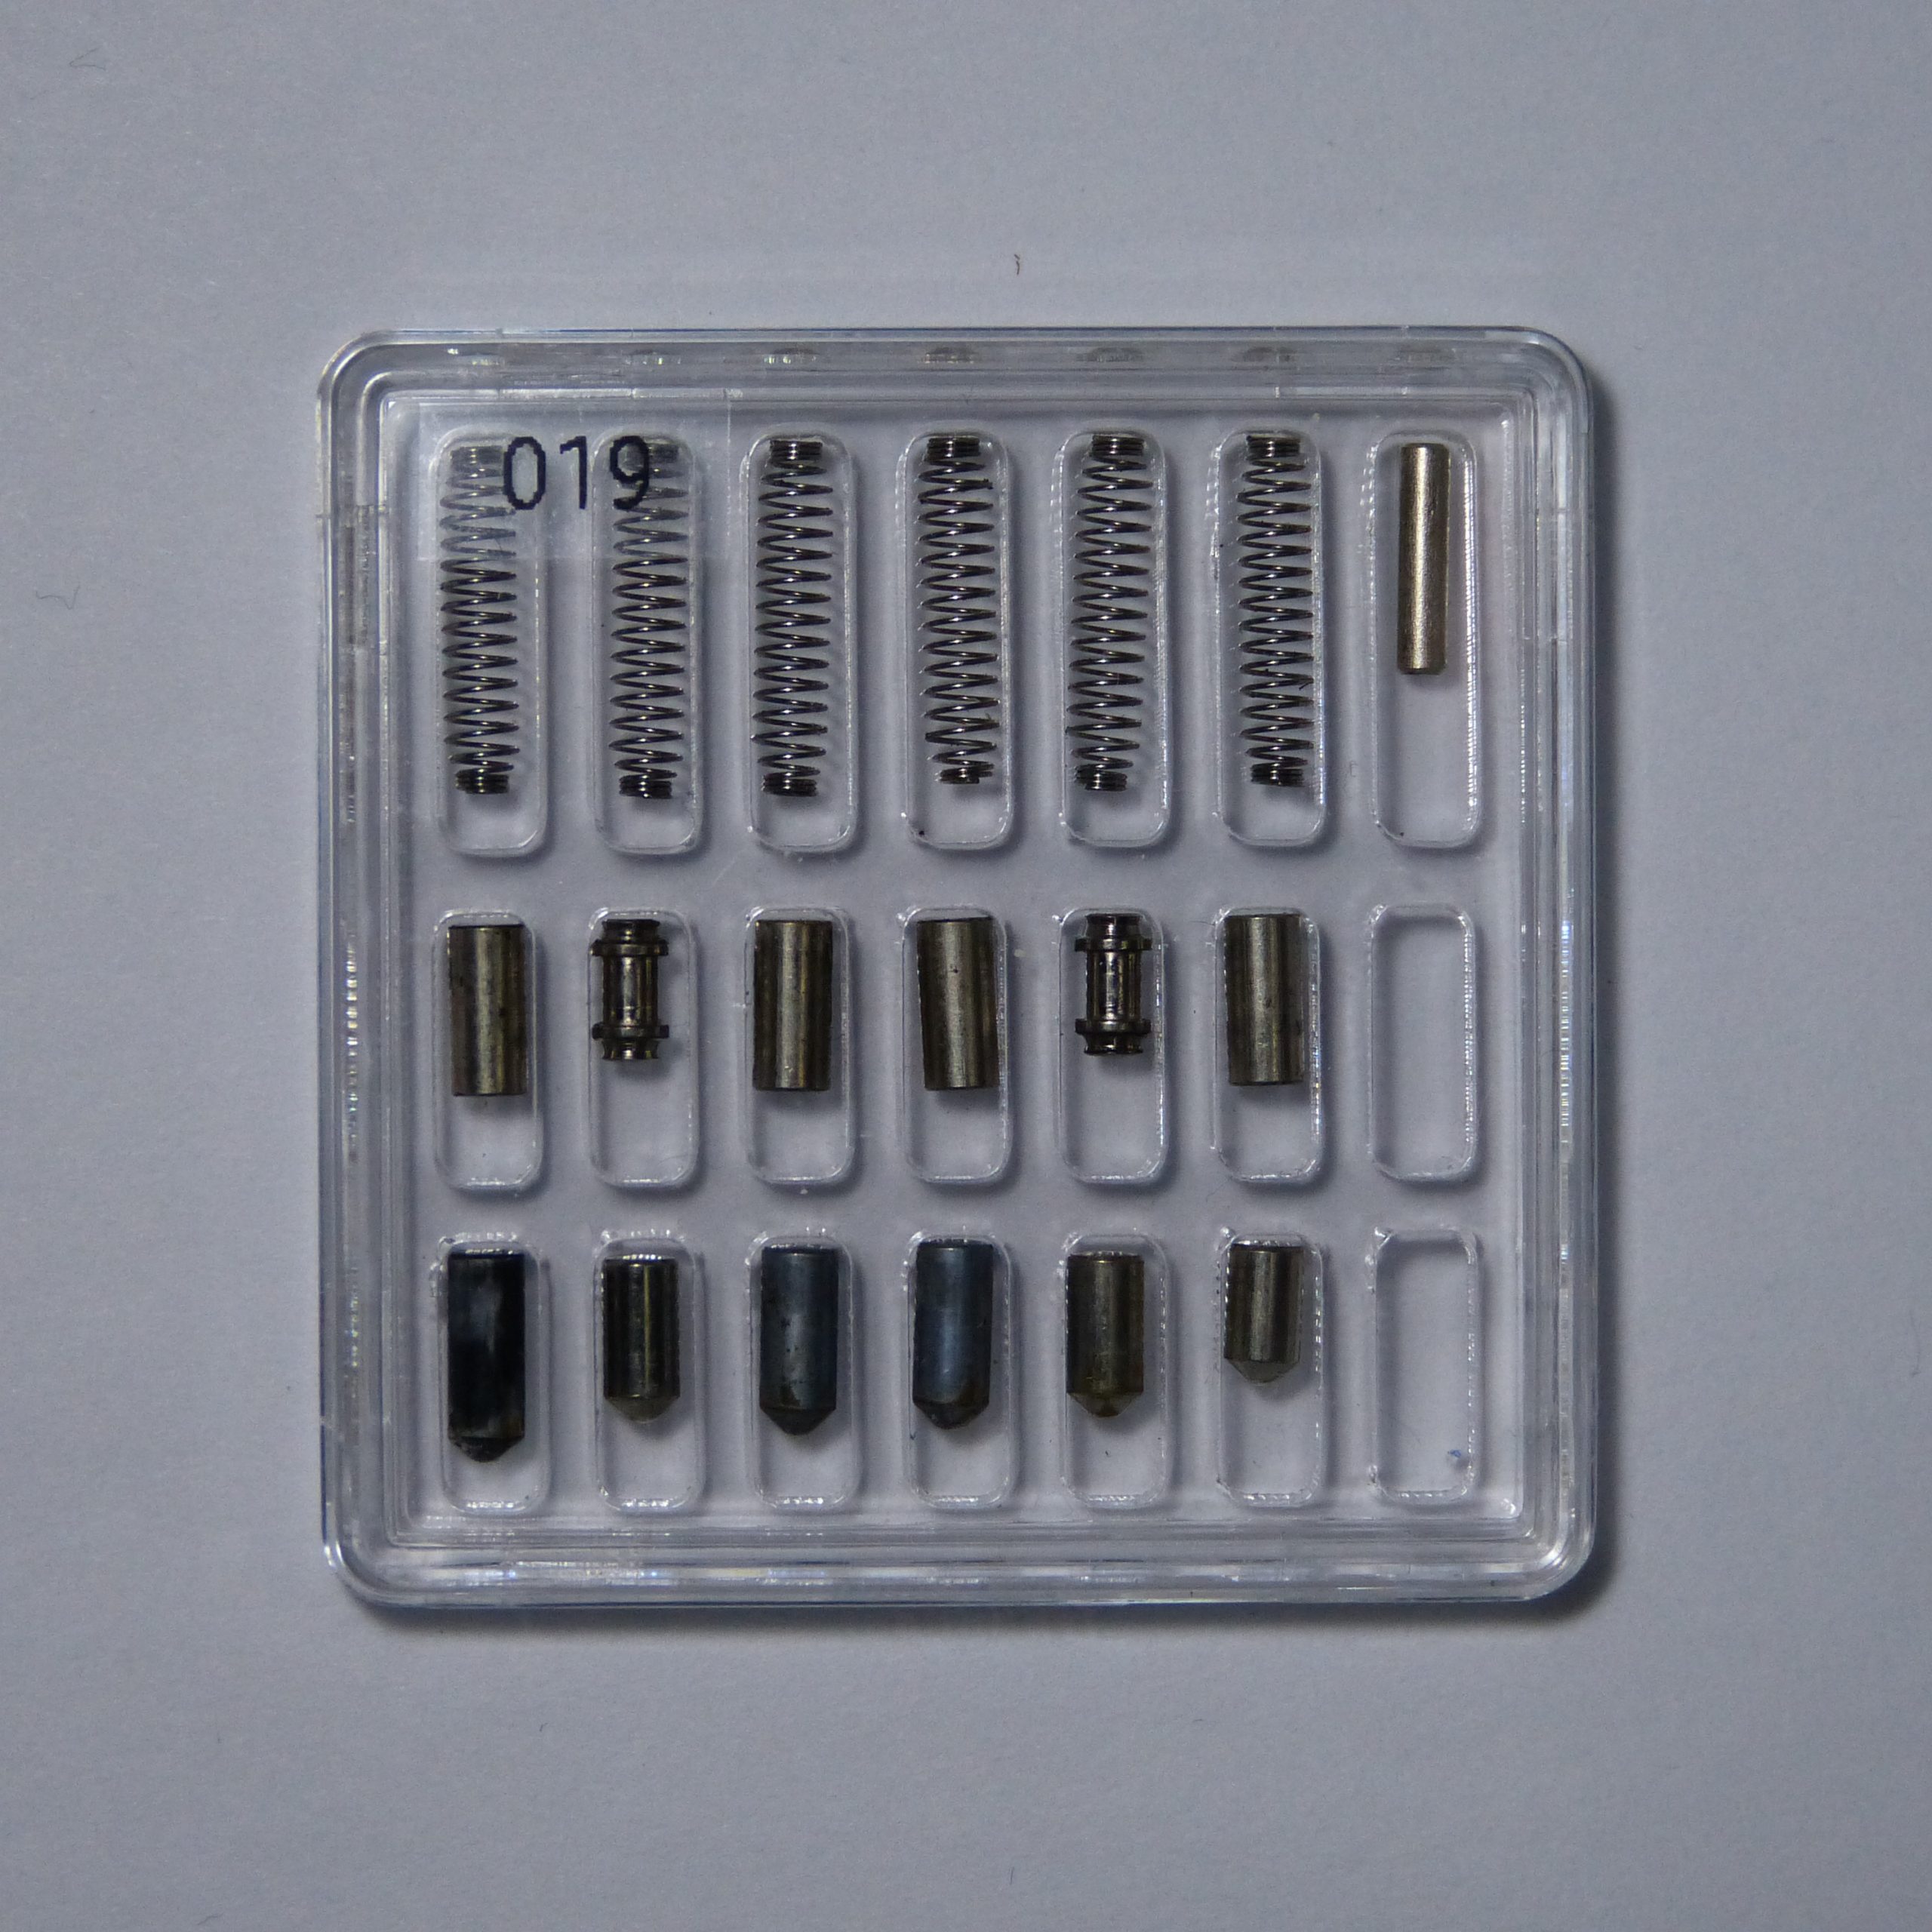
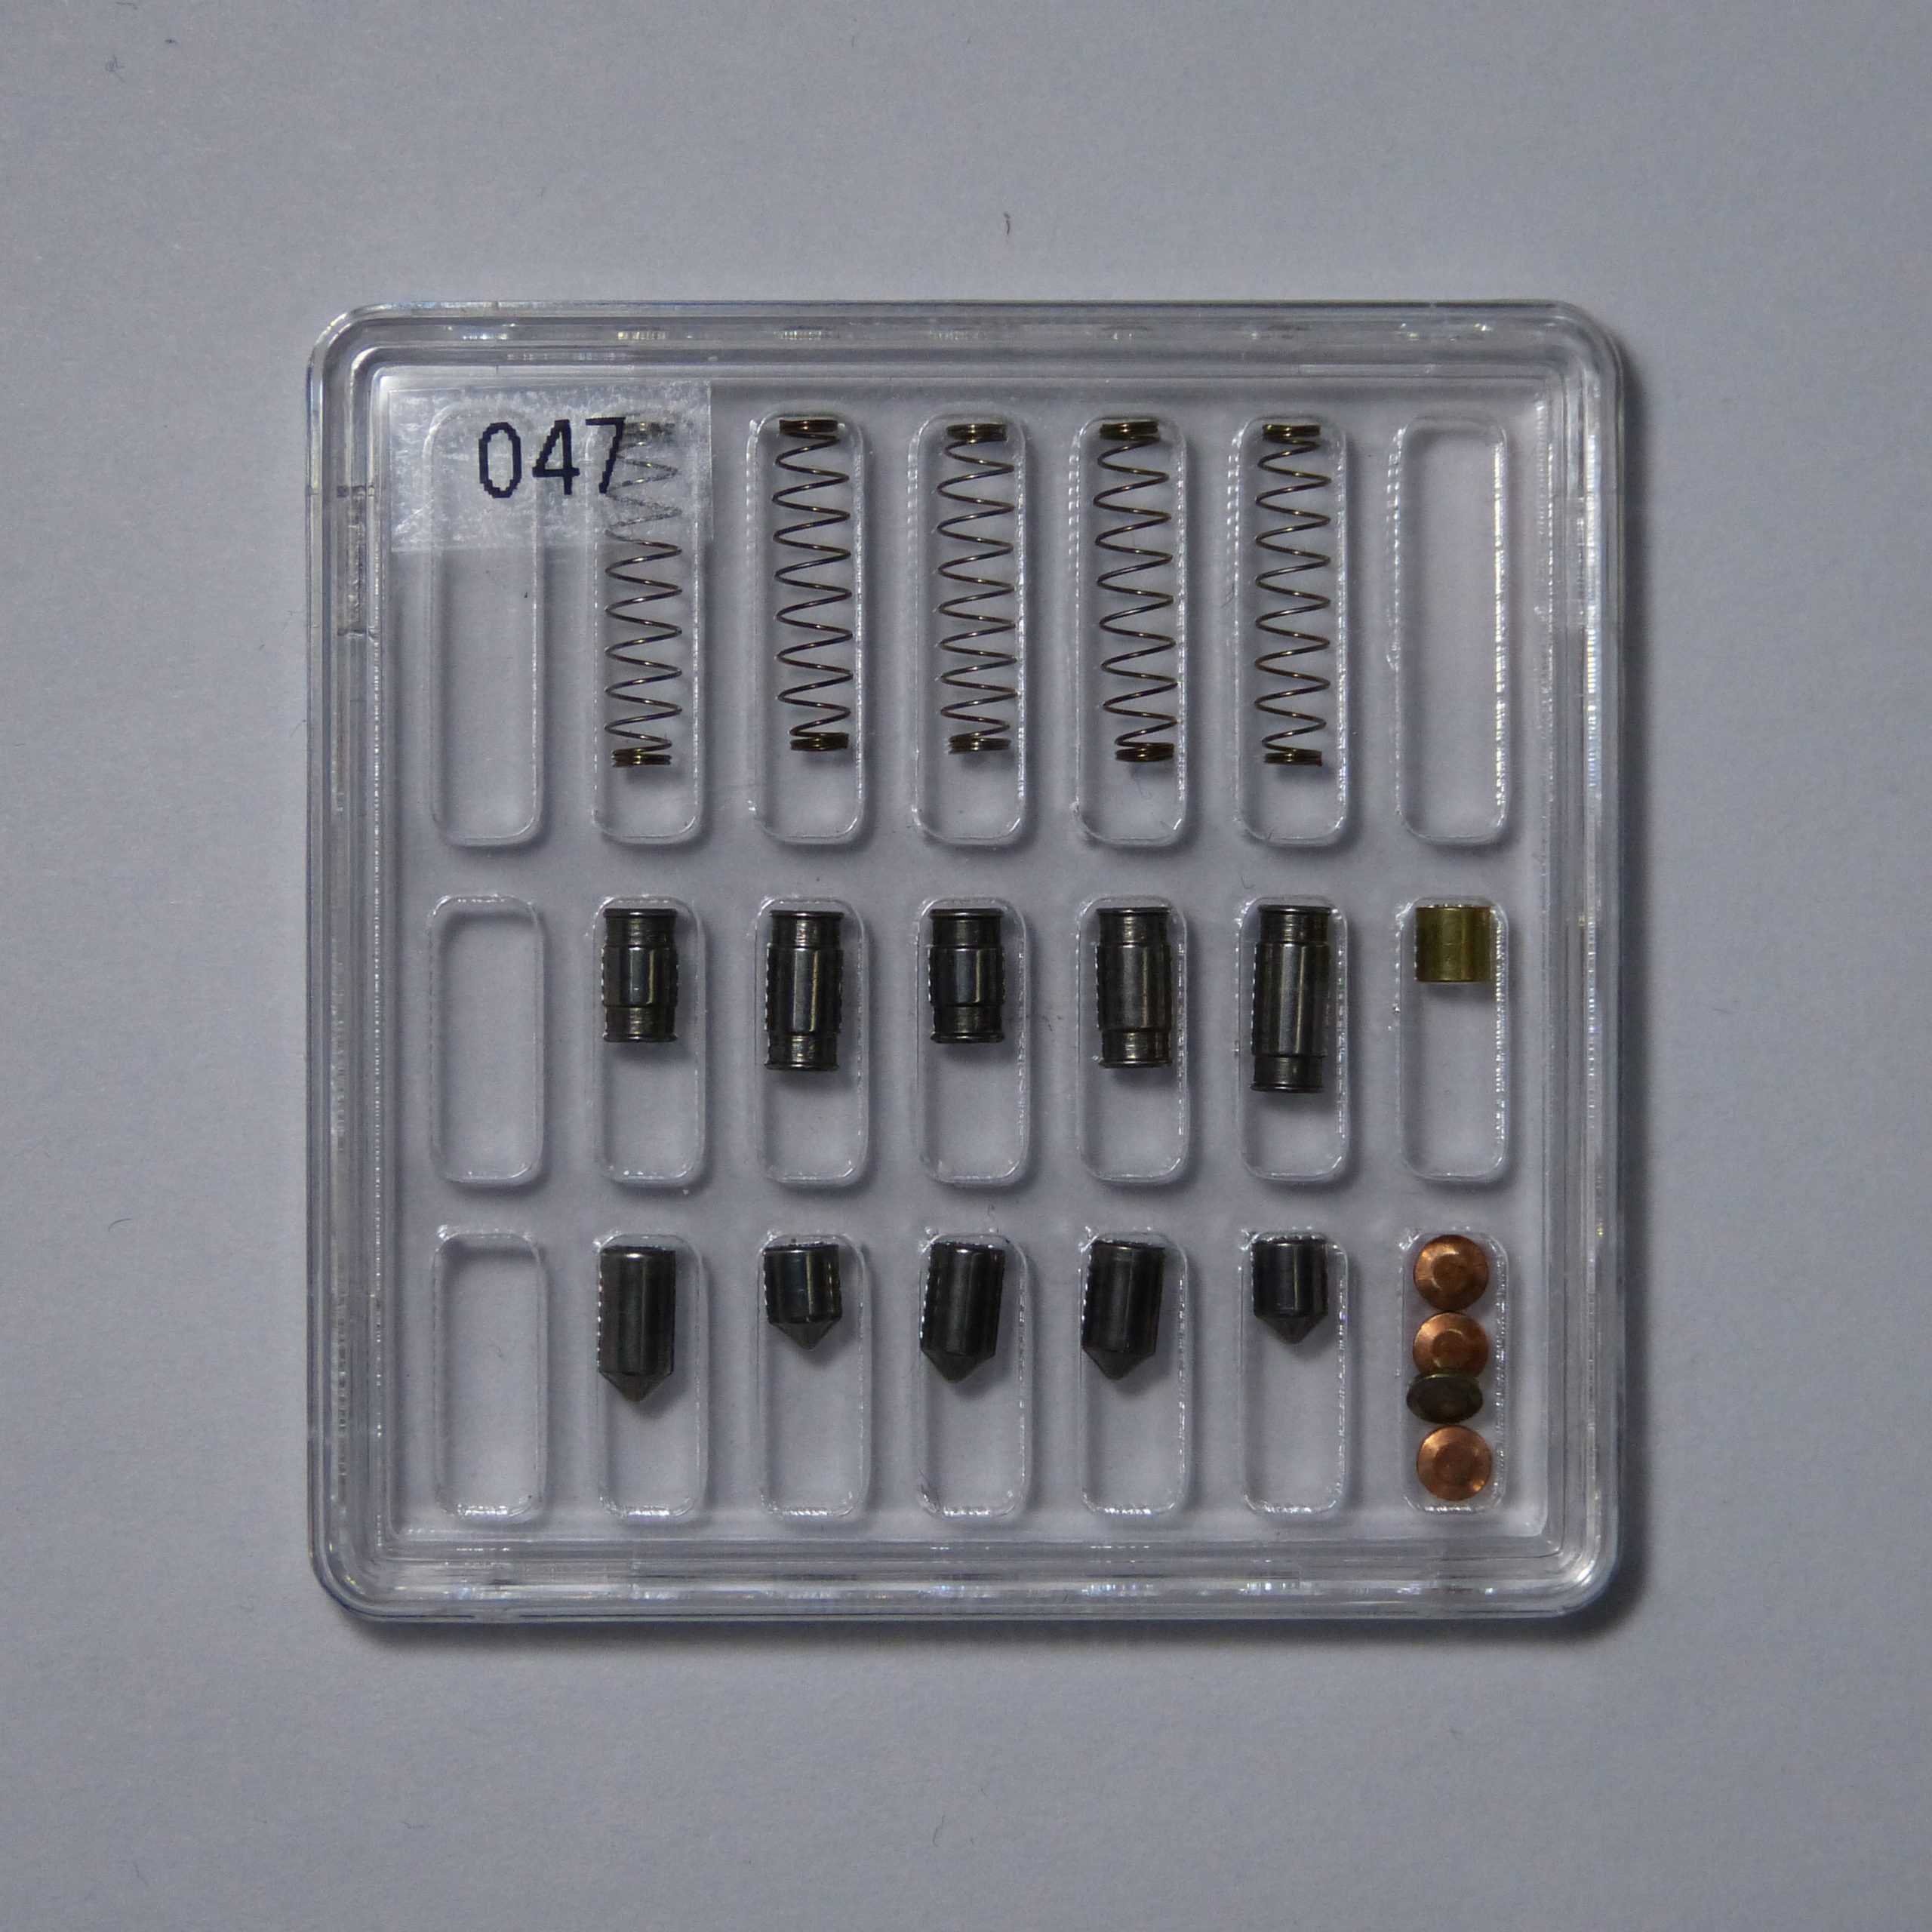
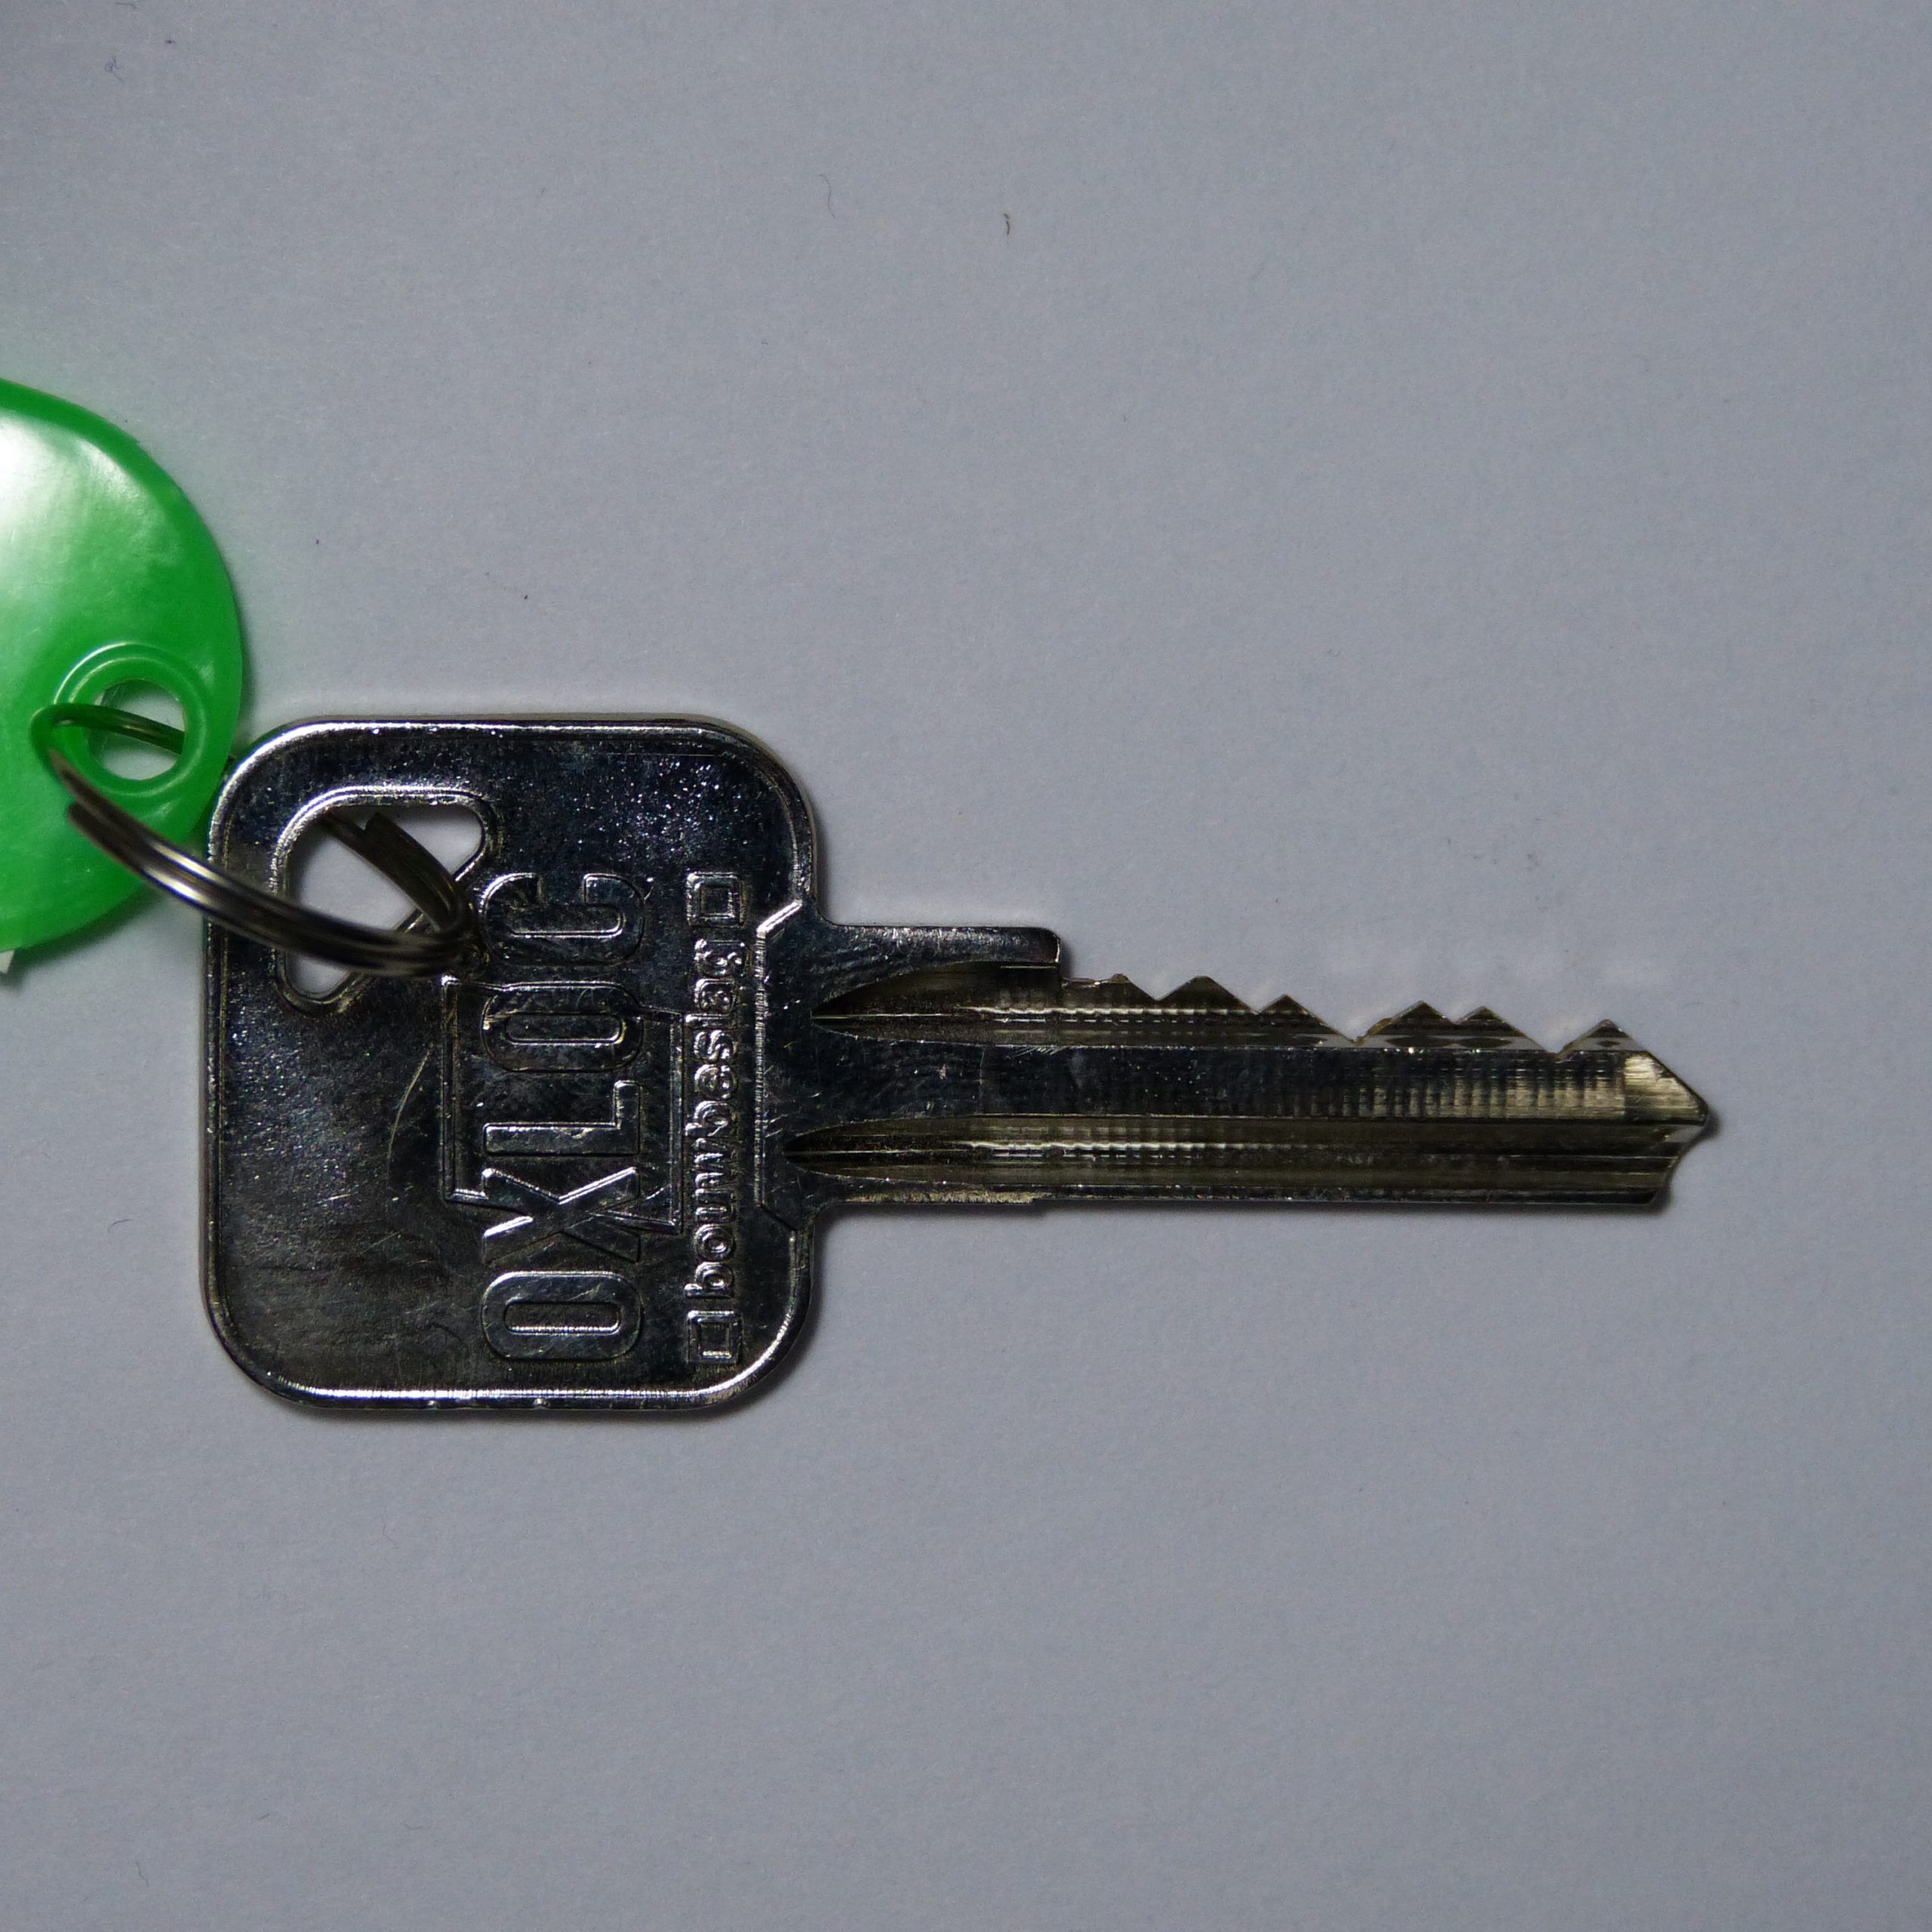
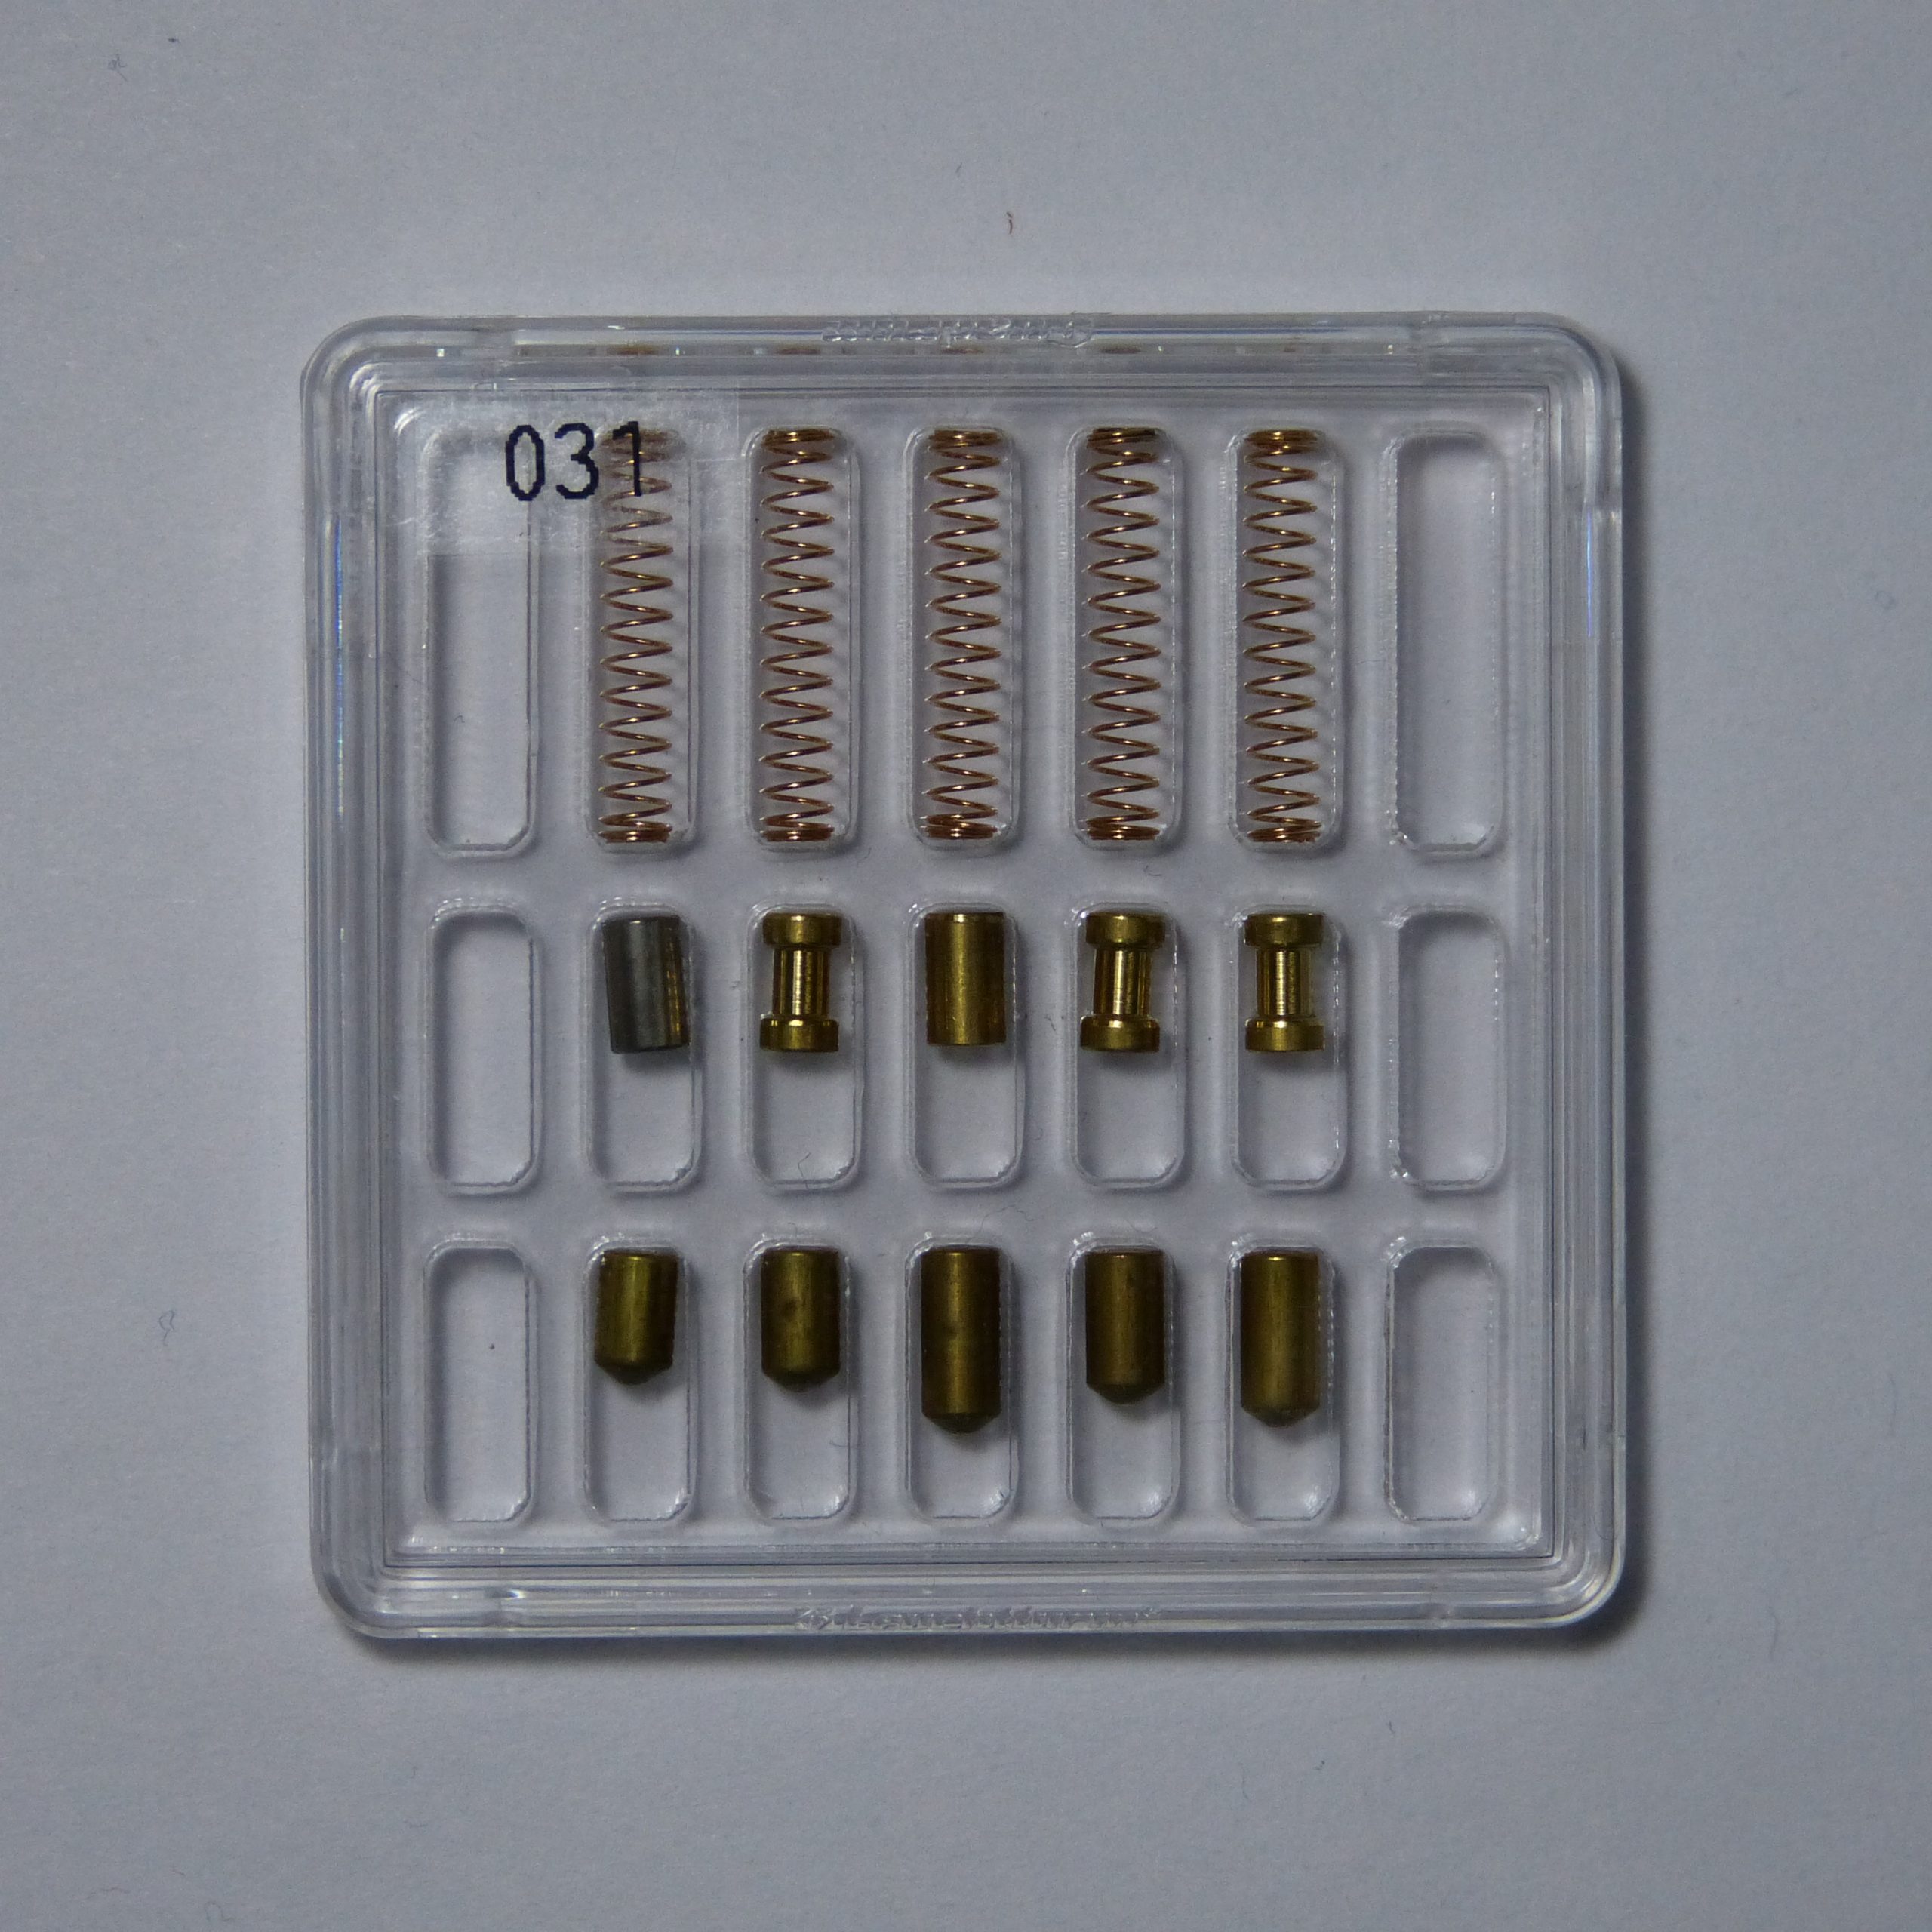
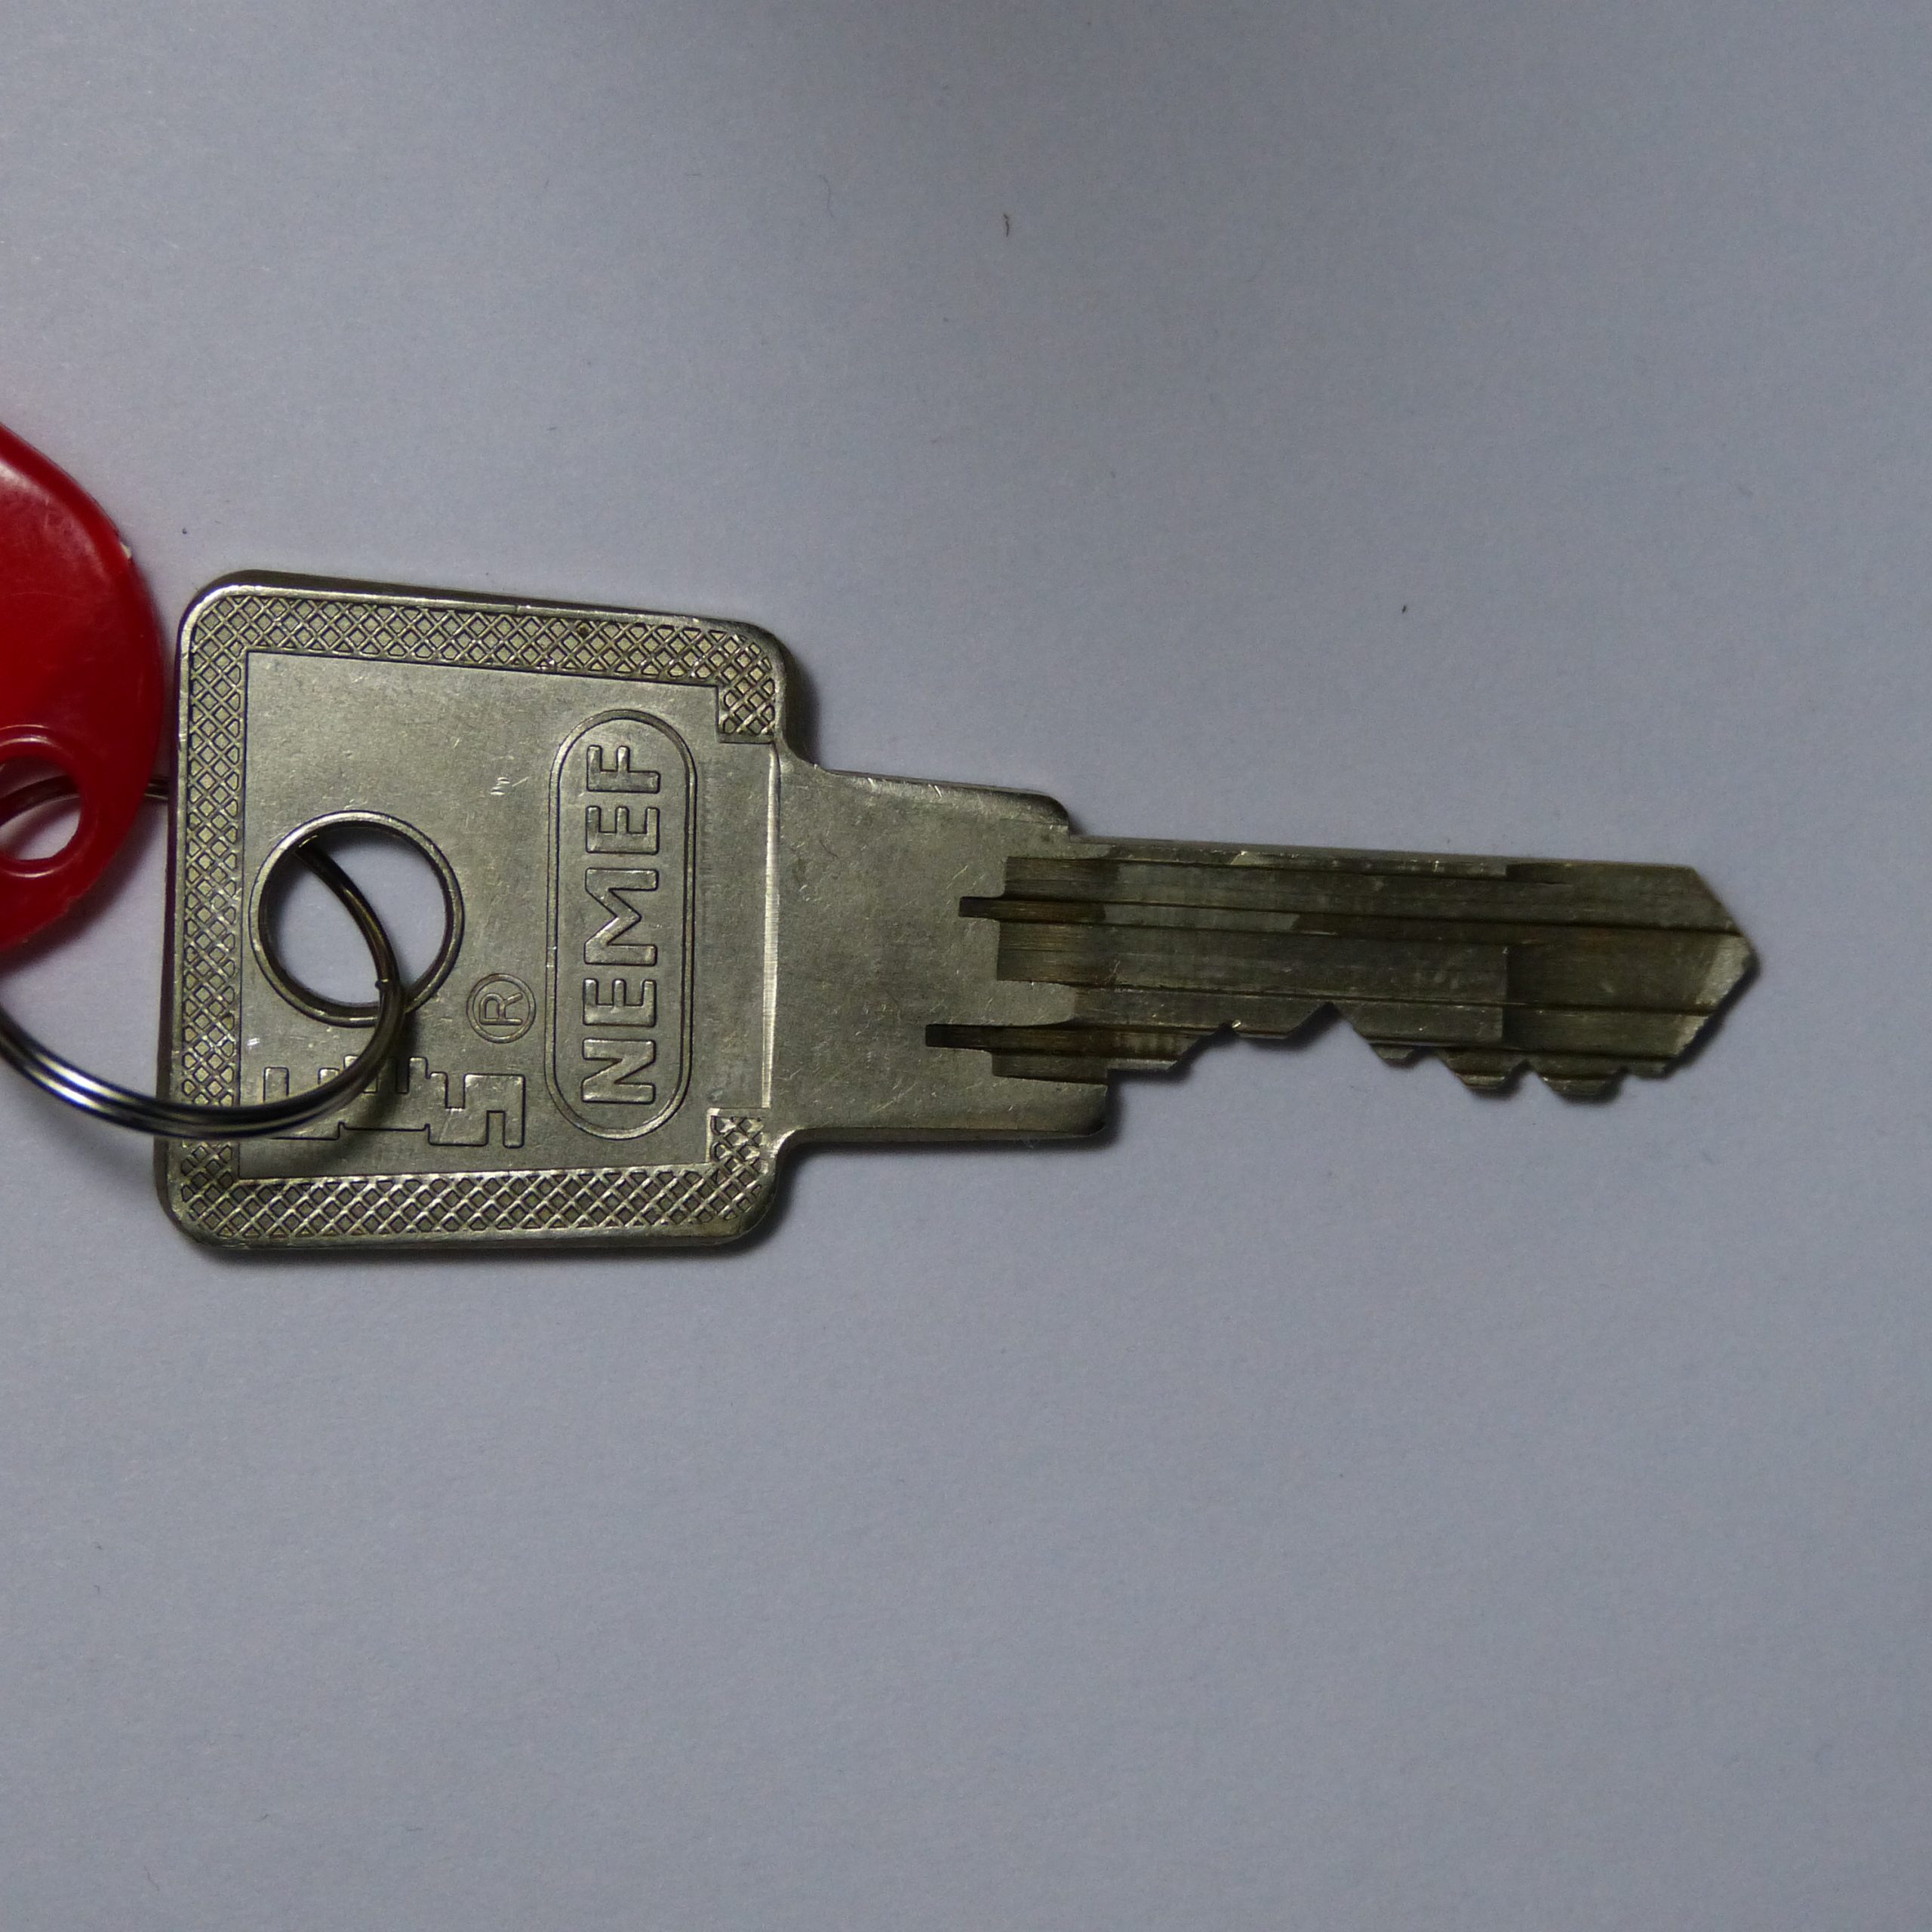
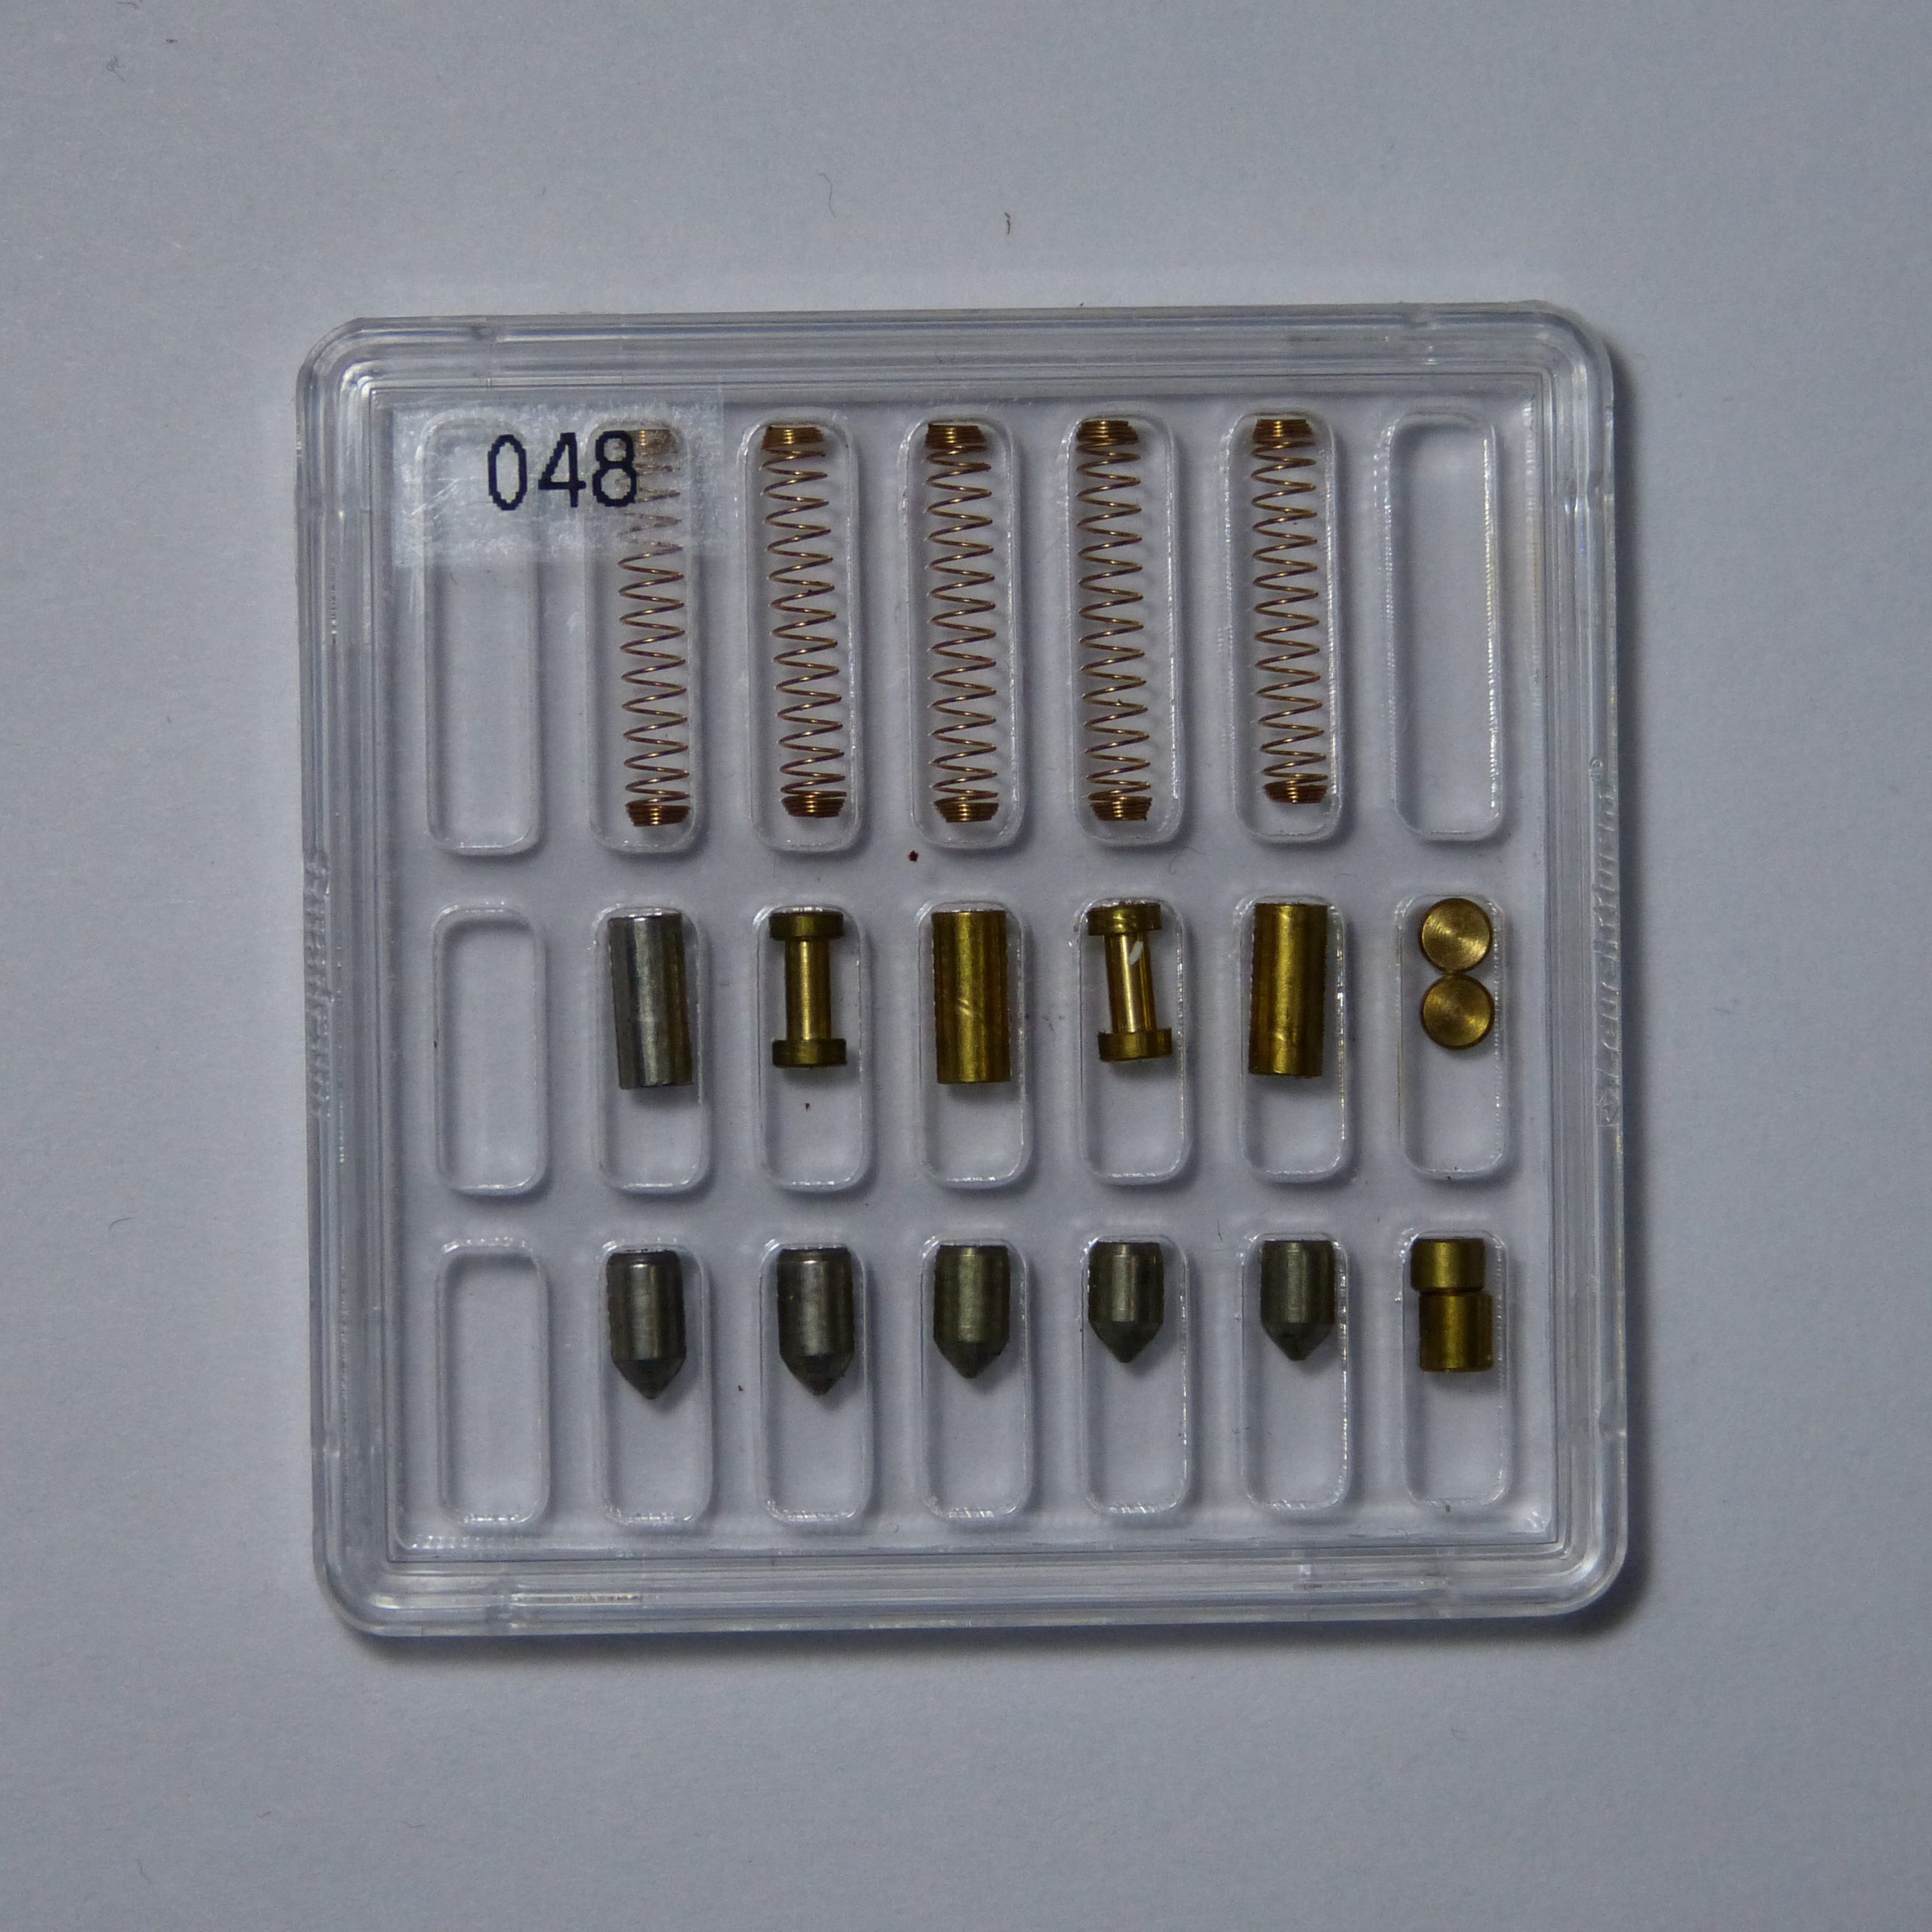
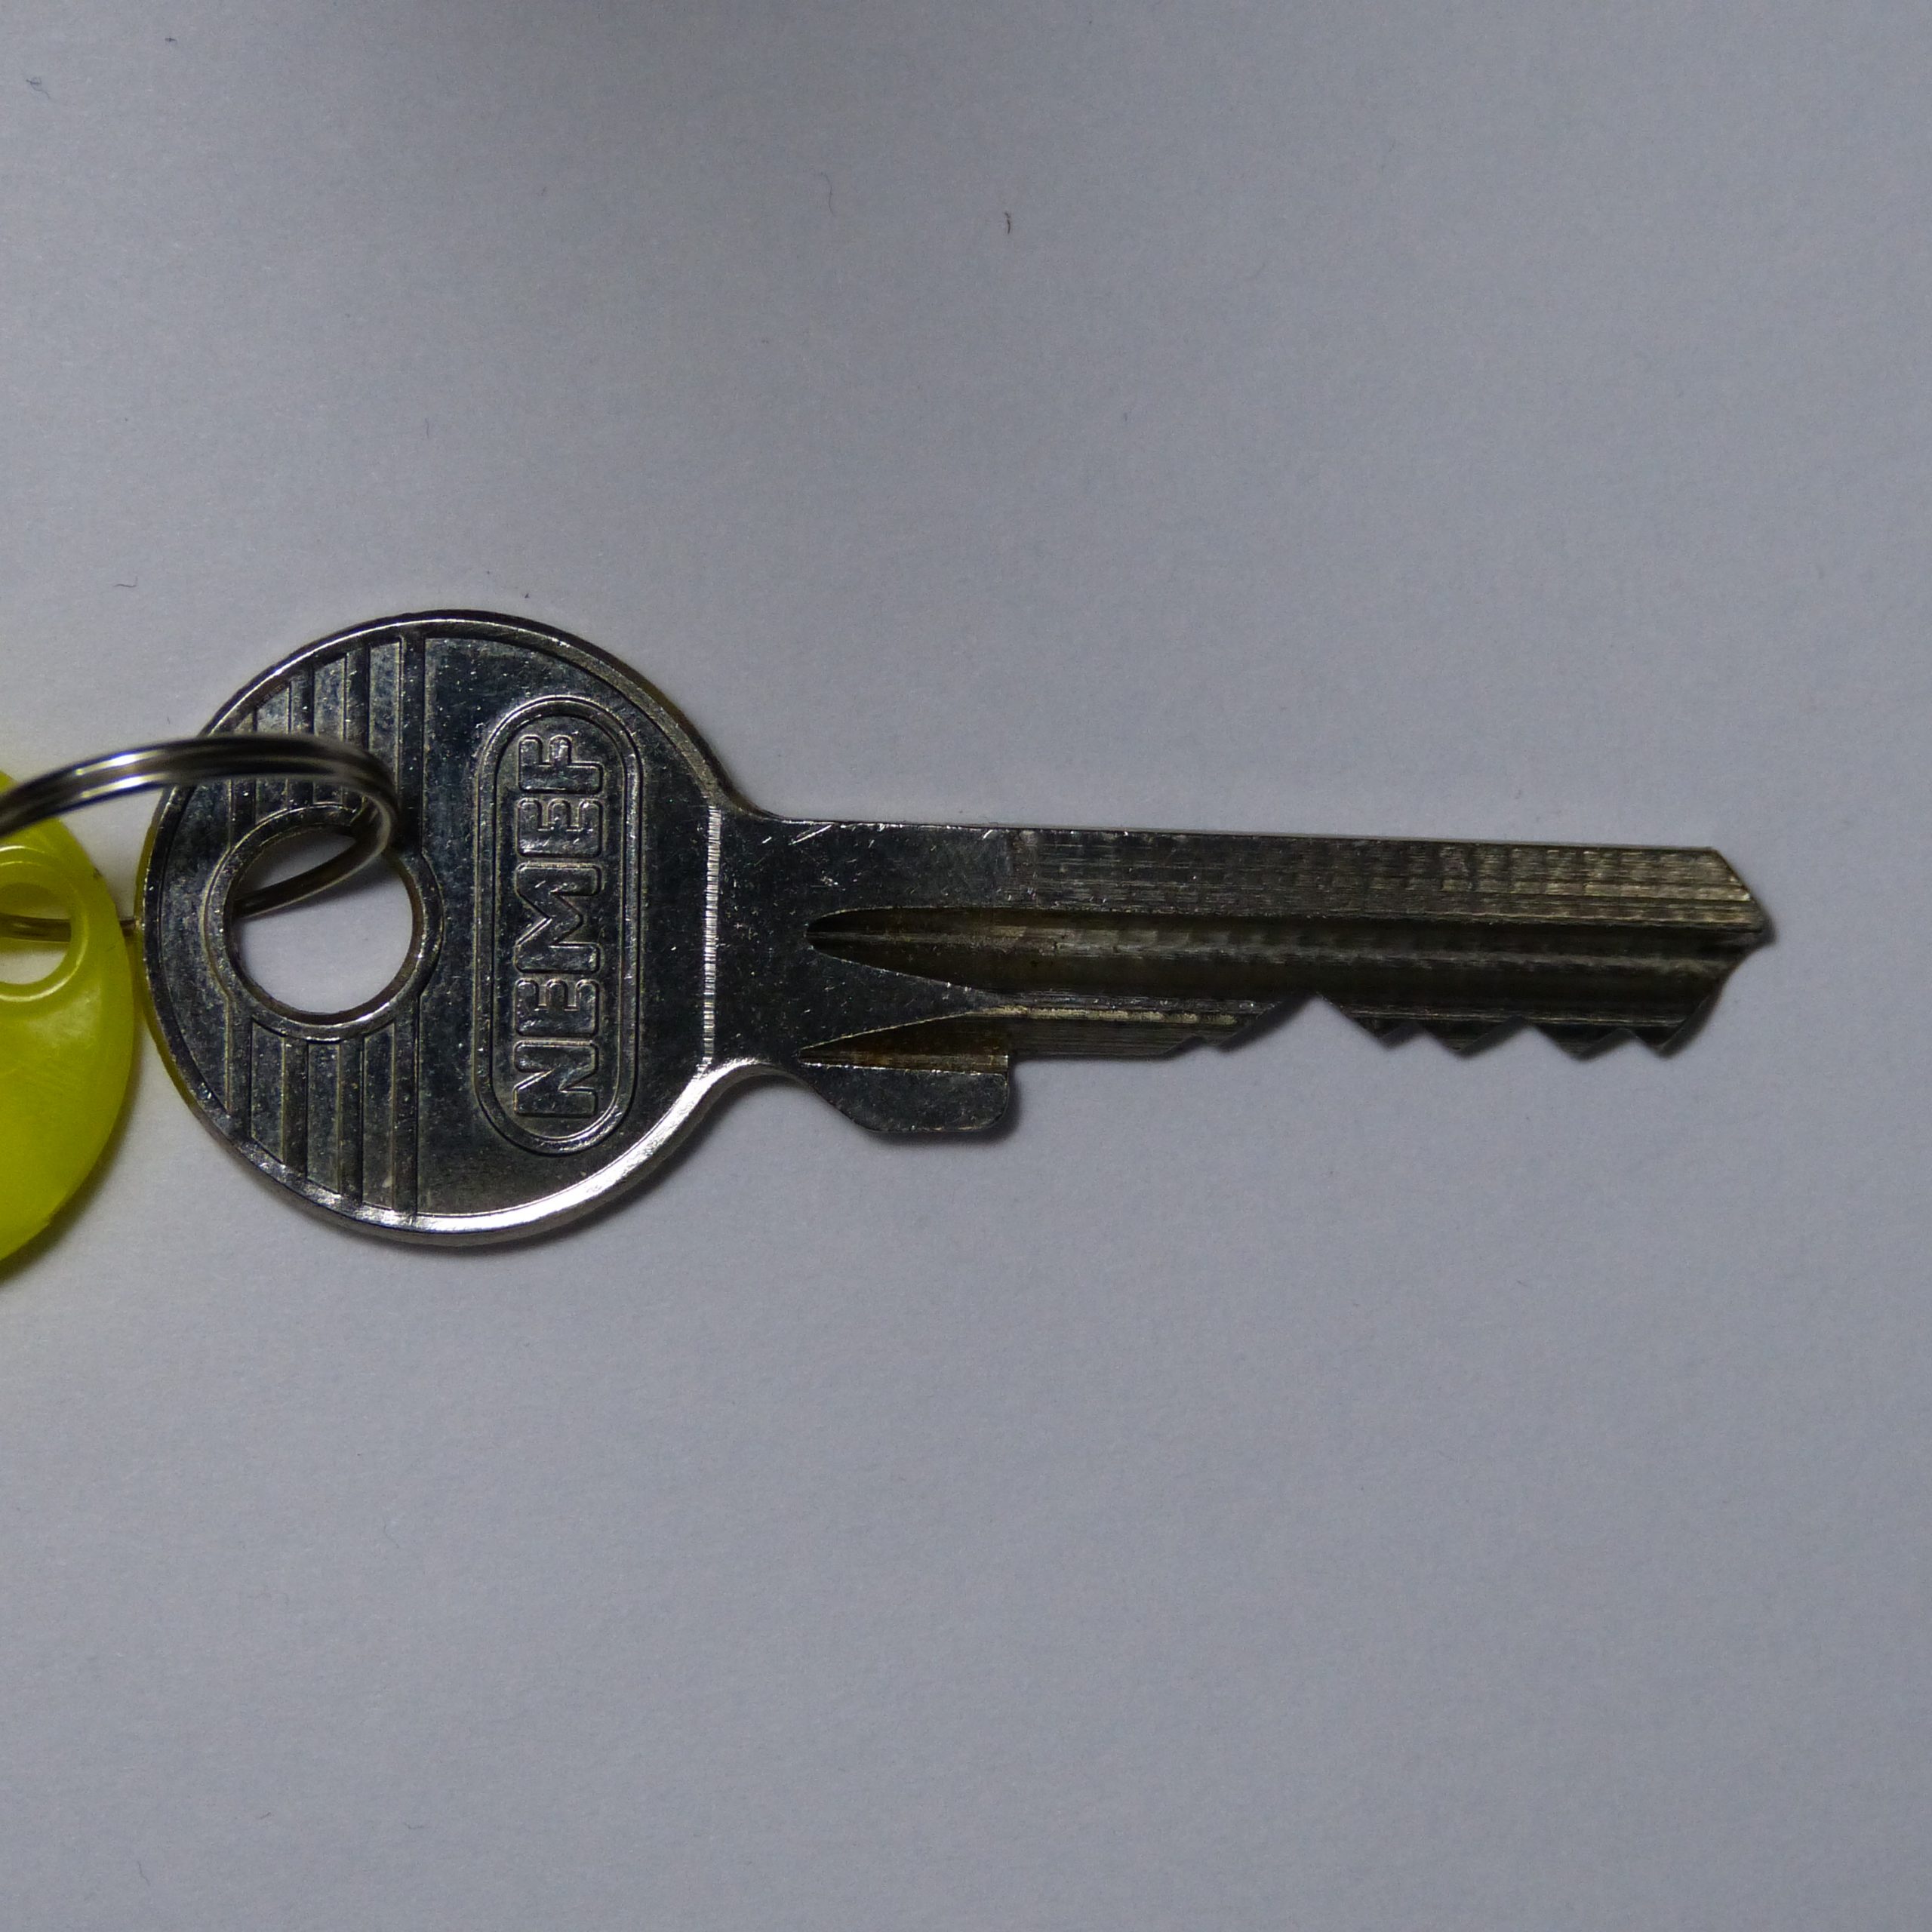
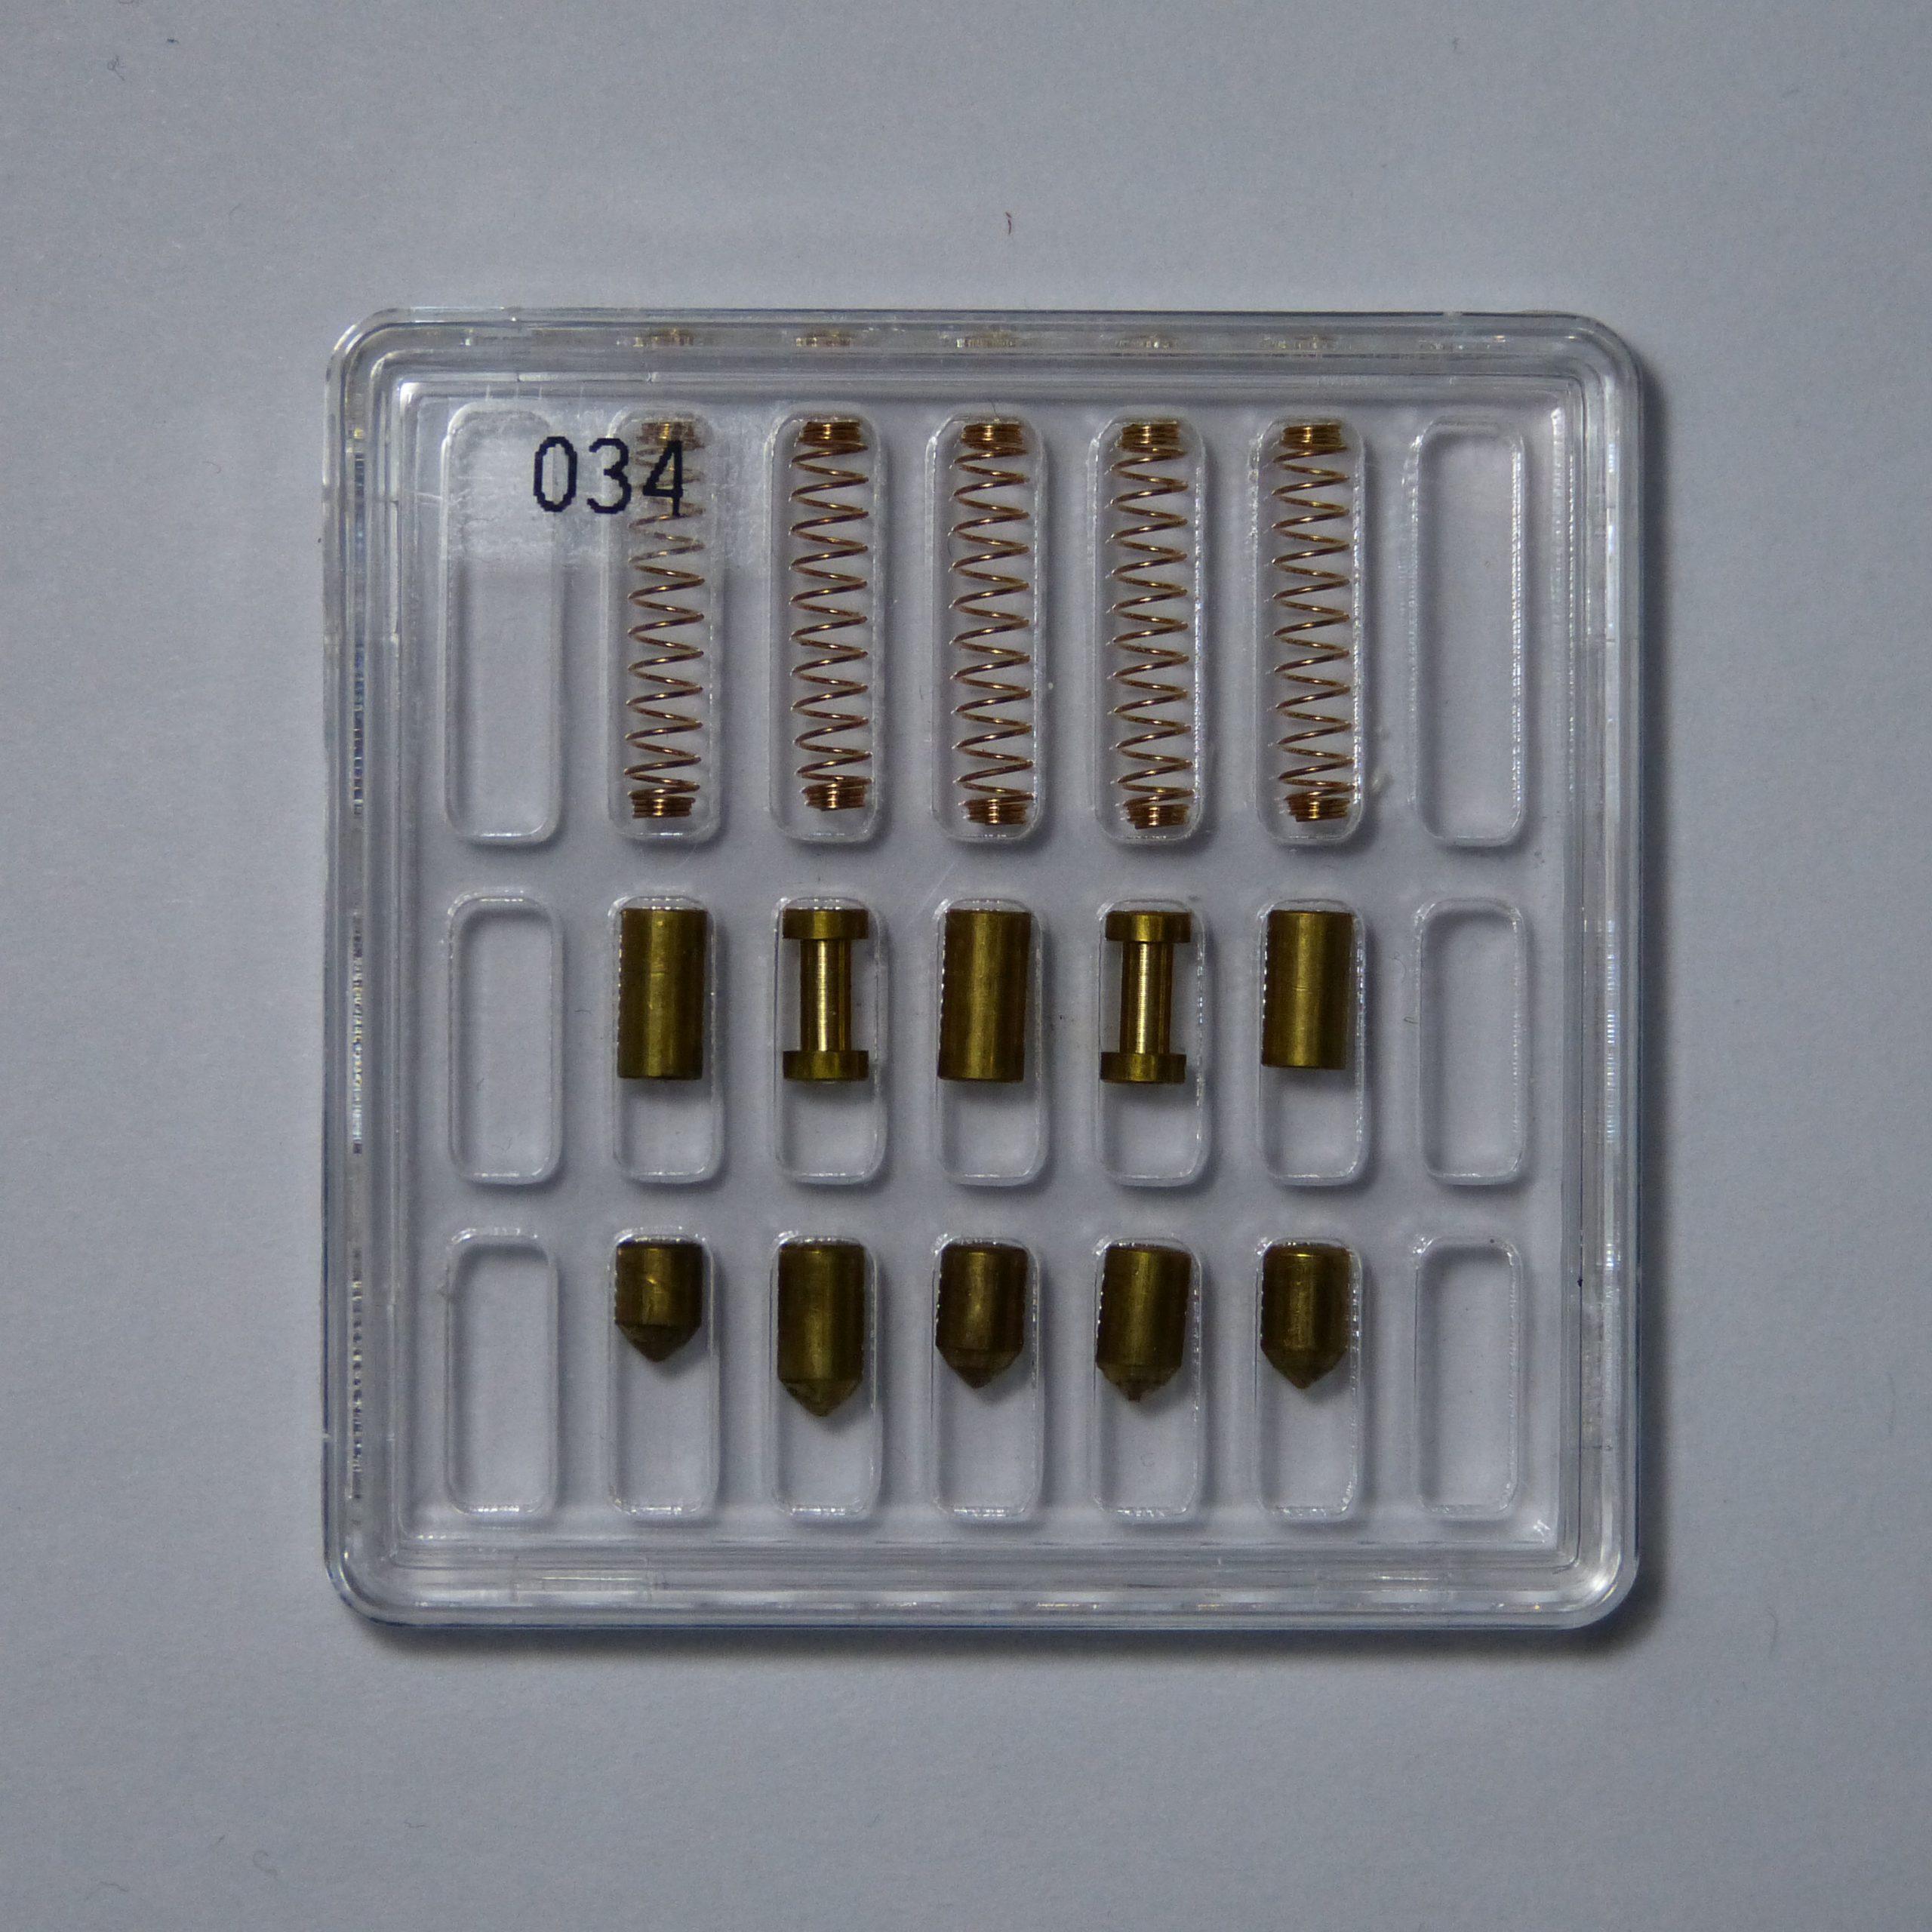
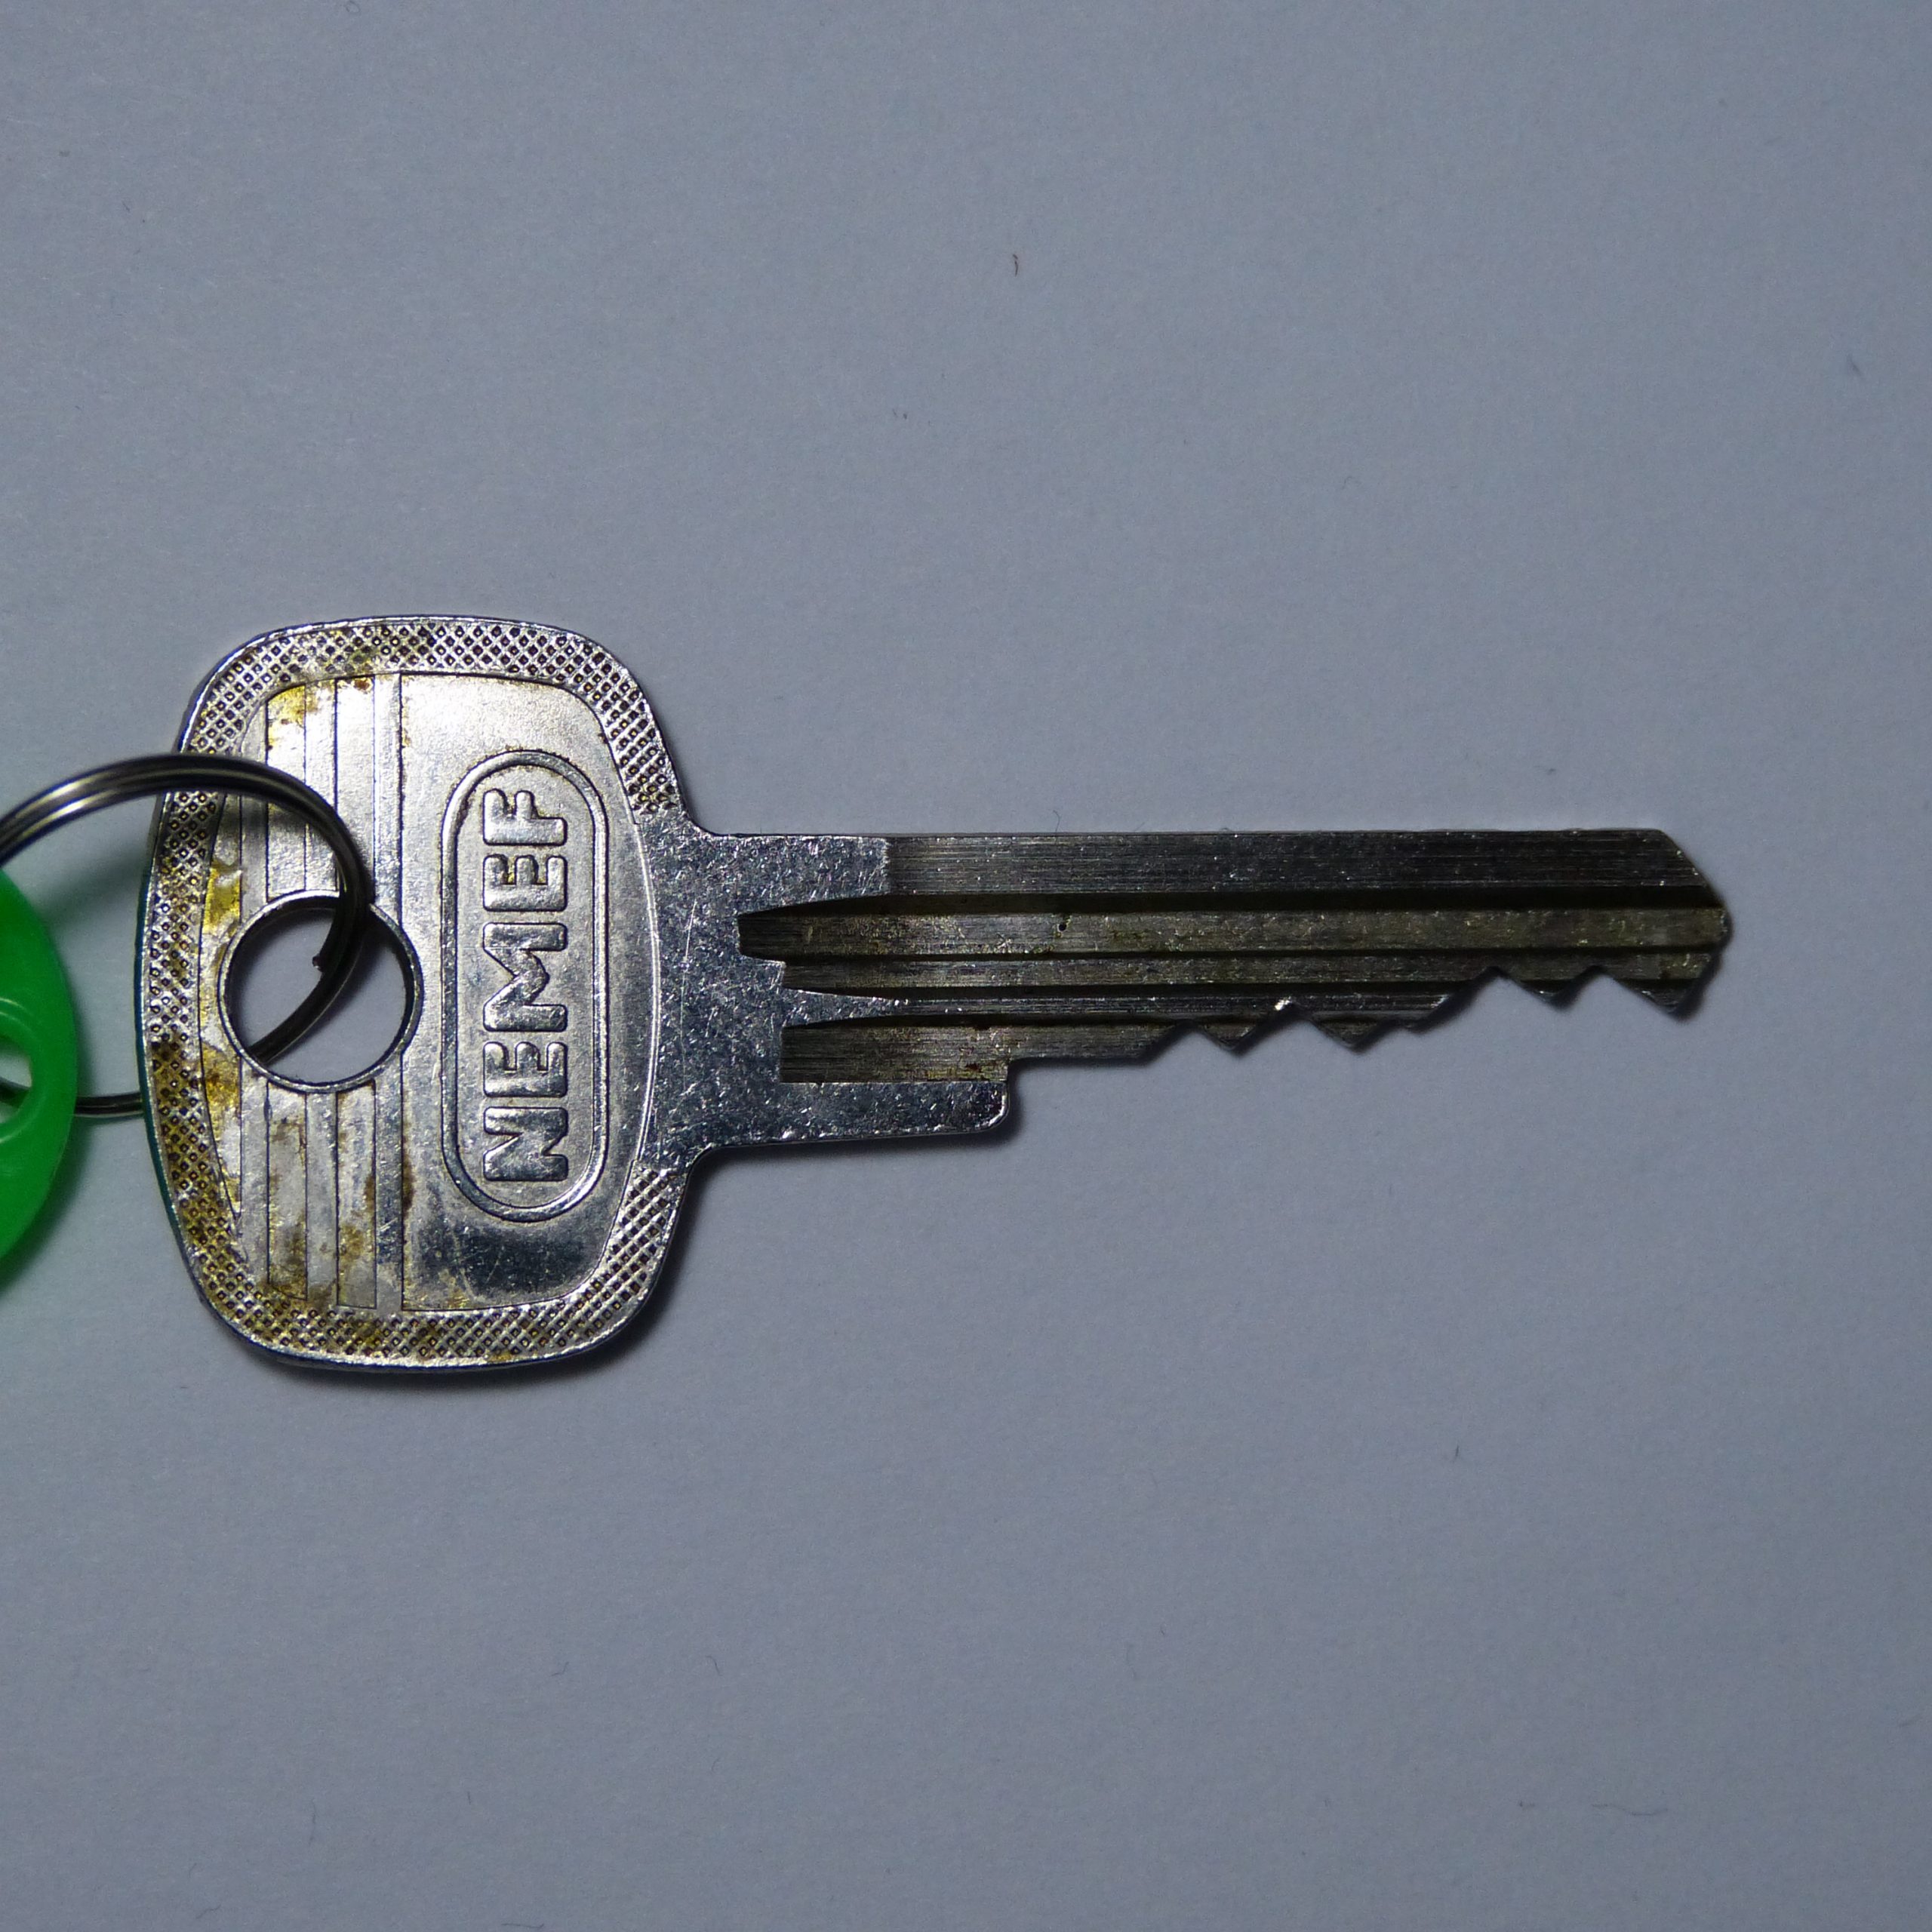
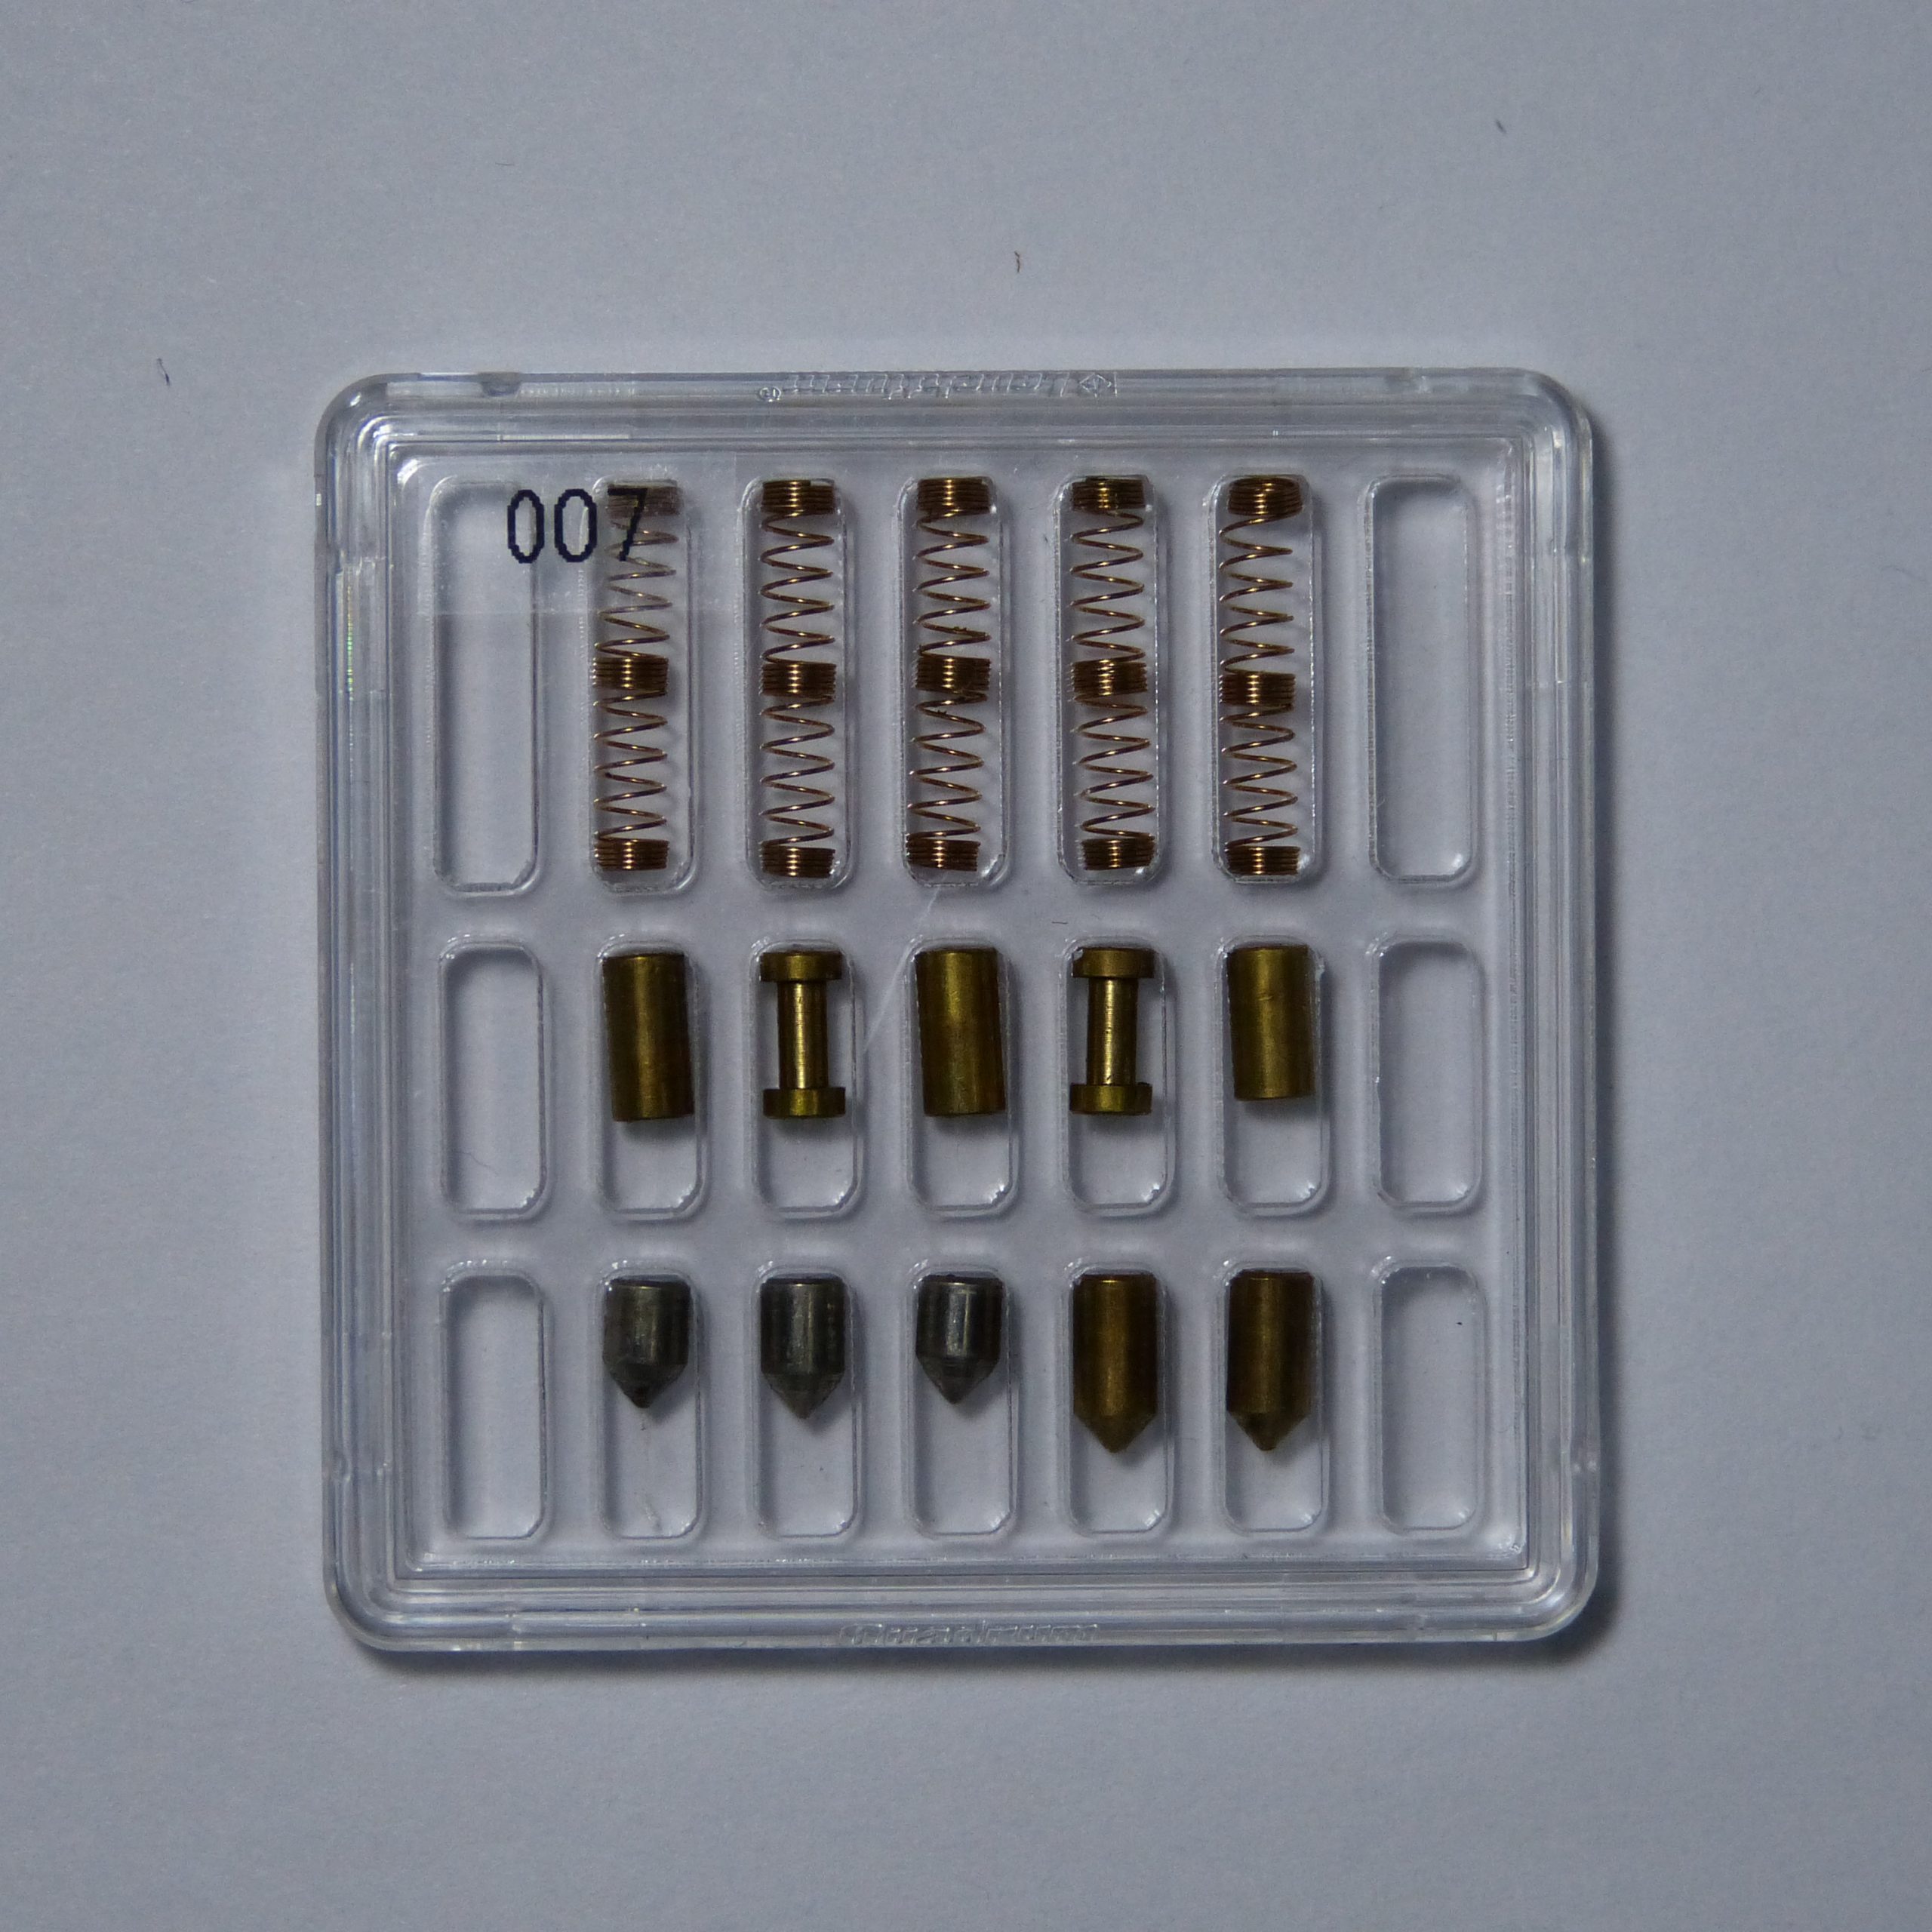
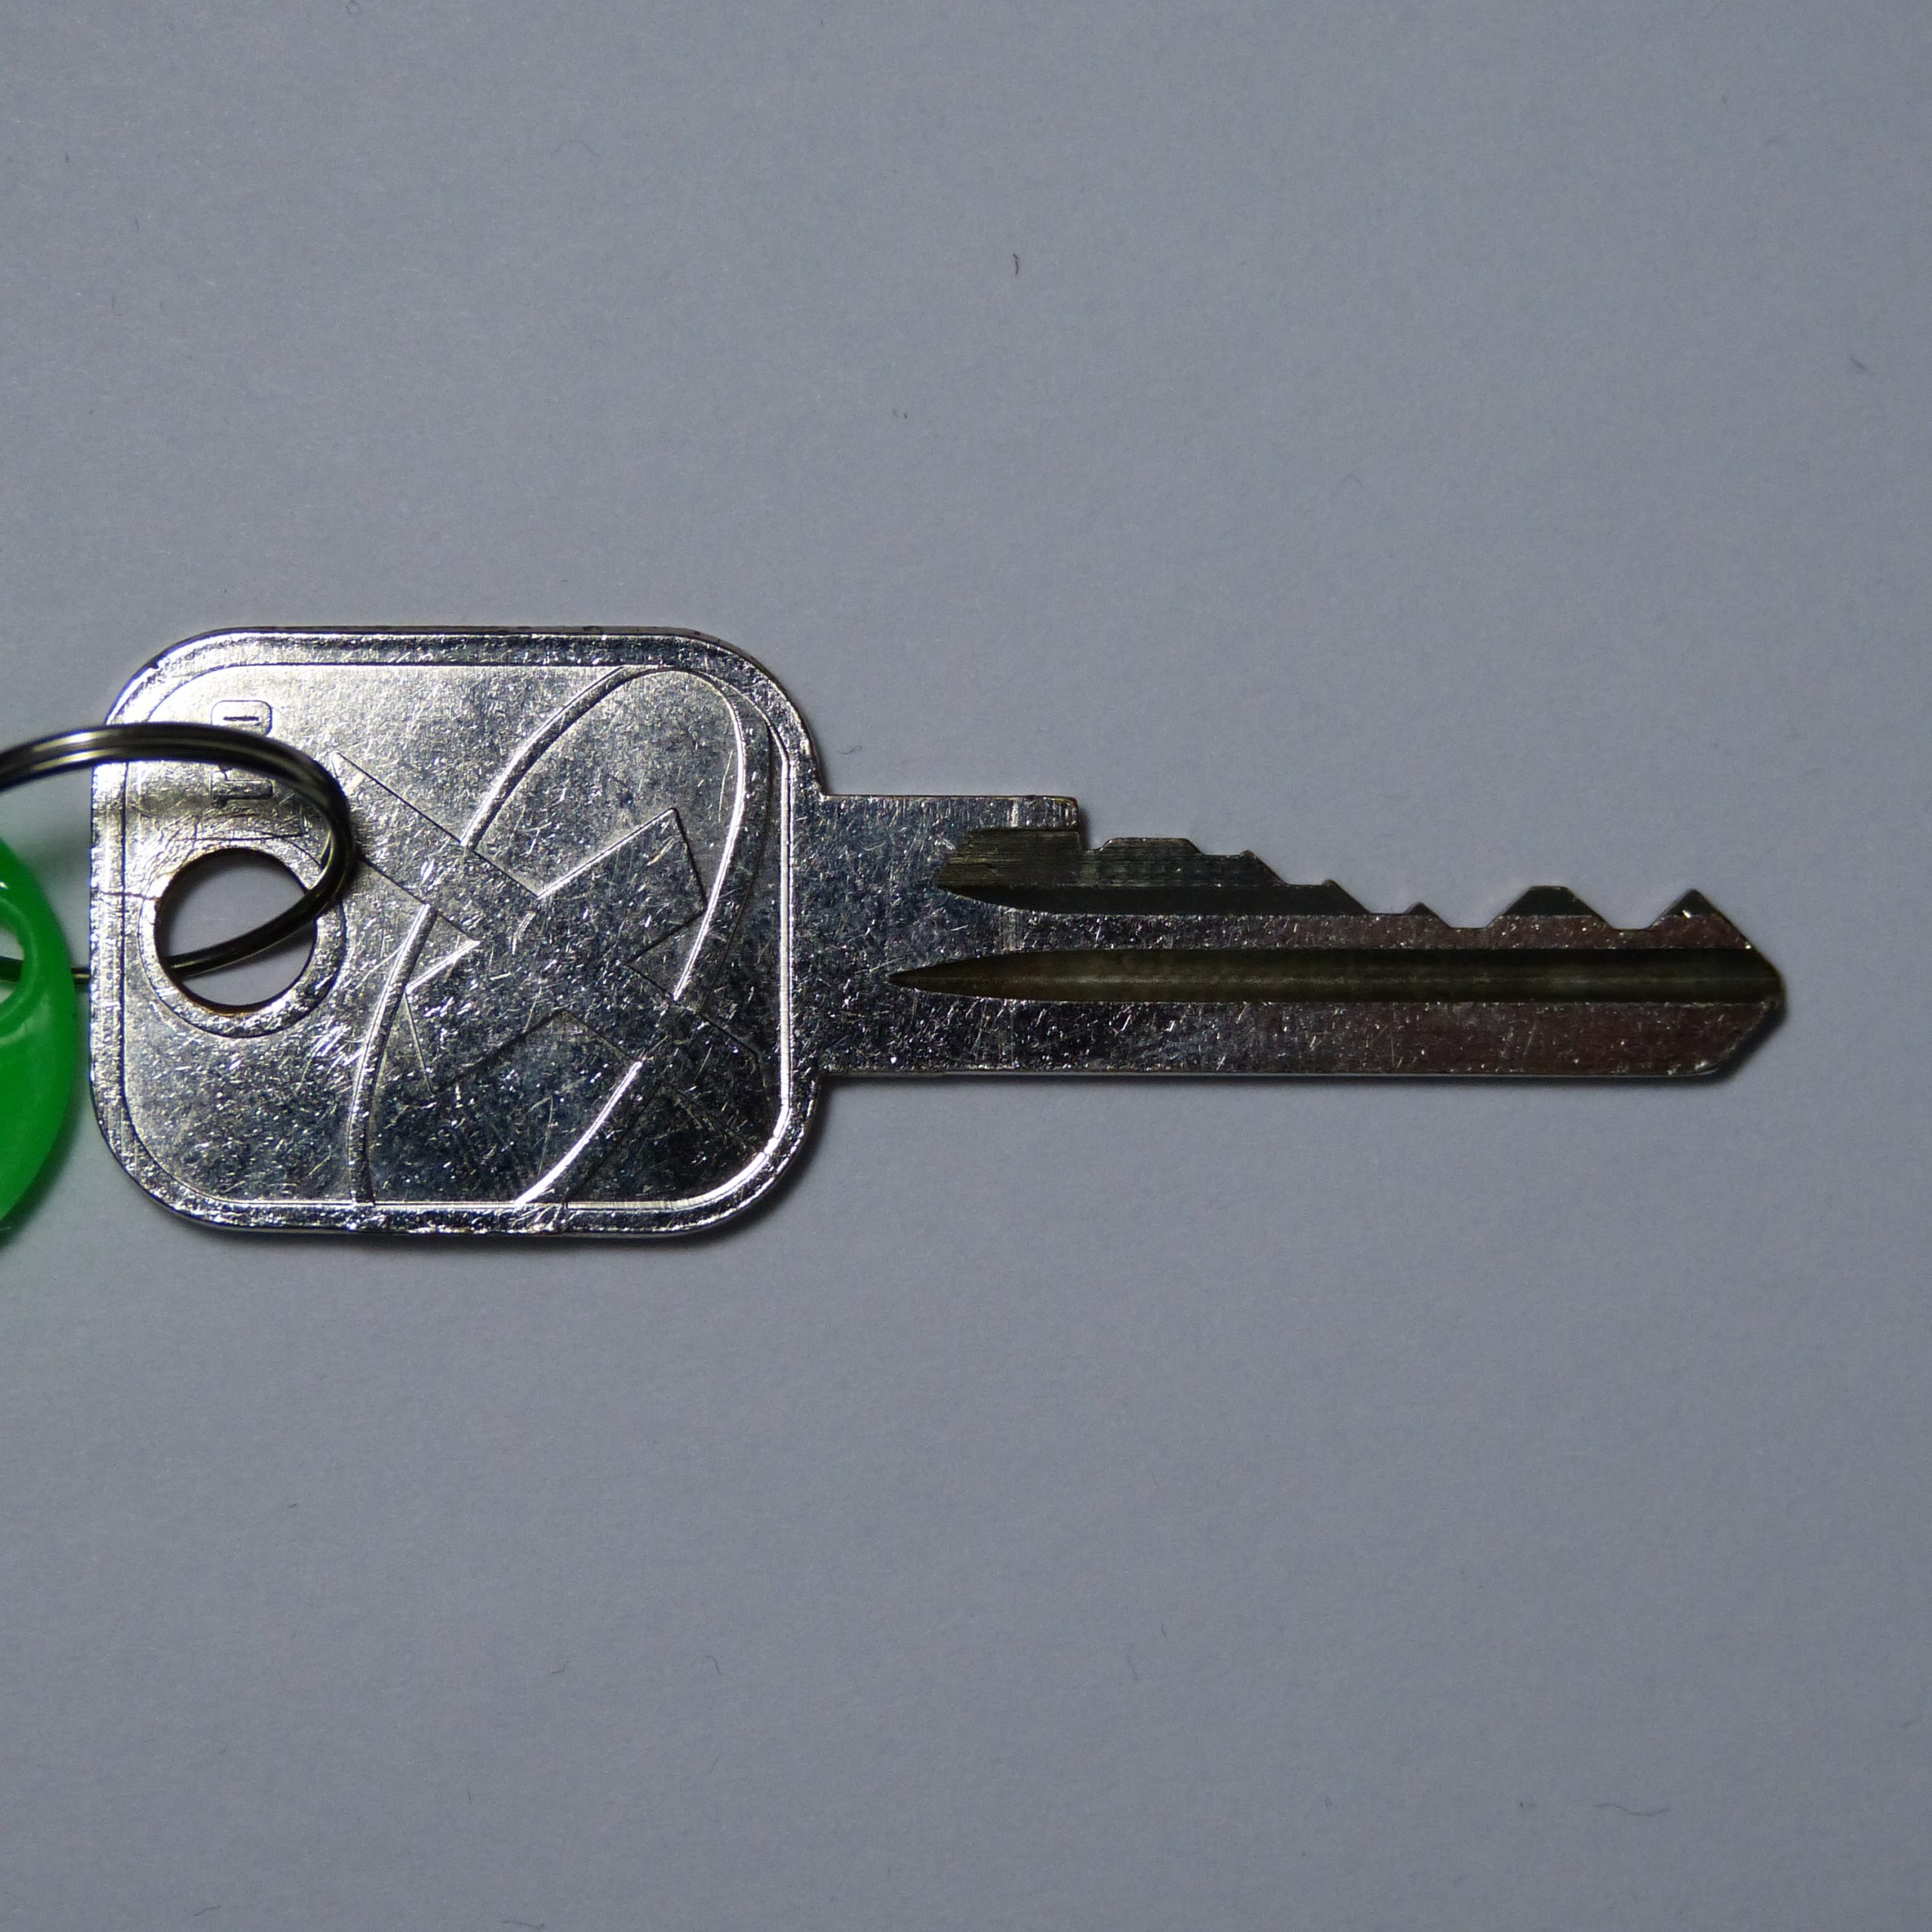
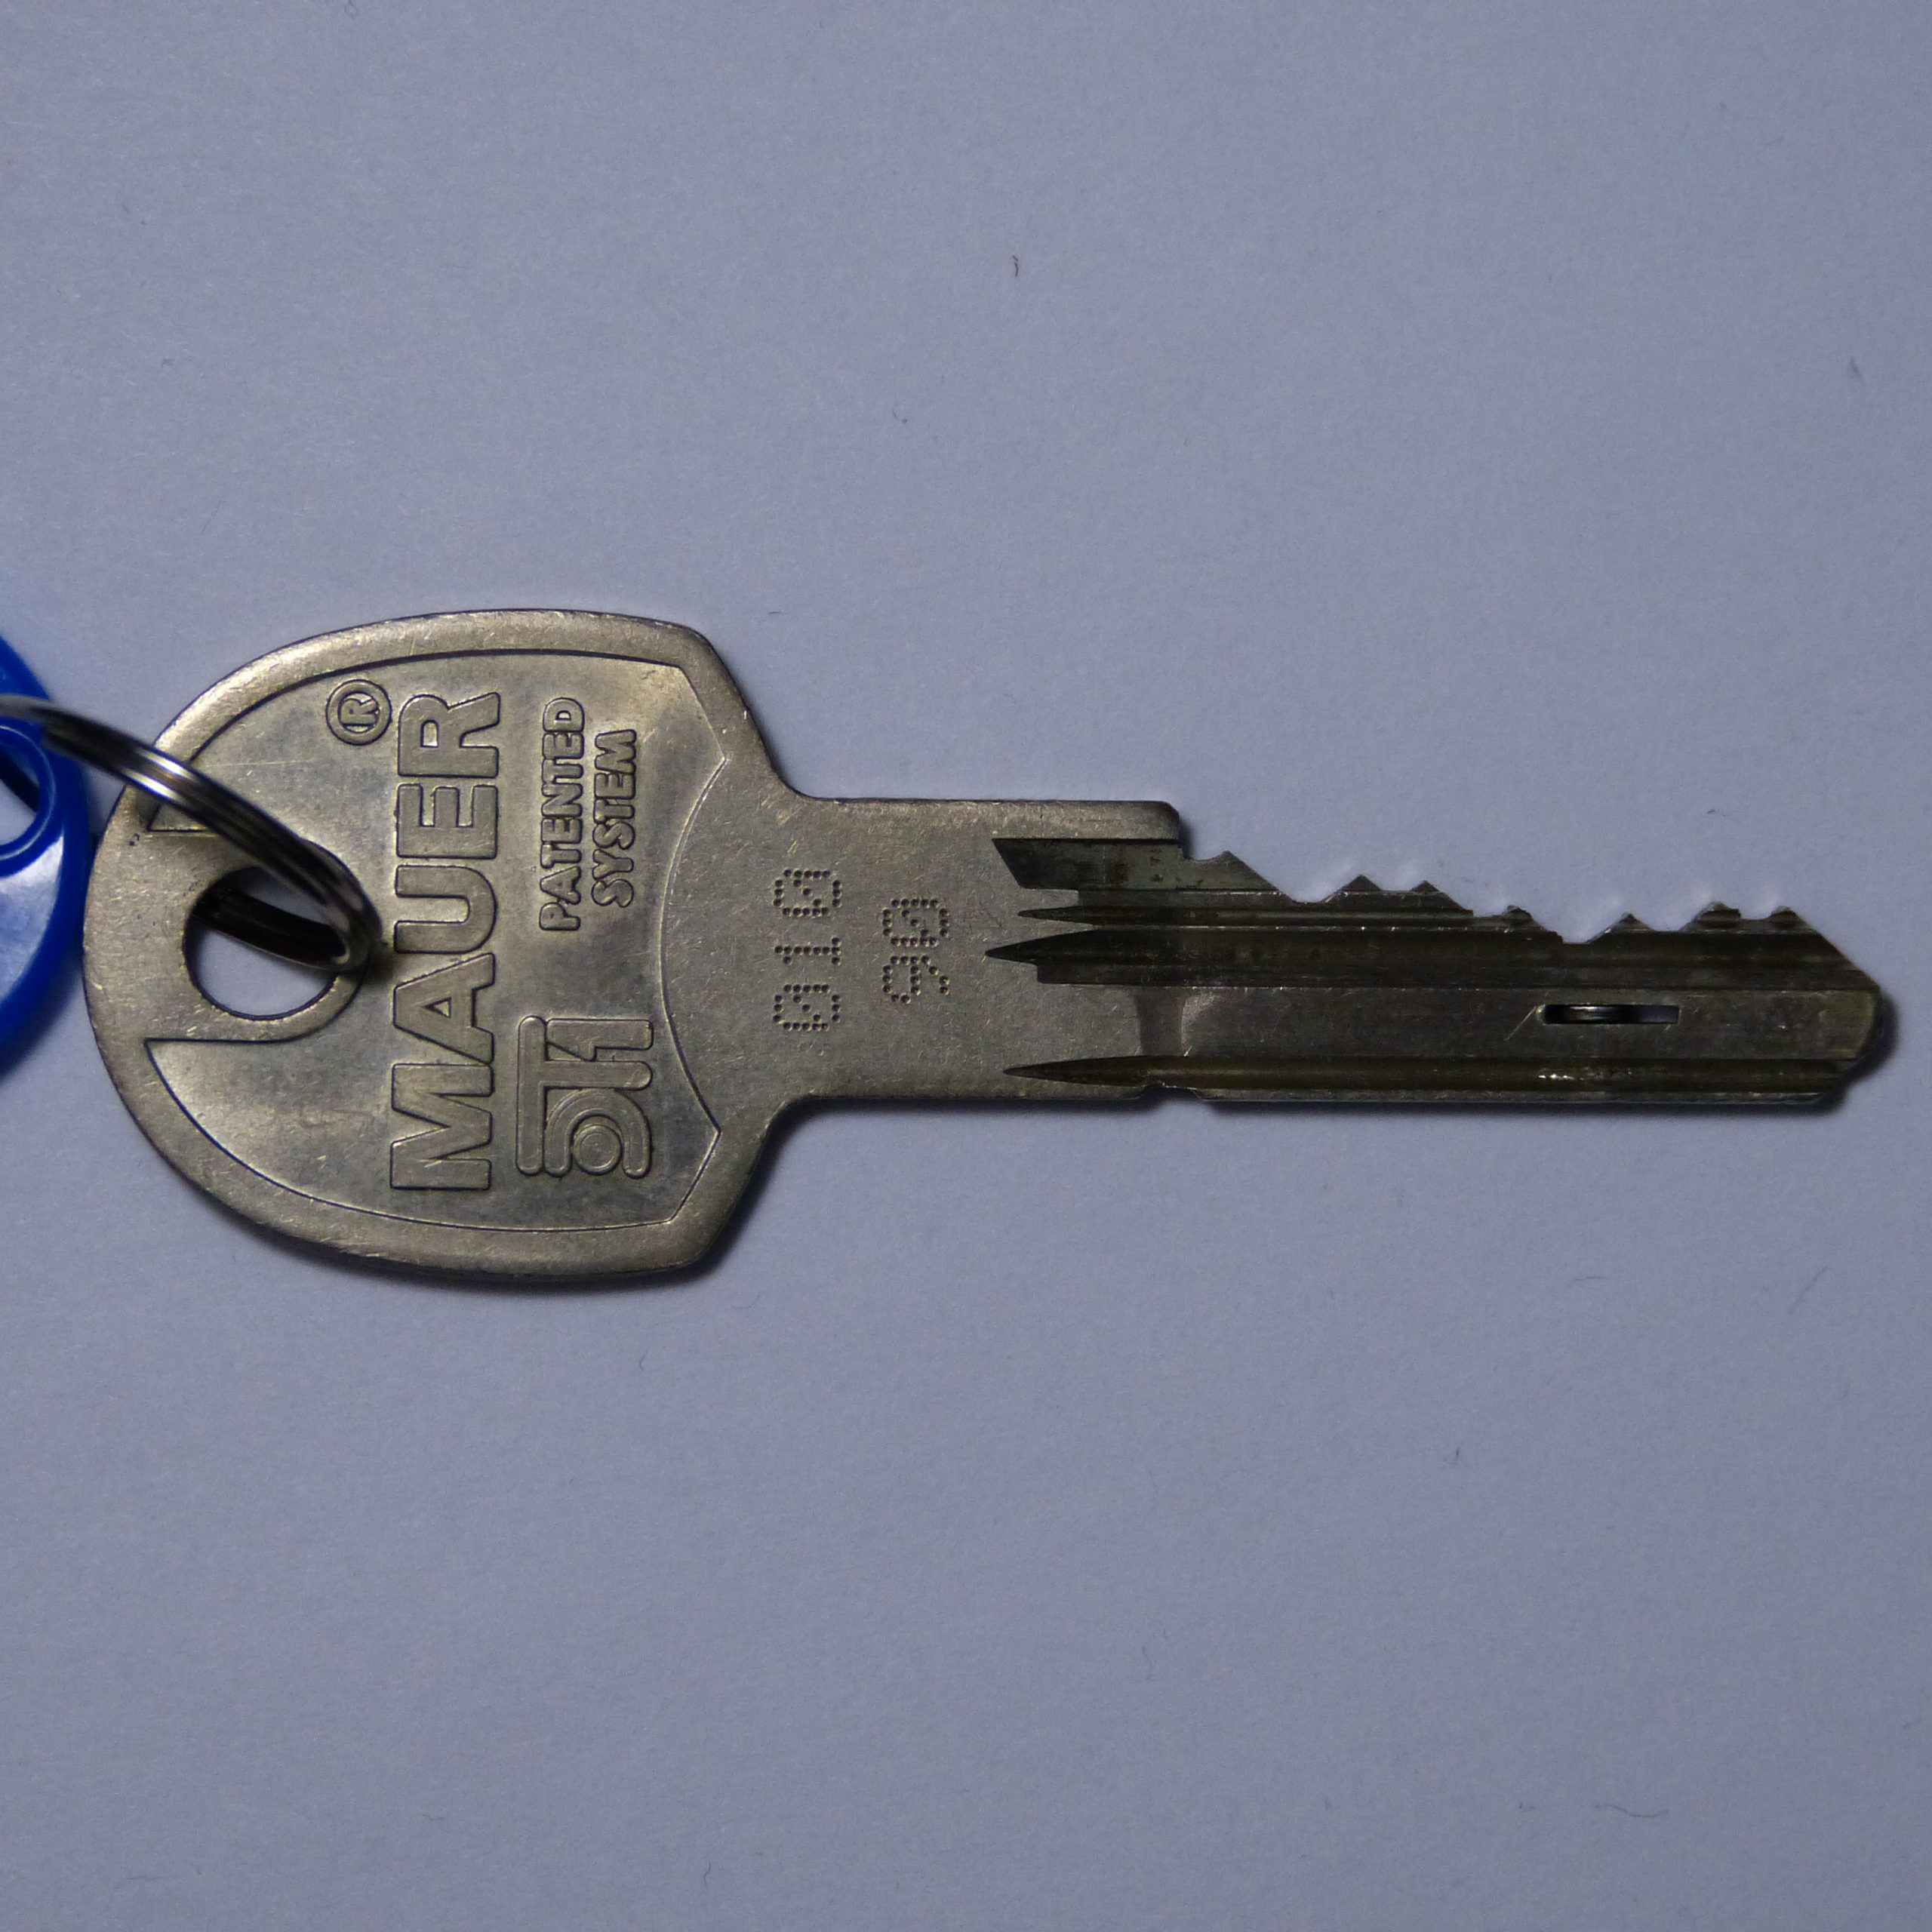
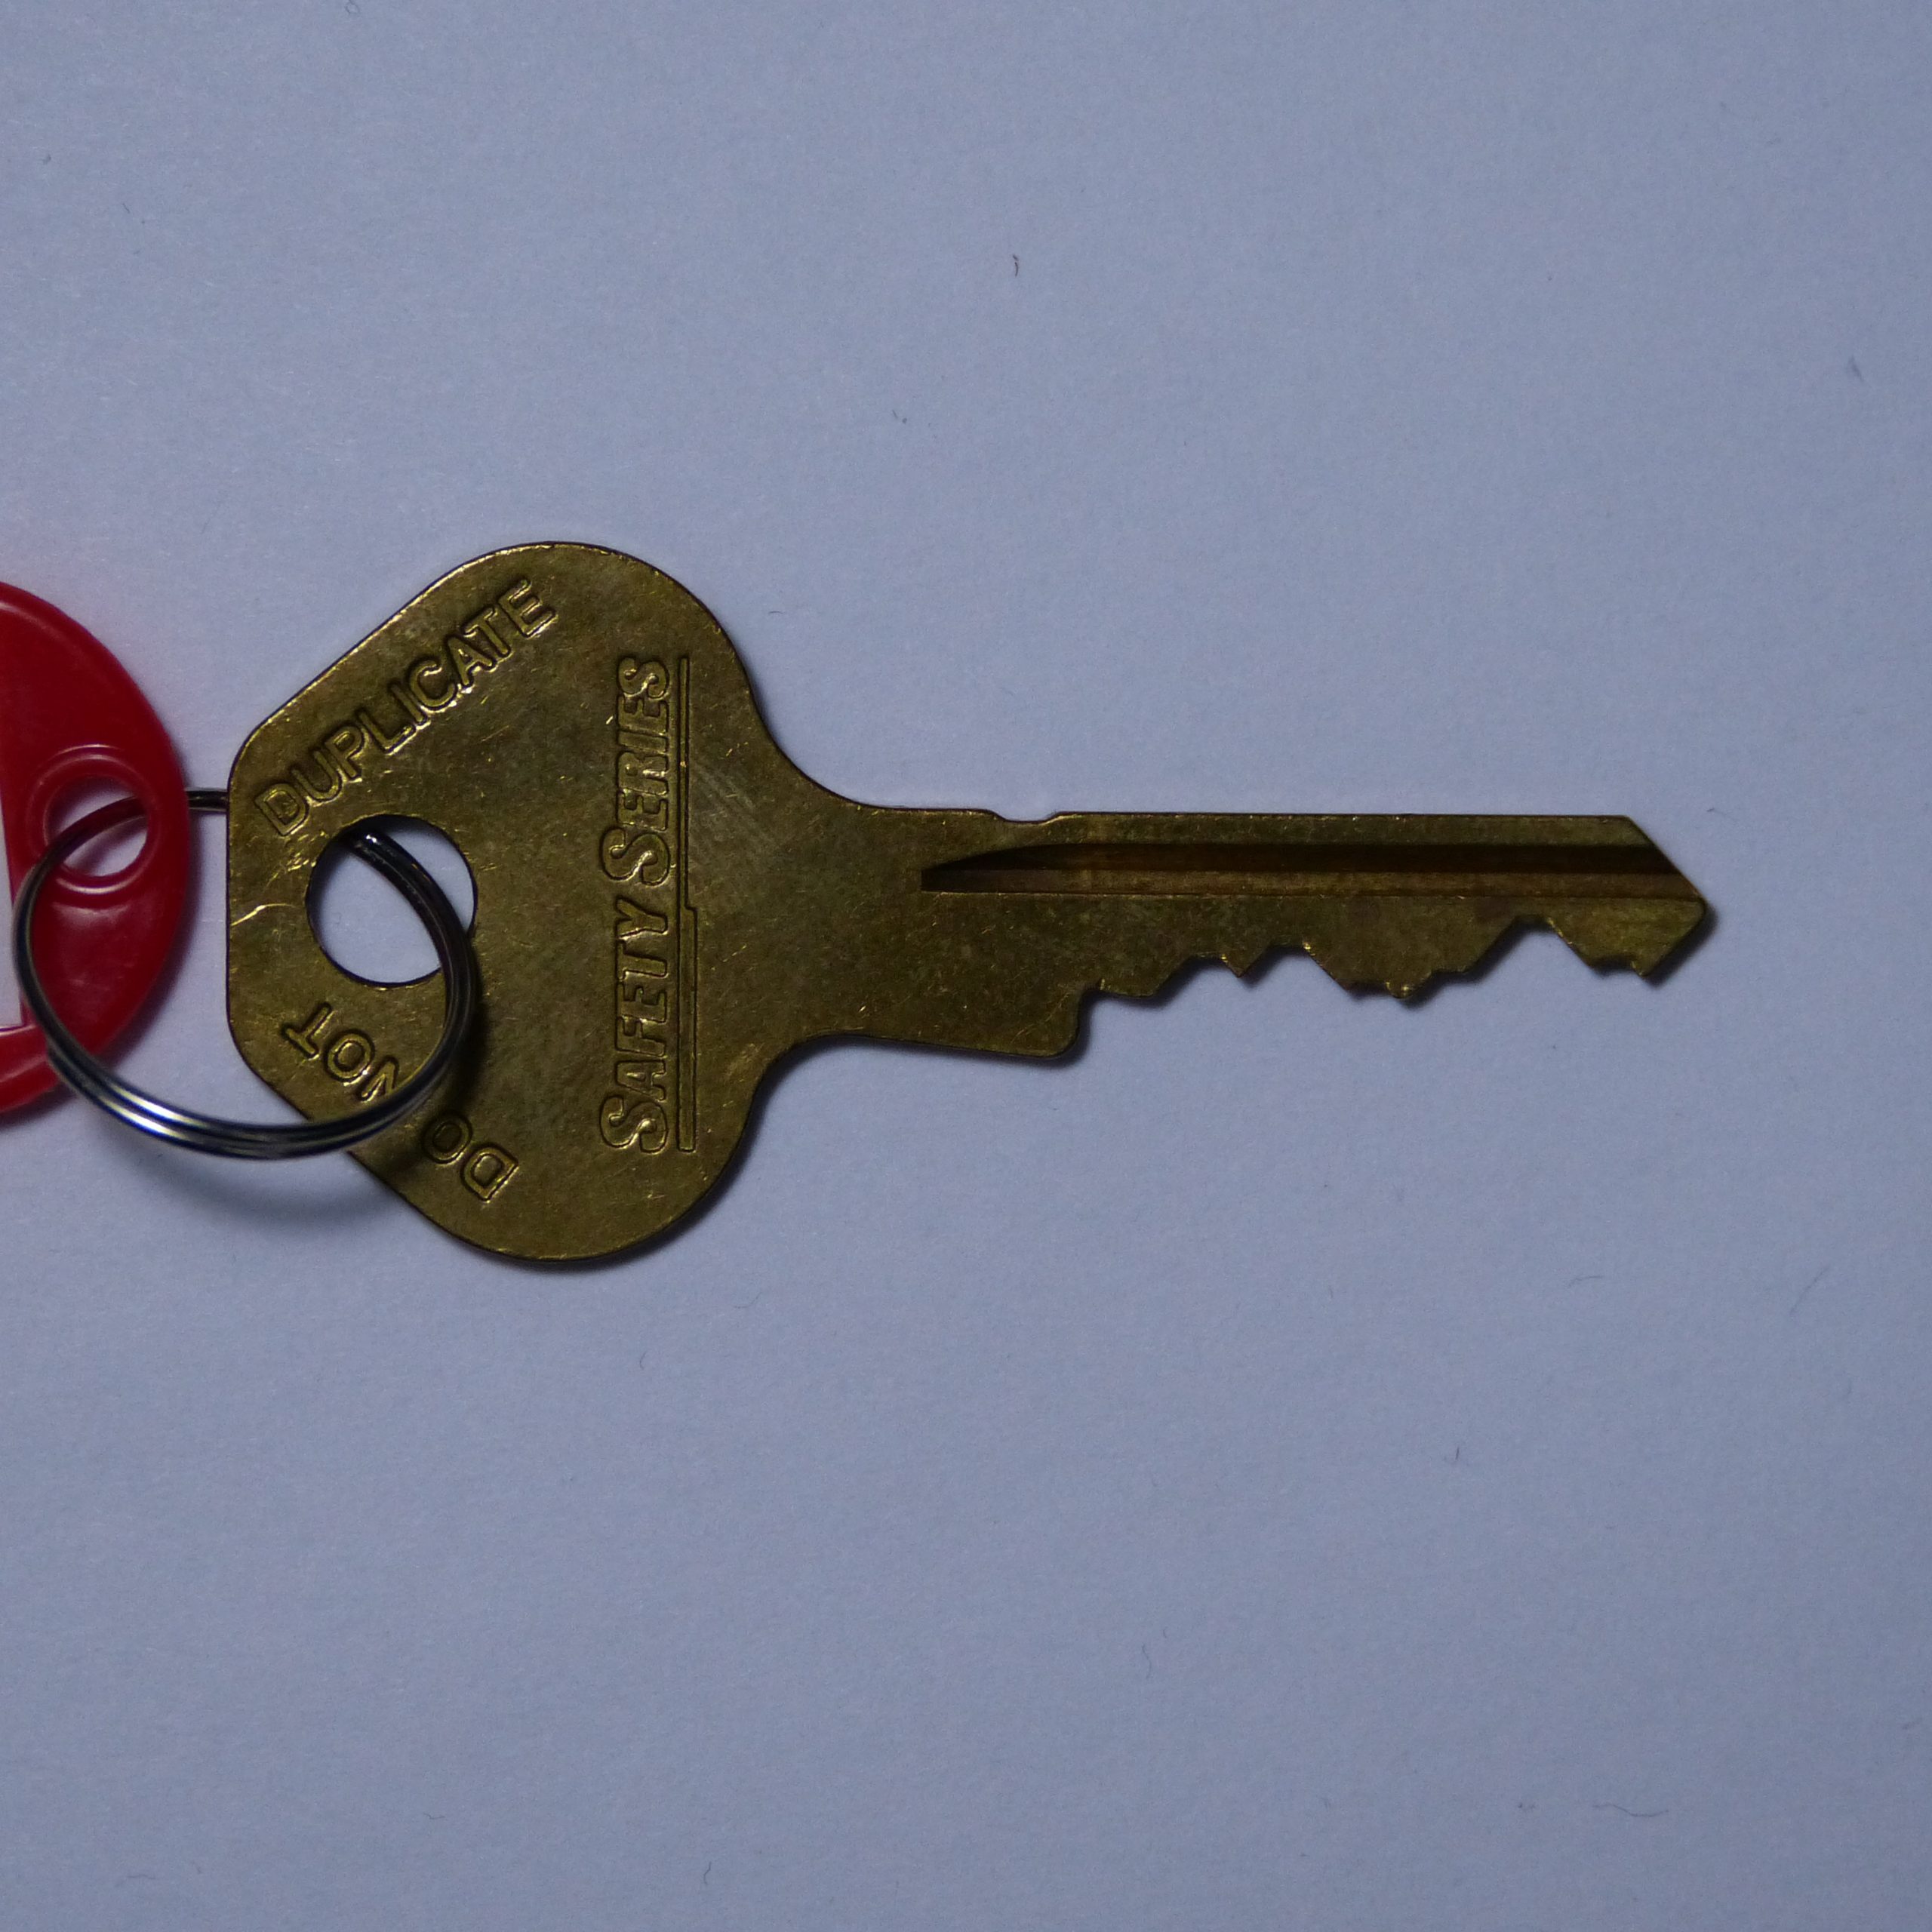
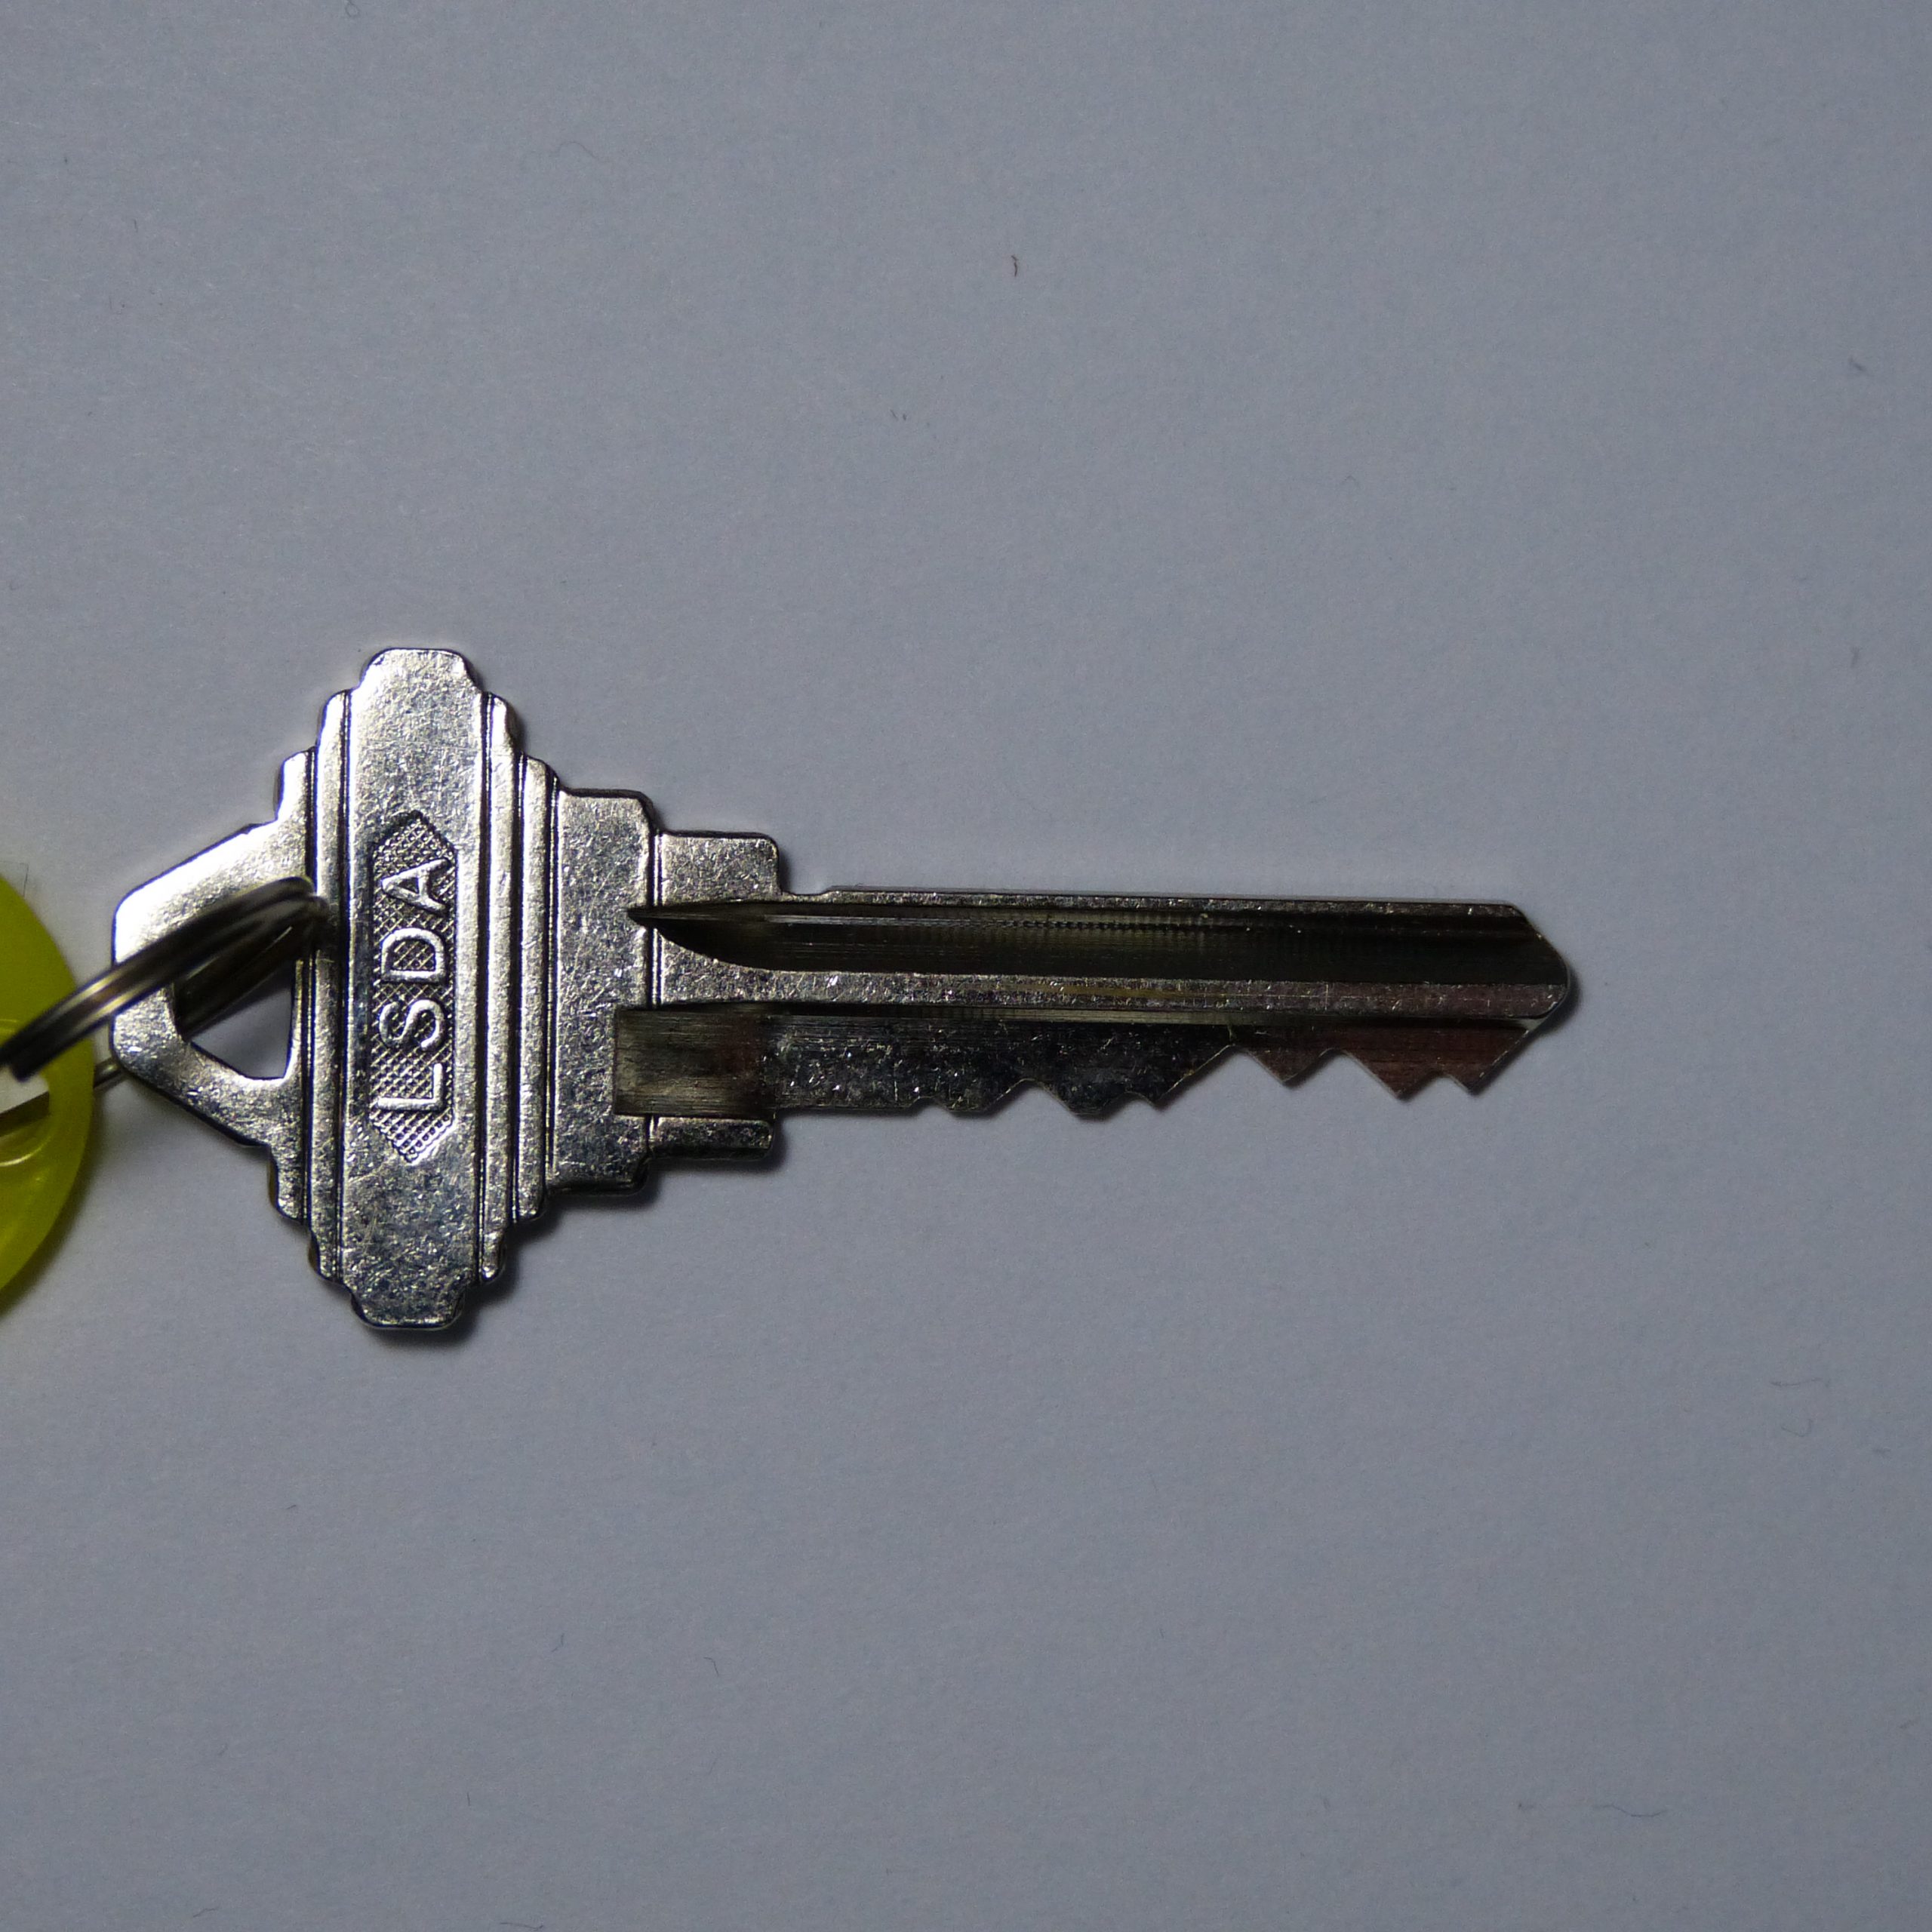
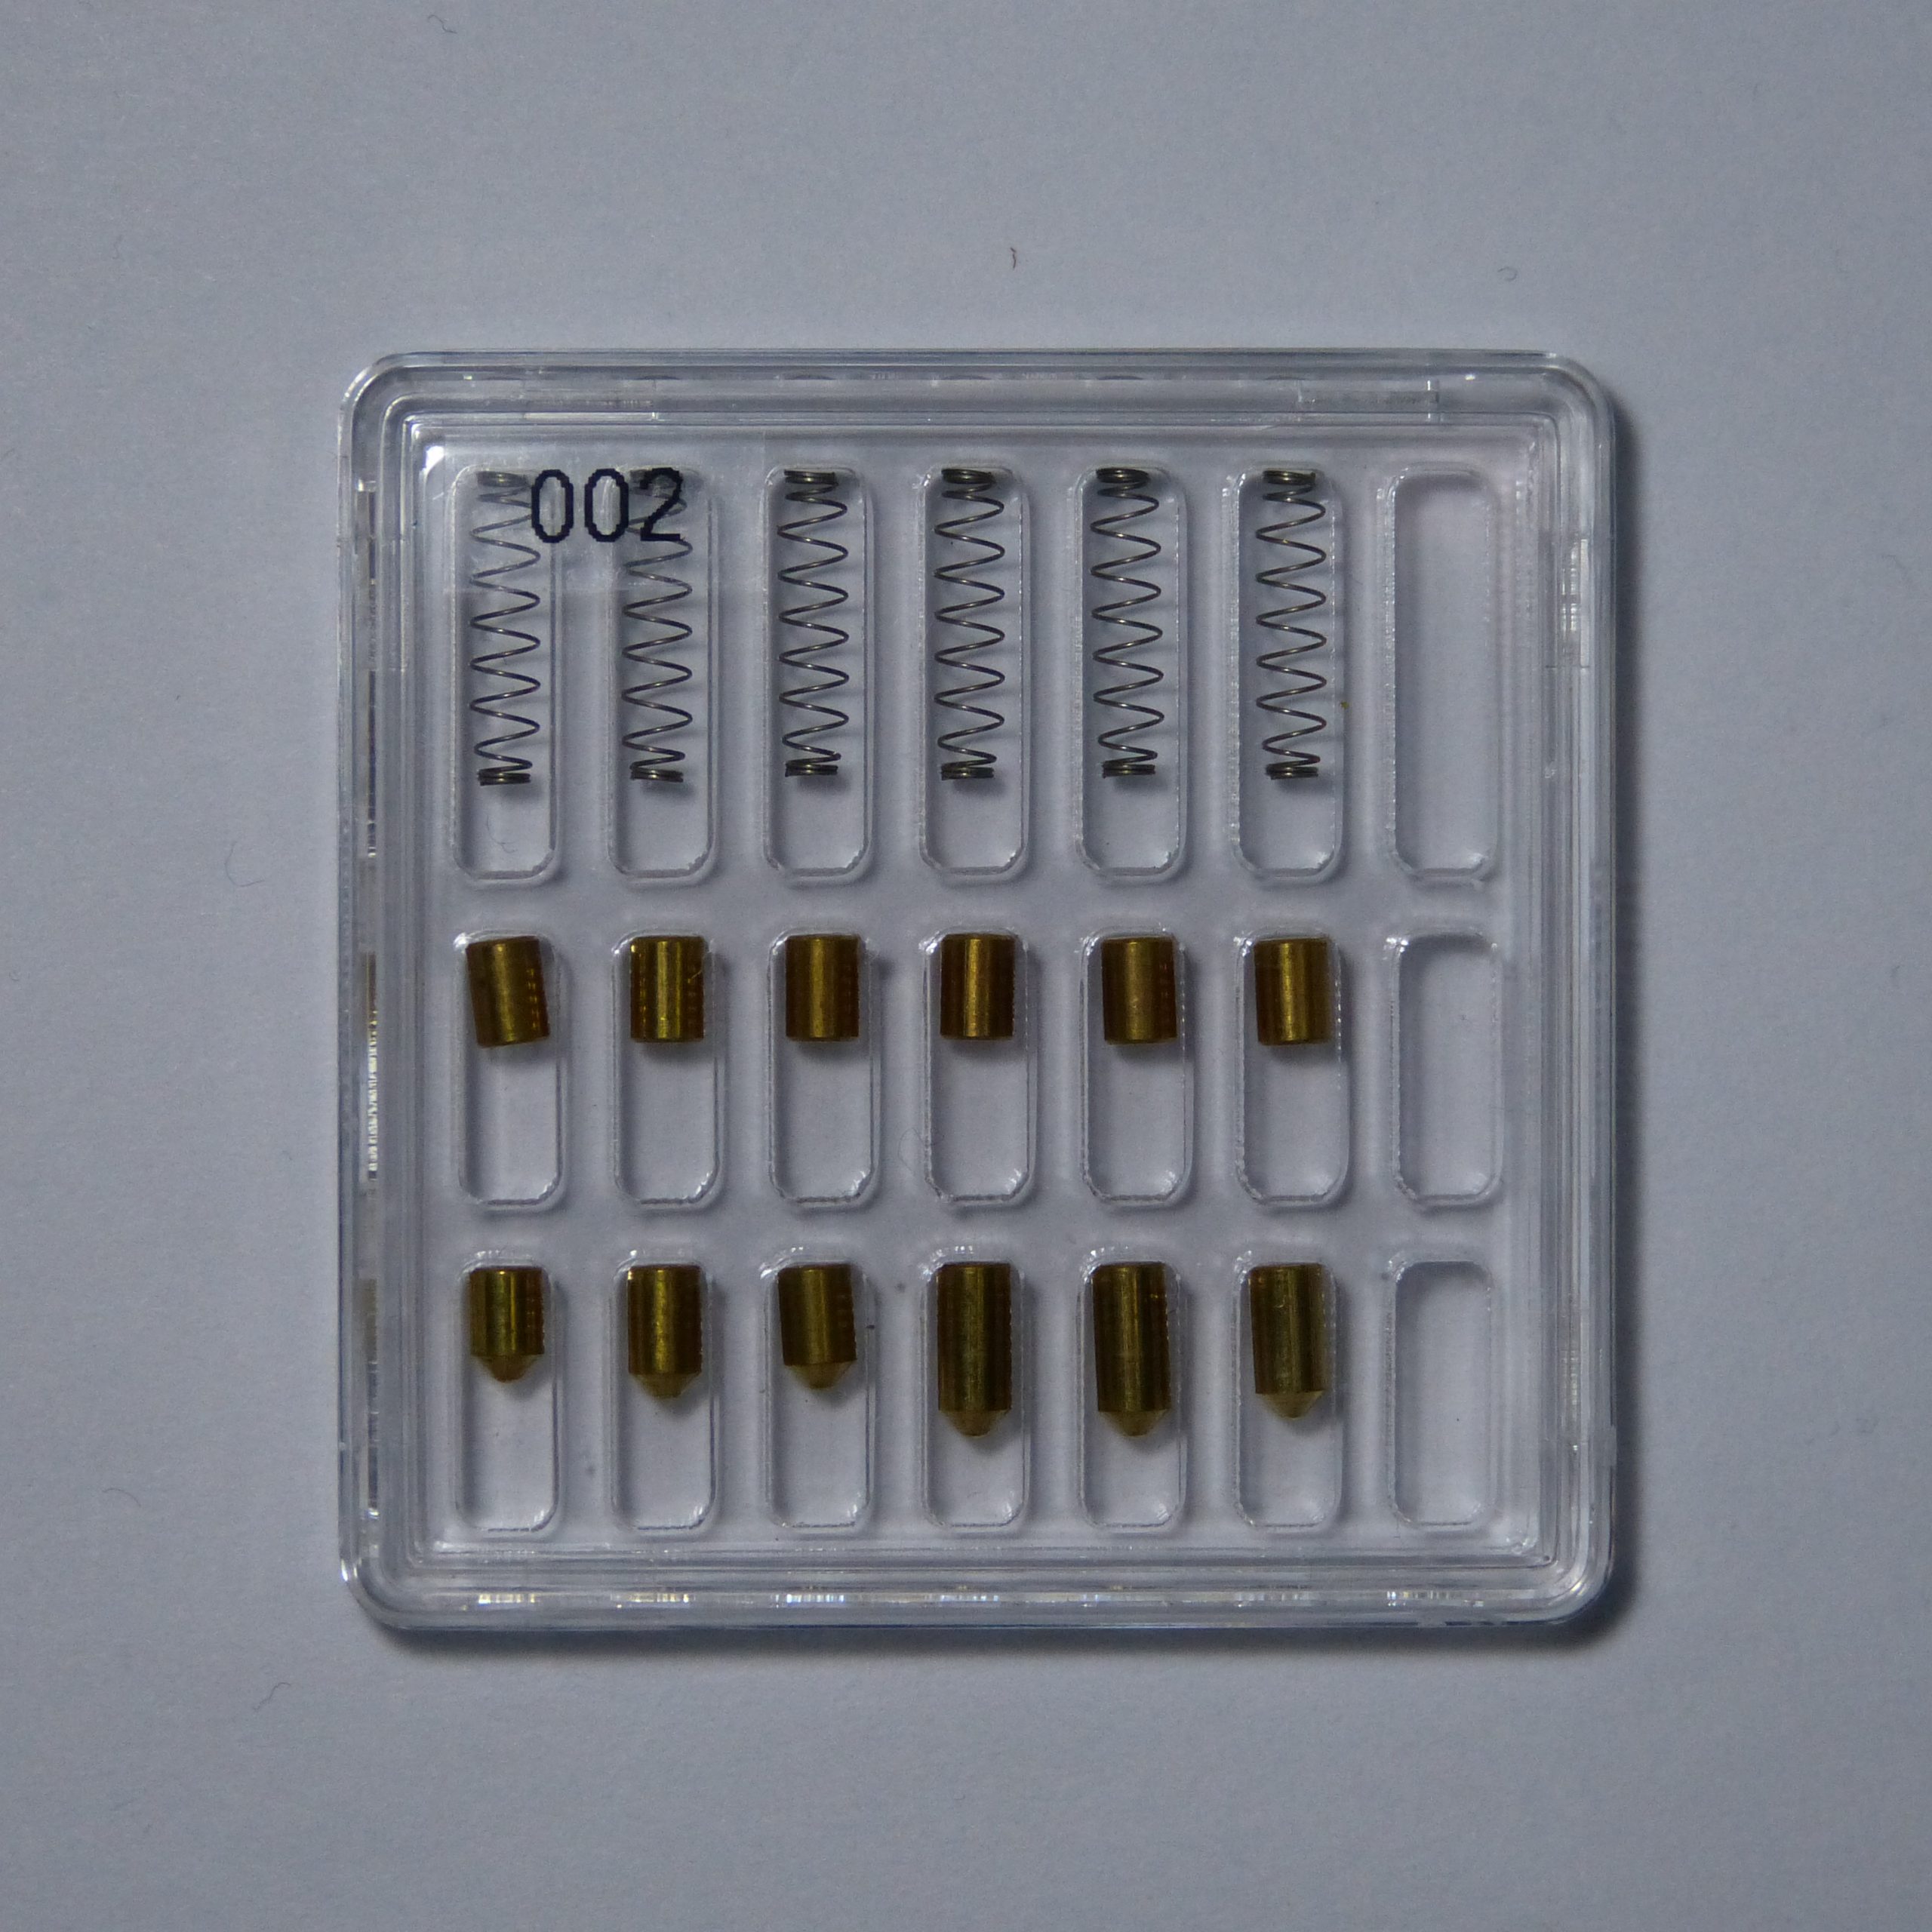
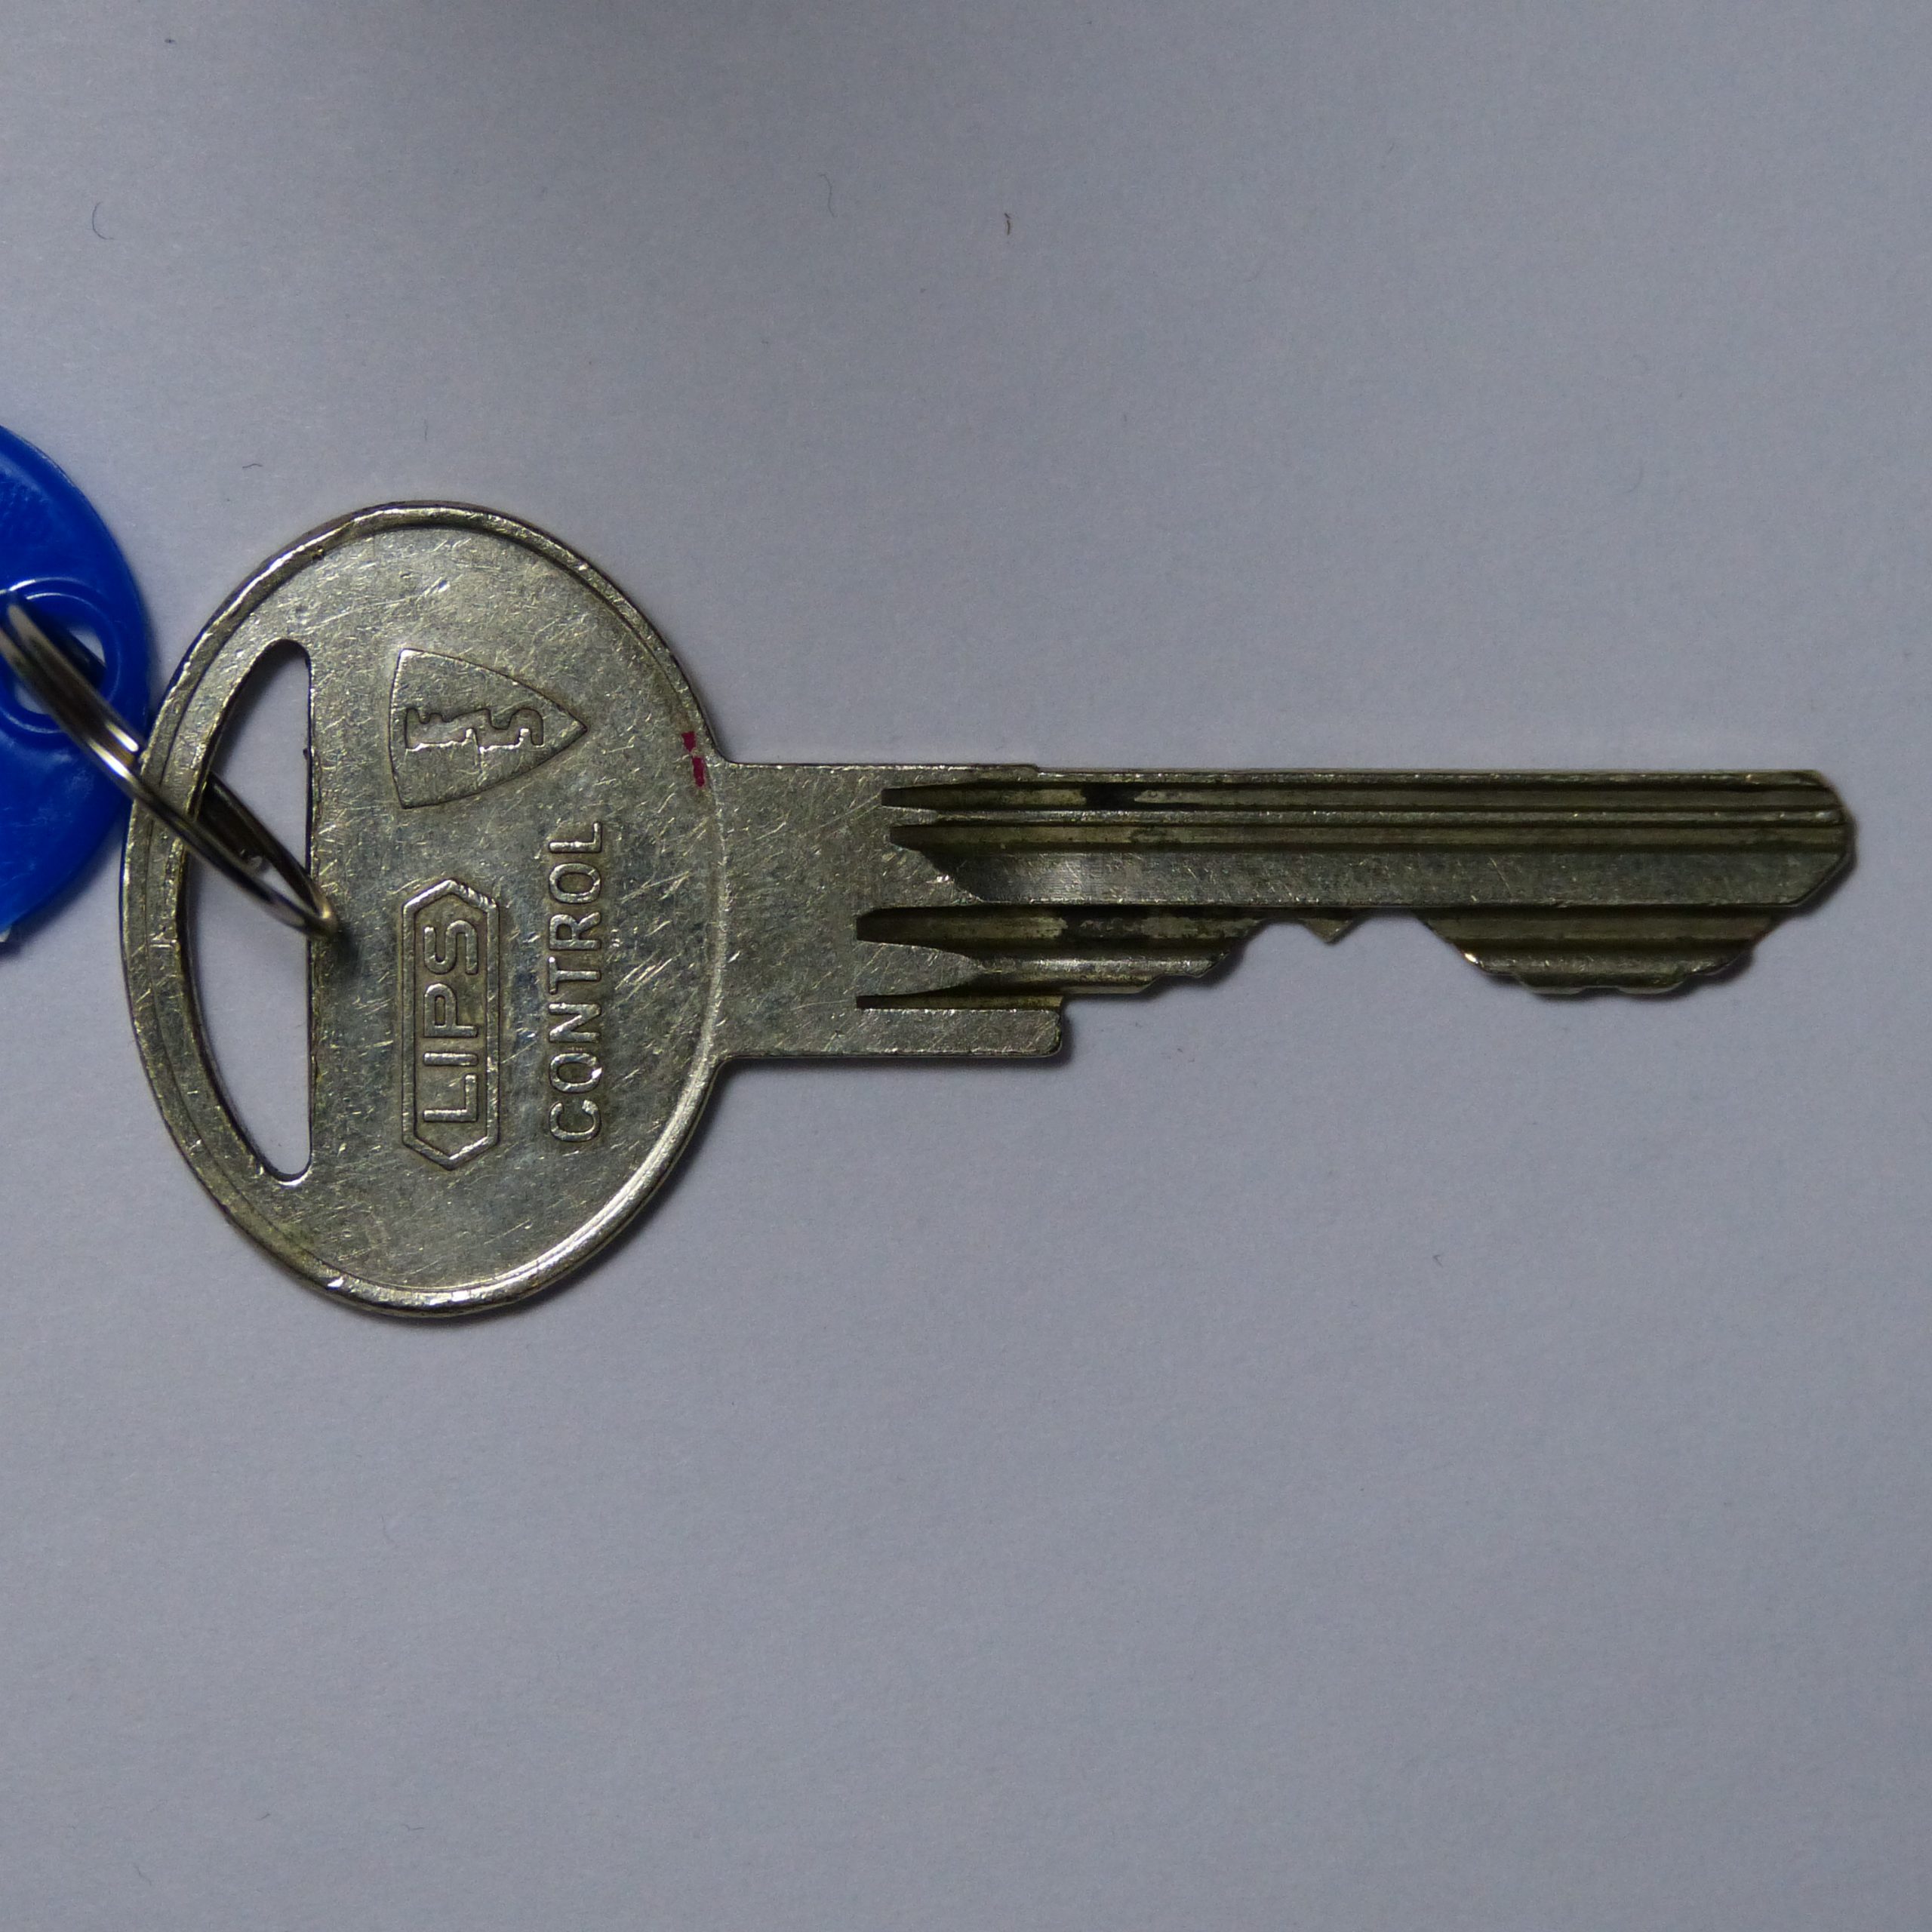
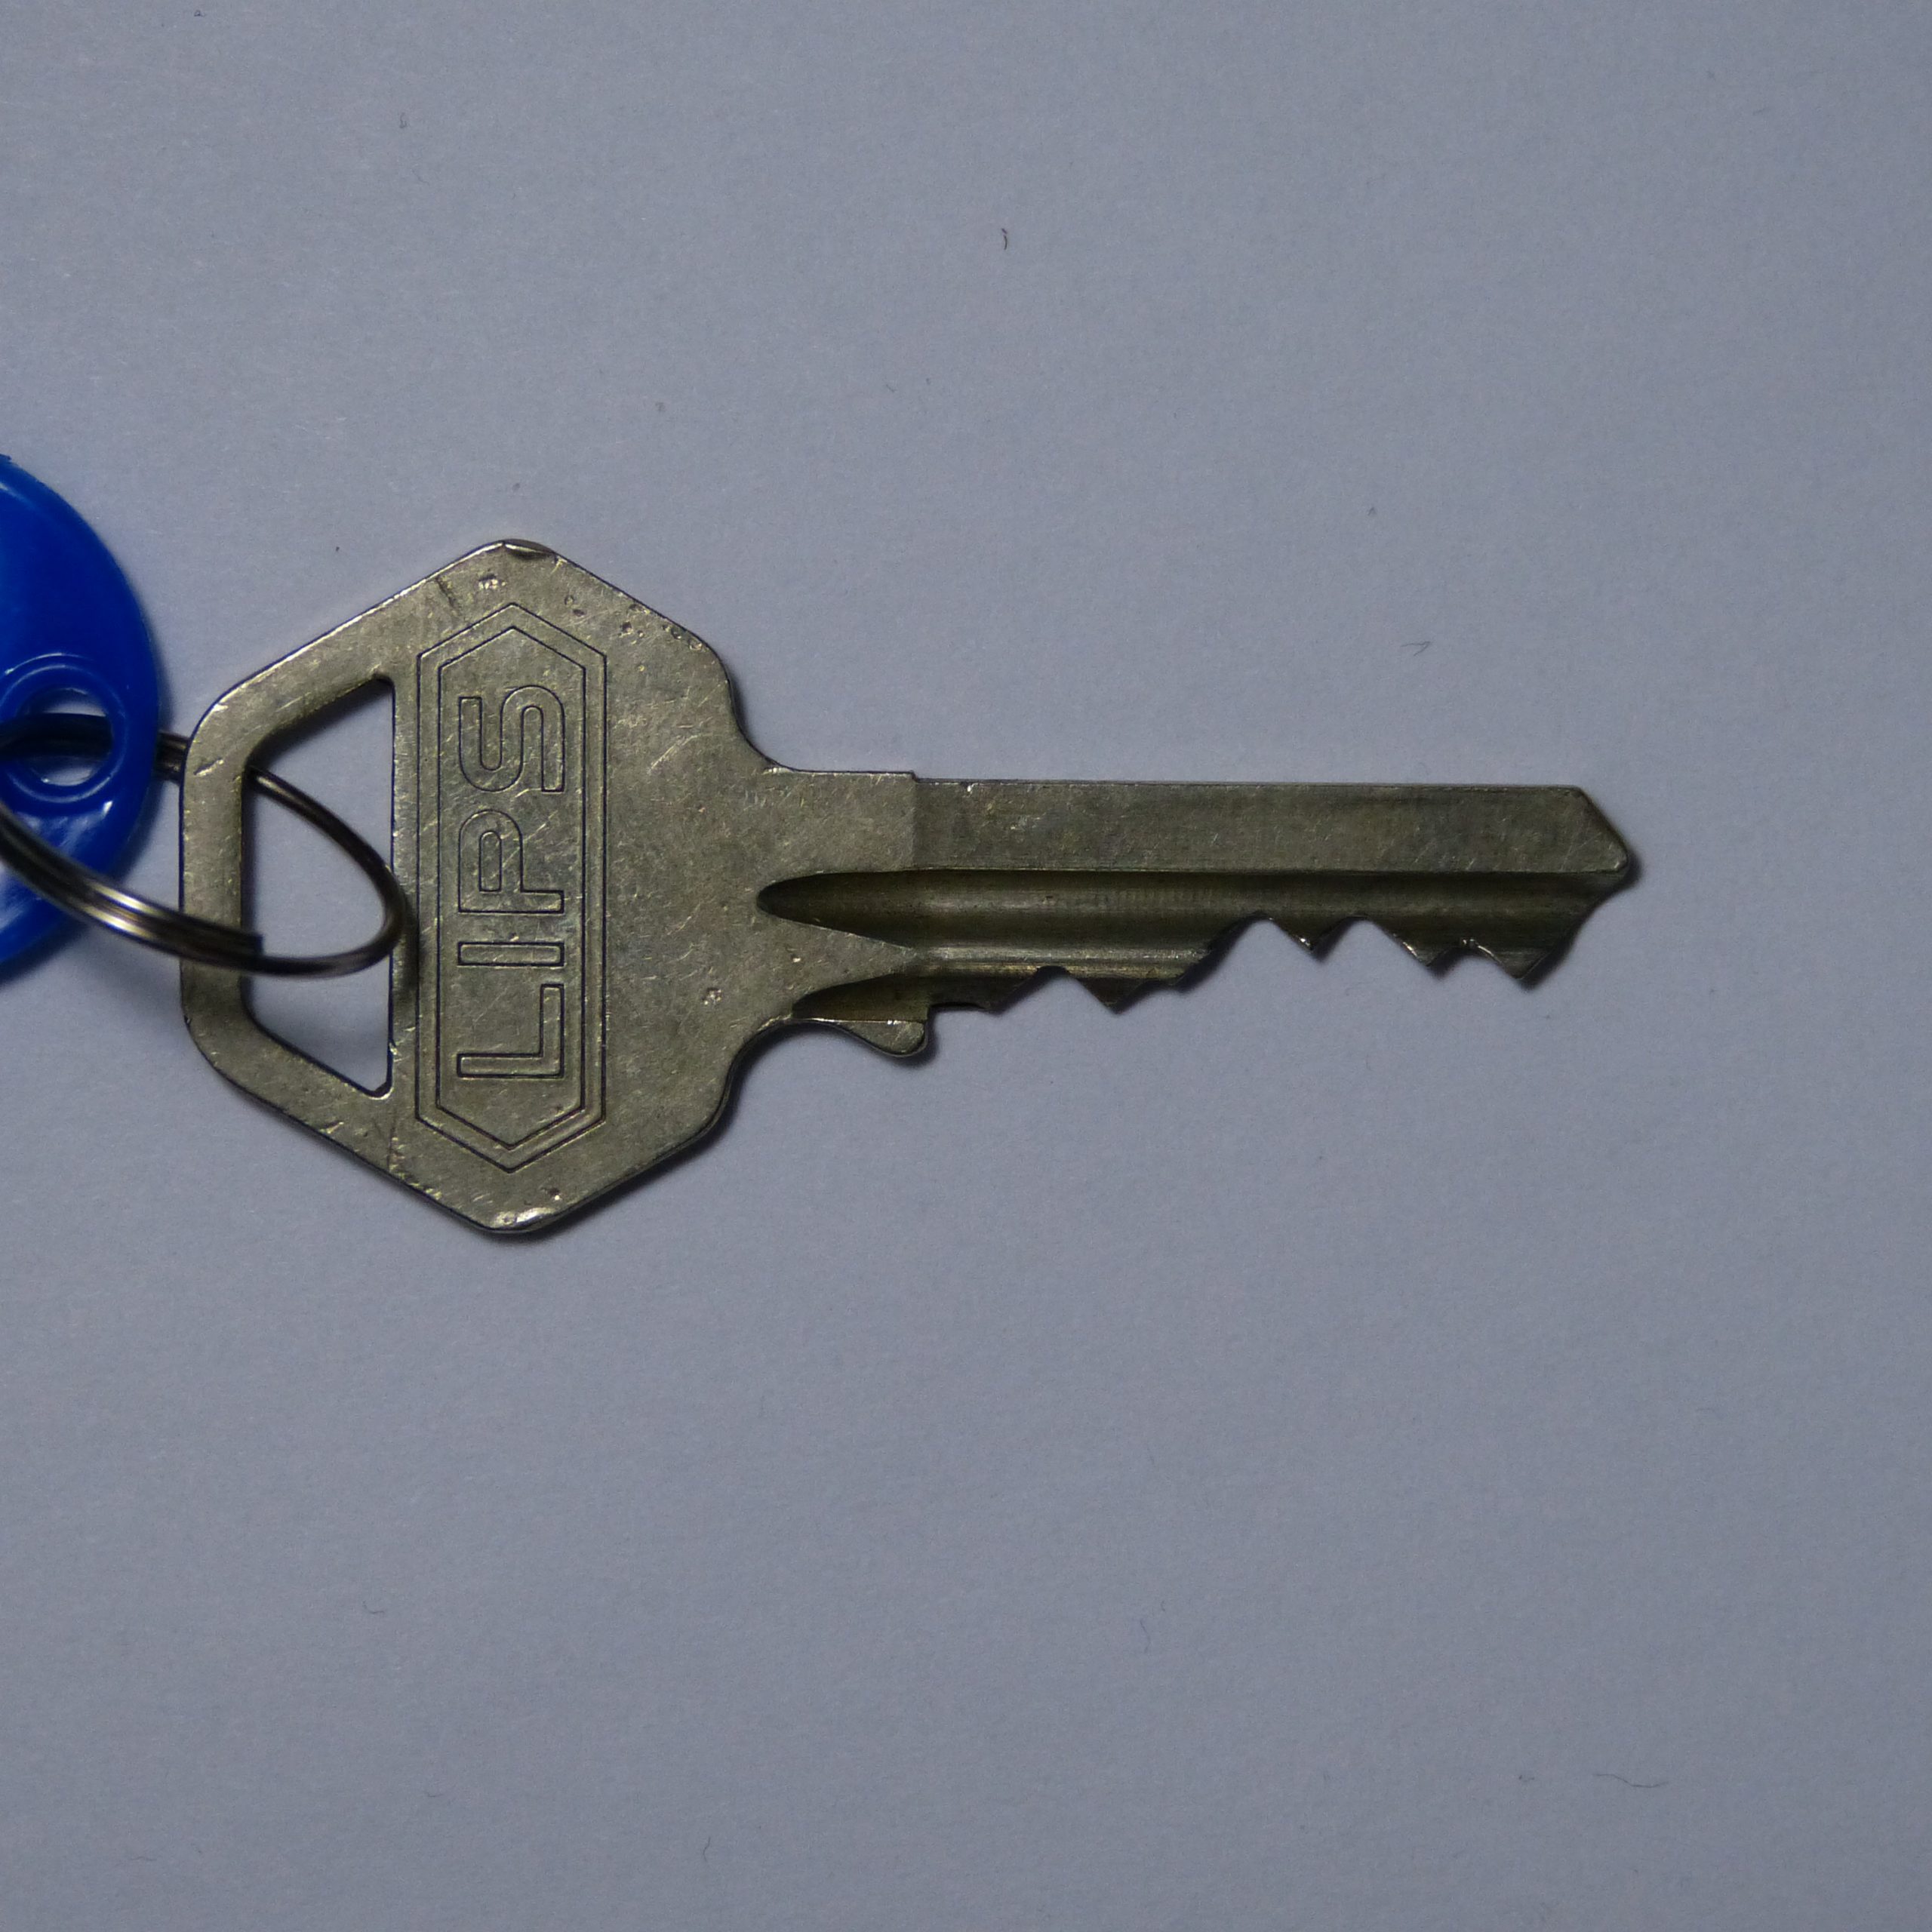
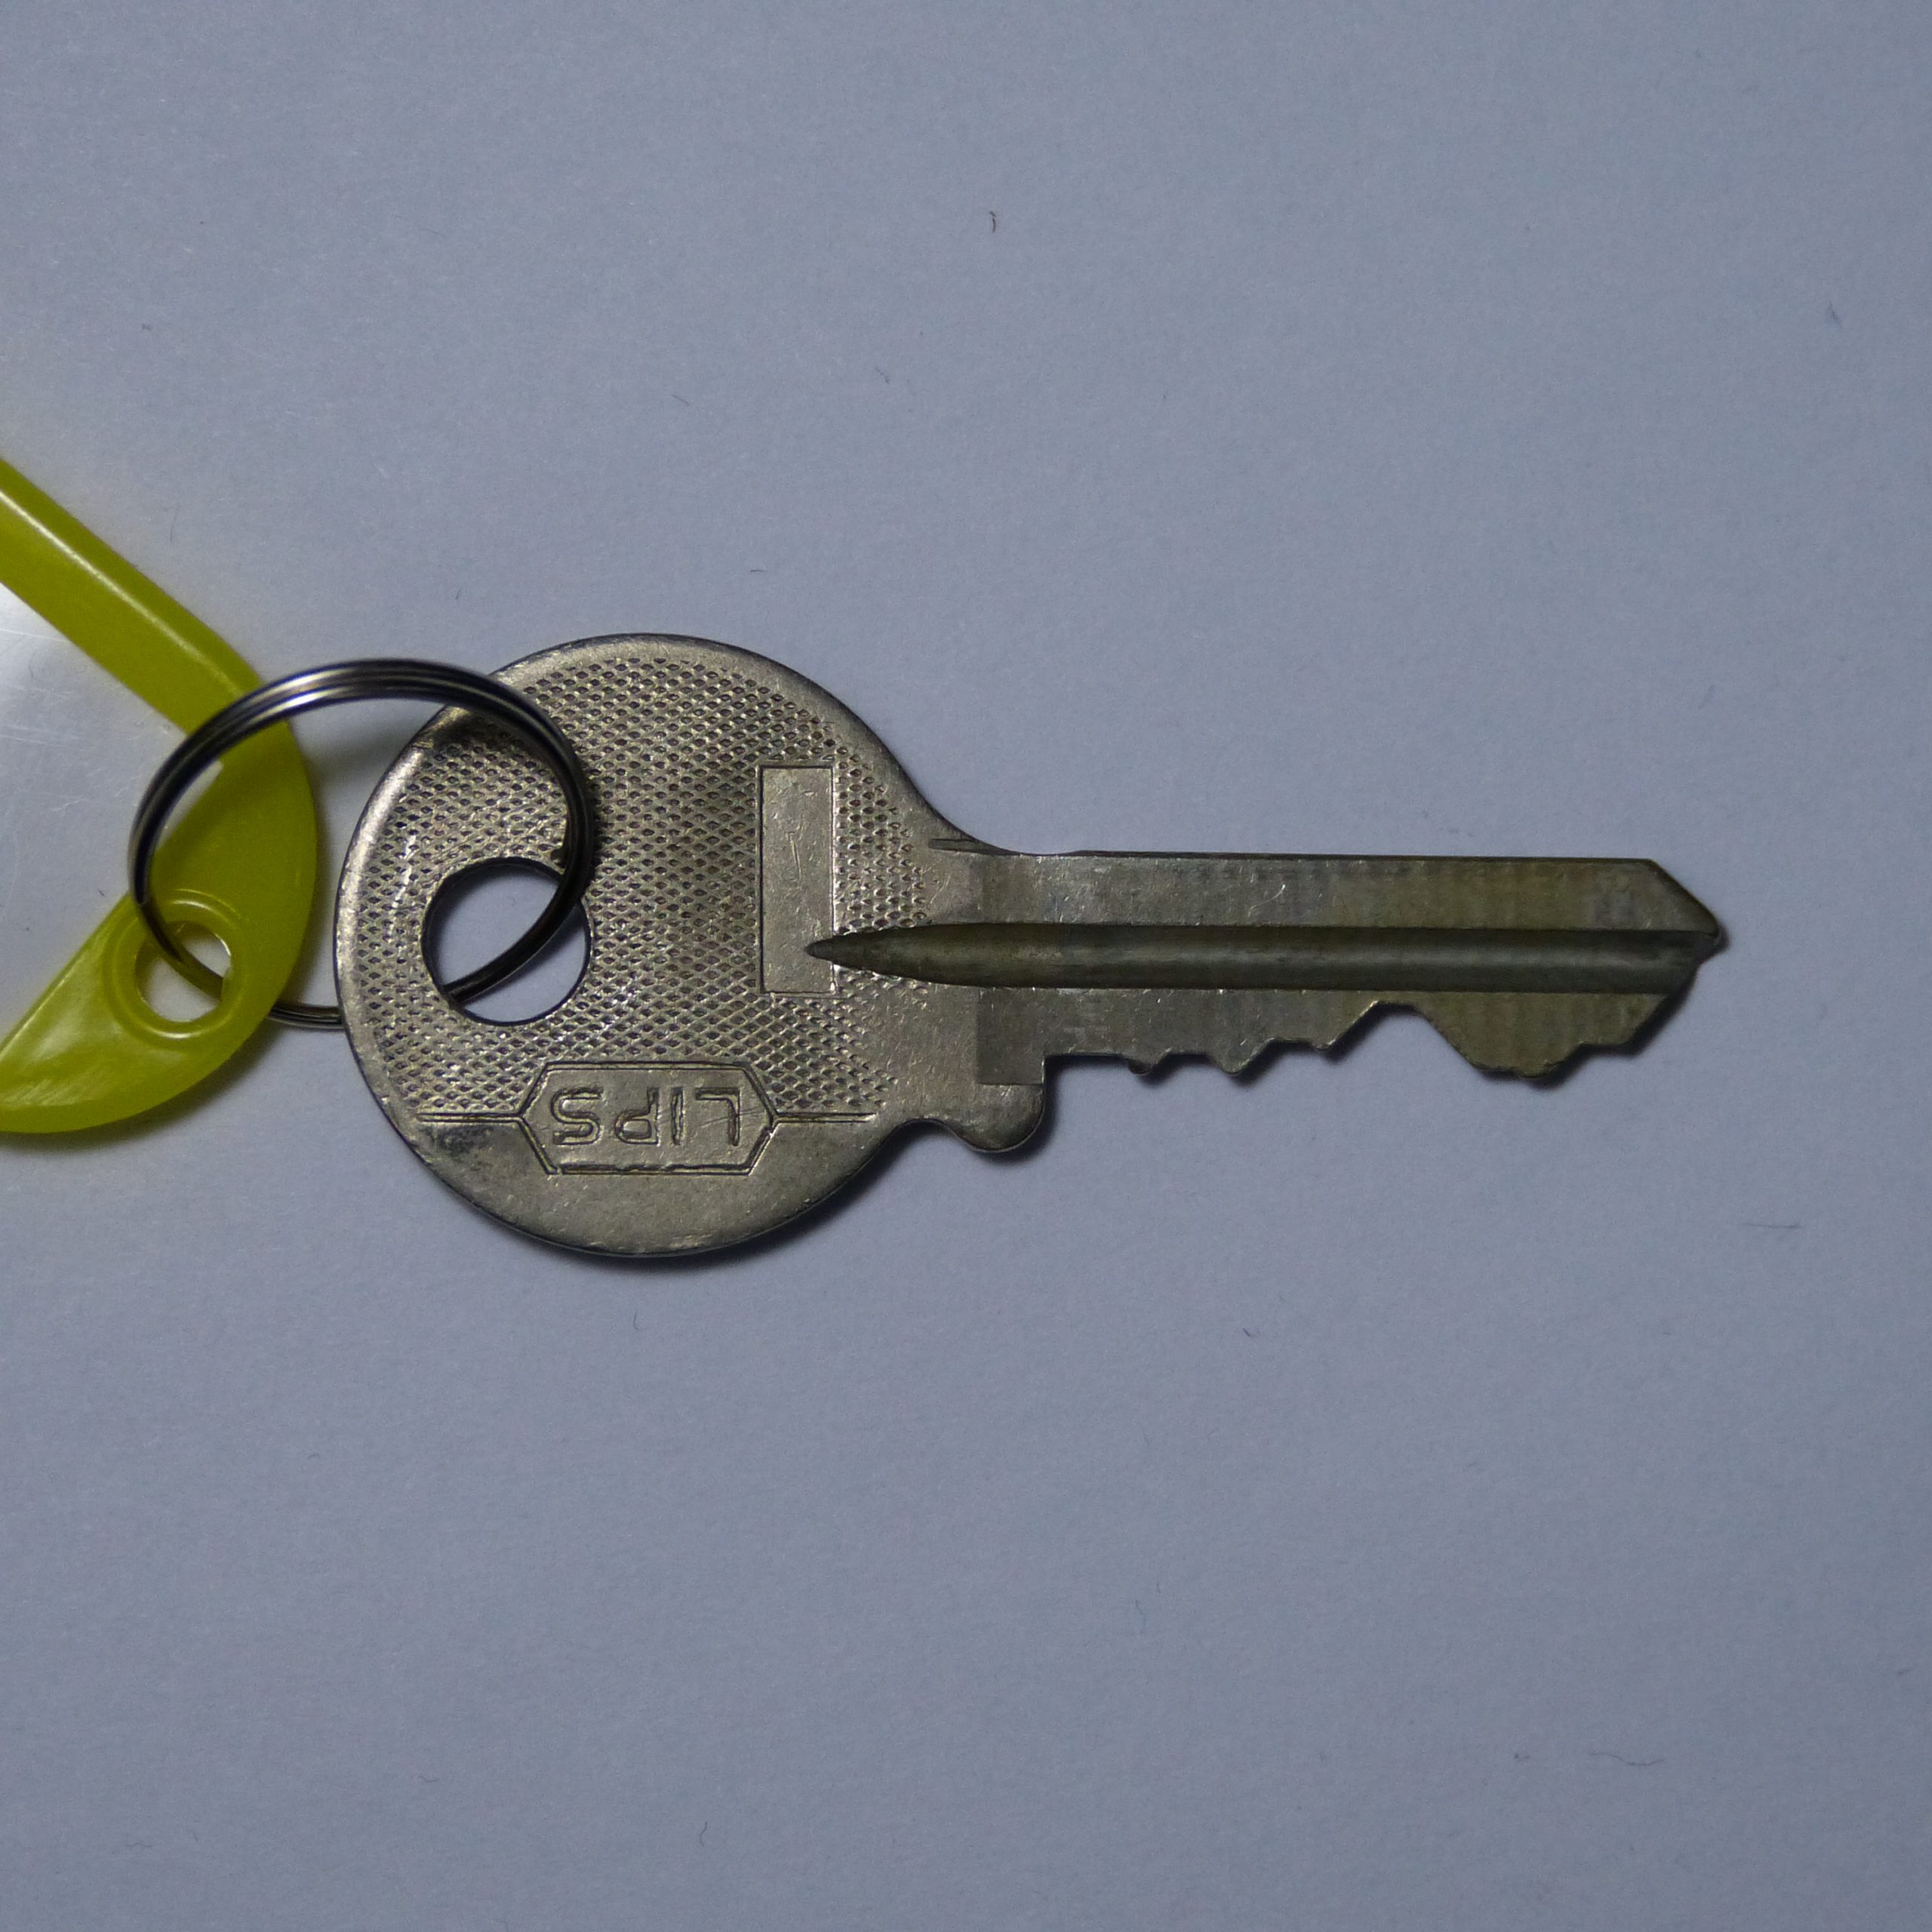
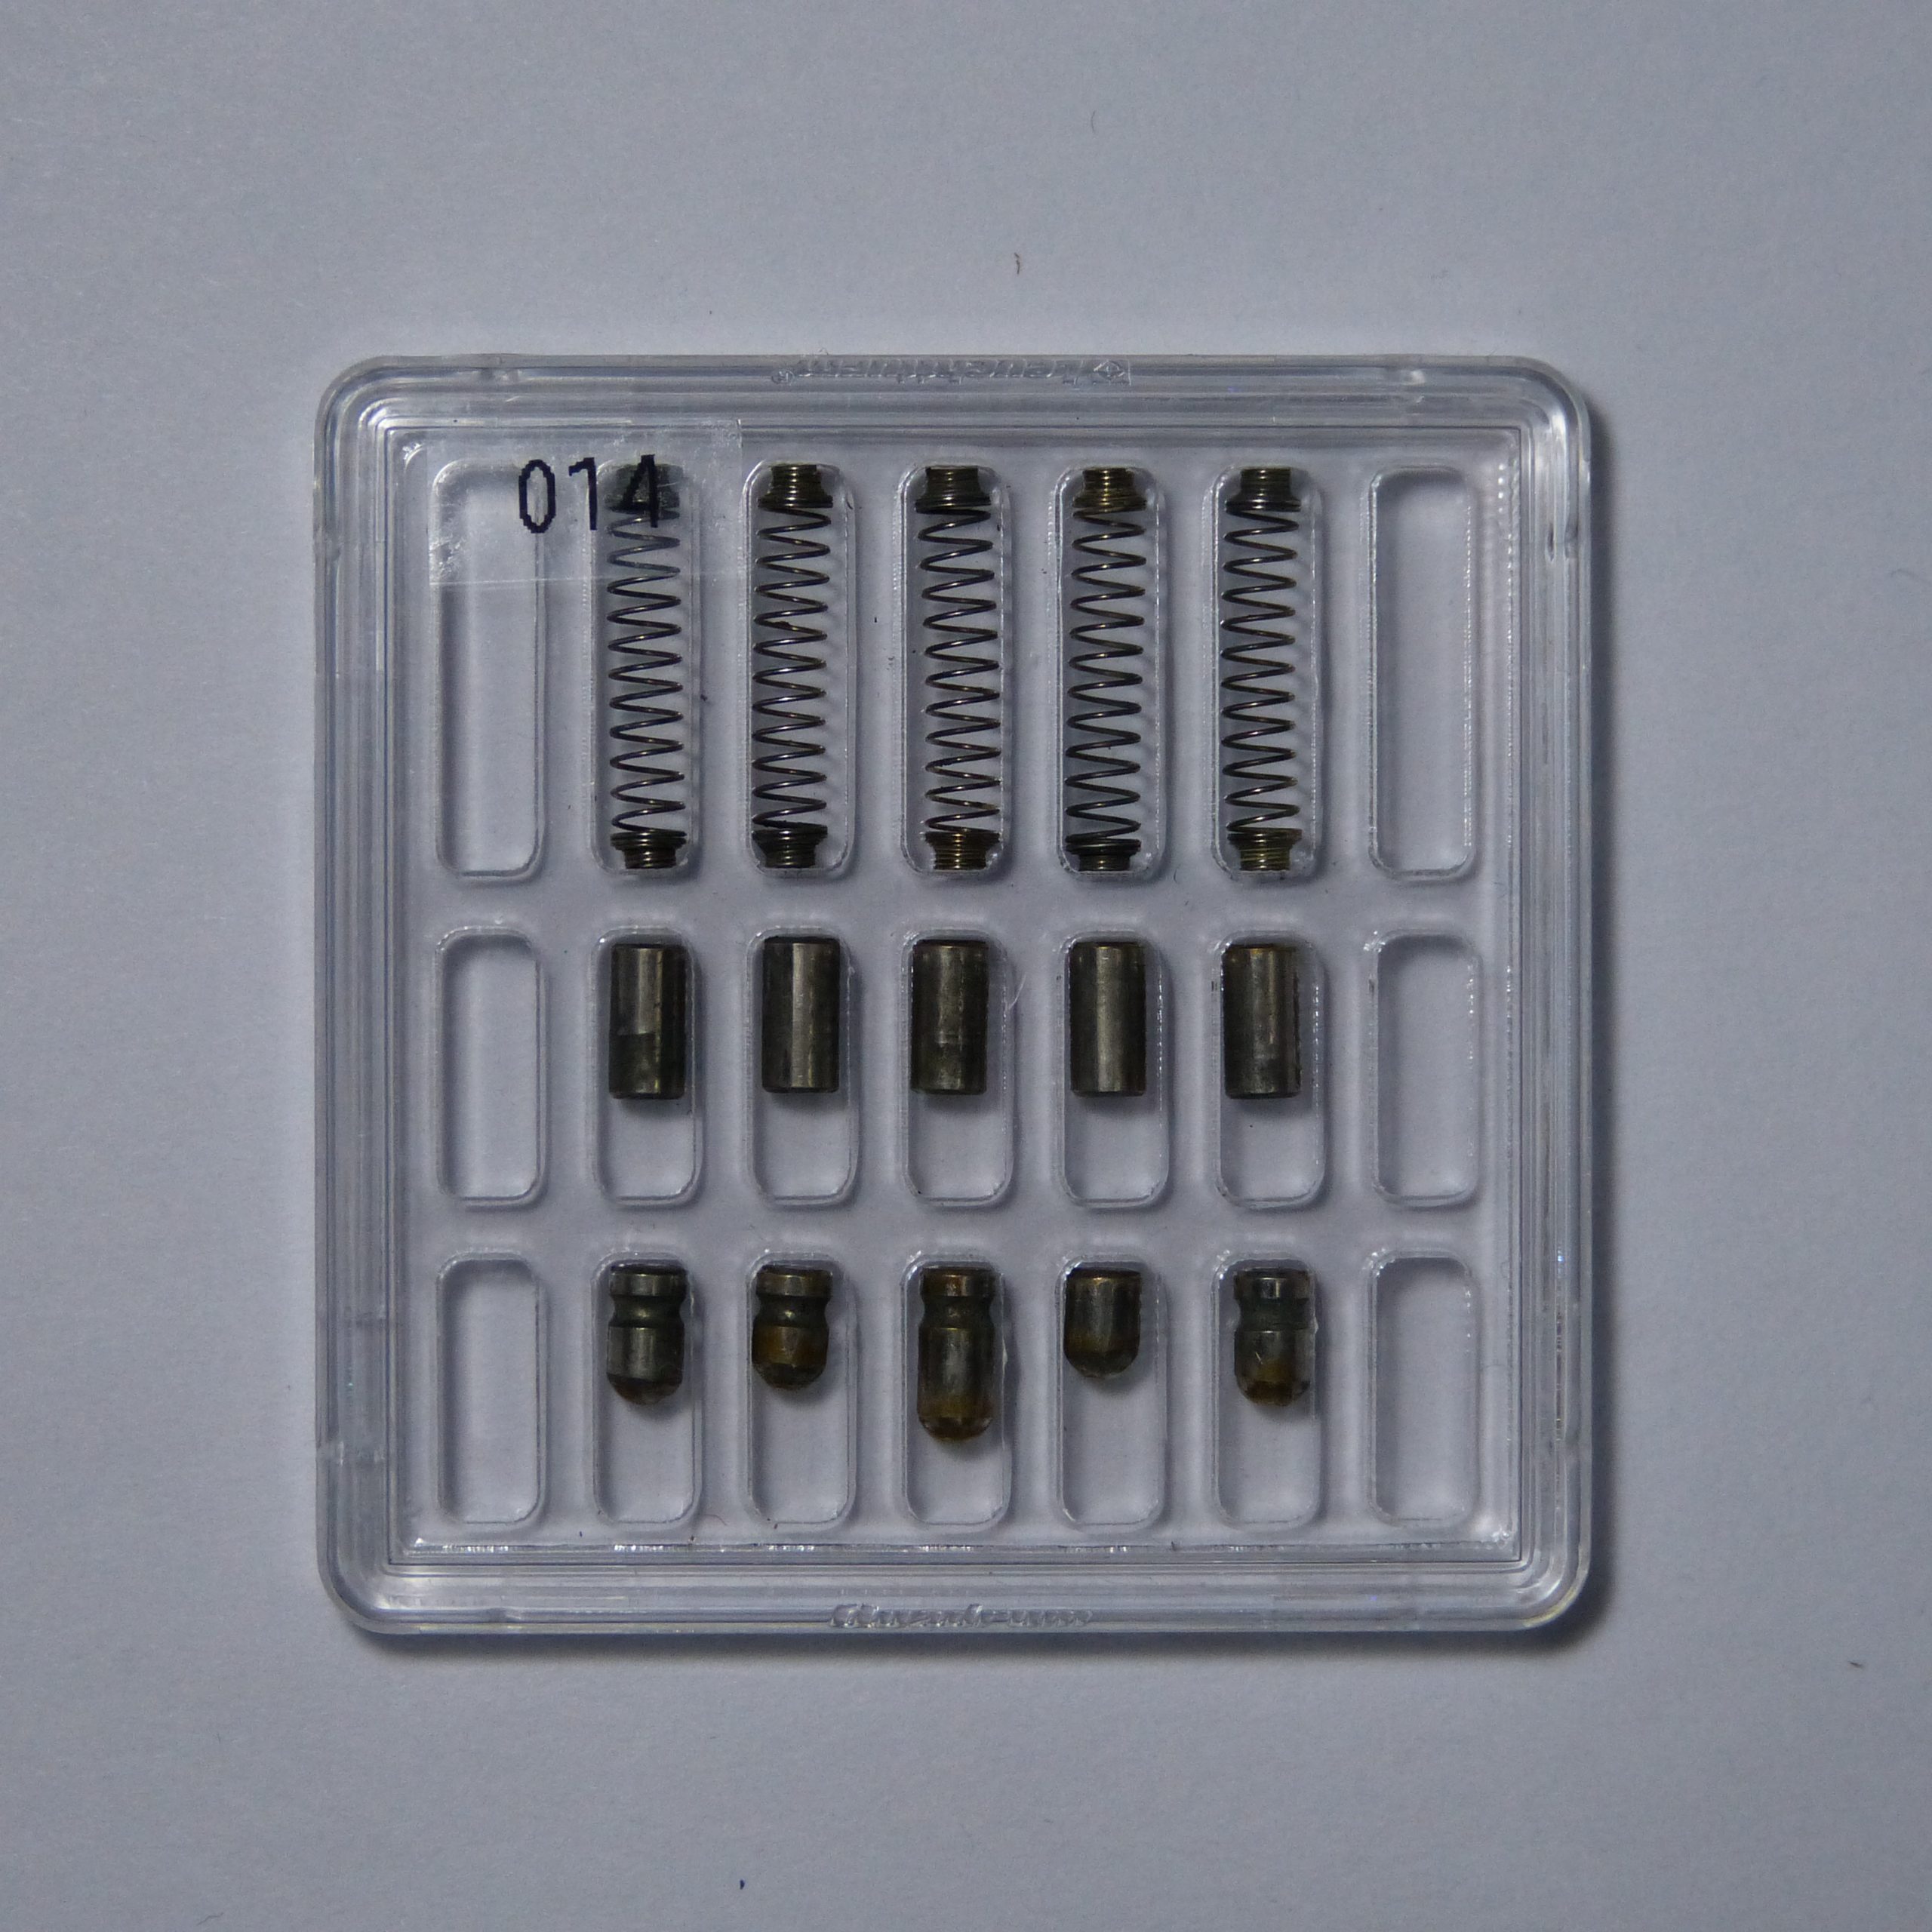
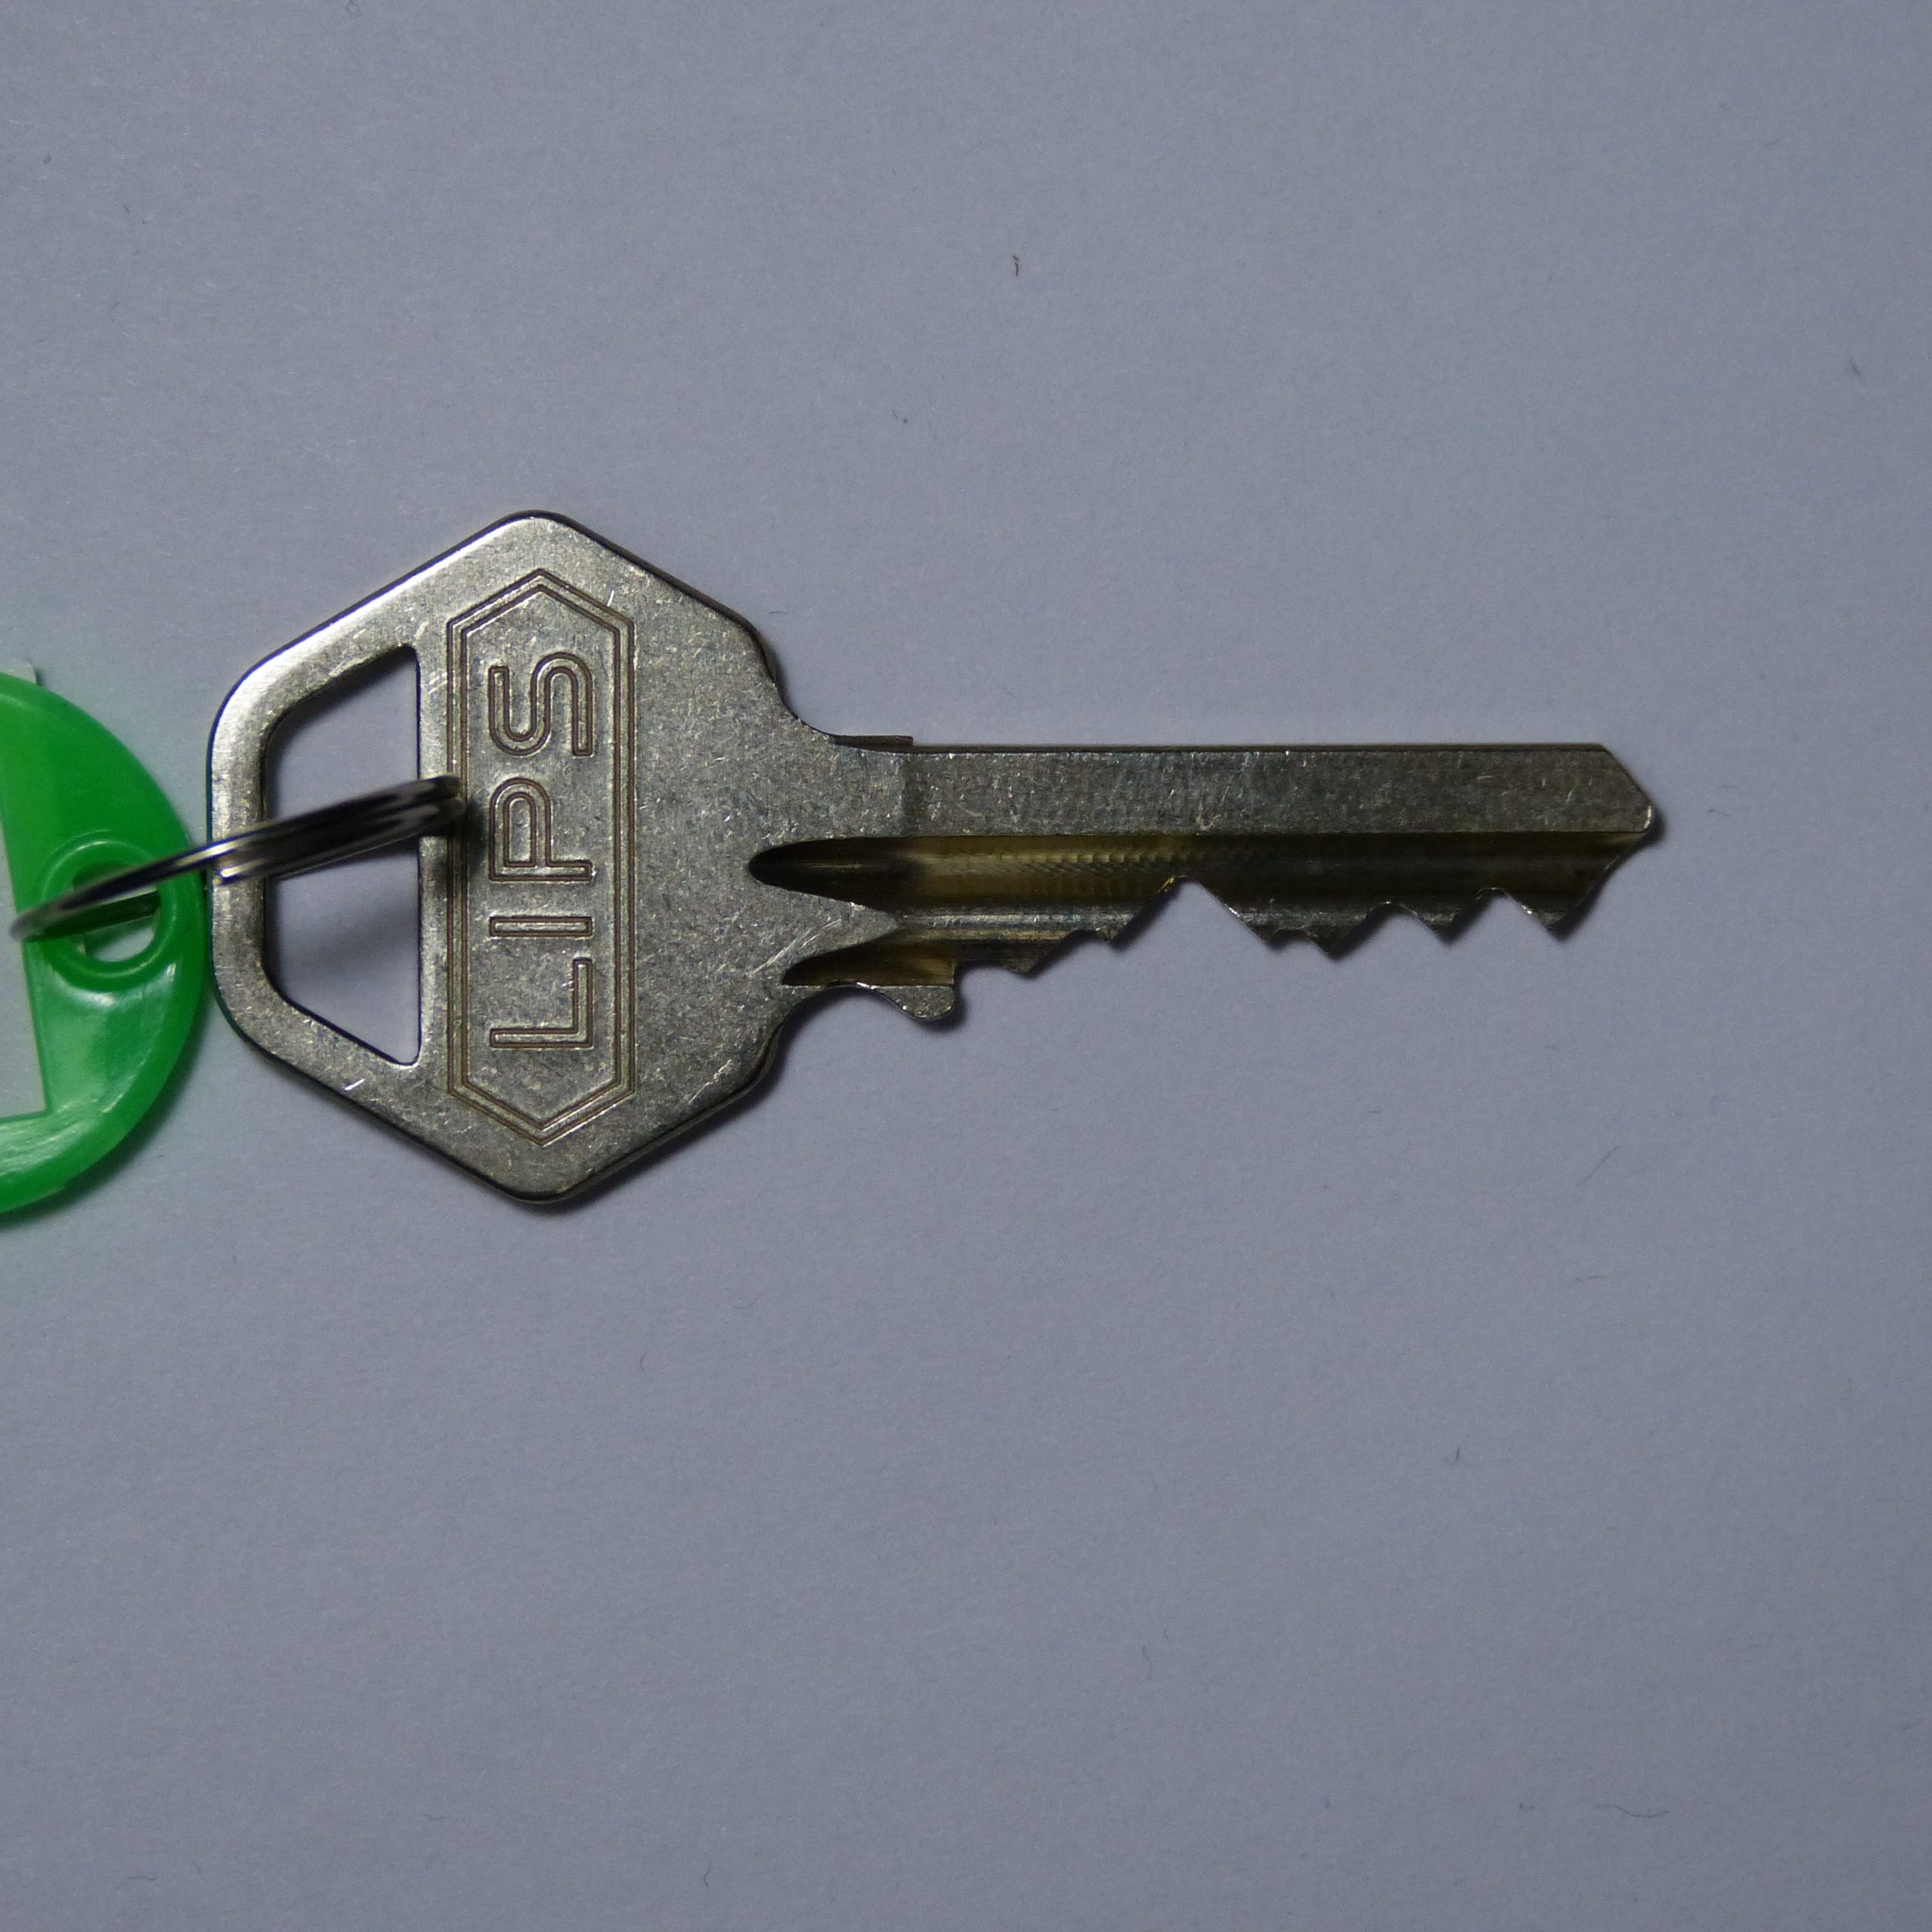
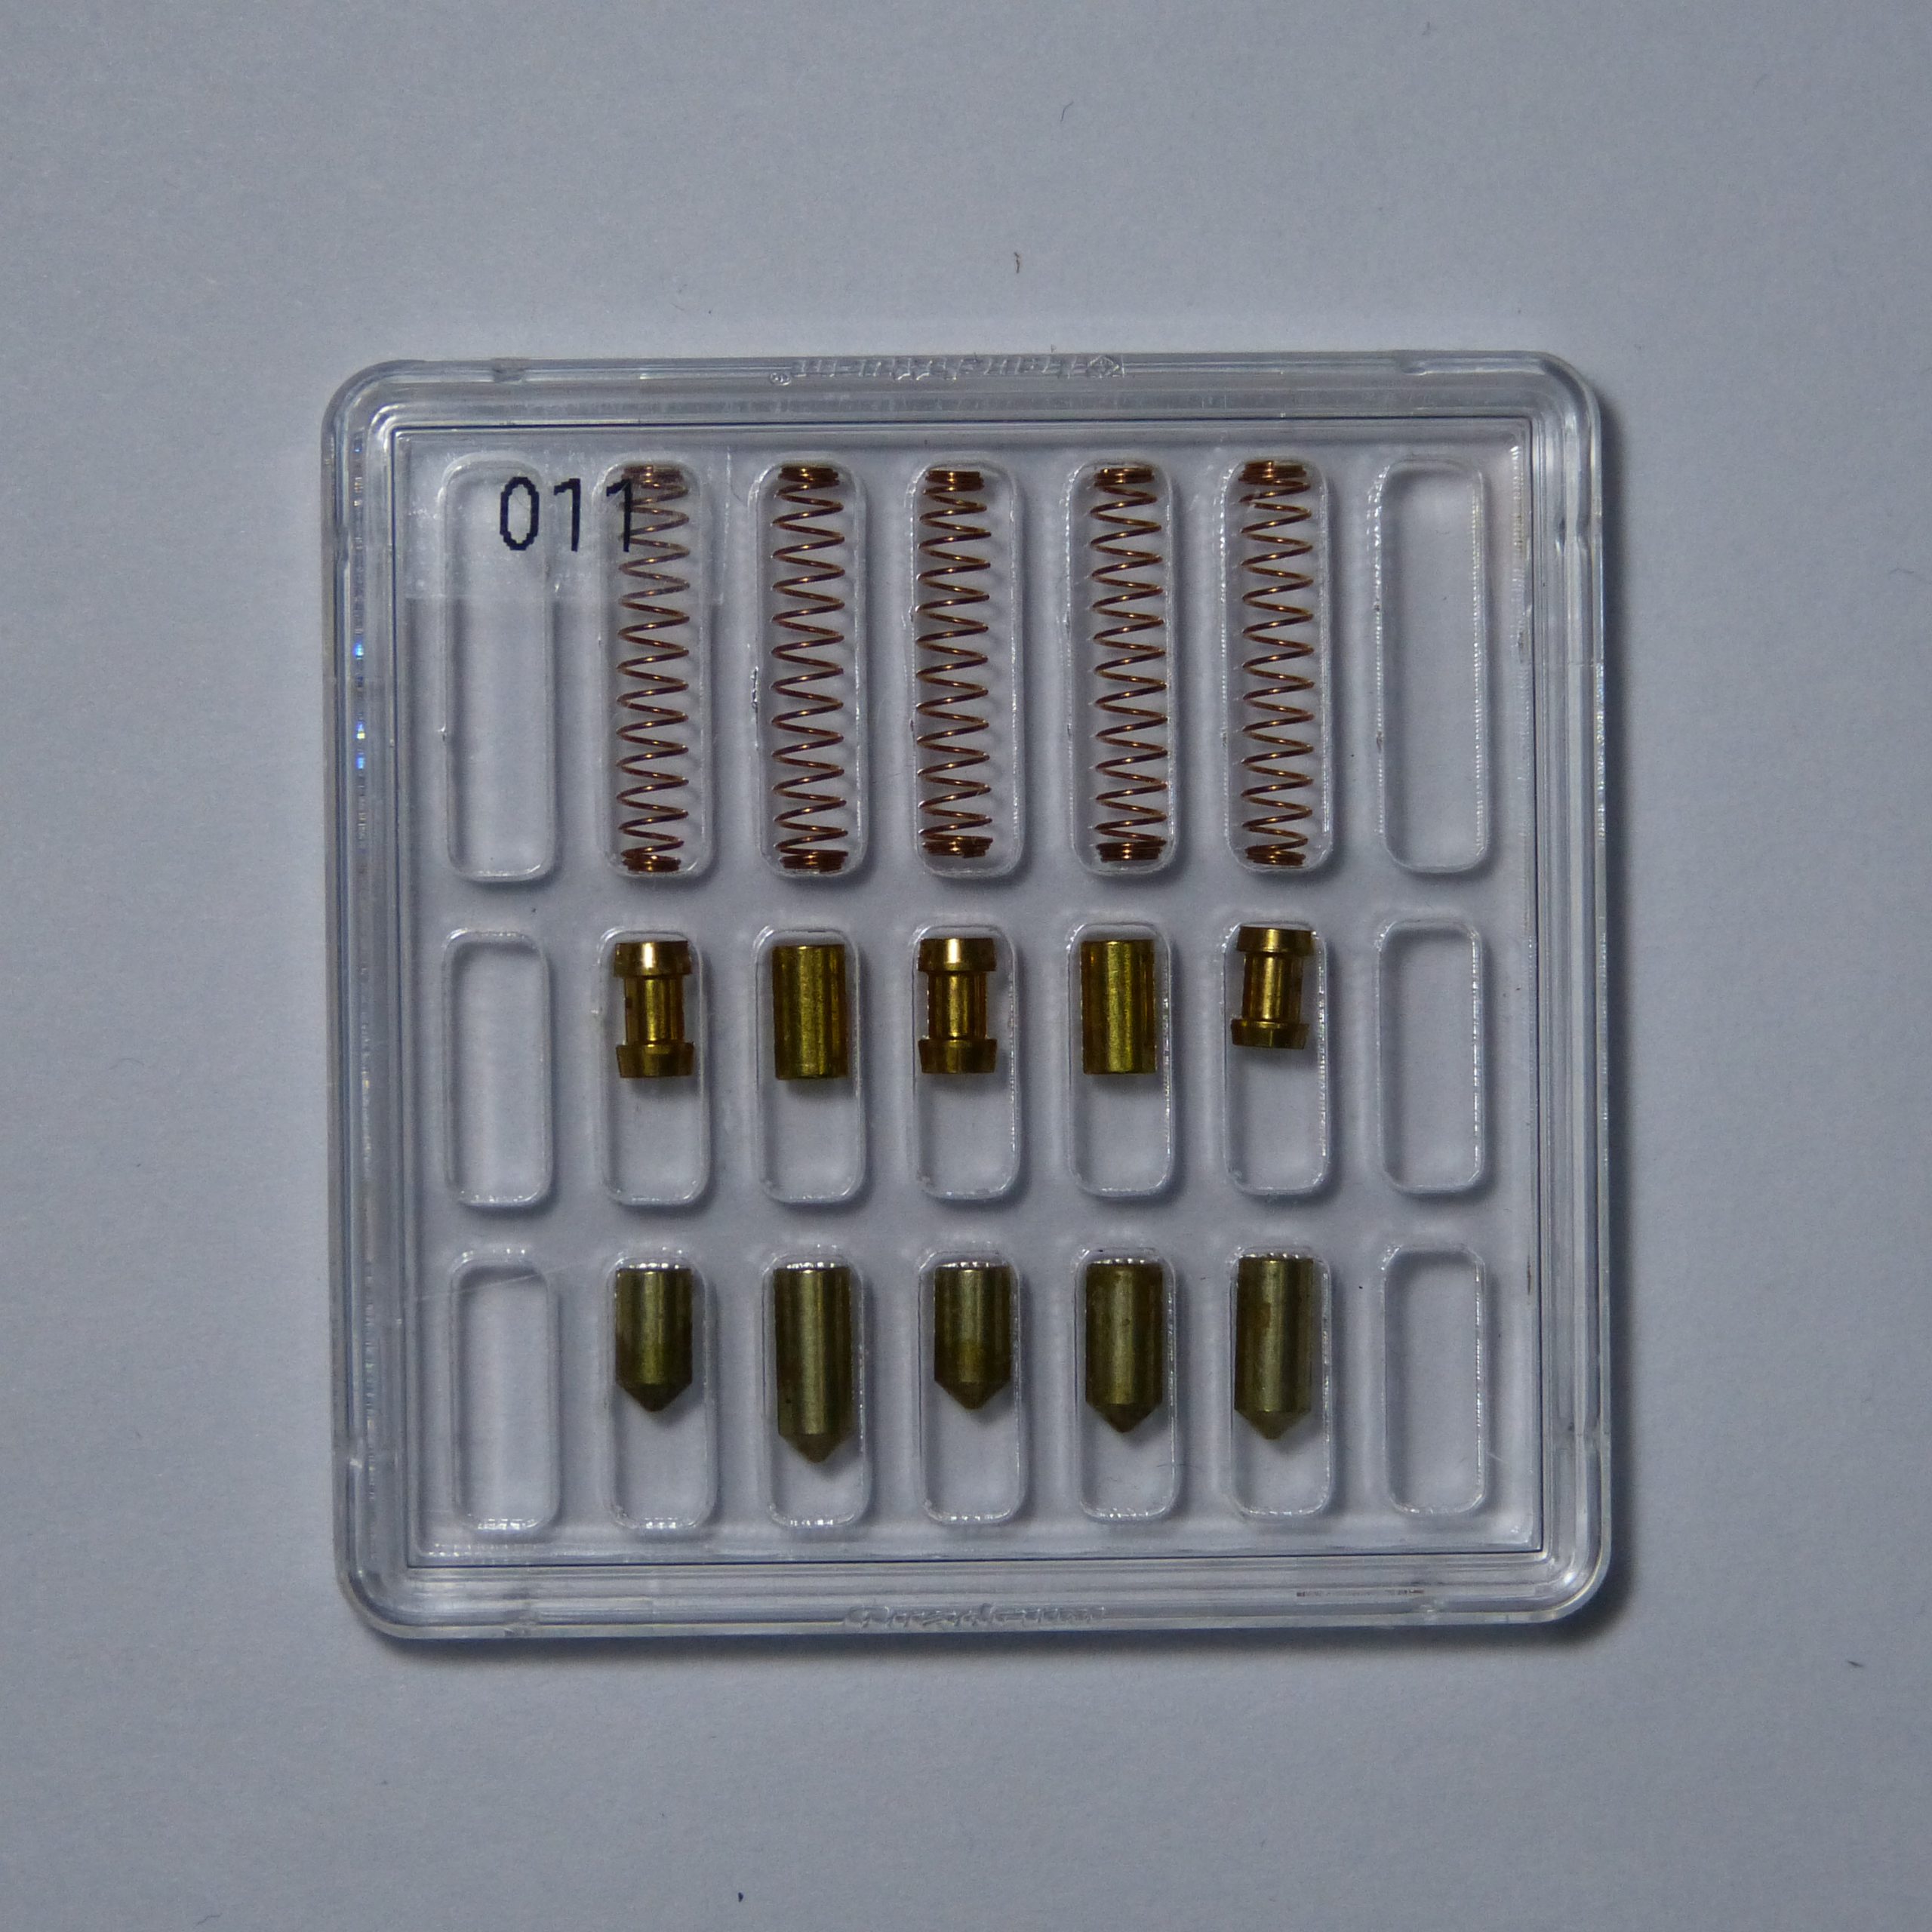
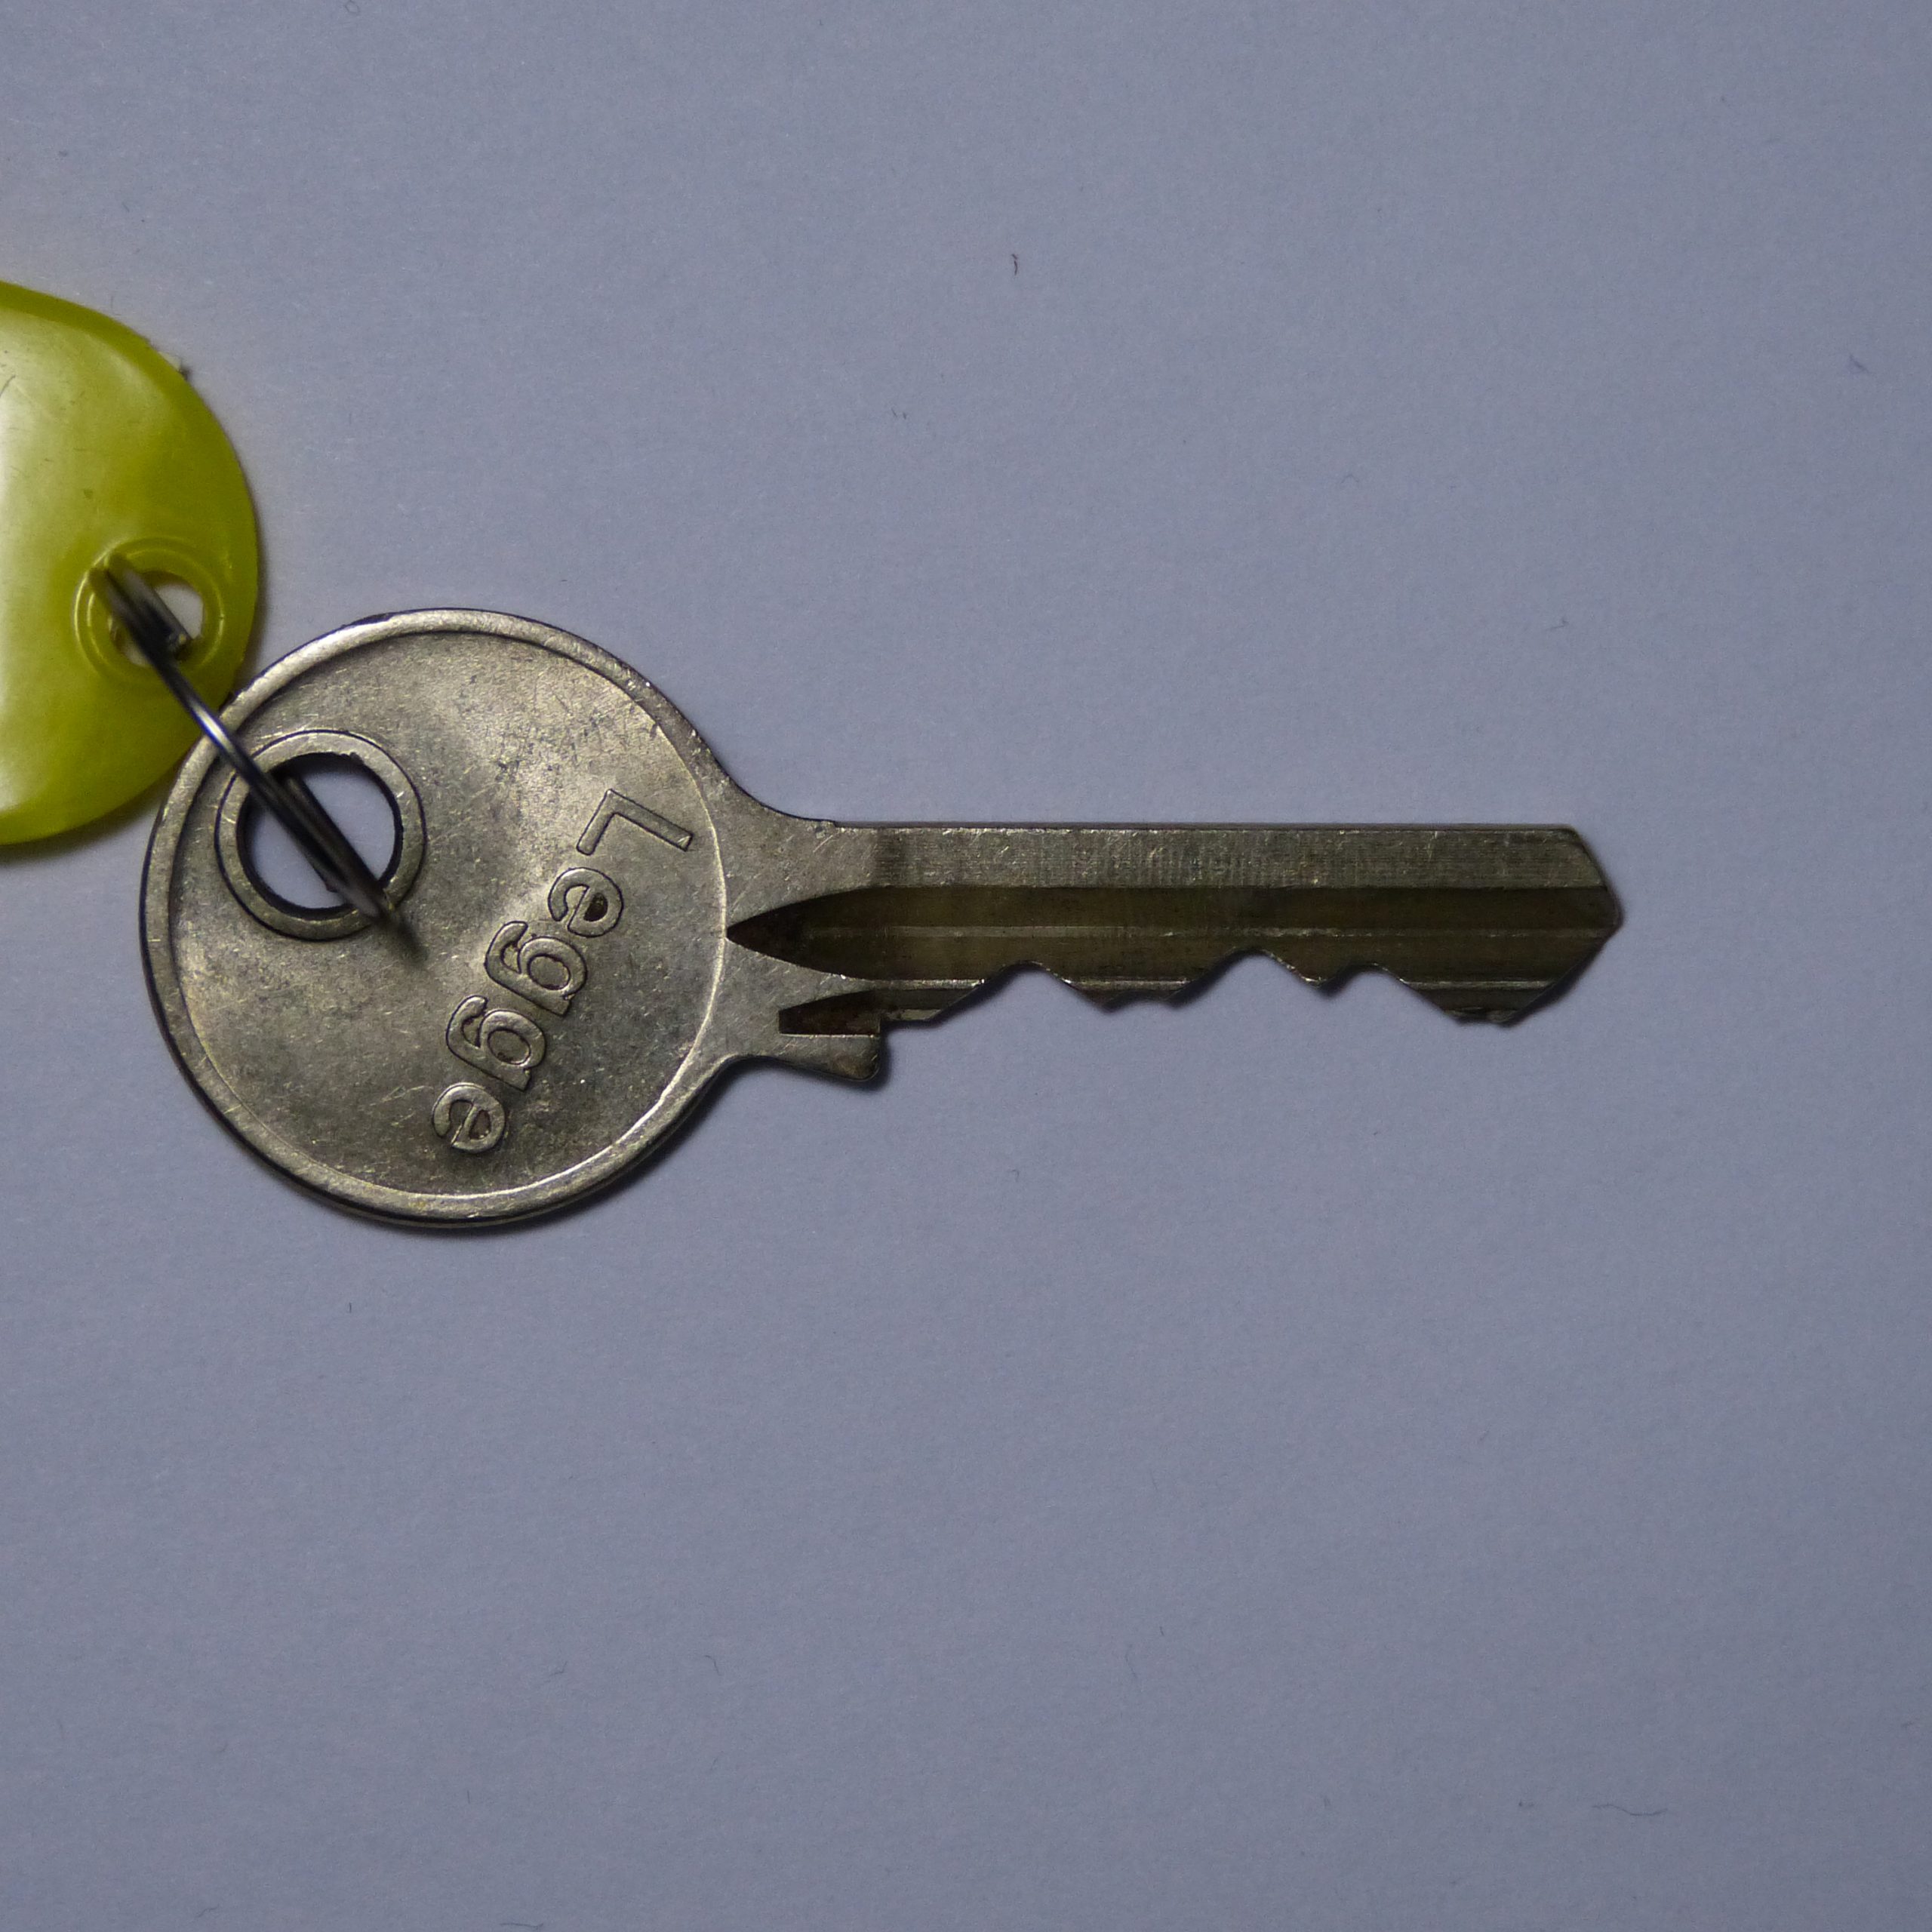
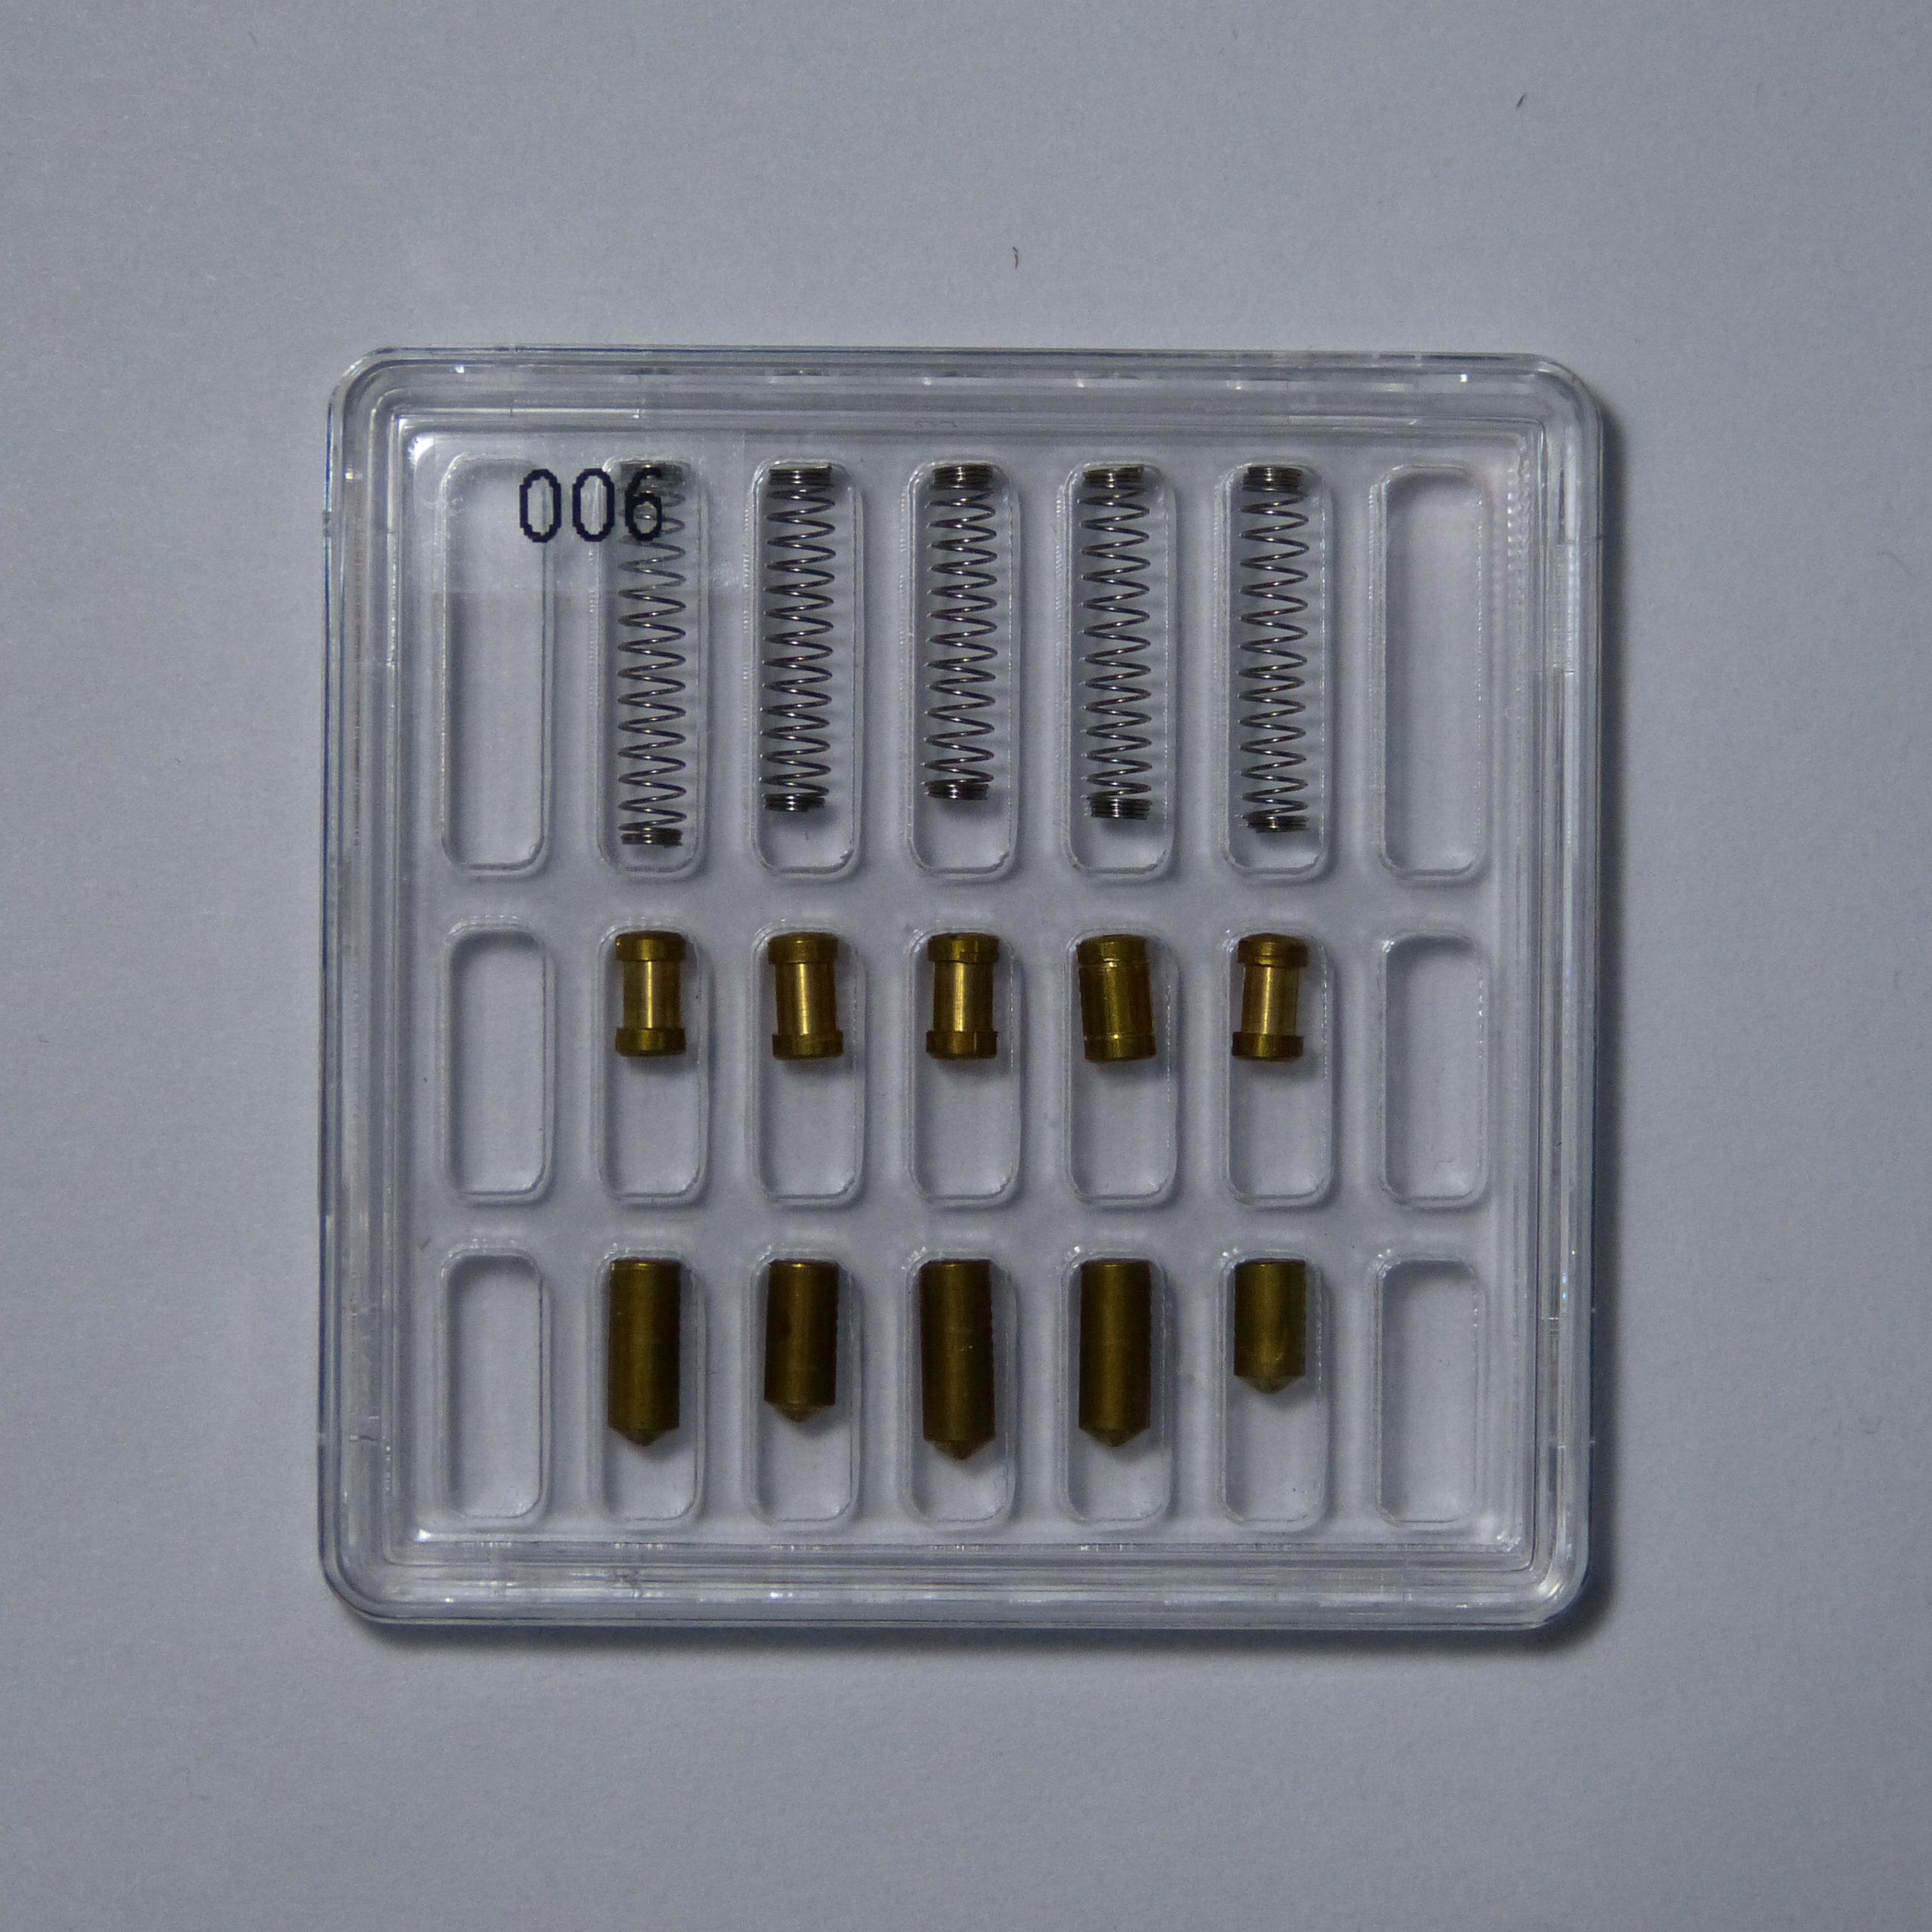
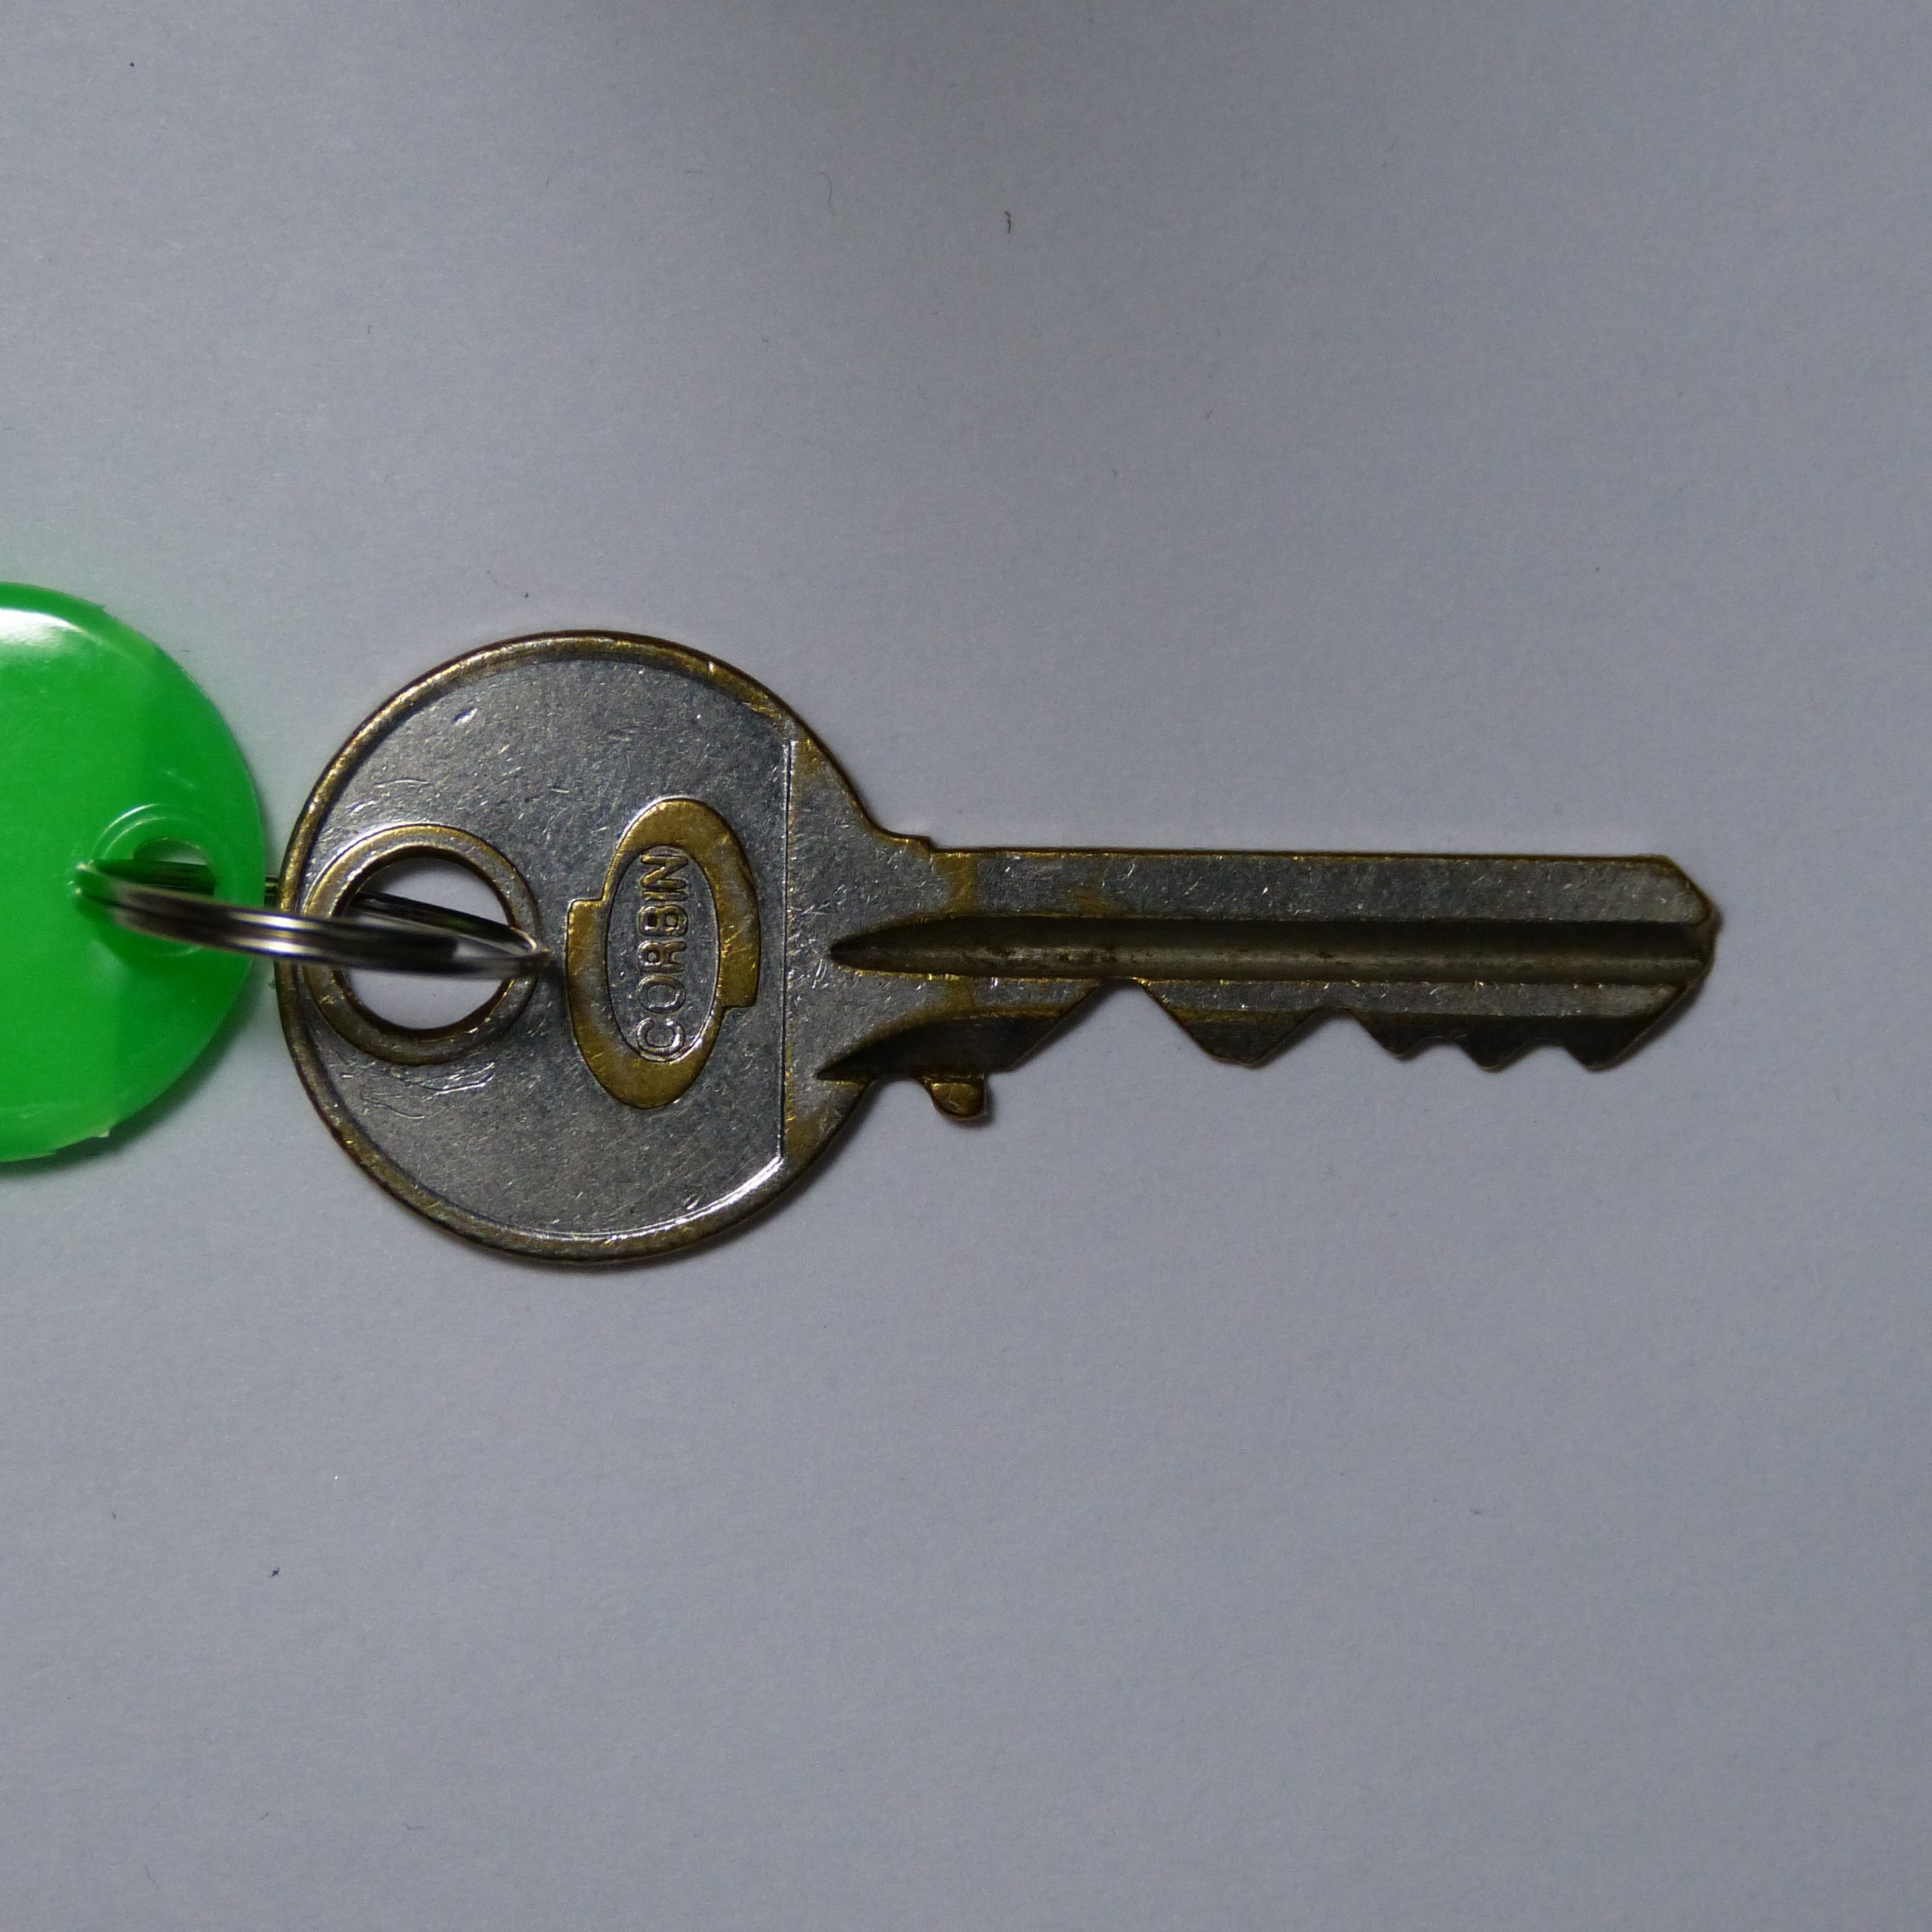
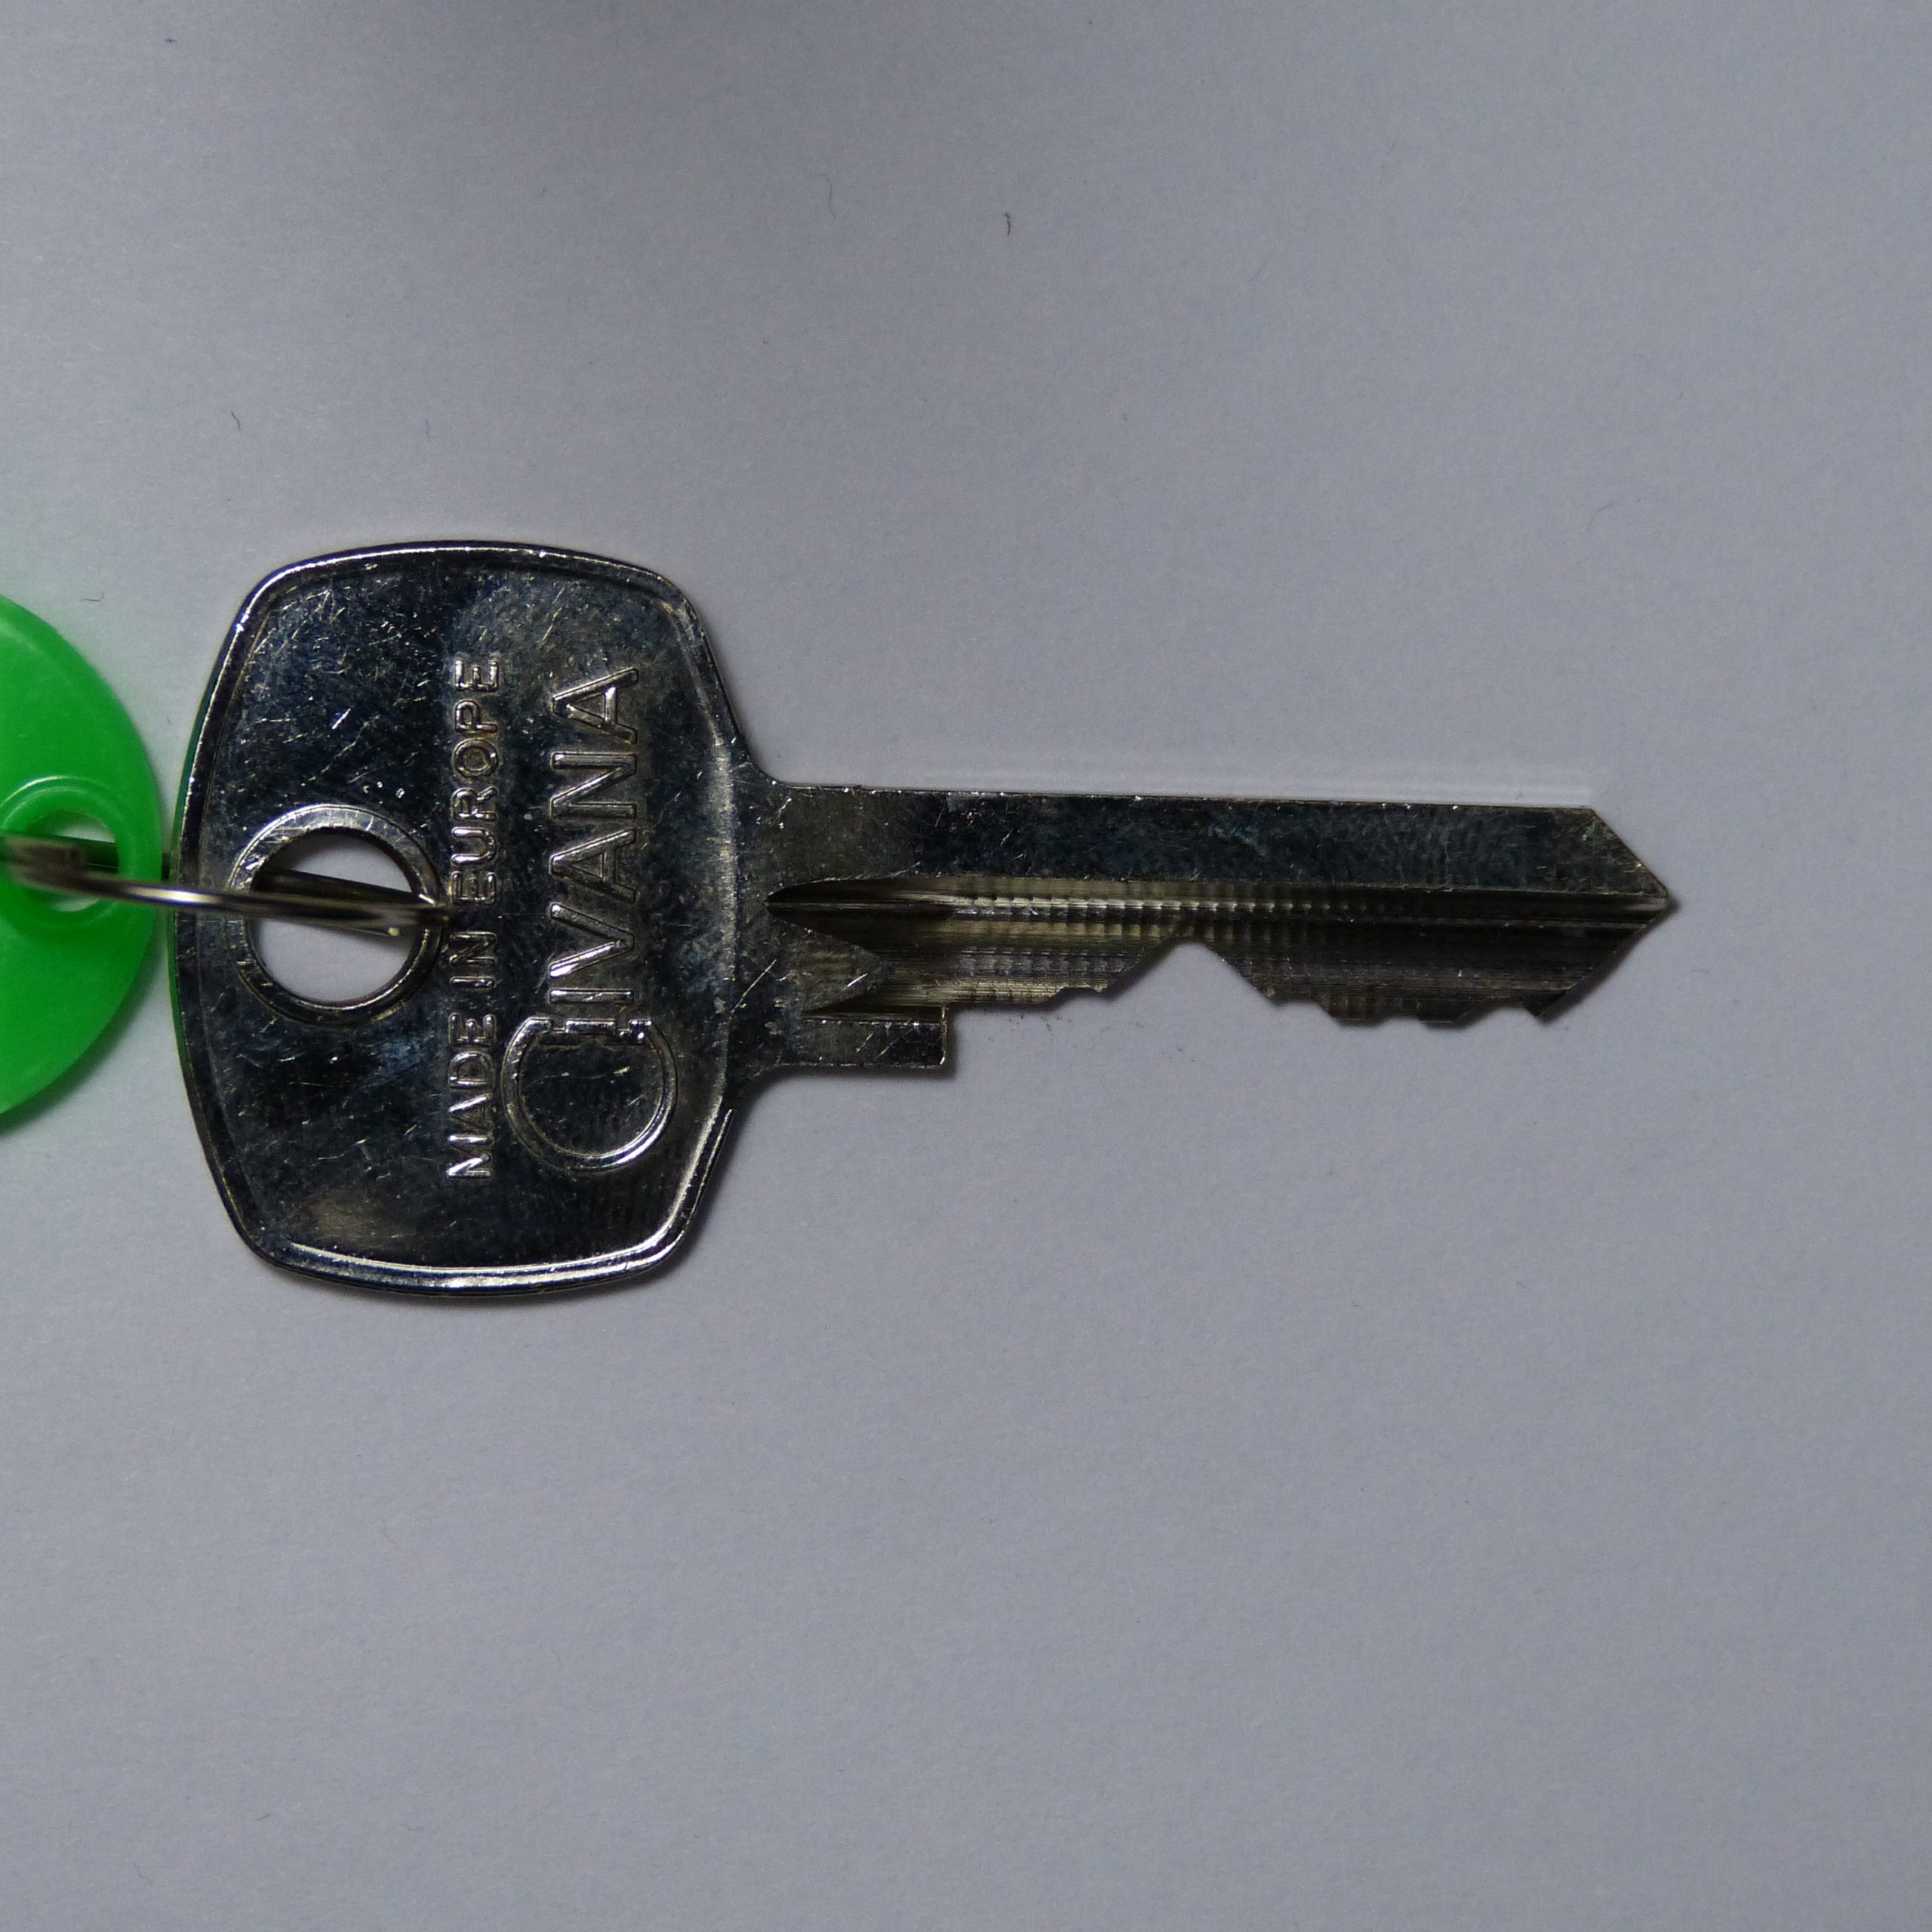
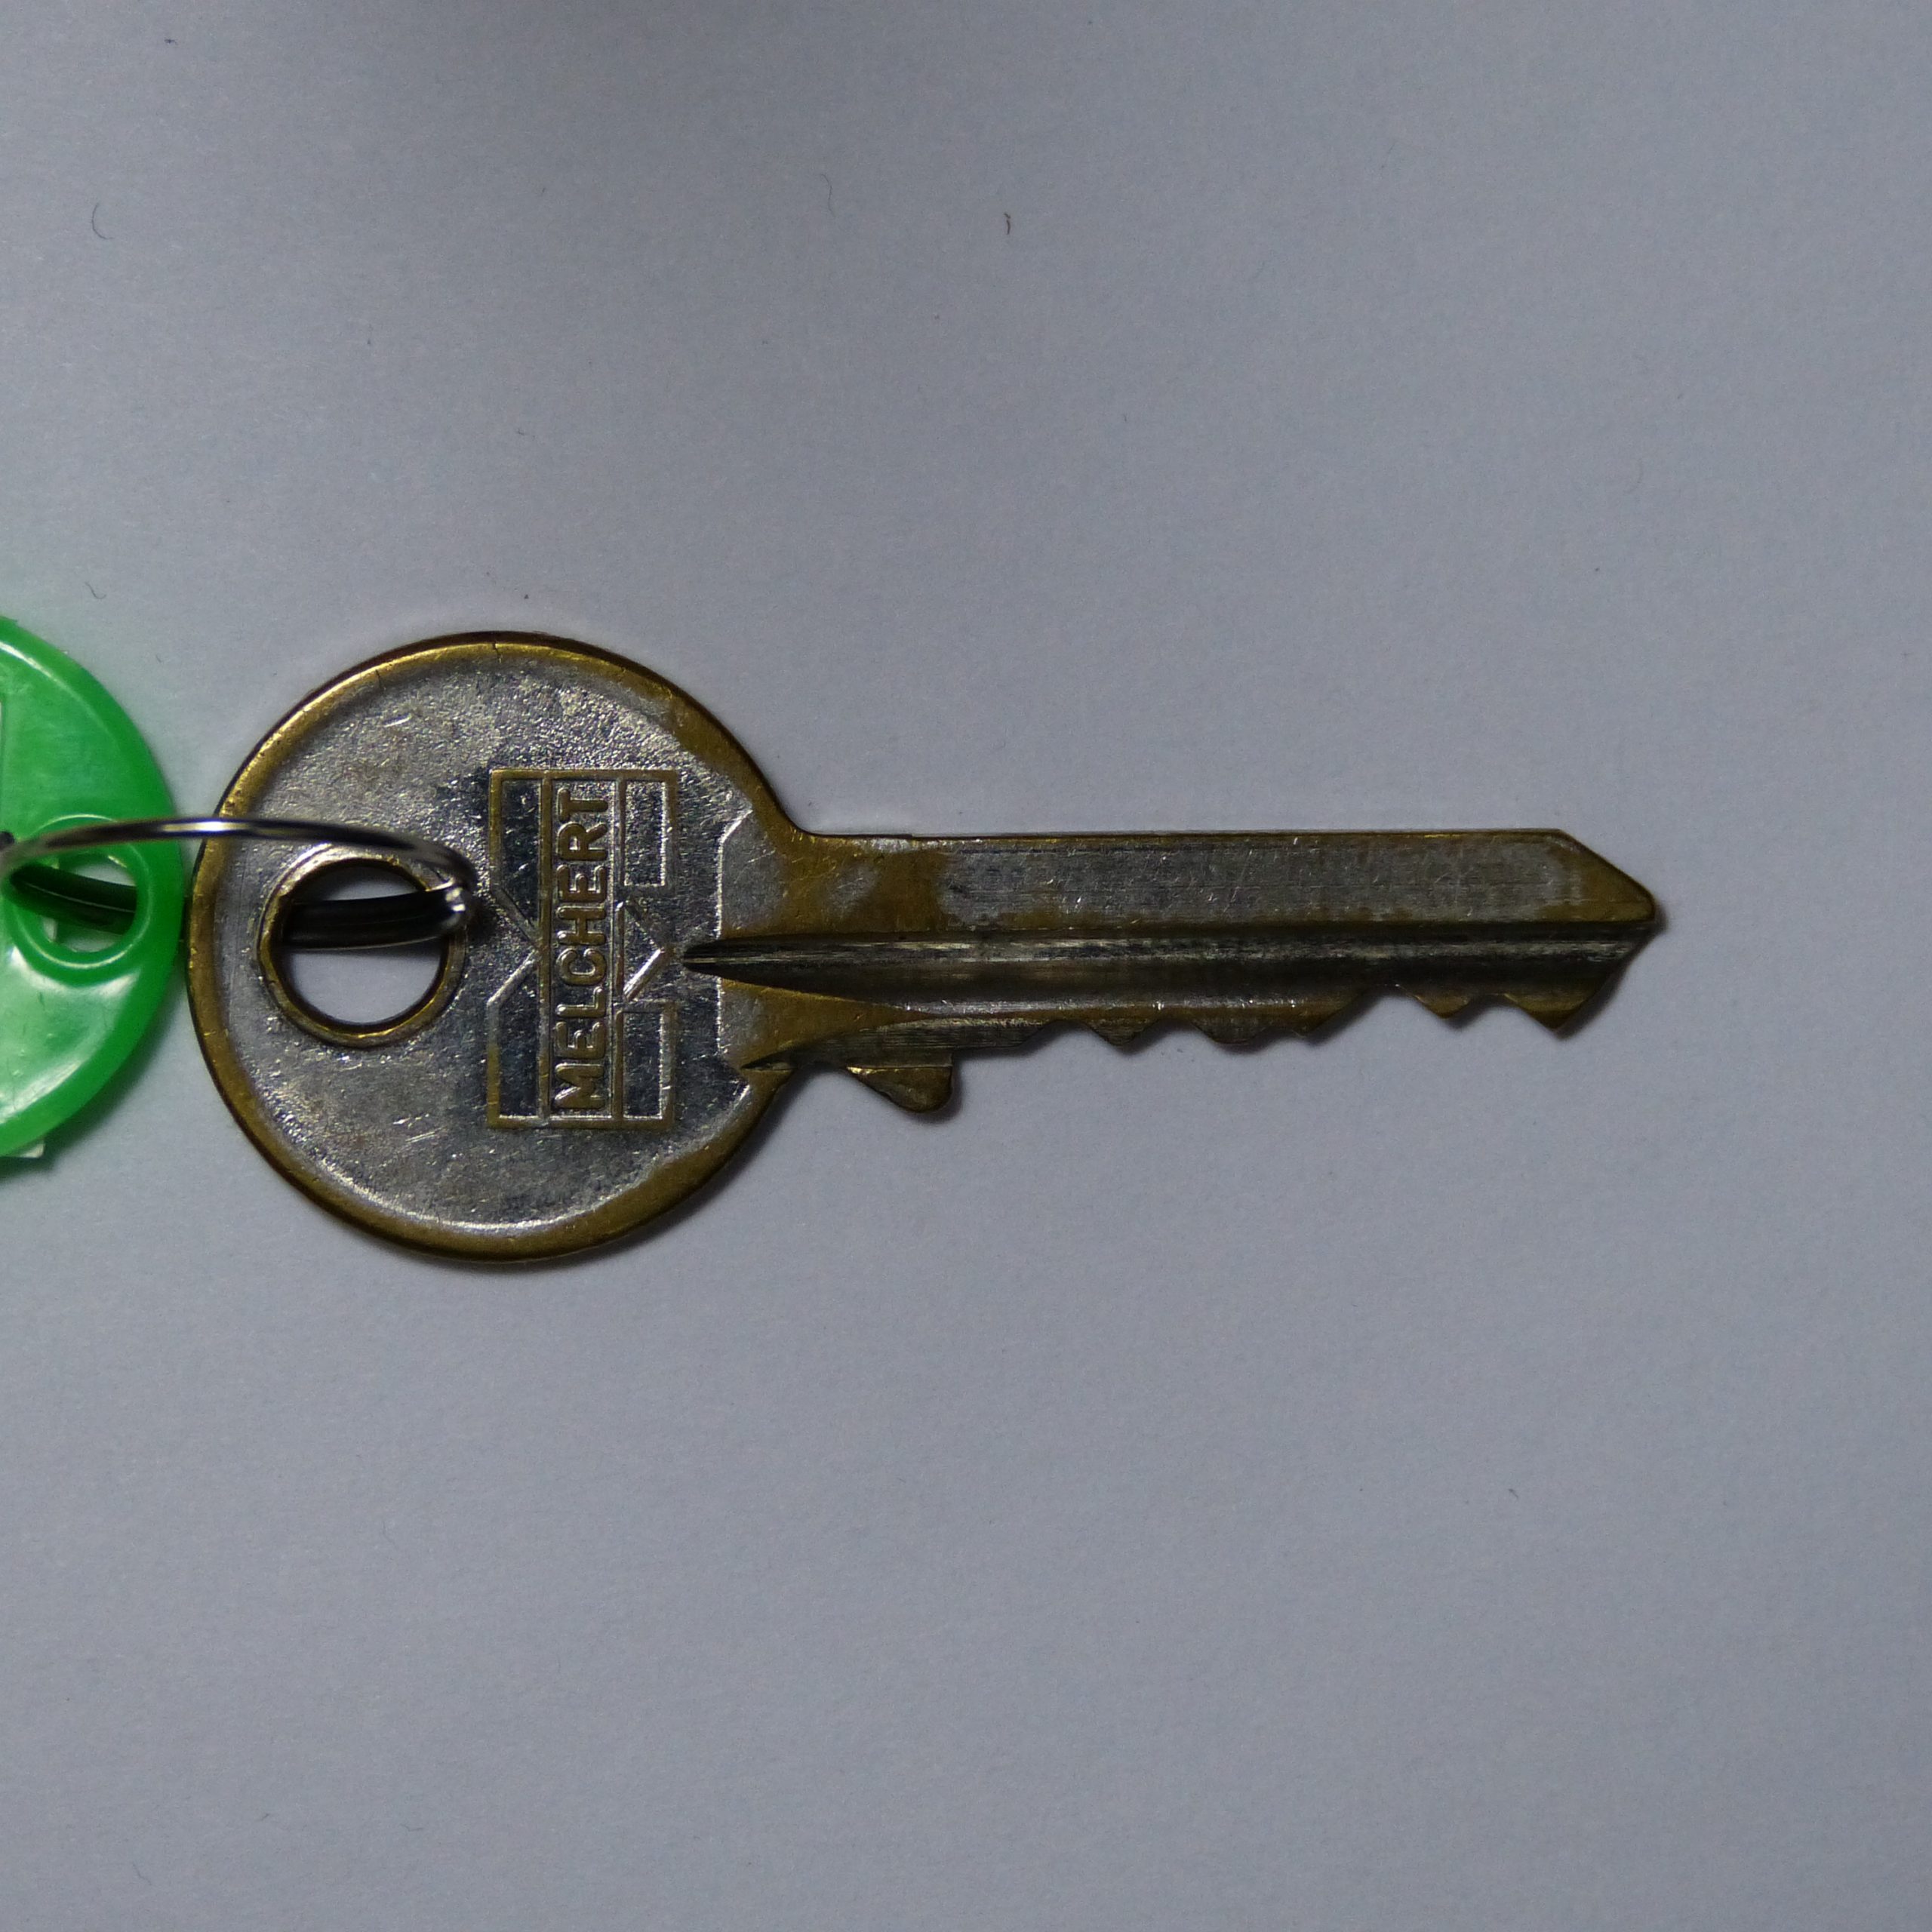
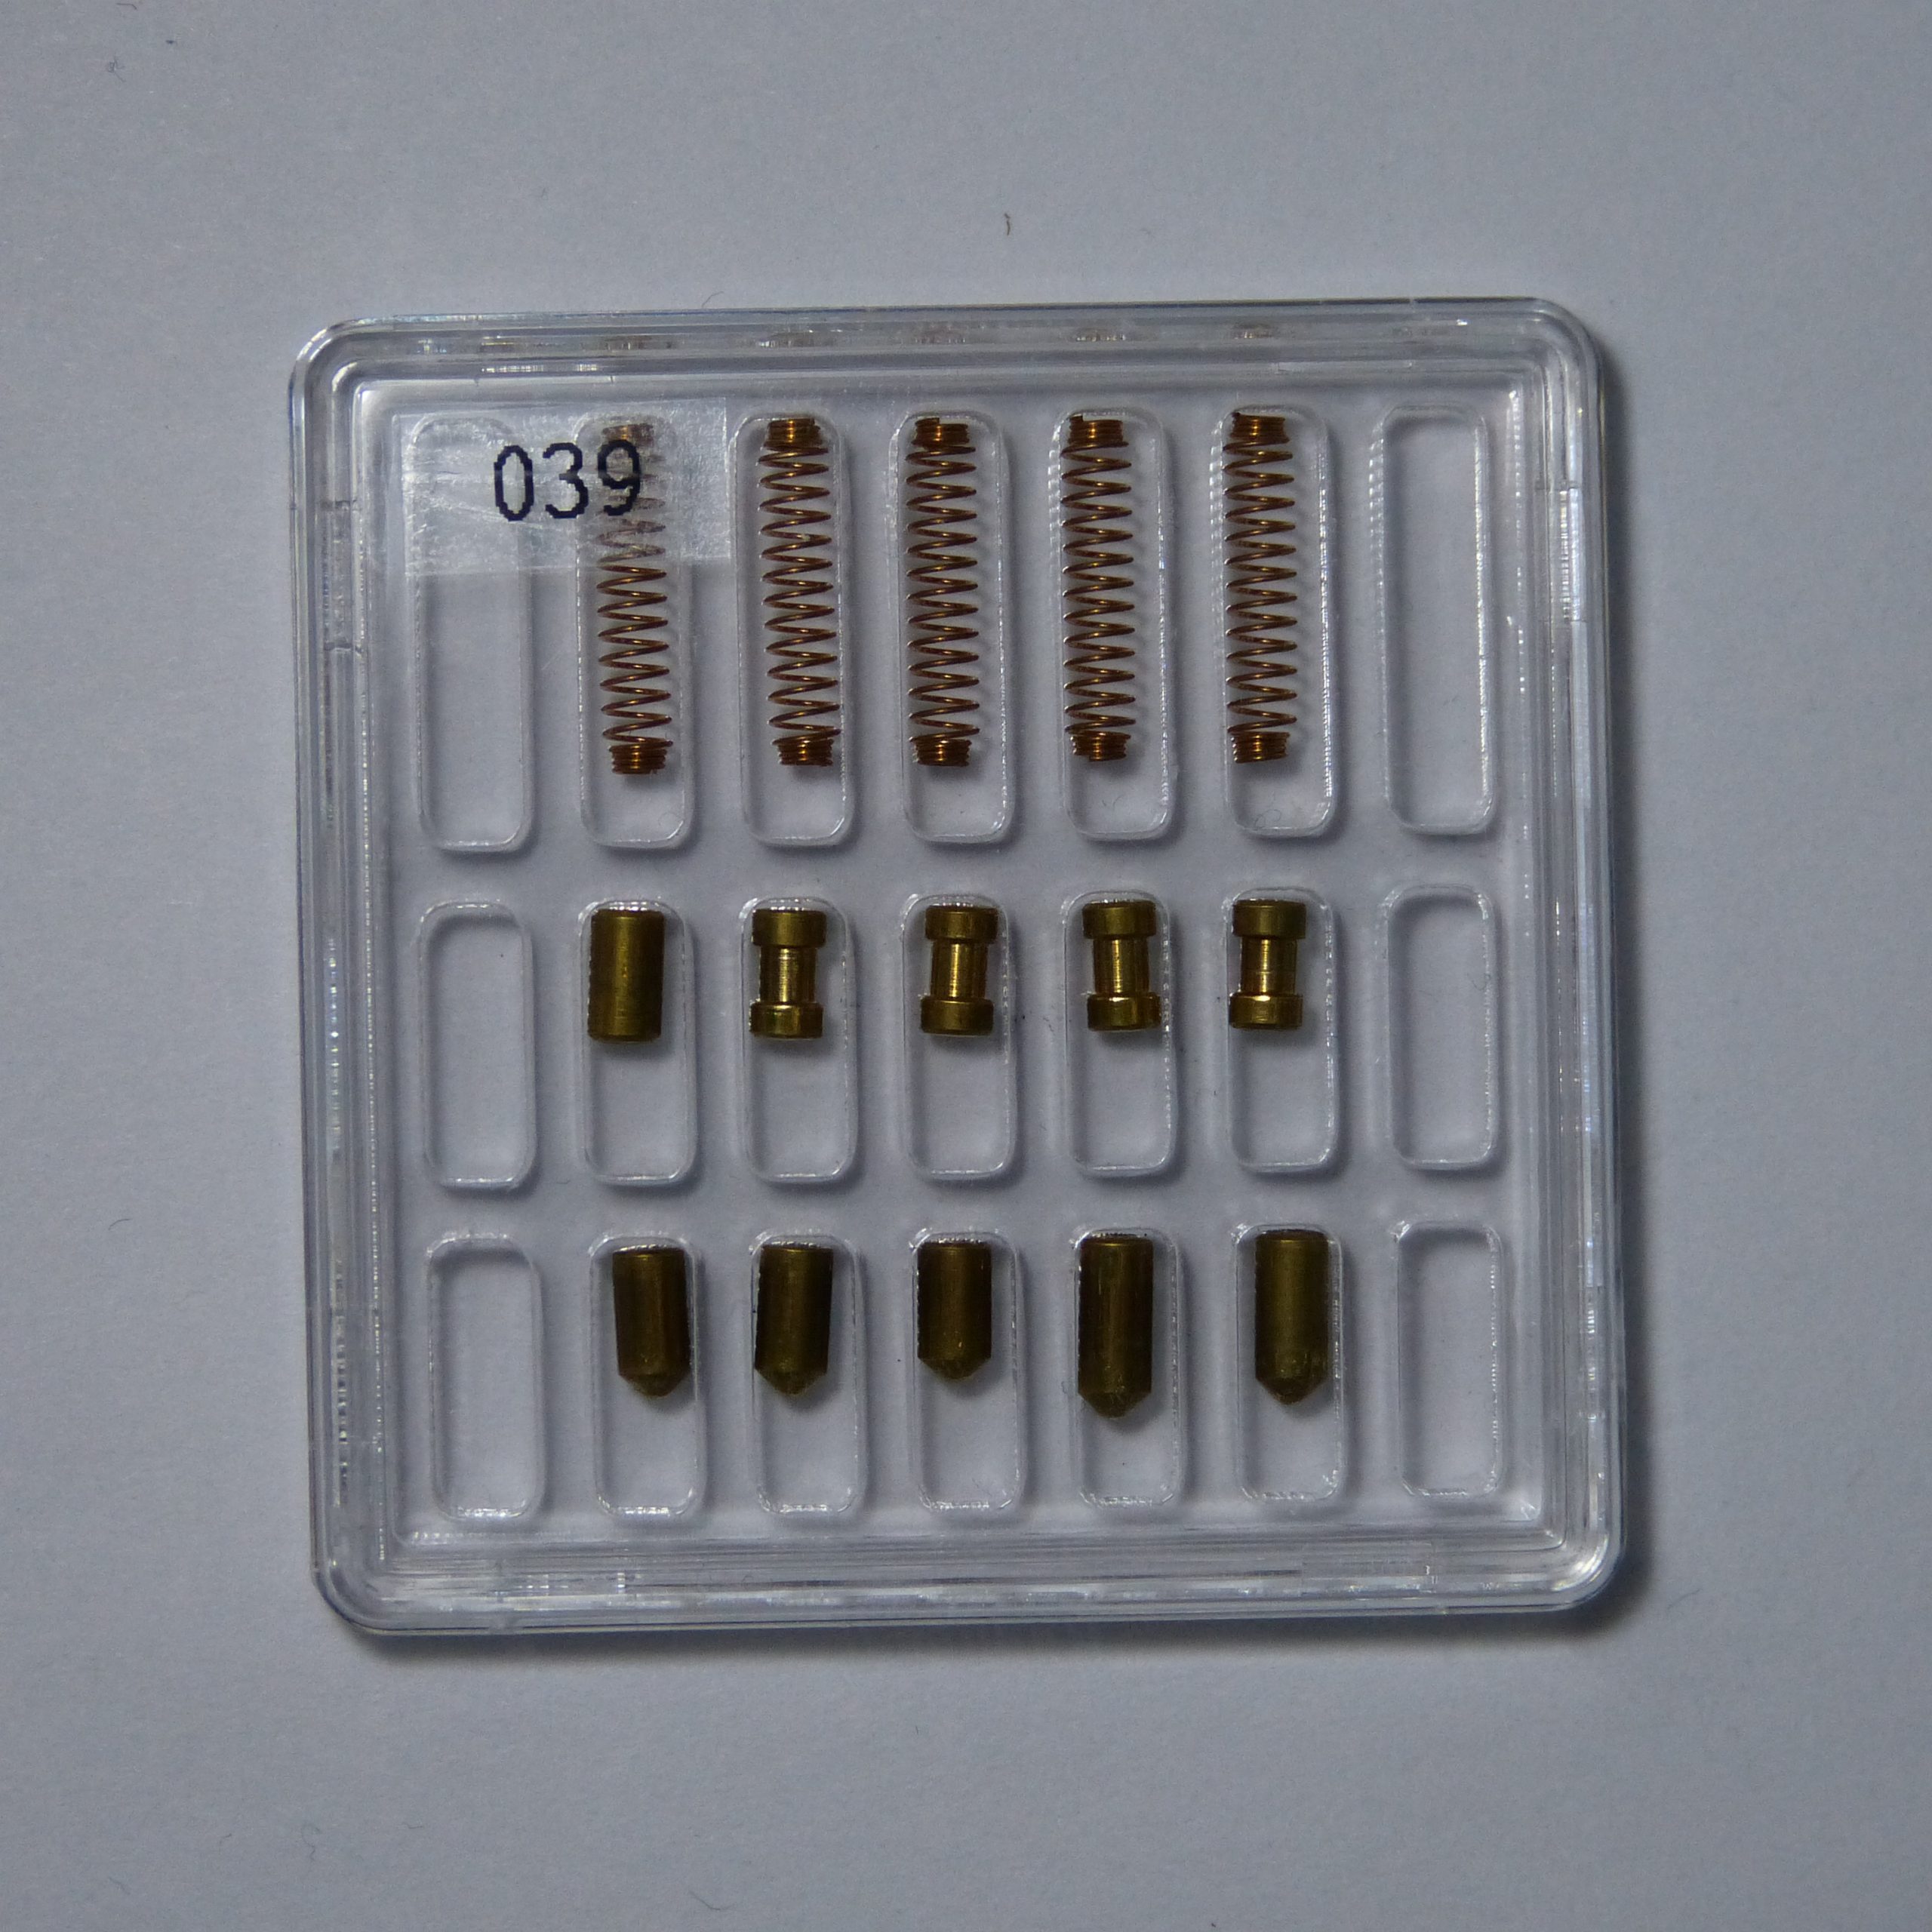
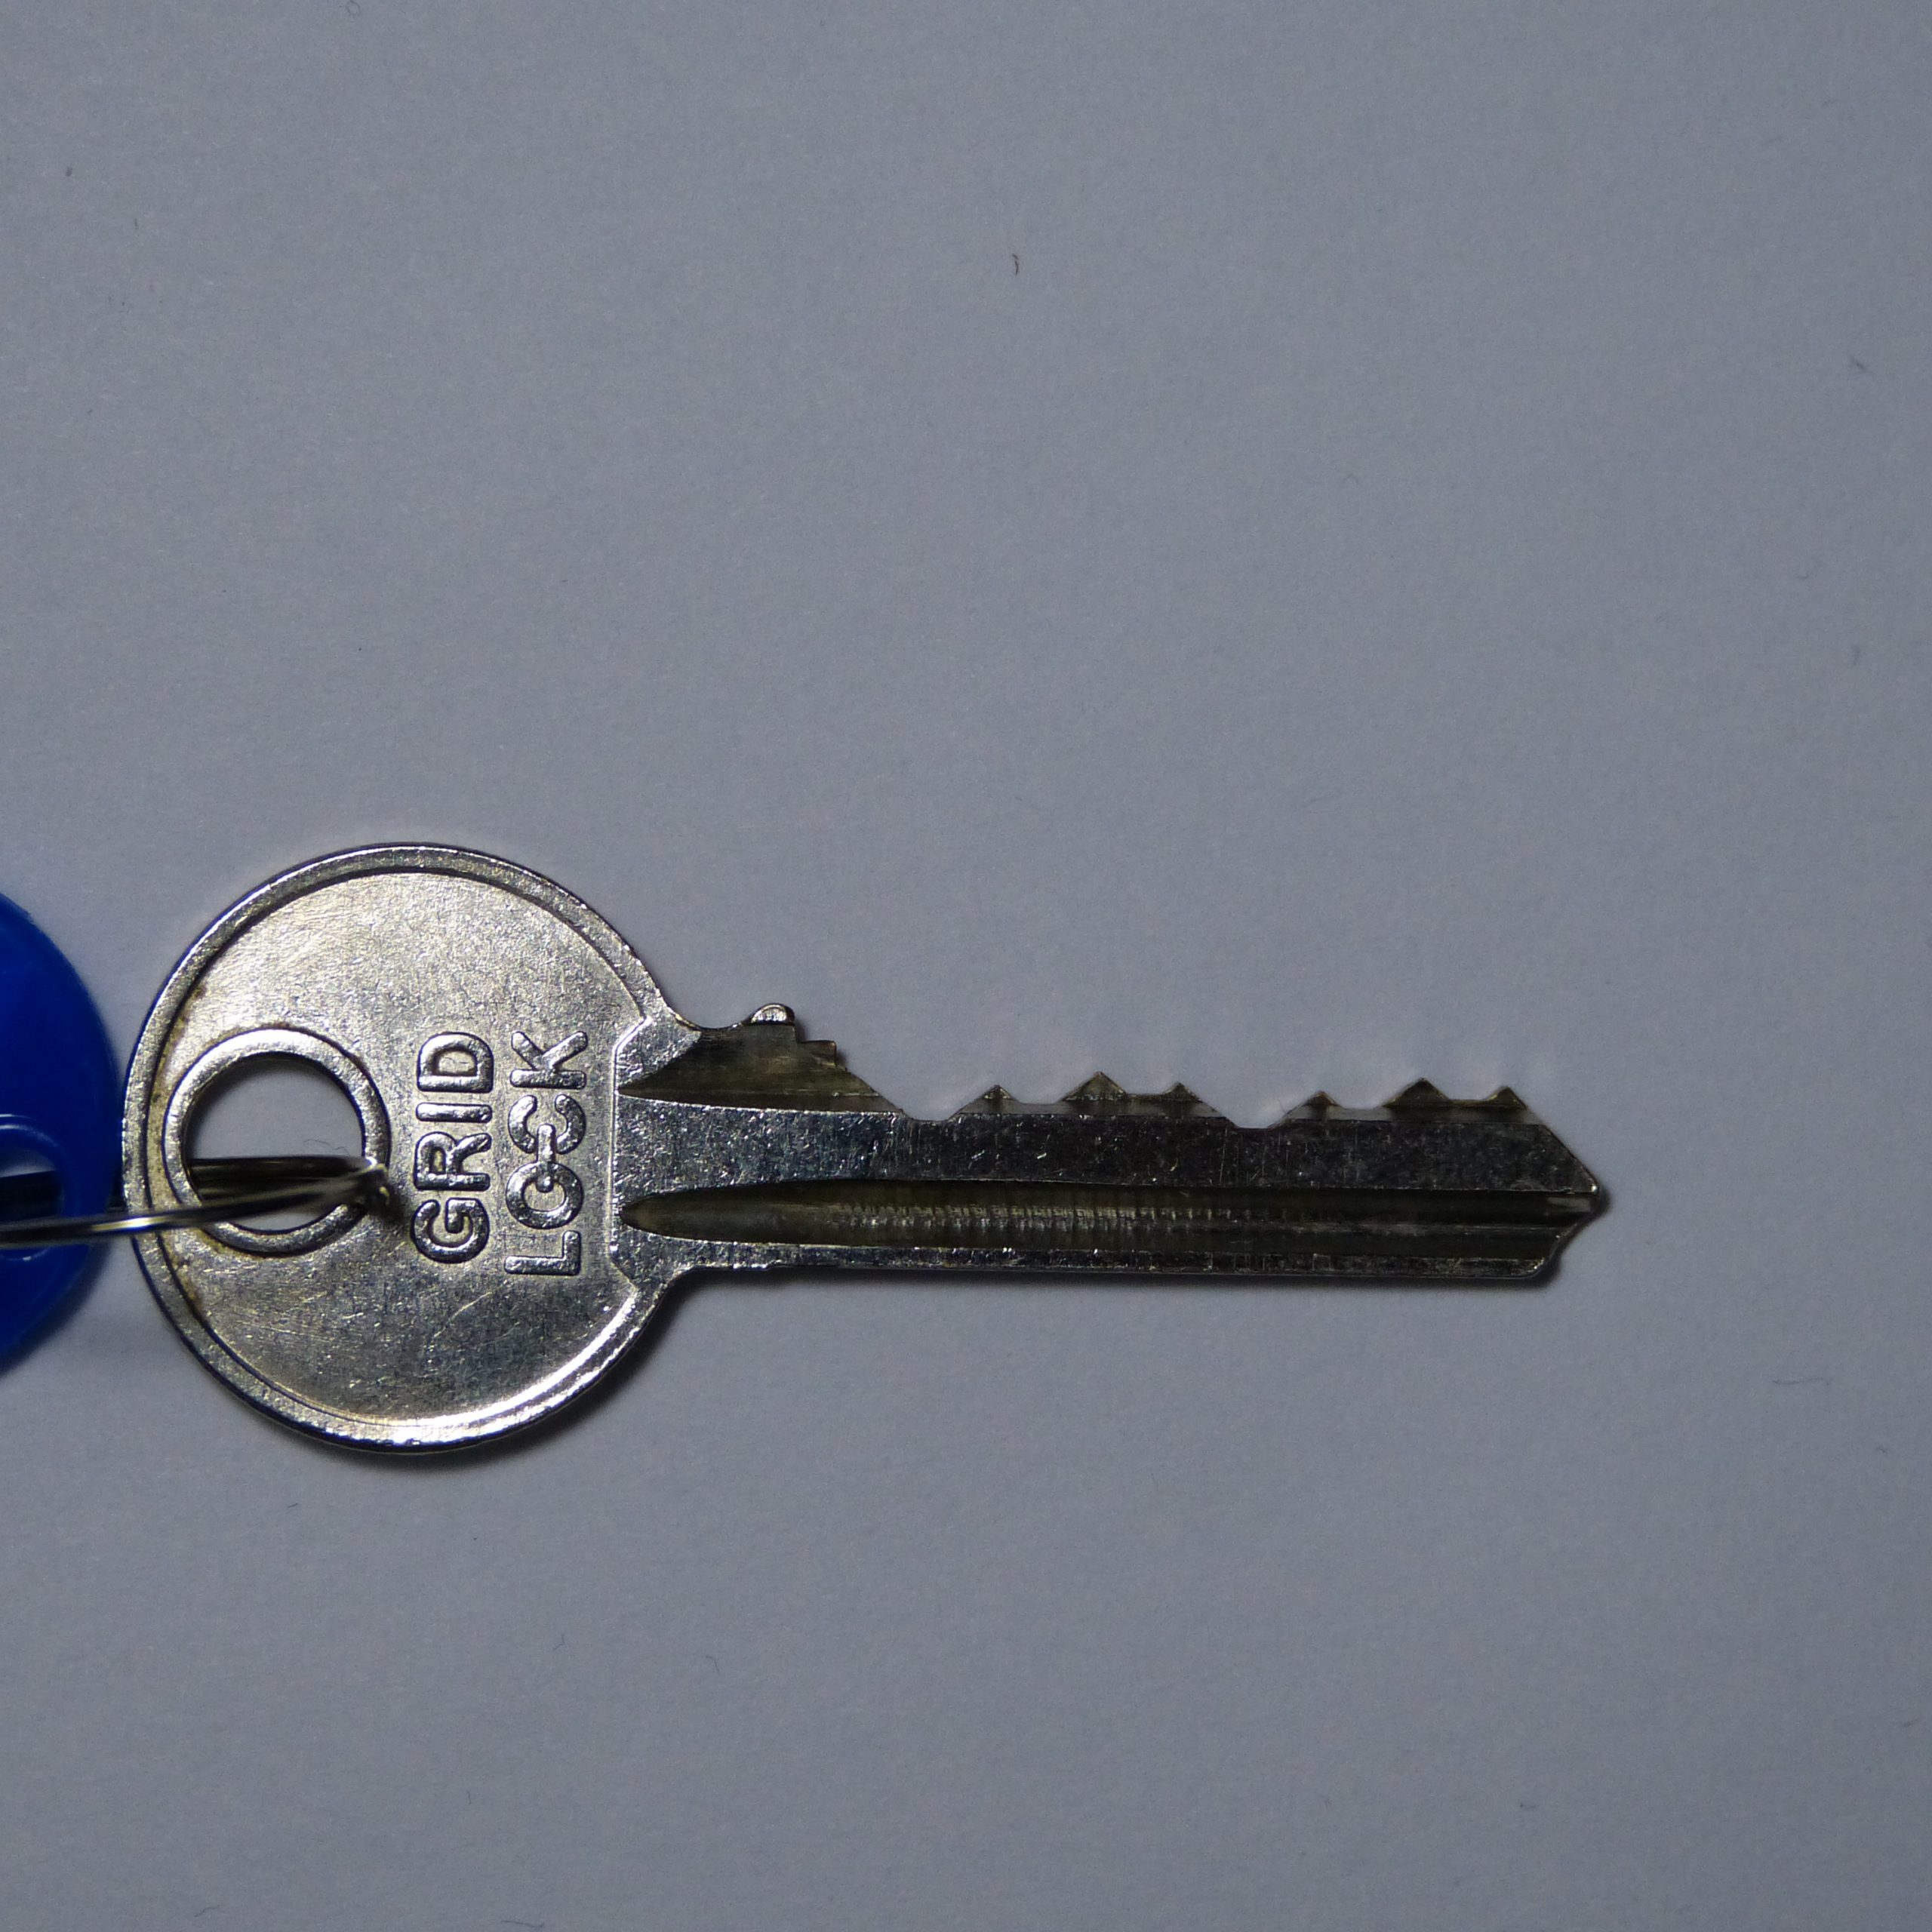
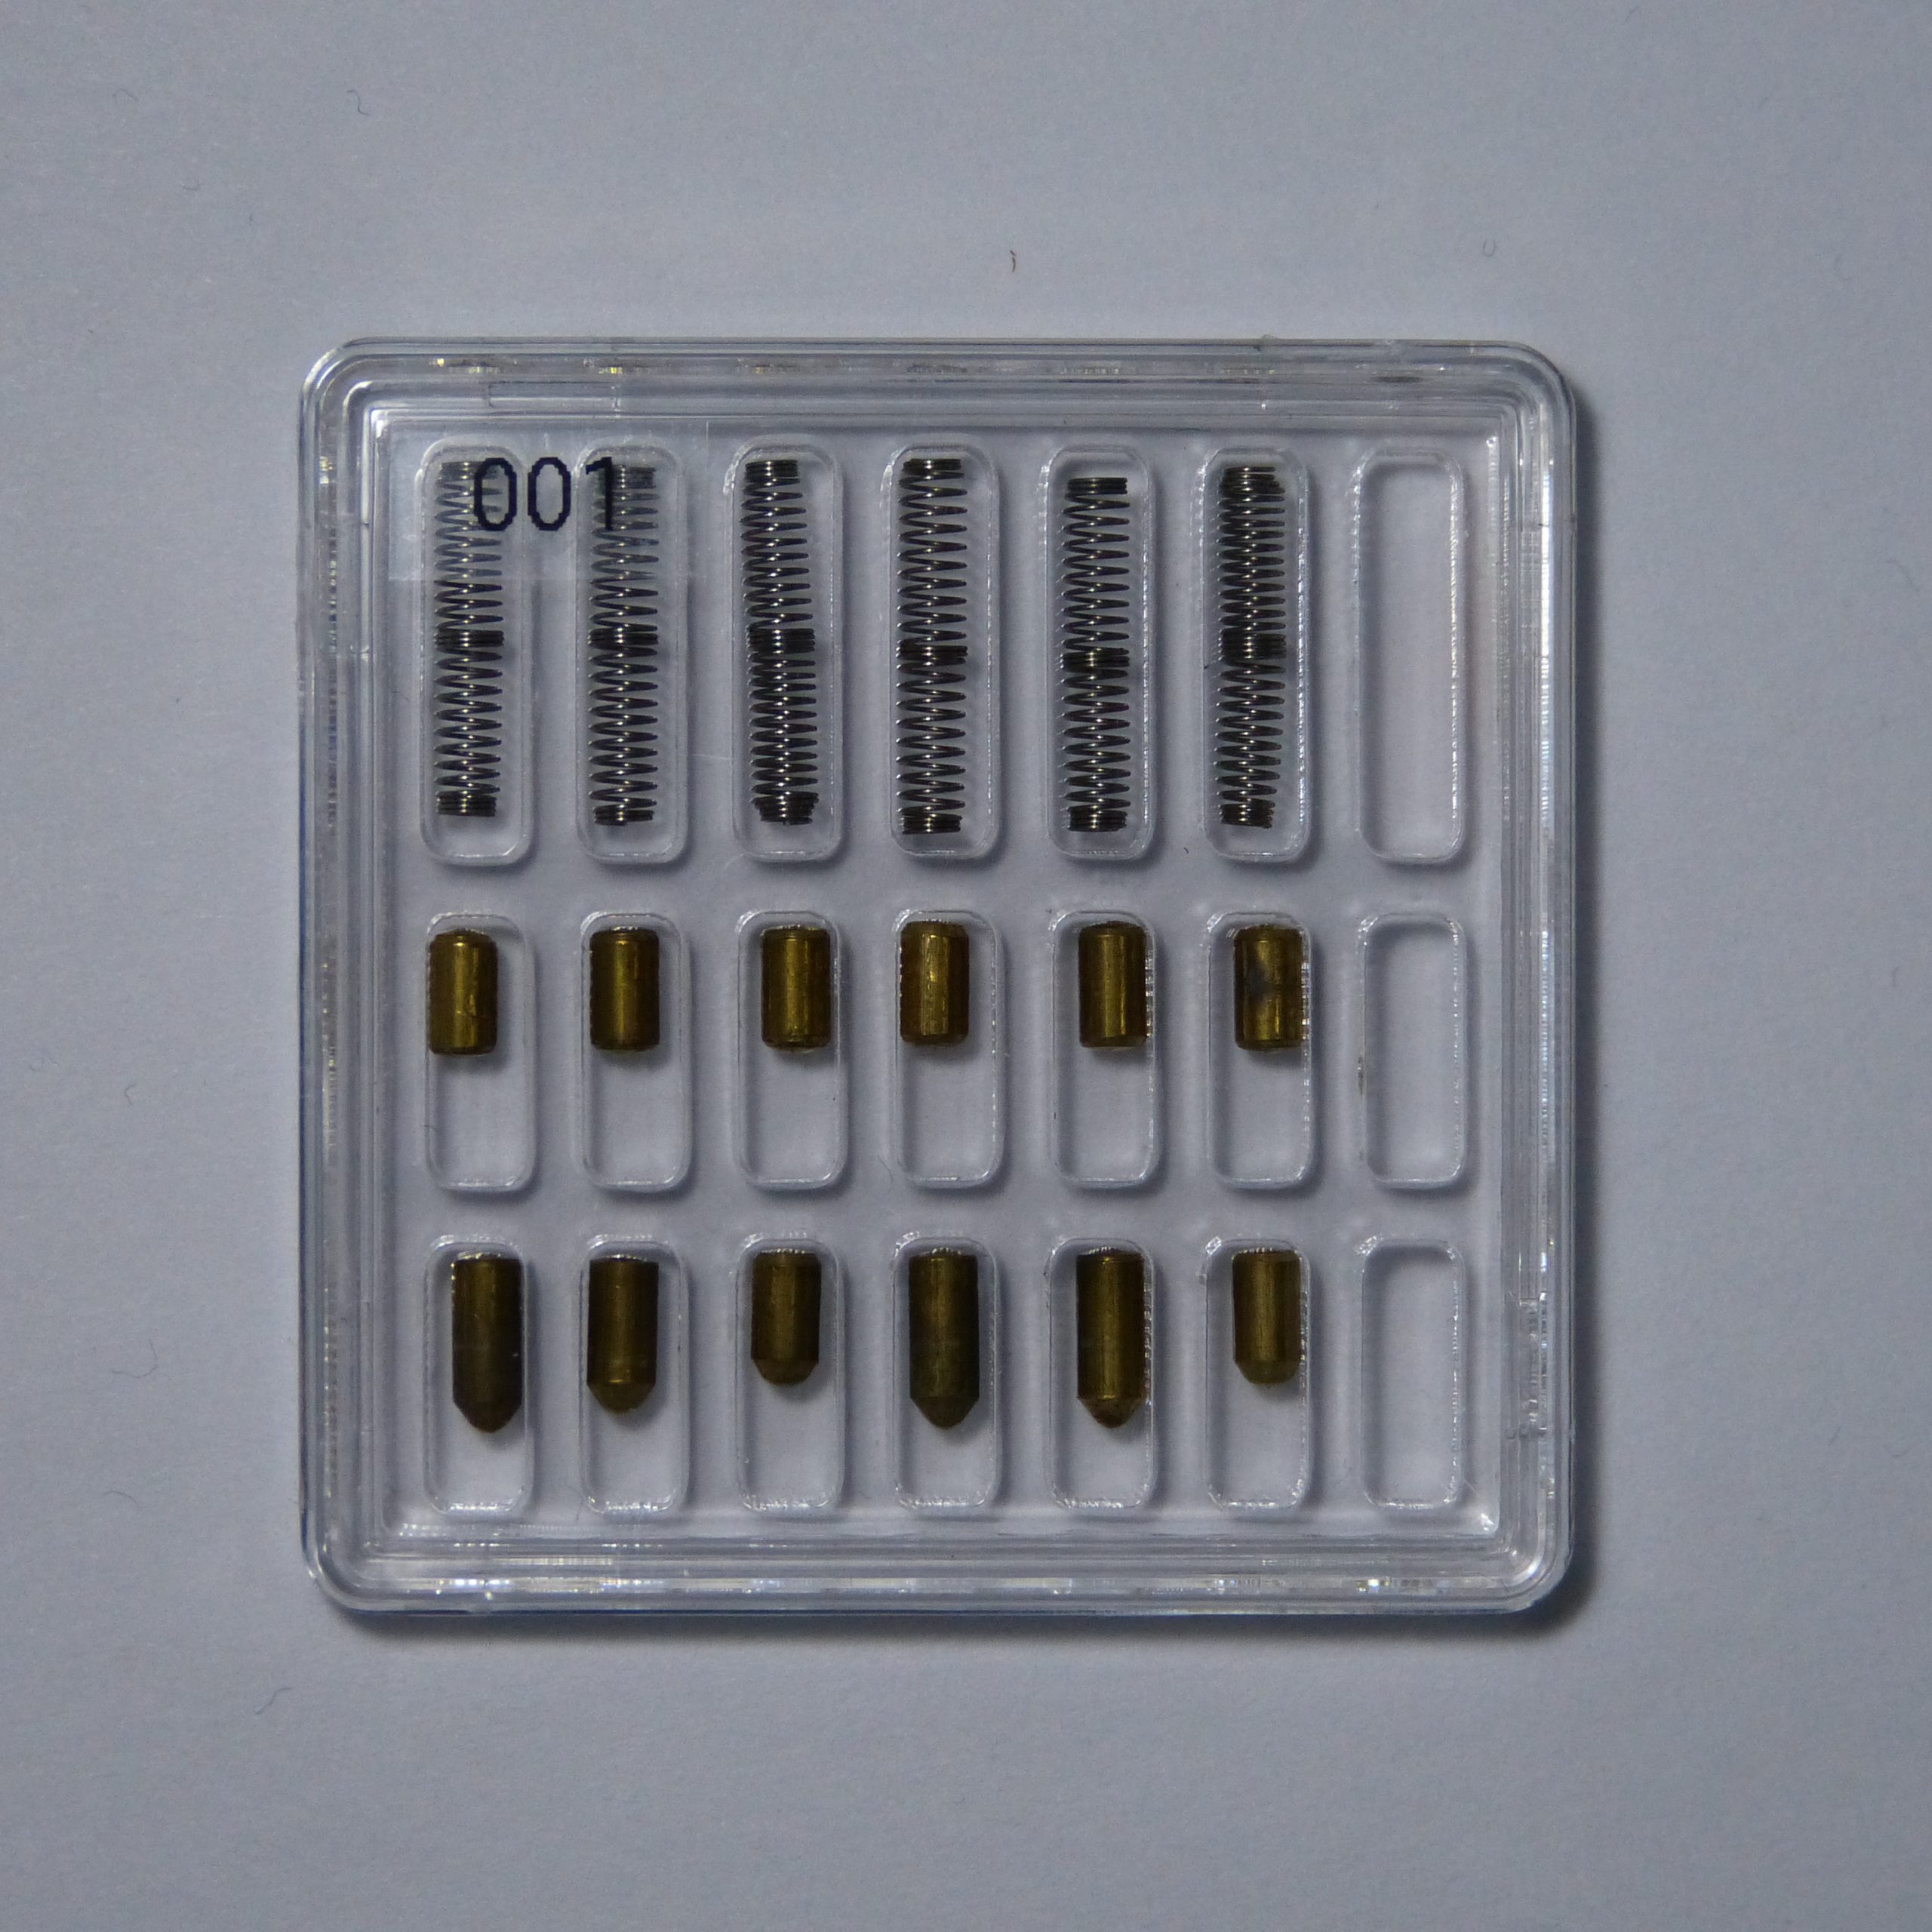
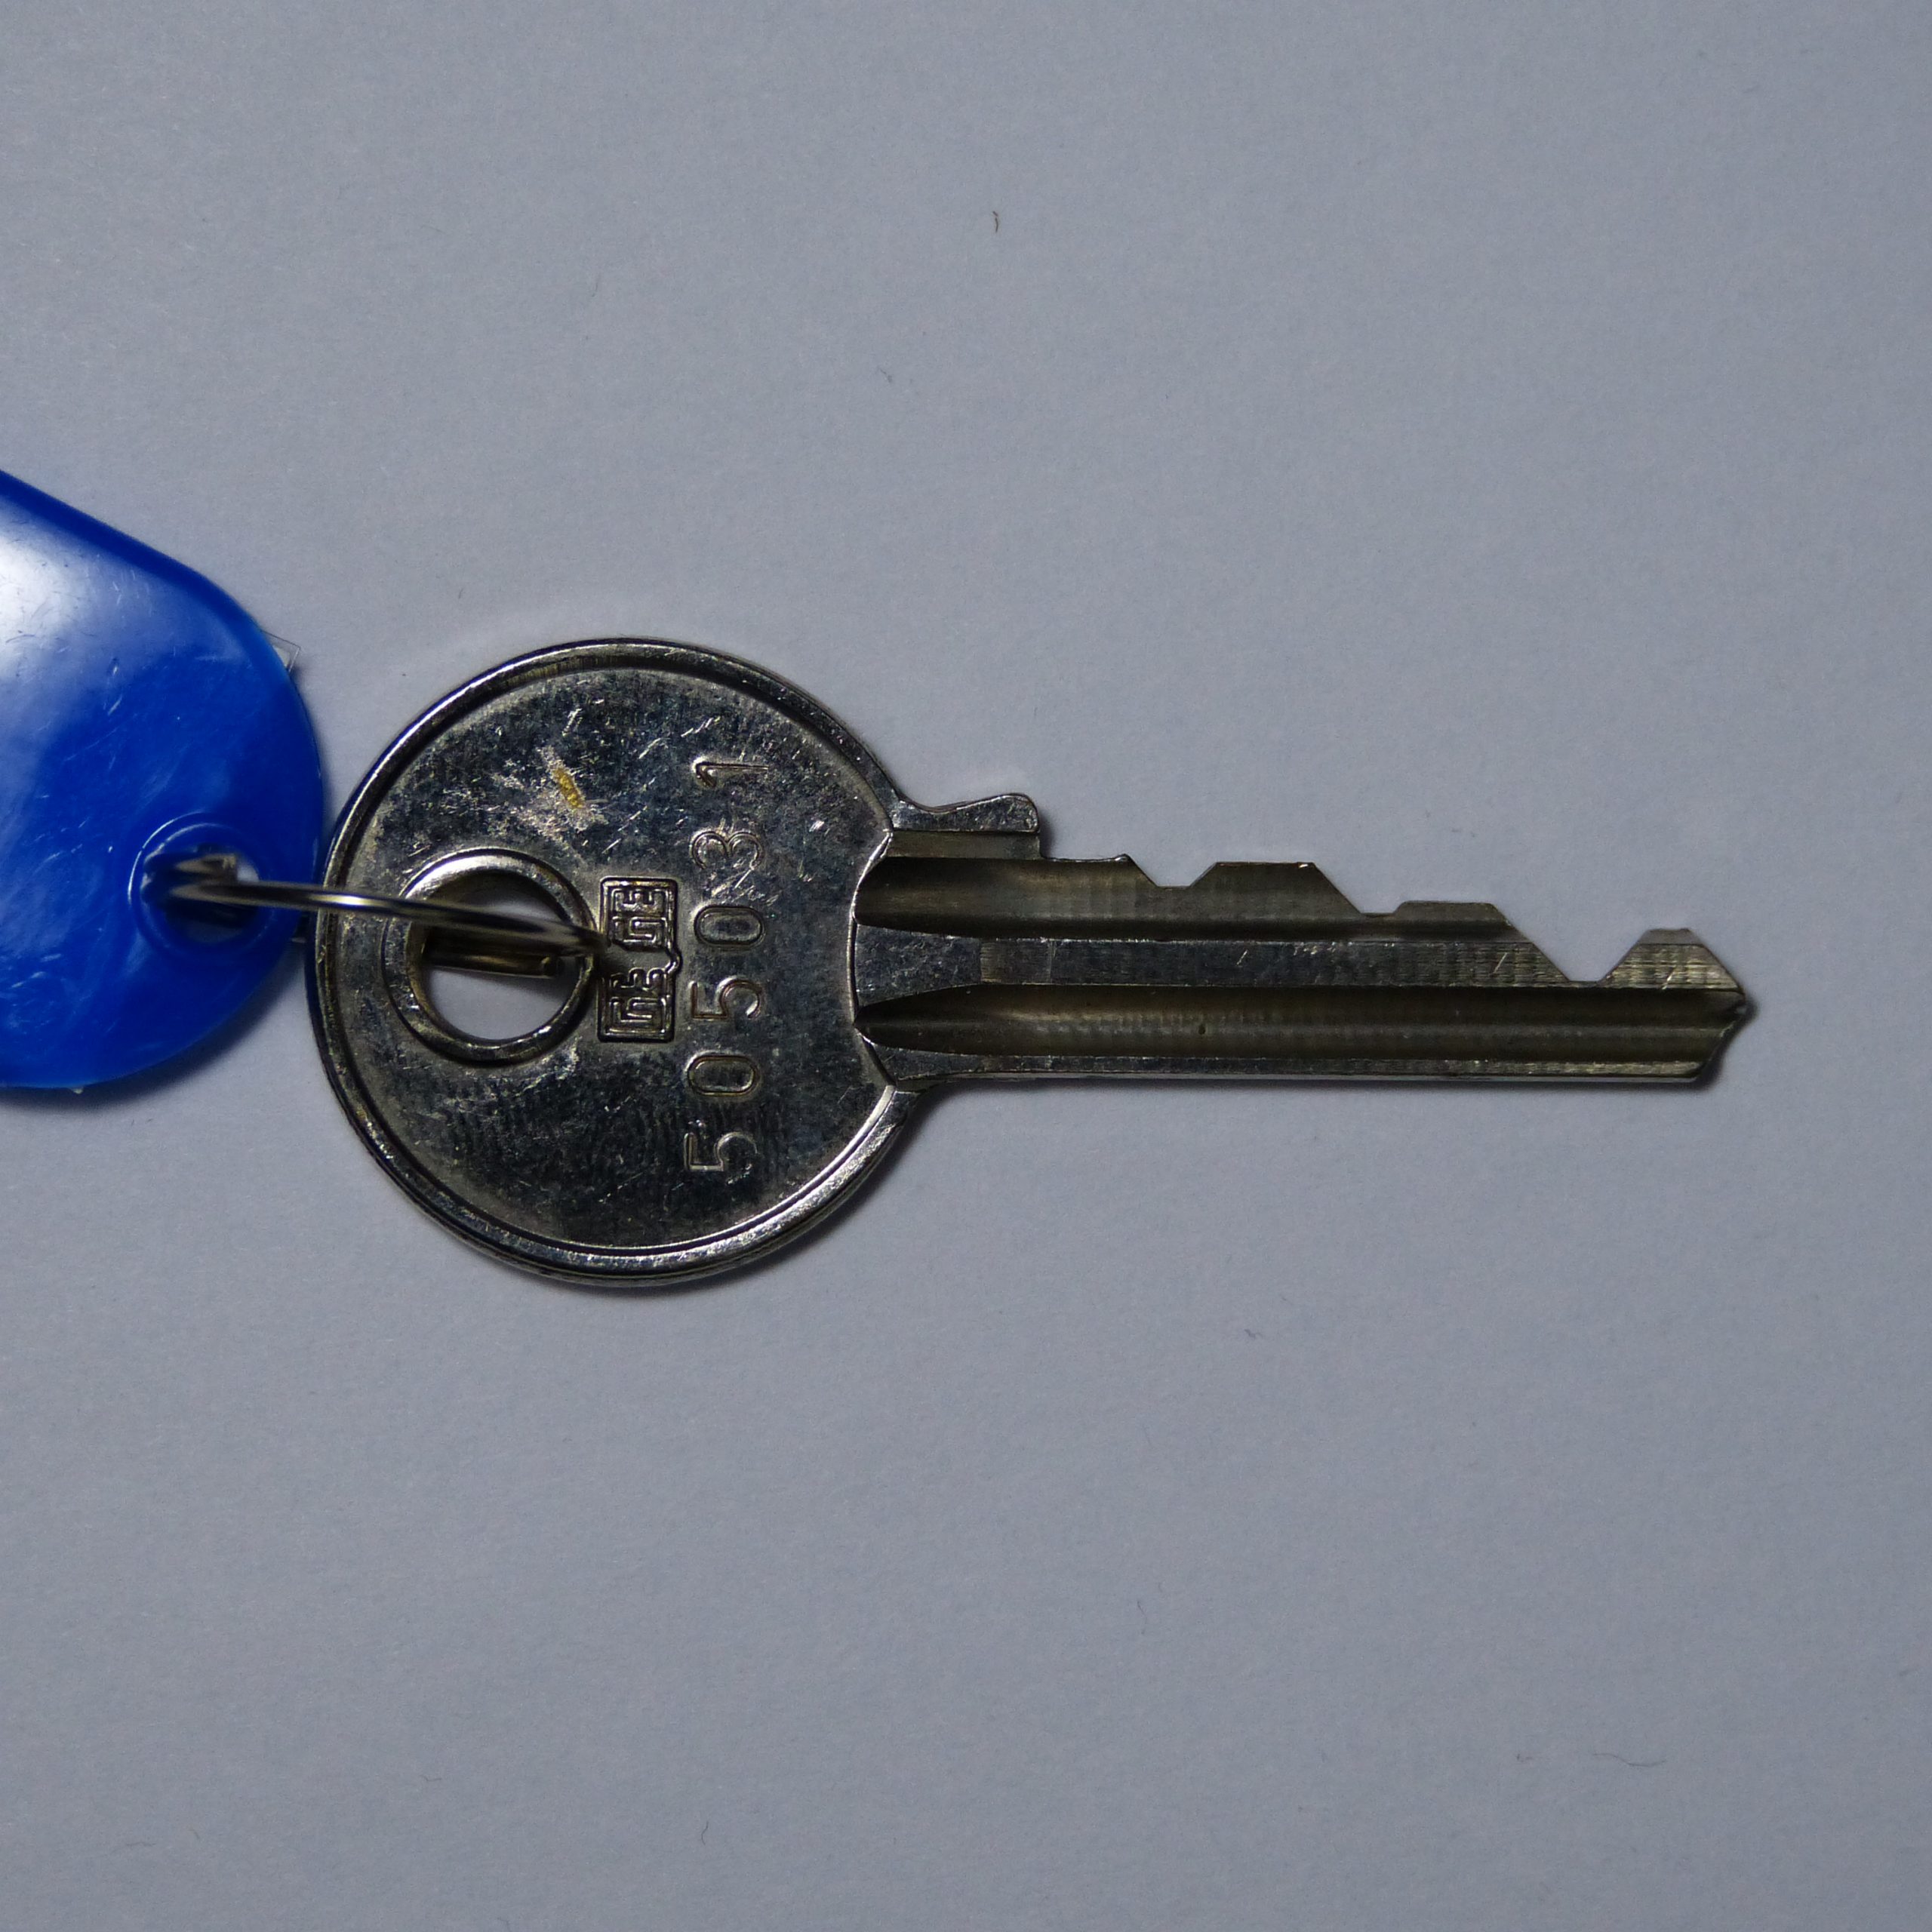
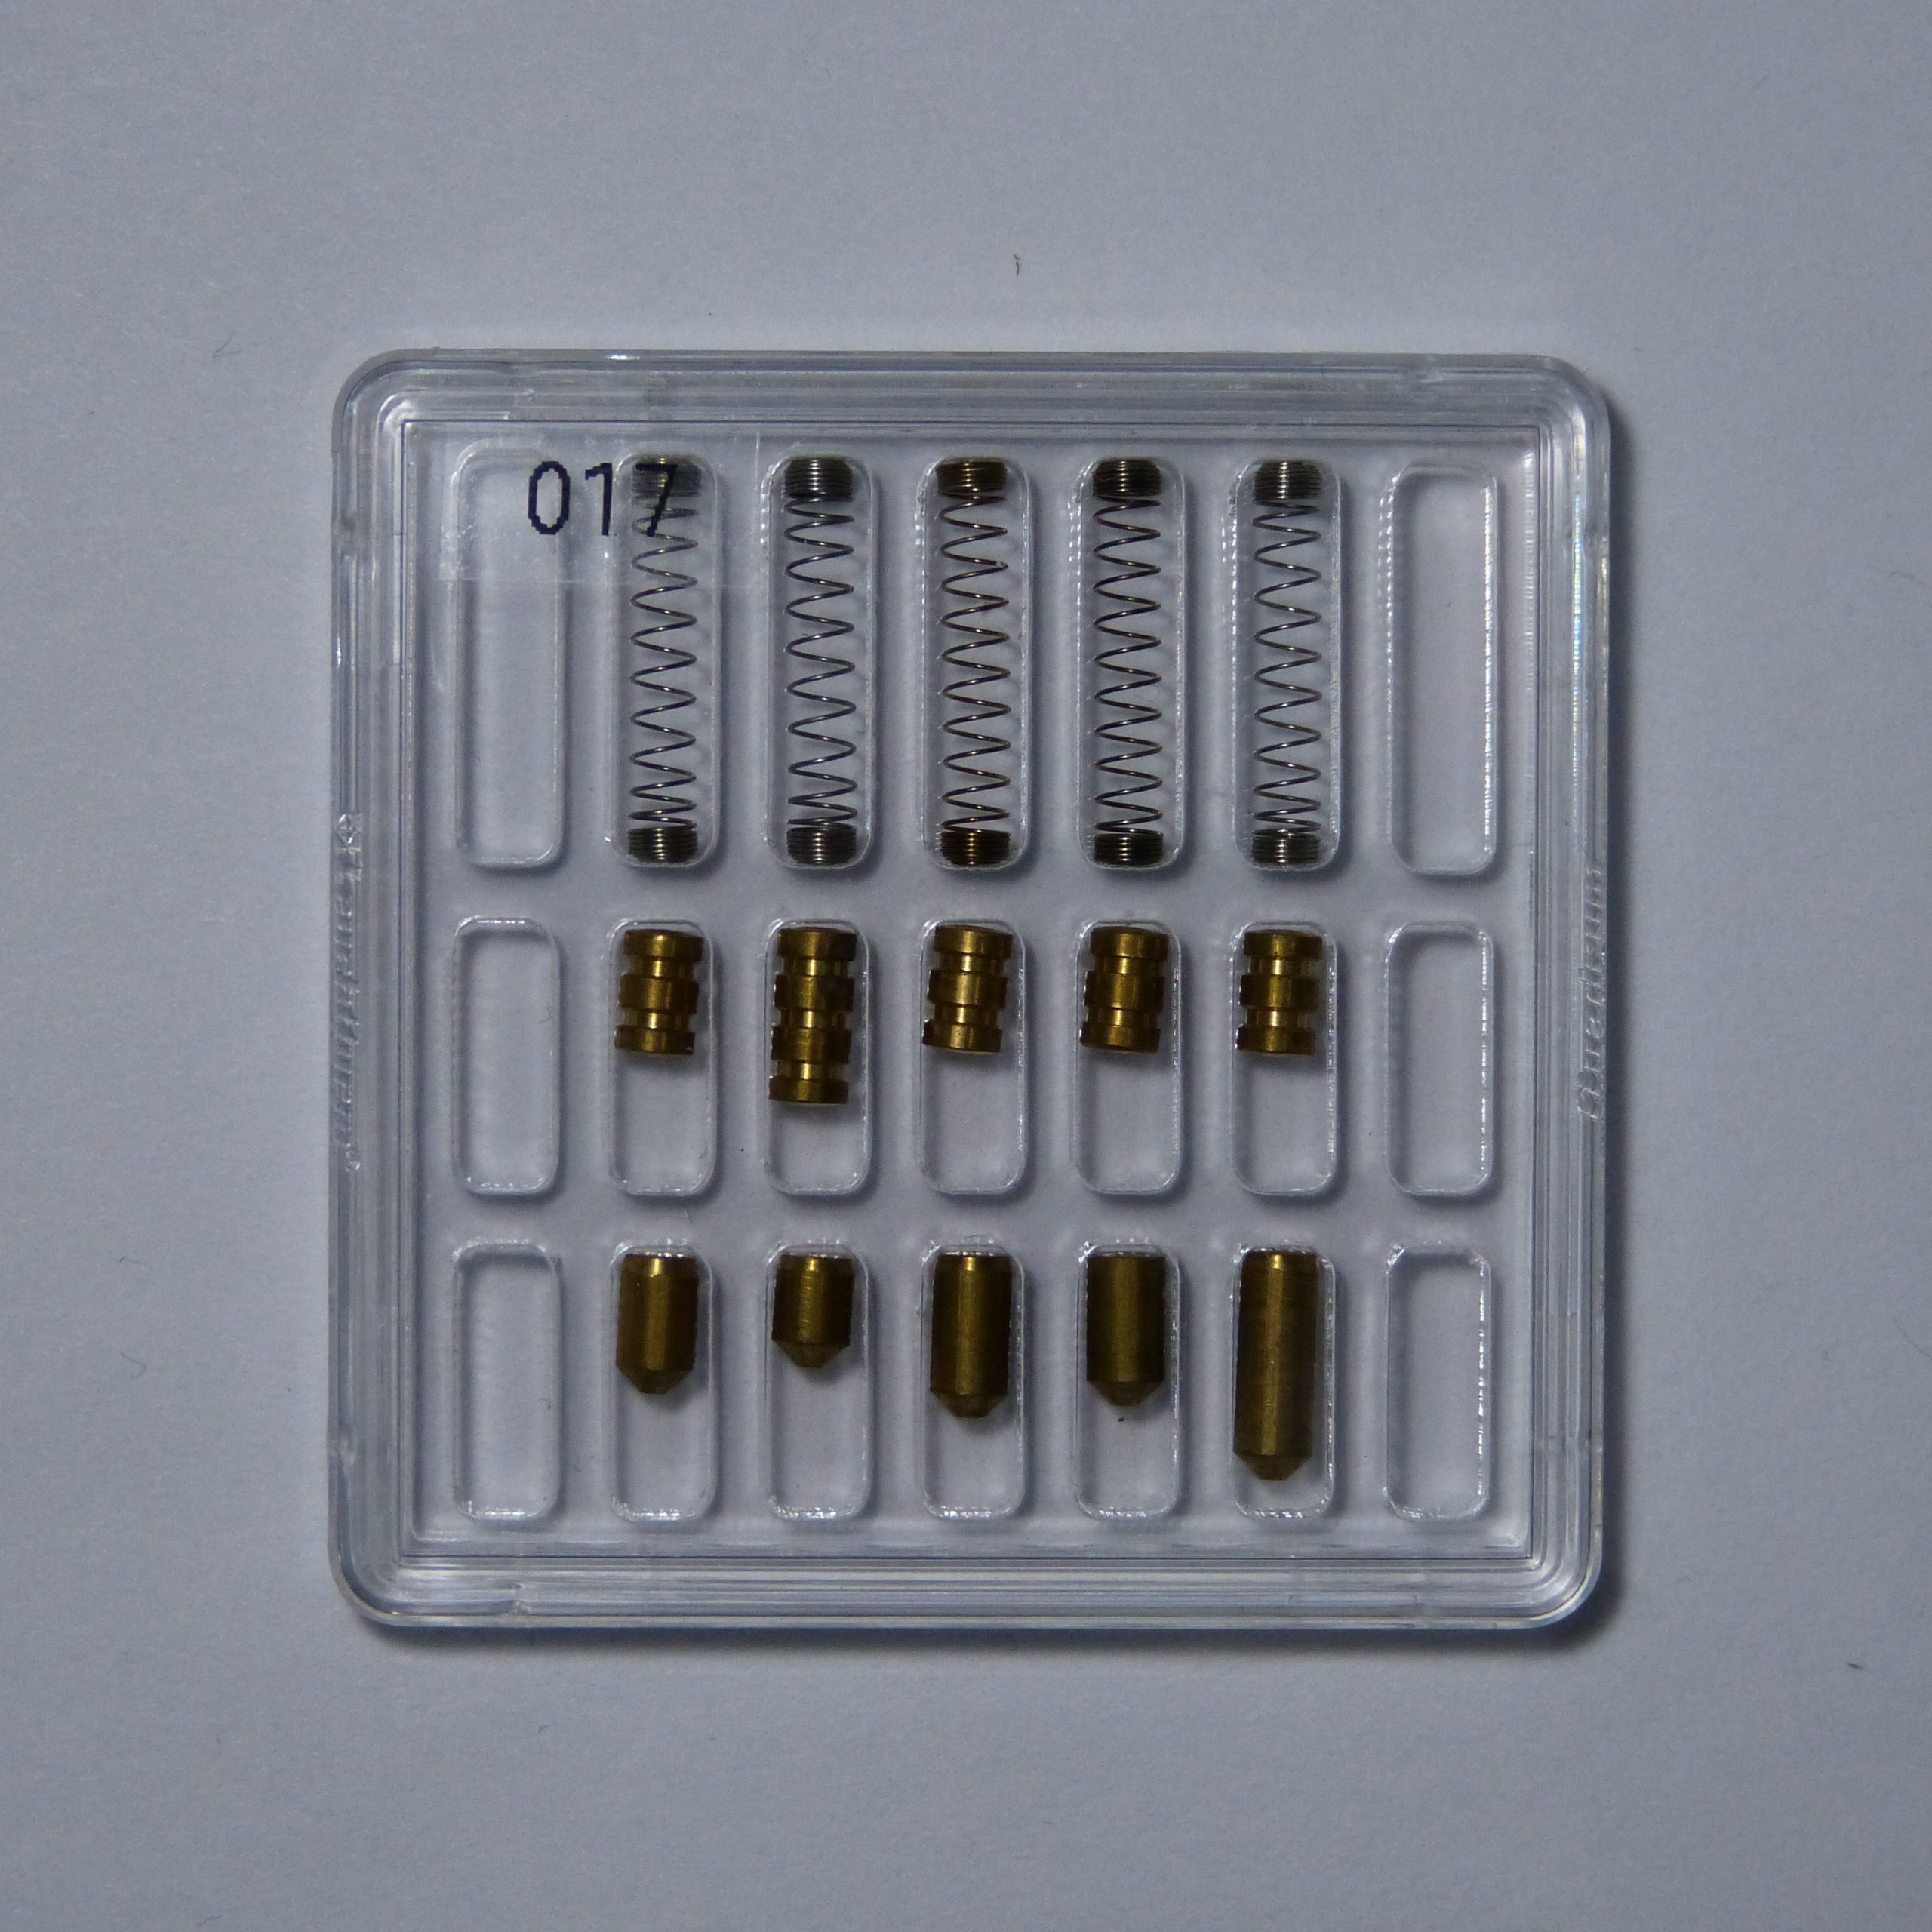
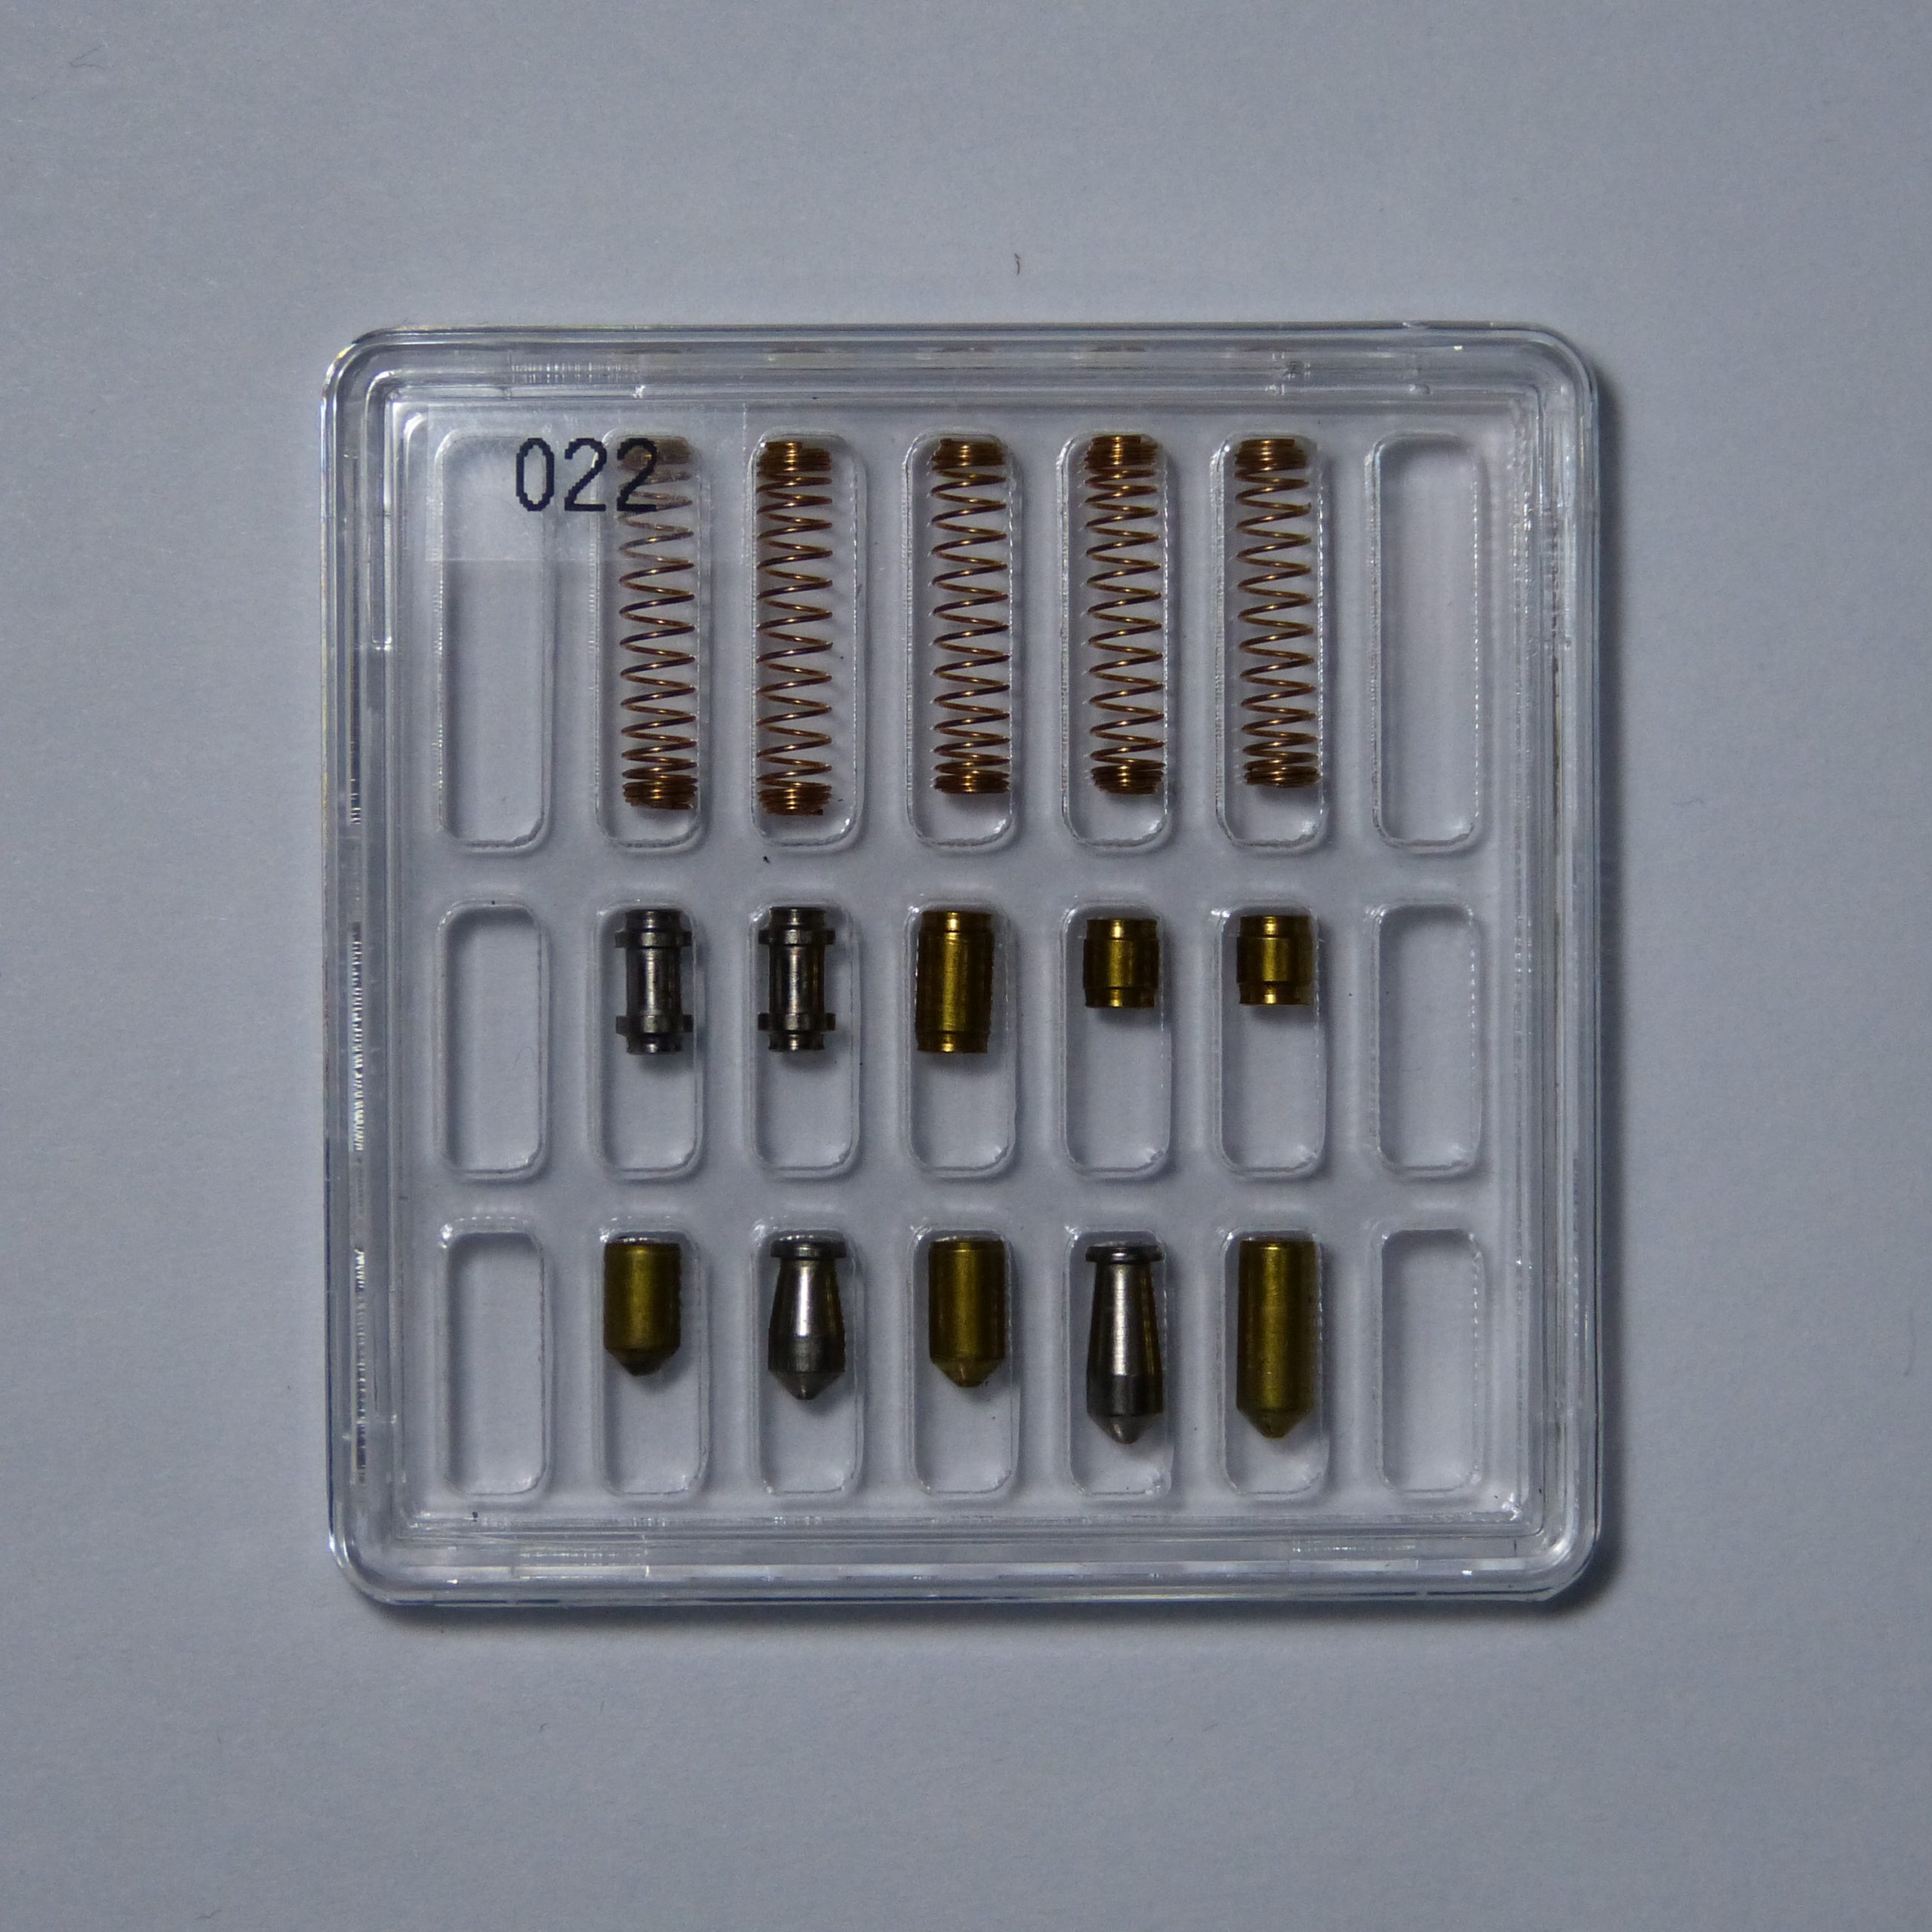
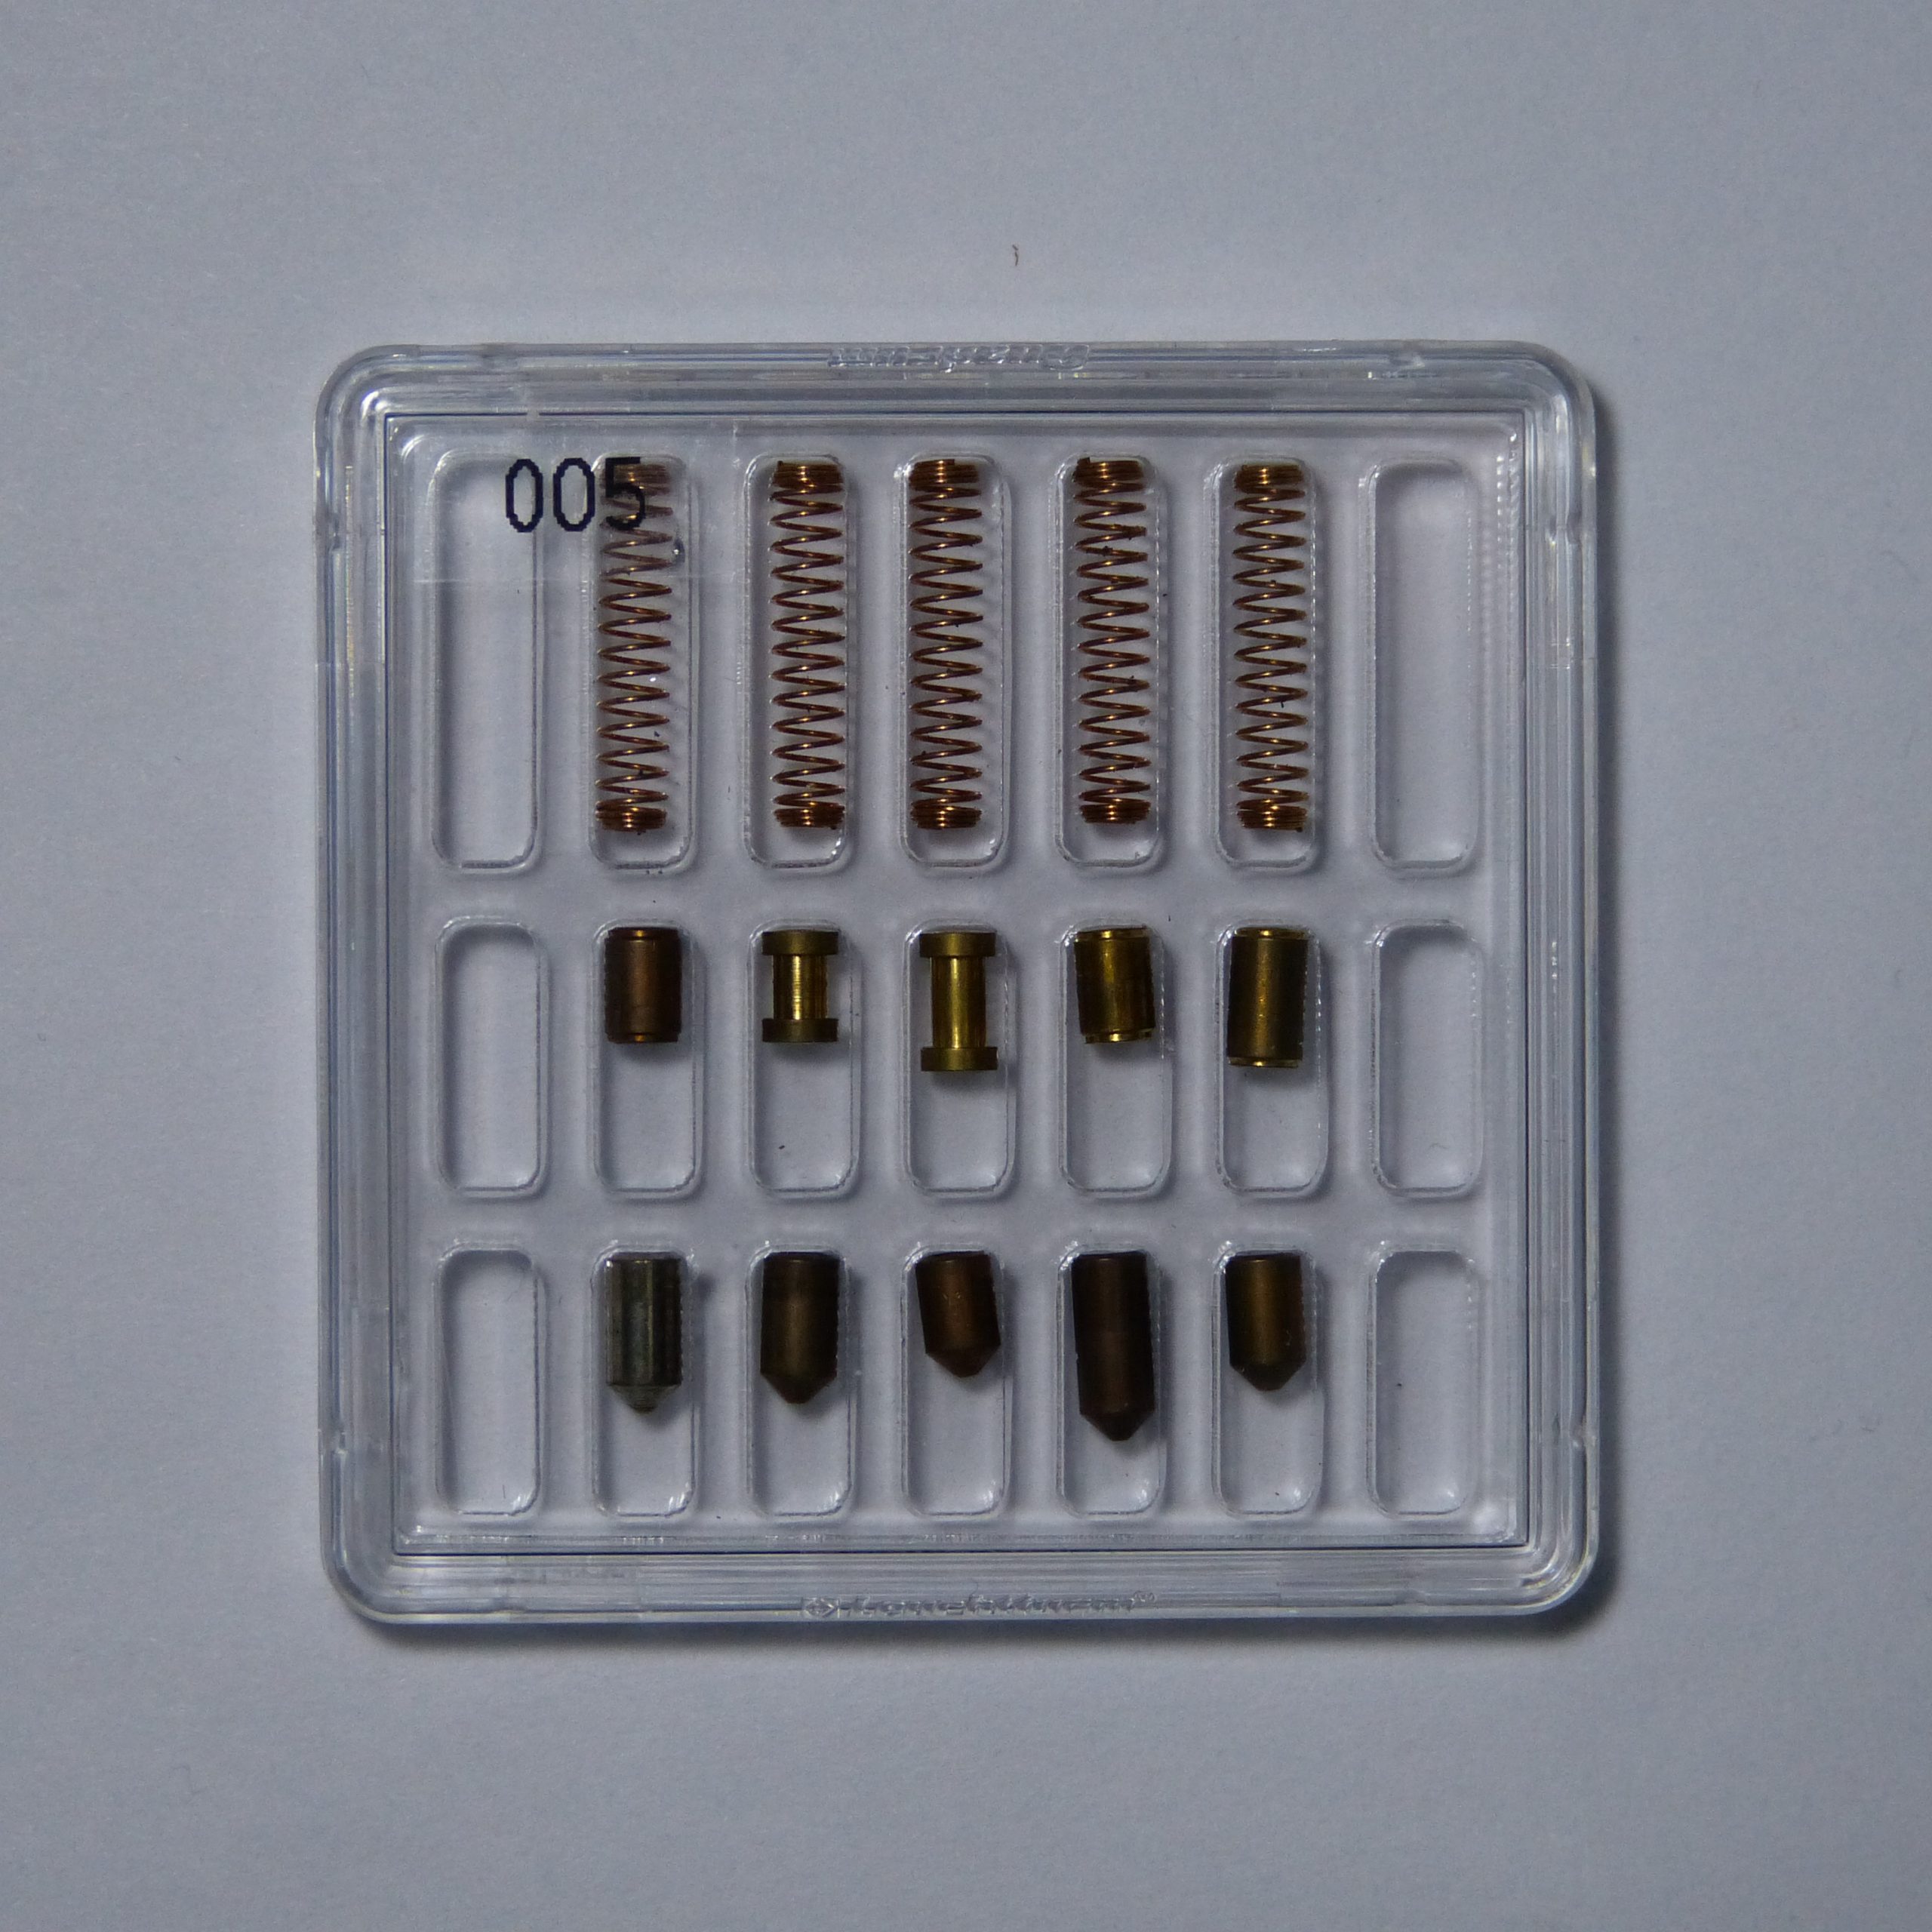
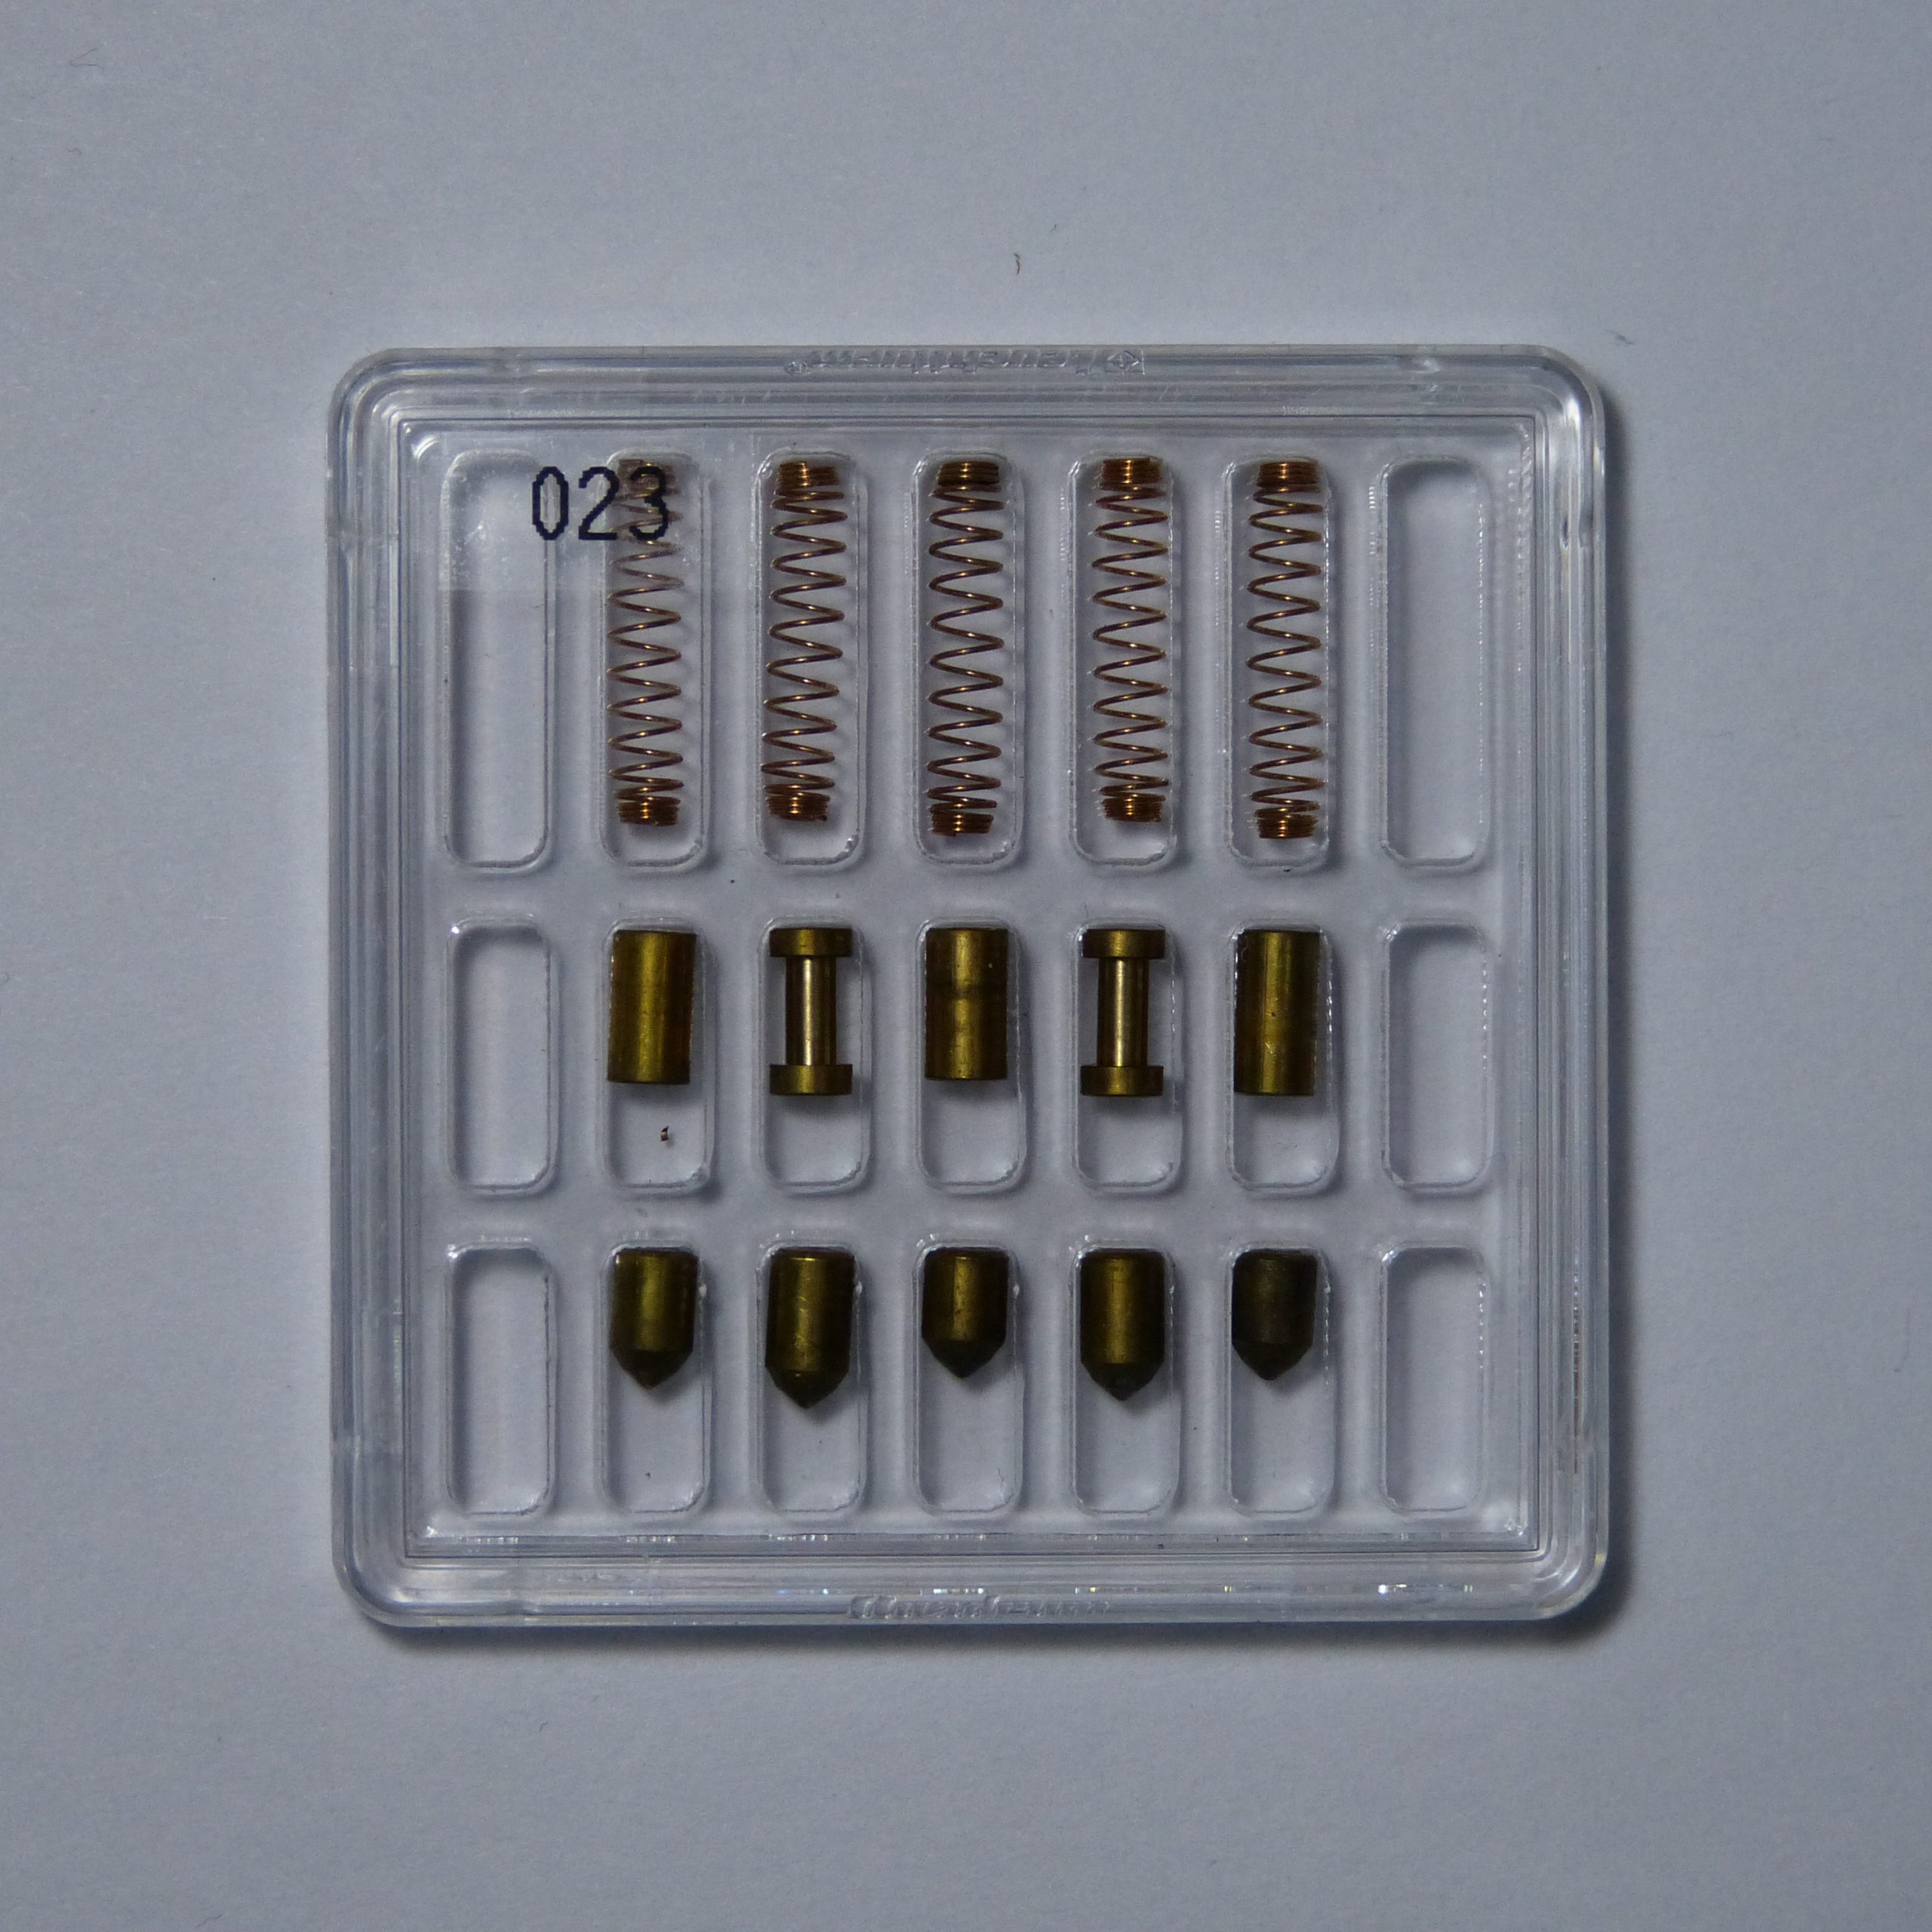
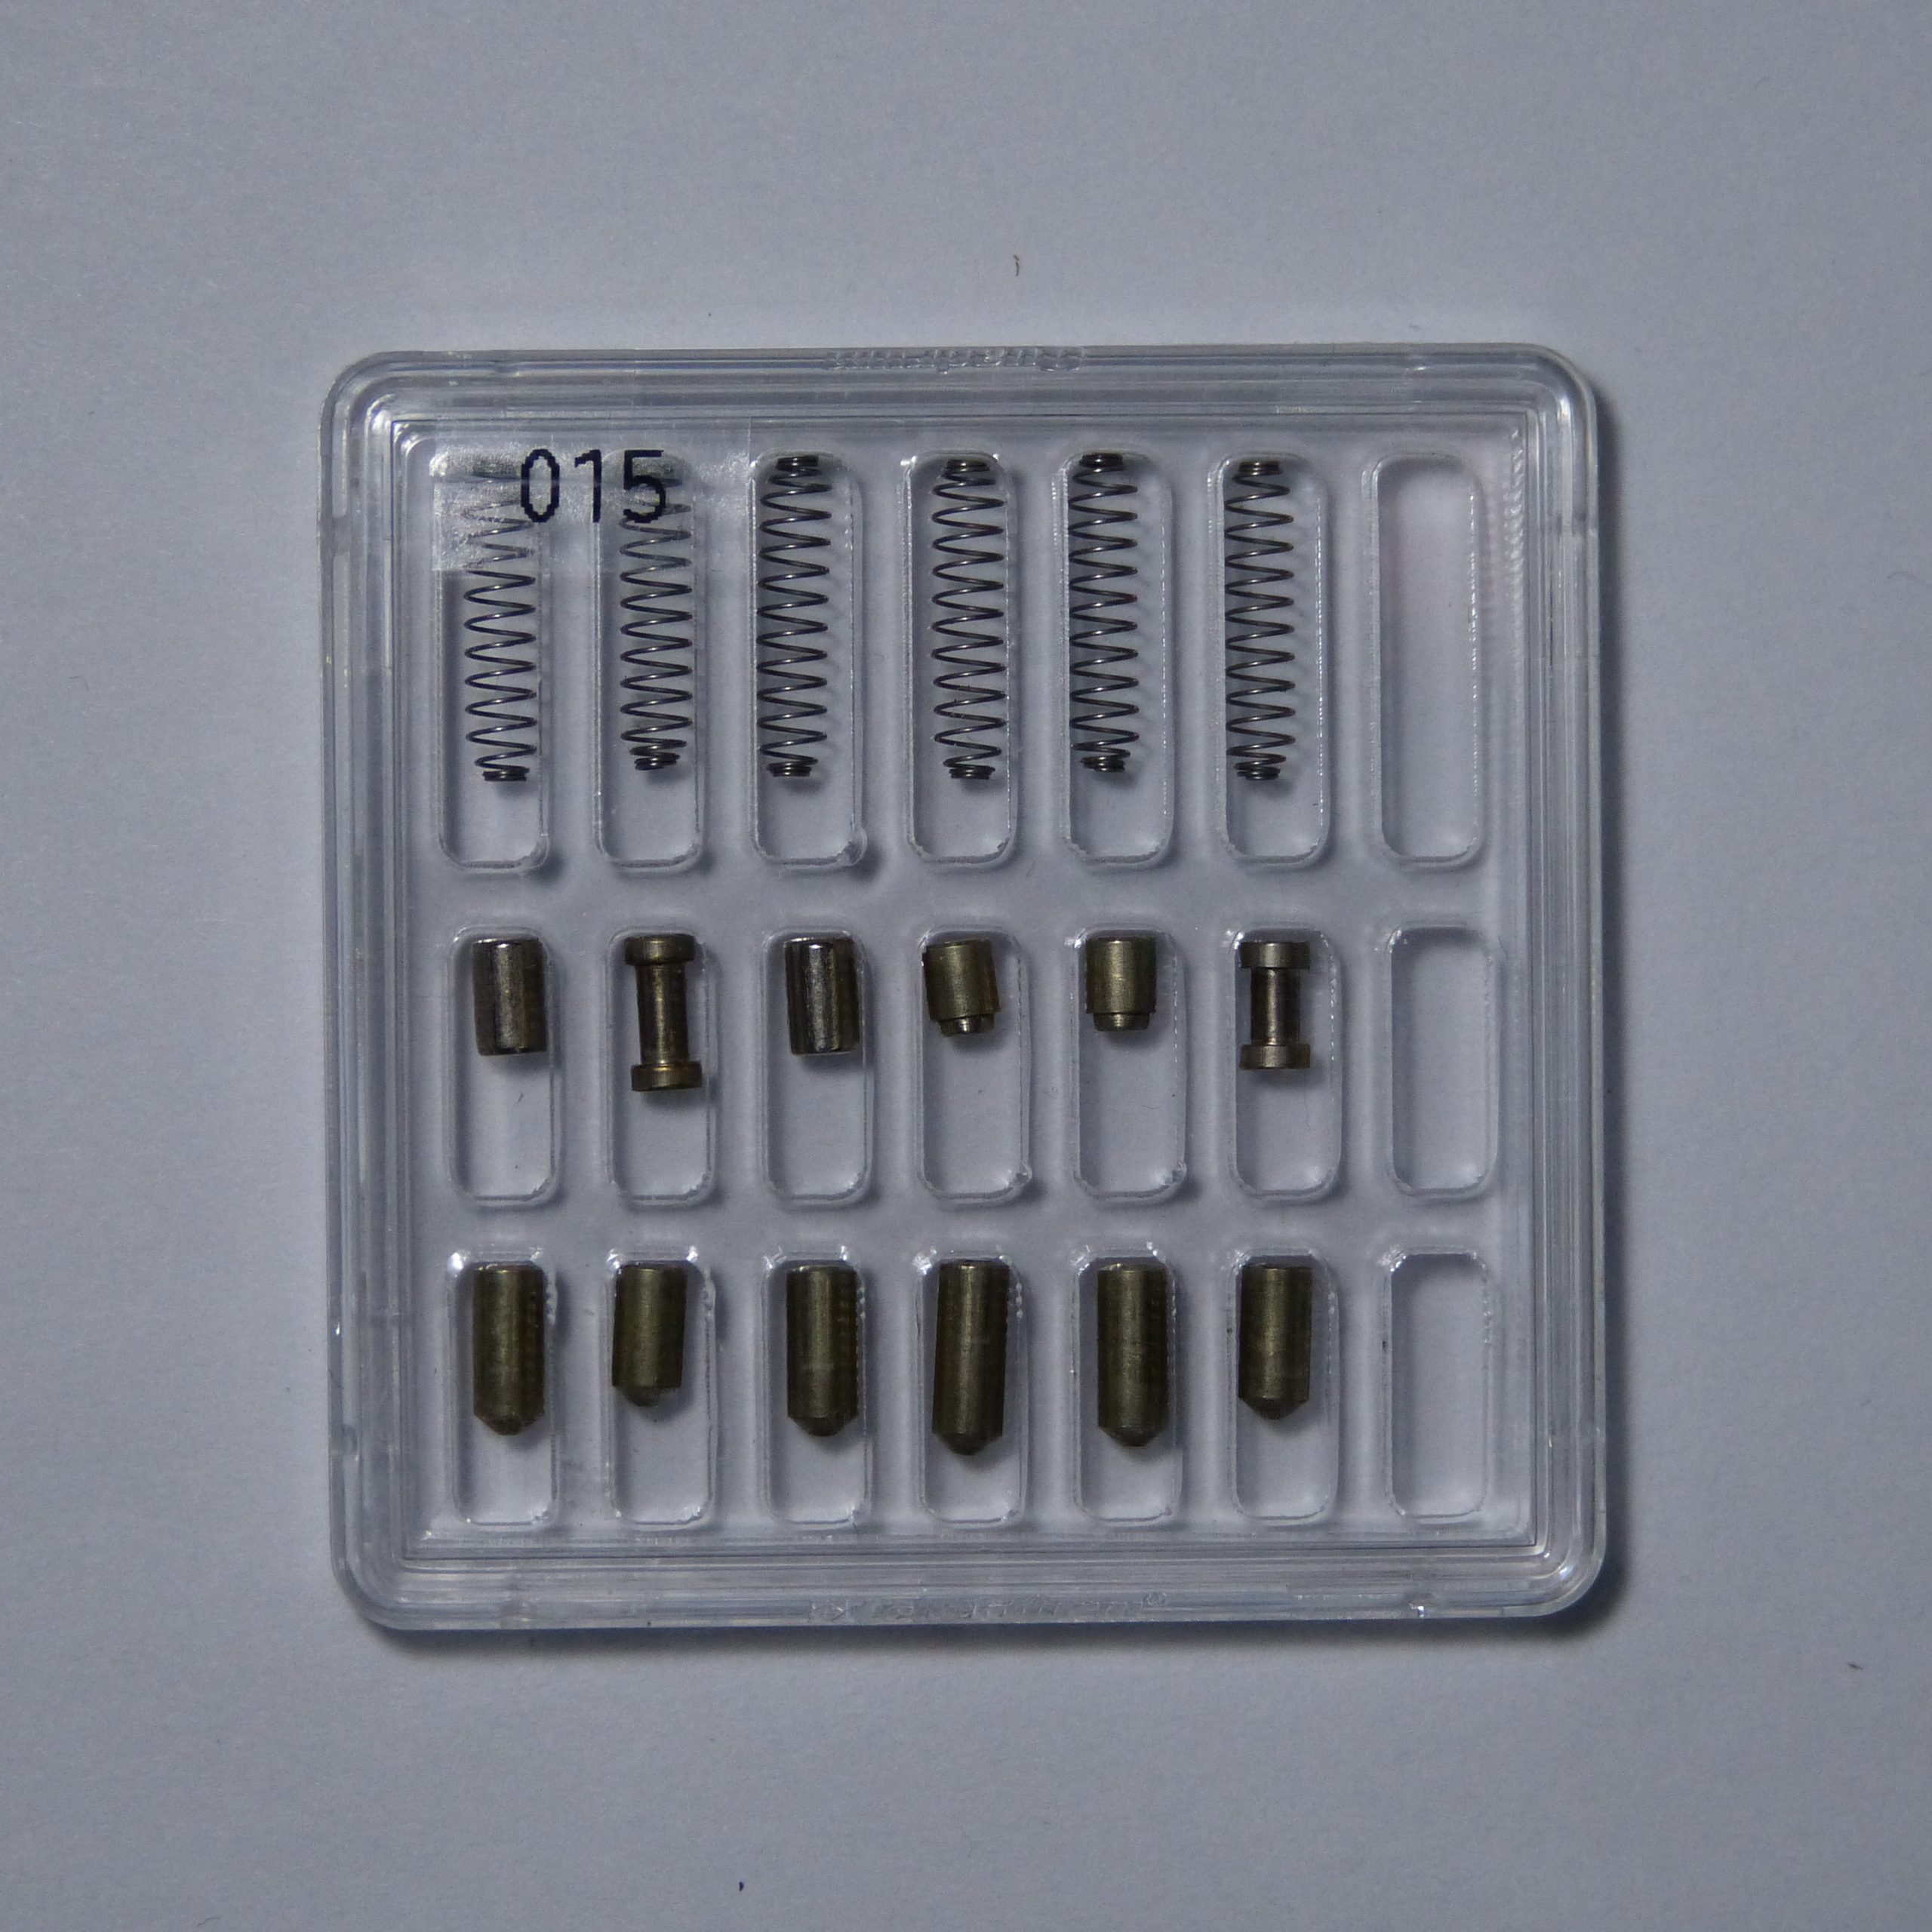
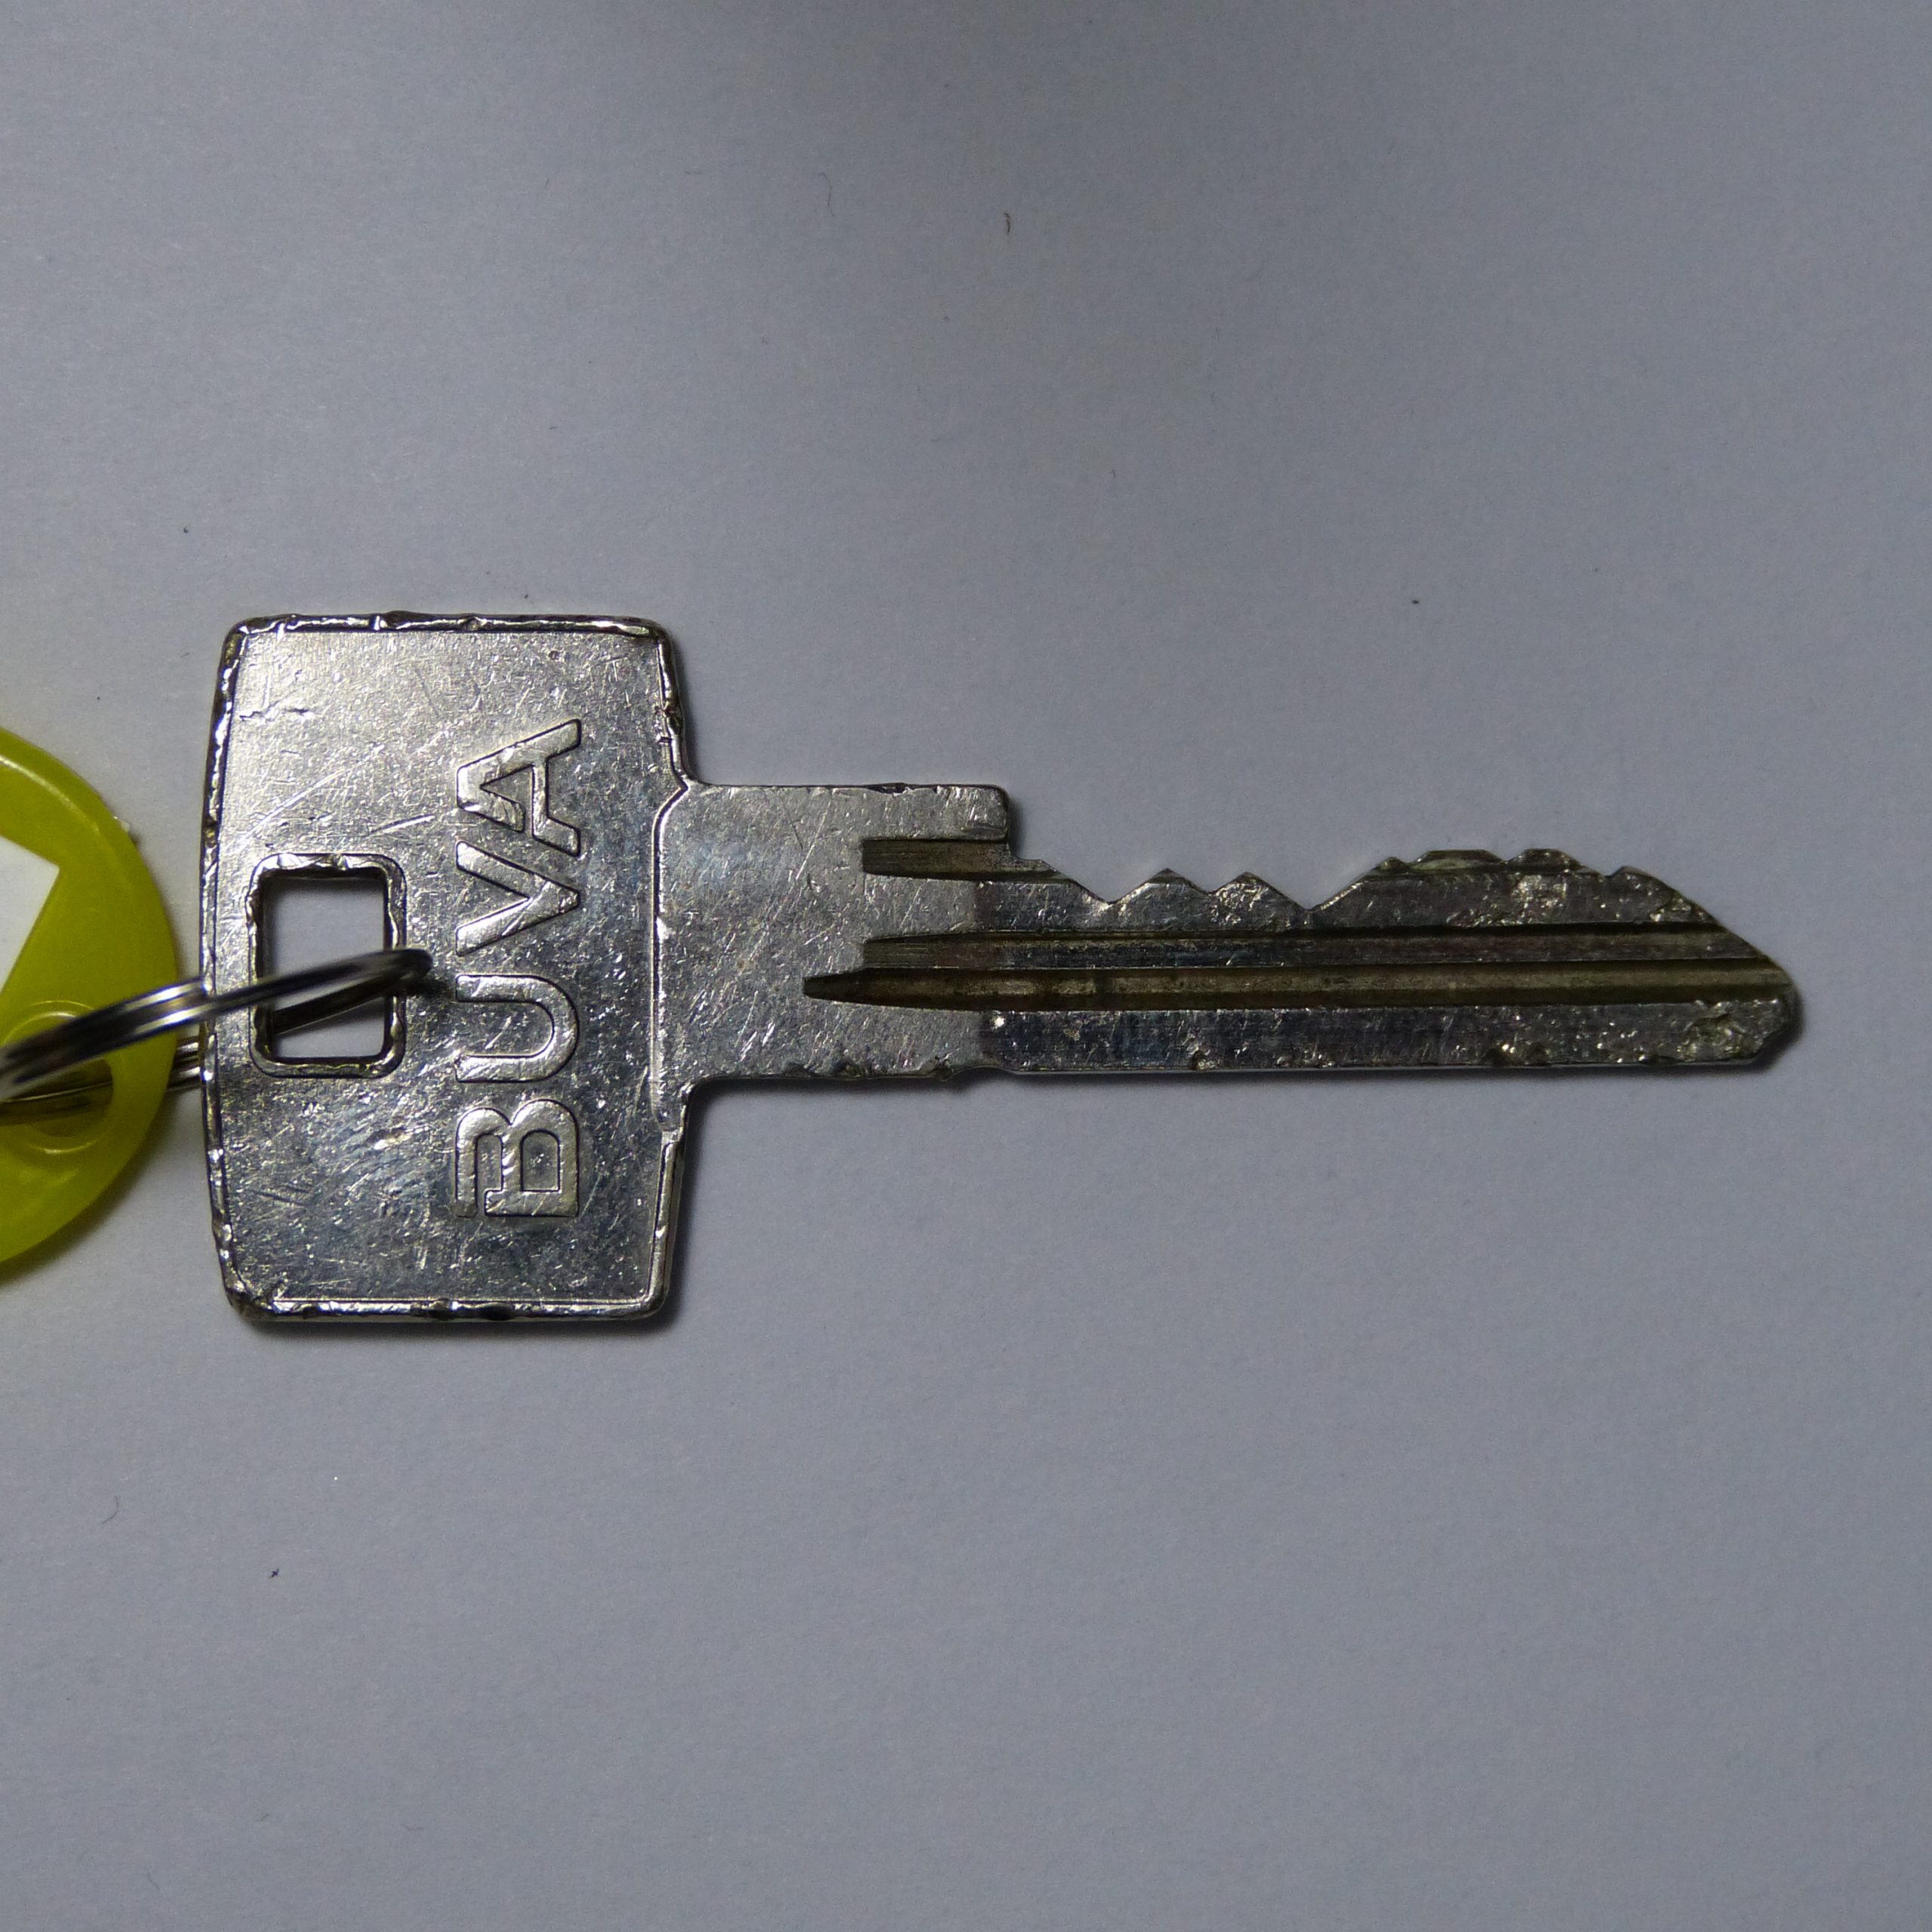
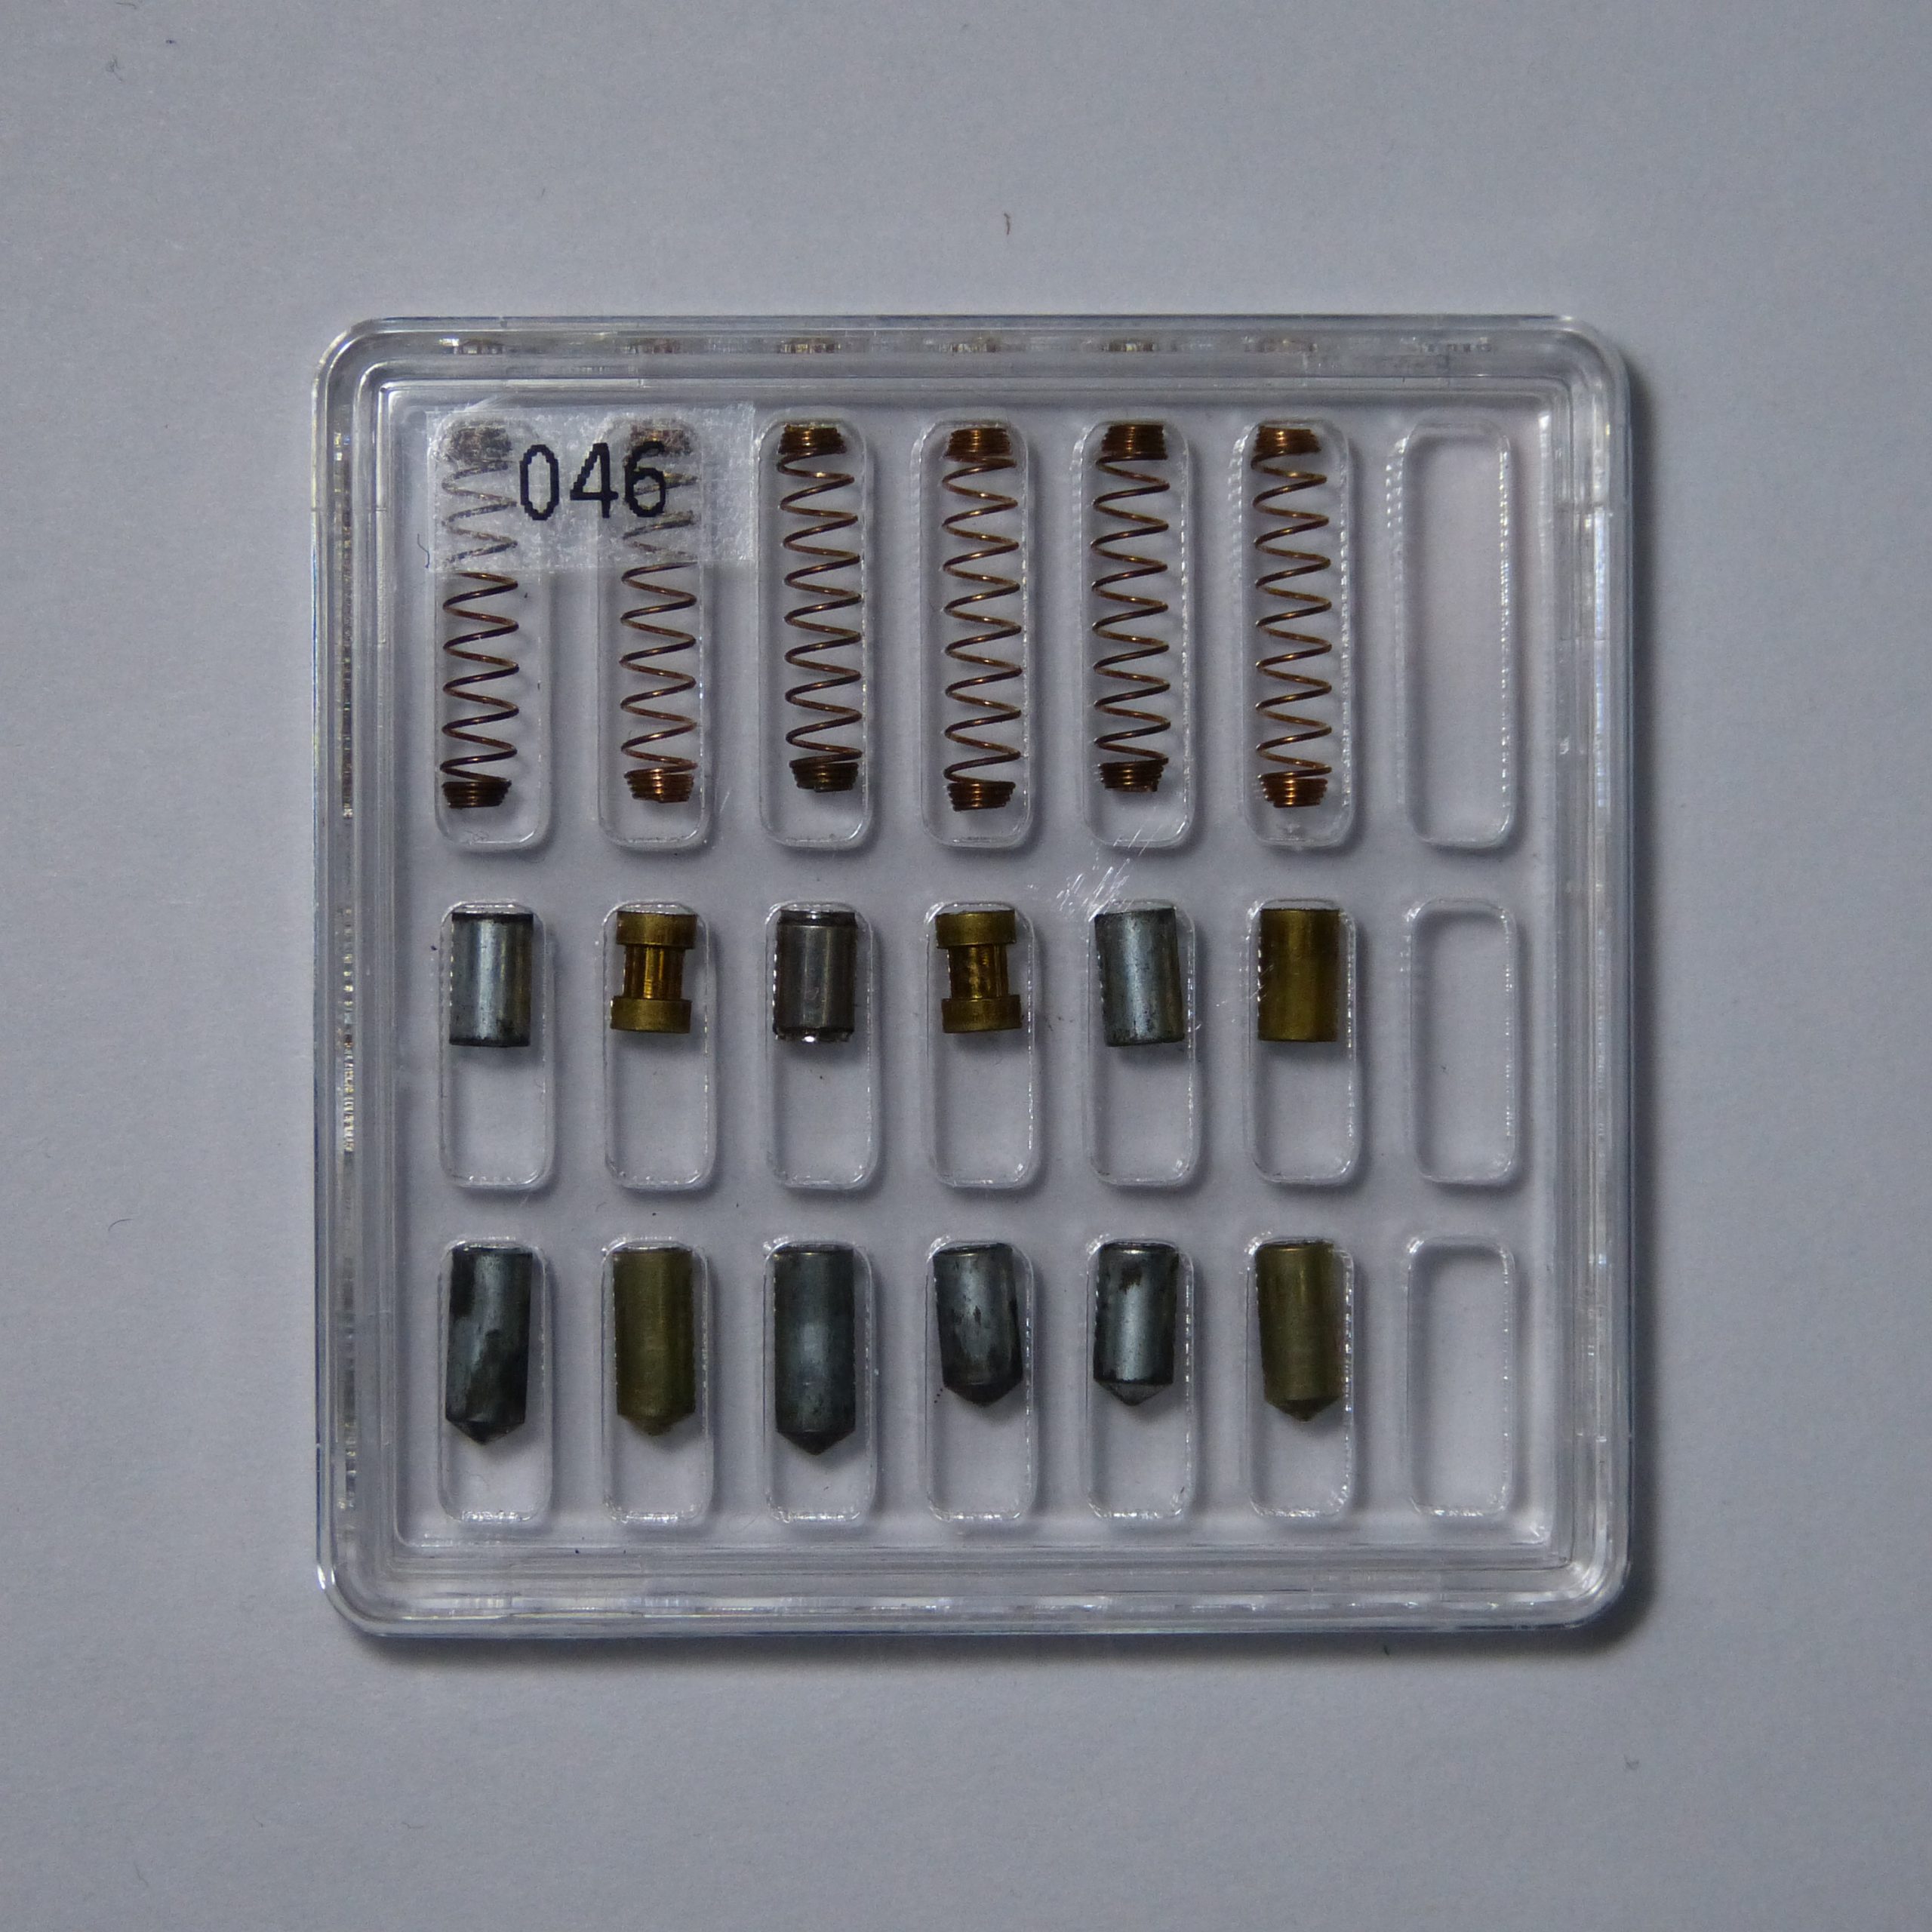
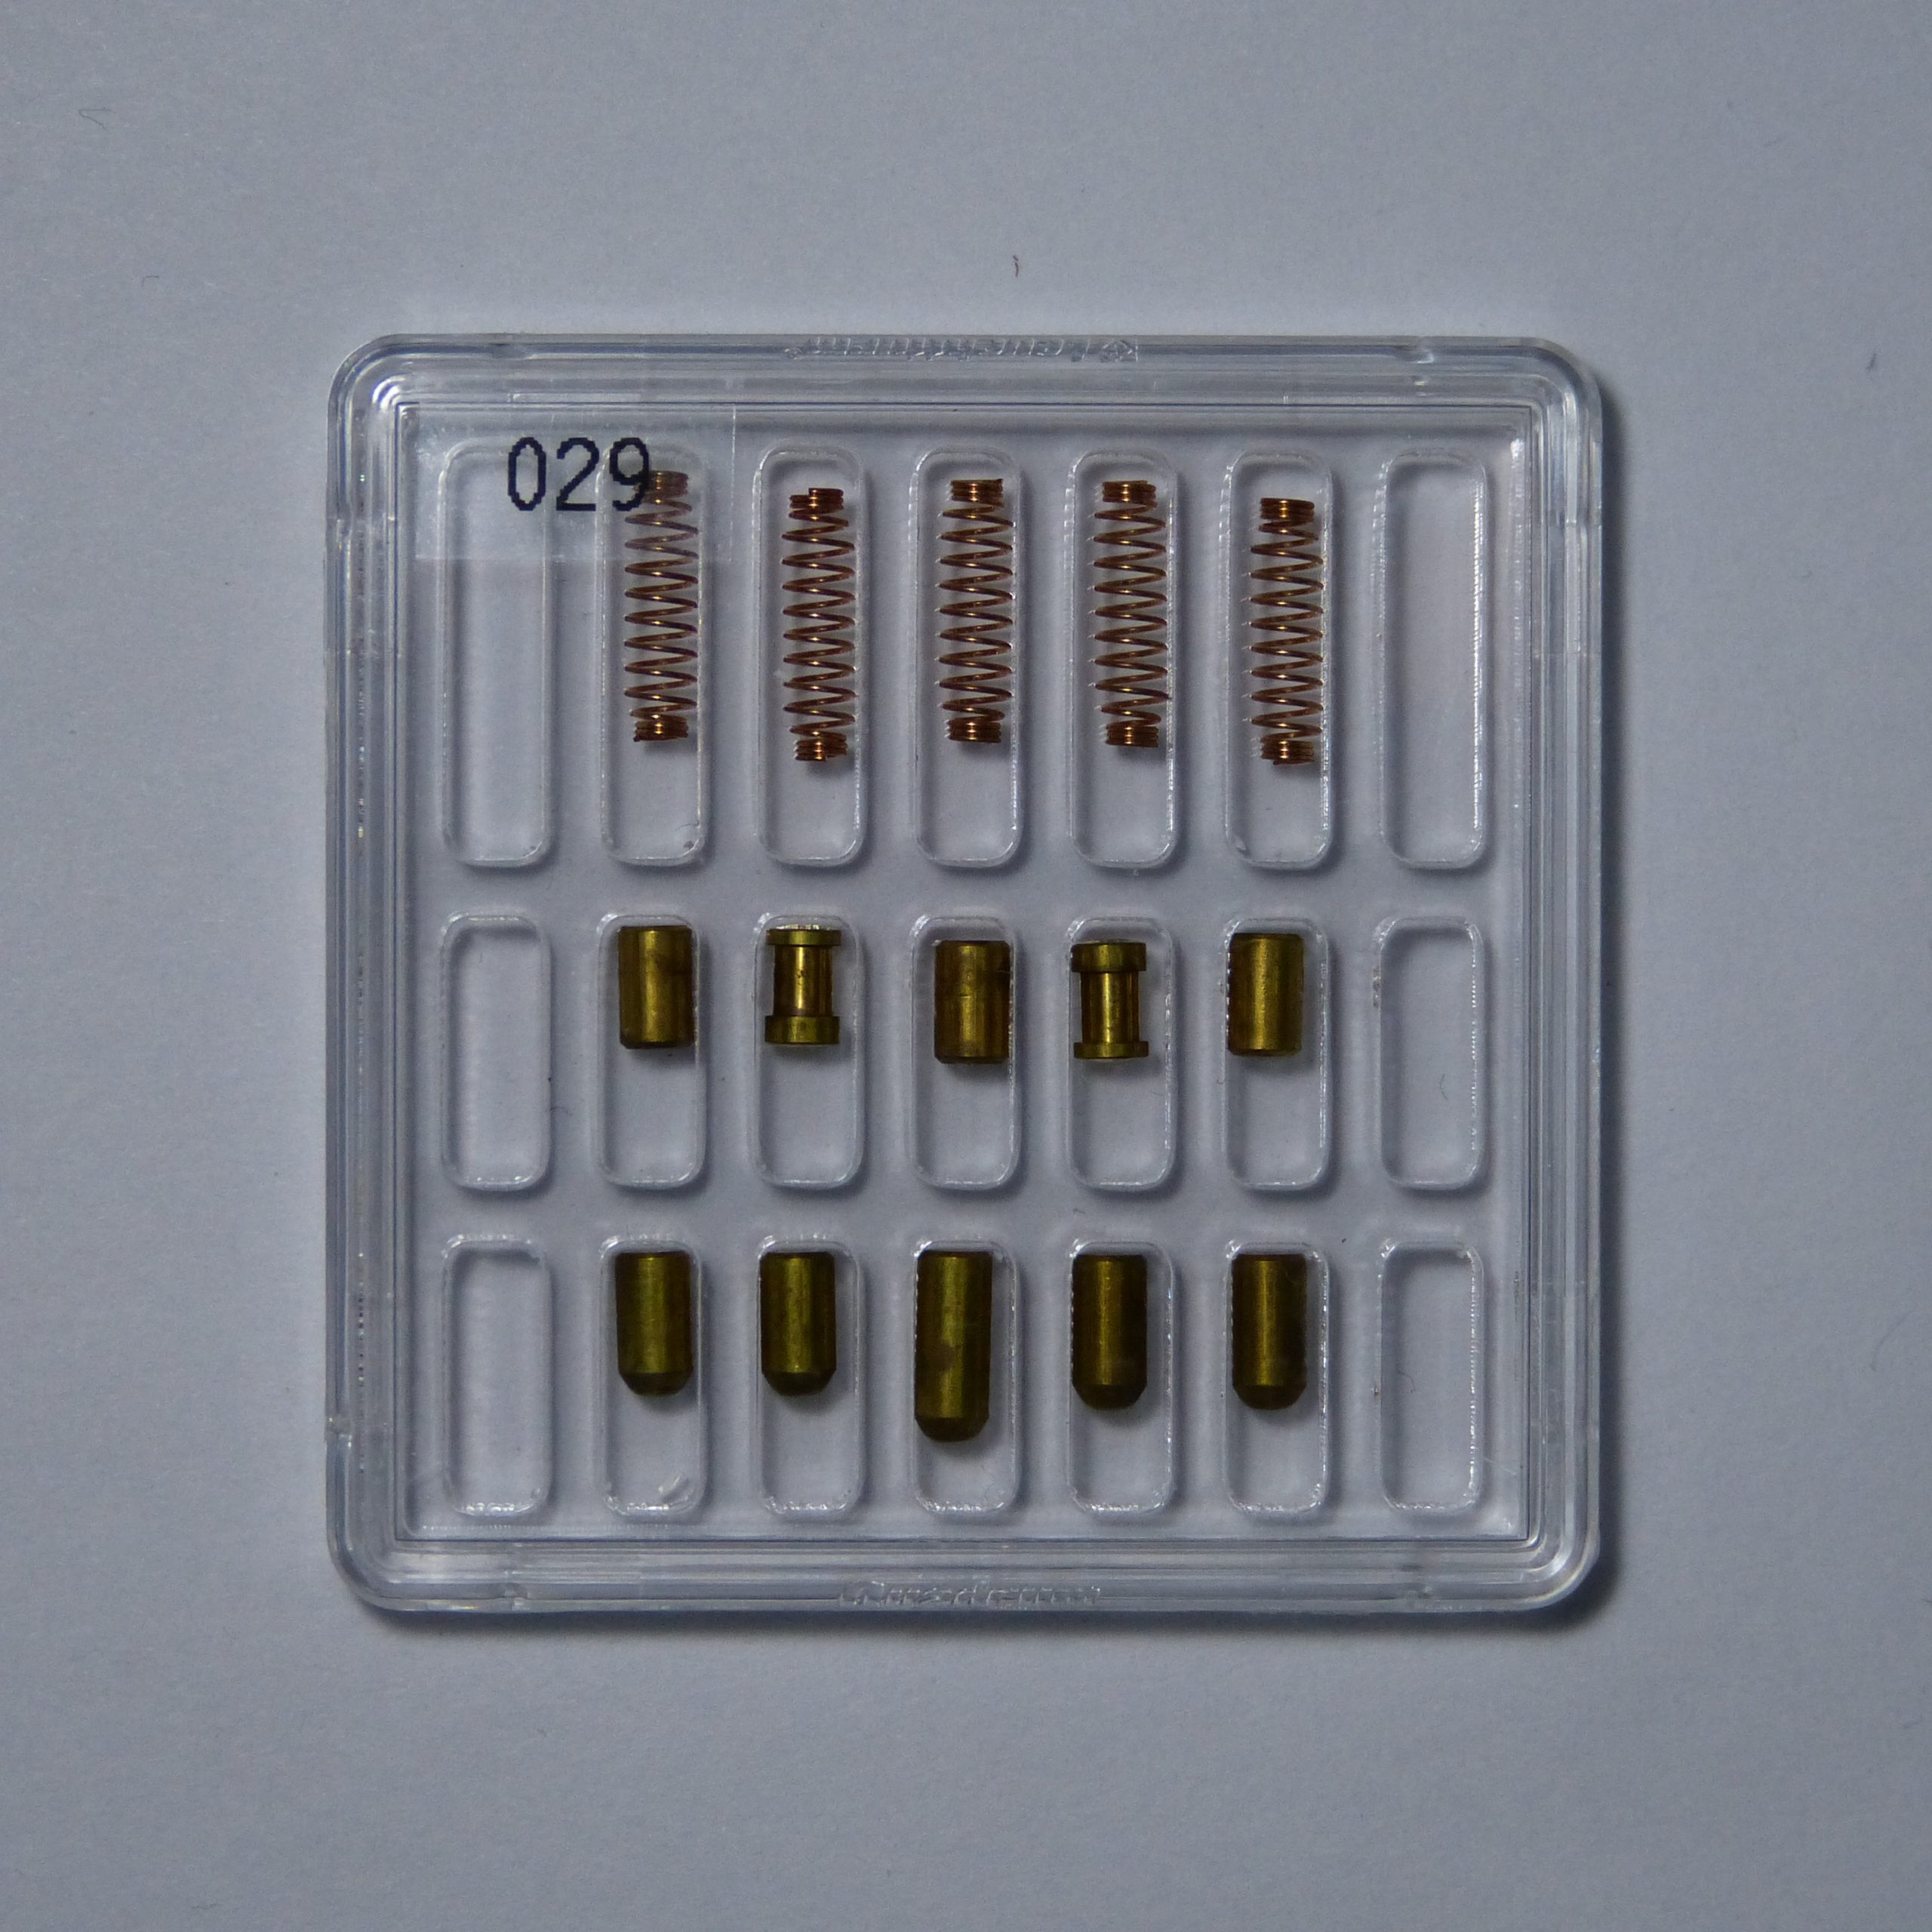
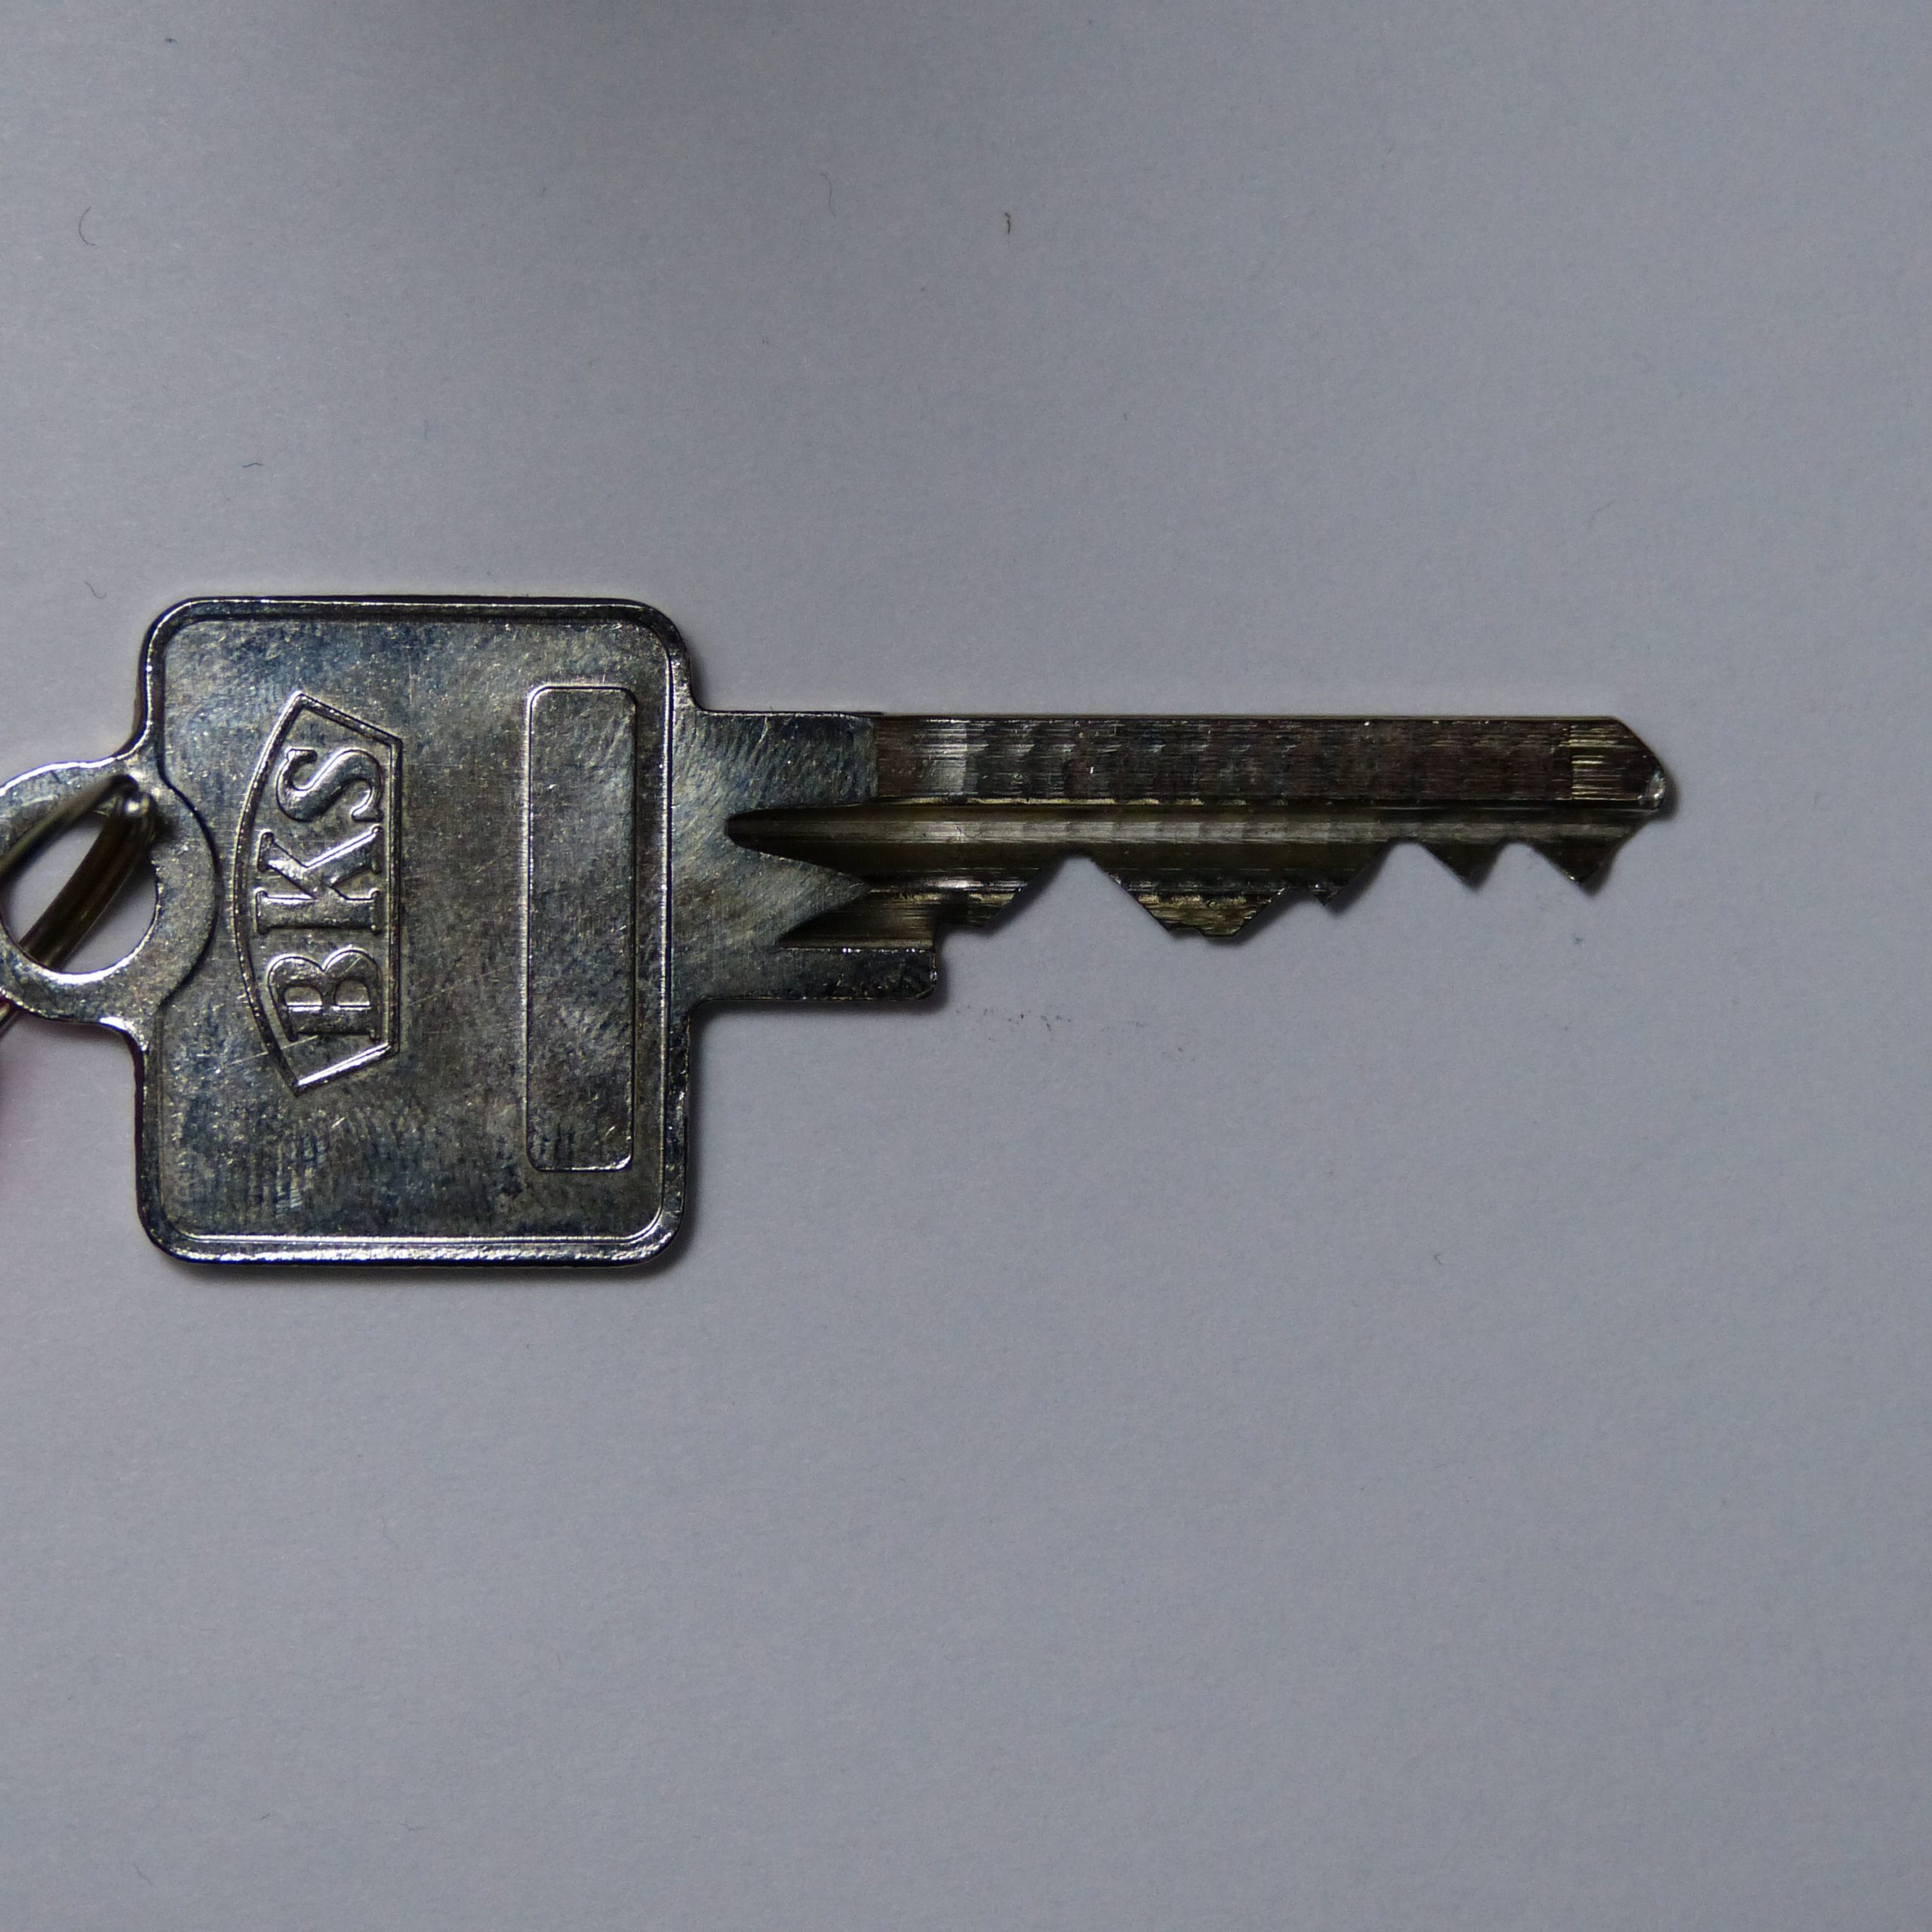
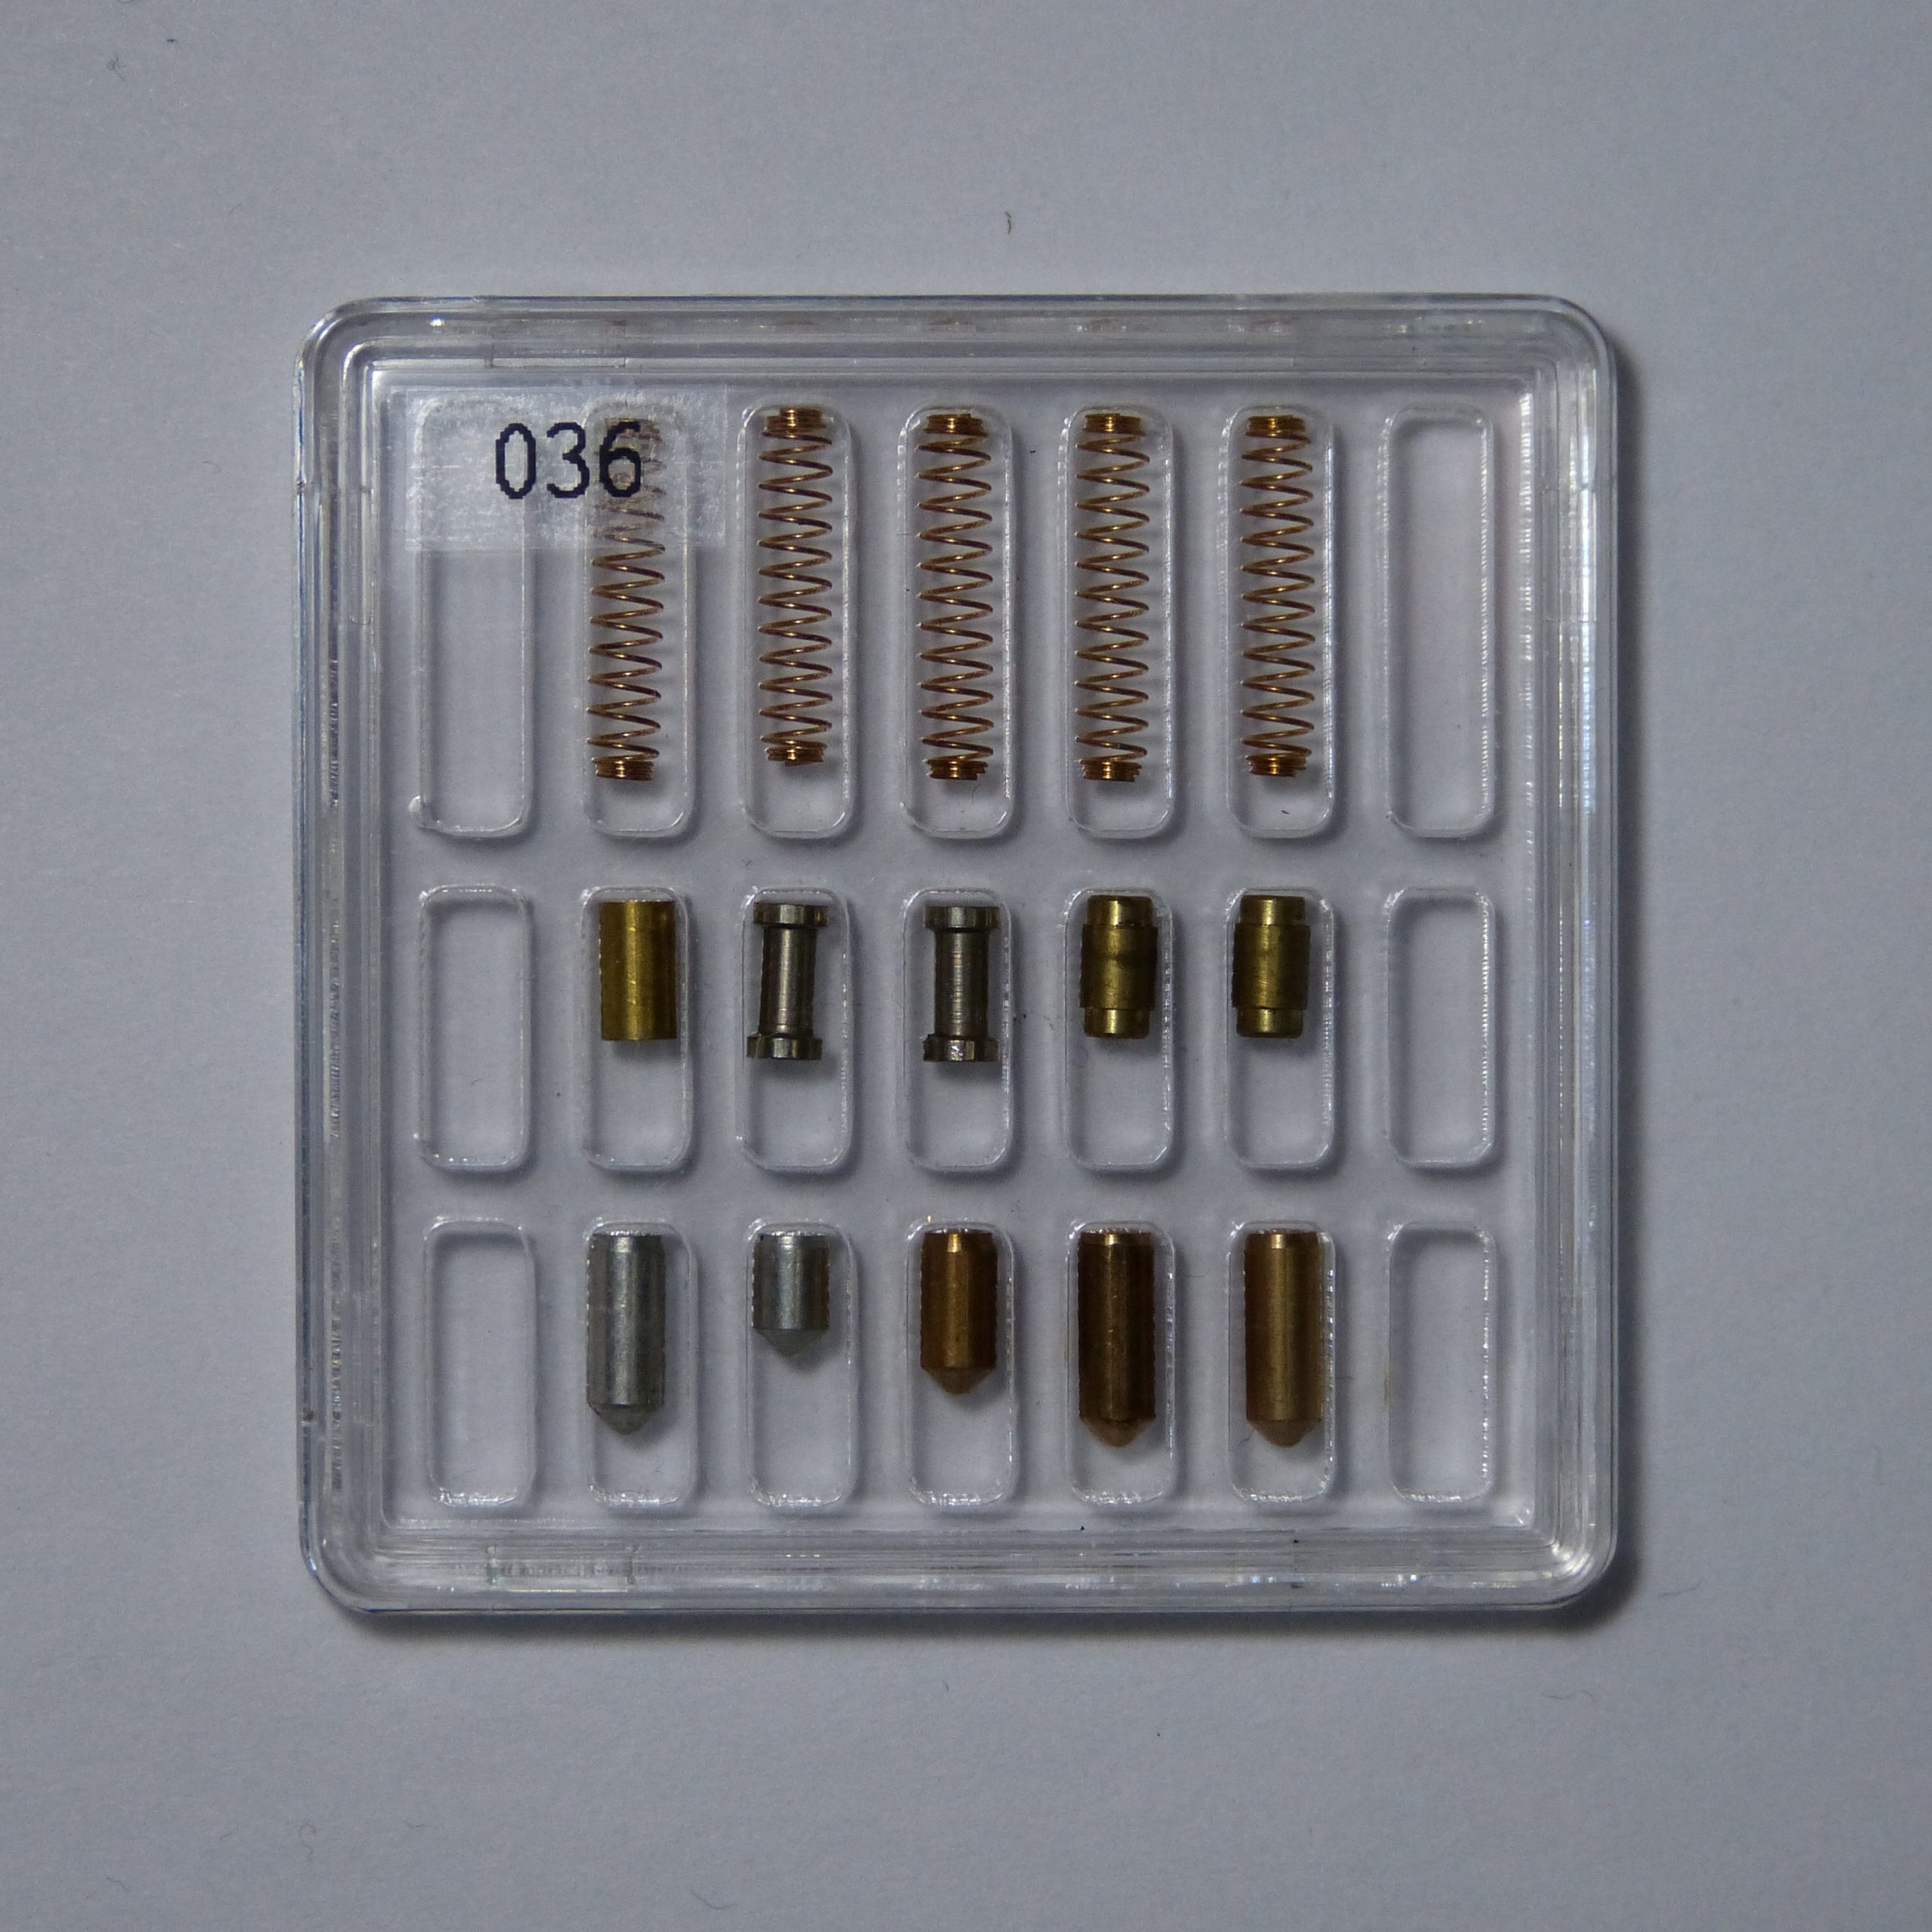
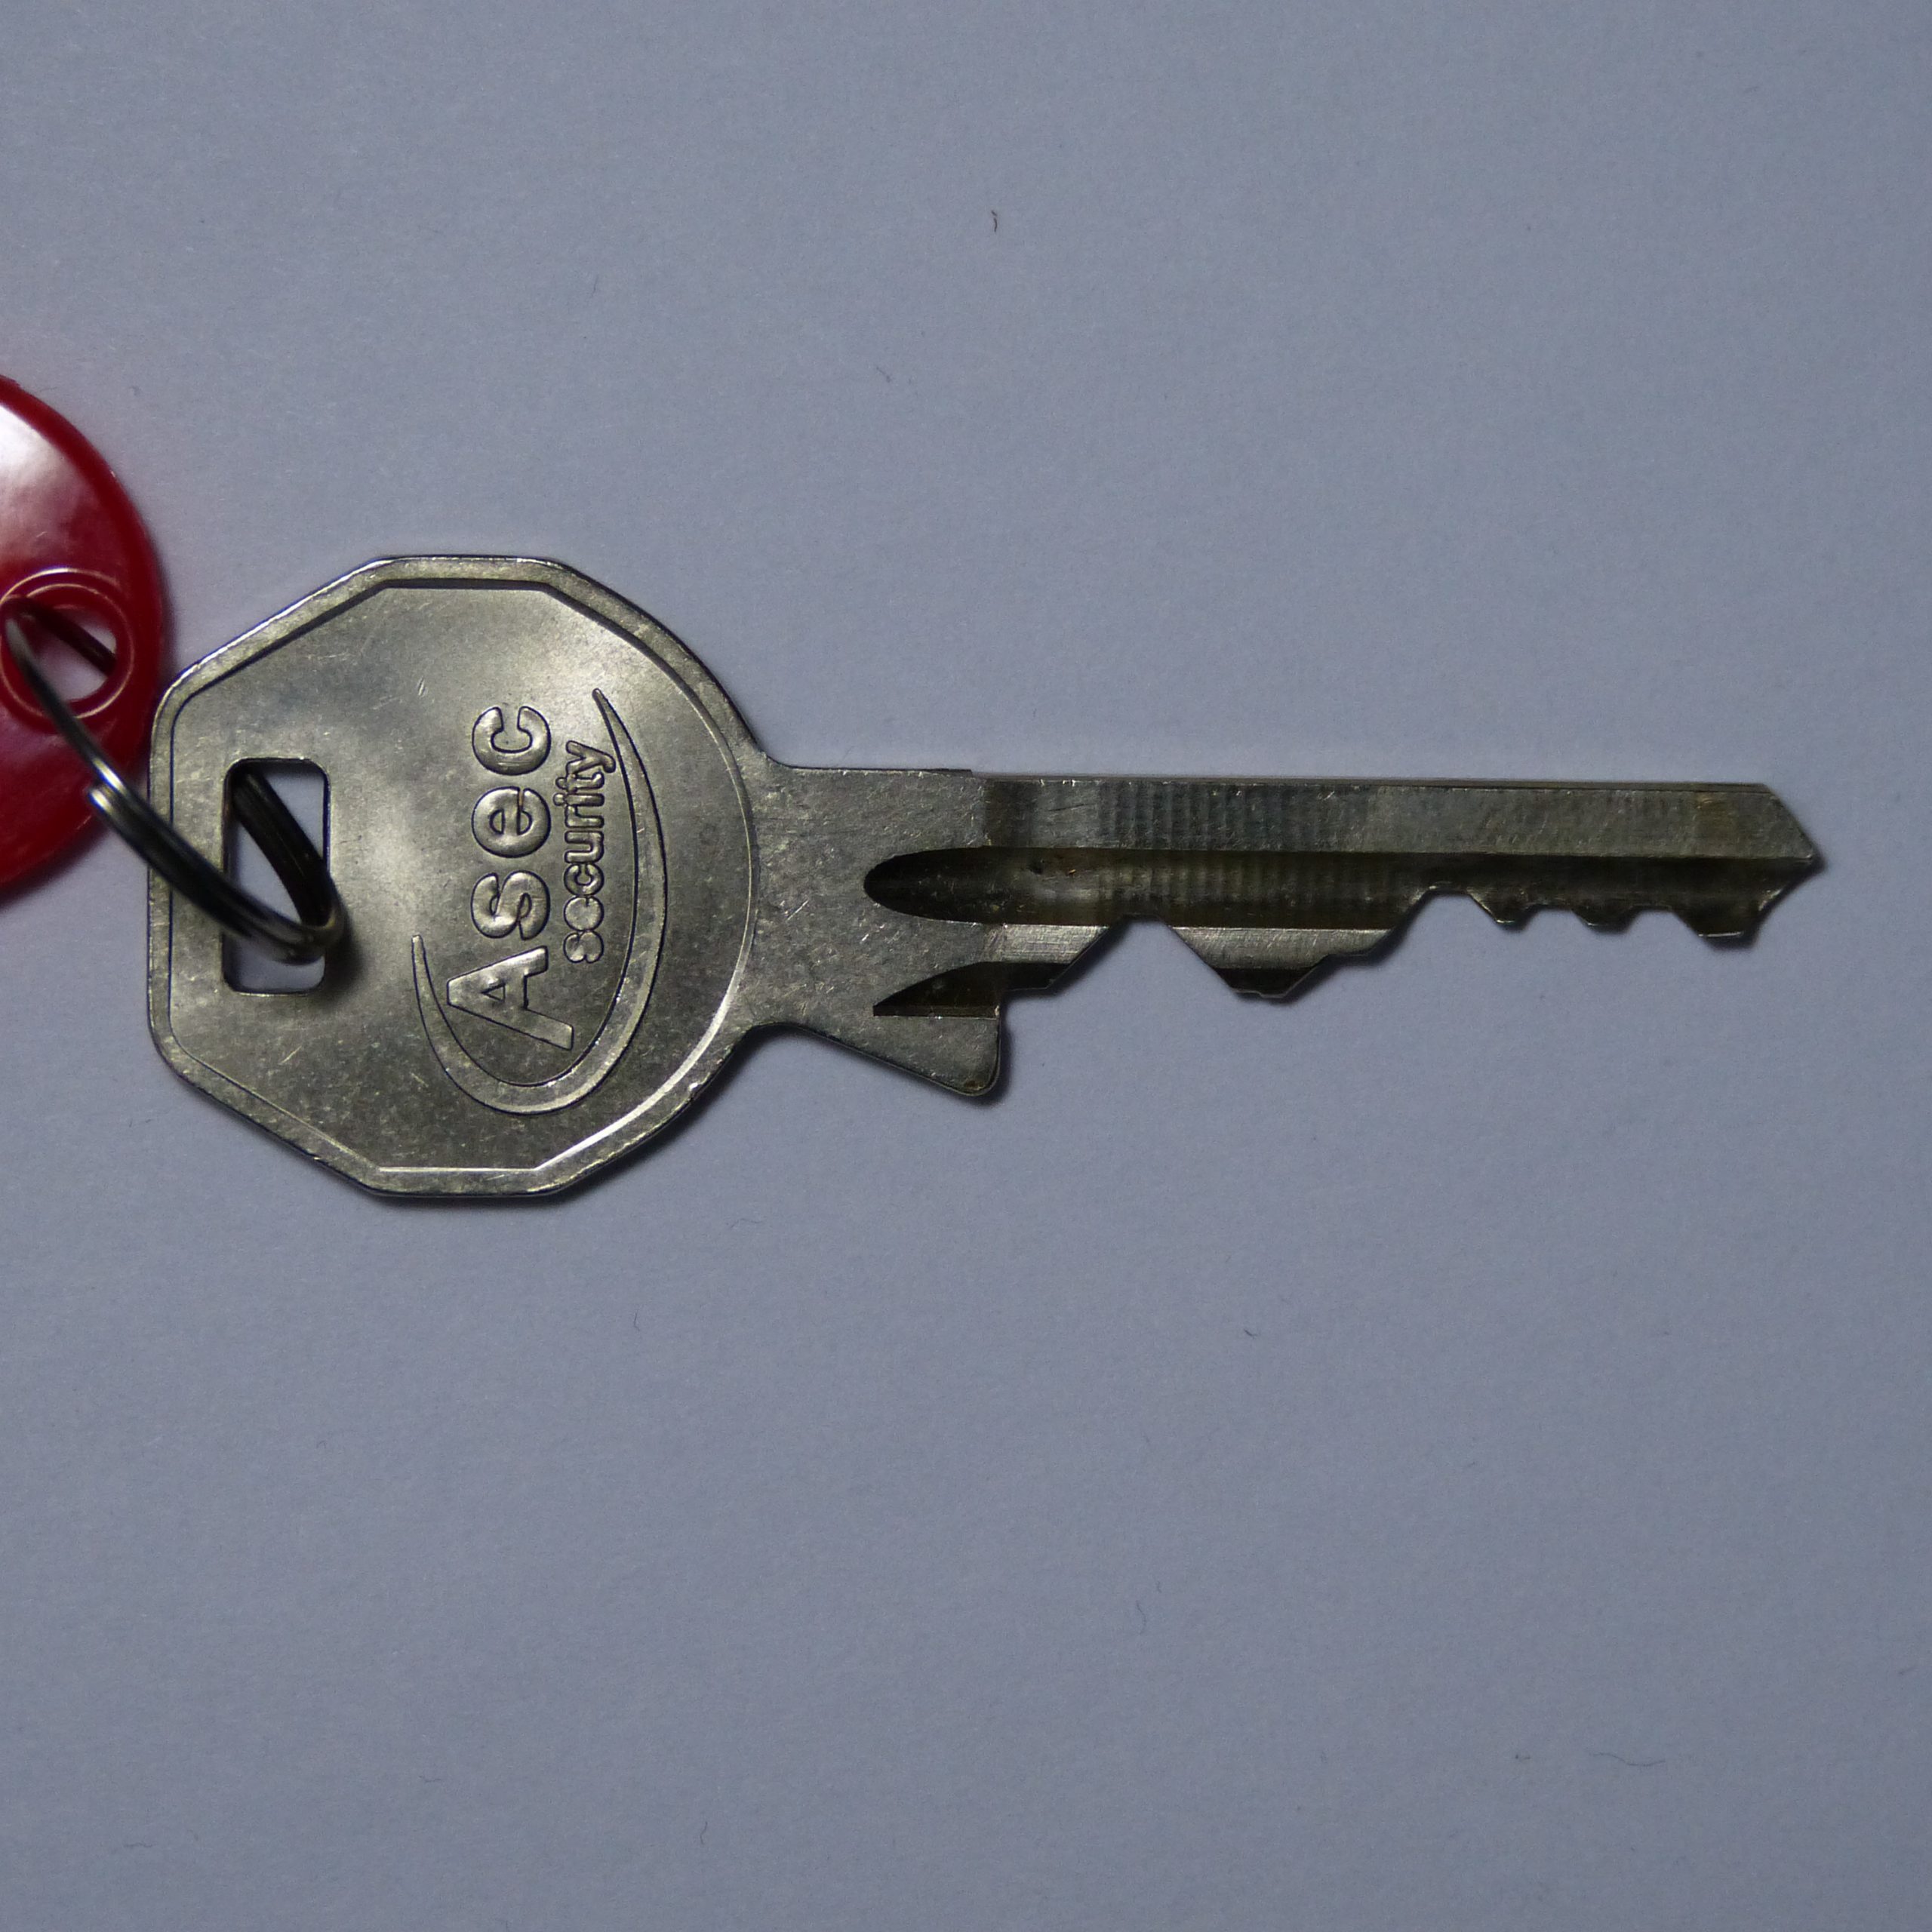
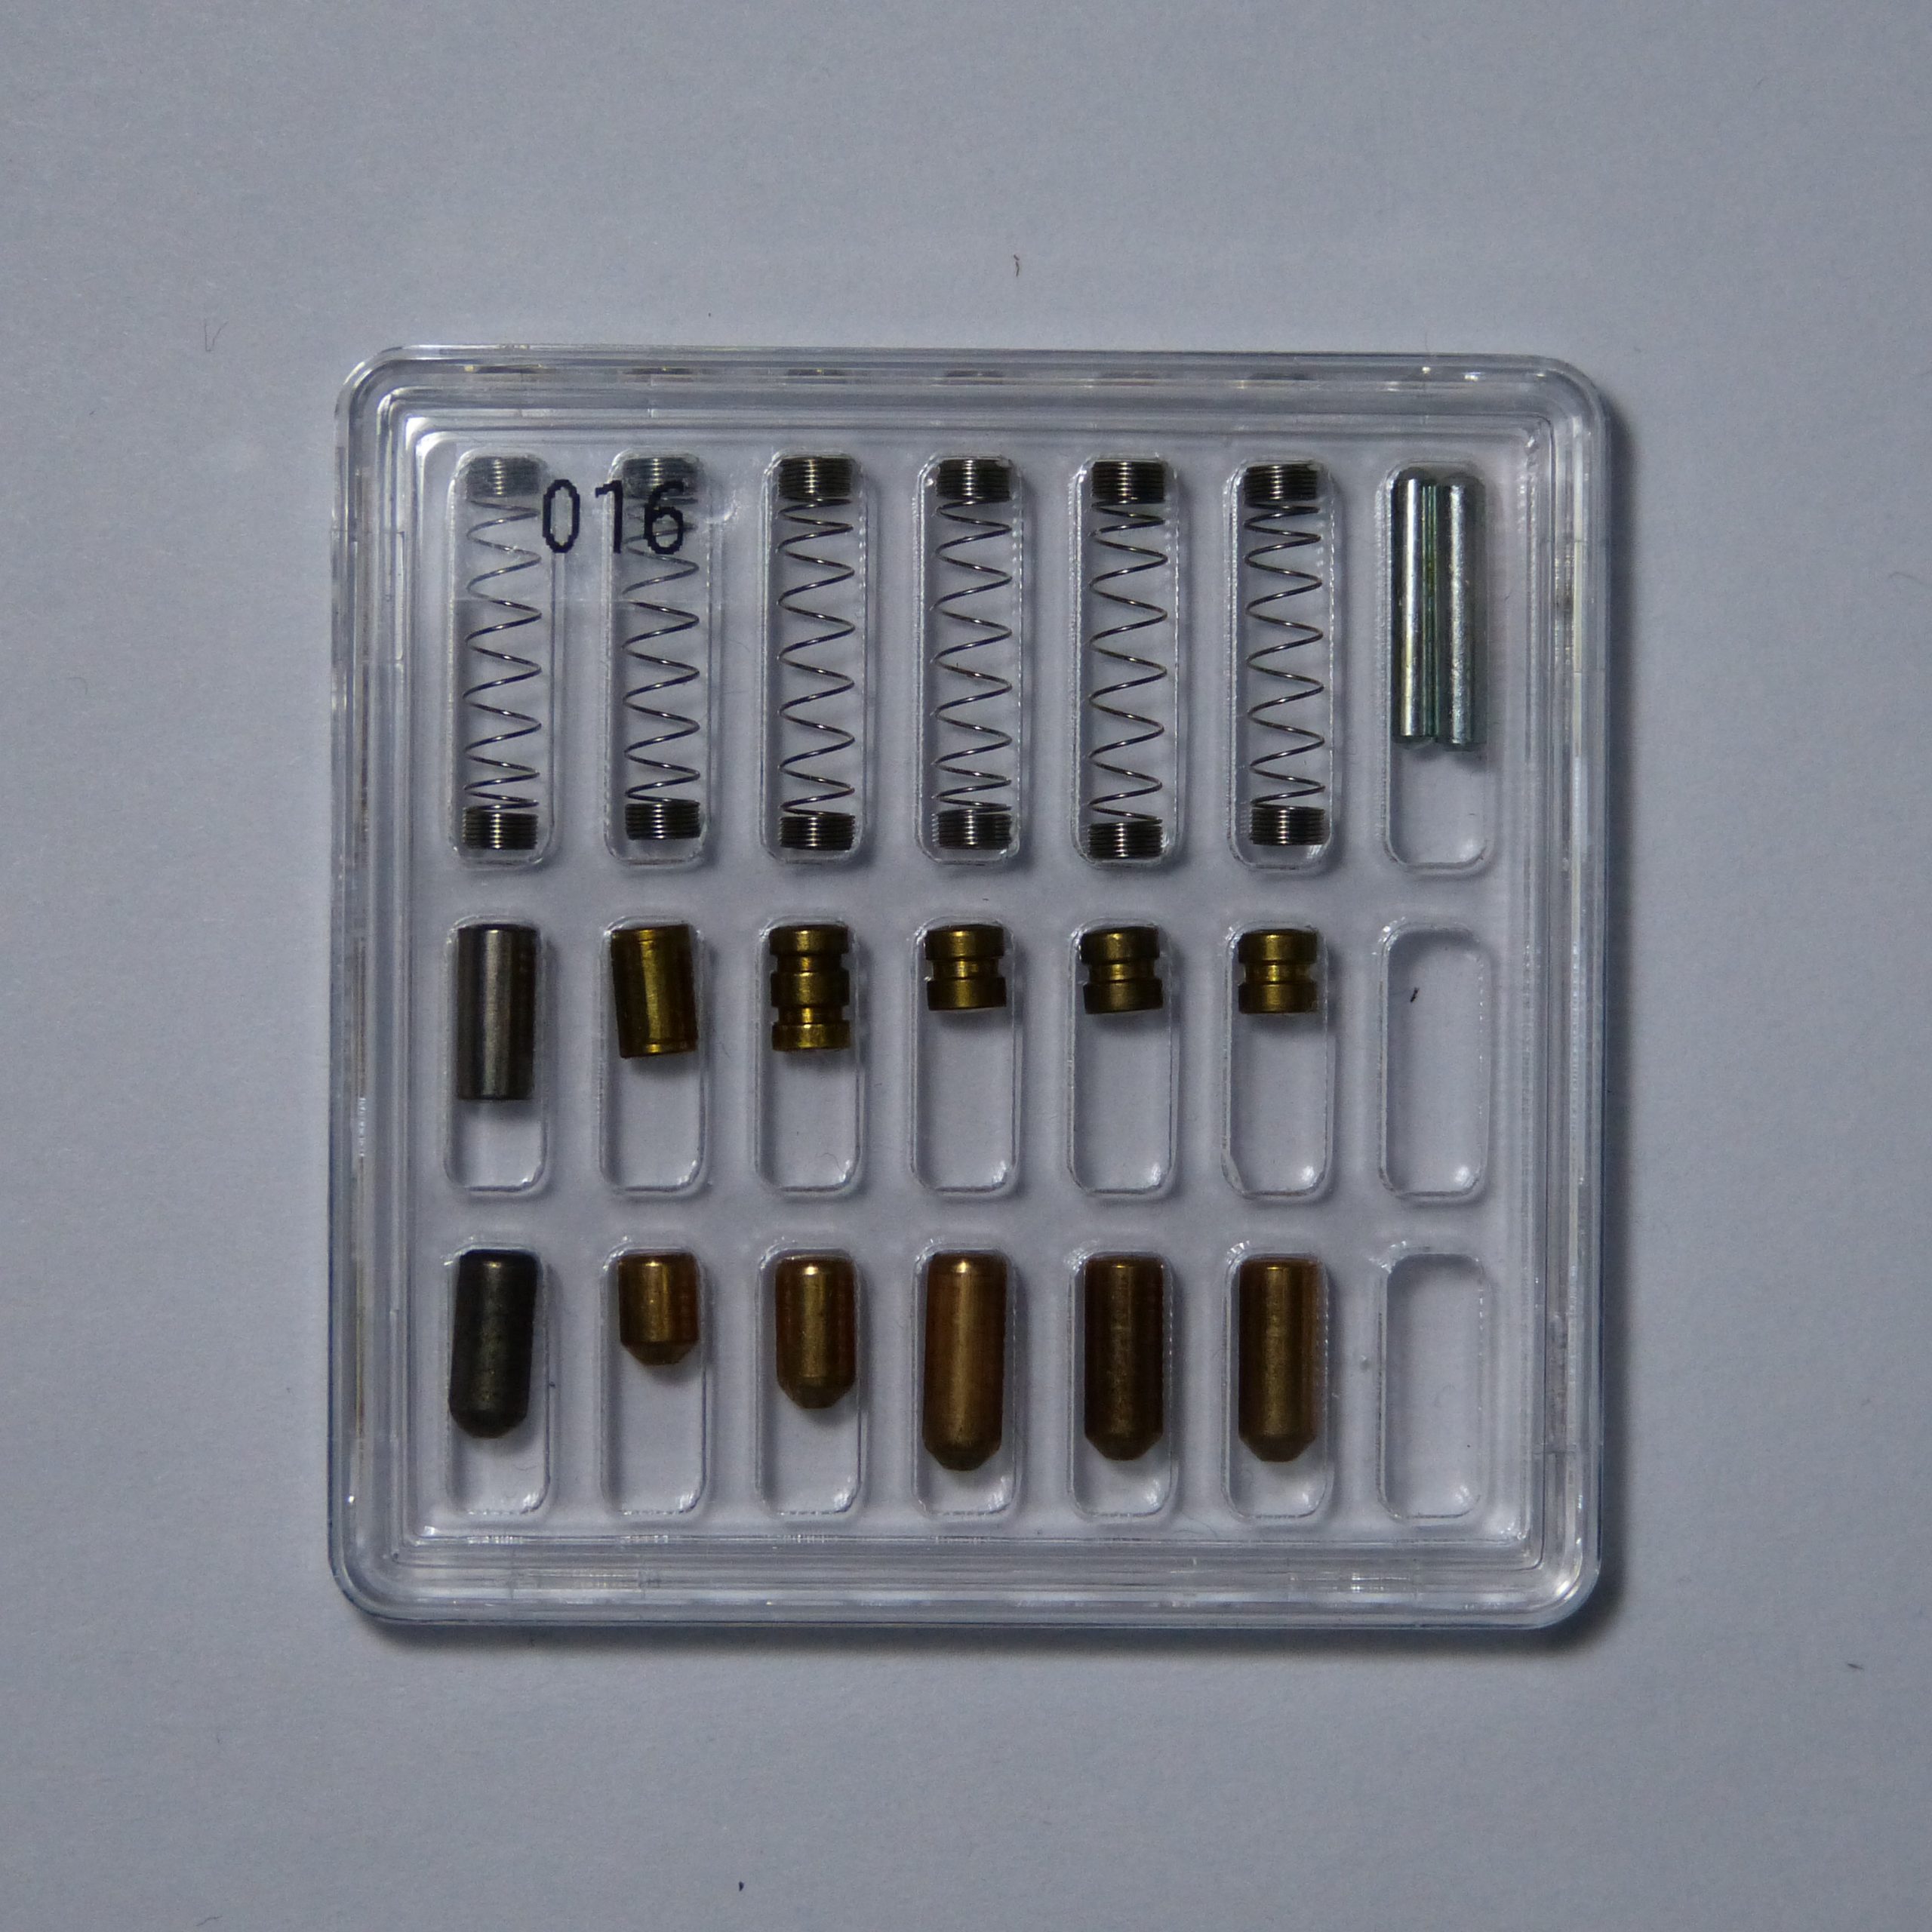
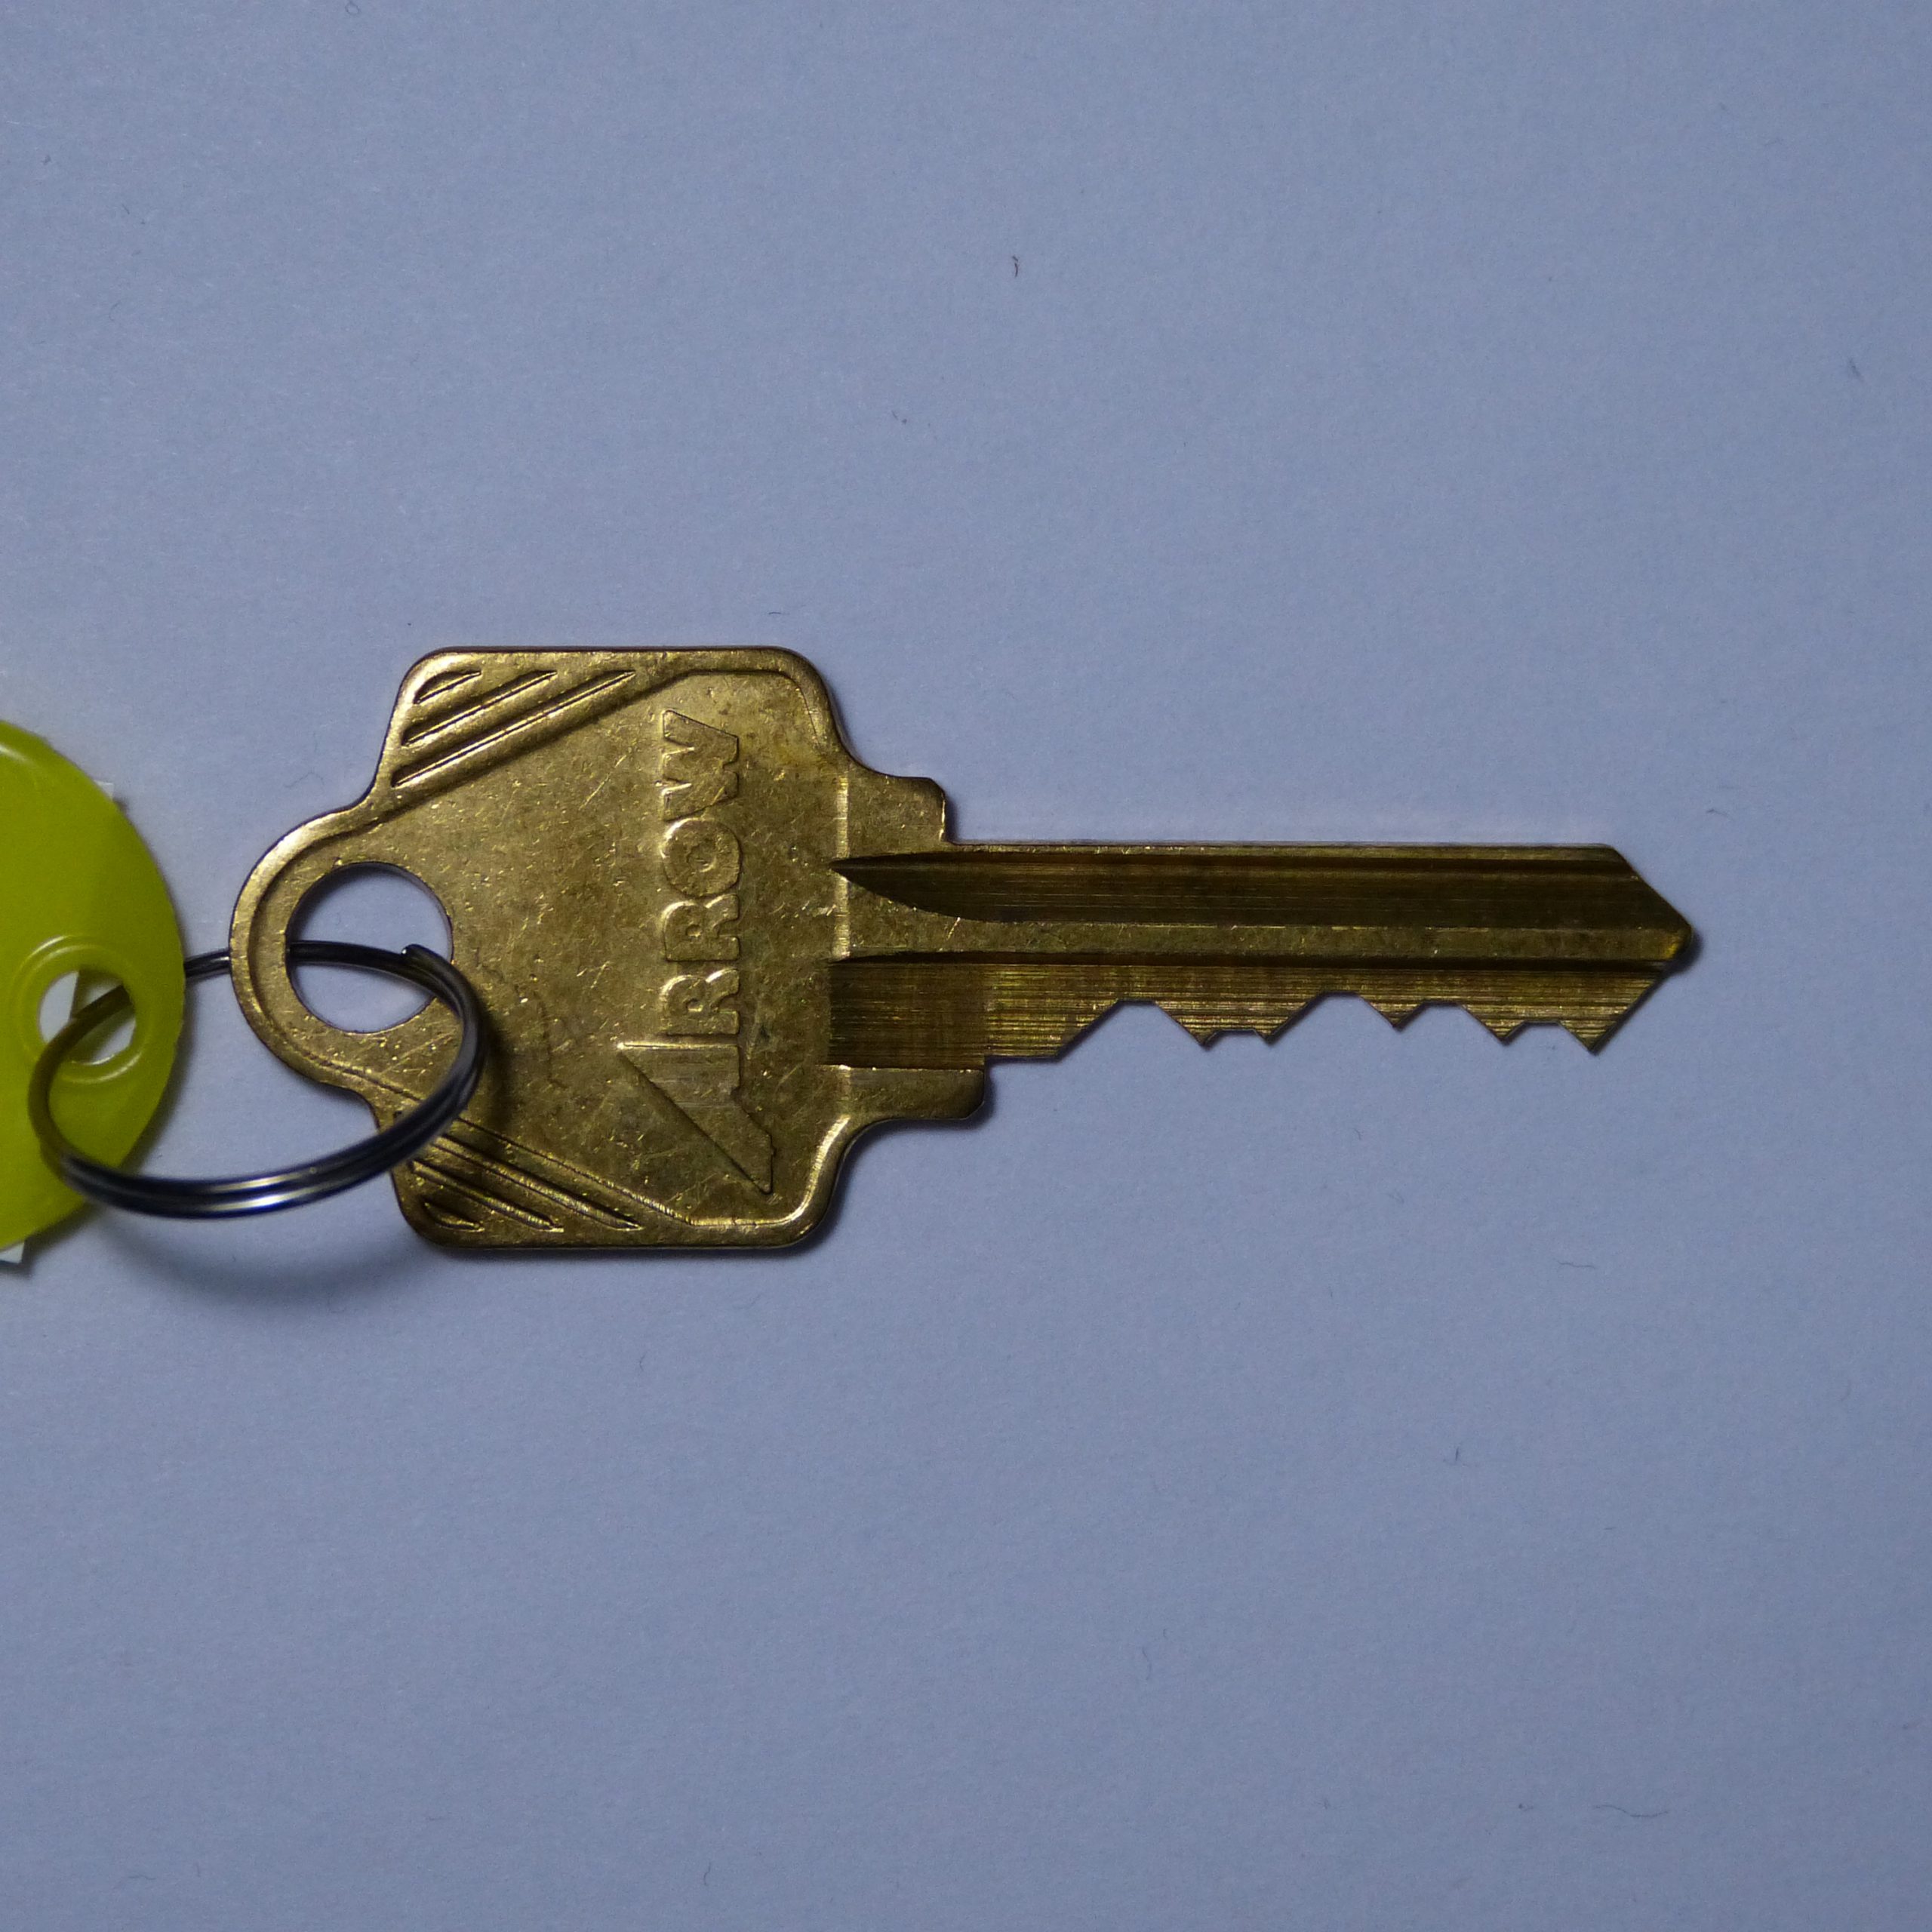
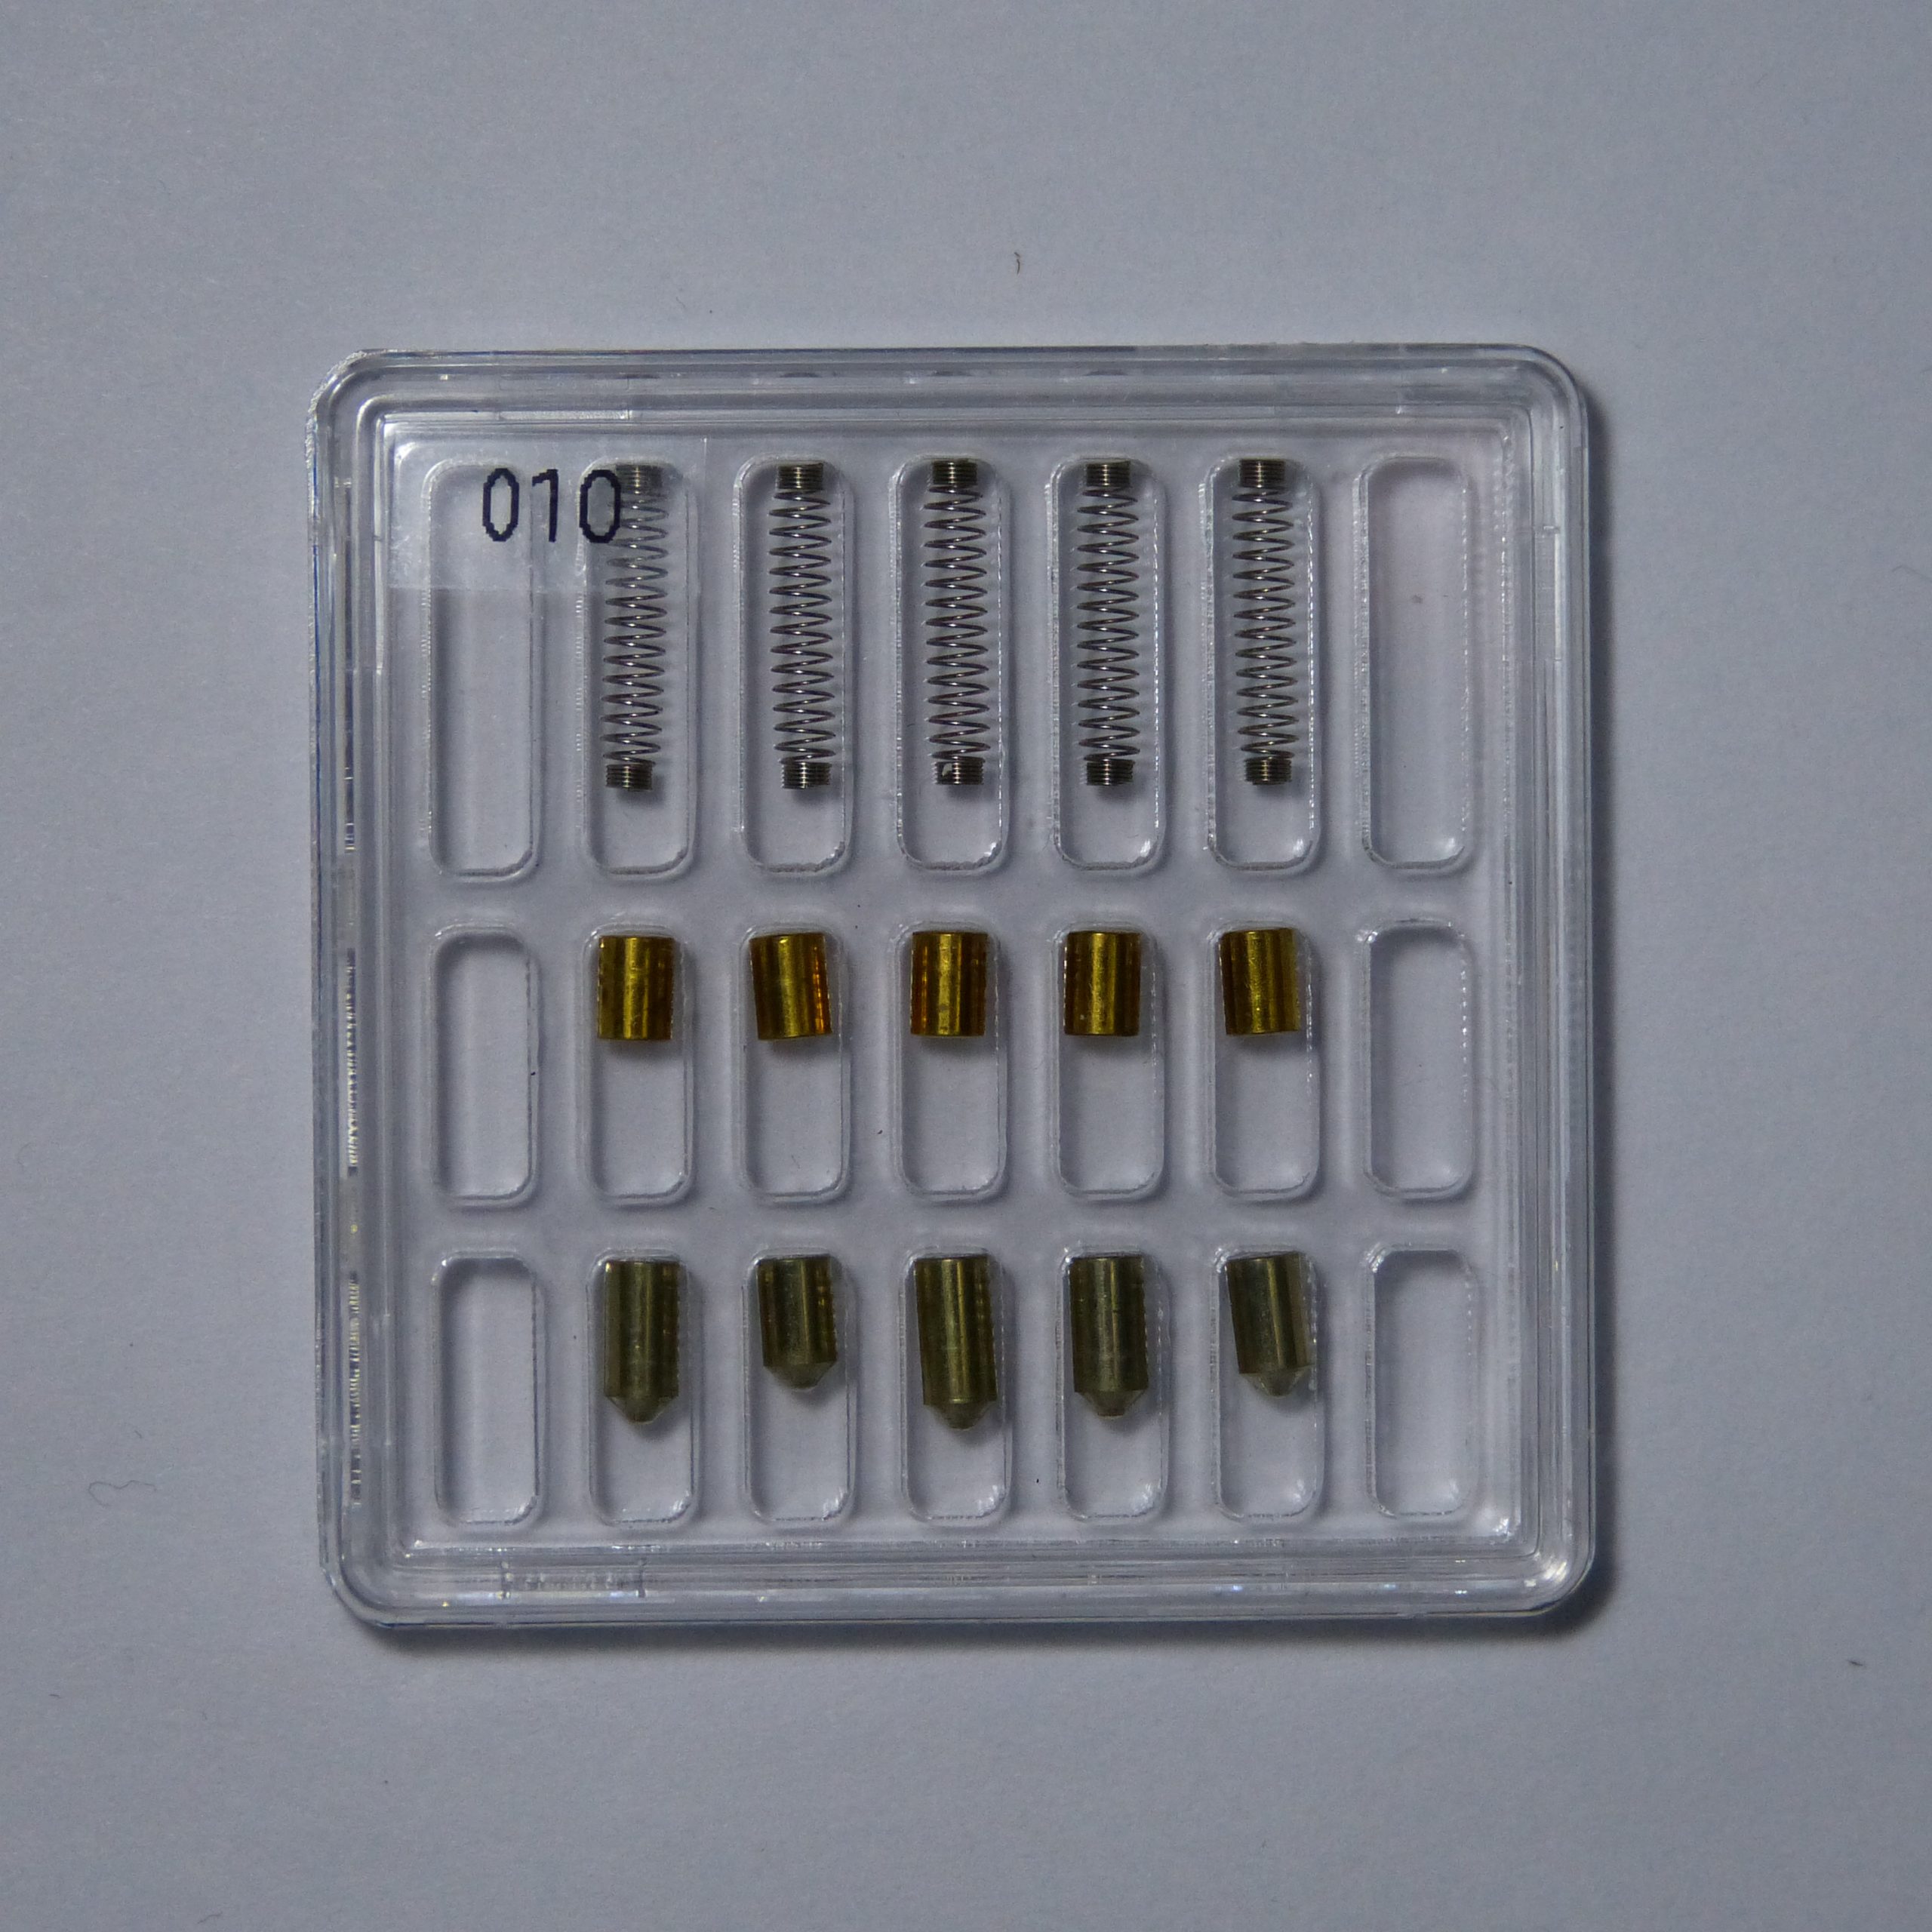
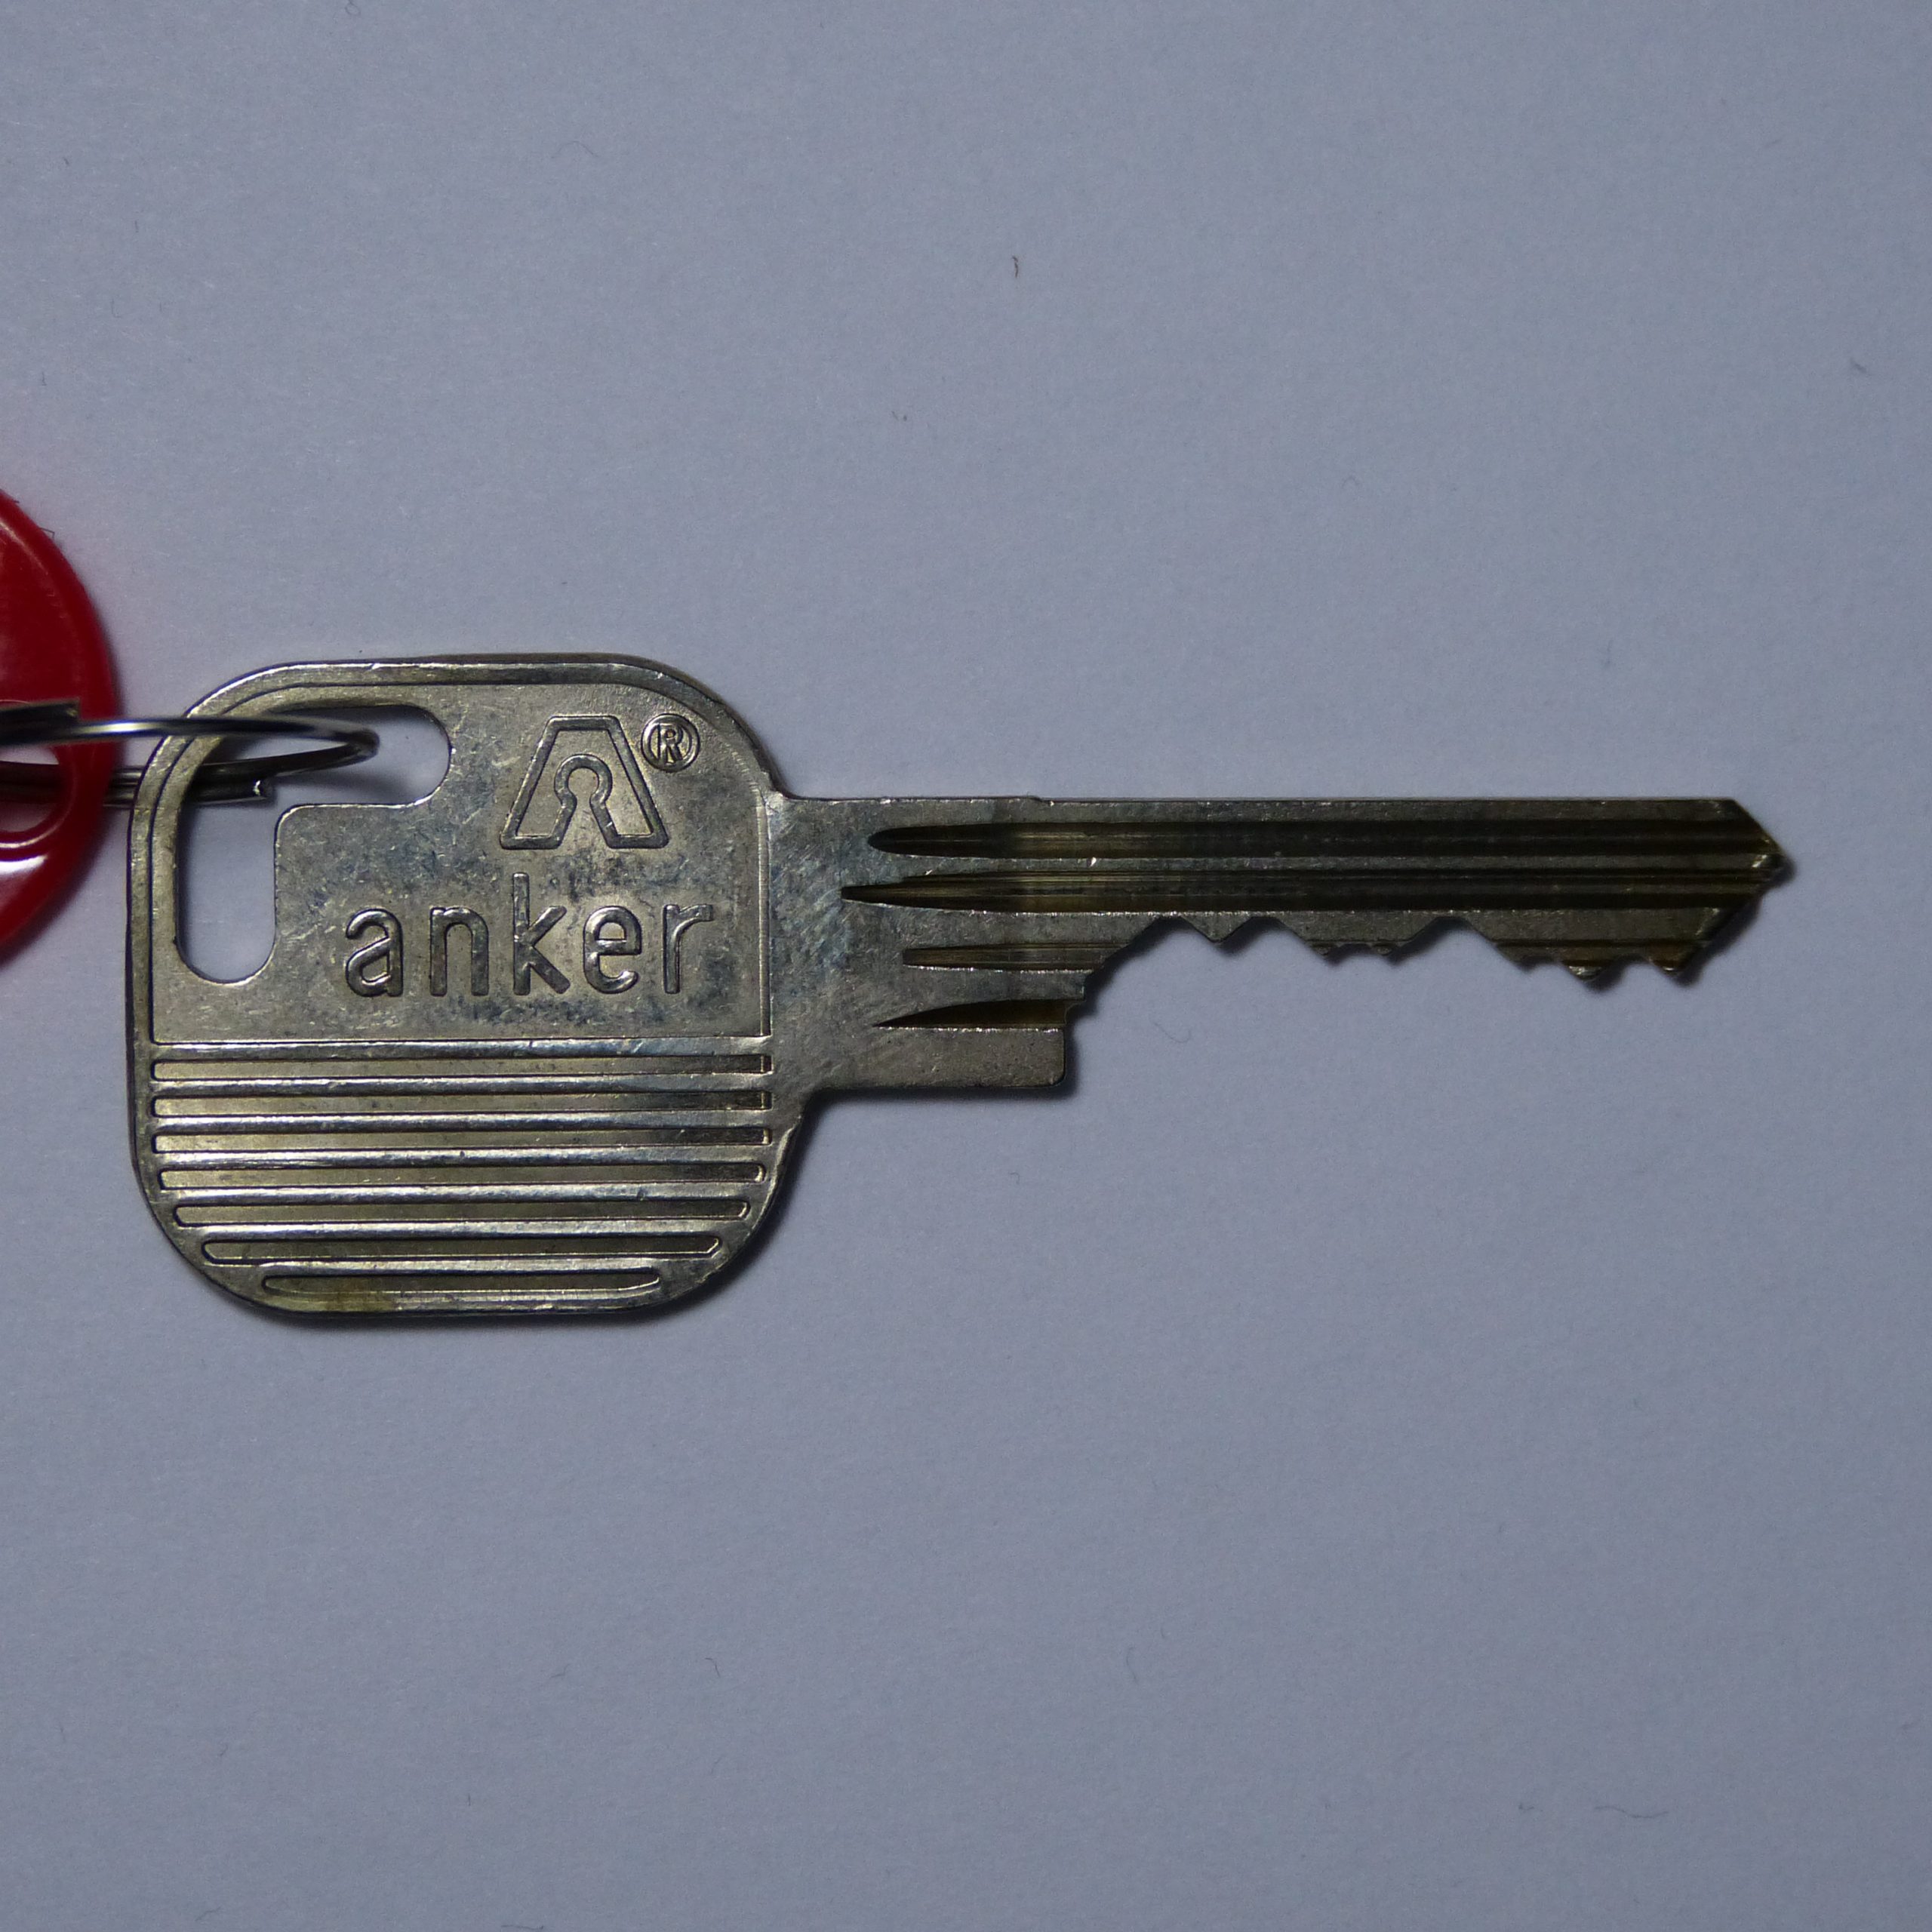
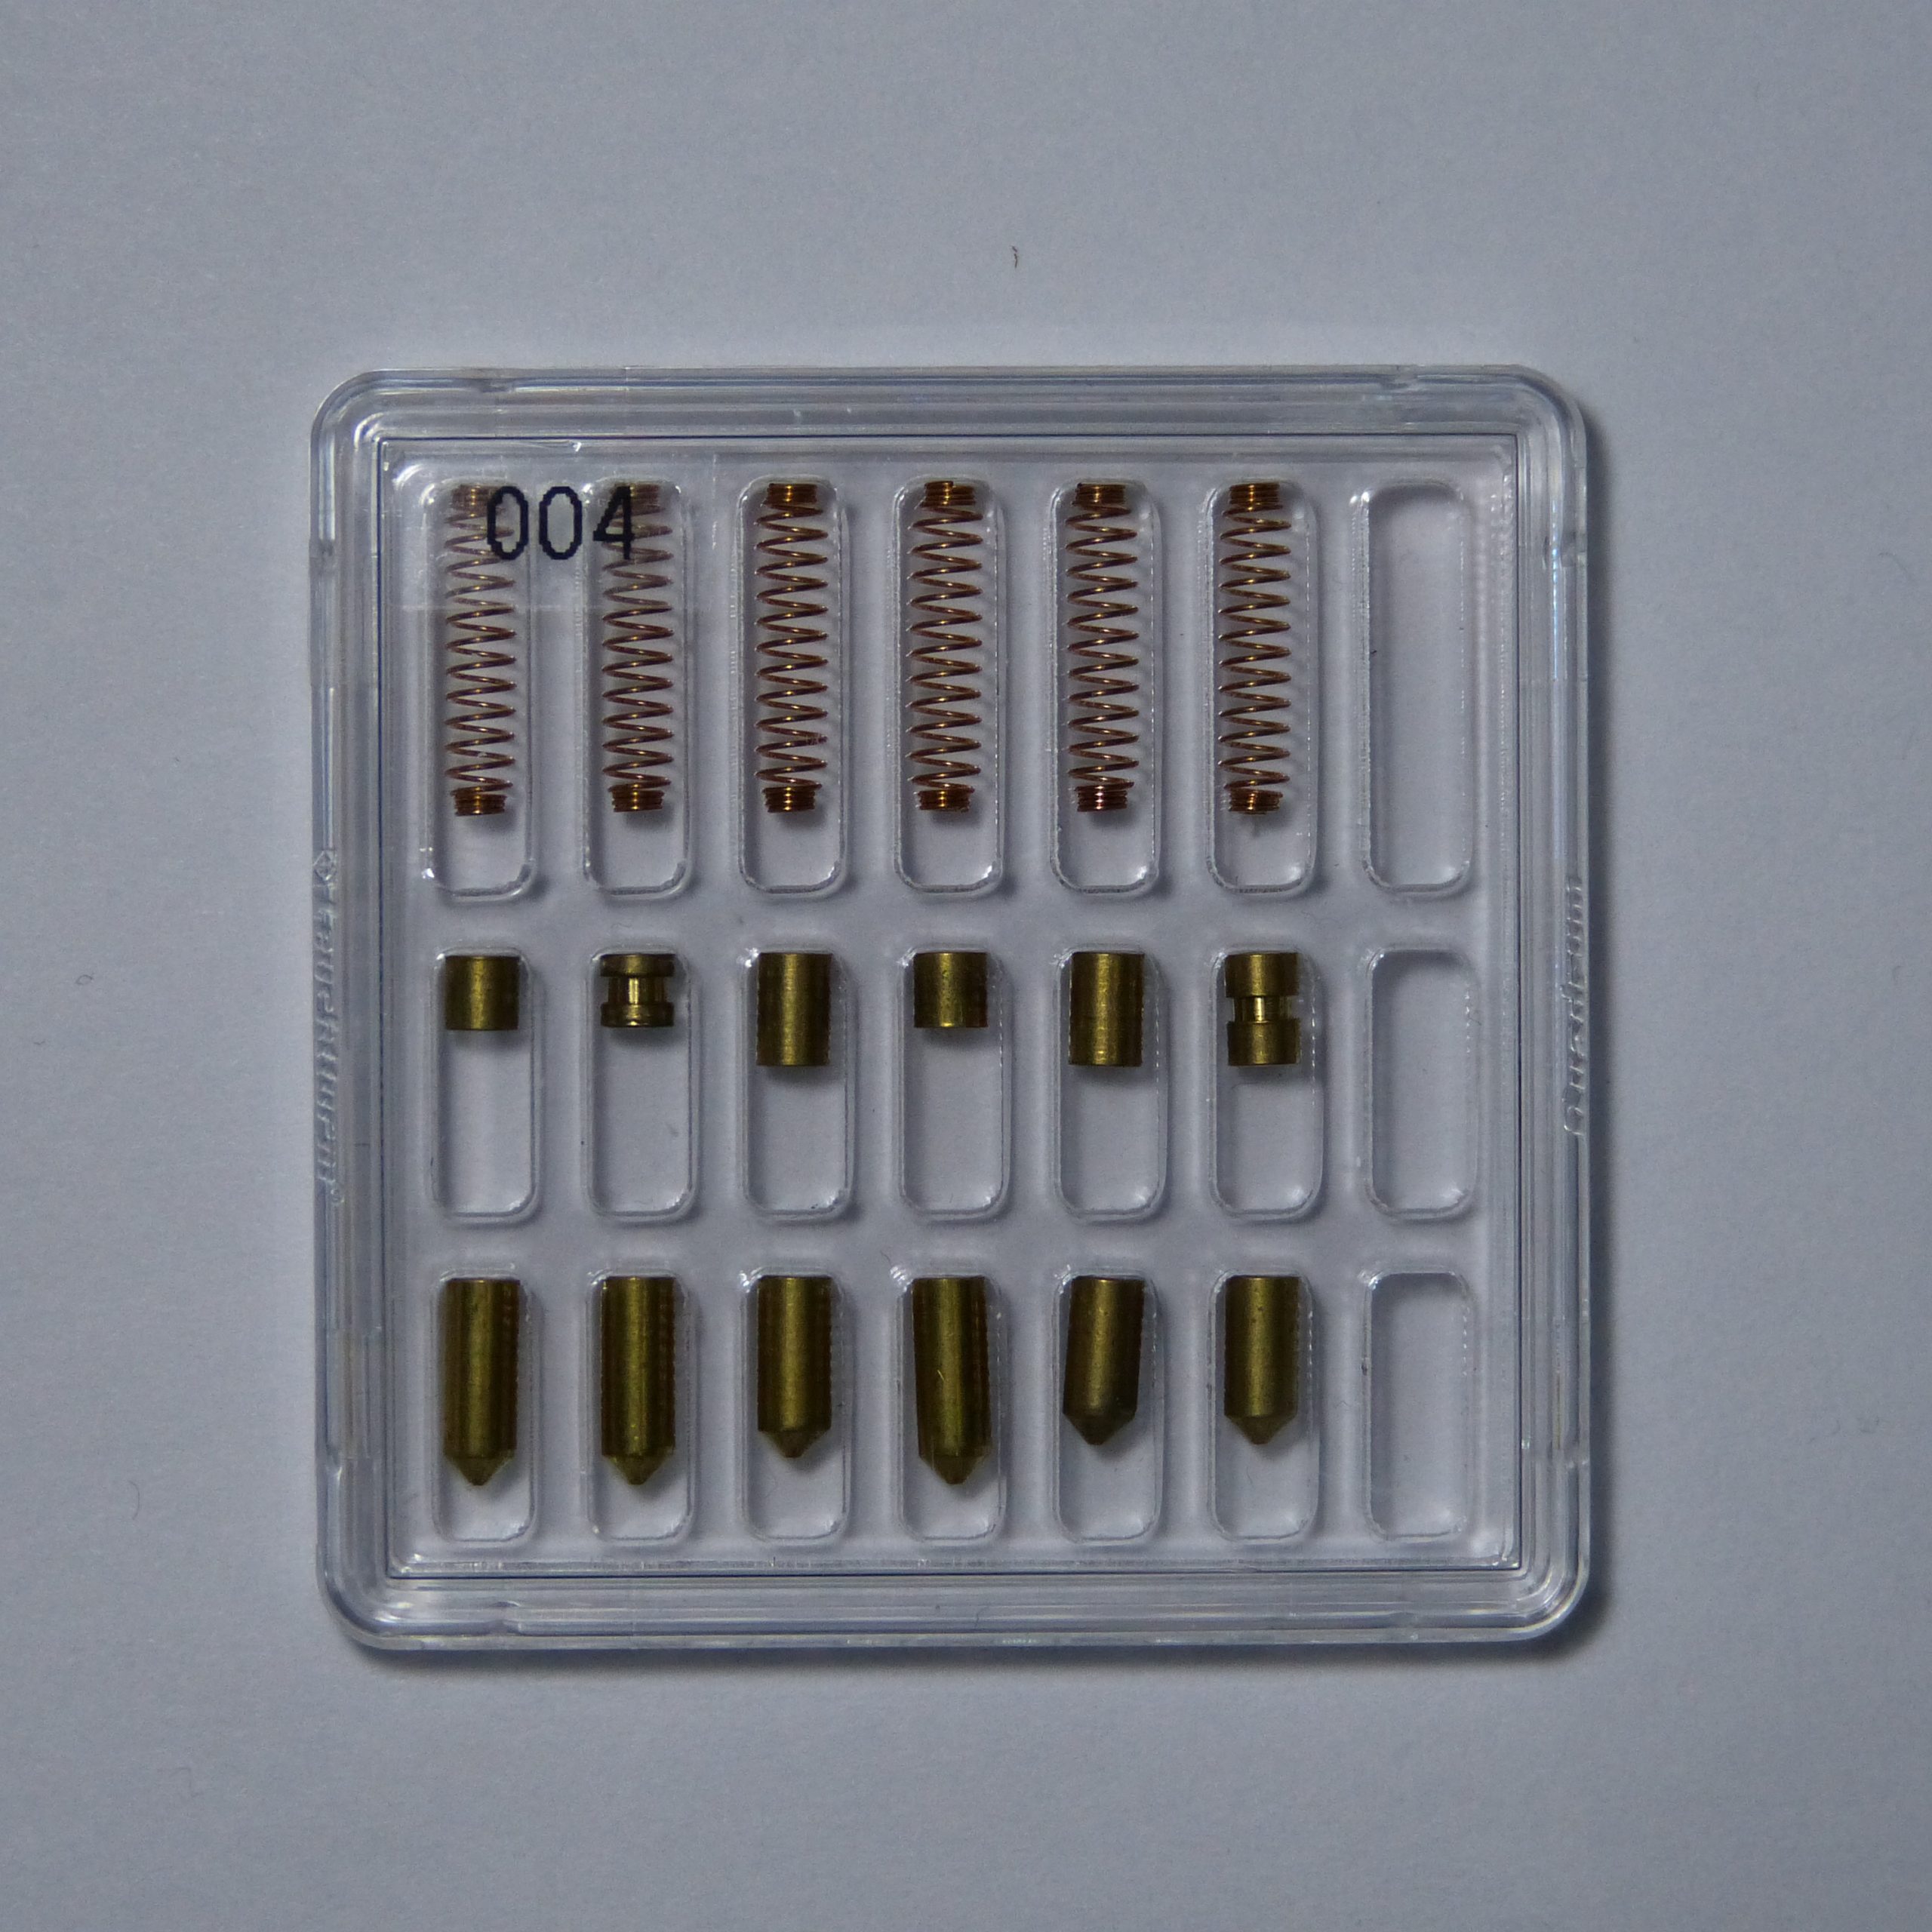
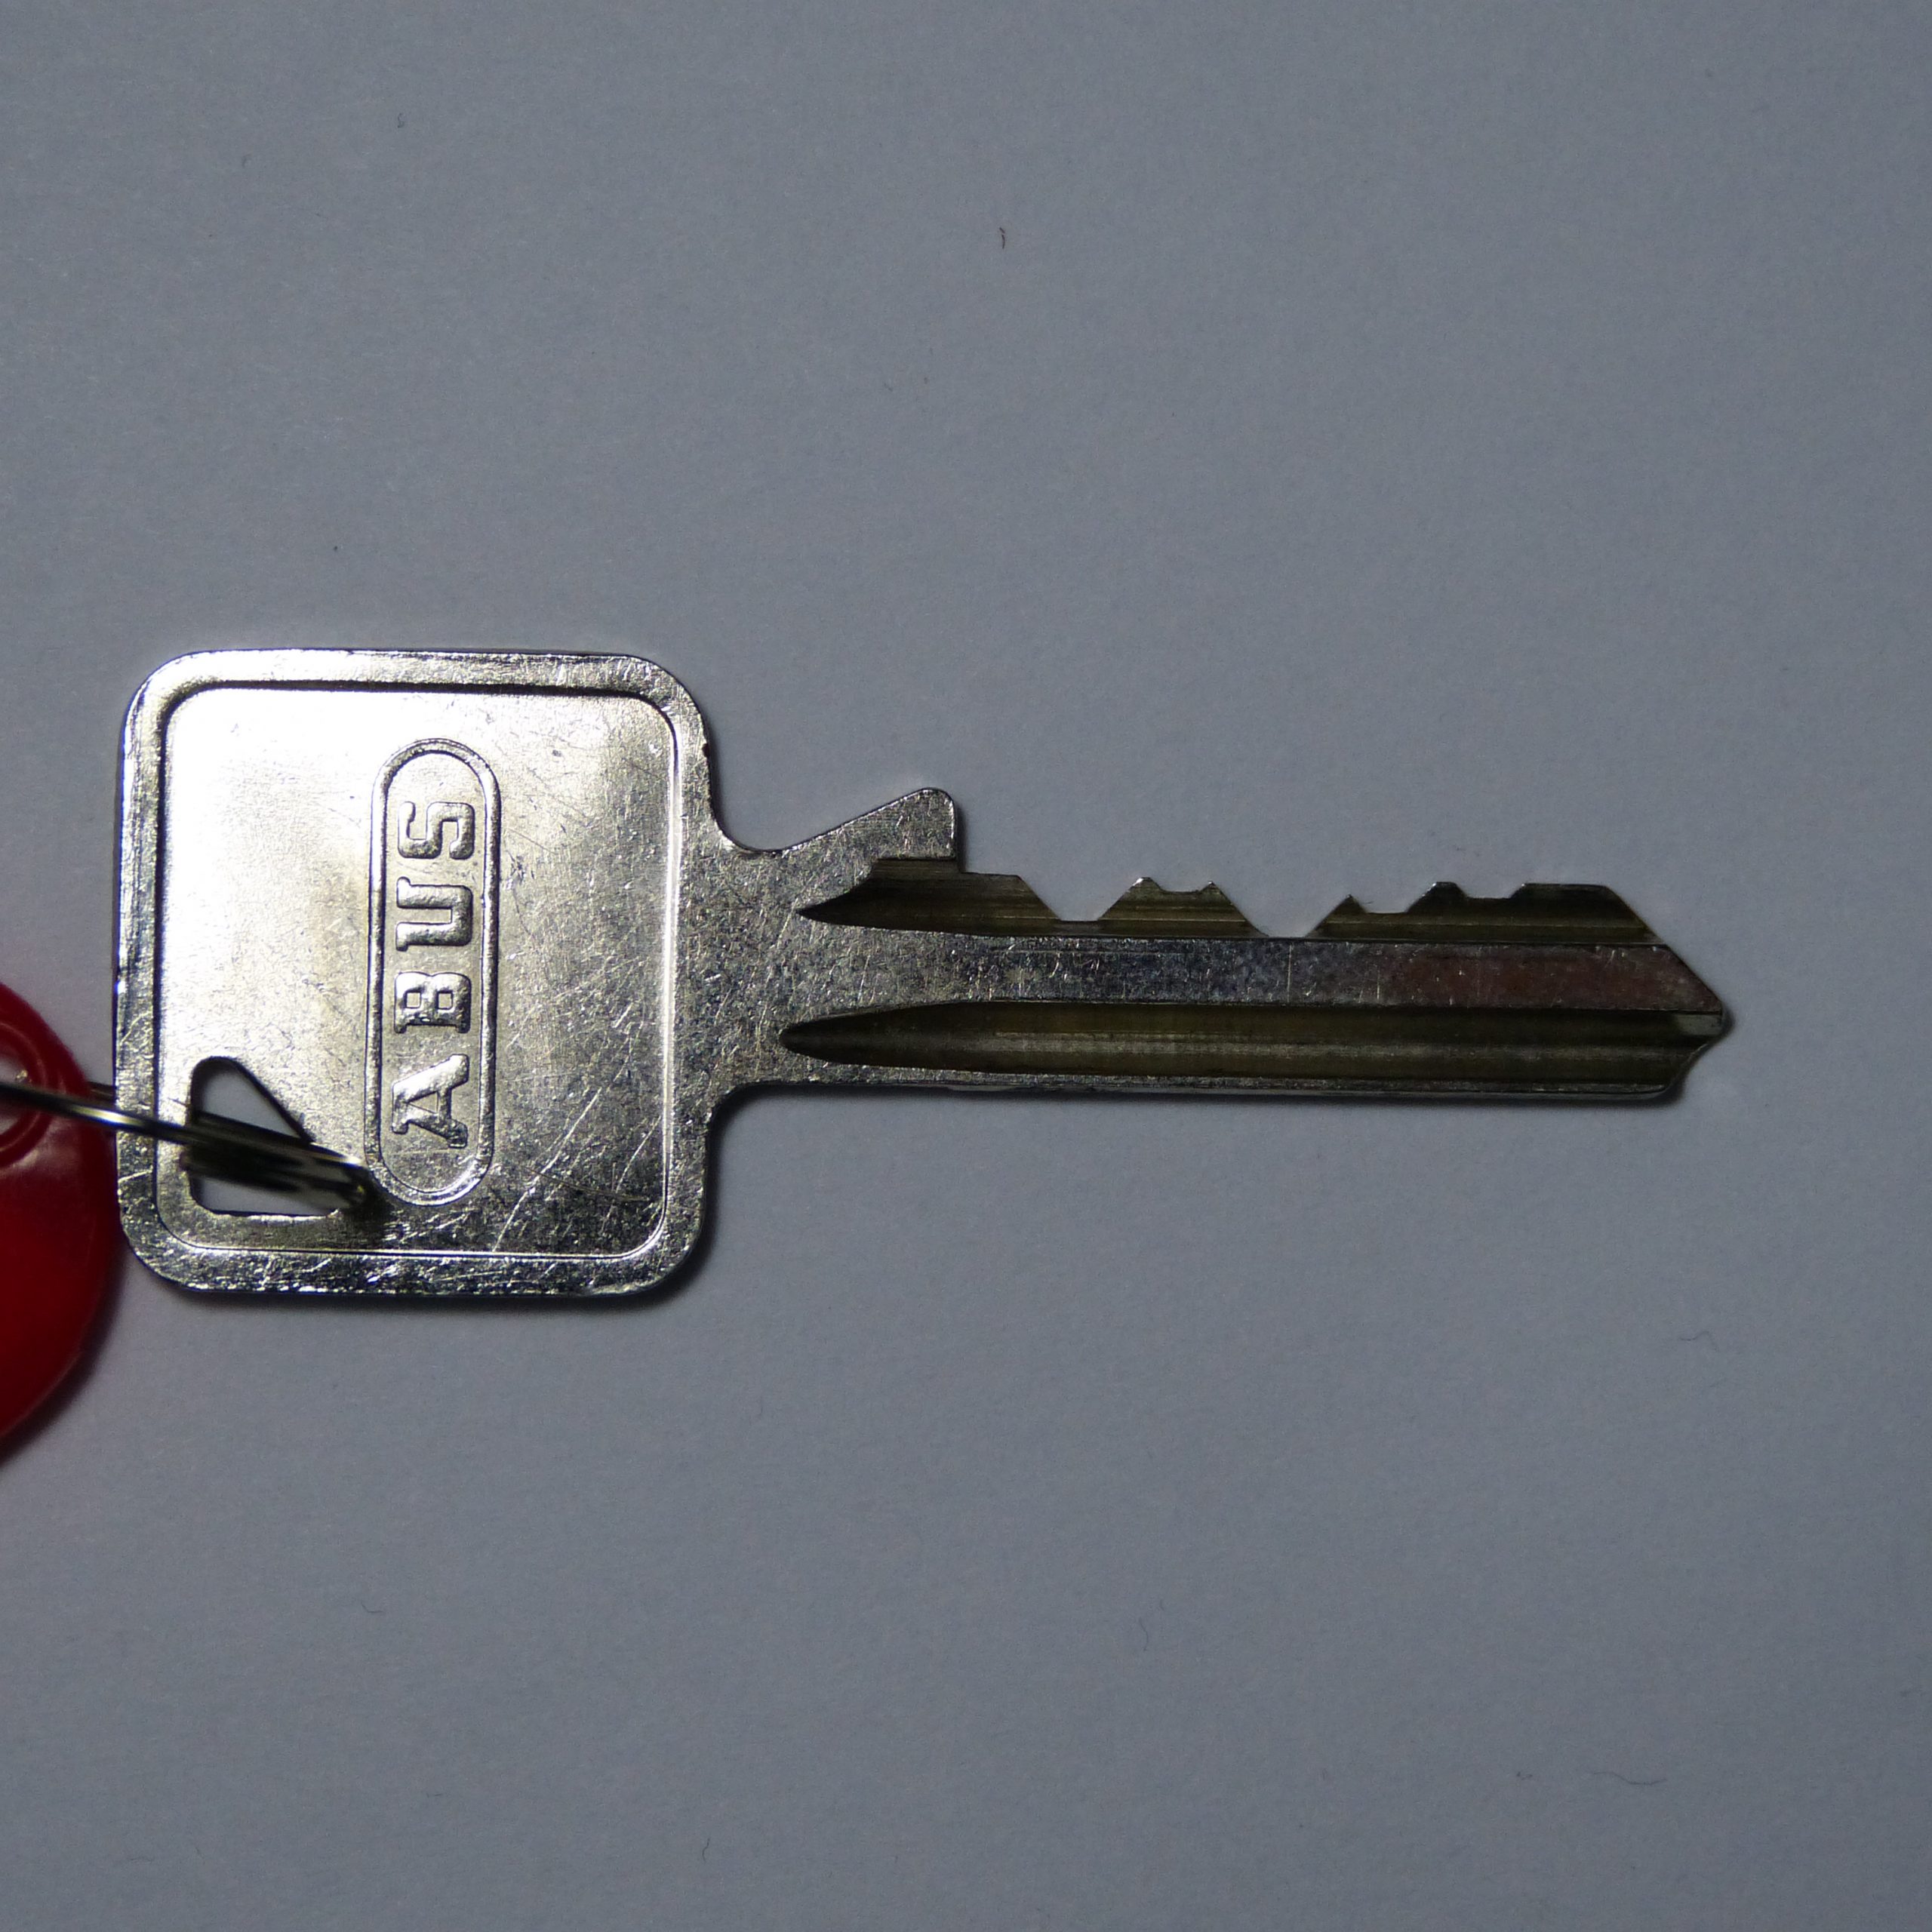
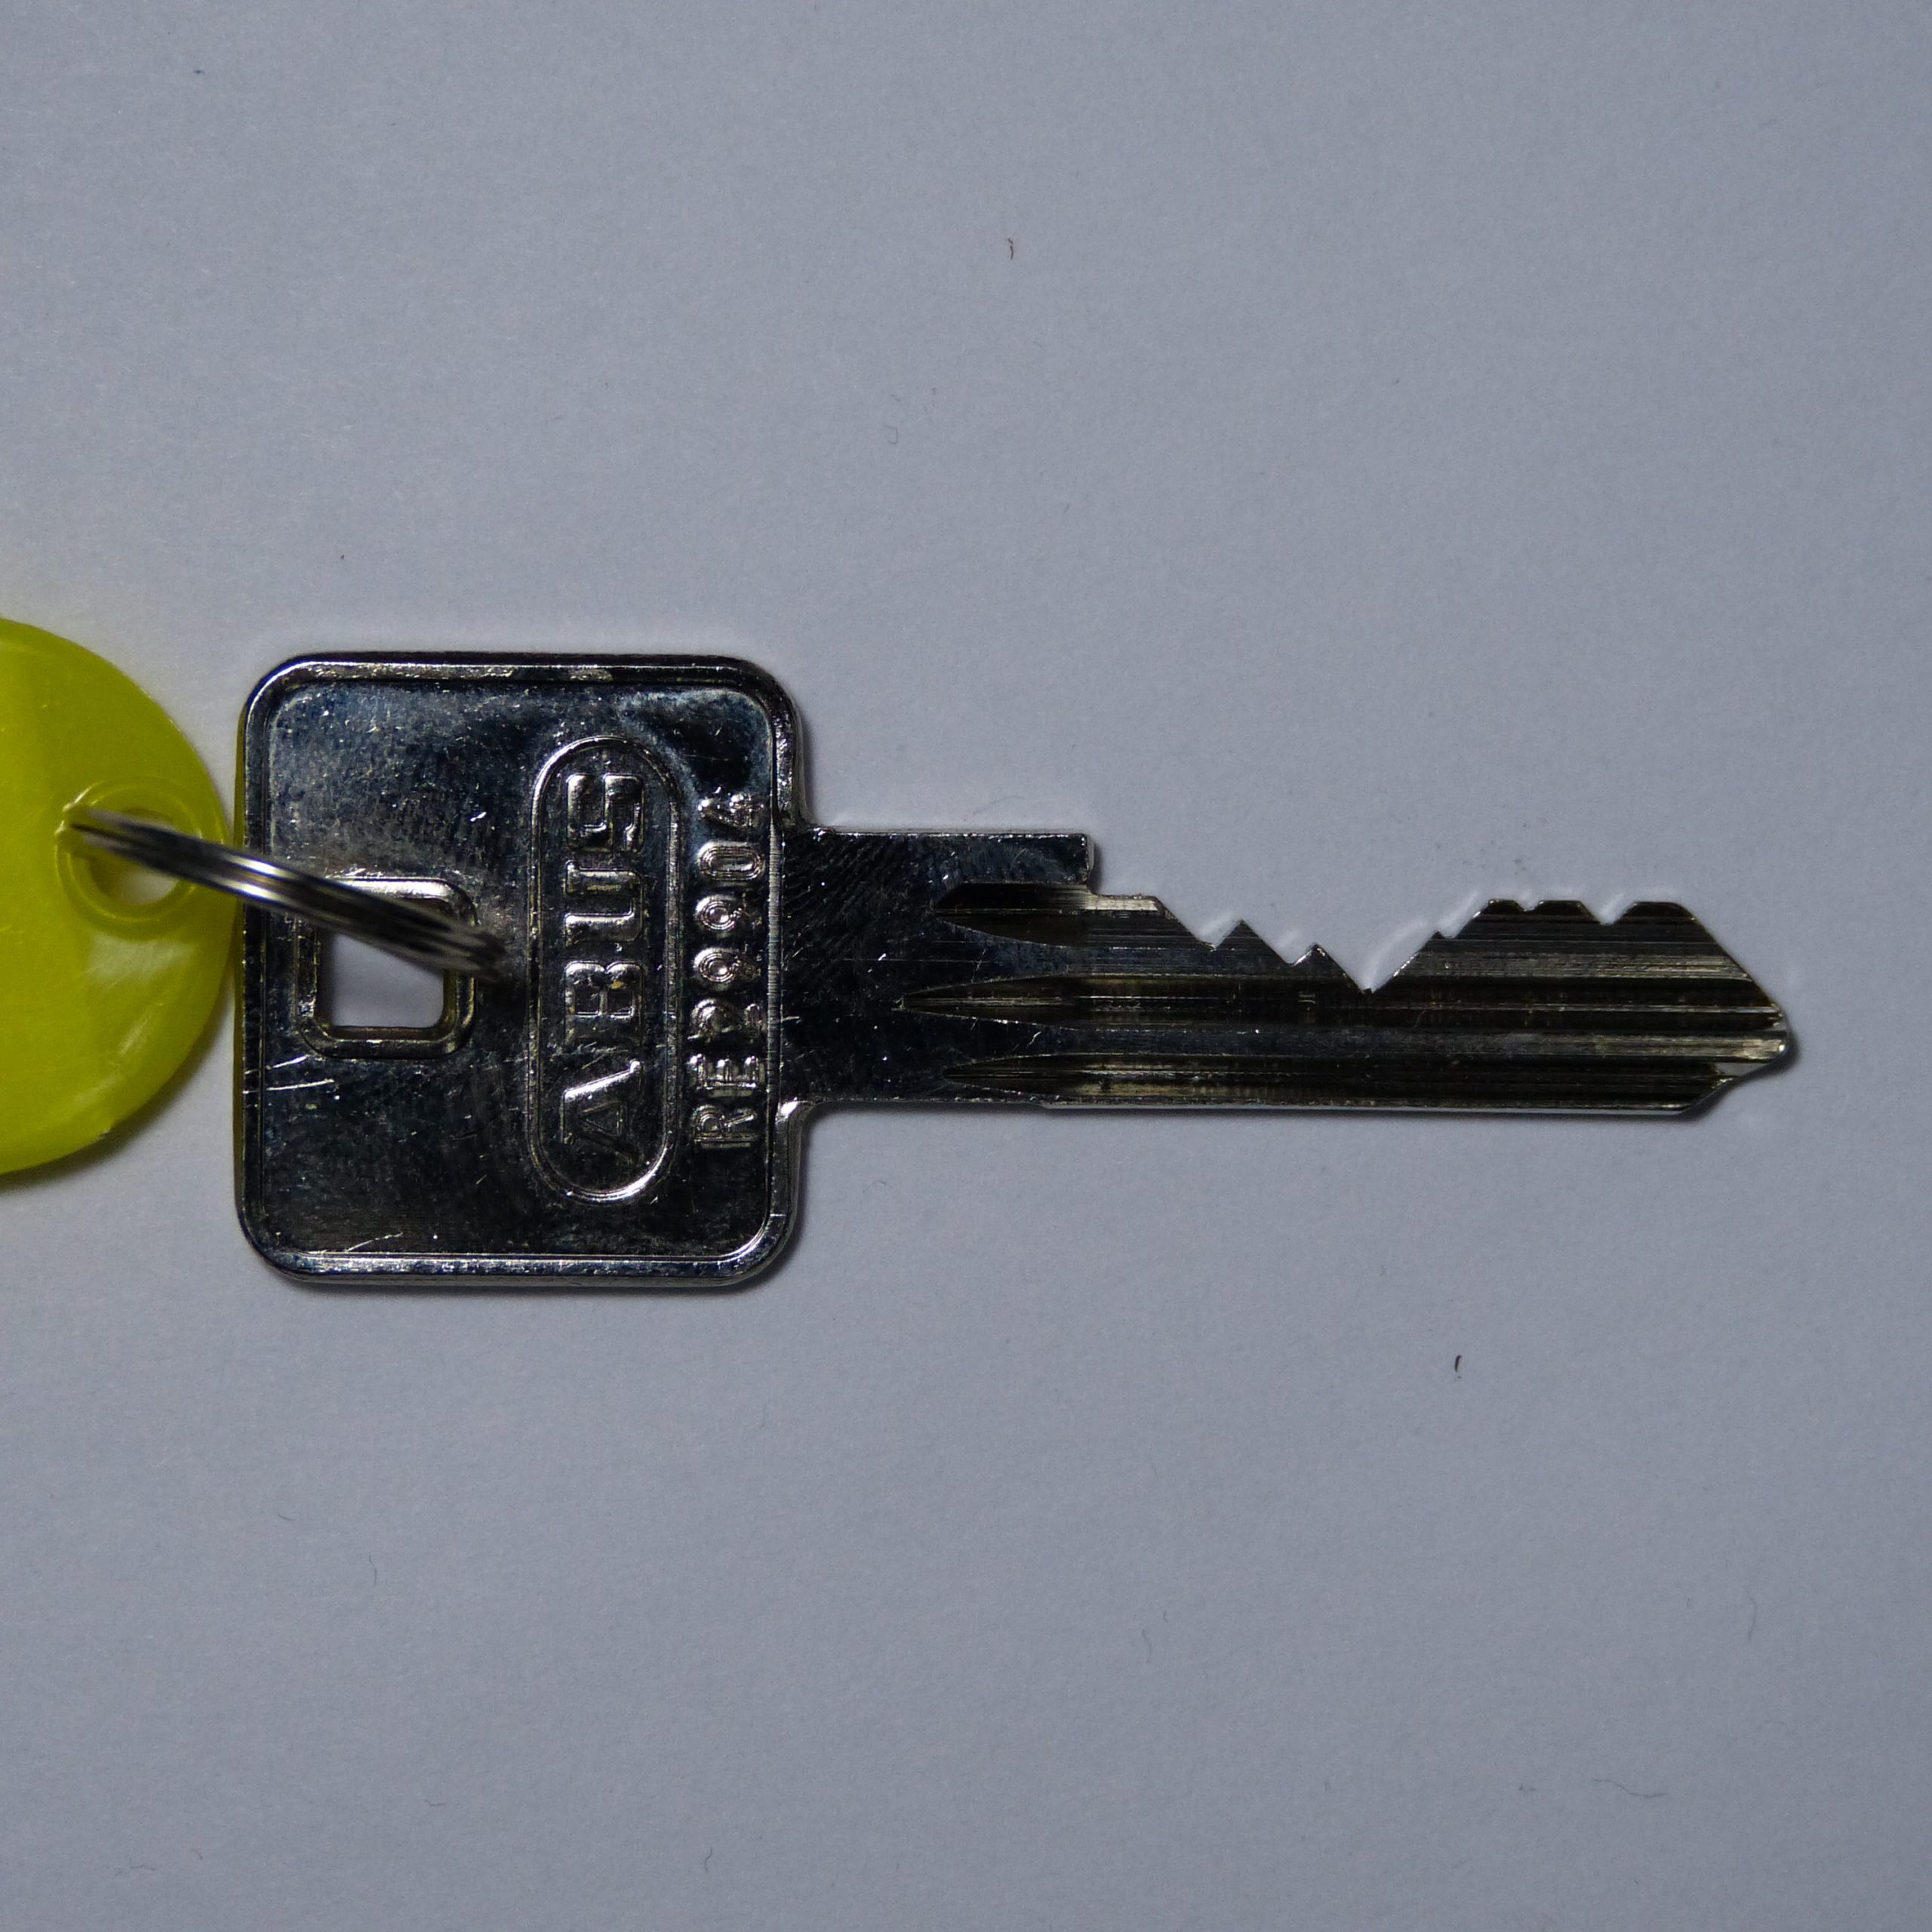
In a previous blog post Jan-Willem’s pin collection was mentioned. In this post the pictures of the pins and keys are shared.
There is no epic conclusions to this project. At this moment it’s is just a collection of photos of locks and pins. Shared with the world. Hopefully it’ll be a resource for new pickers that would like to know what they are up against. Maybe future research will use it. Where someone clever uses the fact some spools are different than others to decode the lock. Sputnik comes to mind and we think the possibilities are not exhausted yet. (If you are working on something I’m happy to assist.)
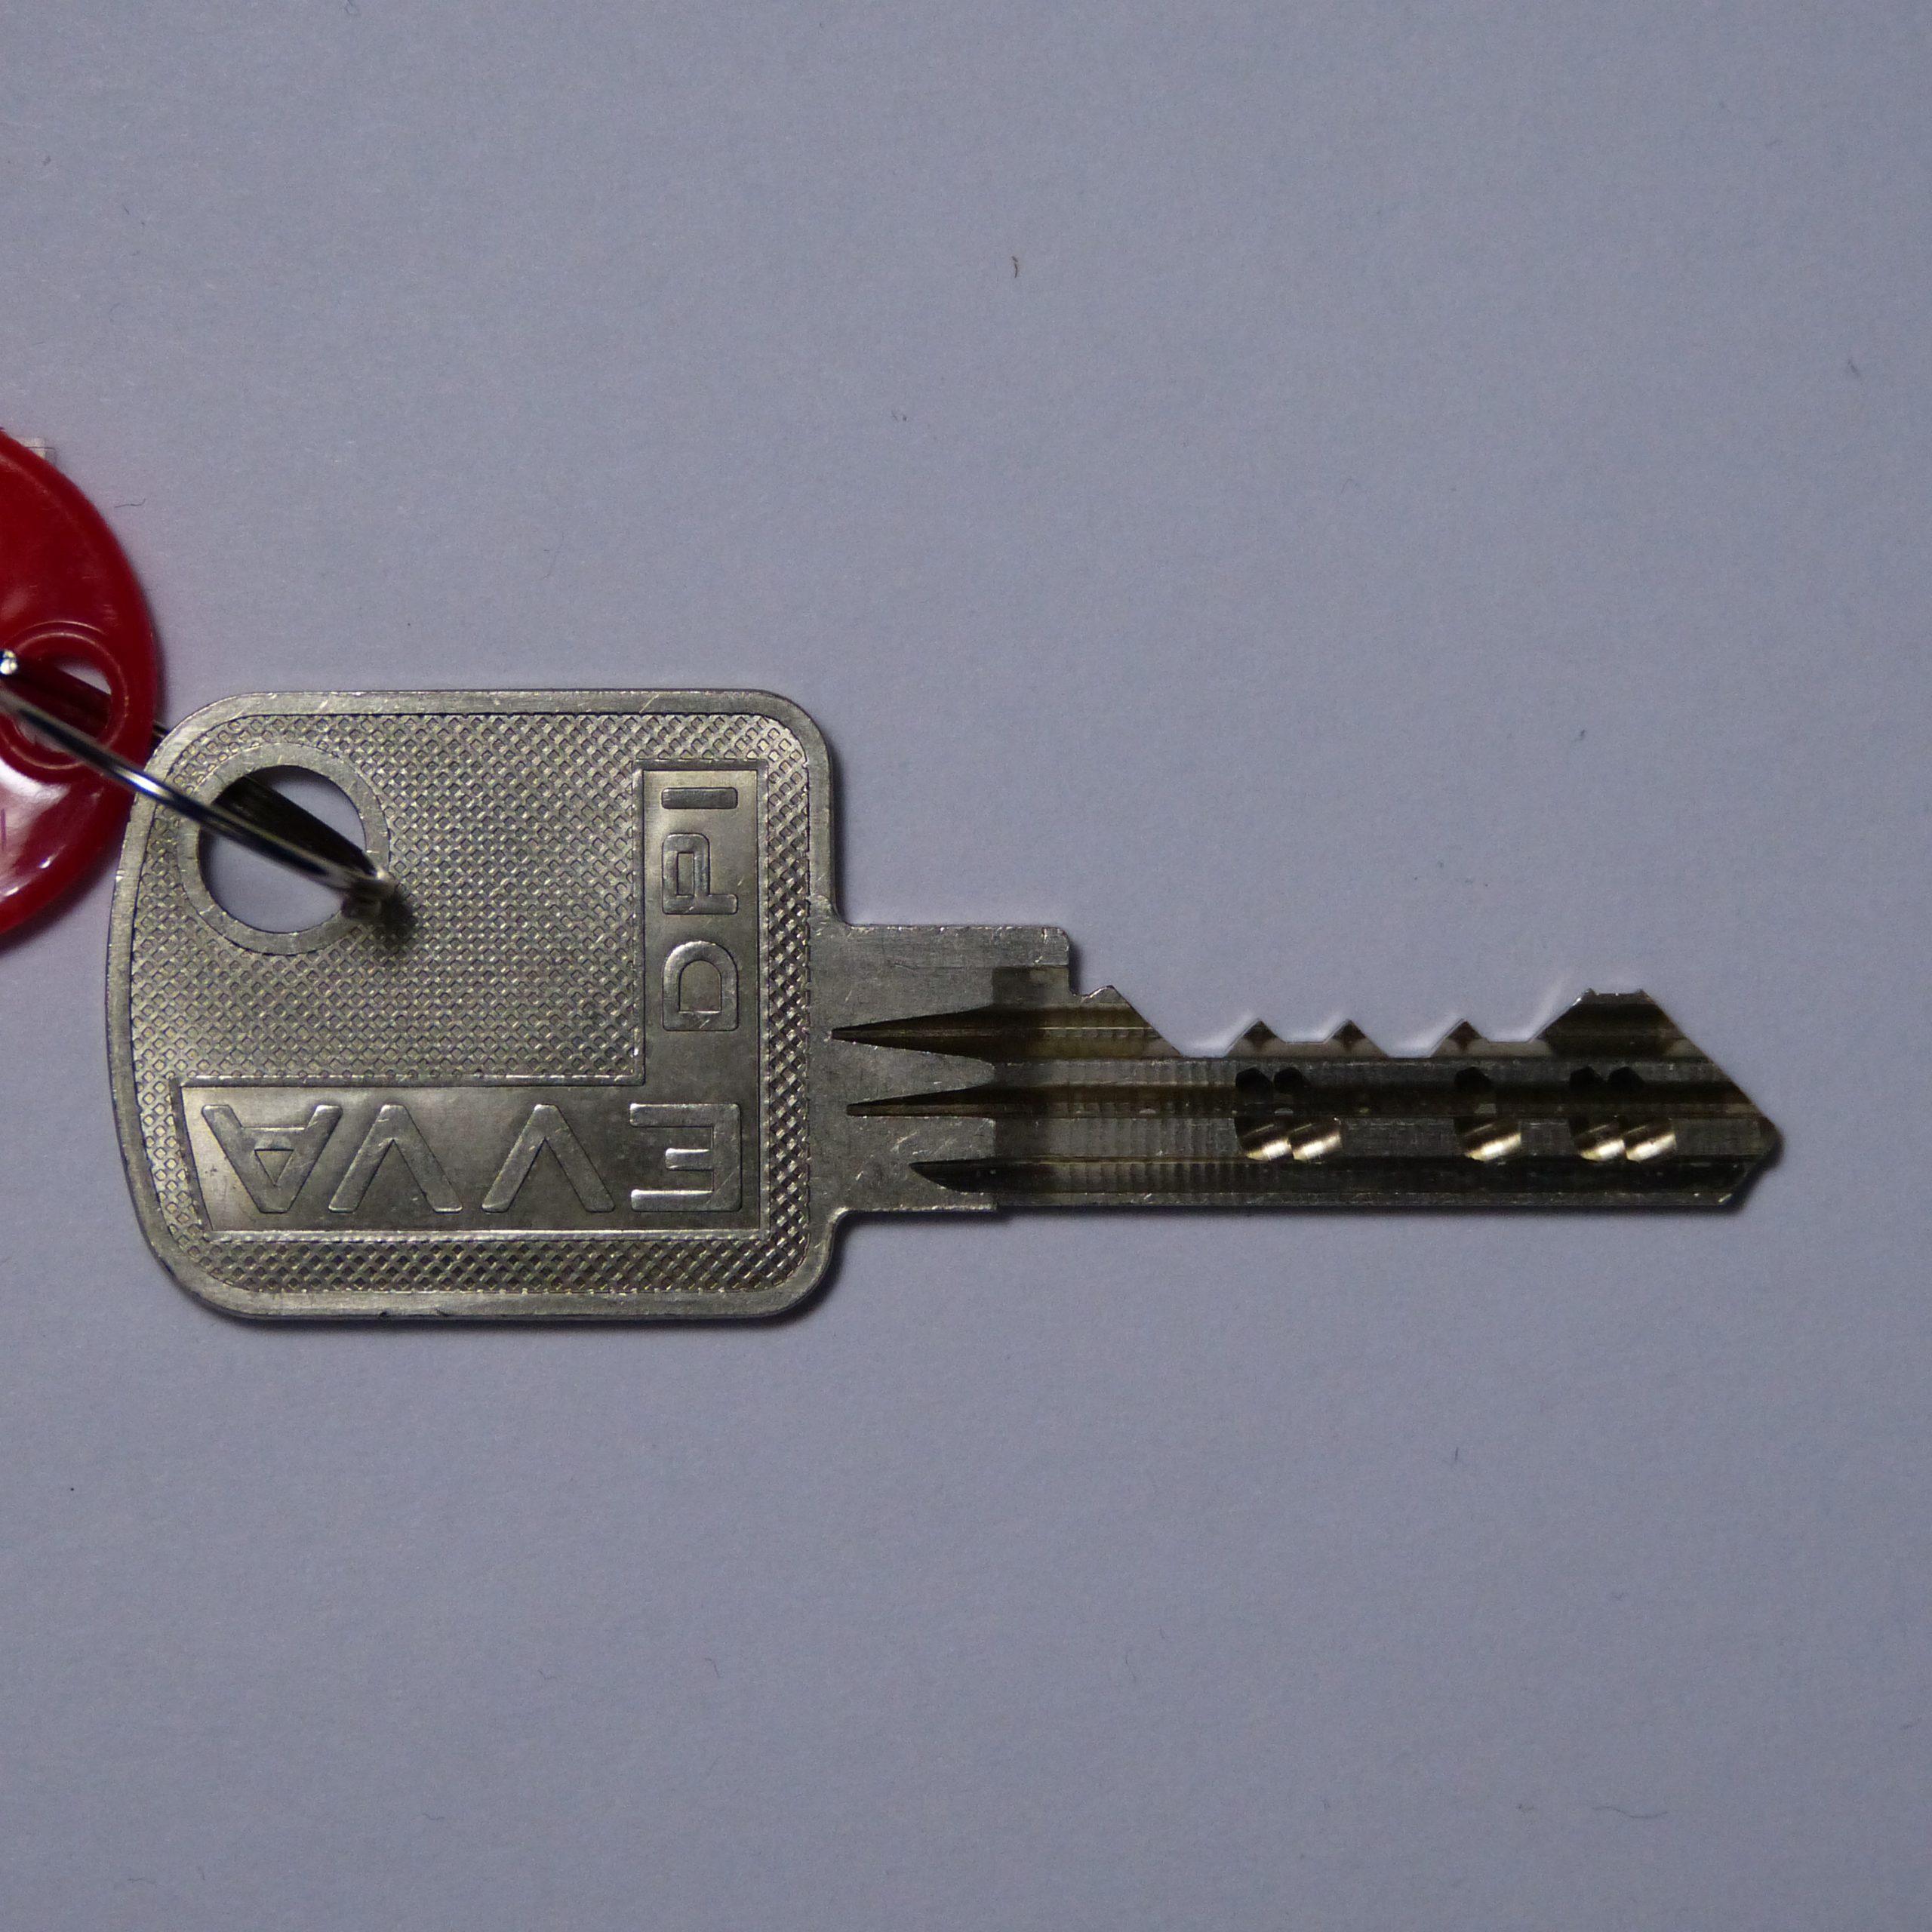
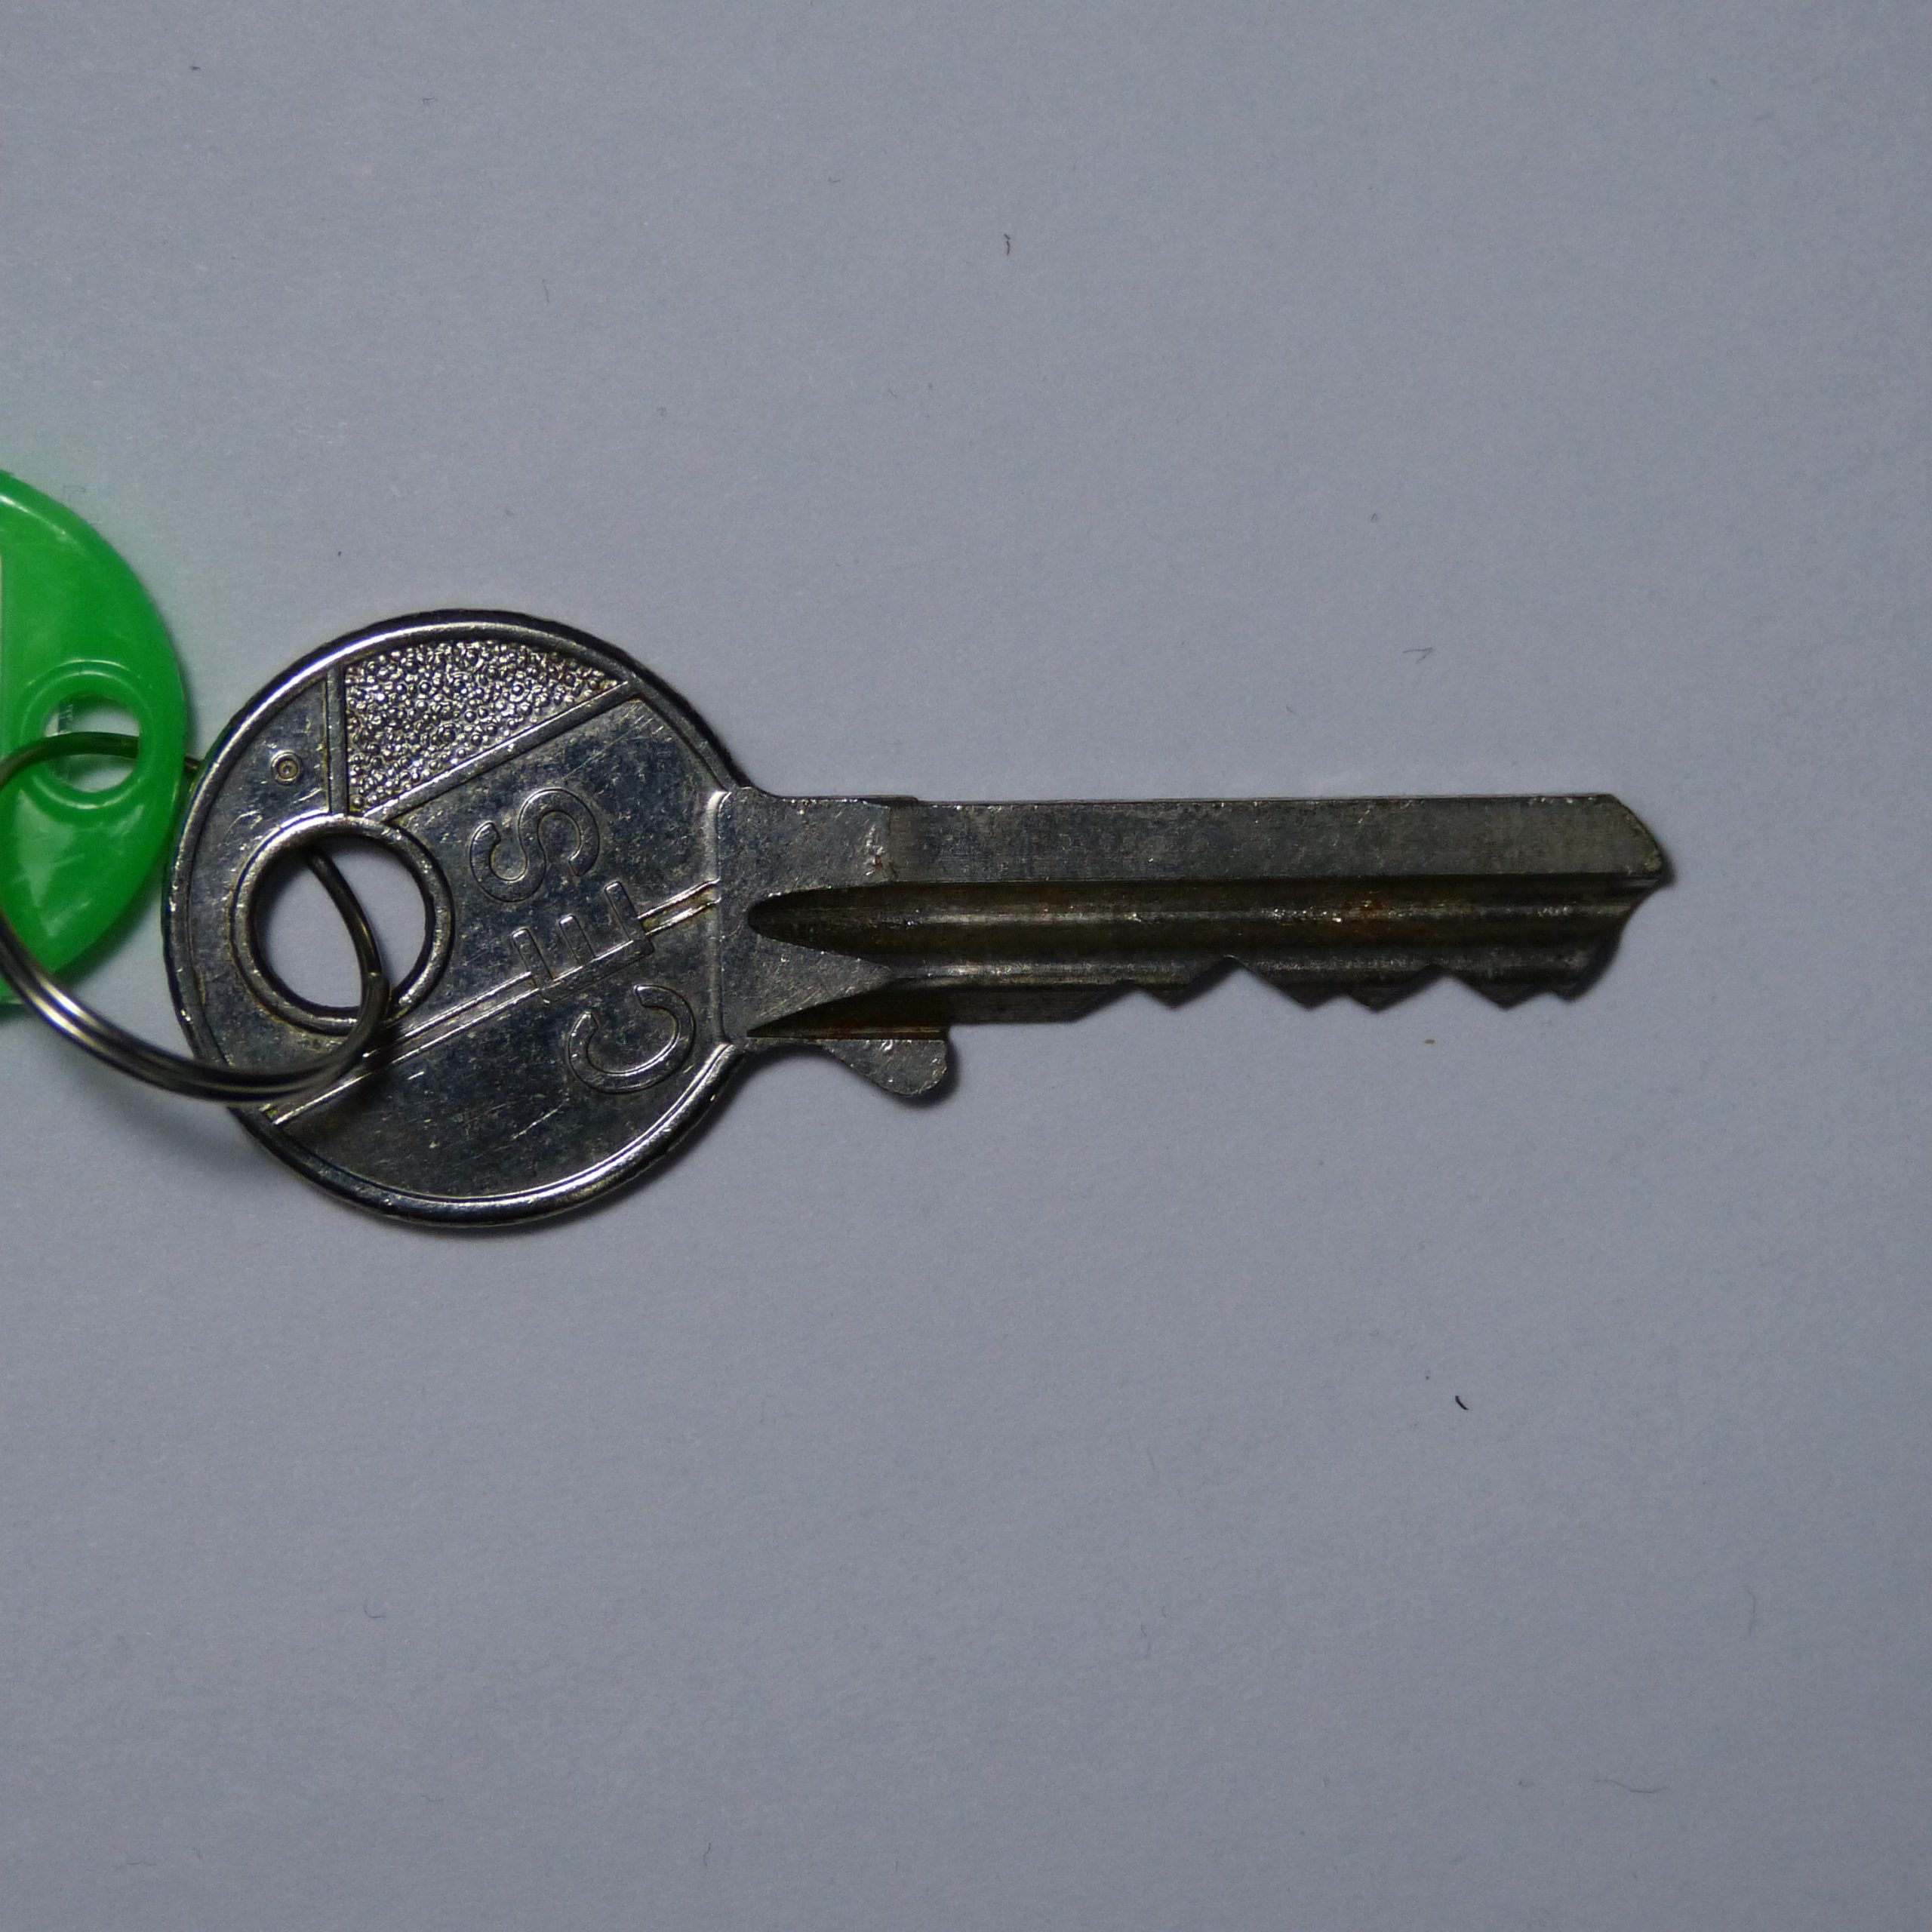
New pickers, don’t be intimidated by the key or keyway. If you look through the collection much of the pins are underwhelming. Where a Evva is known to be difficult lock it was not expected to find all standards or one spool pin. When struggling with a lock just take it apart and see what’s in there. For the next time you encounter the same lock you will know Nemef has a spool on position two (insider joke).
This collection has a few obvious biases:
The collection only contains basic pin tumblers.
Most locks are from Europe, and are from well known lock brands.
The locks are not too expensive and are usually old. Therefore it lacks fancy pins like gins and Christmas trees.
Pins/locks that are too similar are rejected. There are some duplicates as well.
This is a snapshot in time. The pinning of the locks change every few years. A good example is DOM RN with two different types of pins in this collection.
If you have specific knowledge on these locks. Please share, we are open to learning more about locks. Find us on Discord, leave a comment or send us an email.
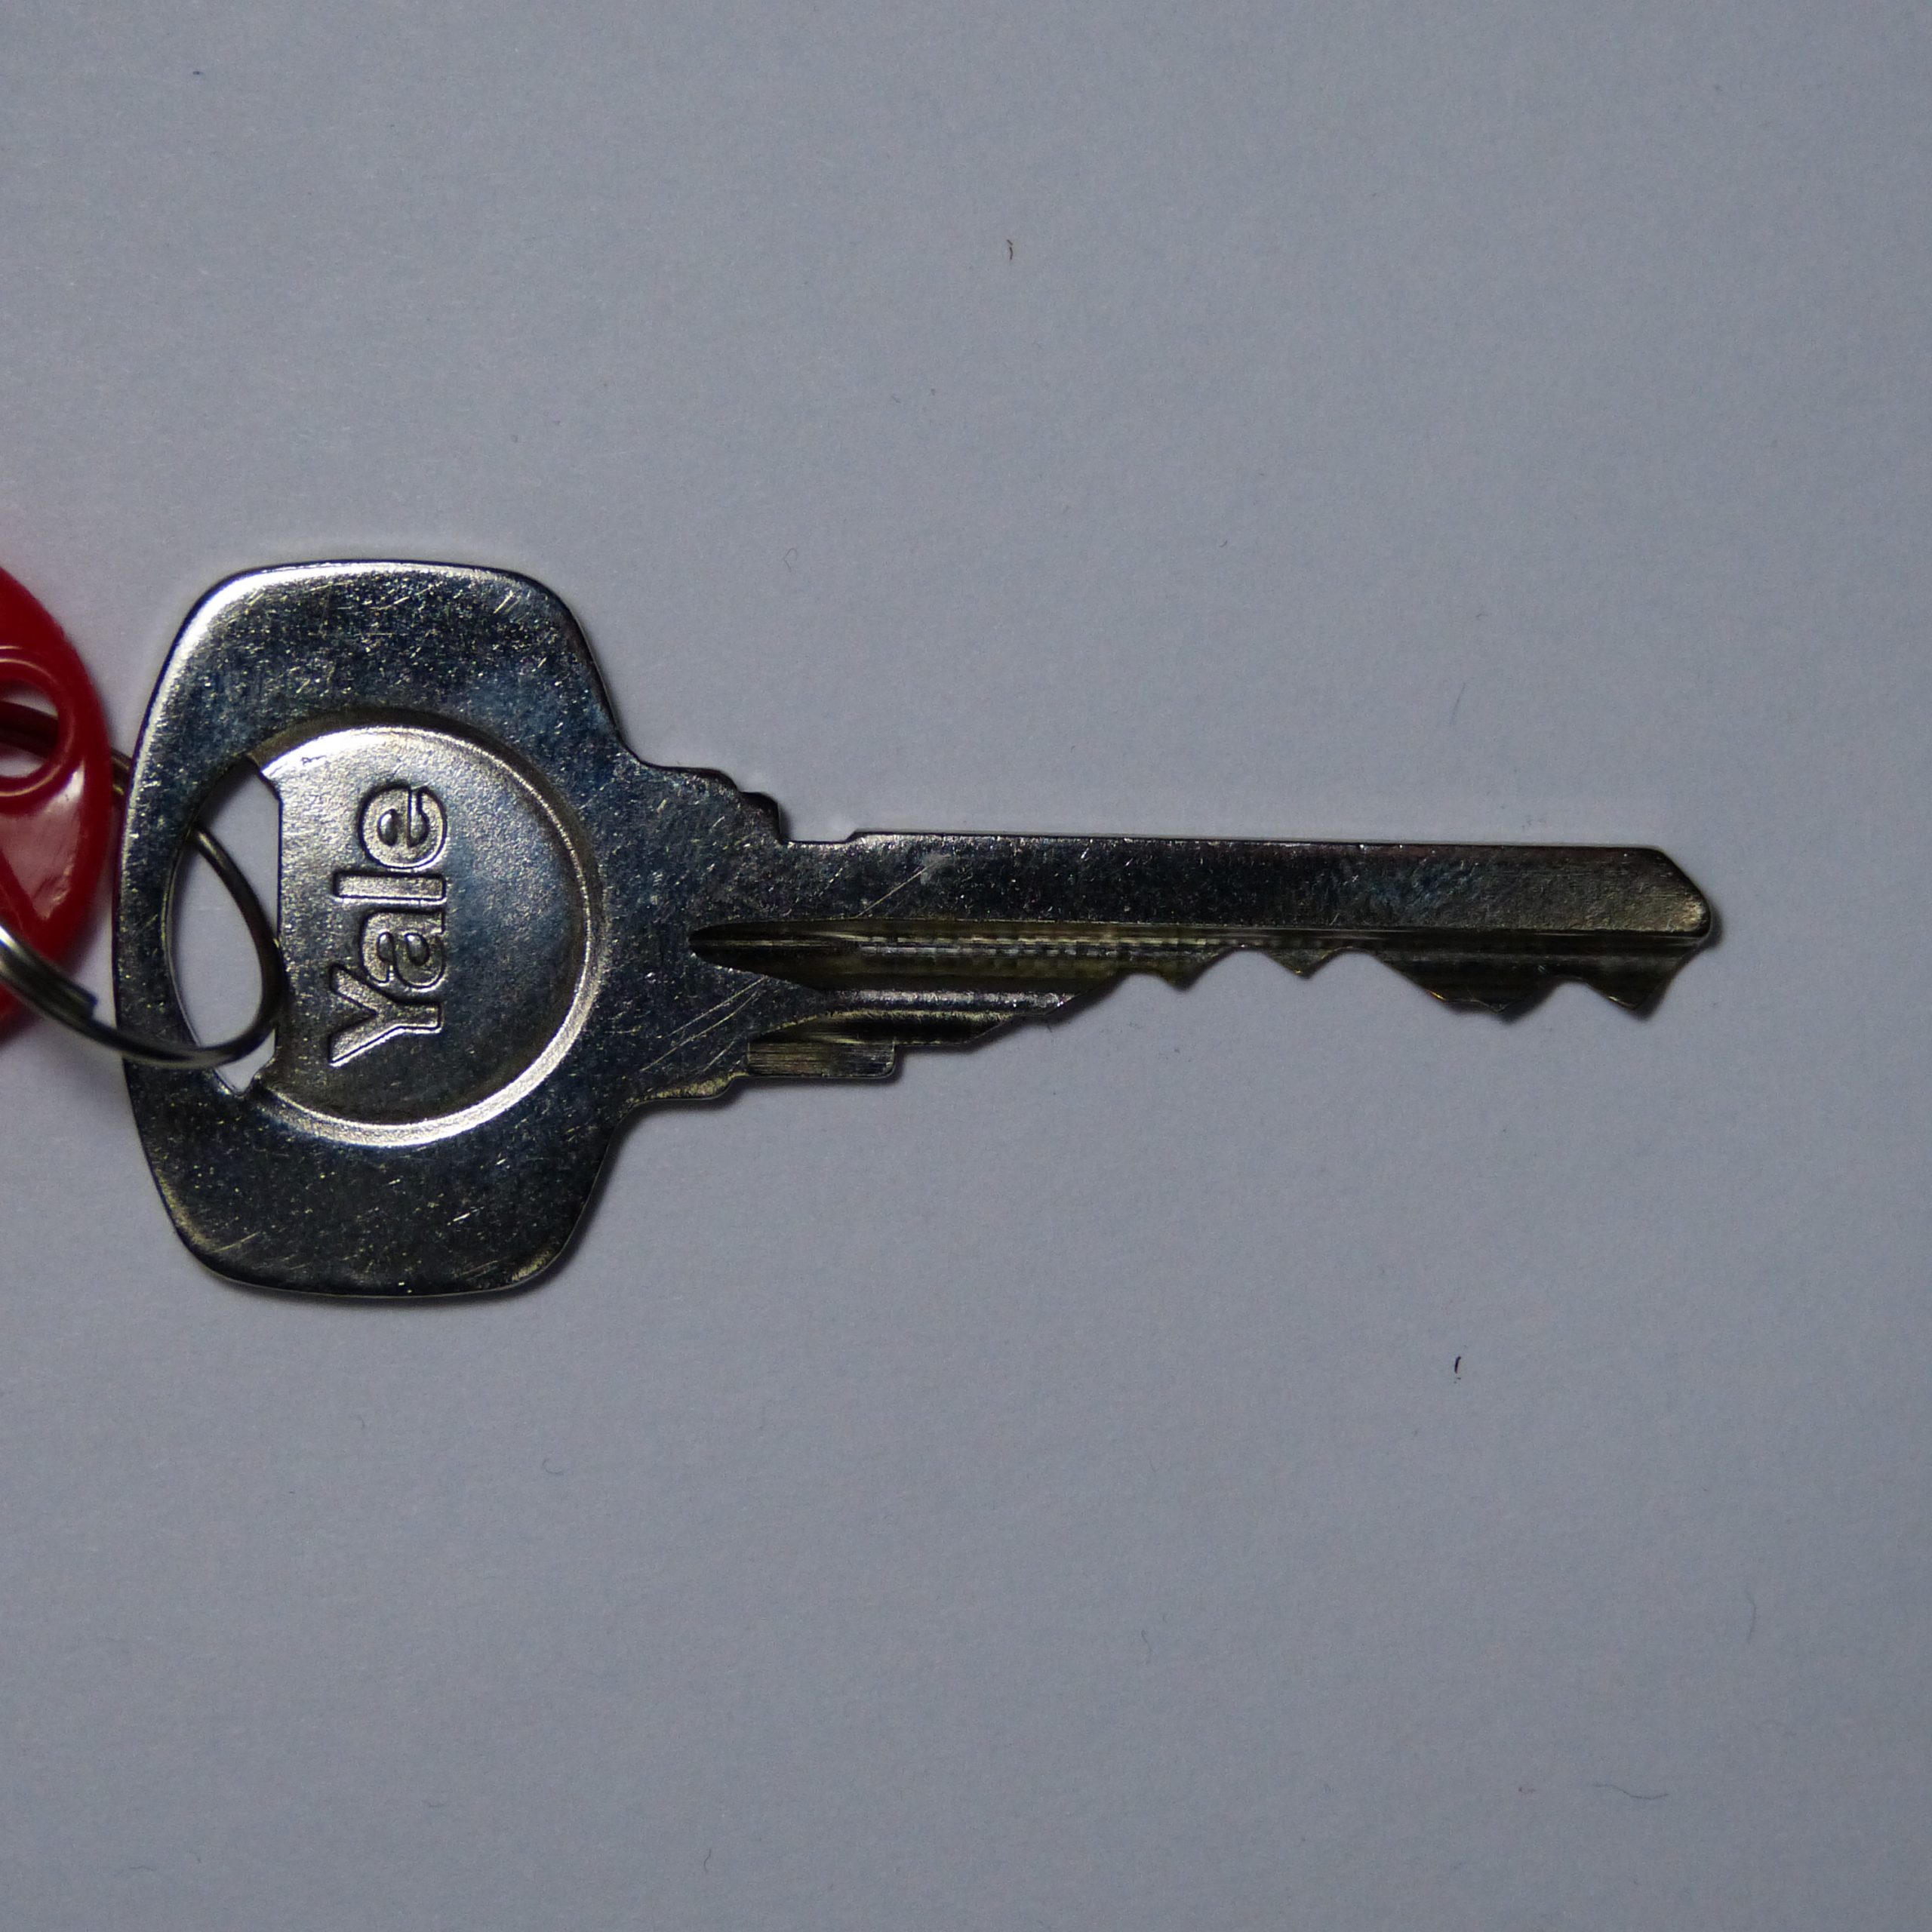
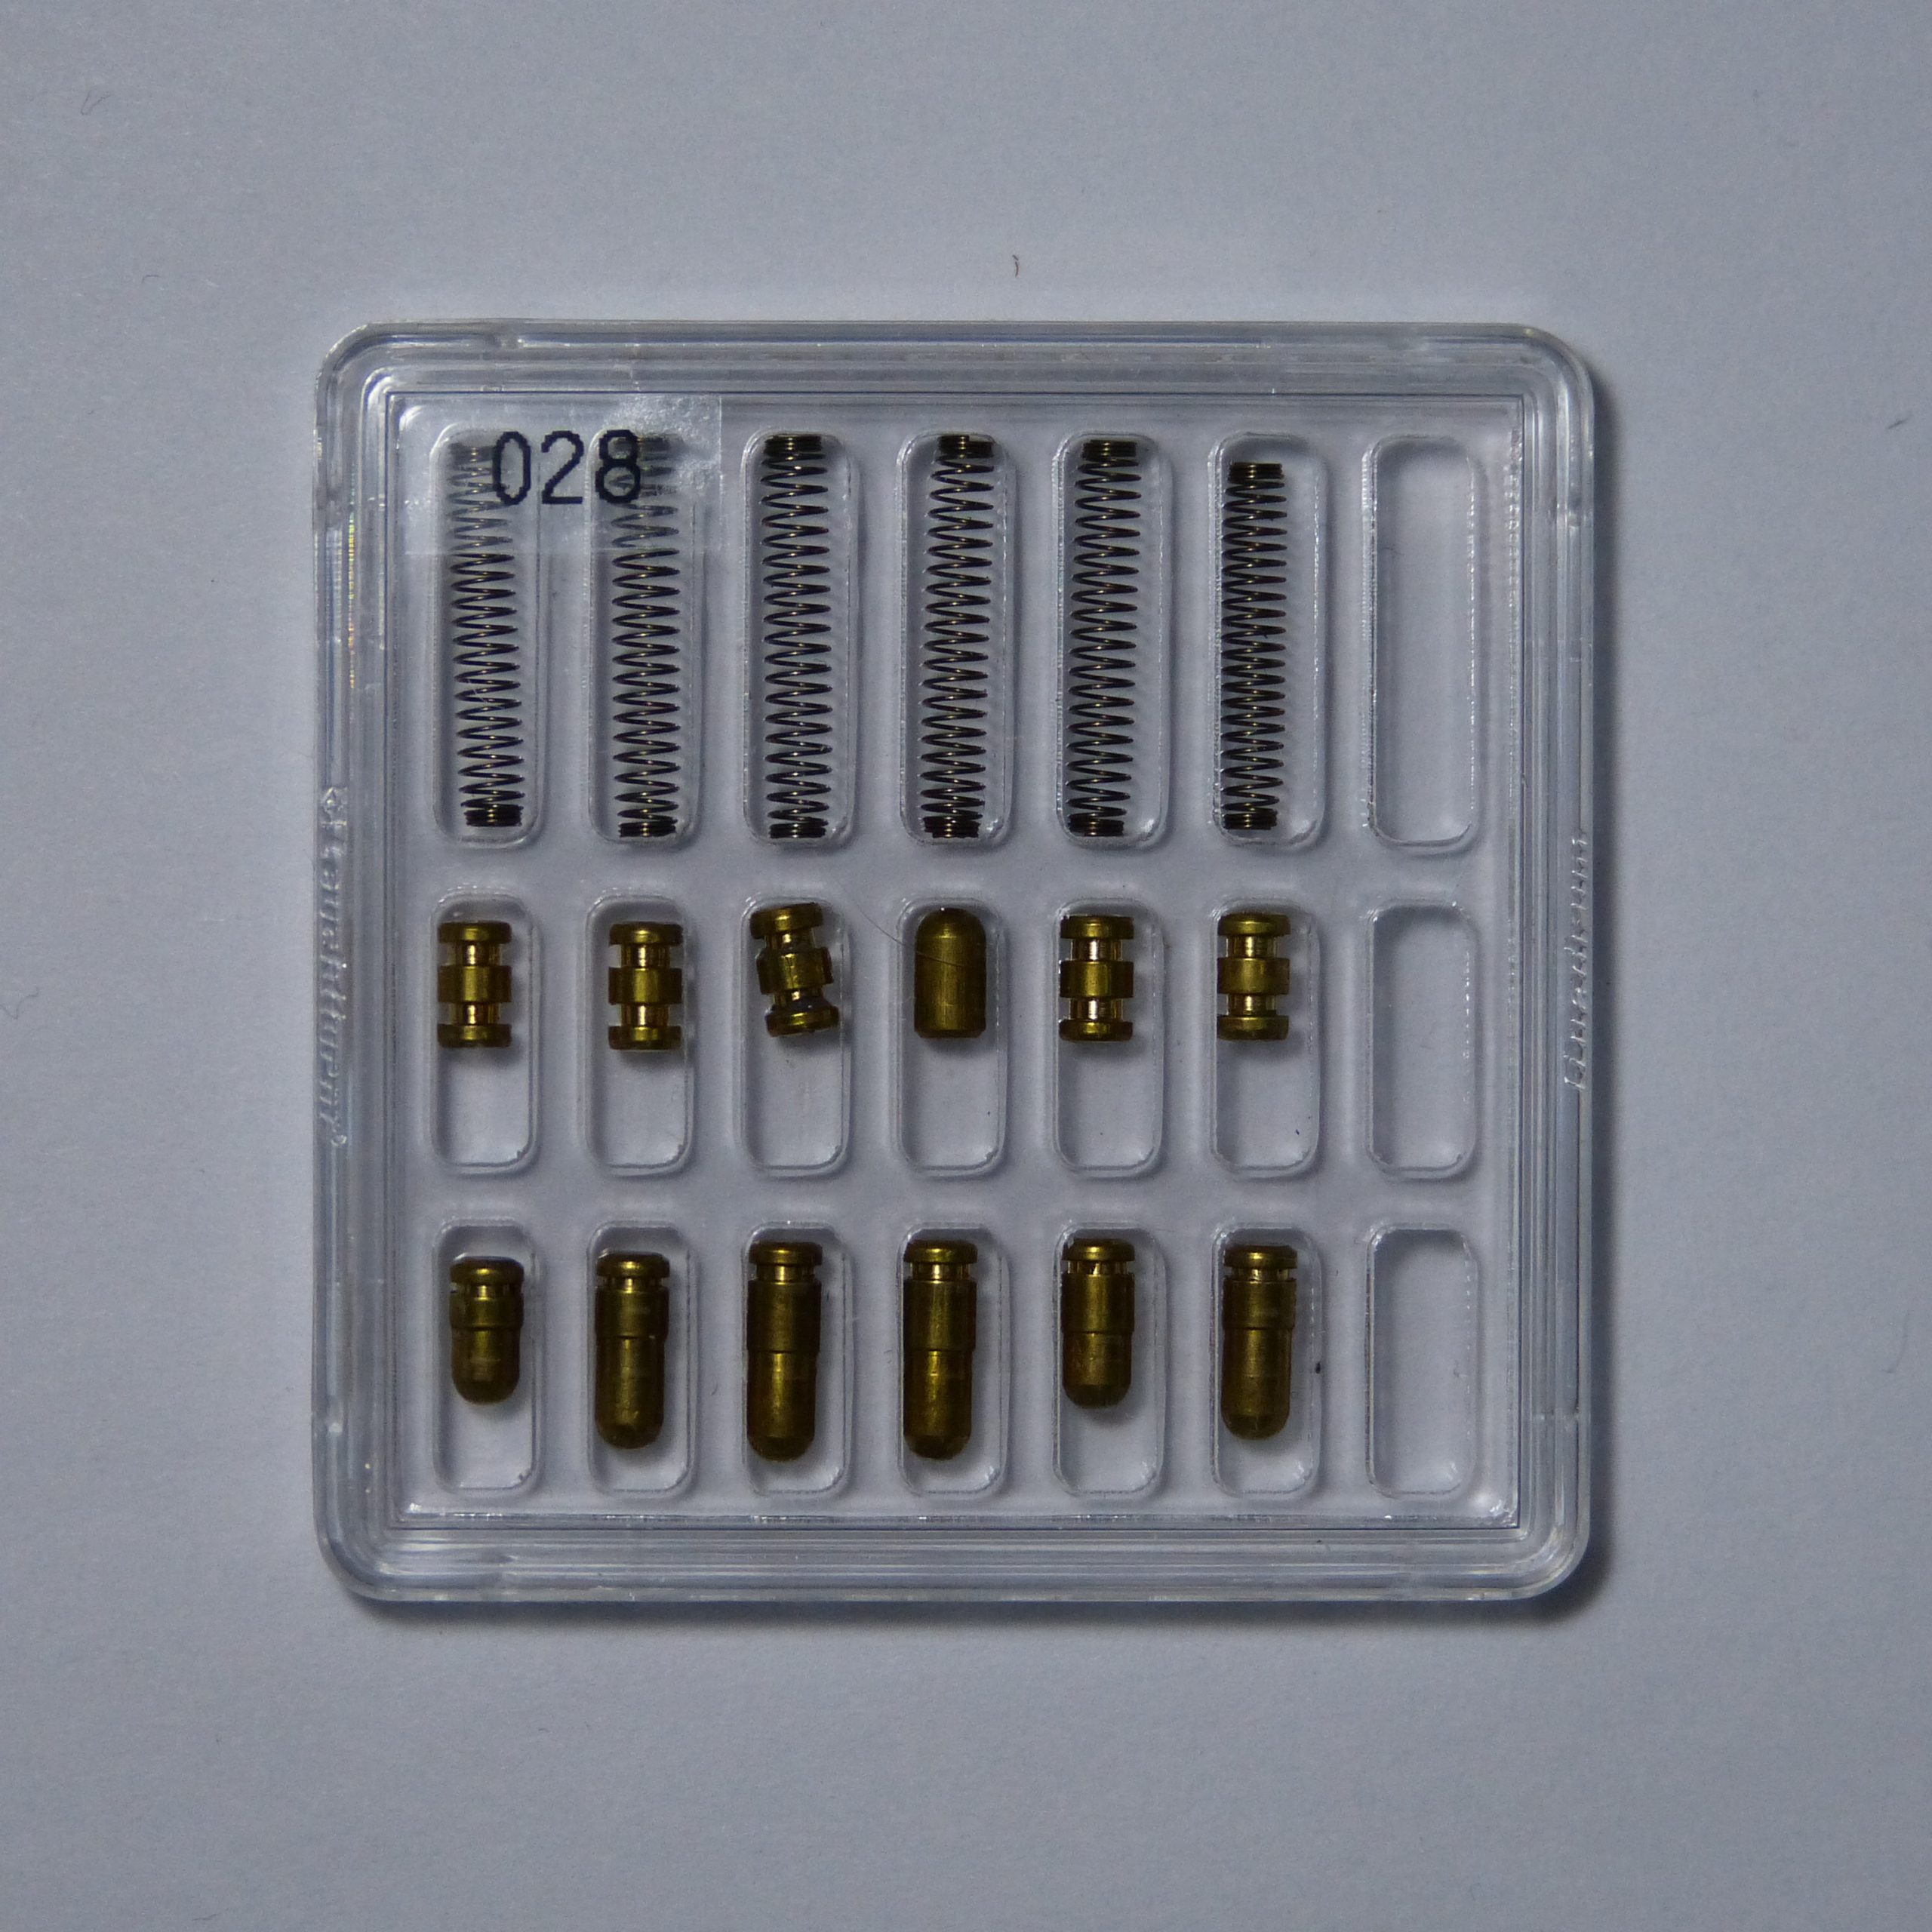
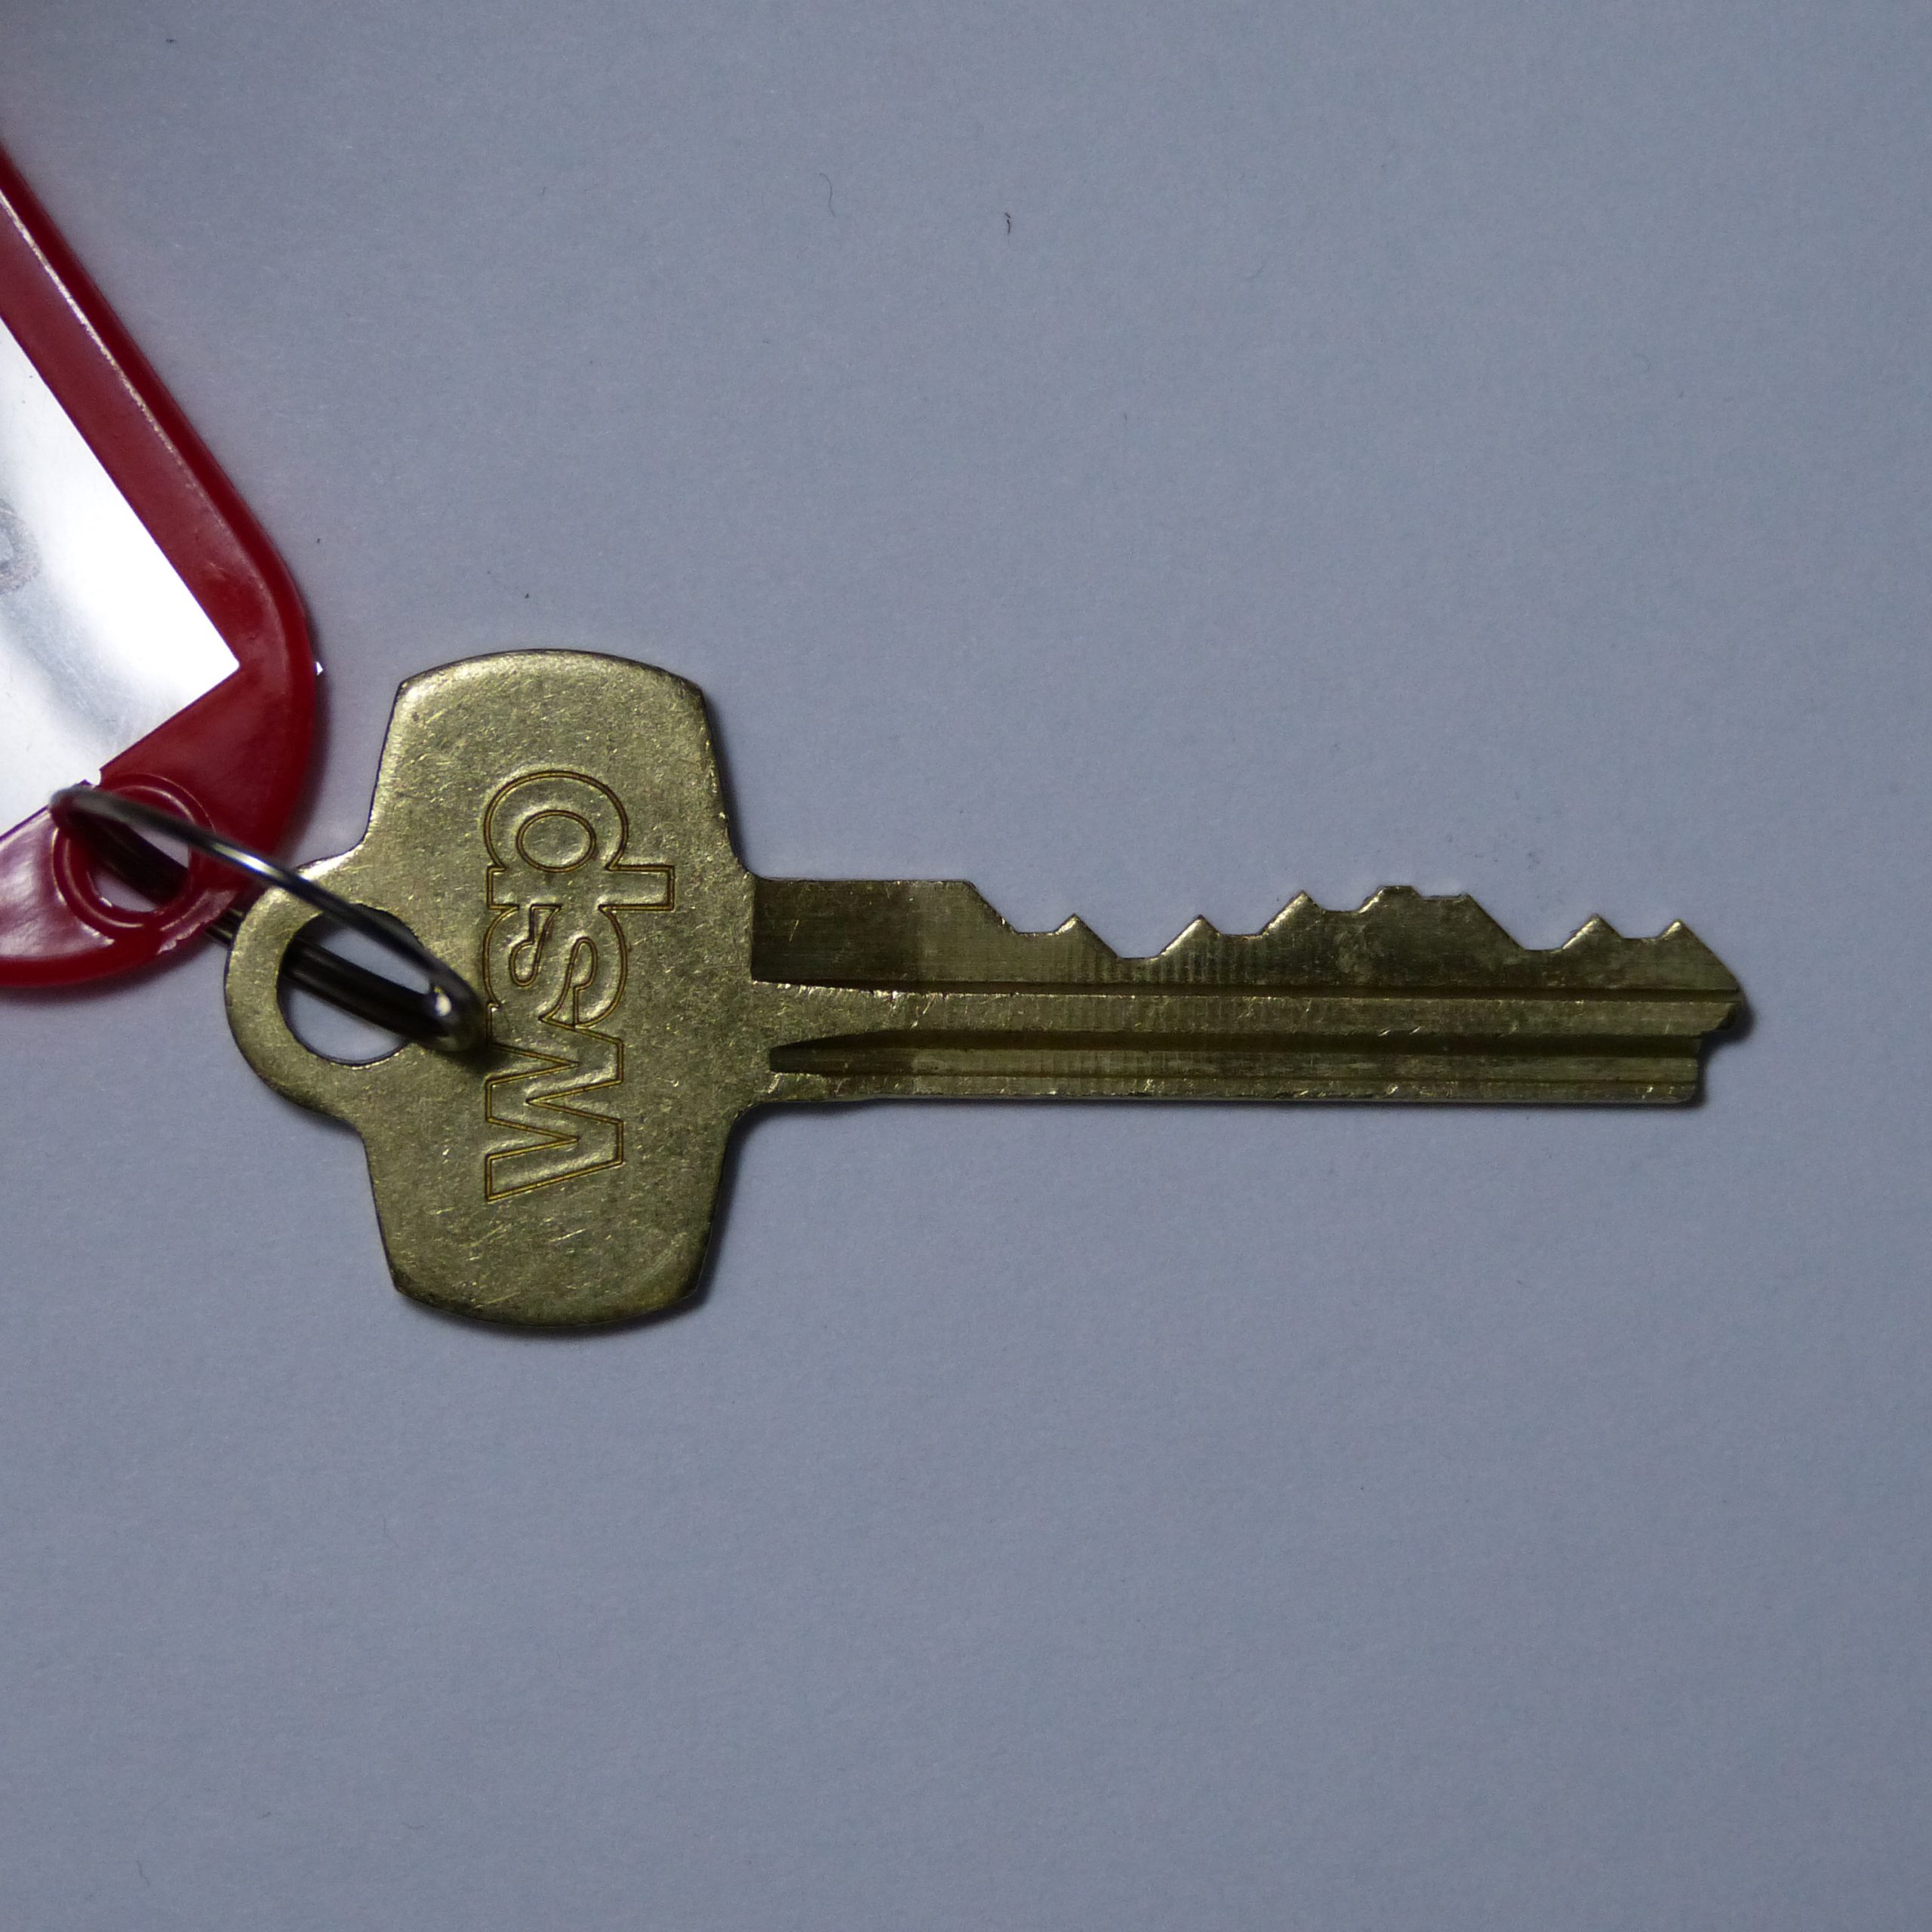
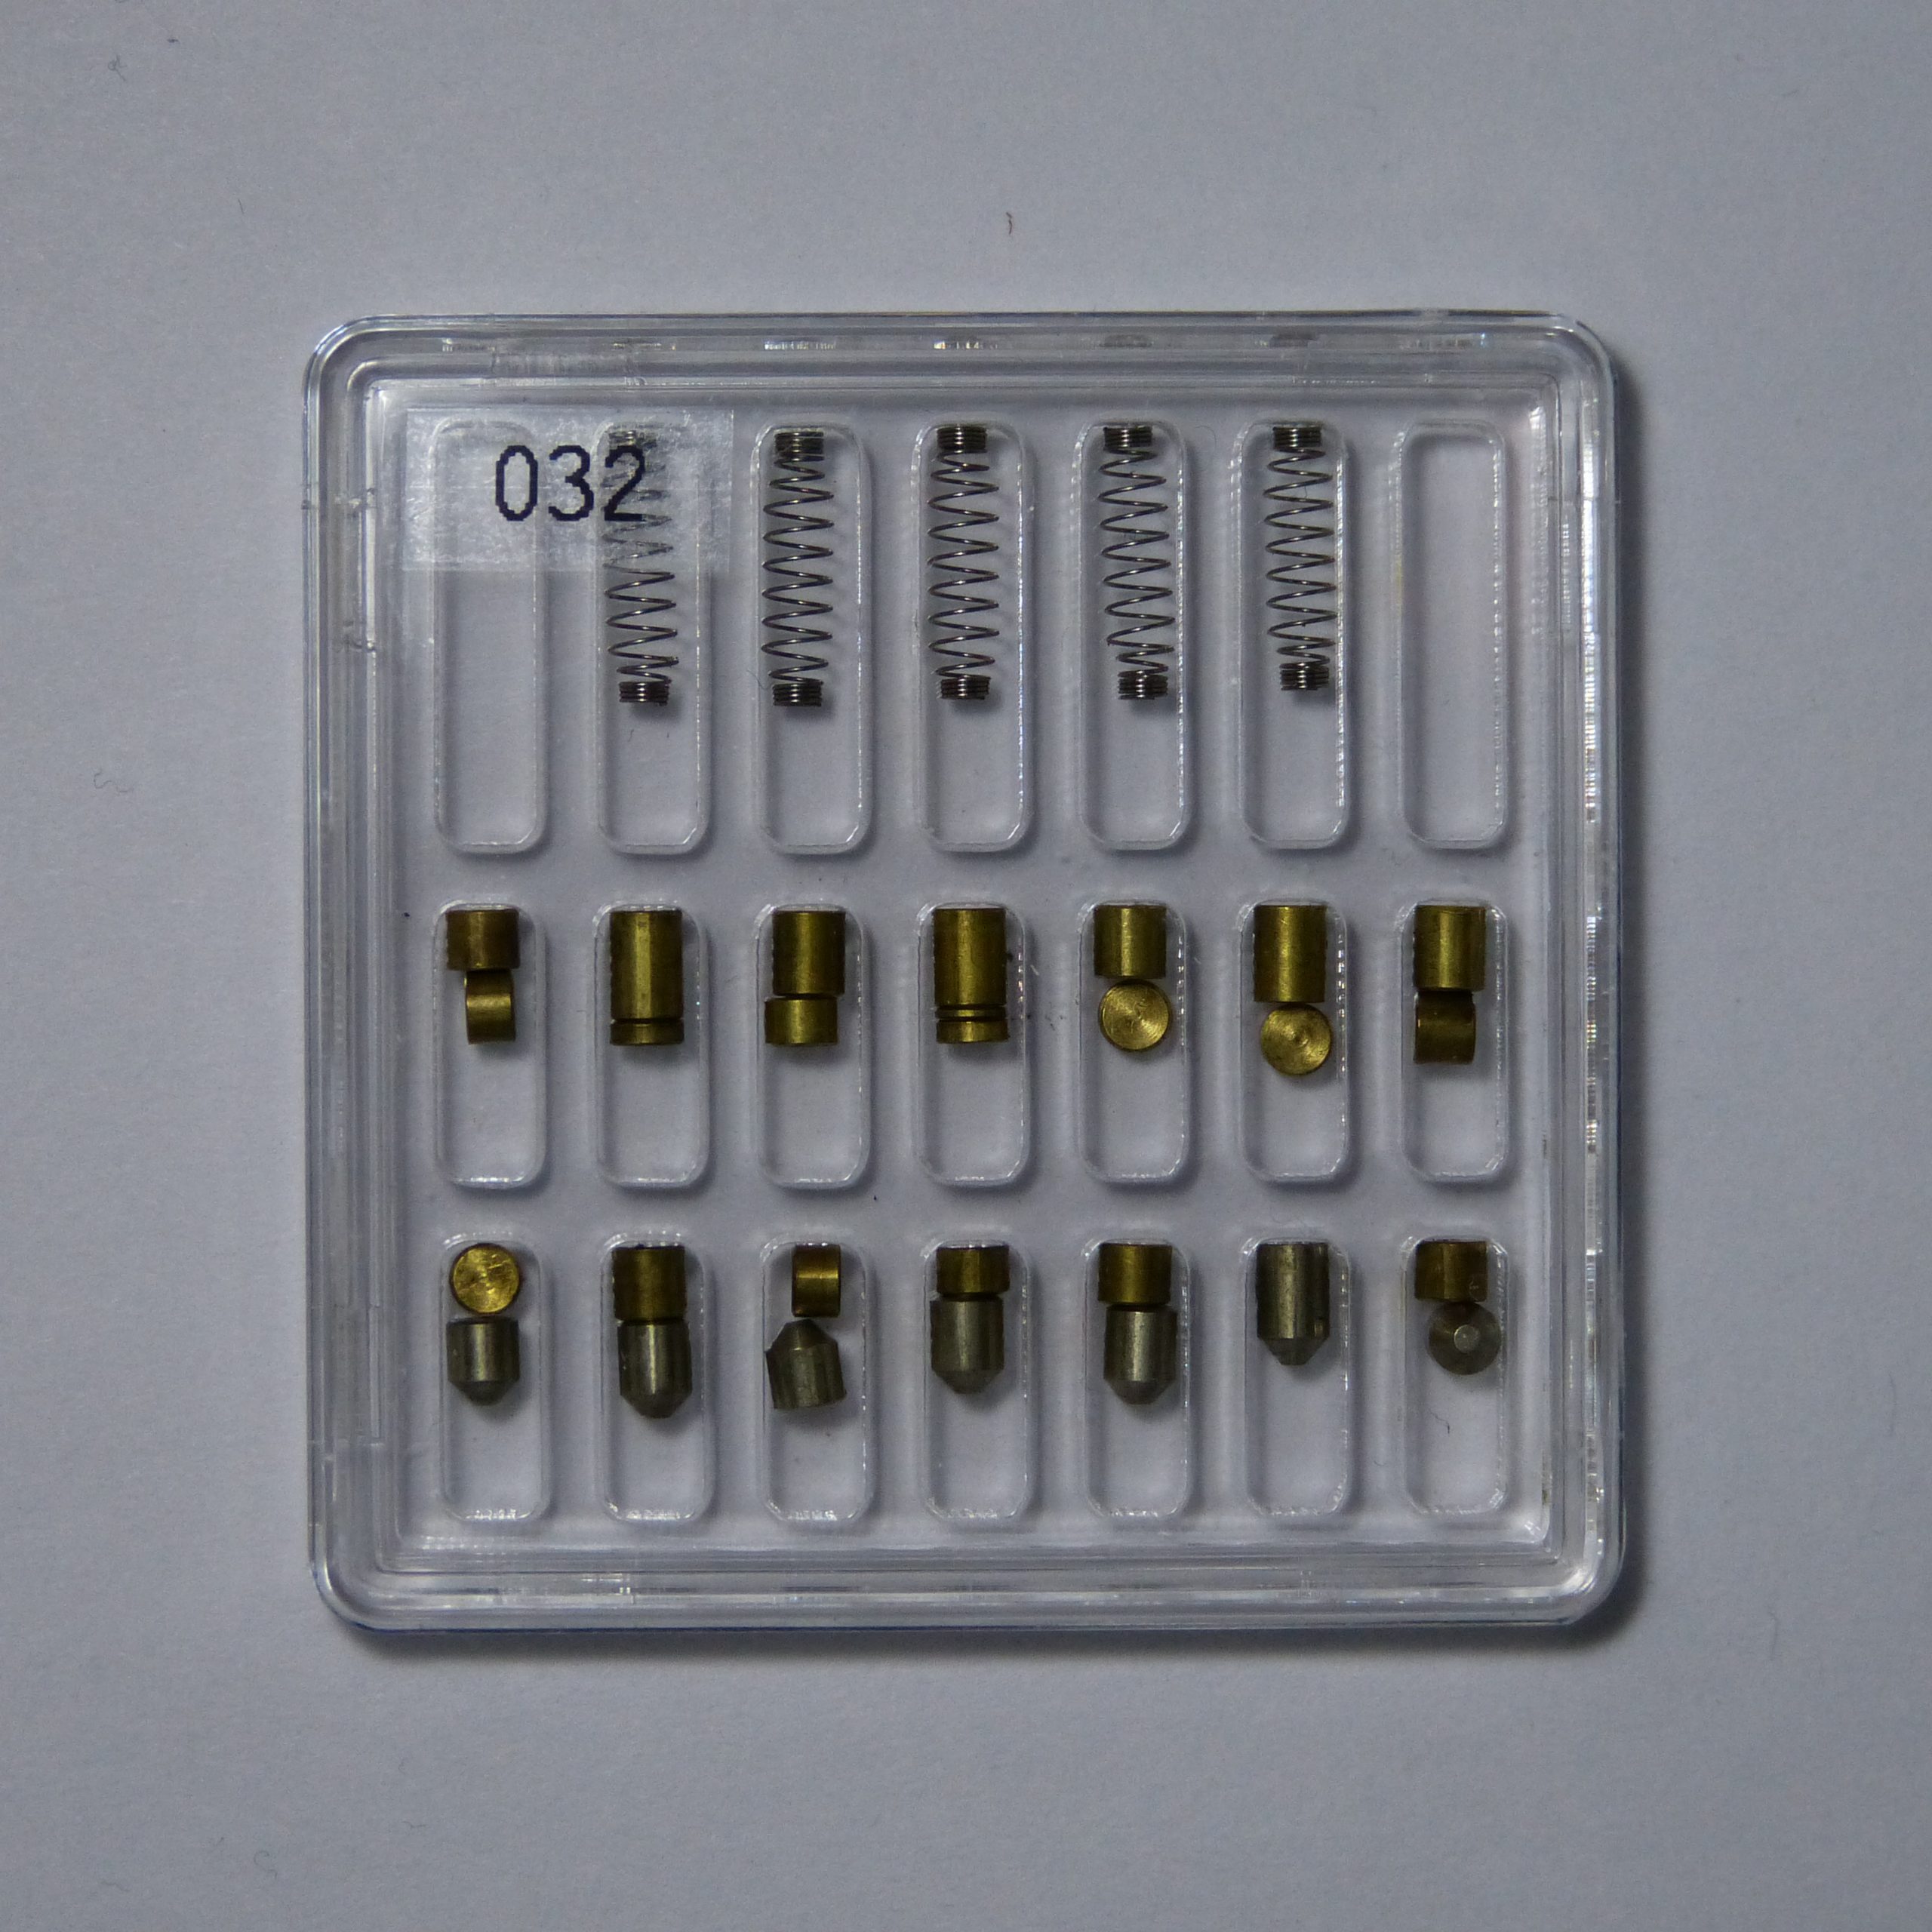
The photos are: key, pins, key, pins. The photos of pins are arranged with the brand and number. The keys have ‘key’ in the name. The Titan with a key engraved D5474 will have the pictures: TitanD5474-1key-1-scaled.jpg and TitanD5474-1-1-scaled.jpg.
The pictures are by Jan-Willem Markus. CC BY 3.0. https://creativecommons.org/licenses/by/3.0/ In short: you are free to use, modify and share these photos as long as you give attribution. If you plan on selling them or using hem in a blog/paper/book please notify us.
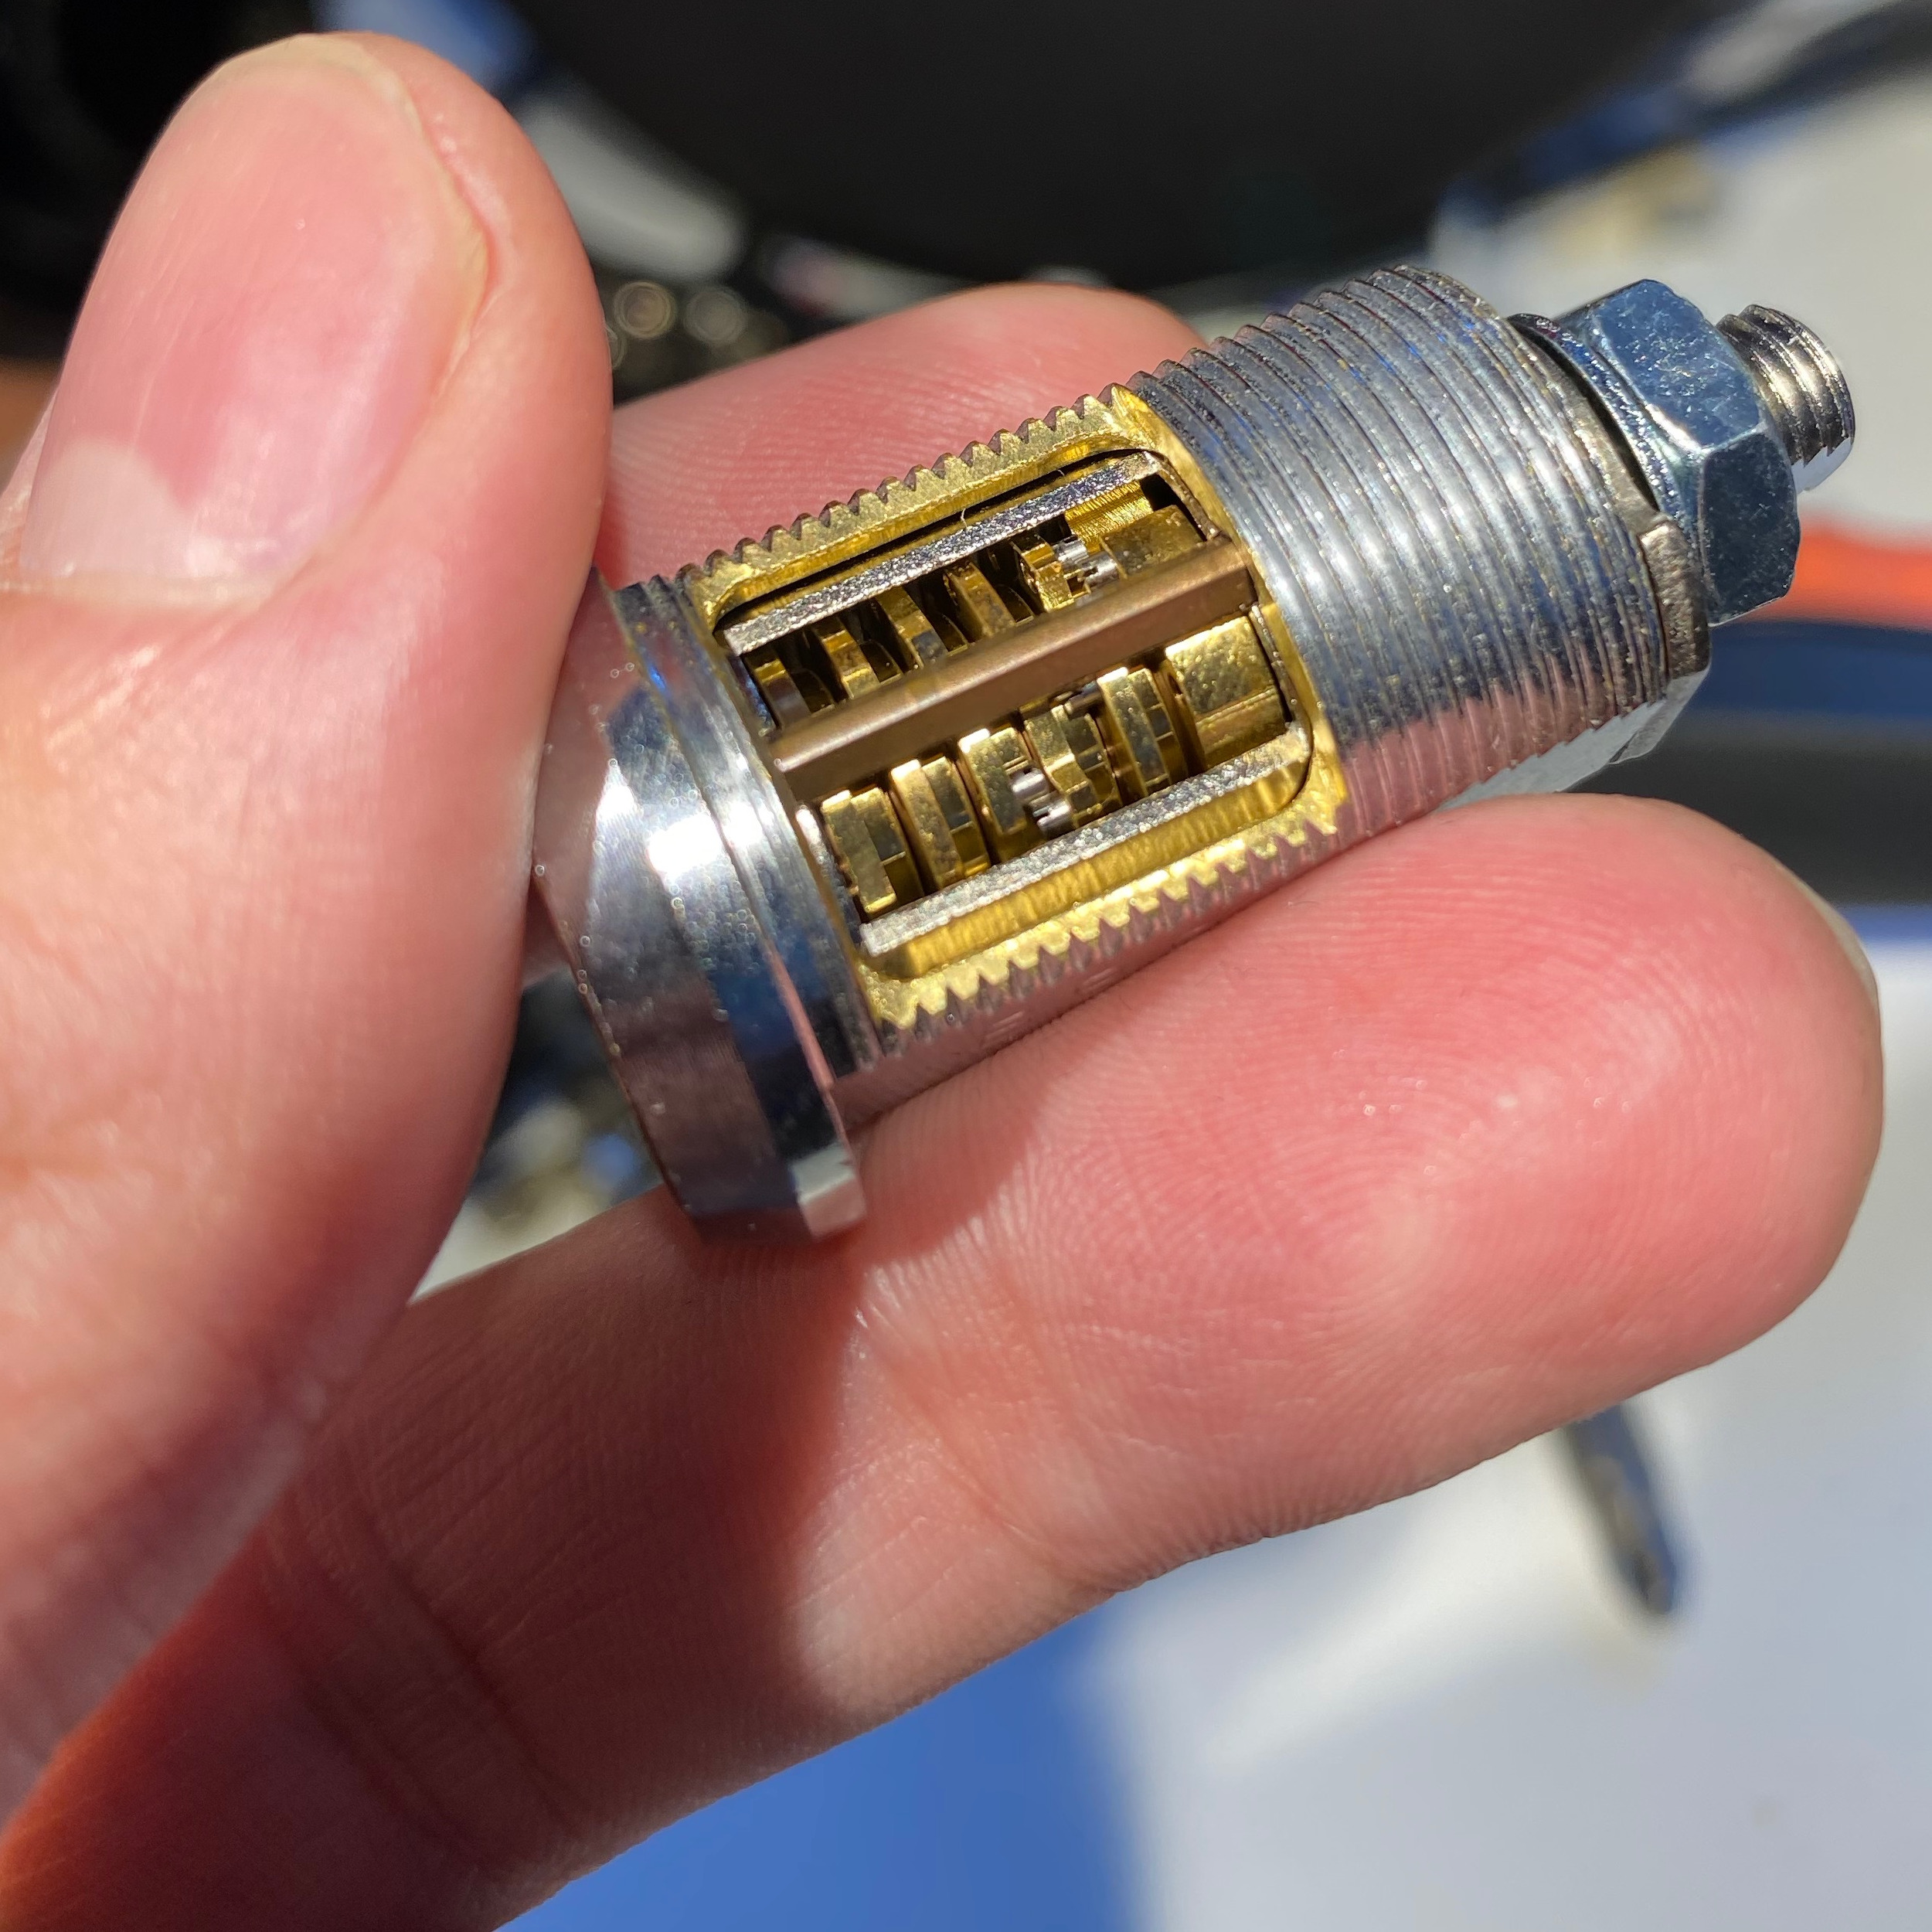
So what do you do with a really rare collectable lock that comes with no documentation, has no documentation and practically nobody knows anything about? YOU GUT THE HELL OUT OF IT.
I’m not going to be going over RKS basics in this doc; check out Han Fey’s “RKS Robo-Key System” doc from 2007. But long story short is that it’s a cam lock with 5 wheel combination lock guts, and it’s meant to be dialed with an electronic dialer but can be dialed with a manual “emergency dialer” as well.
Note that the latest generation locks (IV) detailed in Han Fey’s doc are different than what I have. How exactly? Beats the hell out of me. Let’s find out!
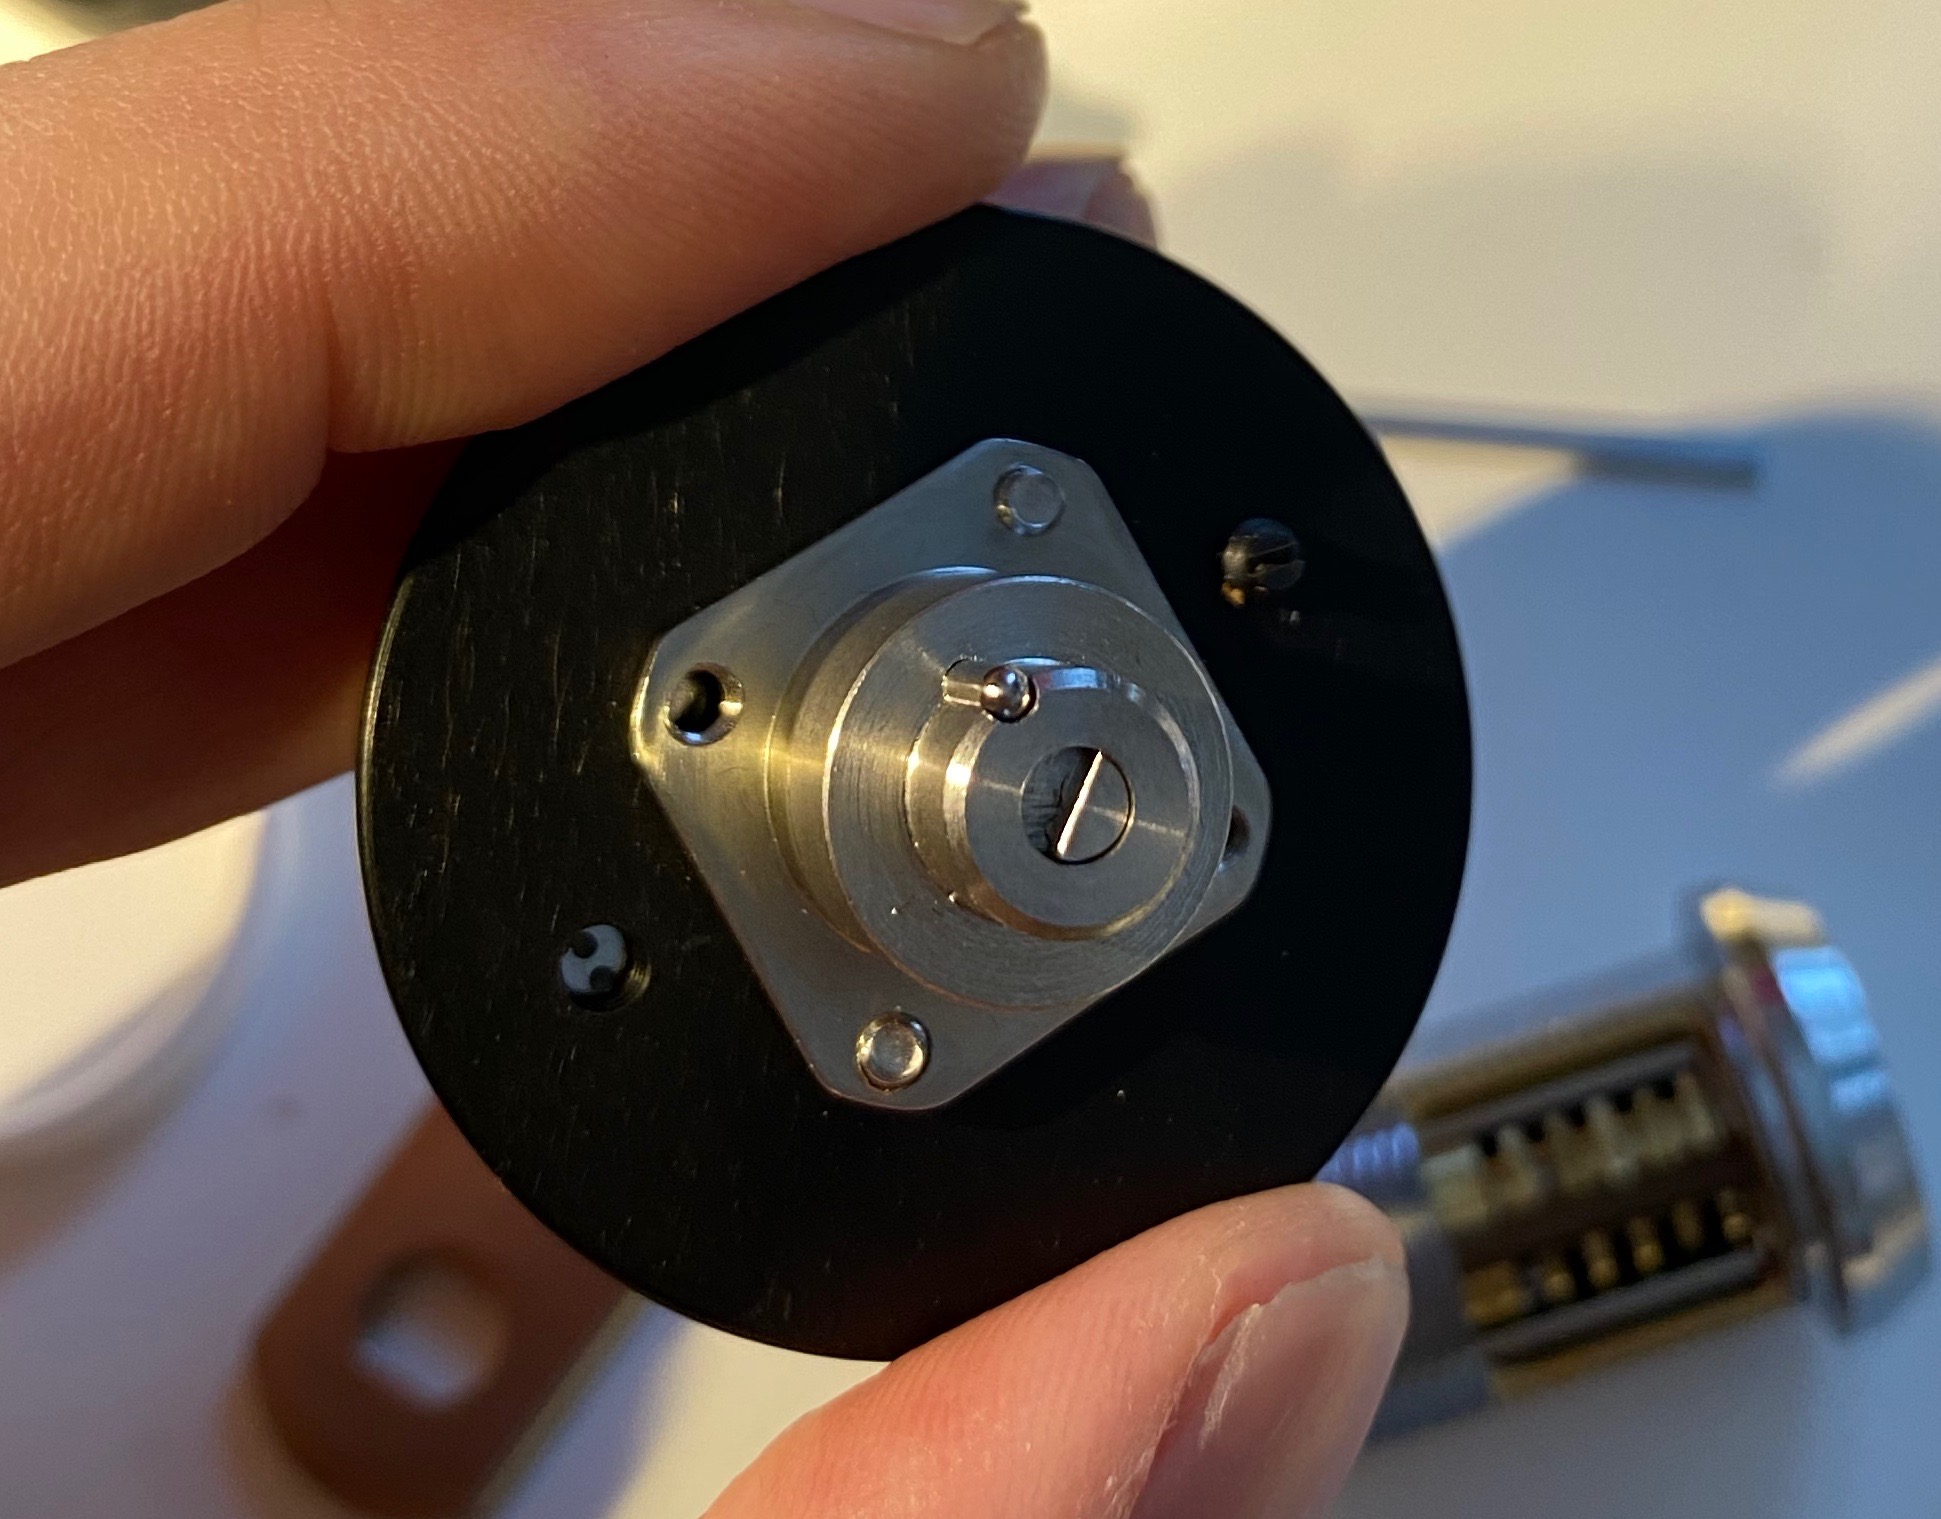
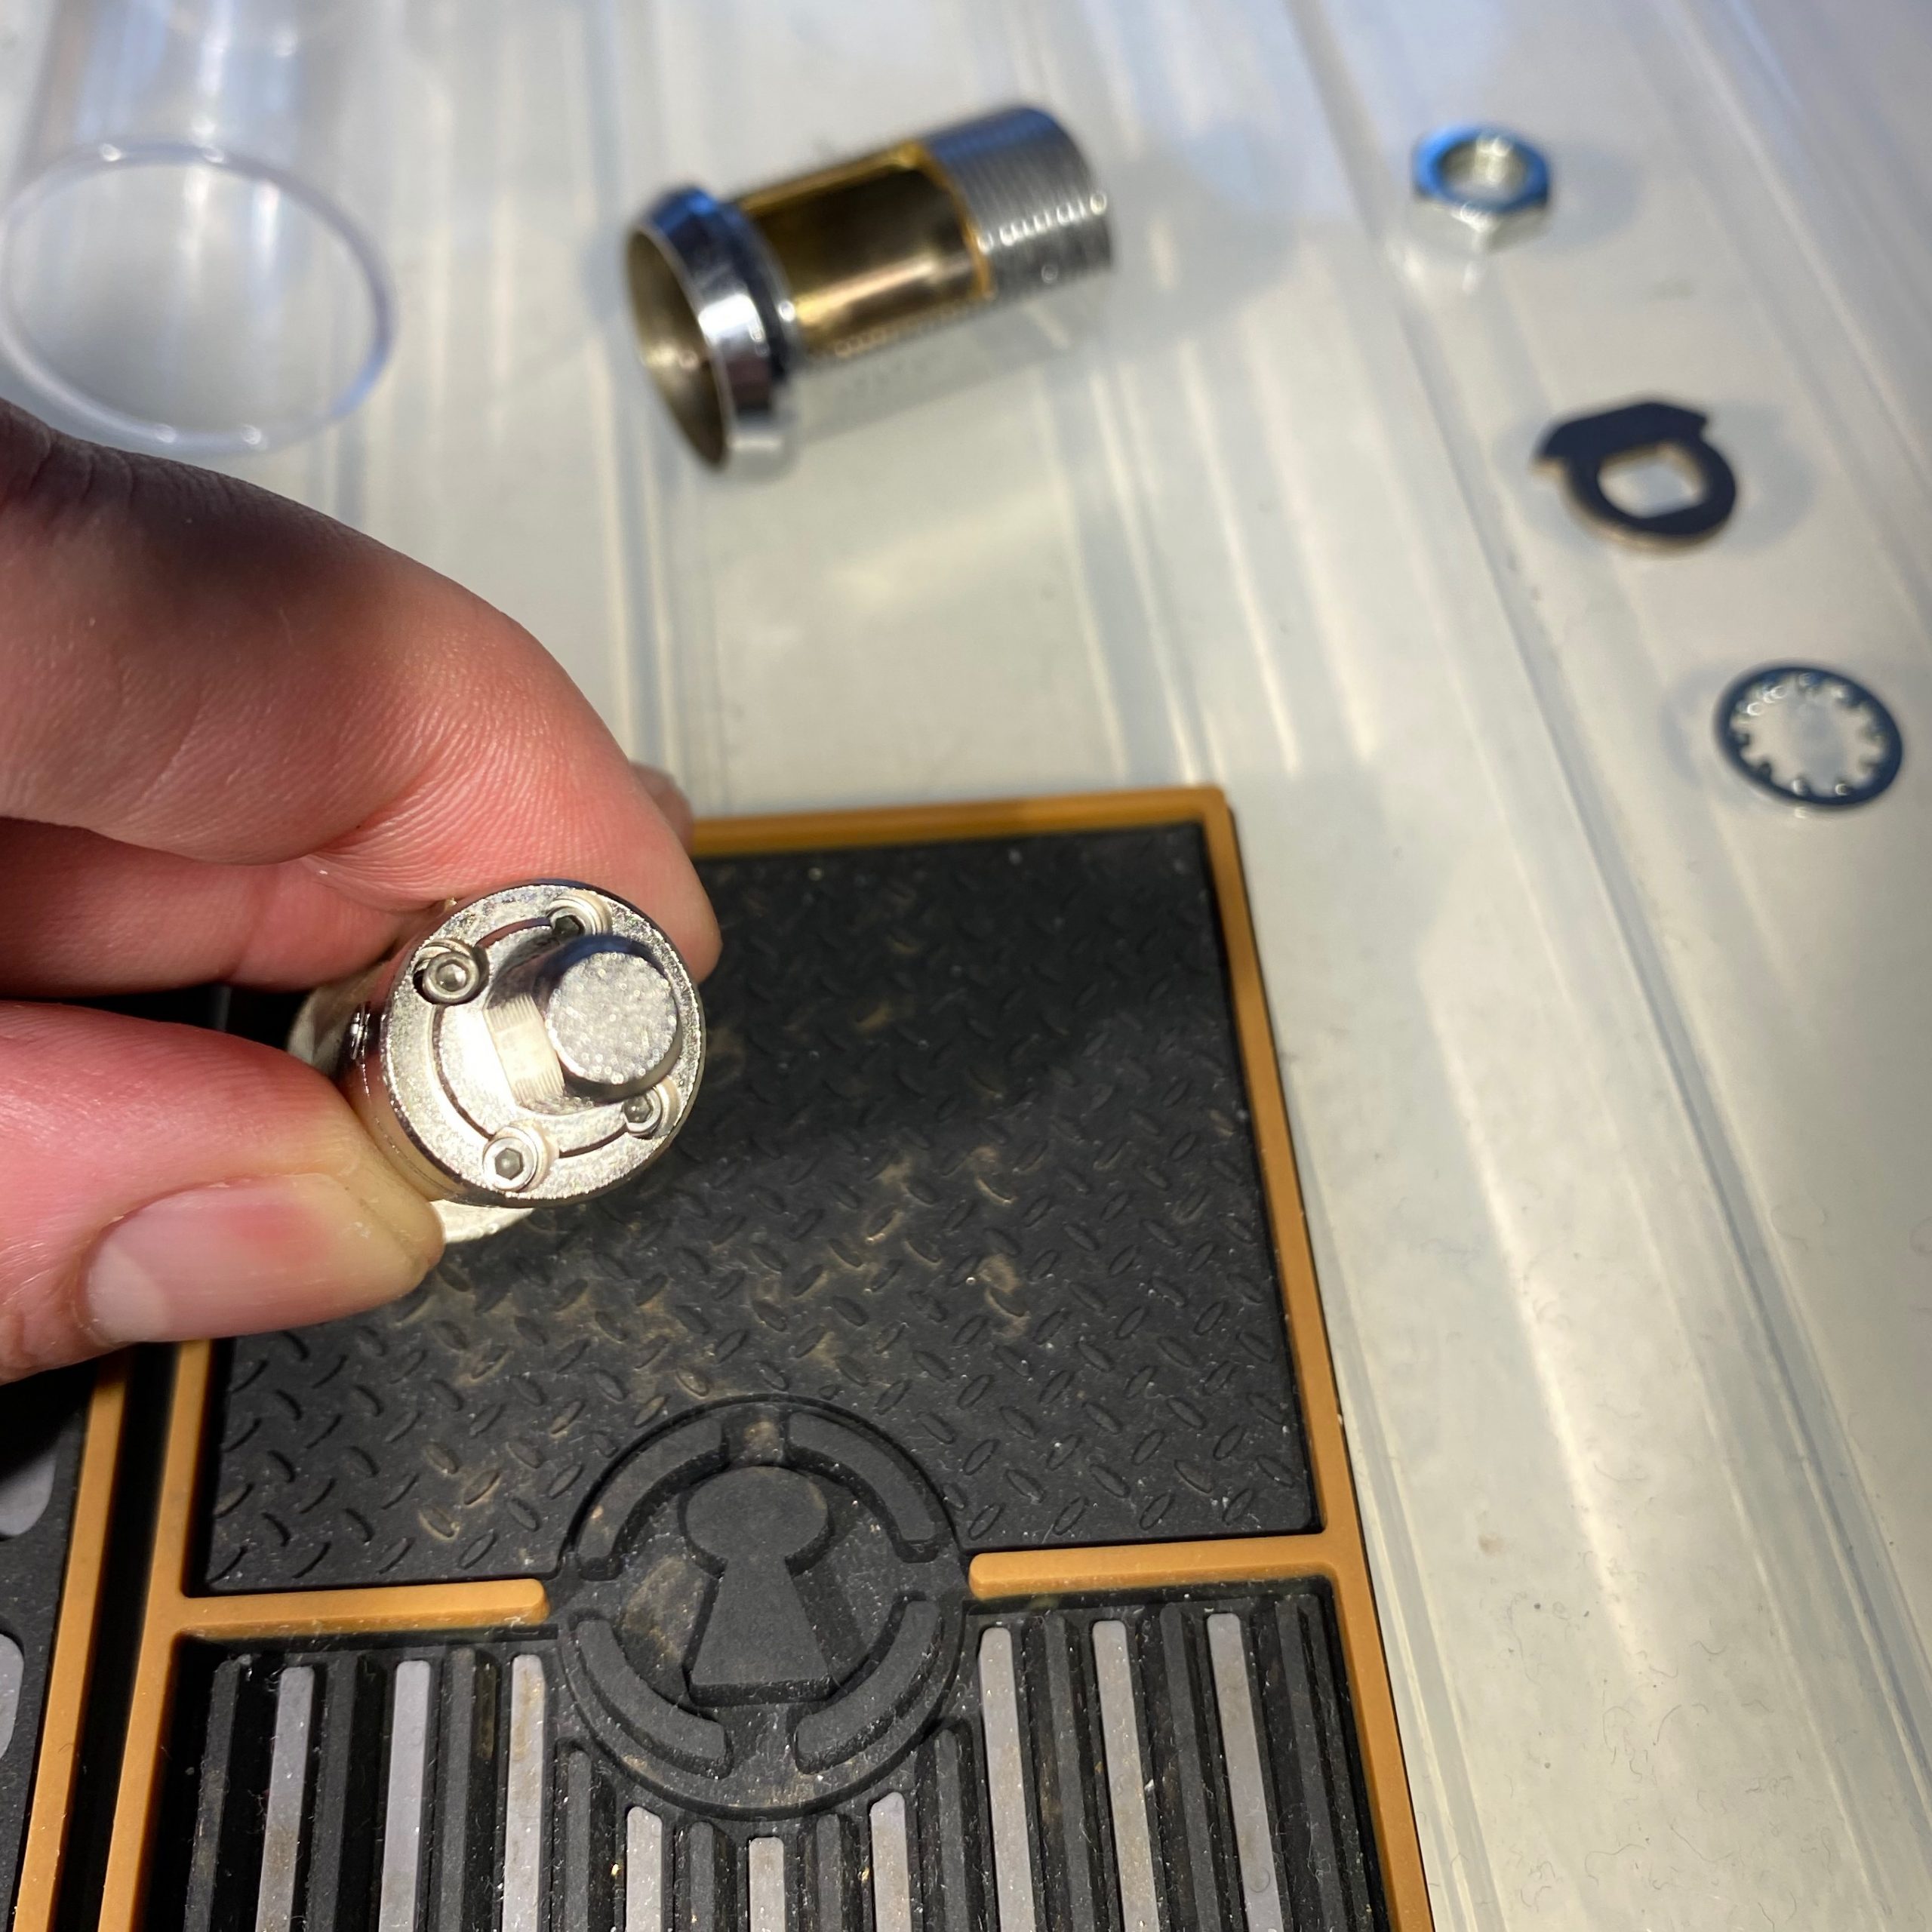
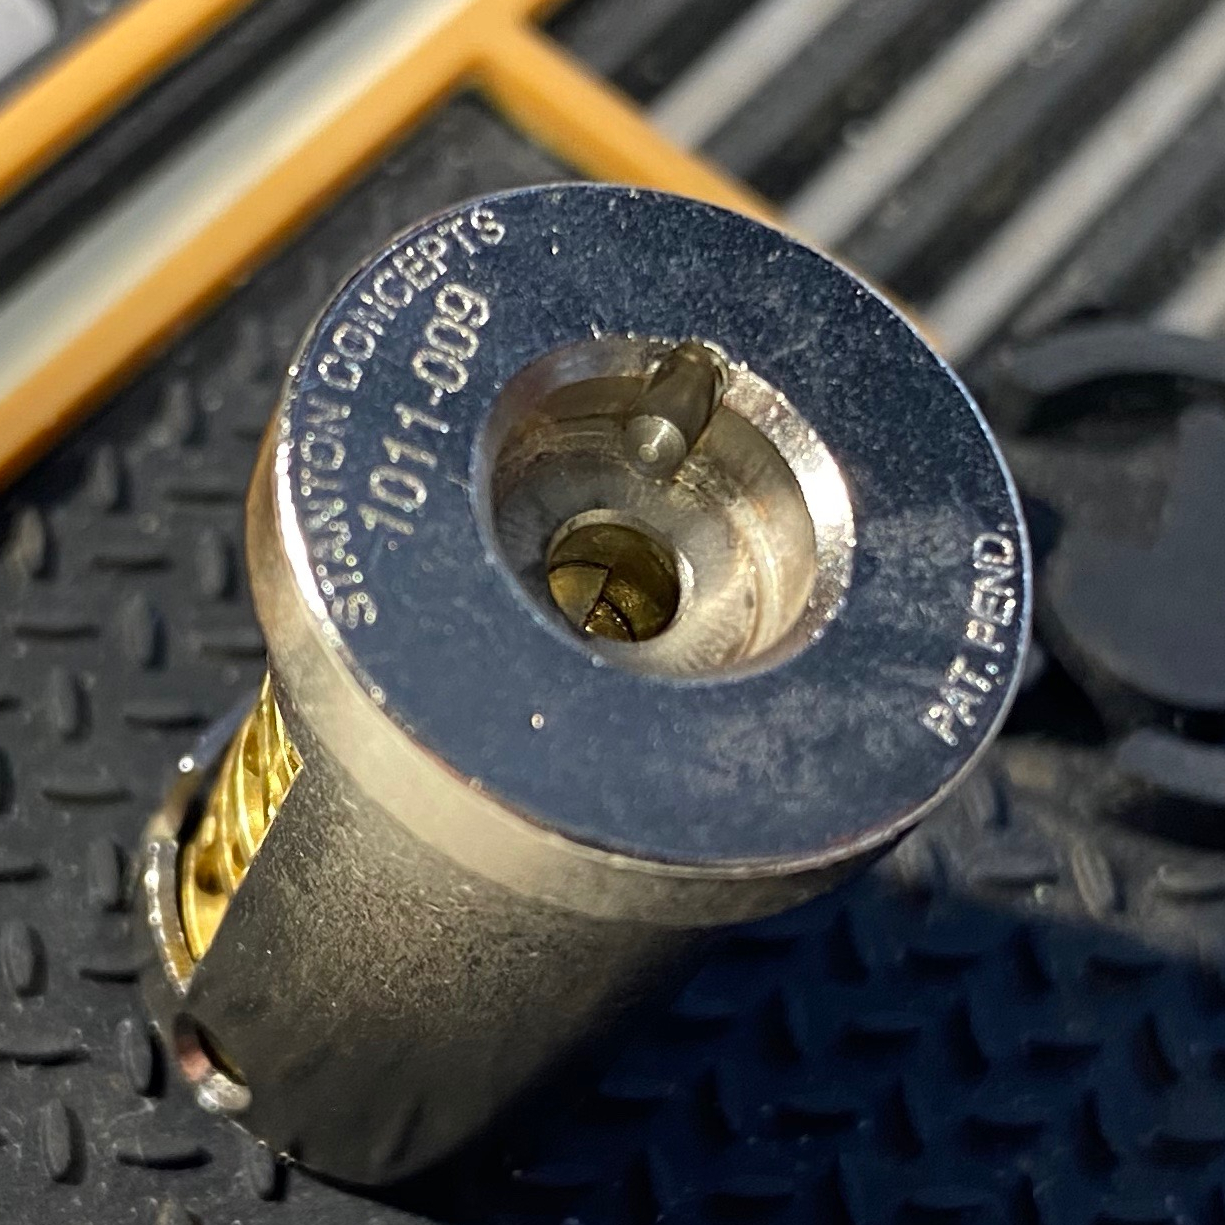
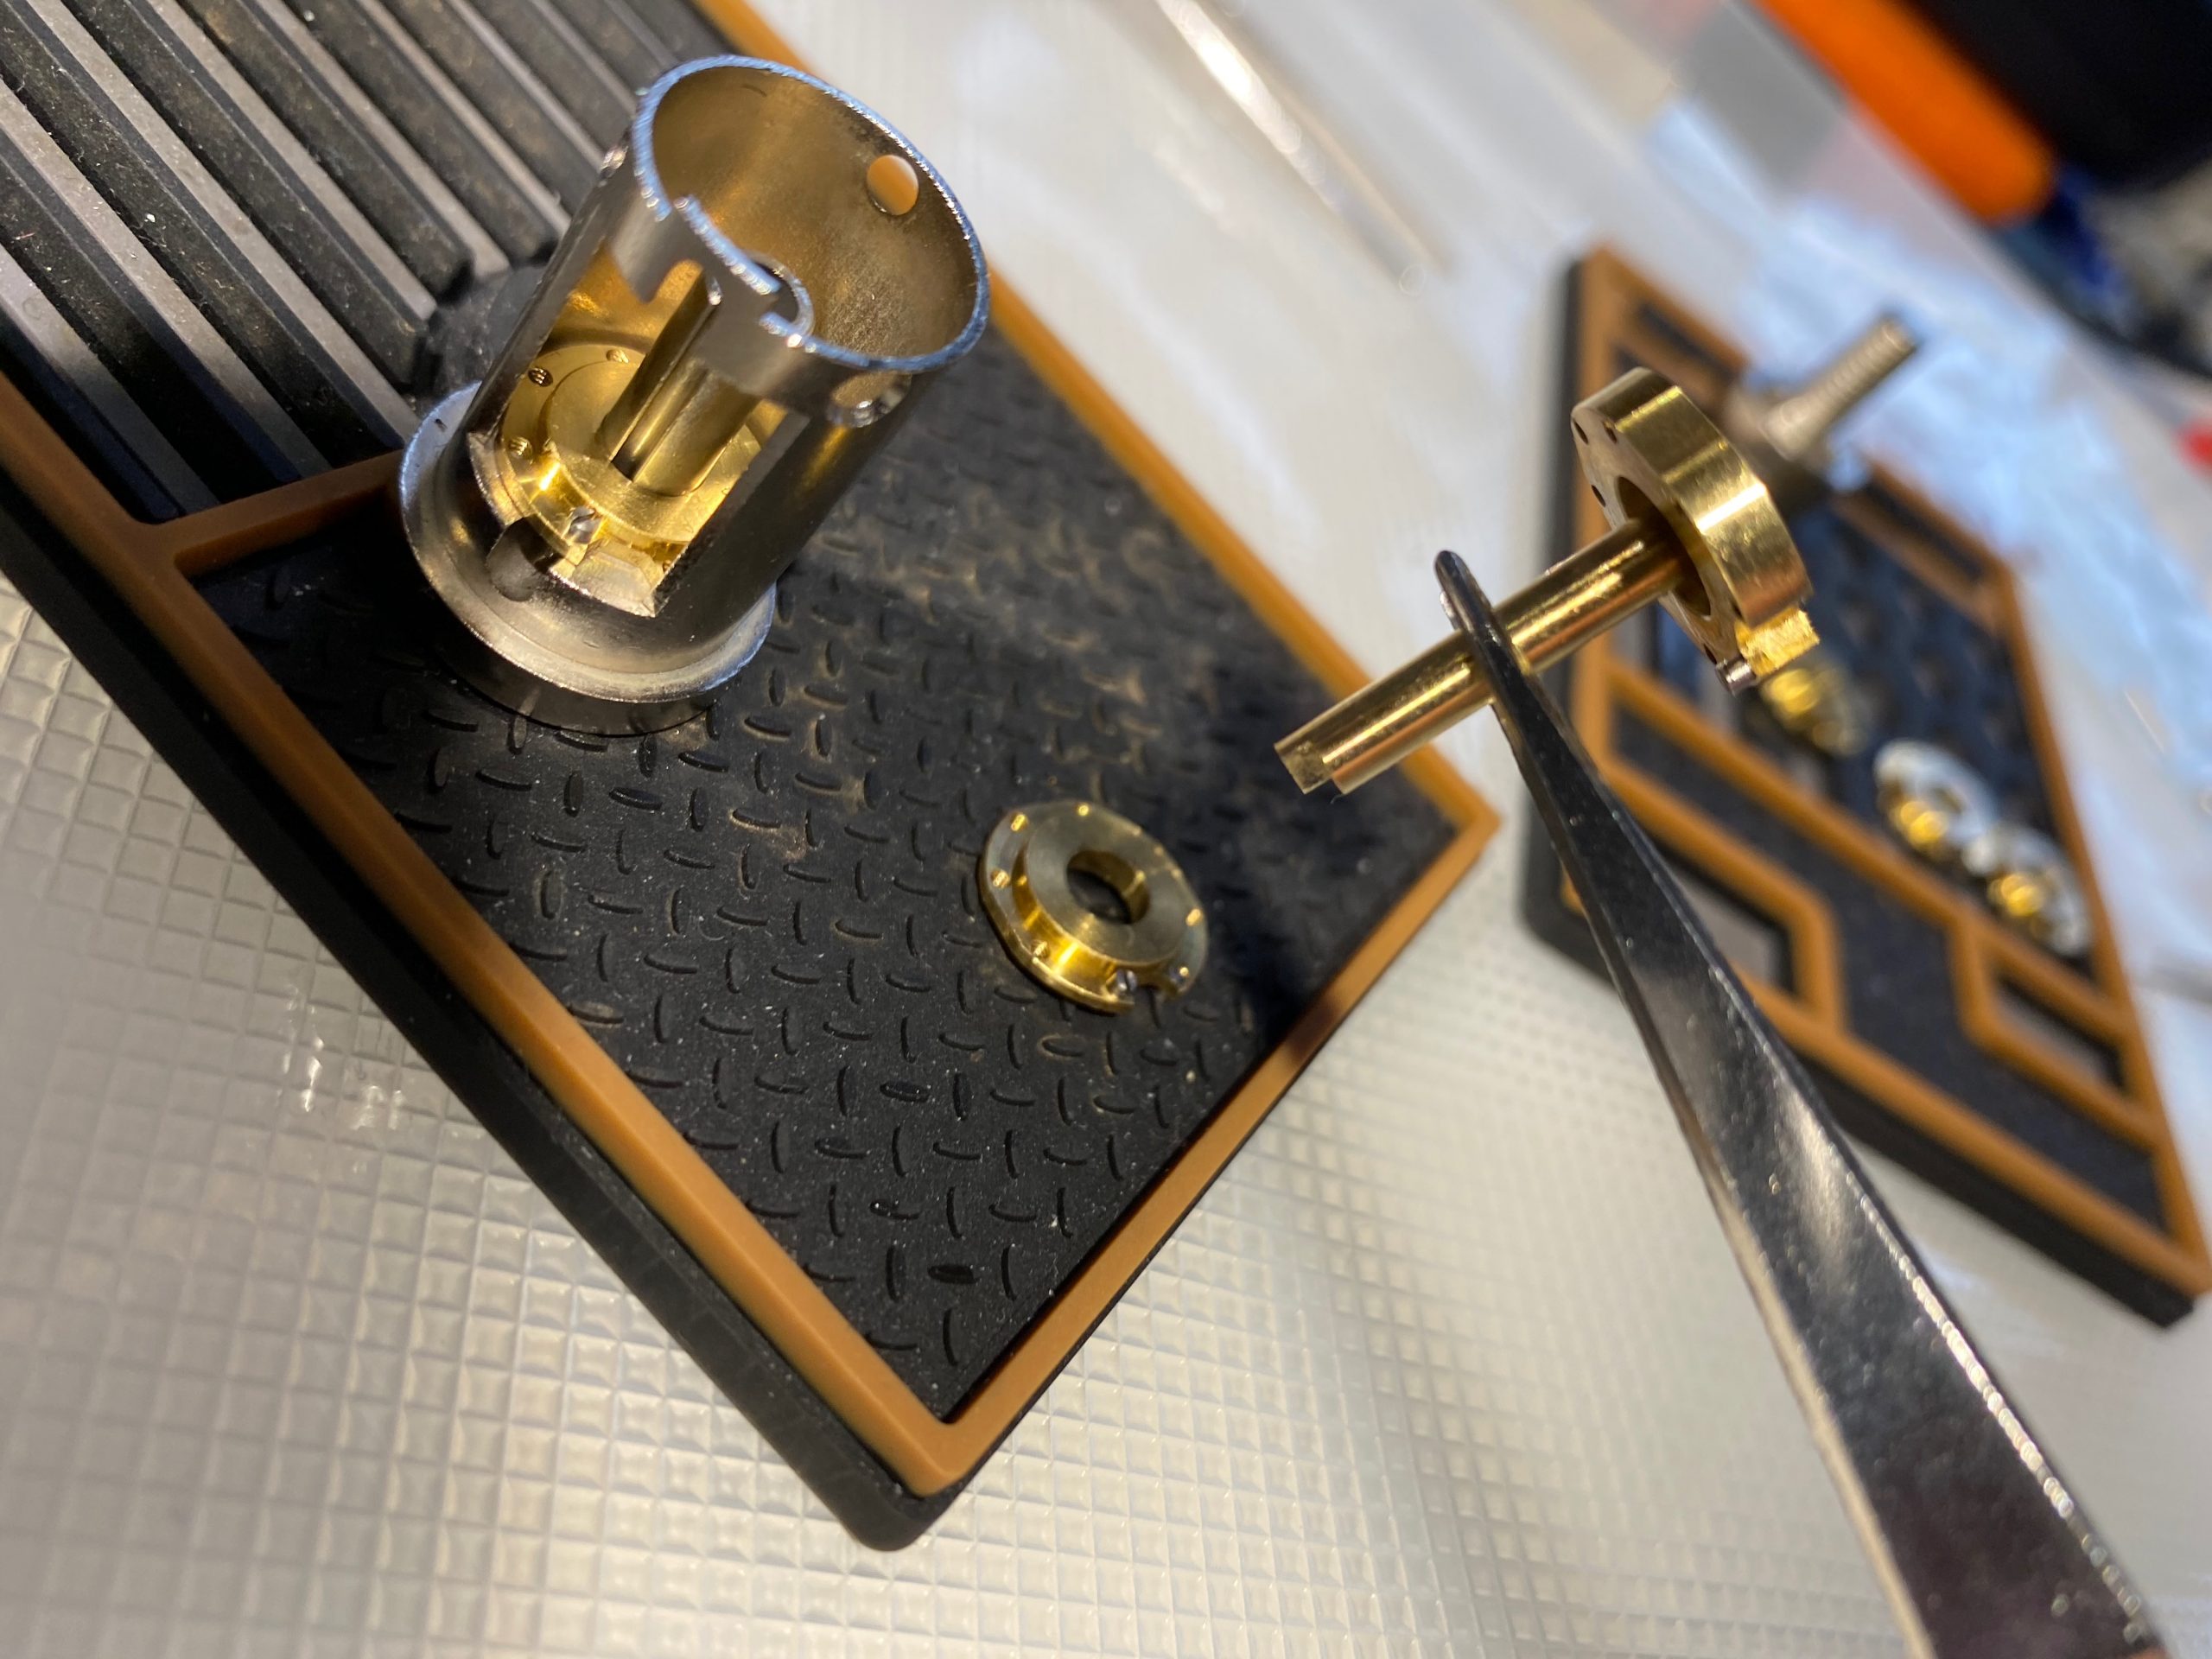
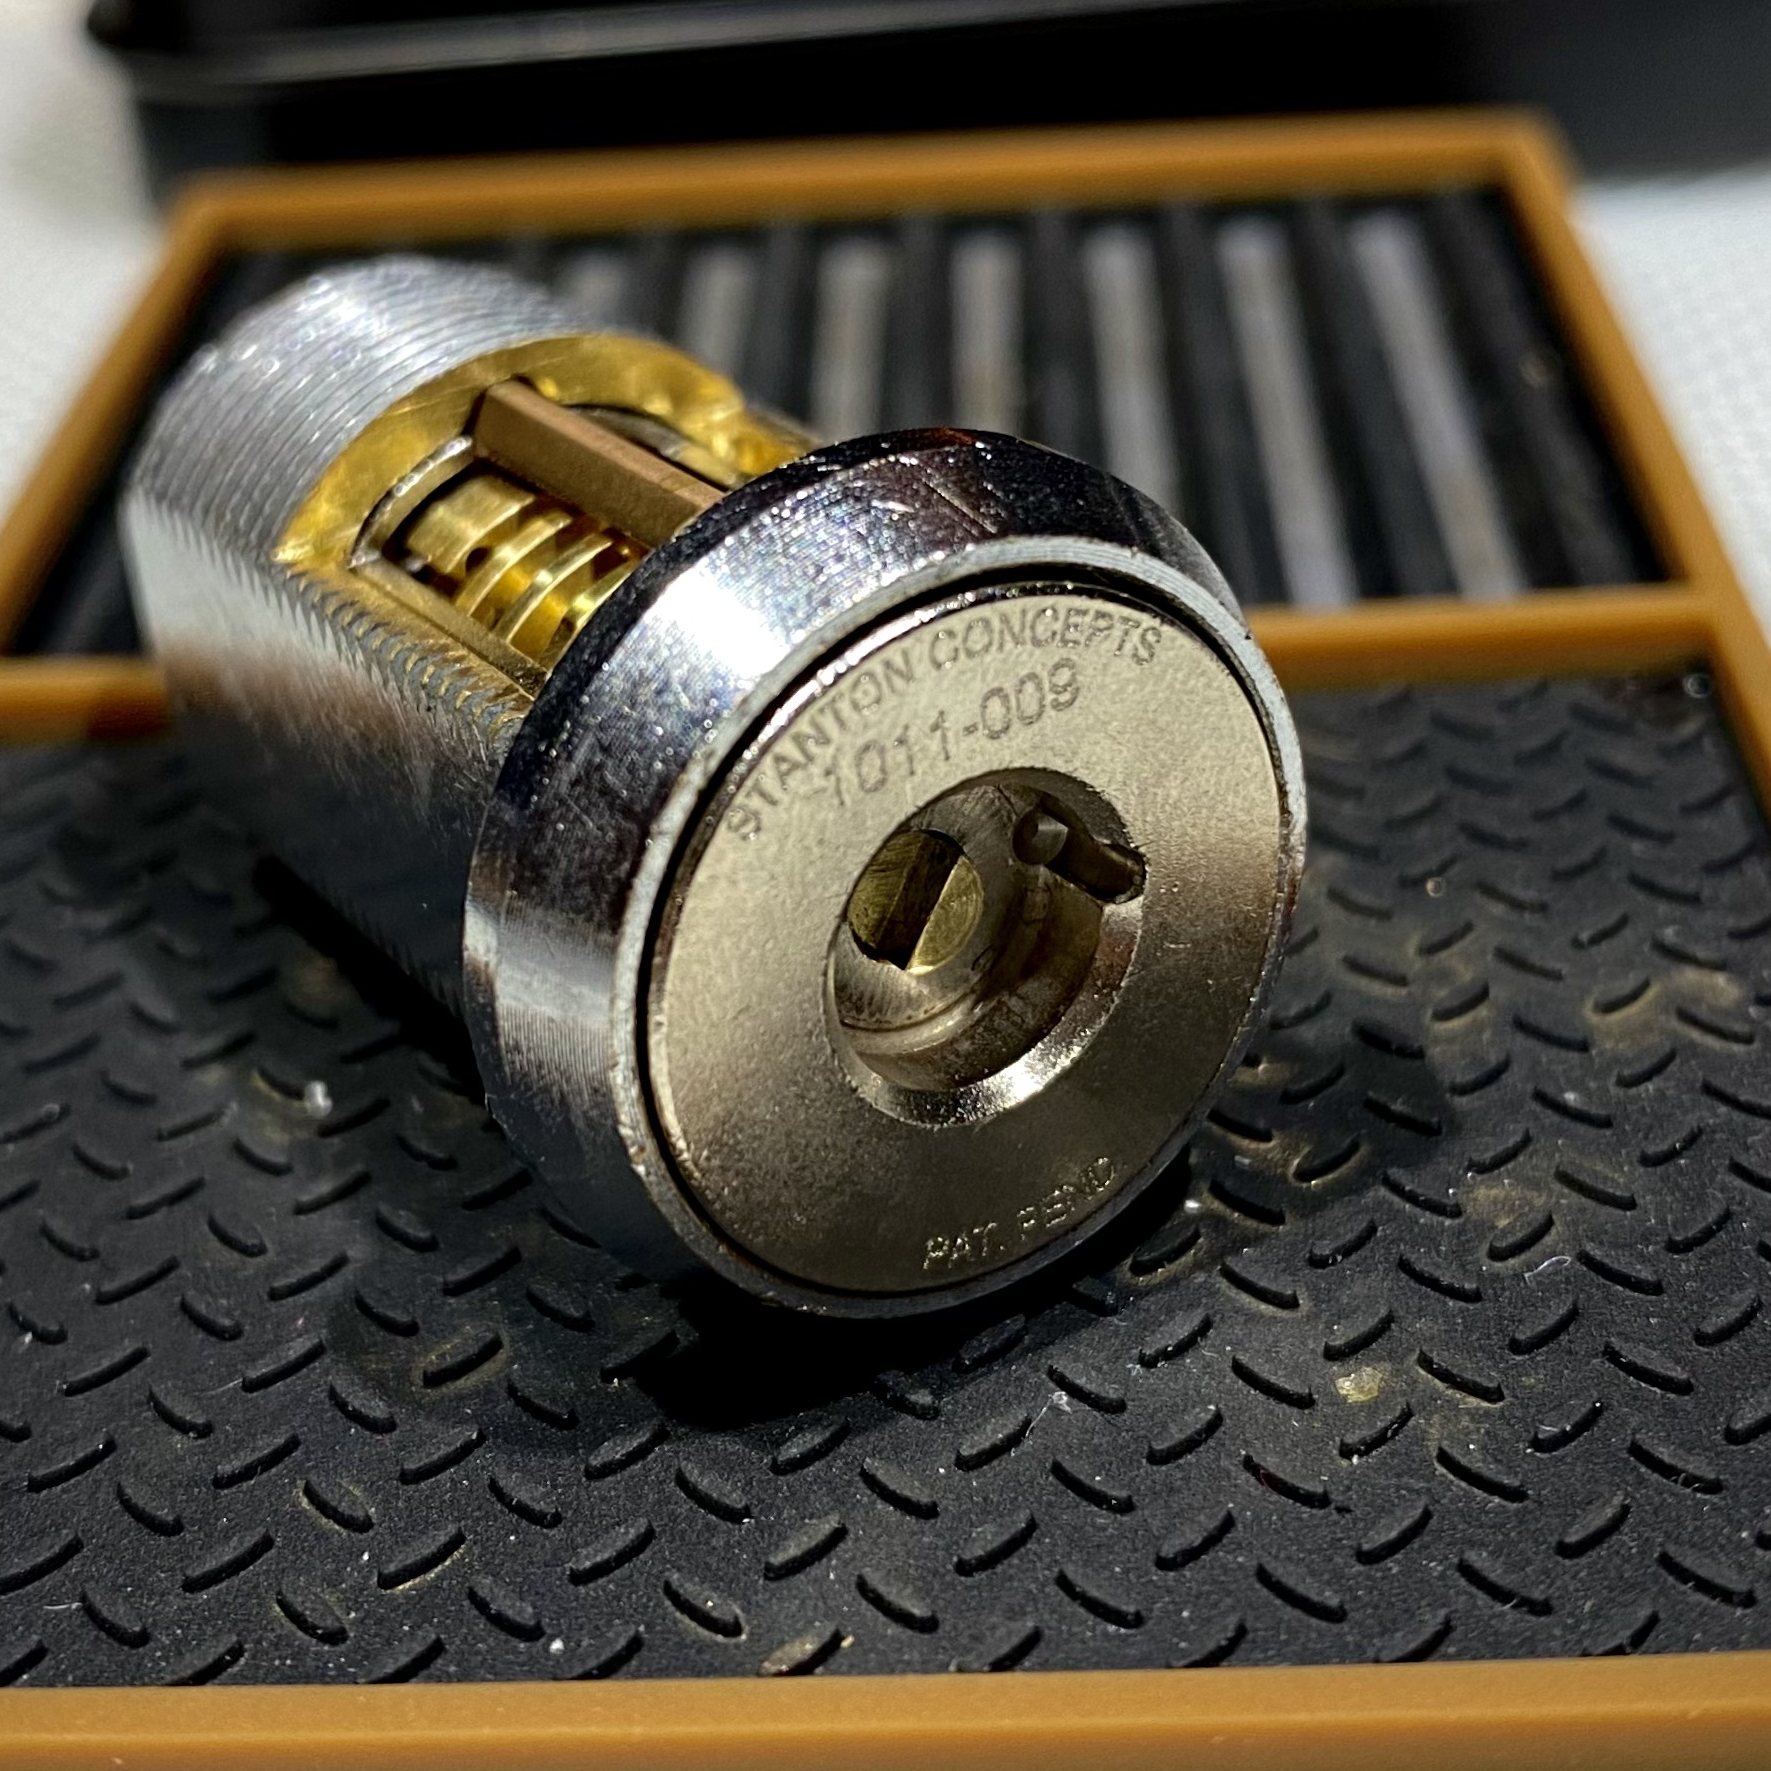
RKS core cutaway.
I’ve been told that the core’s in a repurposed Protec cam, and it does look familiar.
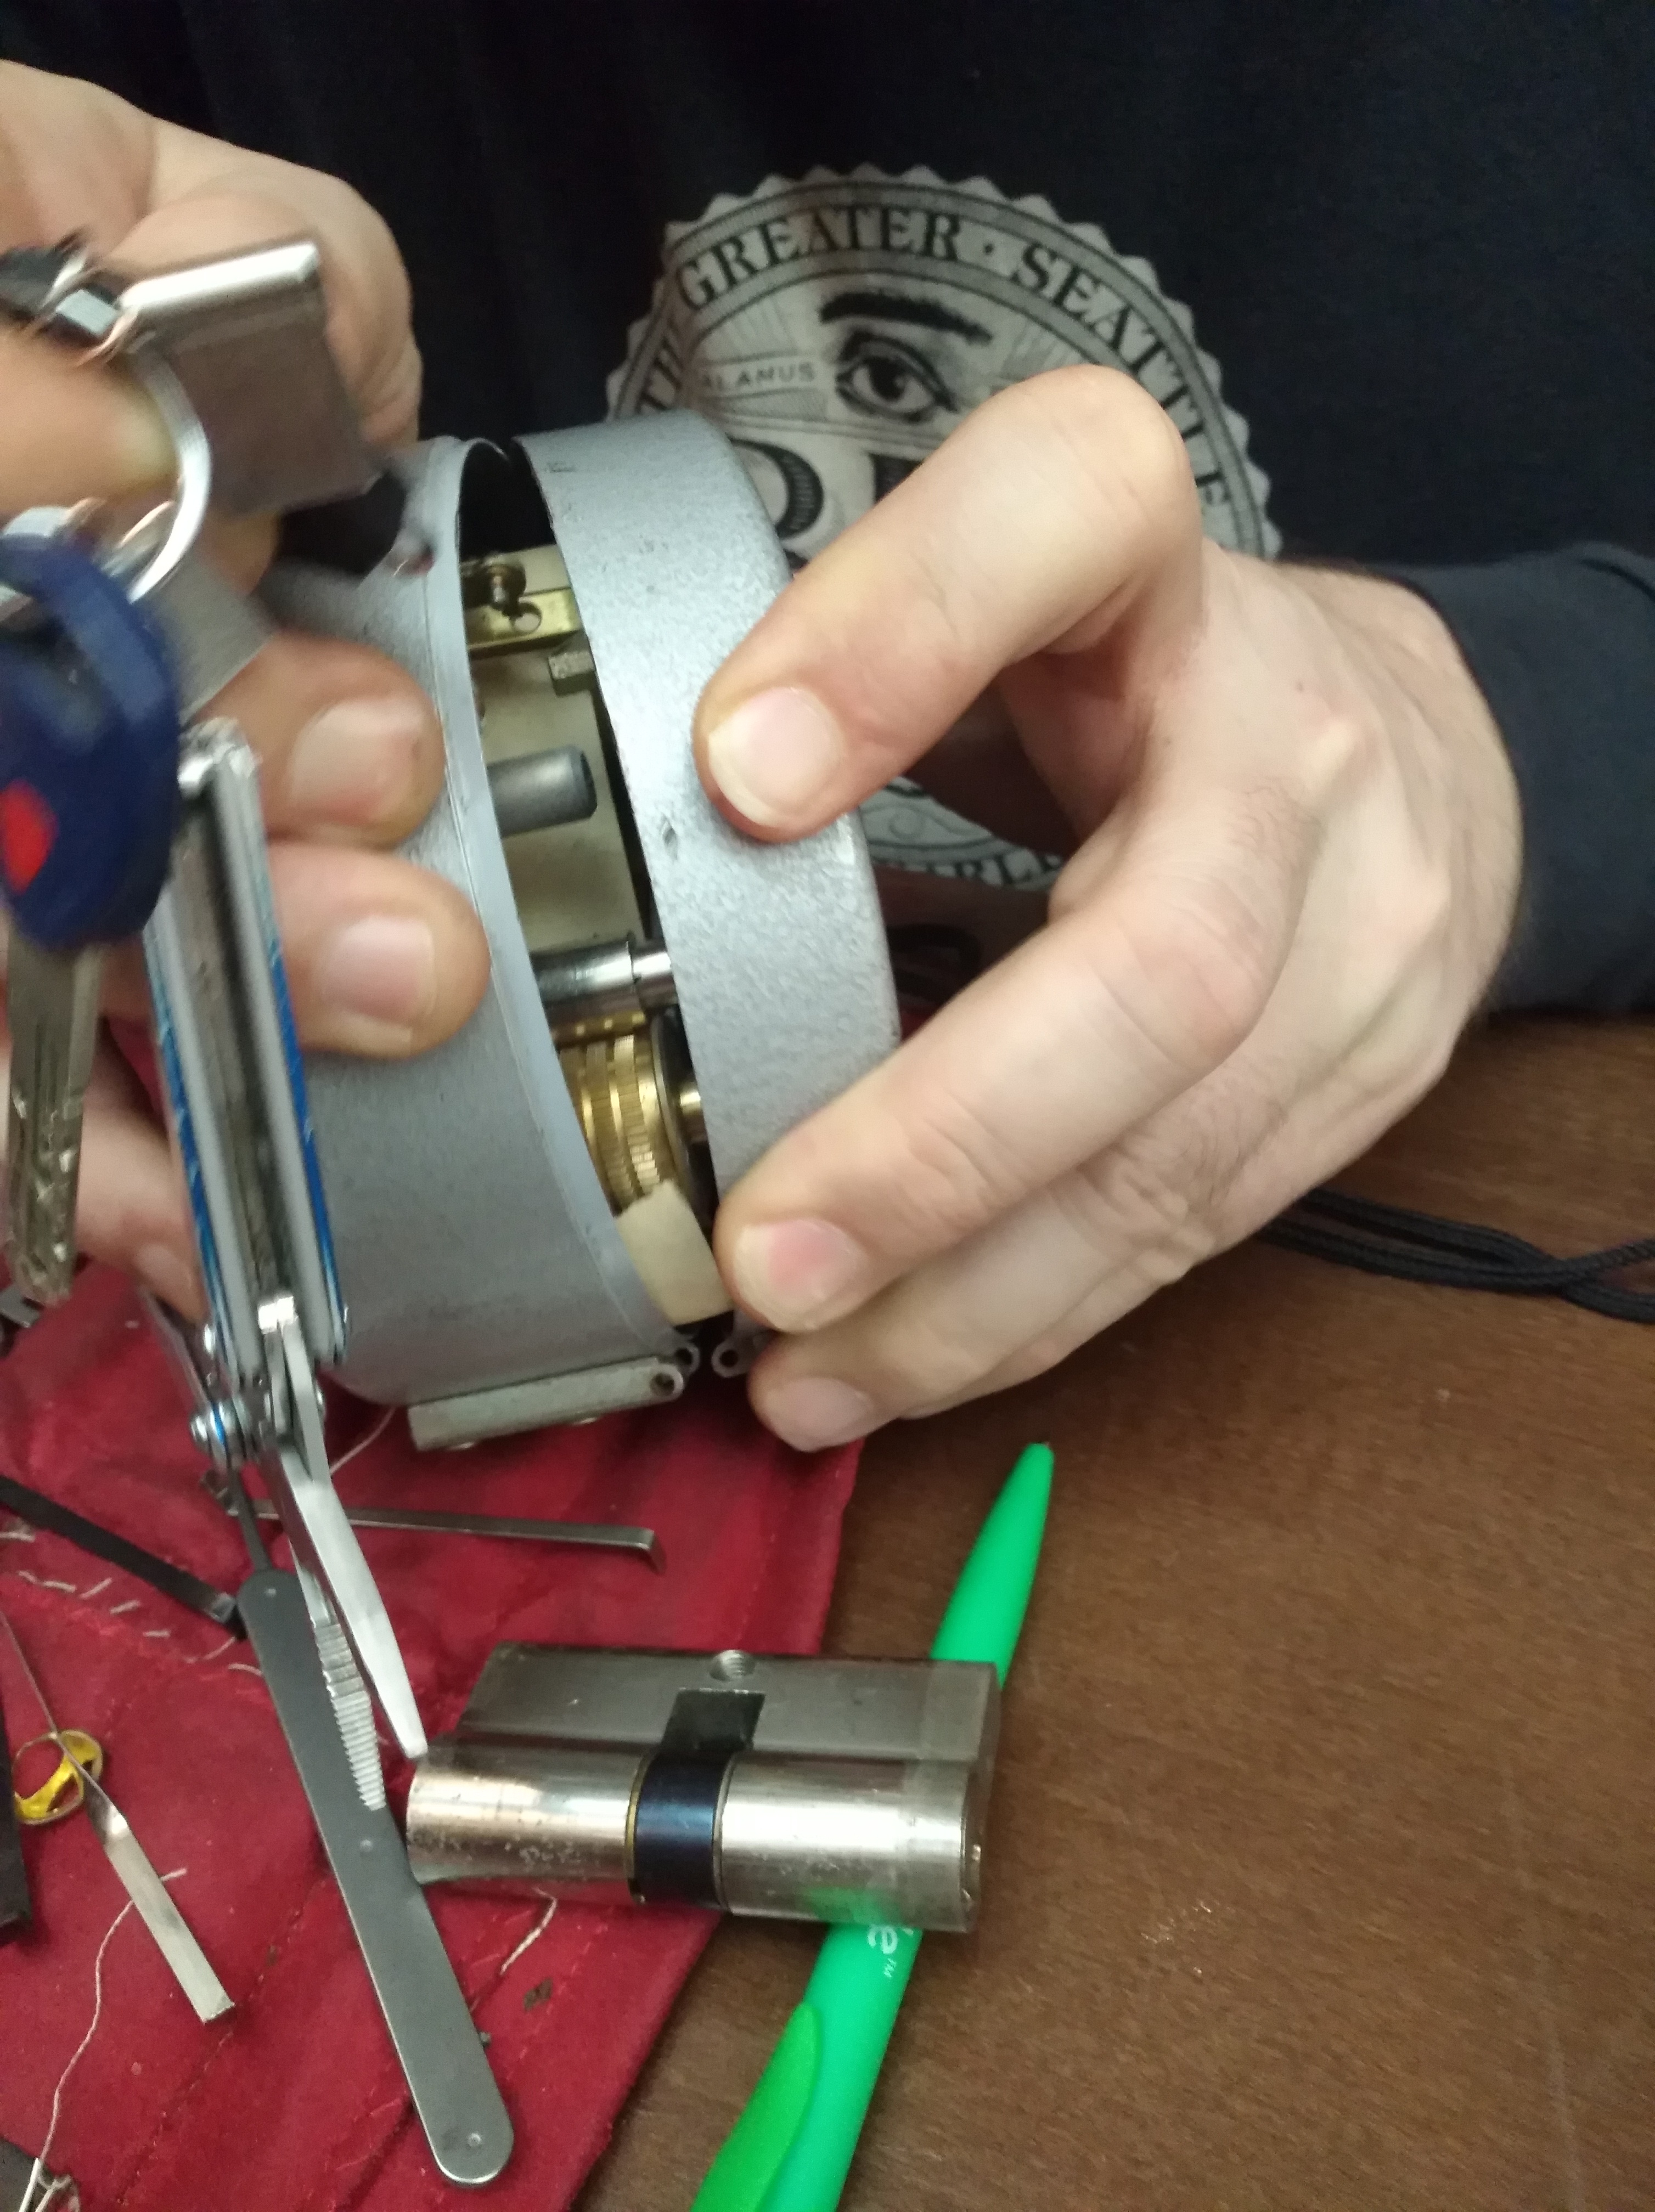
Core’s easy to plop out, just remove the nut in the endplug and that’s it. The sidebar’s not attached to anything so be careful it doesn’t fall off.
Endplug screws.
There’s 4 hex screws inset in the endplug that a 1.5mm key was too big for and that’s the smallest one I have, so I figured I’d leave them alone if I can.
You can see that one of them was loose; it promptly fell out when I tilted the core. Welp. As far as I can tell they hold the part with the threads to the rest of the endplug.
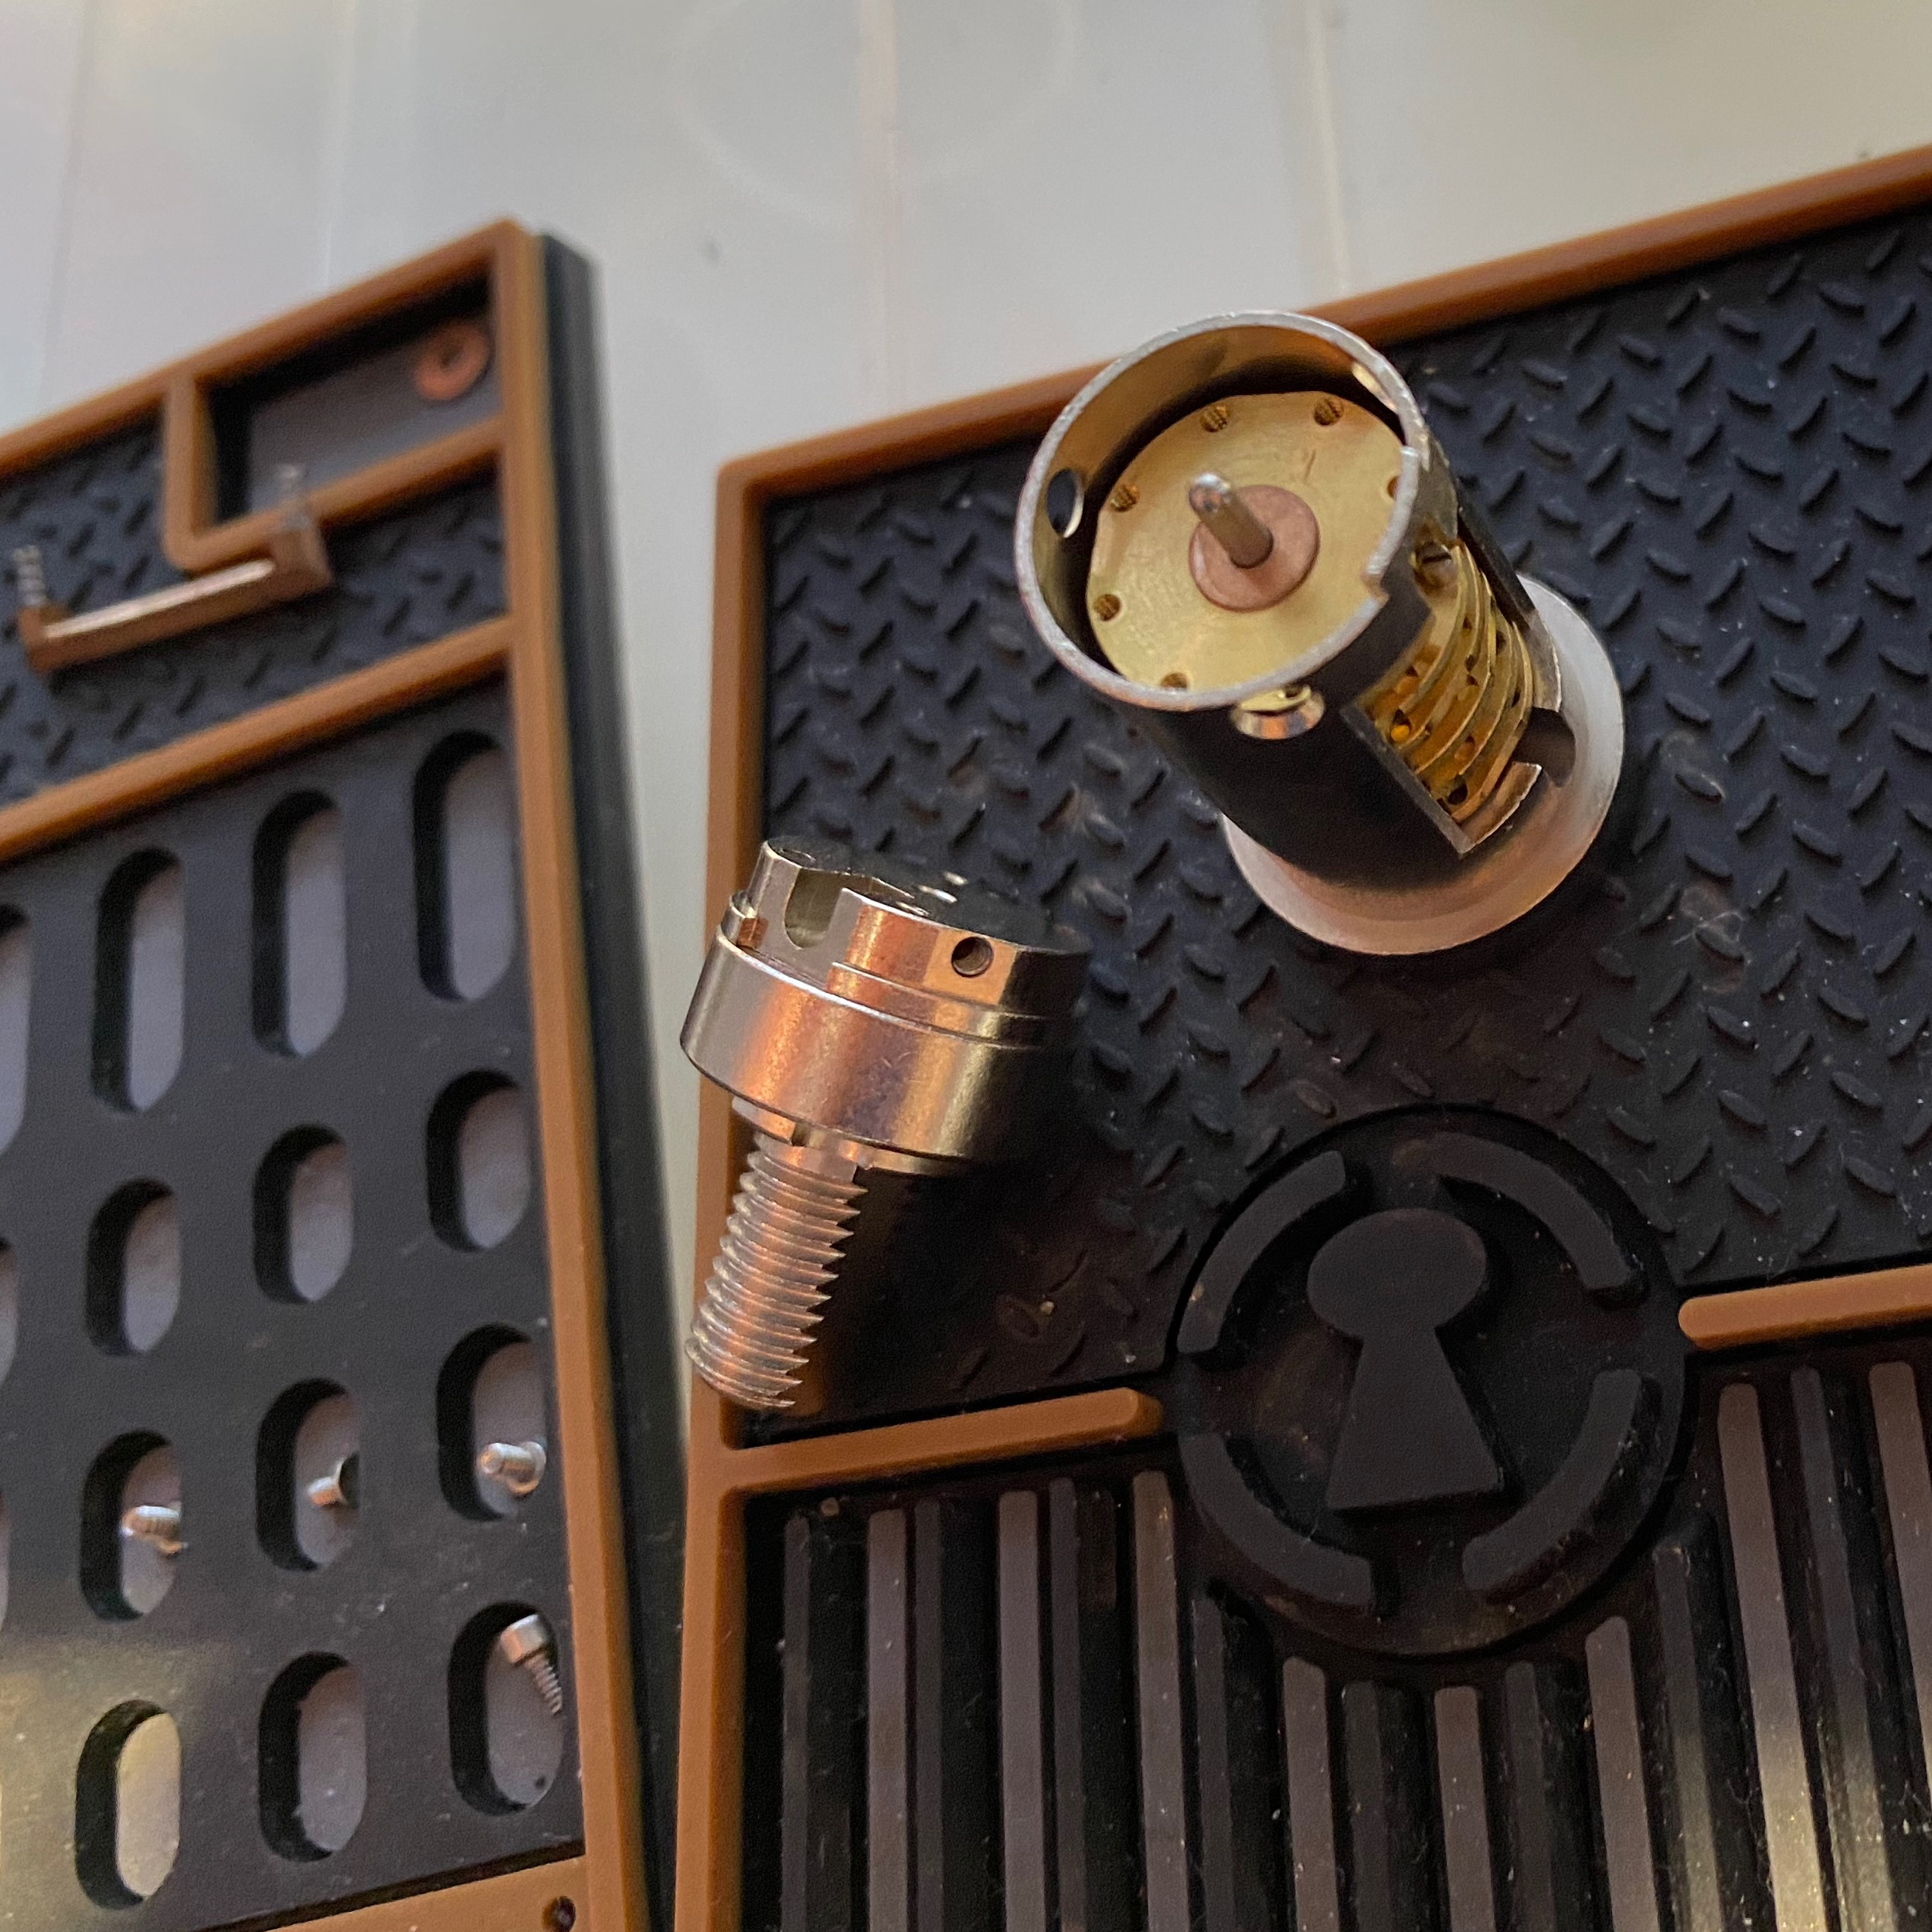
Sidebar.
Sidebar removed.
The sidebar’s got springs on both ends, attached the sidebar. The endplug is attached to the plug casing with 3 screws with PH000 heads (although PH00 will probably do too.) Note that those screws were only very weakly magnetic, so don’t trust them to stay on a magnetized screwdriver.
Disk pack ahoy!
That pin you see on the drive disk sits on a spring. Two washers although it looks like just one.
Disk pack.
Showing drive pin holes in drive disk, with gate pointing to the upper left, although obviously no pin on this side.
Drive pin holes.
The disks sit pretty snugly in the casing, and they’re proving hard to remove. Trying to nudge them from the side just tilts them so the sides snag.
Then I thought to push at the drive shaft from the dialer side with a screwdriver, which got got things moving. This disk pack is now going places!
Dial-side drive shaft.
Your friendly neighbourhood drive disk and their trusty pin.
Note that in some of the subsequent comments I’ll be talking about “top” and “bottom” pins. They refer to the orientation the lock is in, in the picture below, so “keyway” (dialerway?) down, and the wide part of the disk goes “down.”
Before I even started taking this apart I was thinking that my smallest screwdriver might not have a thin enough head. It didn’t. And no way am I doing anything to those pins without better tweezers.
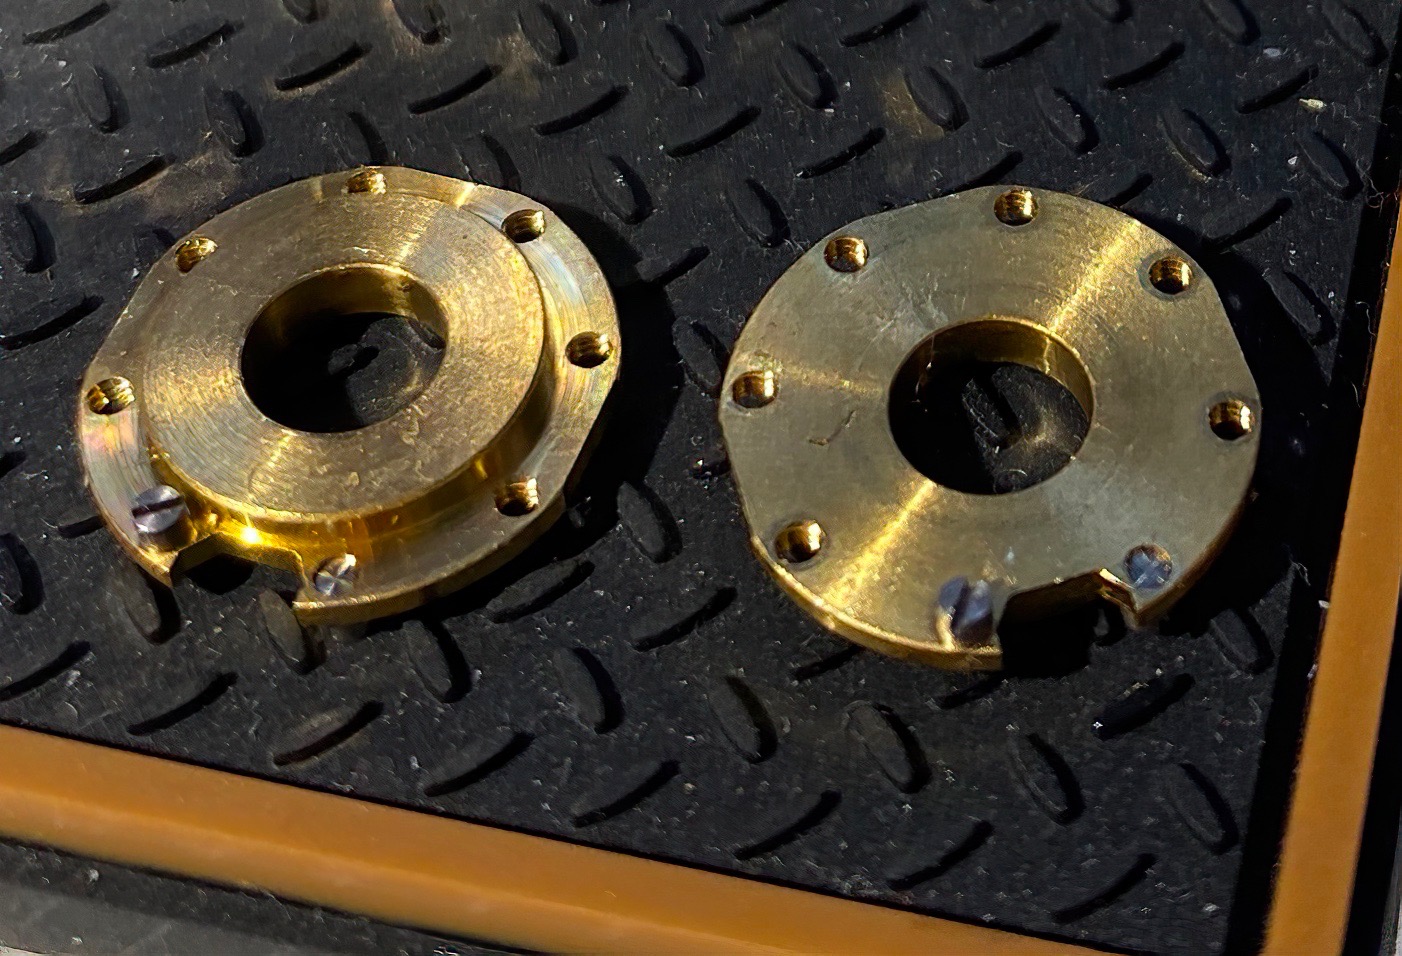
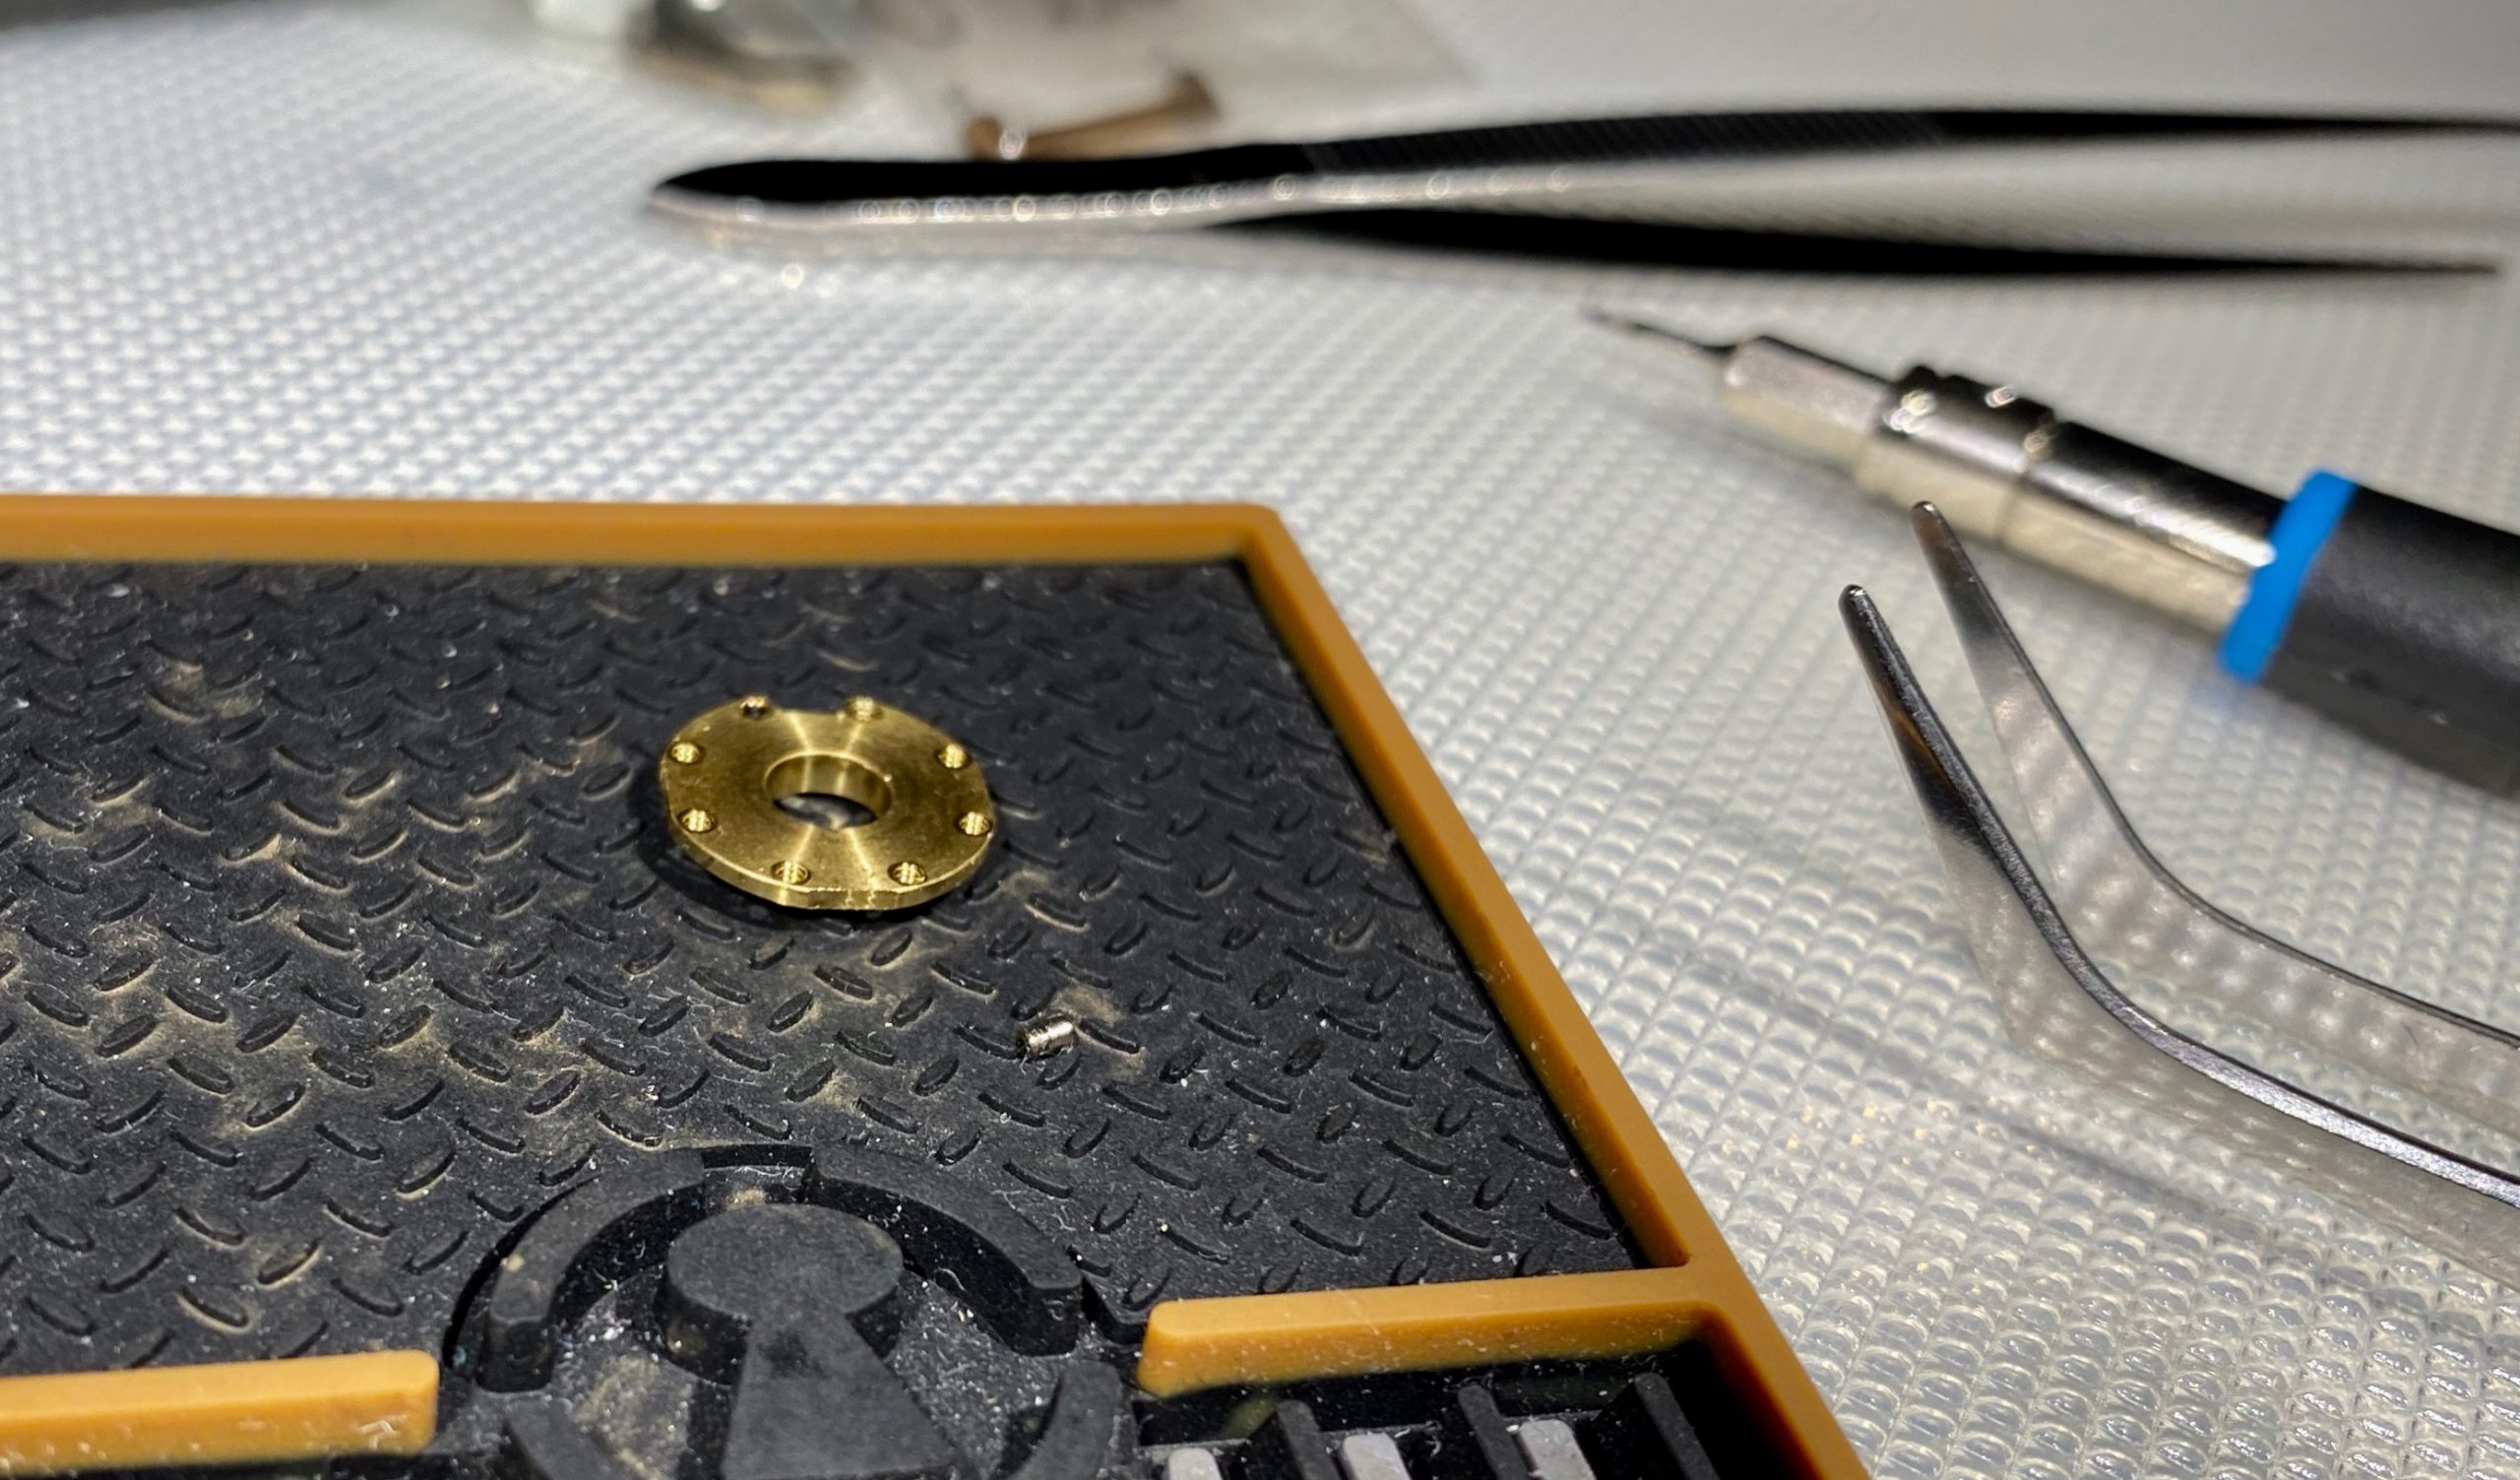
Drive disk.
Circlip washers from hell. Getting those back on will be interesting, but if I manage the pins these should feel like a walk in the park.
Circlip.
Disks.
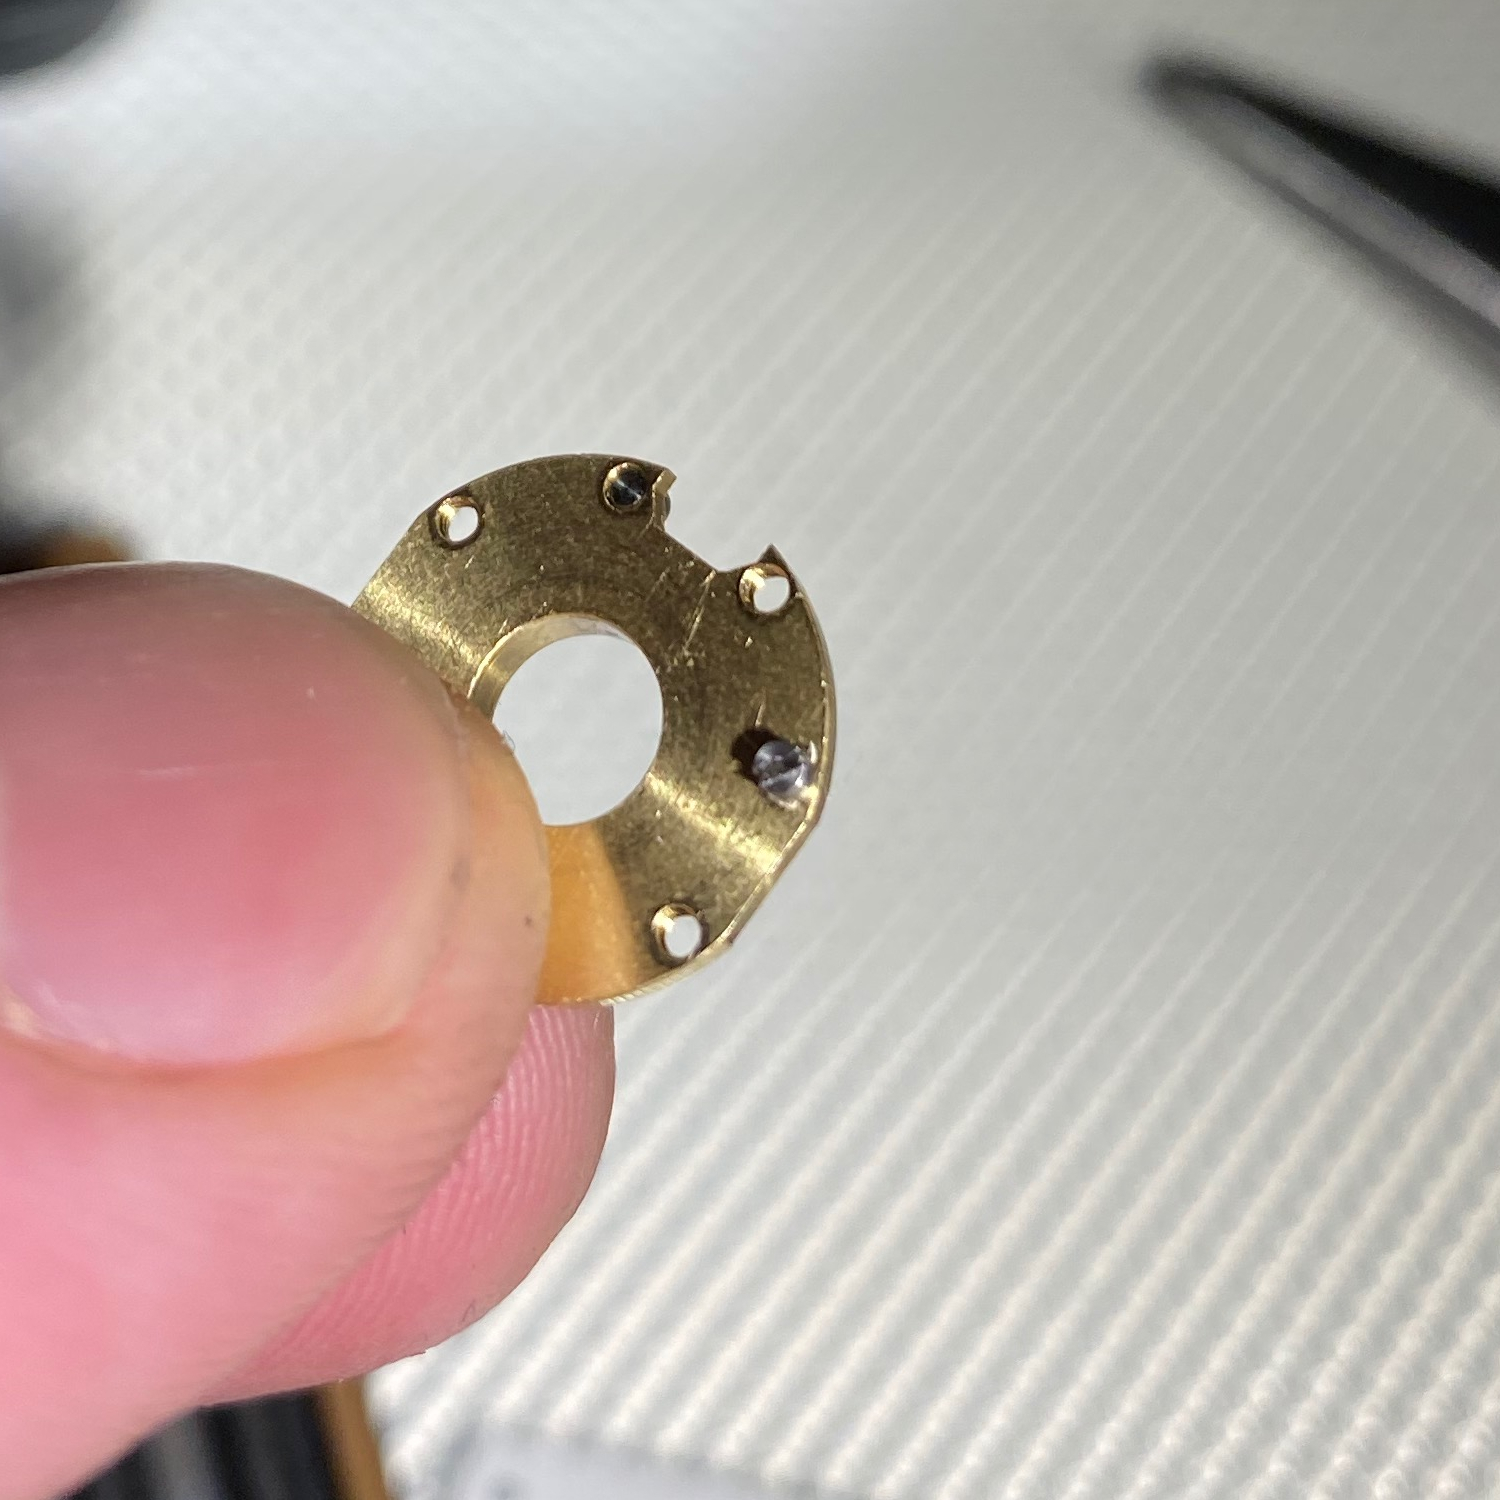
Disks. You can see that the gates are always 90° apart and the pin positions are 45° apart and at the edges of the gates. All disks except 1 (lower right) have 2 pins, and disk 1 only has the top pin (it’s top down in the picture).
The drive pin screws are 1.2mm wide at the head and they’re around 1.9mm long but they’re nontrivial to measure.
The disks were about 1.2cm at the widest part. Unfortunately I forgot to write down the measurements and only realized this after I’d reassembled the lock. Oh well.
Drive disk.
Looking at the pins got me wondering if the combo change is supposed to be done so that you can change the positions of both of the pins, or is the top pin fixed? Why I thought it’d be the top pin (i.e. the one sticking up towards the drive disk in this orientation) was that the drive disk only has a bottom disk and it has pin holes, so its pin likely isn’t fixed.
7 gate positions per disk sounds very small compared to the RKS doc, though, but who knows if that applies to this version. The other option would be that both pins are actually movable, but I’m not entirely sure how much that’d increase the keyspace. We’ll hopefully find out once I get my grubby mitts on a smaller screwdriver.
Close-up of a disk.
Closeup of a disk, “bottom” side up. The lock is currently on a “factory default” pinning where both pins are next to the gate.
When you go all disks left / right and spin the core, you can see that the gates just follow each other at regular intervals, i.e. each separated by two drive pin widths. That’s actually surprisingly hard to see when not moving the core because you generally see at most 3 gates and even then one of them’s under the side bar, so it took me a while to realize the gates were just sequential even after having figured out the combination.
Intermission
“But obrotund, how could you not notice a rising sequence? Shouldn’t it be obvious if it’s something like L0 R6 L12 … ?”.
If you go ADL to 0 and then continue left, the gate for each disk (from the drive down to 1) will be at roughly L0, L6, L12, L17, L23, L29 – fairly obvious they’re sequential when done like that. Since the lock came with no instructions or anything, I eyeballed the correct combo to be 6x L29 5x R40 4x L17 3x R19 2x L6 R0; that didn’t exactly scream “sequential” at me.
To see how much of an effect the stacking of drive pins has on something with 6 wheels we can go ADL 0 and then start dialing right so that we note the index where each disk gets picked up, and get something like:
d5: R2 d4: R5, after going around once, of course. So already at d4, pickup is happening 5 indices earlier because there’s now a bunch of drive pins there d3: R10 d2: R15 d1: R20
So the difference is 20 increments at the last disk, which is about 30% of the dial’s range of 0 – 63. To drive the point home, the correct combination but starting from R is 6x R49 5x L23 4x R30 3x L12 2x R10 L0.
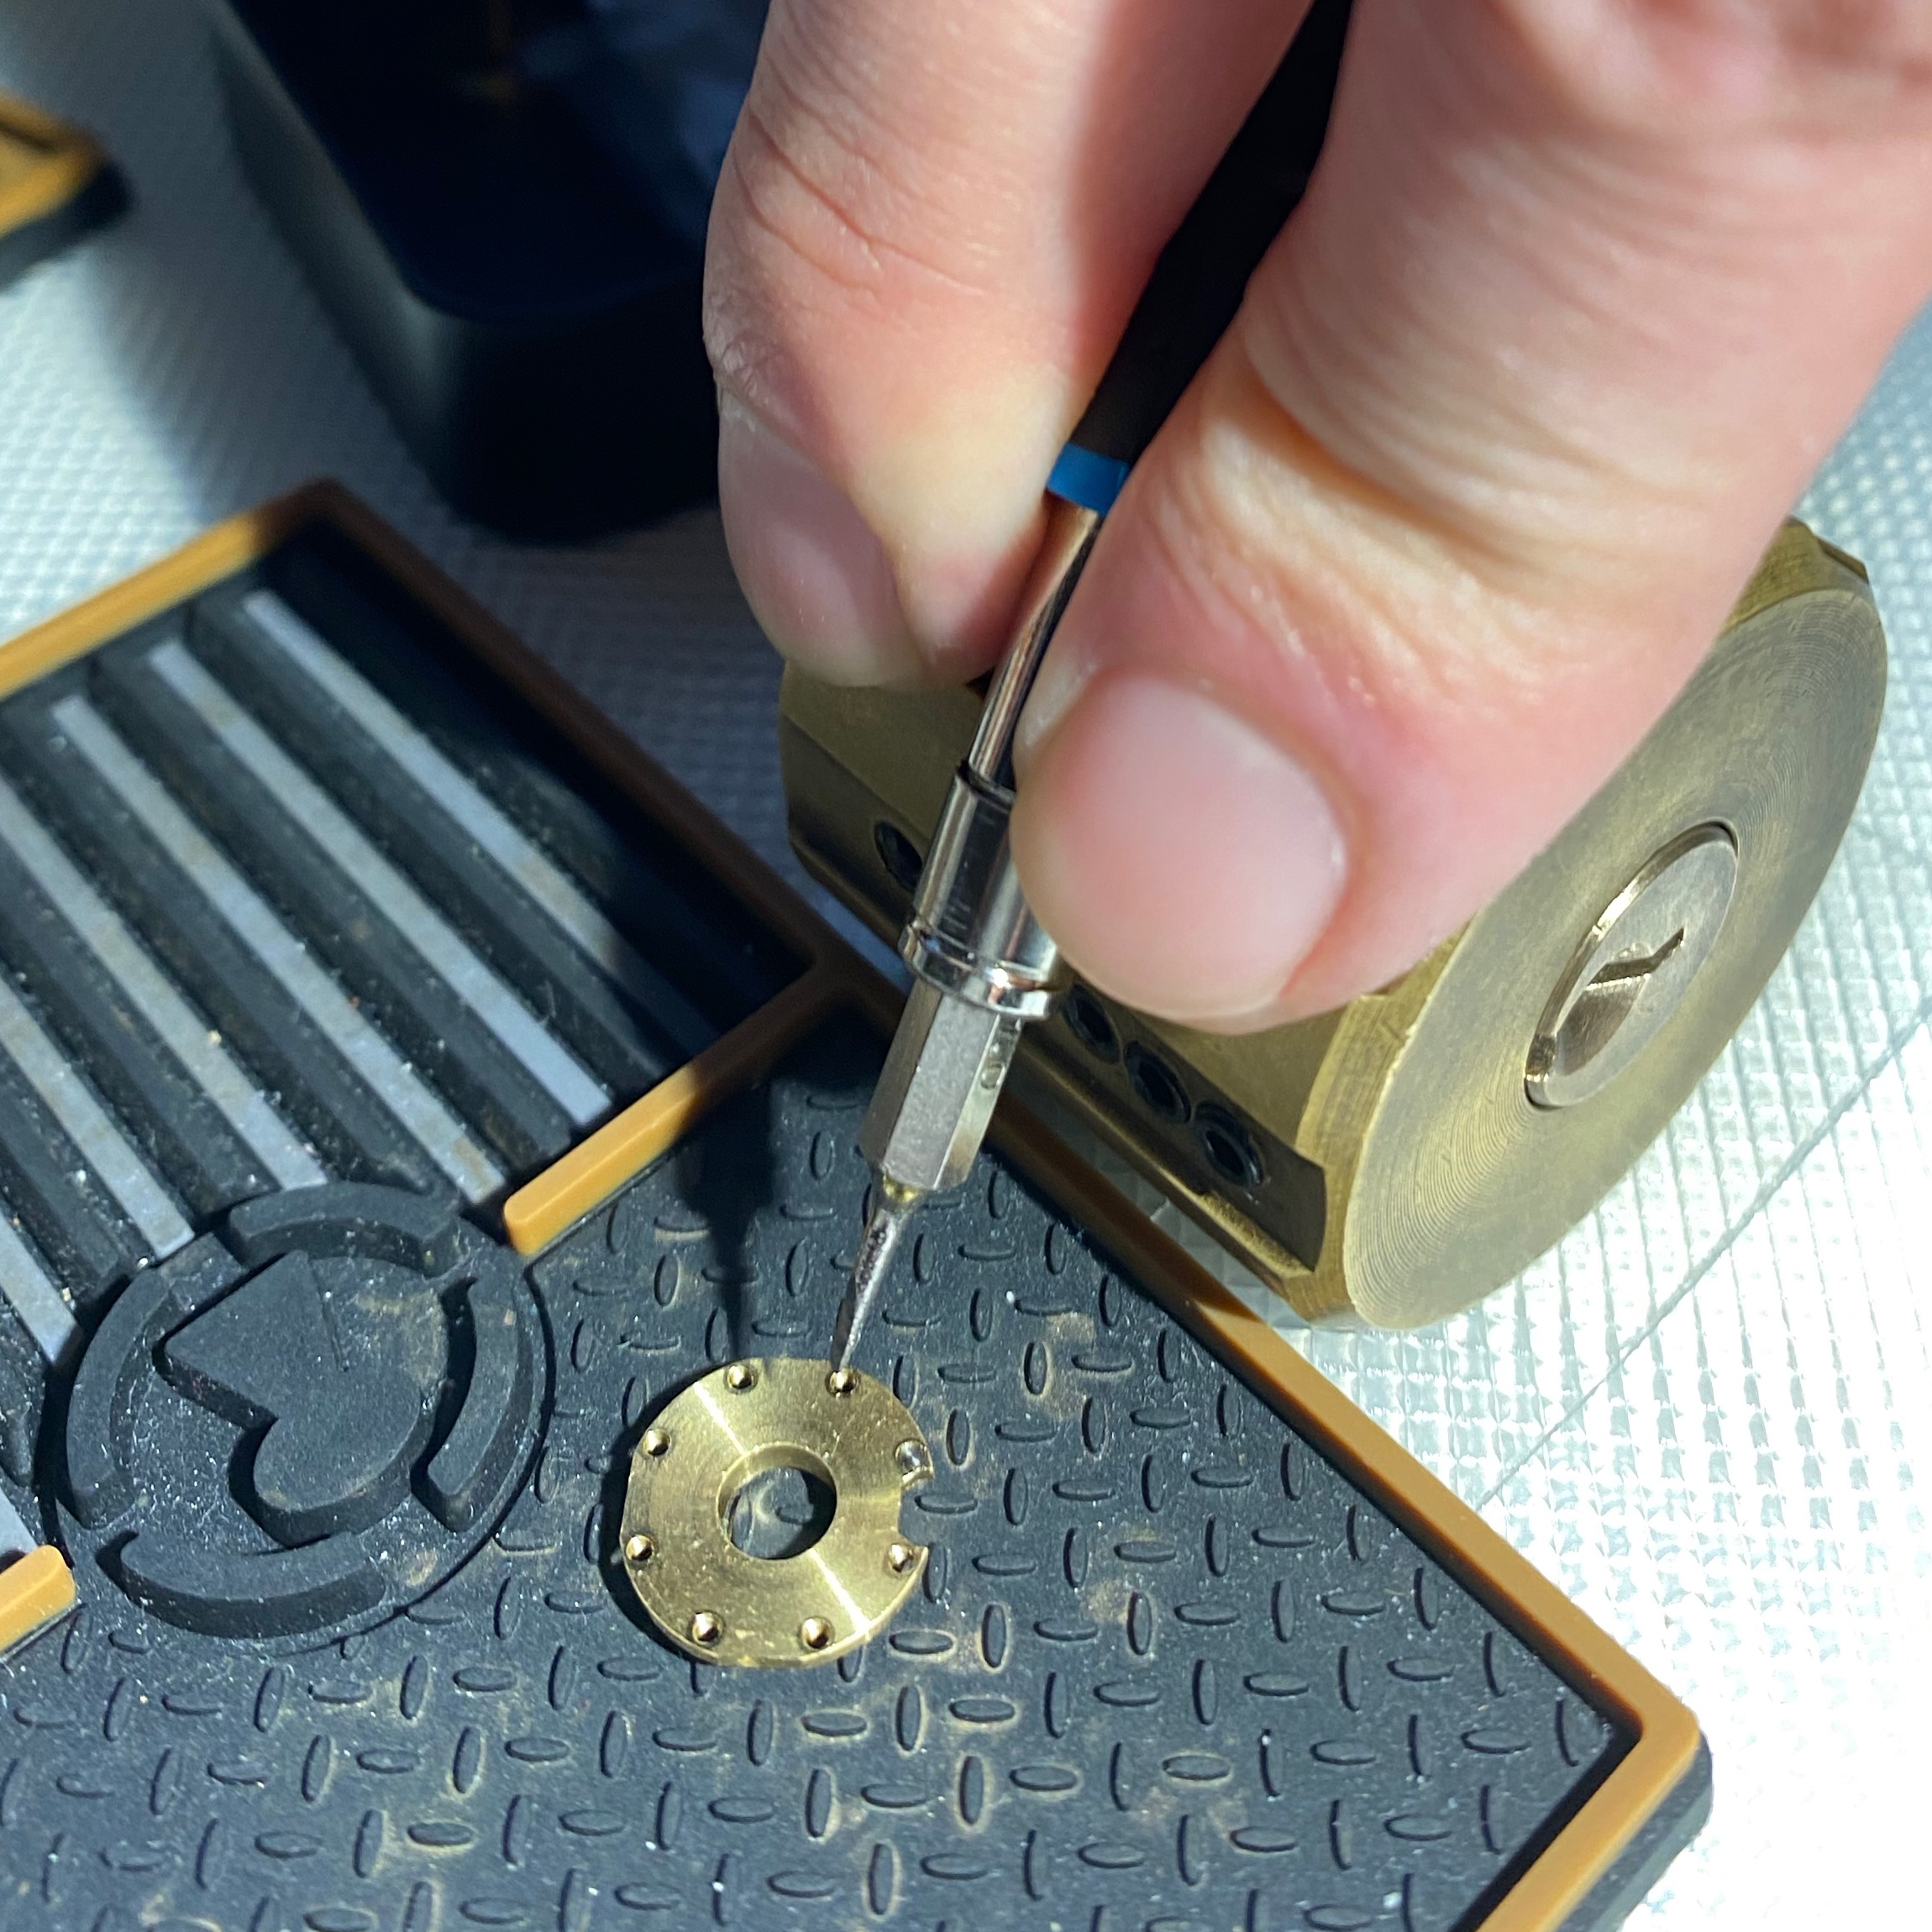
Act II, the Screws
So, now I was ready to actually start dealing with the drive pin screws. Note that if you happen to have an RKS or manage to get your hands on one, this probably won’t be as difficult for you, but I’ve got a tremor that makes dealing with screws this small a bit of a challenge. Luckily for me I enjoy challenges, so I headed over to a hardware store and bought a set with the smallest screwdrivers they had, some tweezers, and a “helping hand” that I knew to have a fantastically useless base but with alligator clips and such that I could put to use.
Note that you’ll really want to have good angled tweezers; you likely won’t be using them for the drive pin screws, but the washers between disks and then the 3 . The ones in the picture were cheap but extremely annoying to use and stuff had a tendency of slipping out of them, and ended up getting Tamiya’s angled tweezers the next day.
You’ll definitely want a magnetized screwdriver; I used a neodymium magnet I had lying around.
Easy part’s done, so now for the hard part. I held the disk in locking tweezers and somehow managed to get the screw in on the first try. Victory!
Armed with a false sense of confidence, I attacked the next disk. The same locking tweezer technique failed to work. I tried it a few times and after almost losing the screw because the disk had a tendency of starting to slip from the tweezers, I changed tactics.
Tools.
Disk with screw.
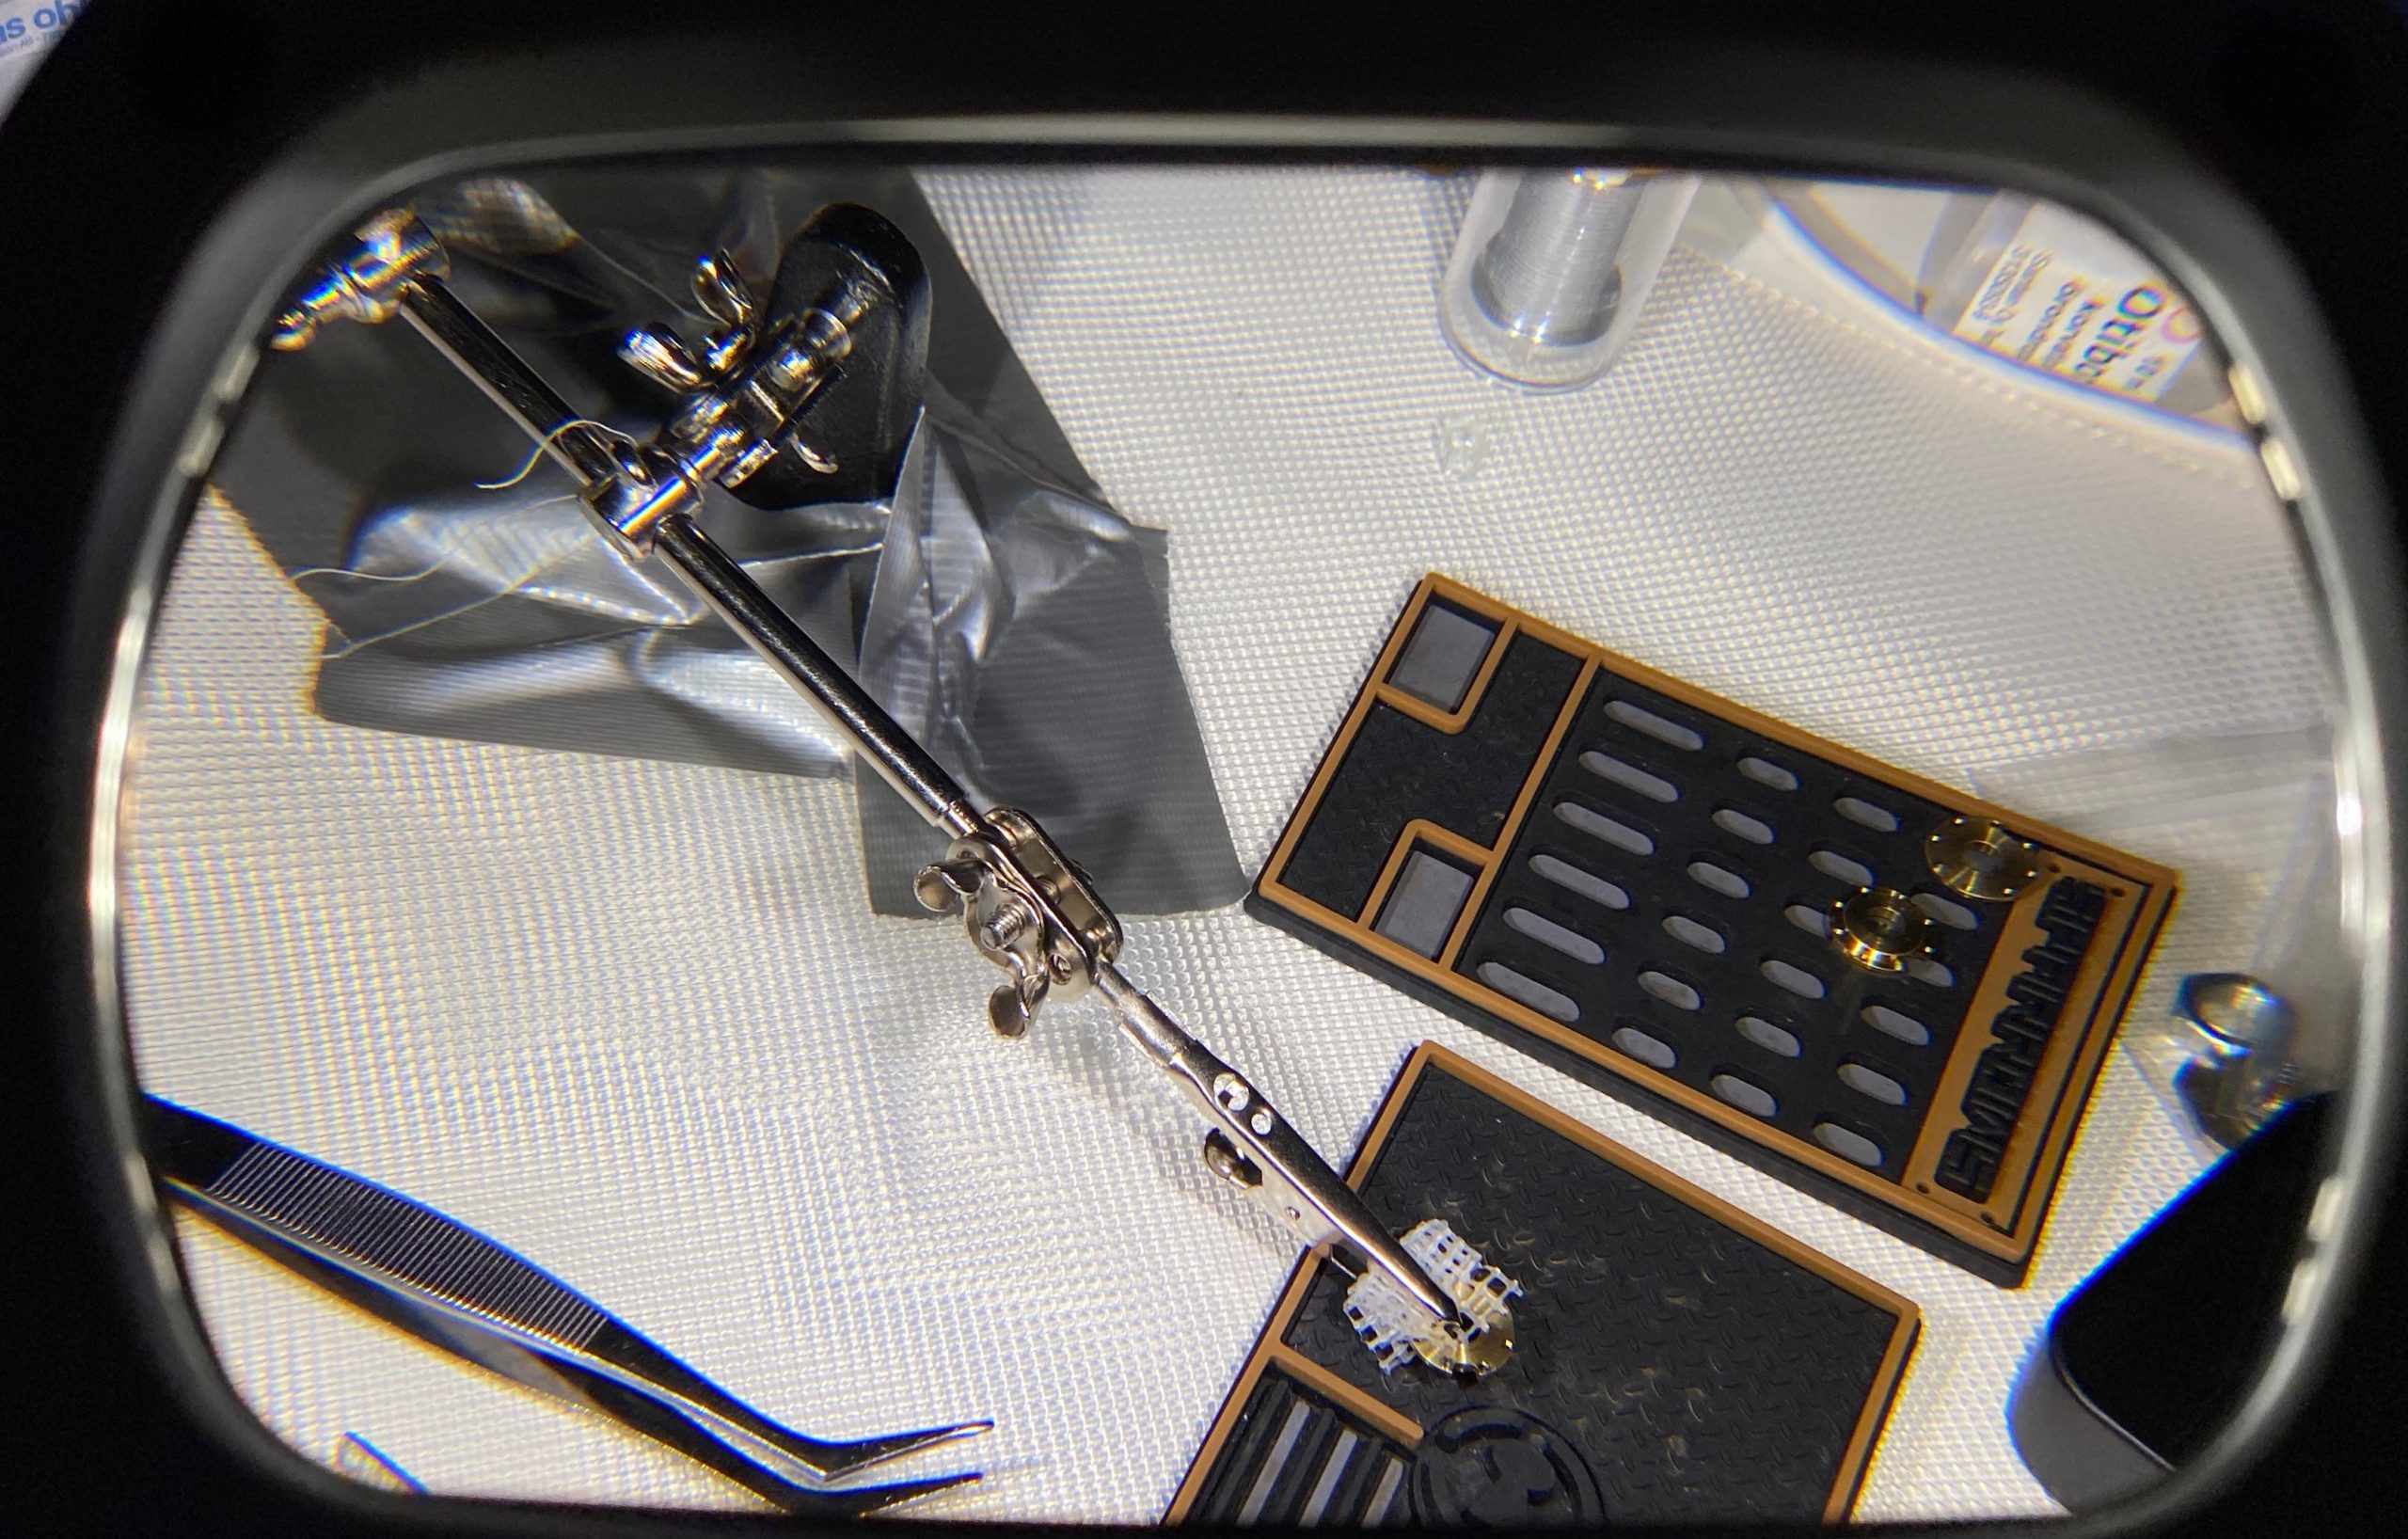
Helping hand time. As said, the base is absolute crap so I duct taped it to the desk. That worked about as well as you’d expect.
Helping hand.
Helping hand.
I was extremely paranoid about losing parts, so I kept everything in minigrip bags that I made sure to close.
Bags.
OK, so that was a no-go. I headed over to Discord to see if anybody had any advice.
NKT gave me the idea of using something cylindrical for stablizing the screwdriver, and I gave that a go. I grabbed my Revolver, stuck it to the table with some two-sided mounting tape and tried the concept out – this could work.
Narrator: “it didn’t.”
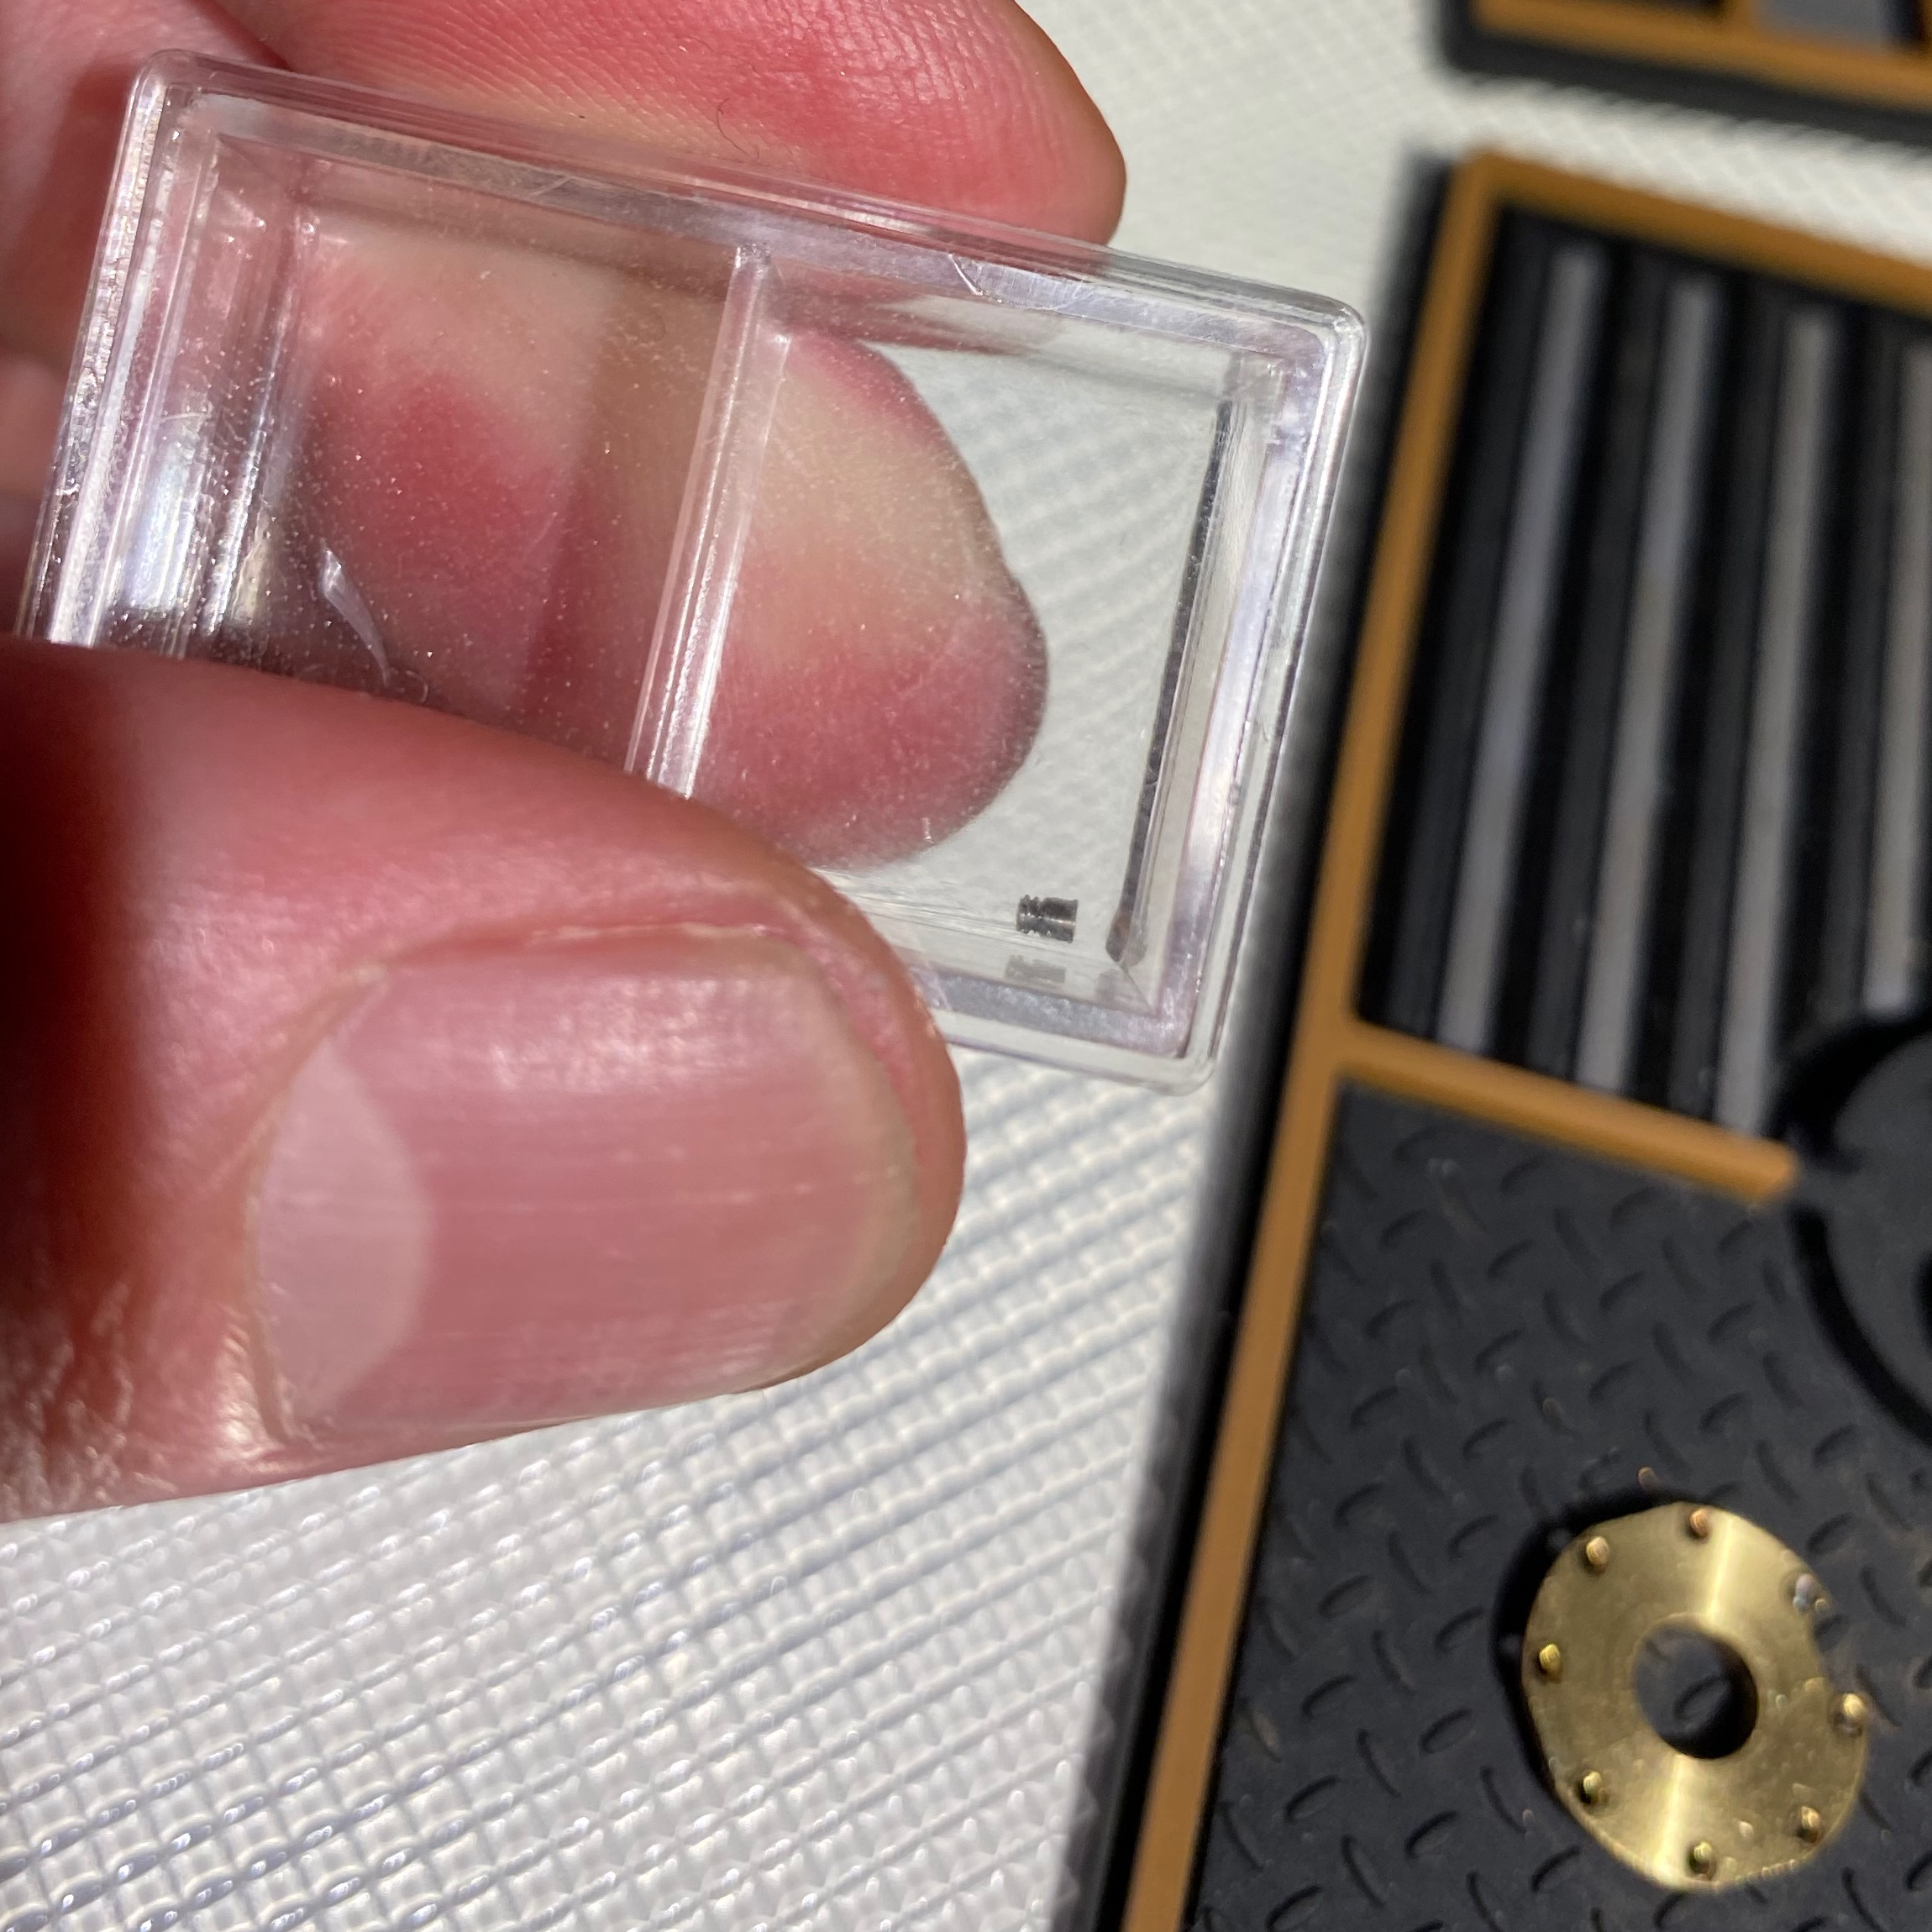
At that point I gave up for the day and put the screw in the naughty box.
Revolver.
Naughty box.
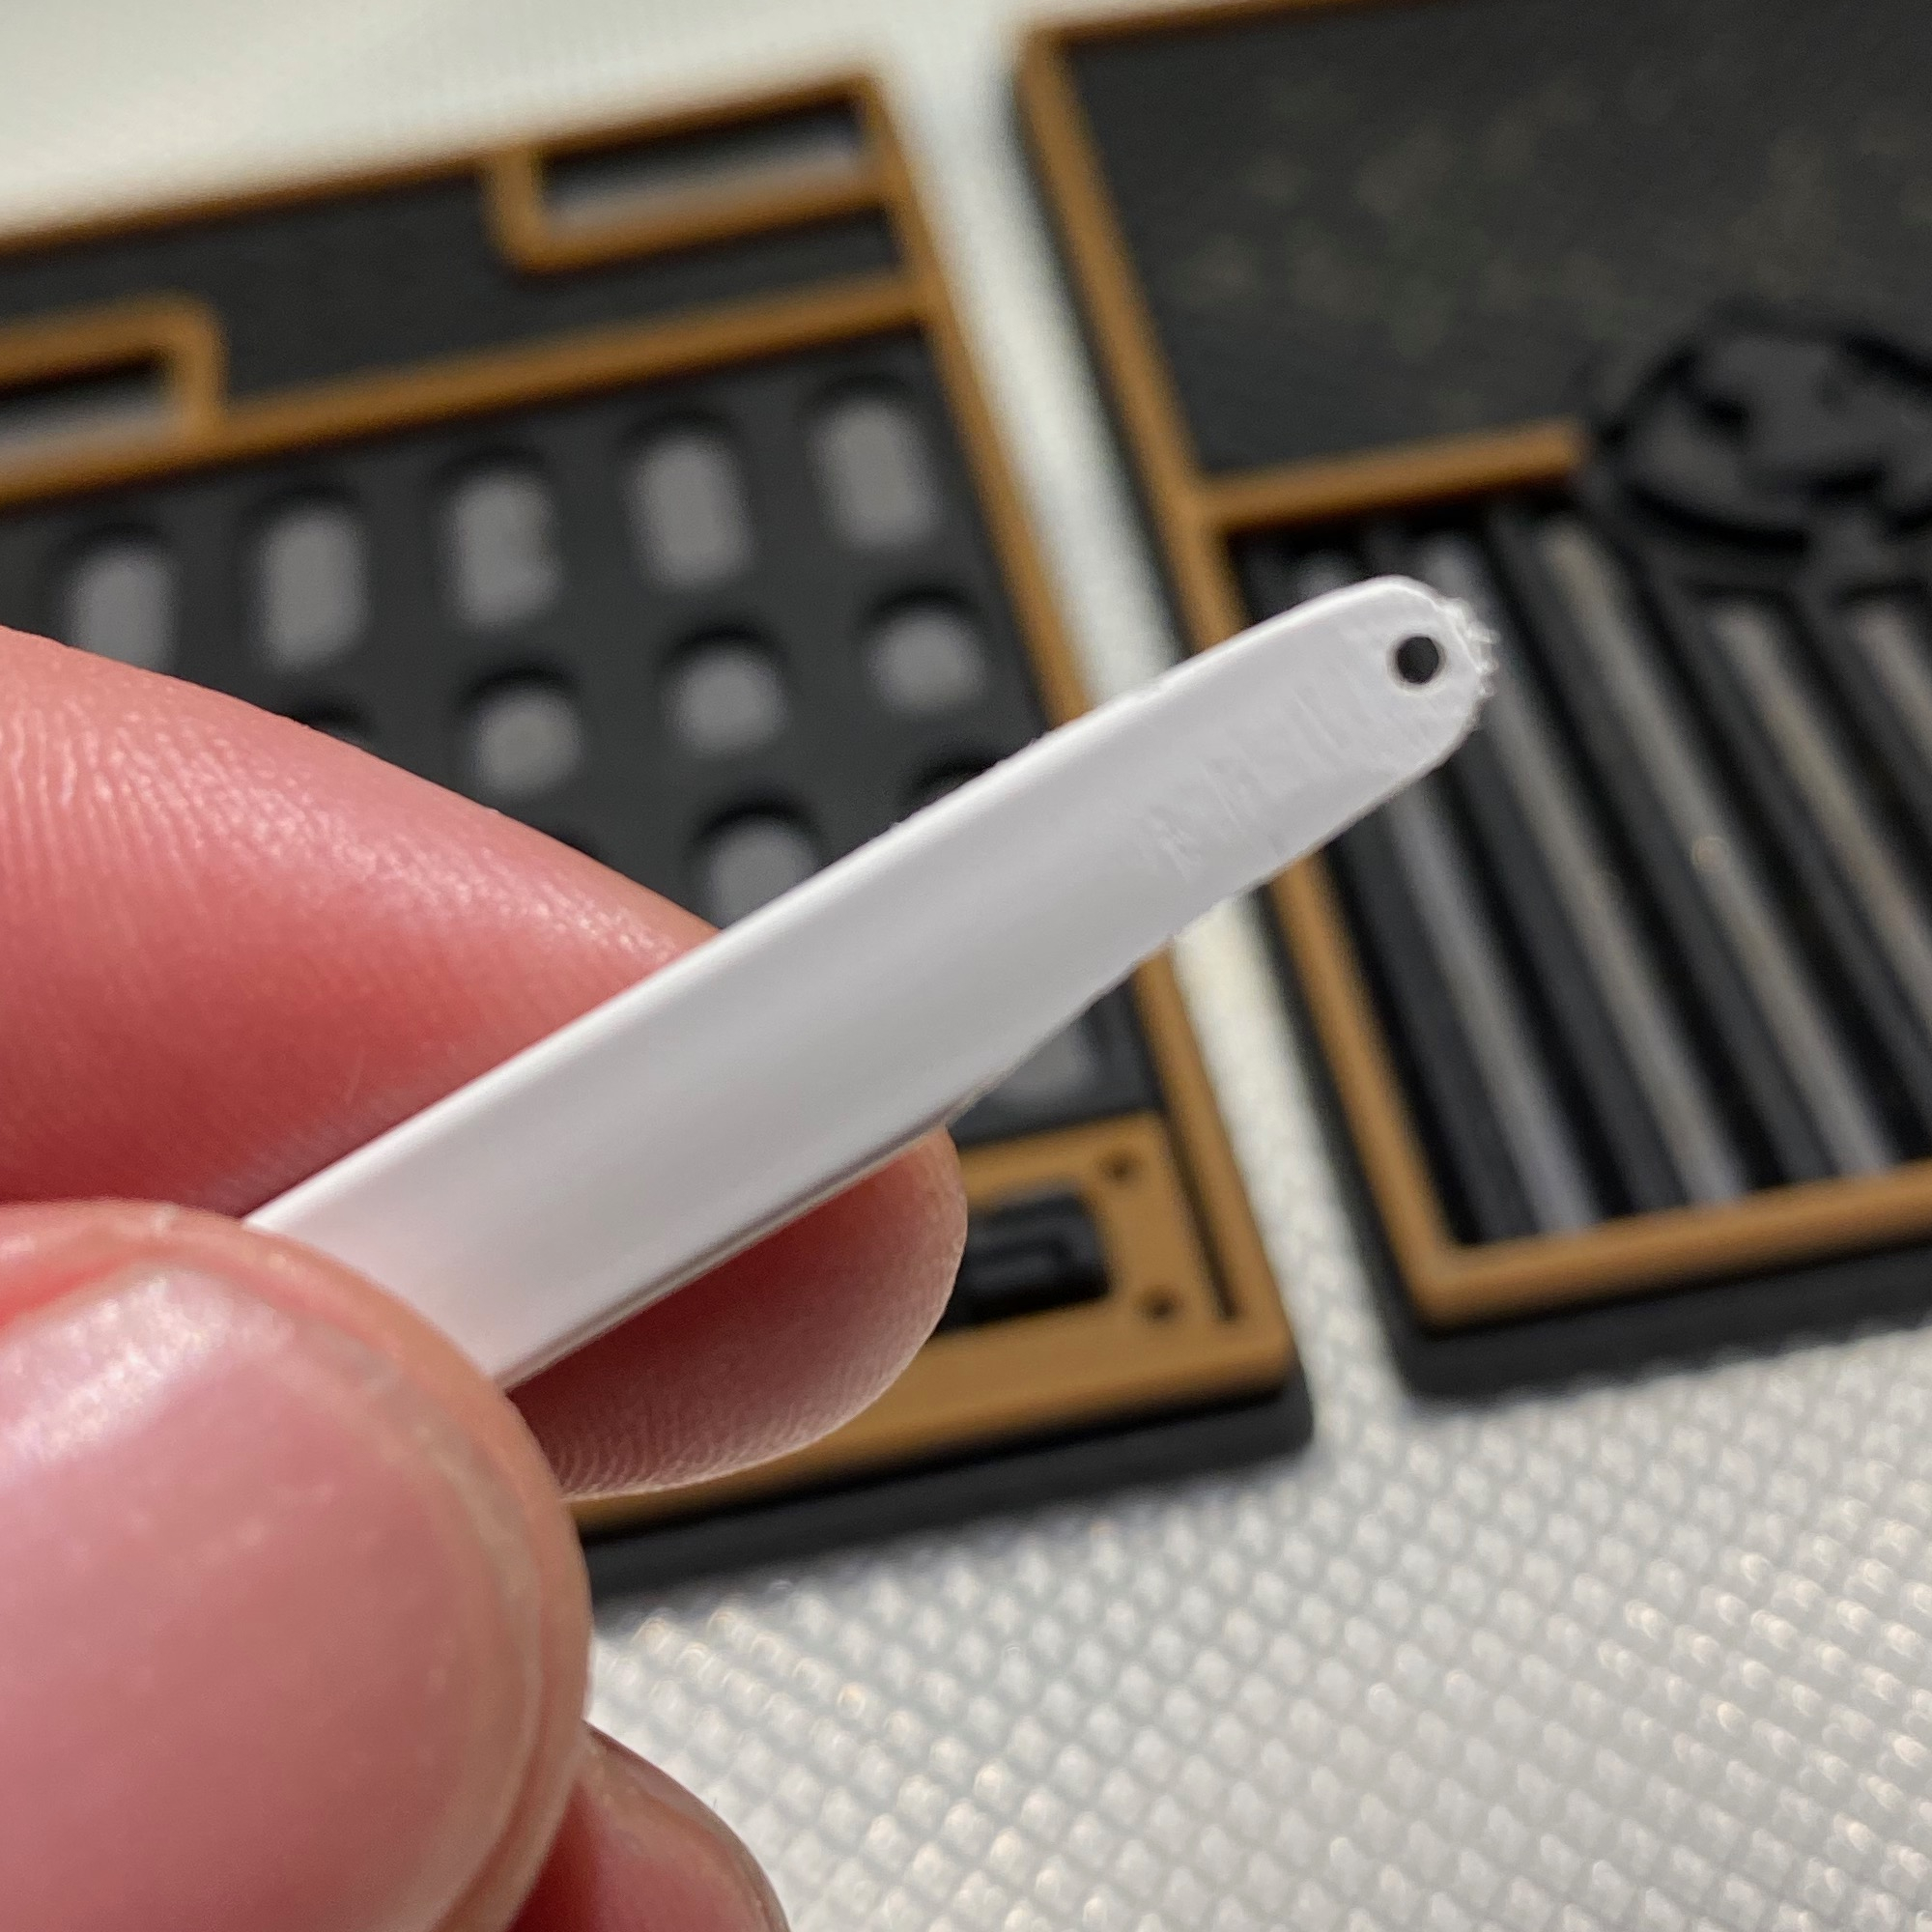
On Monday I headed over to a hobby store, and the guy there suggested drilling a hole into a piece of plastic and then using that as a screw holder, and it sounded like it might work so I decided to give it a go. I got a 1.6mm thick rod of plastic, a 1.2mm drill bit and a handle for it, and the Tamiya tweezers.
After some experimenting it looked like the plastic was just a bit too thick (should have gone with eg. 1.2mm) and it was hard to see if I was anywhere near the screw hole, so I thinned it a bit with a file and rounded the head. In hindsight I should probably have taken even more of the head off. While it was easy to get the screw onto the plastic “handle”, getting the screw positioned properly was a pain and the screw had a tendency of falling out, but I suspect a 1.1mm bit would have already been too small. I tried different ways of clamping the disk in place but eventually gave up. I was starting to doubt I’d get this done.
Plastic screw holder.
Act III, Rustling up Some Screws
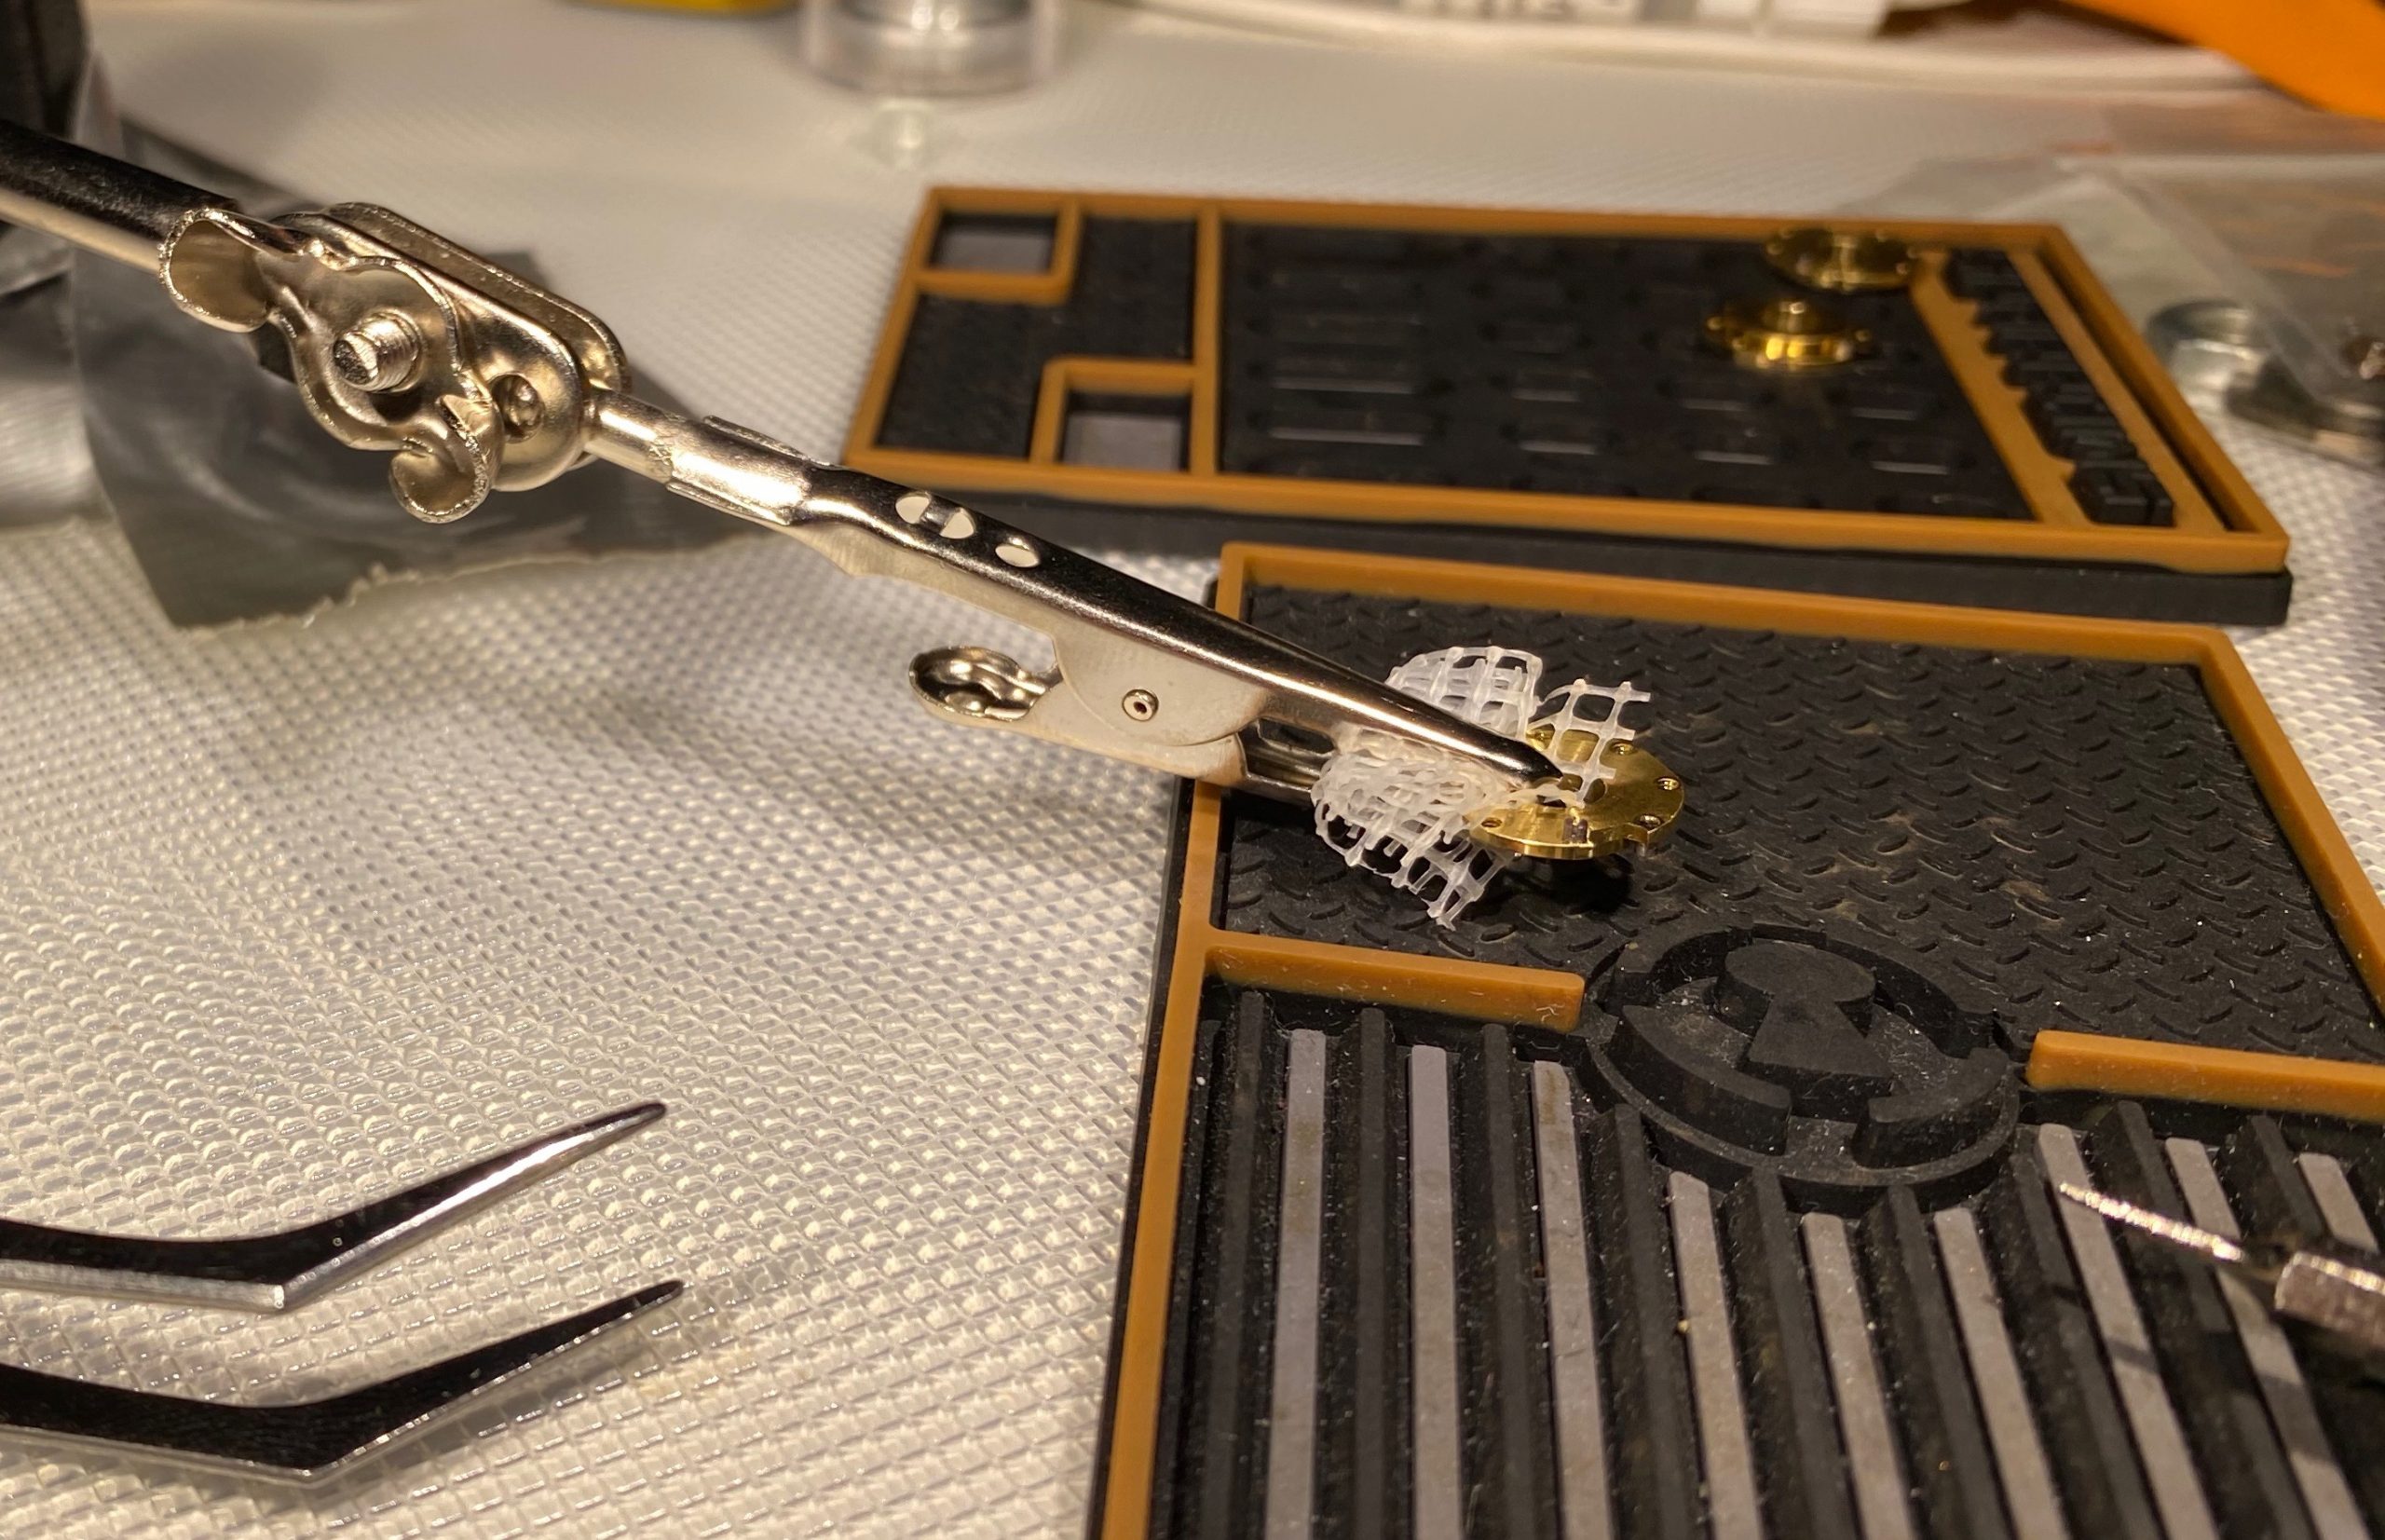
On Tuesday I asked around on Discord if people had any further ideas, and legendofthesamurai suggested using thin copper wire to make a lasso around the threads of the screw and then using that wire as a handle. That’d solve the problem of not being able to see where I was putting the screw, and I could use the plastic tool to hold the currently detached screw for lassoing.
After I had the screw in the lasso, it was downright easy to get it in the disk.
Success.
OK, not so easy that I wanted to do all disks so I left one at the default position, but I did change the pin on the drive disk, which was challenging due to the drive shaft.
Getting the washers back in took me a while, and I don’t think I could have done it without two tweezers, but I eventually got there. The last step was tightening those 3 screws in the plug casing, but they were big enough that I could hold them with the tweezers to screw them in, so that was an absolute breeze. Used a 1.3mm hex head to reattach the loose screw on the endplug, and plopped the sidebar back on.
And there we have it. 3 days later I have an assembled lock again.
It does seem like there’s a little more friction than there used to be; I think I dinged some of the circlip washers as I was putting them back in, but there’s no way I’m popping it open in a while and not much I could do about those washers anyhow. I put very small amounts of PTFE-based lock oil between the disks which helped a lot.
In 2019 Jan-Willem started with am odd collection. Not the locks, nor the keys, just the pins from a pin tumbler. Pins are in a lock and make them function. However, the pins are only observable when the owner decides to gut the lock or create a cutaway. The idea was simple: Create a collection/archive of pin tumbler pins and their keys. This required a proper way to store the pins.
To store the pins many different boxes have been tried. After many failed attempts Jan-Willem stumbled upon a hobby not to dissimilar from our own: coin collecting! The value of one €2 coin is just €2 to a consumer. While the collector is looking for a 1st edition misprint from Monaco, and not just any coin.
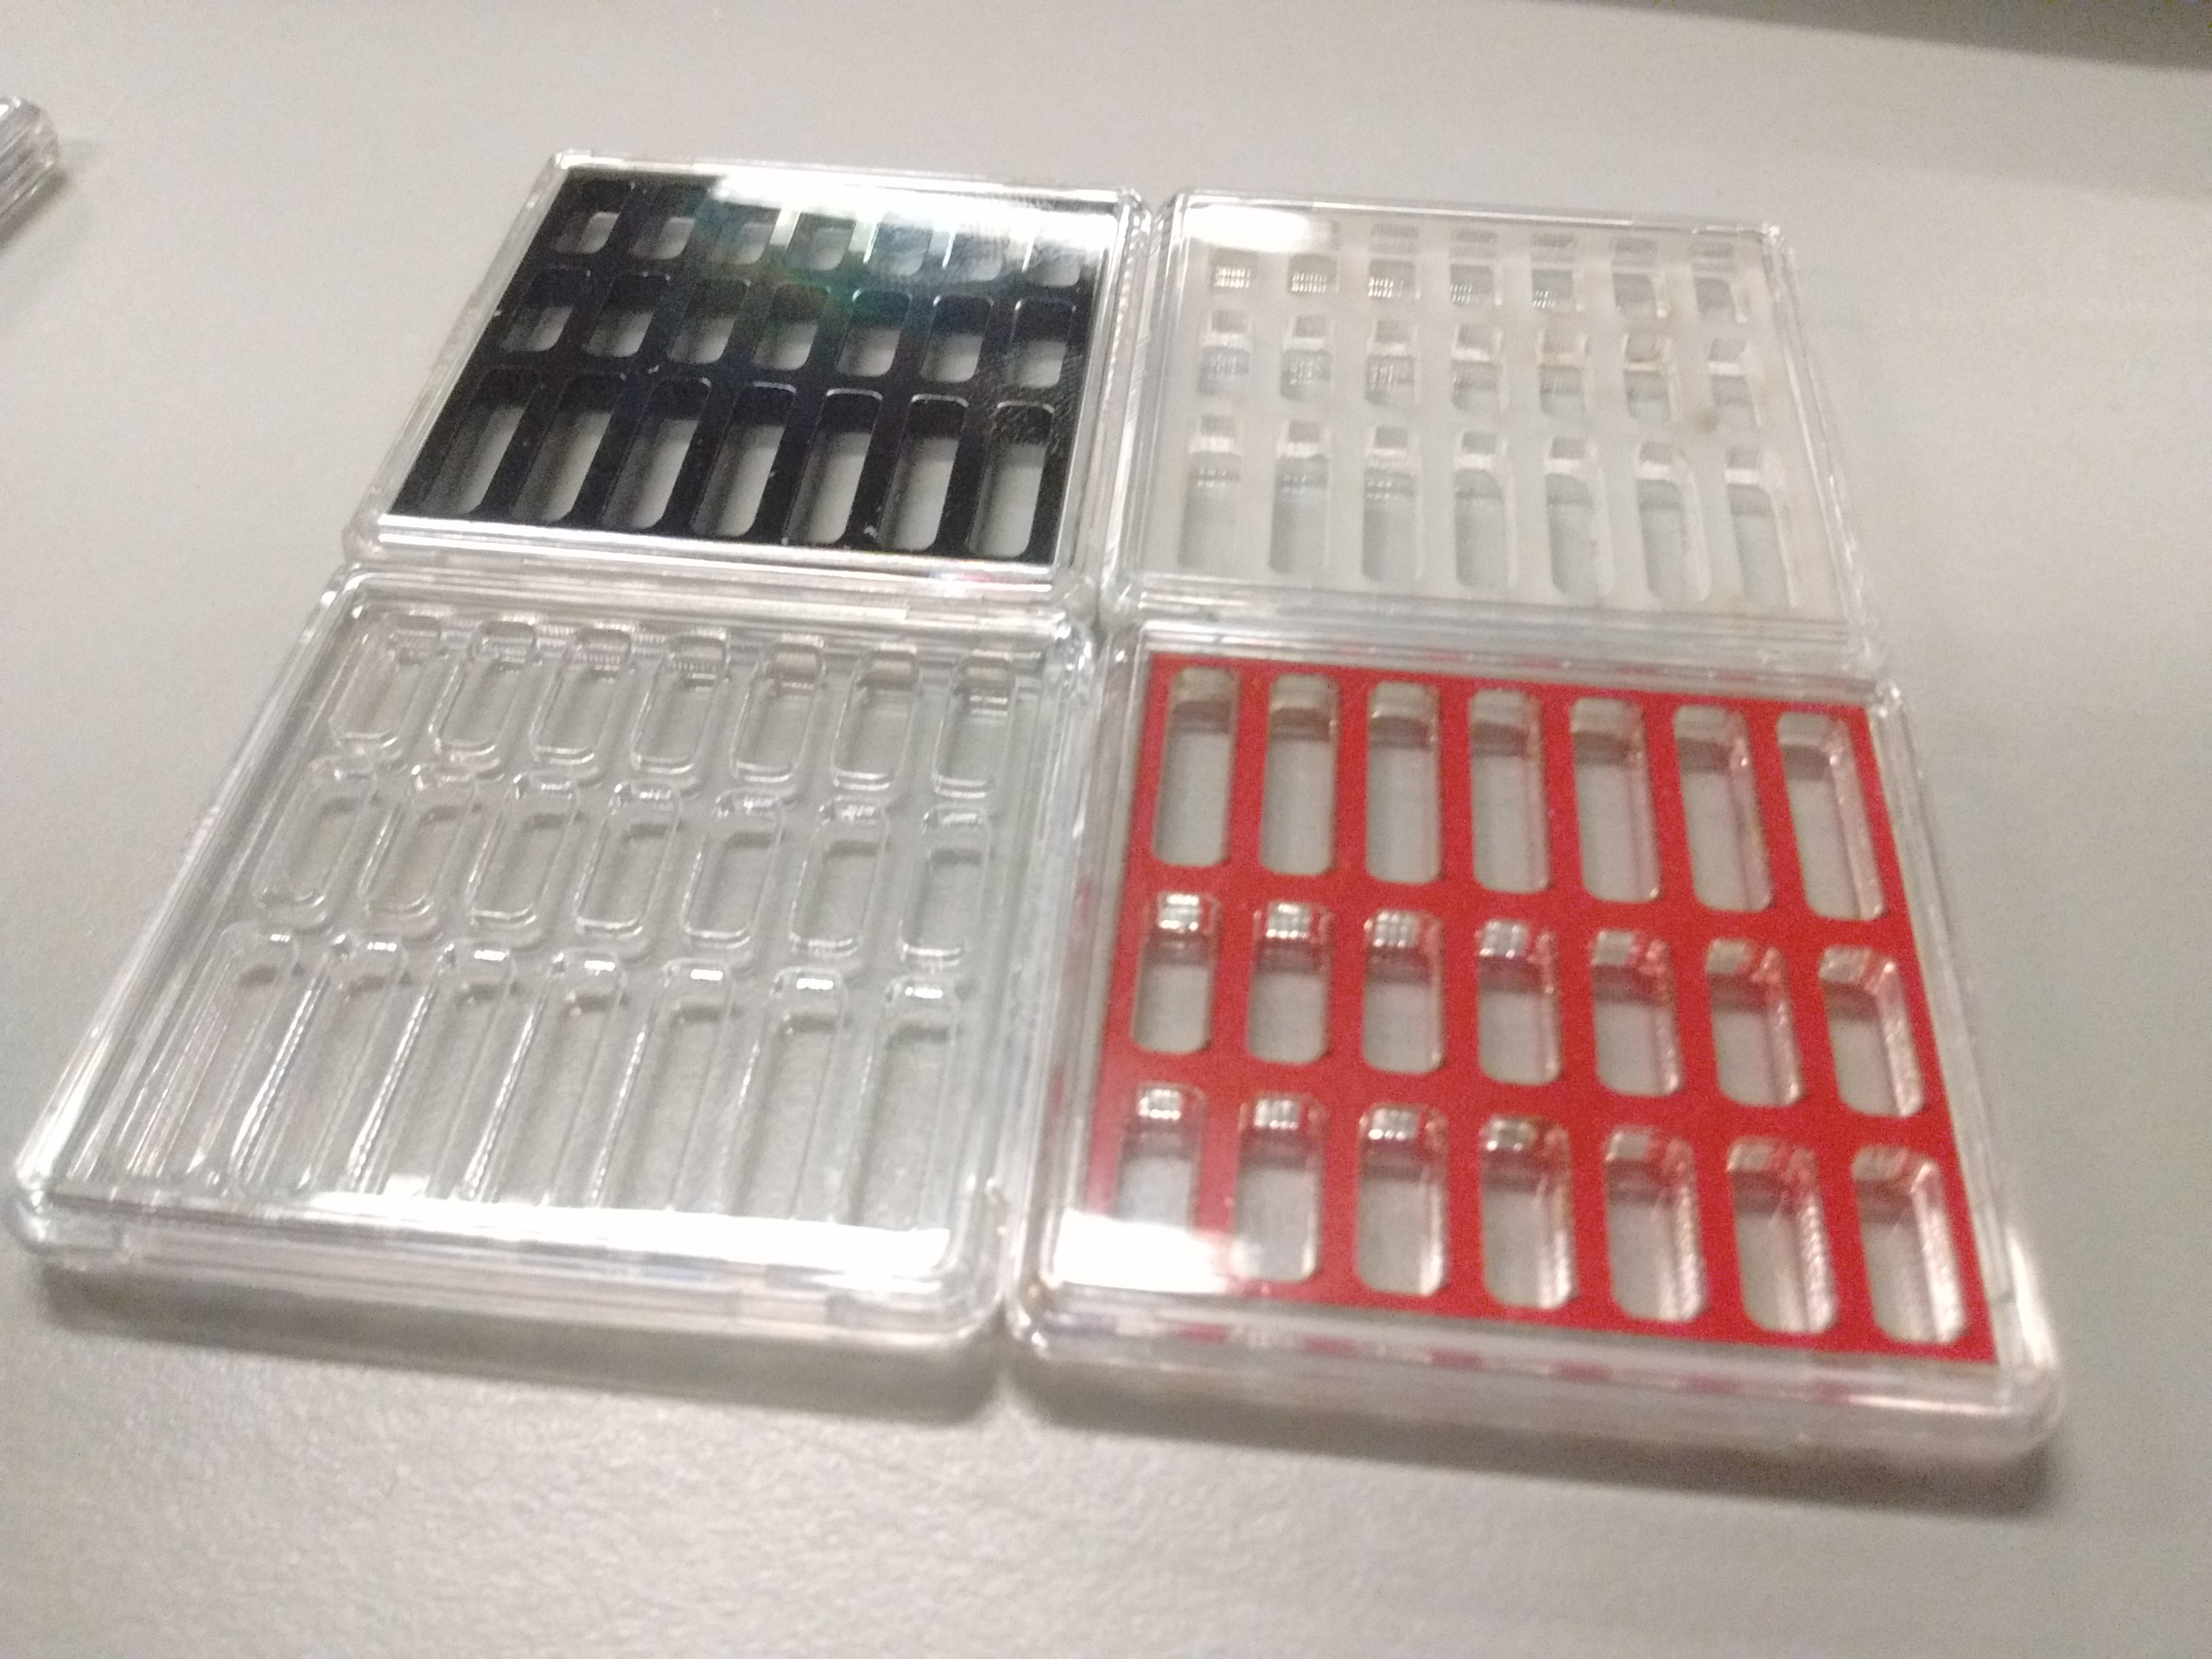
Coins are often stored in albums, either with or without protection. The lowest quality coins protection are two pieces of plastic film and a cardboard cutout. Often glued or stapled together. While the high end coins are with a certificate sealed in an acrylic case. Leuchtturm makes coin boxes in between the two, and at a reasonable price and the inserts are DIY, lasercut acrylic.
First attempt with Leuchtturm boxes.
To store these boxes it was decided to use business card holders, this did not go as plan and required custom holders. First made from acrylic and the second version from wood. Fifty sets of pins are created and thirty are added to the album. This is where the project was stuck for a year.
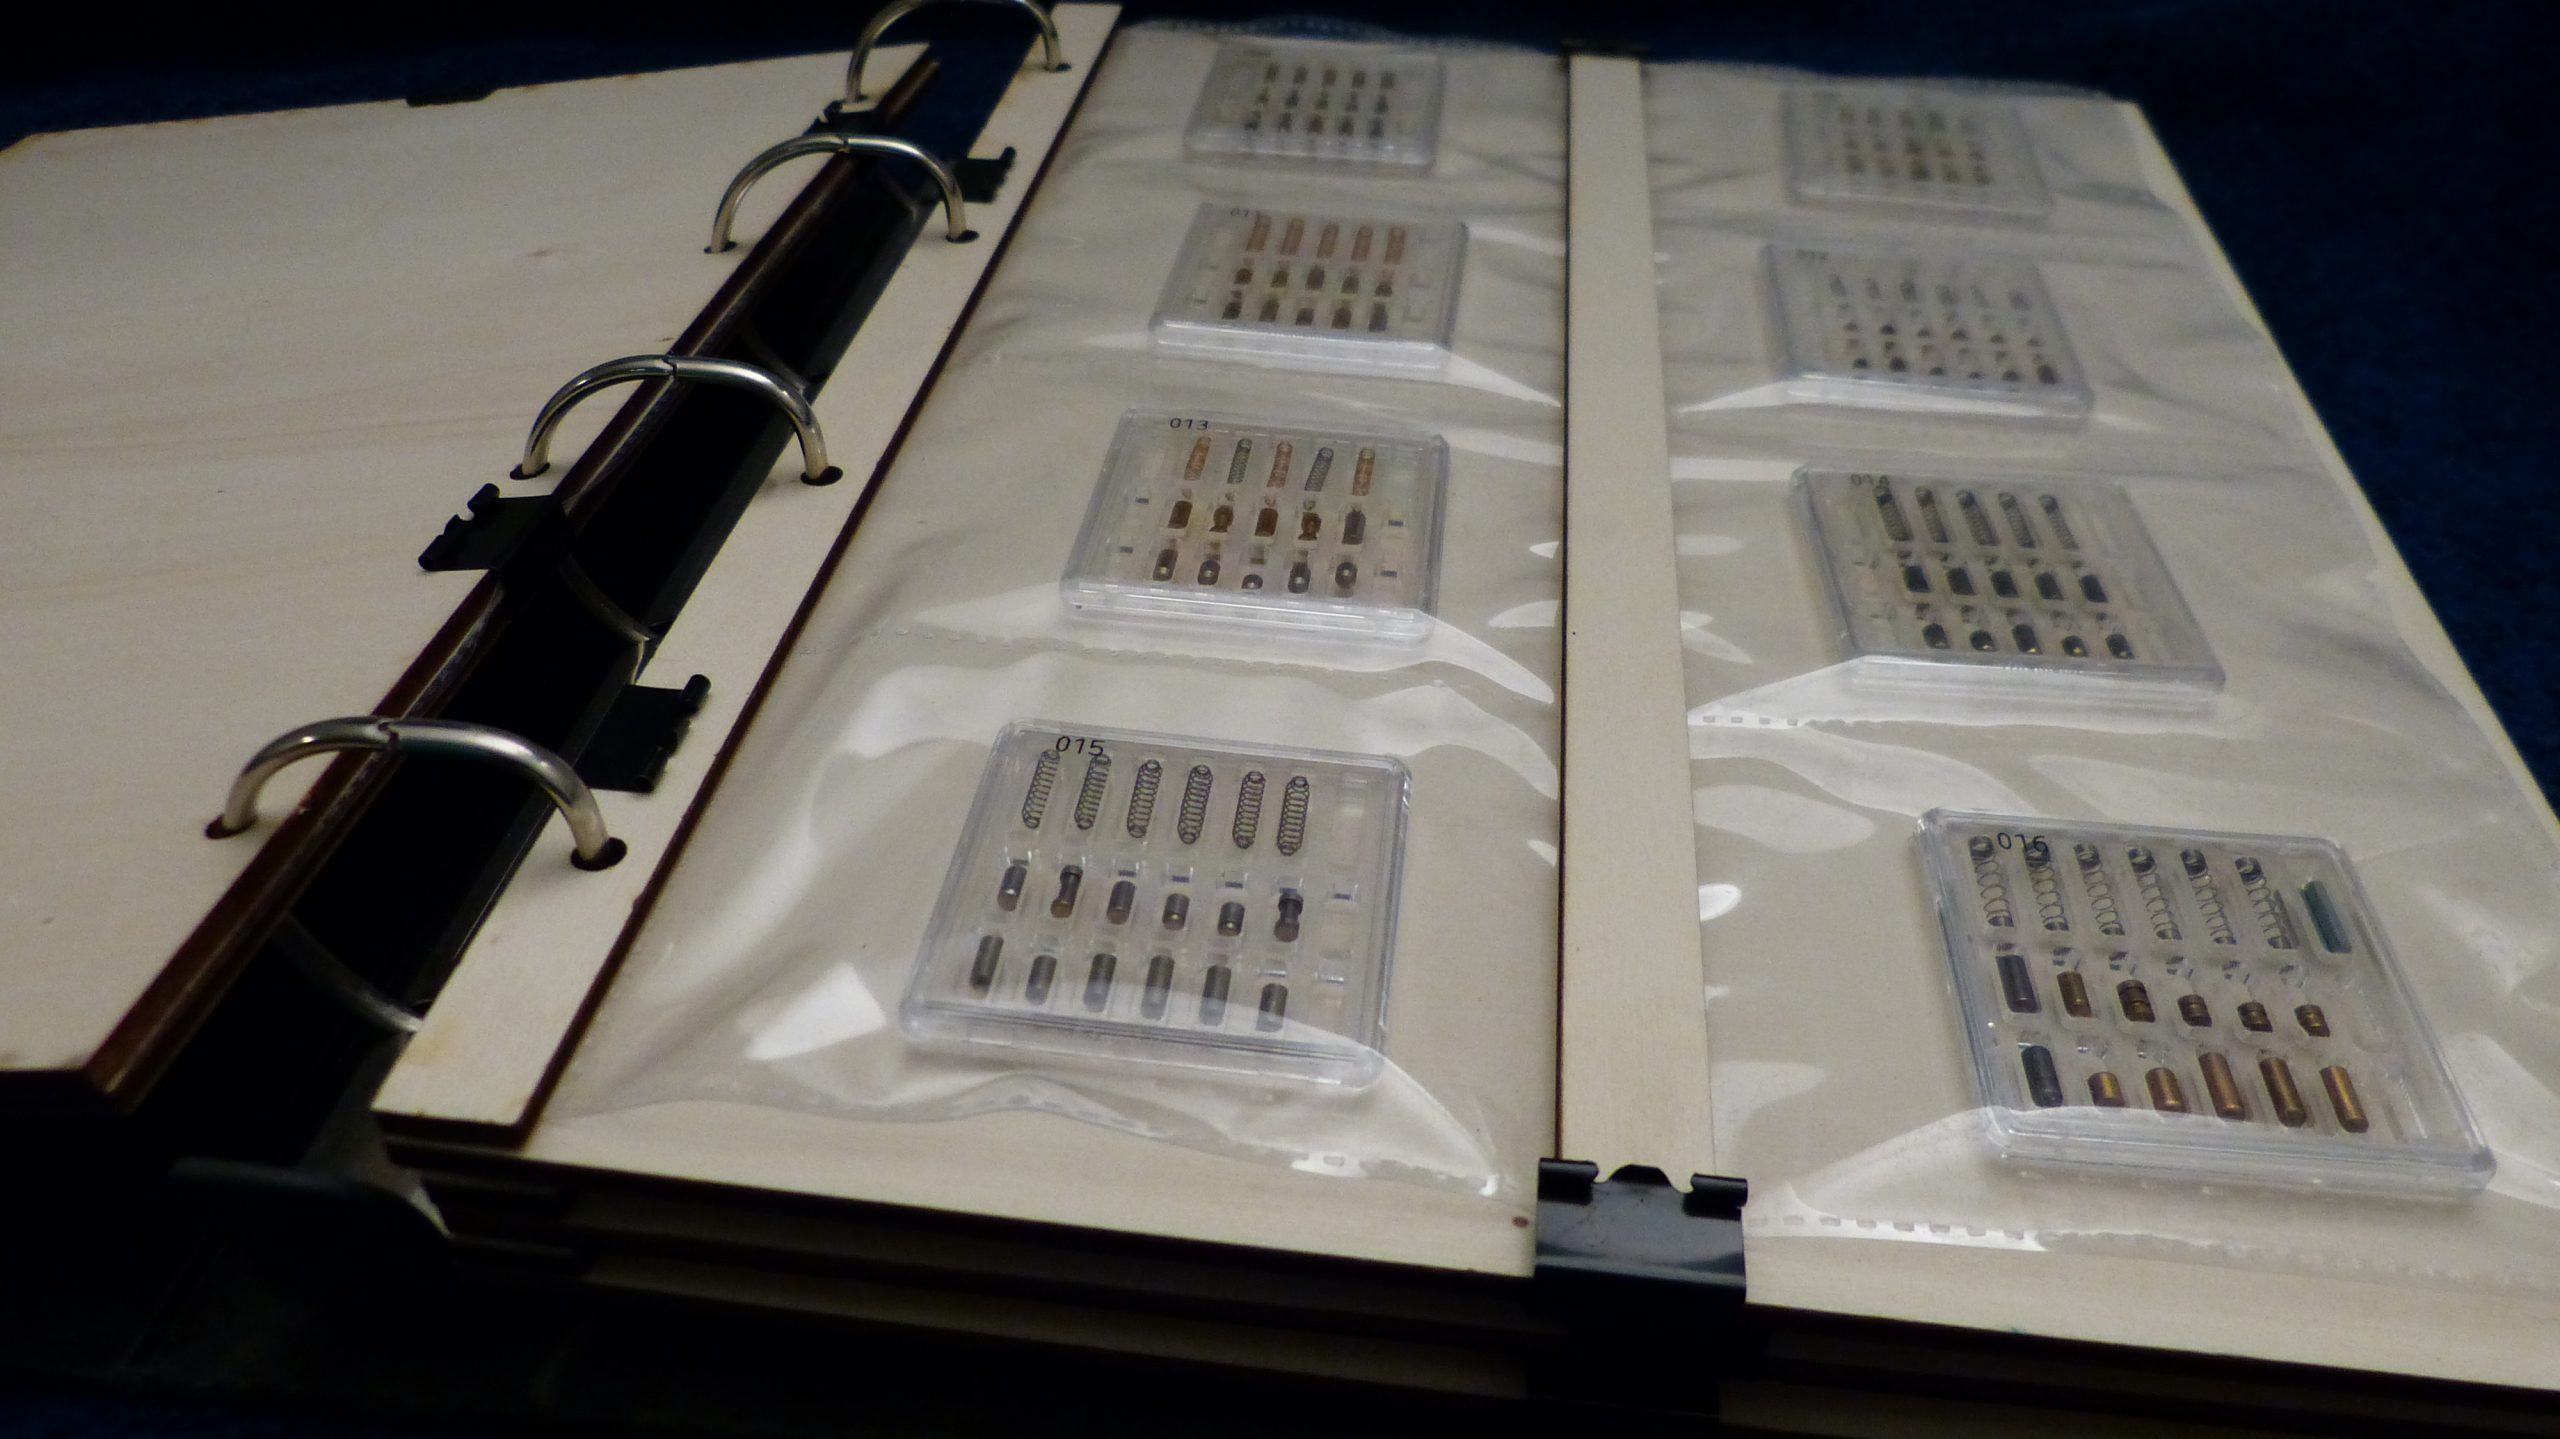
Pins in album v1
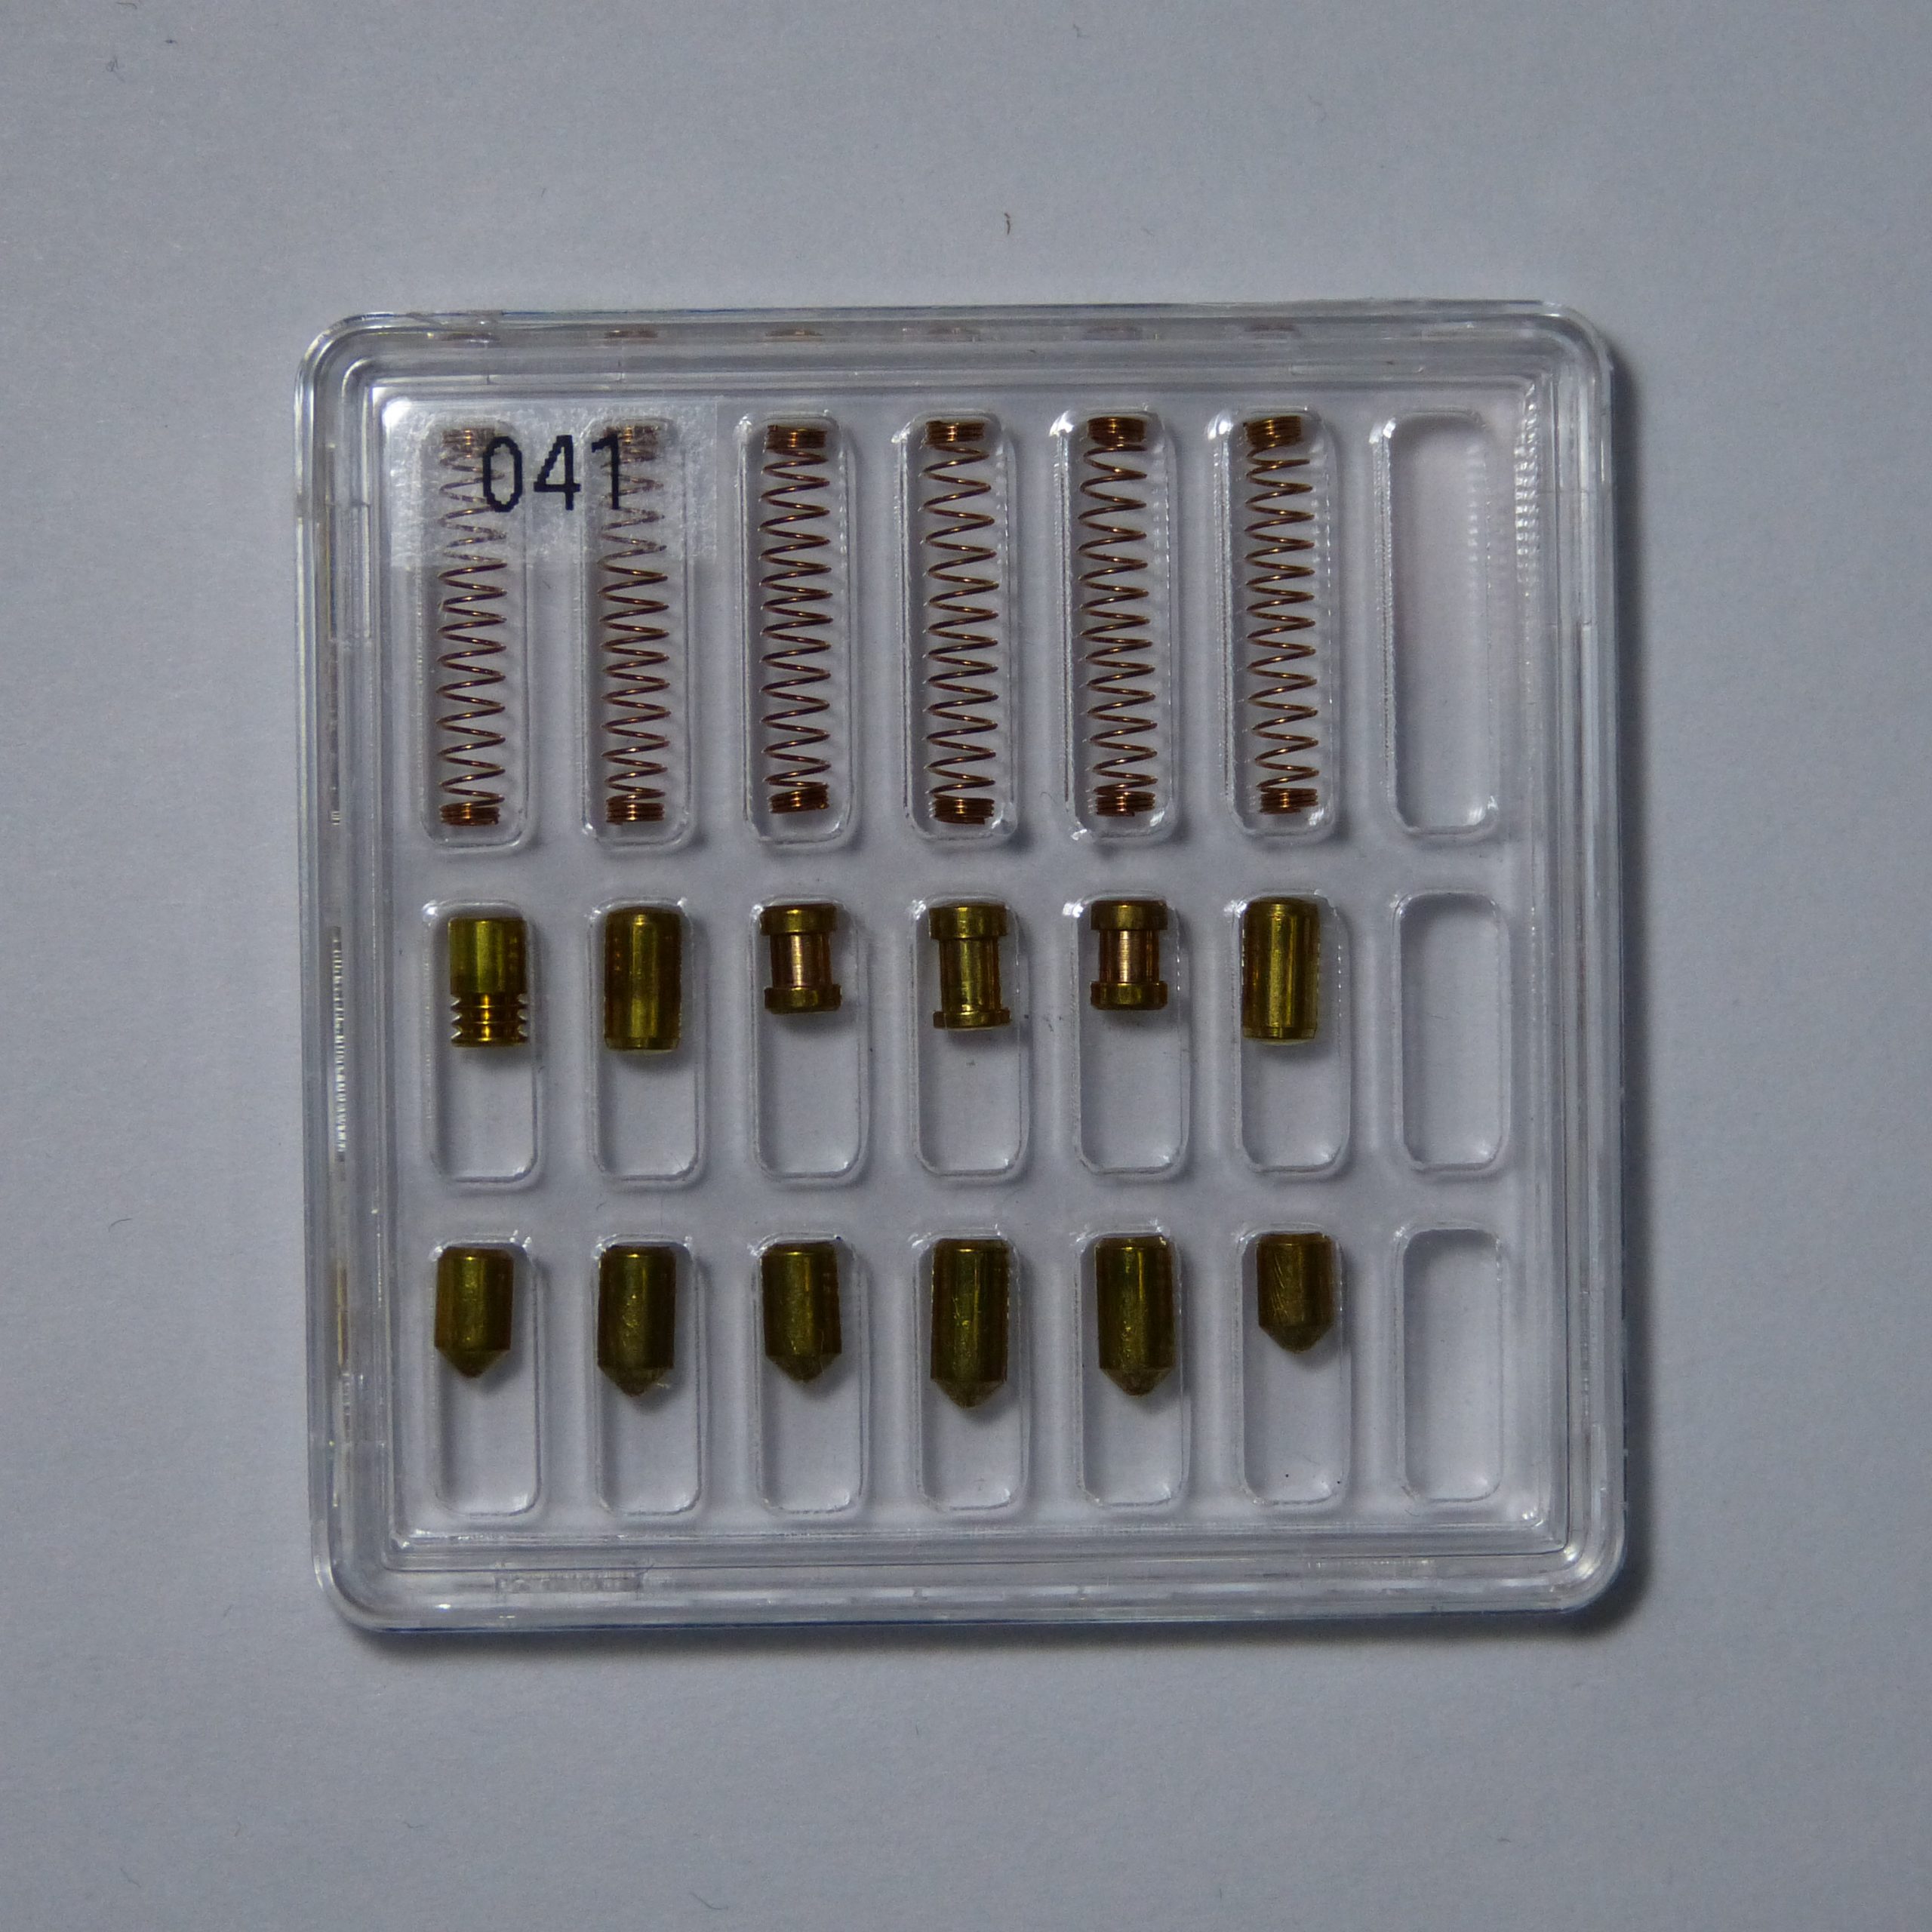
Last week was a good time to continue this project. A proper pleader album was bought. And the pins are added. This is the result this far:
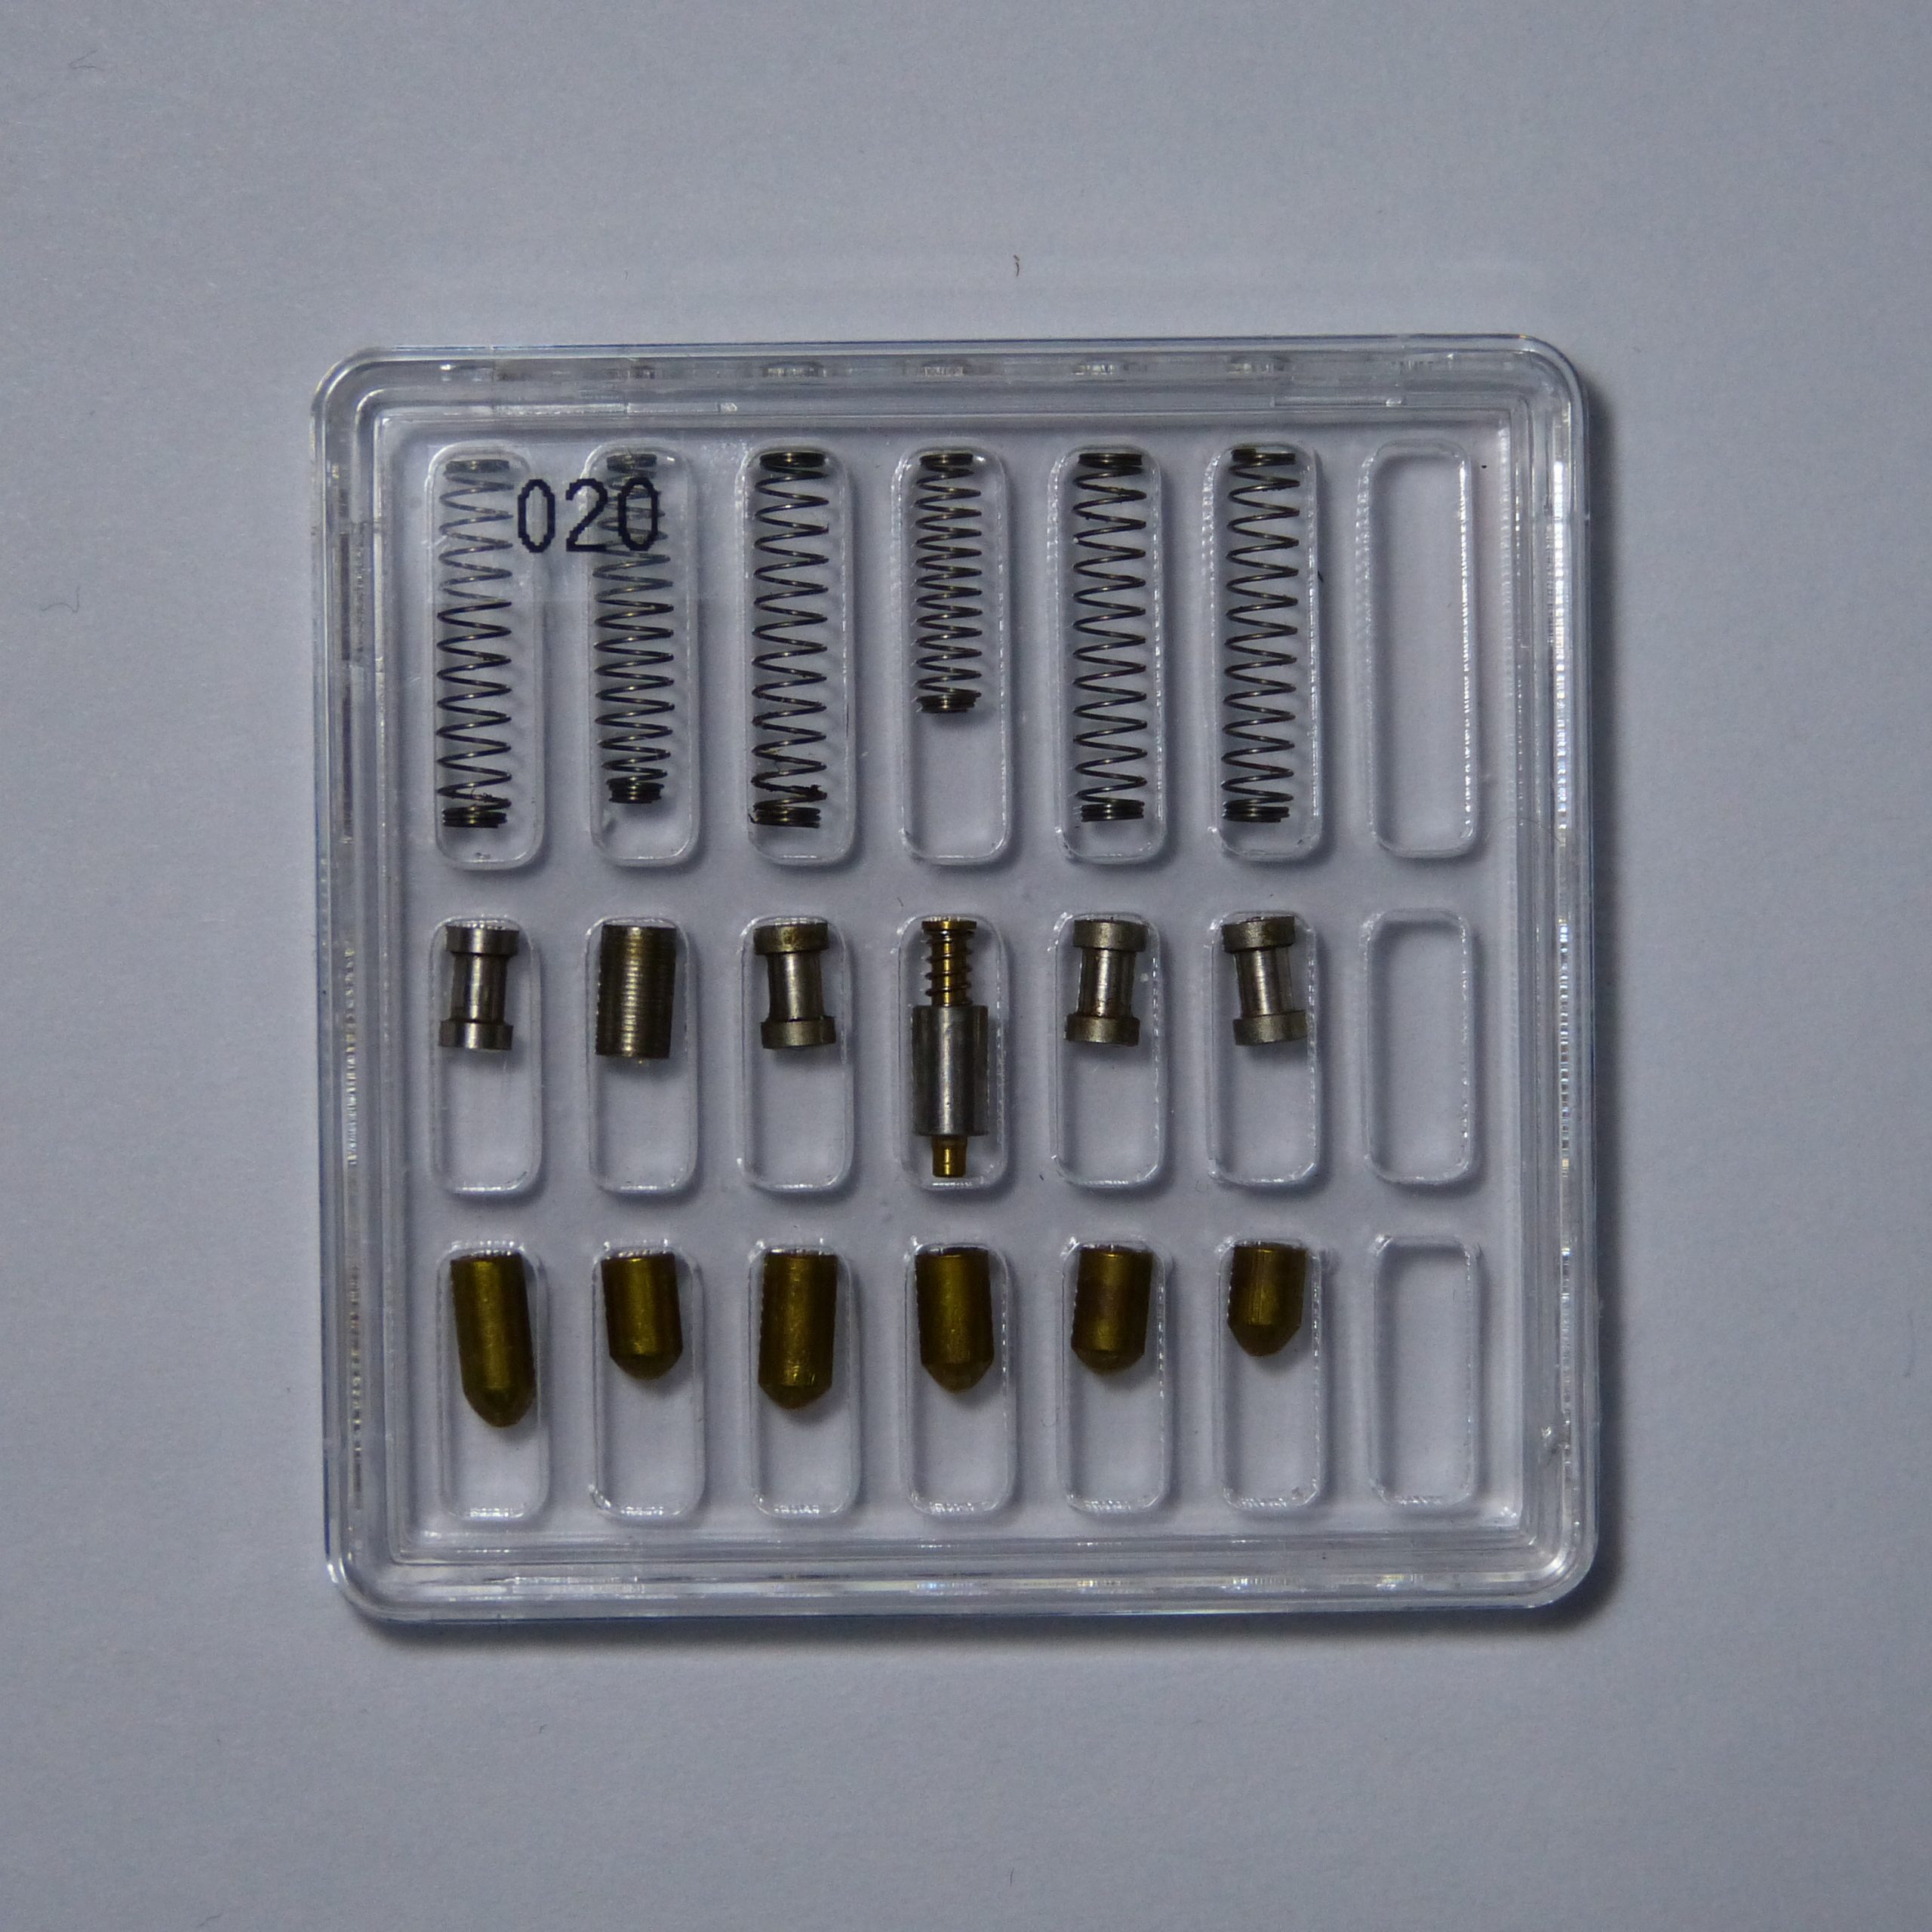
Abus E90 pins in a box.Leuchtturm album.Pins neatly stored in the album.
The album has 48 pins and about 30 more sets are ready to be archived. Acrylic is ordered and the inserts will be created when a lasercutter is accessible again. The photos will be published here on Blackbag. For now you can find one key a day on twitter: https://twitter.com/hashtag/microkeys?src=hashtag_click&f=live
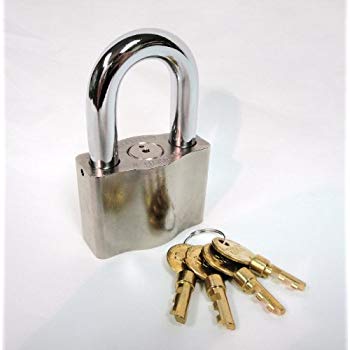
A while ago, we talked about a very nice cutaway lock made by l0ckcr4ck3r, see https://blackbag.toool.nl/?p=2613. That was a Mul-T-Lock MT5+. He has been busy on a new lock lately, the Sargent and Greenleaf Environmental Padlock 0881.
S&G 0881
I must admit I did not know the lock, aklthough it is apparantly well-known in the USA. The lock is made to especially withstand harsh weather for prolonged periods and still open without problems,
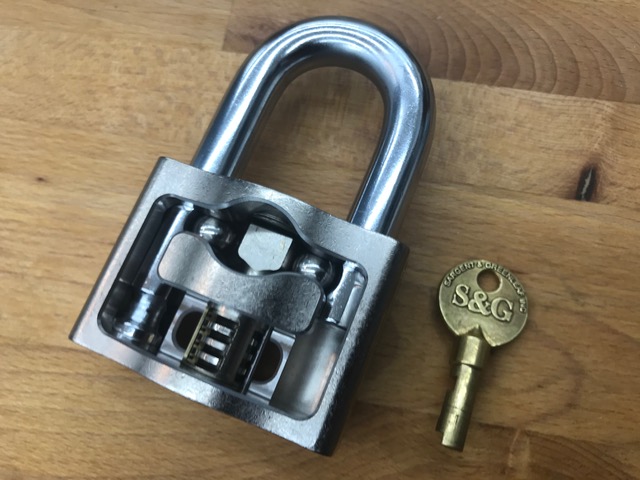
L0ckcr4ck3r has worked his magic to cut the lock open and this is the result:
A couple of years ago one of our members, Jos Weyers, came up with a novel method to attack masterkeysystems. If you know Jos, it’s probably not at all surprising that this method mainly consists of impressioning. Attacking masterkeyed systems that way has several distinct advantages; no need to take a lock apart, no need for huge numbers of blanks, no need to have access to a working key, no guessing if your new key is indeed the master you are looking for, to name just a few. After keeping this knowledge within a rather small community for some time, it is now out in the open due to a talk Jos did at OzSecCon in Melbourne this year.Which off course includes live demo’s right there on stage.
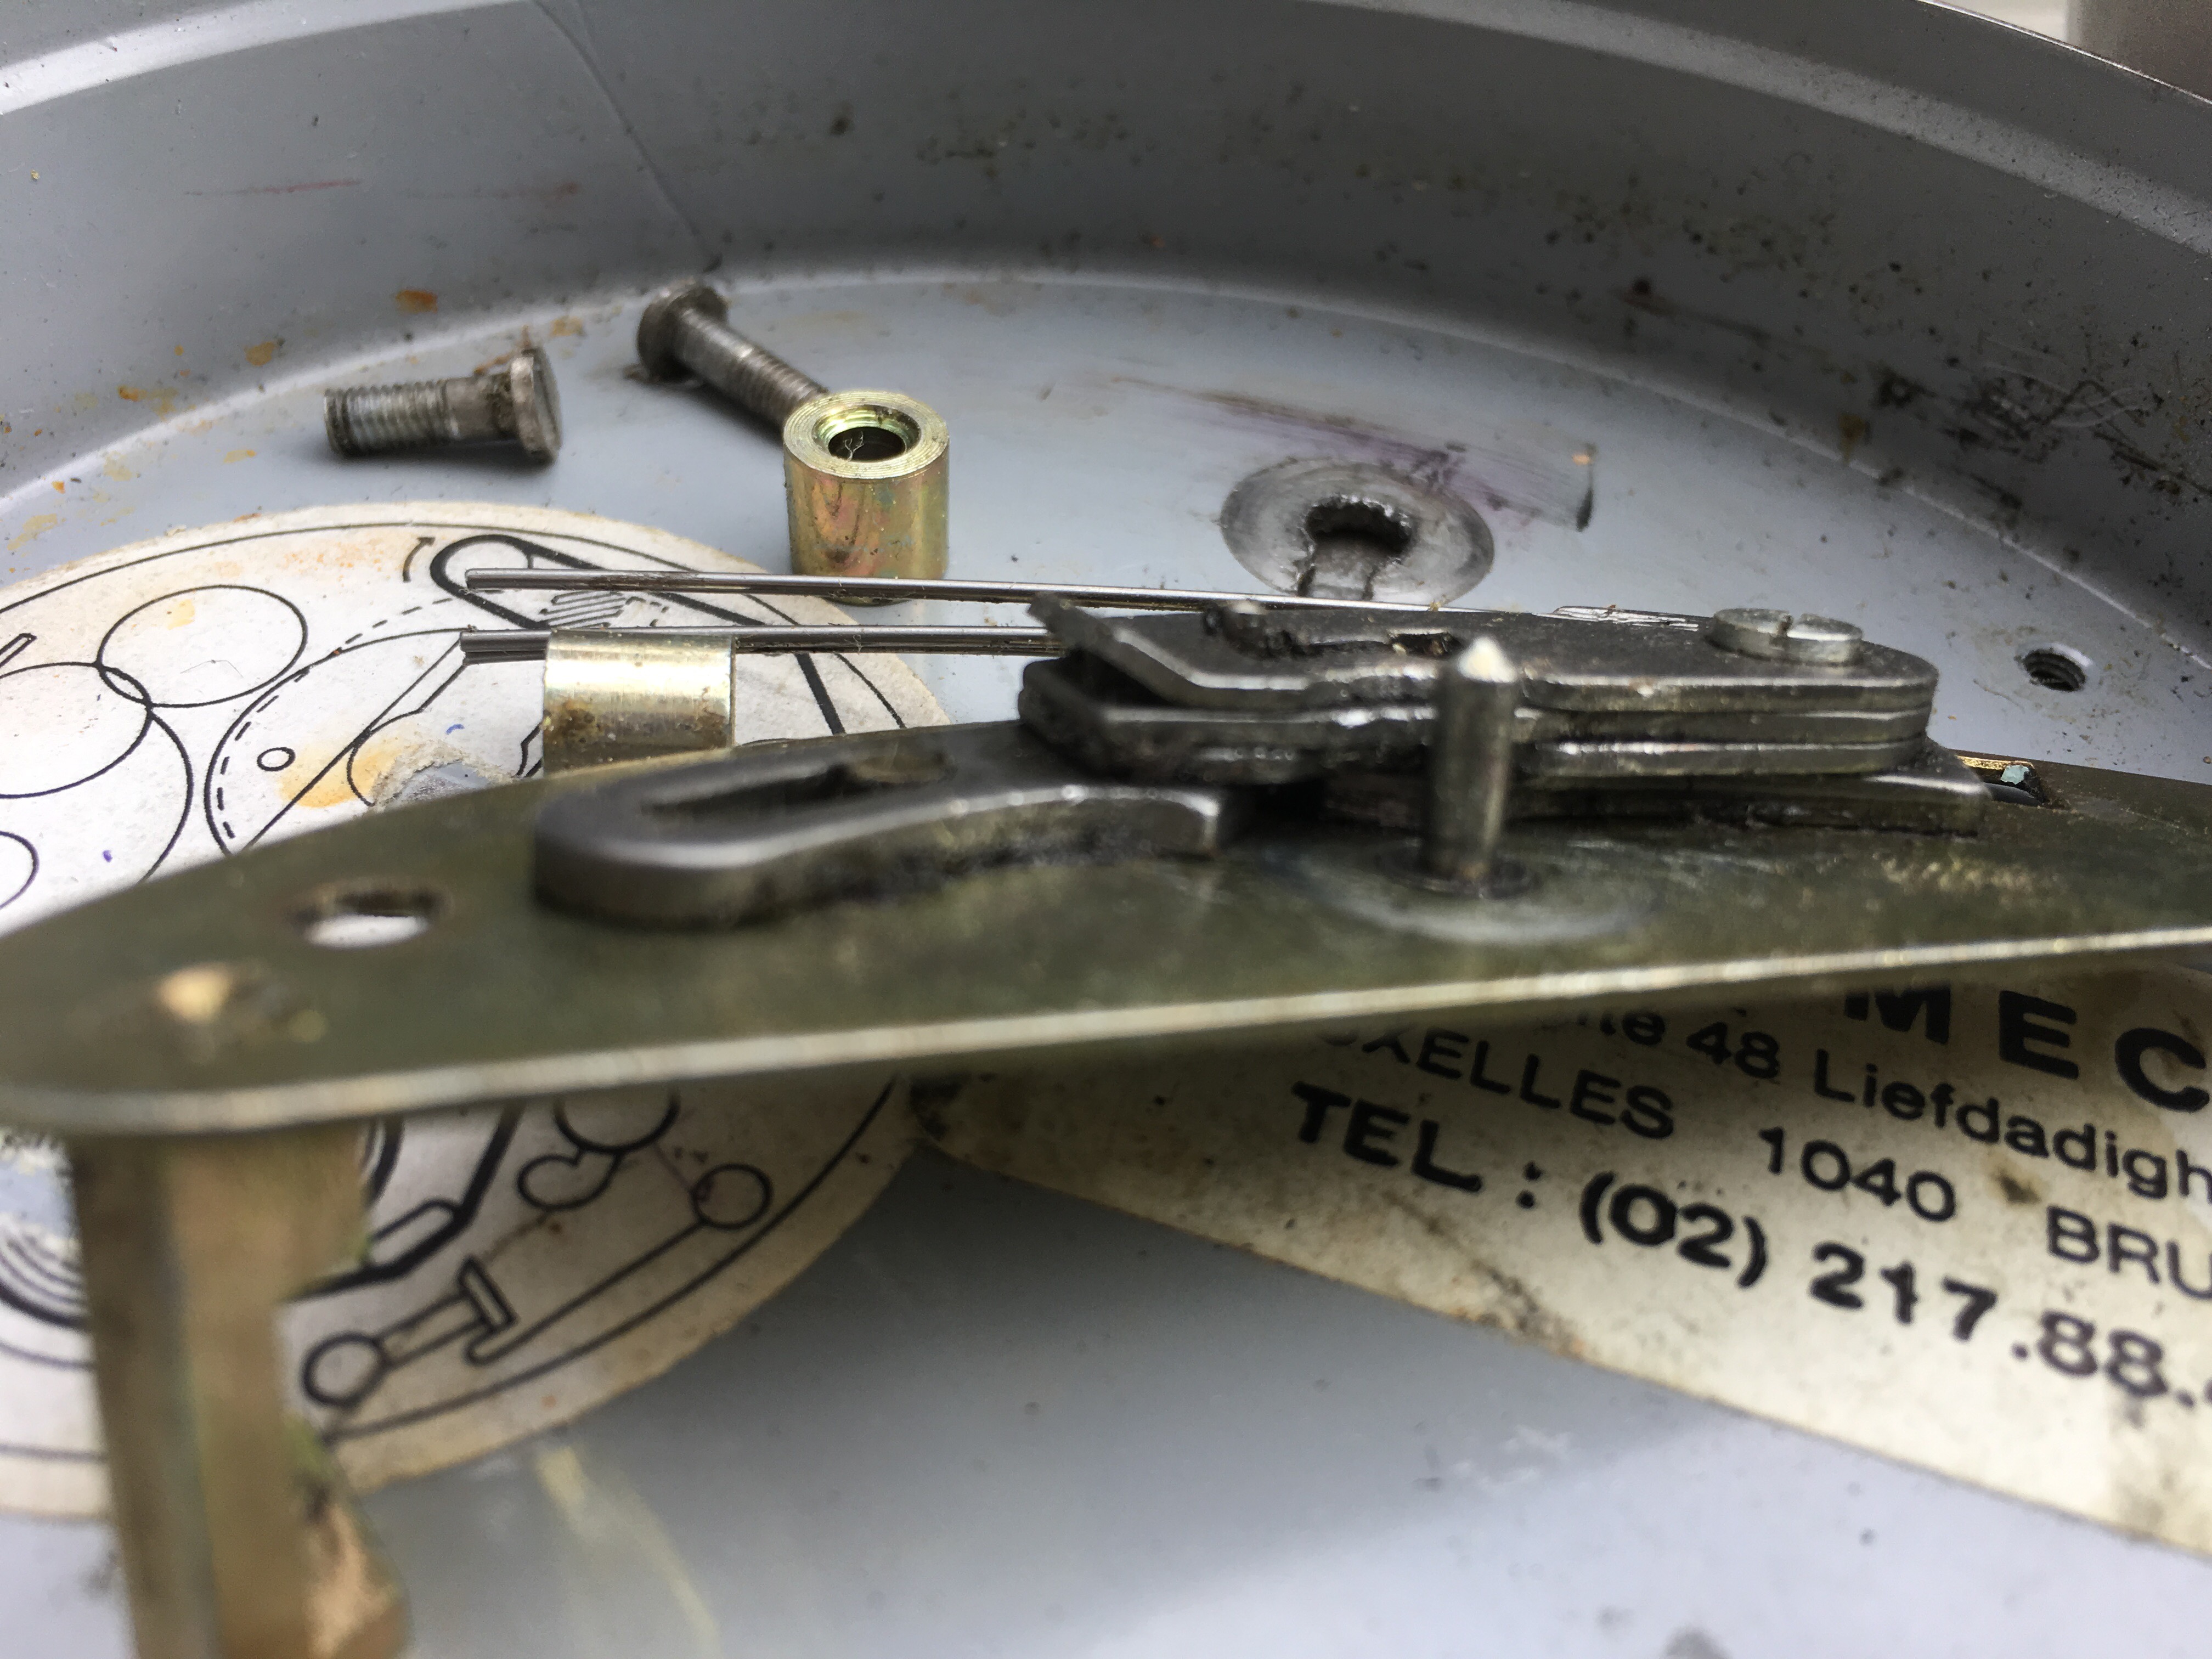
A while back, somebody visited one of our Toool meetings. This gentleman brought with him a punch clock device. I am not sure in what setting it was used, but found one example on the internet of such a clock being used in a prison, where the warden would register their rounds through the facility
The keys were lost, so we were asked to try to open it without damage. The lock looked easy enough..
Still, we could not open it fully.
In the end, Jos took it home to look at it a bit further and in the end he was able to open it. We had not expected a three lever lock when we started.
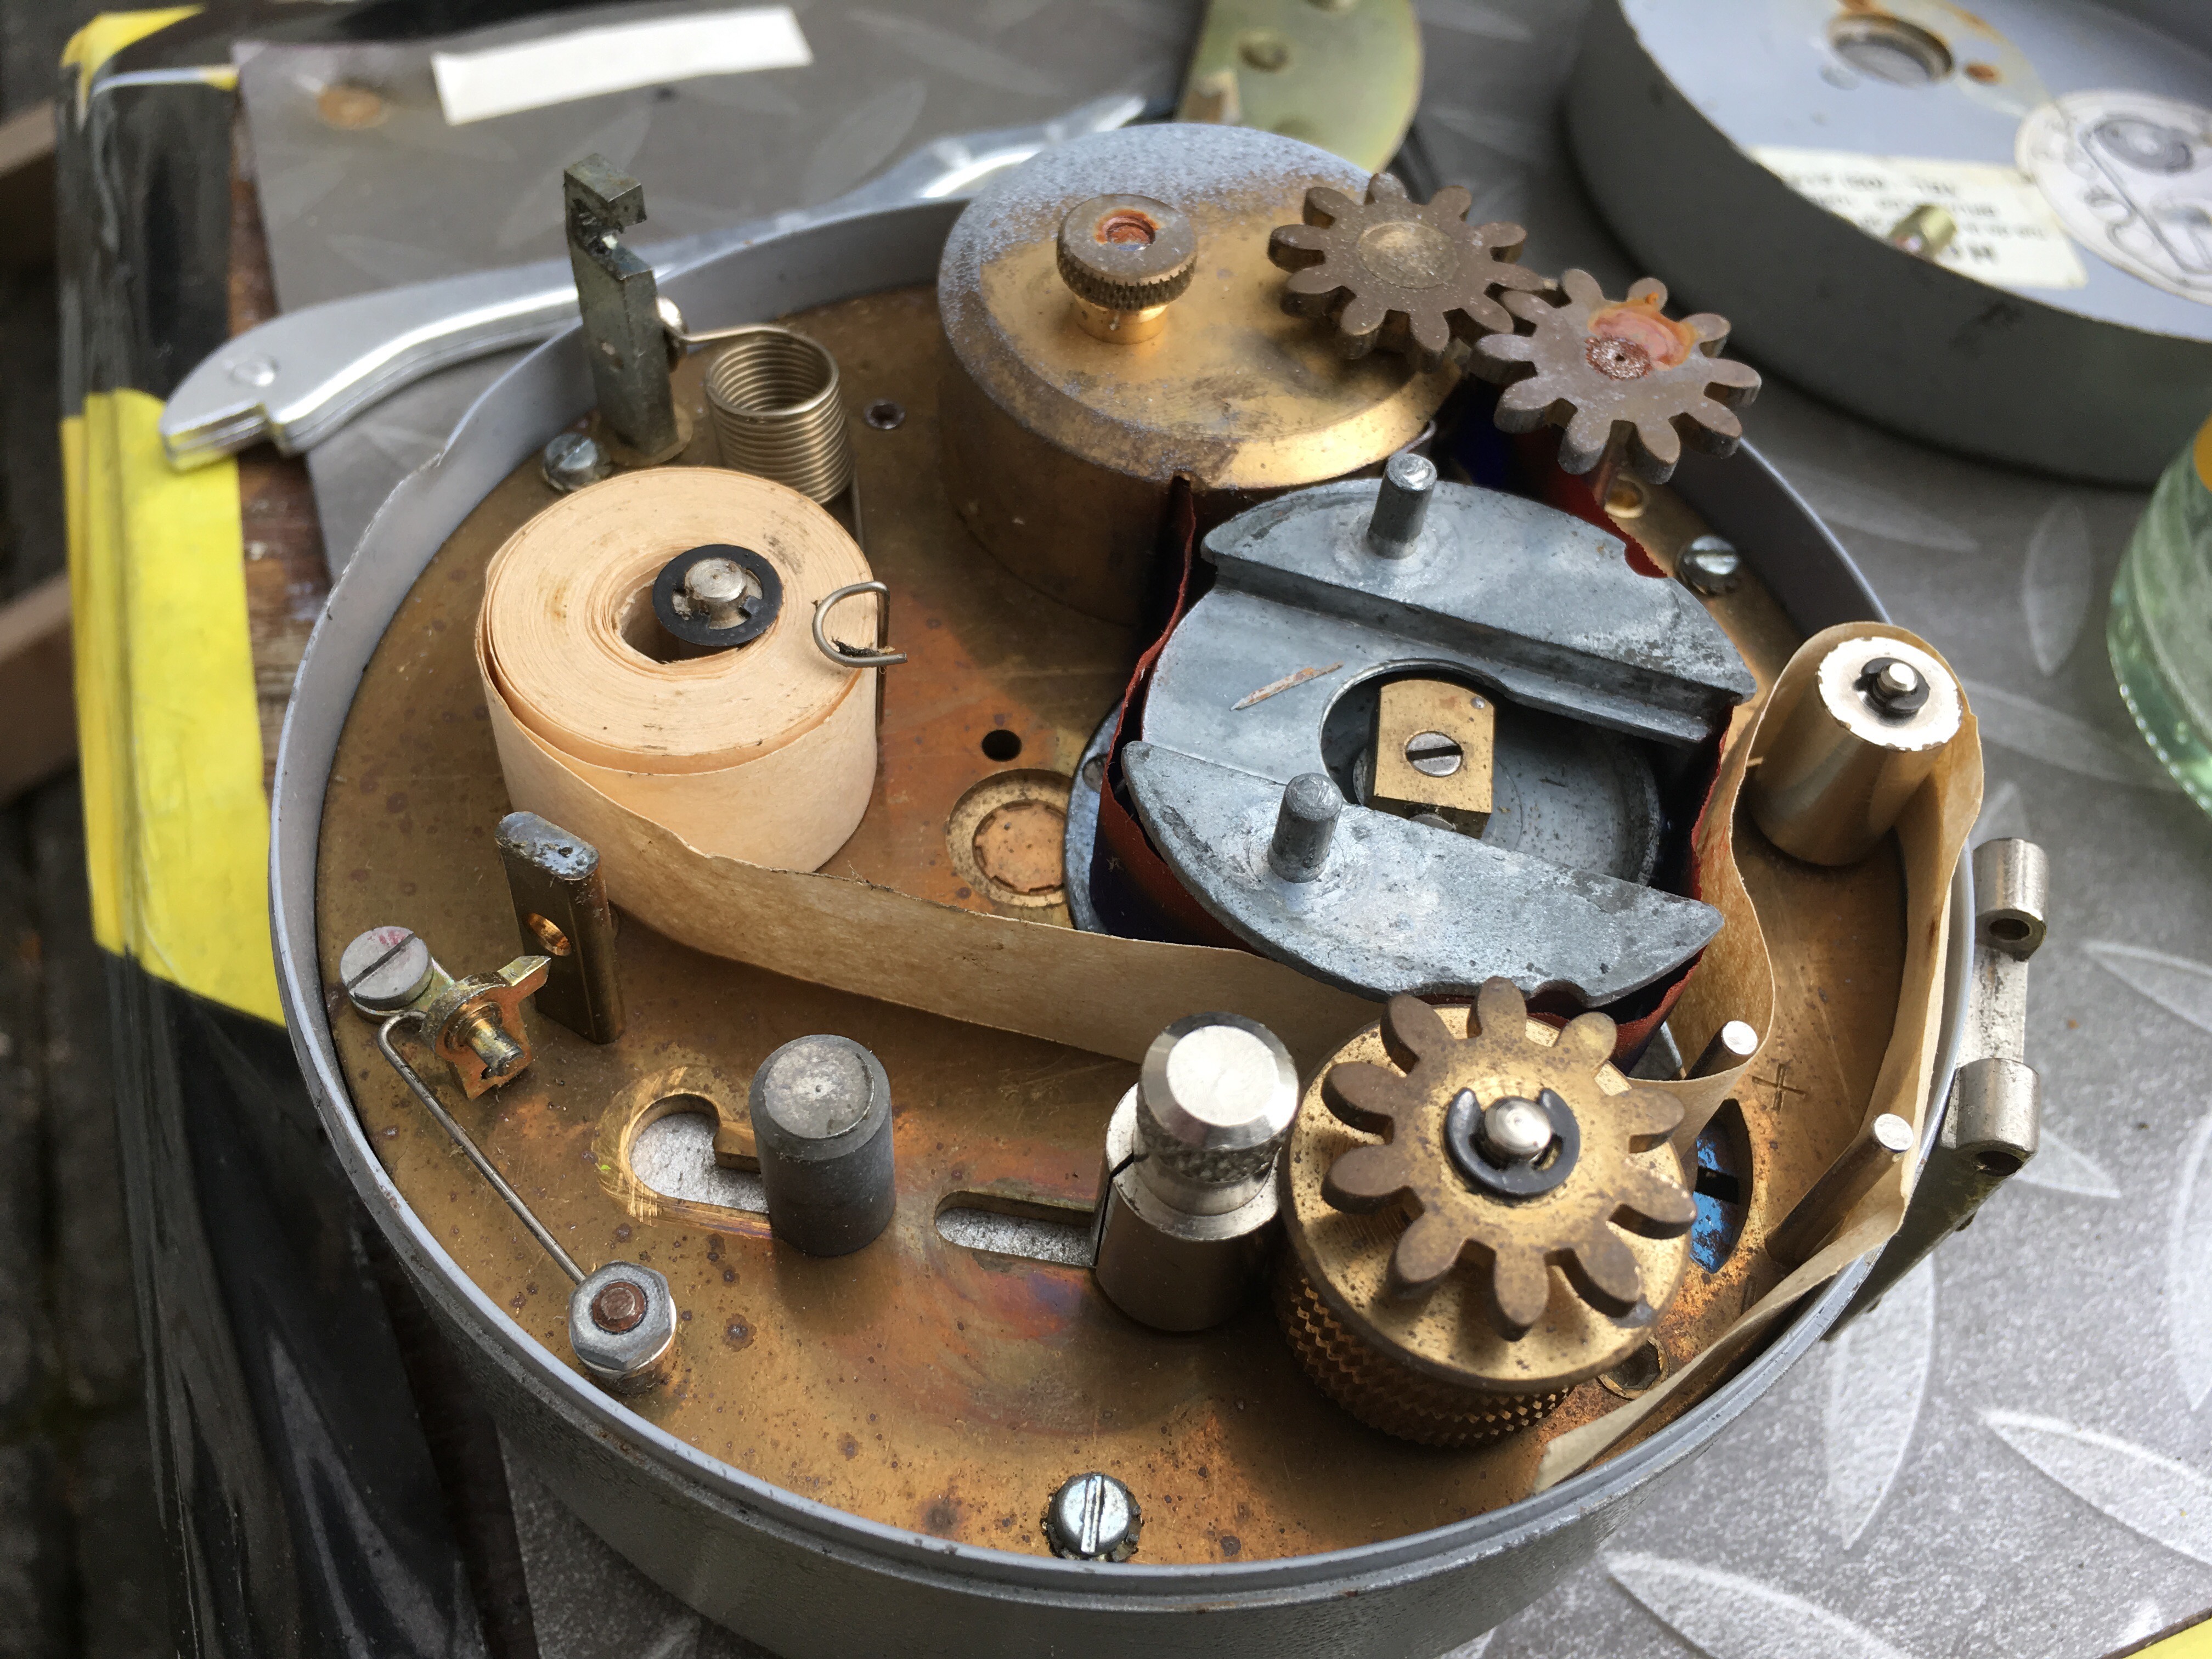
Finally, we had a nice view of the insides, where you can see the mechanism to transport a paper tape and an ink ribbon.
Posted in Locks | Comments Off on Opening a vintage lock