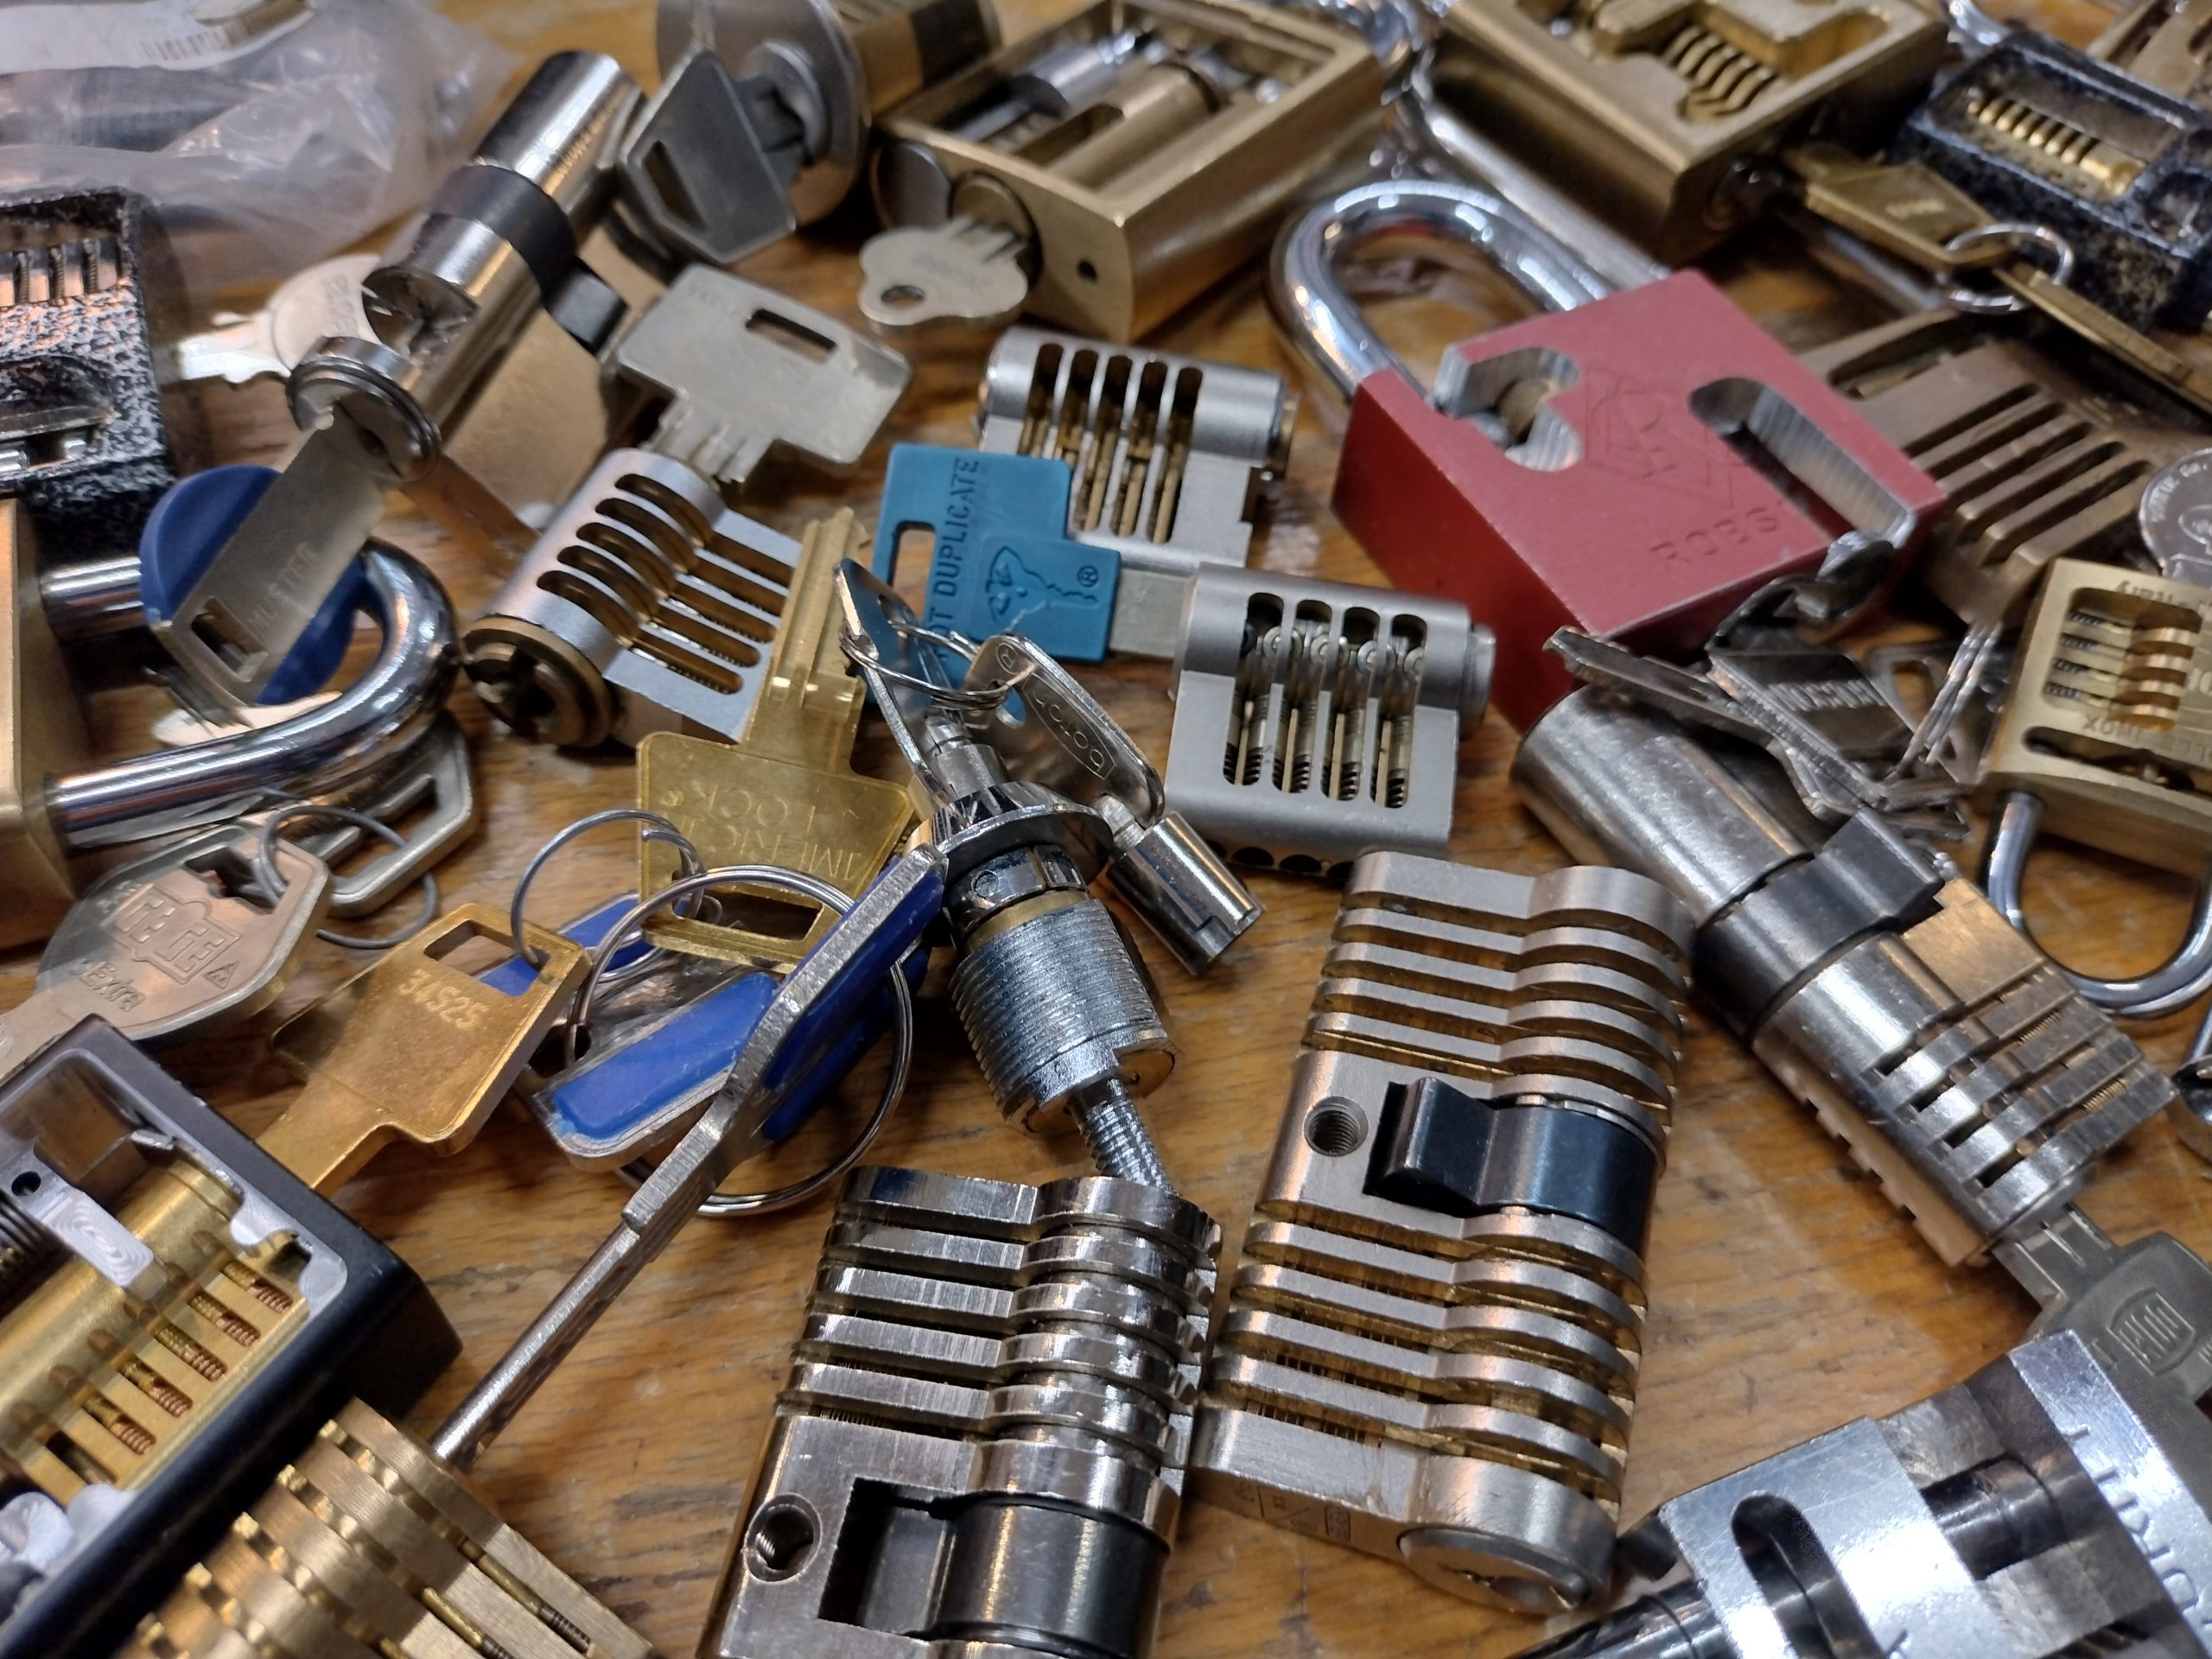
When we teach lockpicking we usually revert to schematics of locks, and different models for demonstrating the functionality of locks. Usually required as the core functionality is well hidden, and not often observable in action. Multiple skilled machinists have made cutaway locks for the purpose of demonstrating the inner workings of real locks.
At one cutaway themed evening, we had over 50 unique cutaways on the table. From all brands and mechanisms. Some of which even the pins themselves were cutaway.
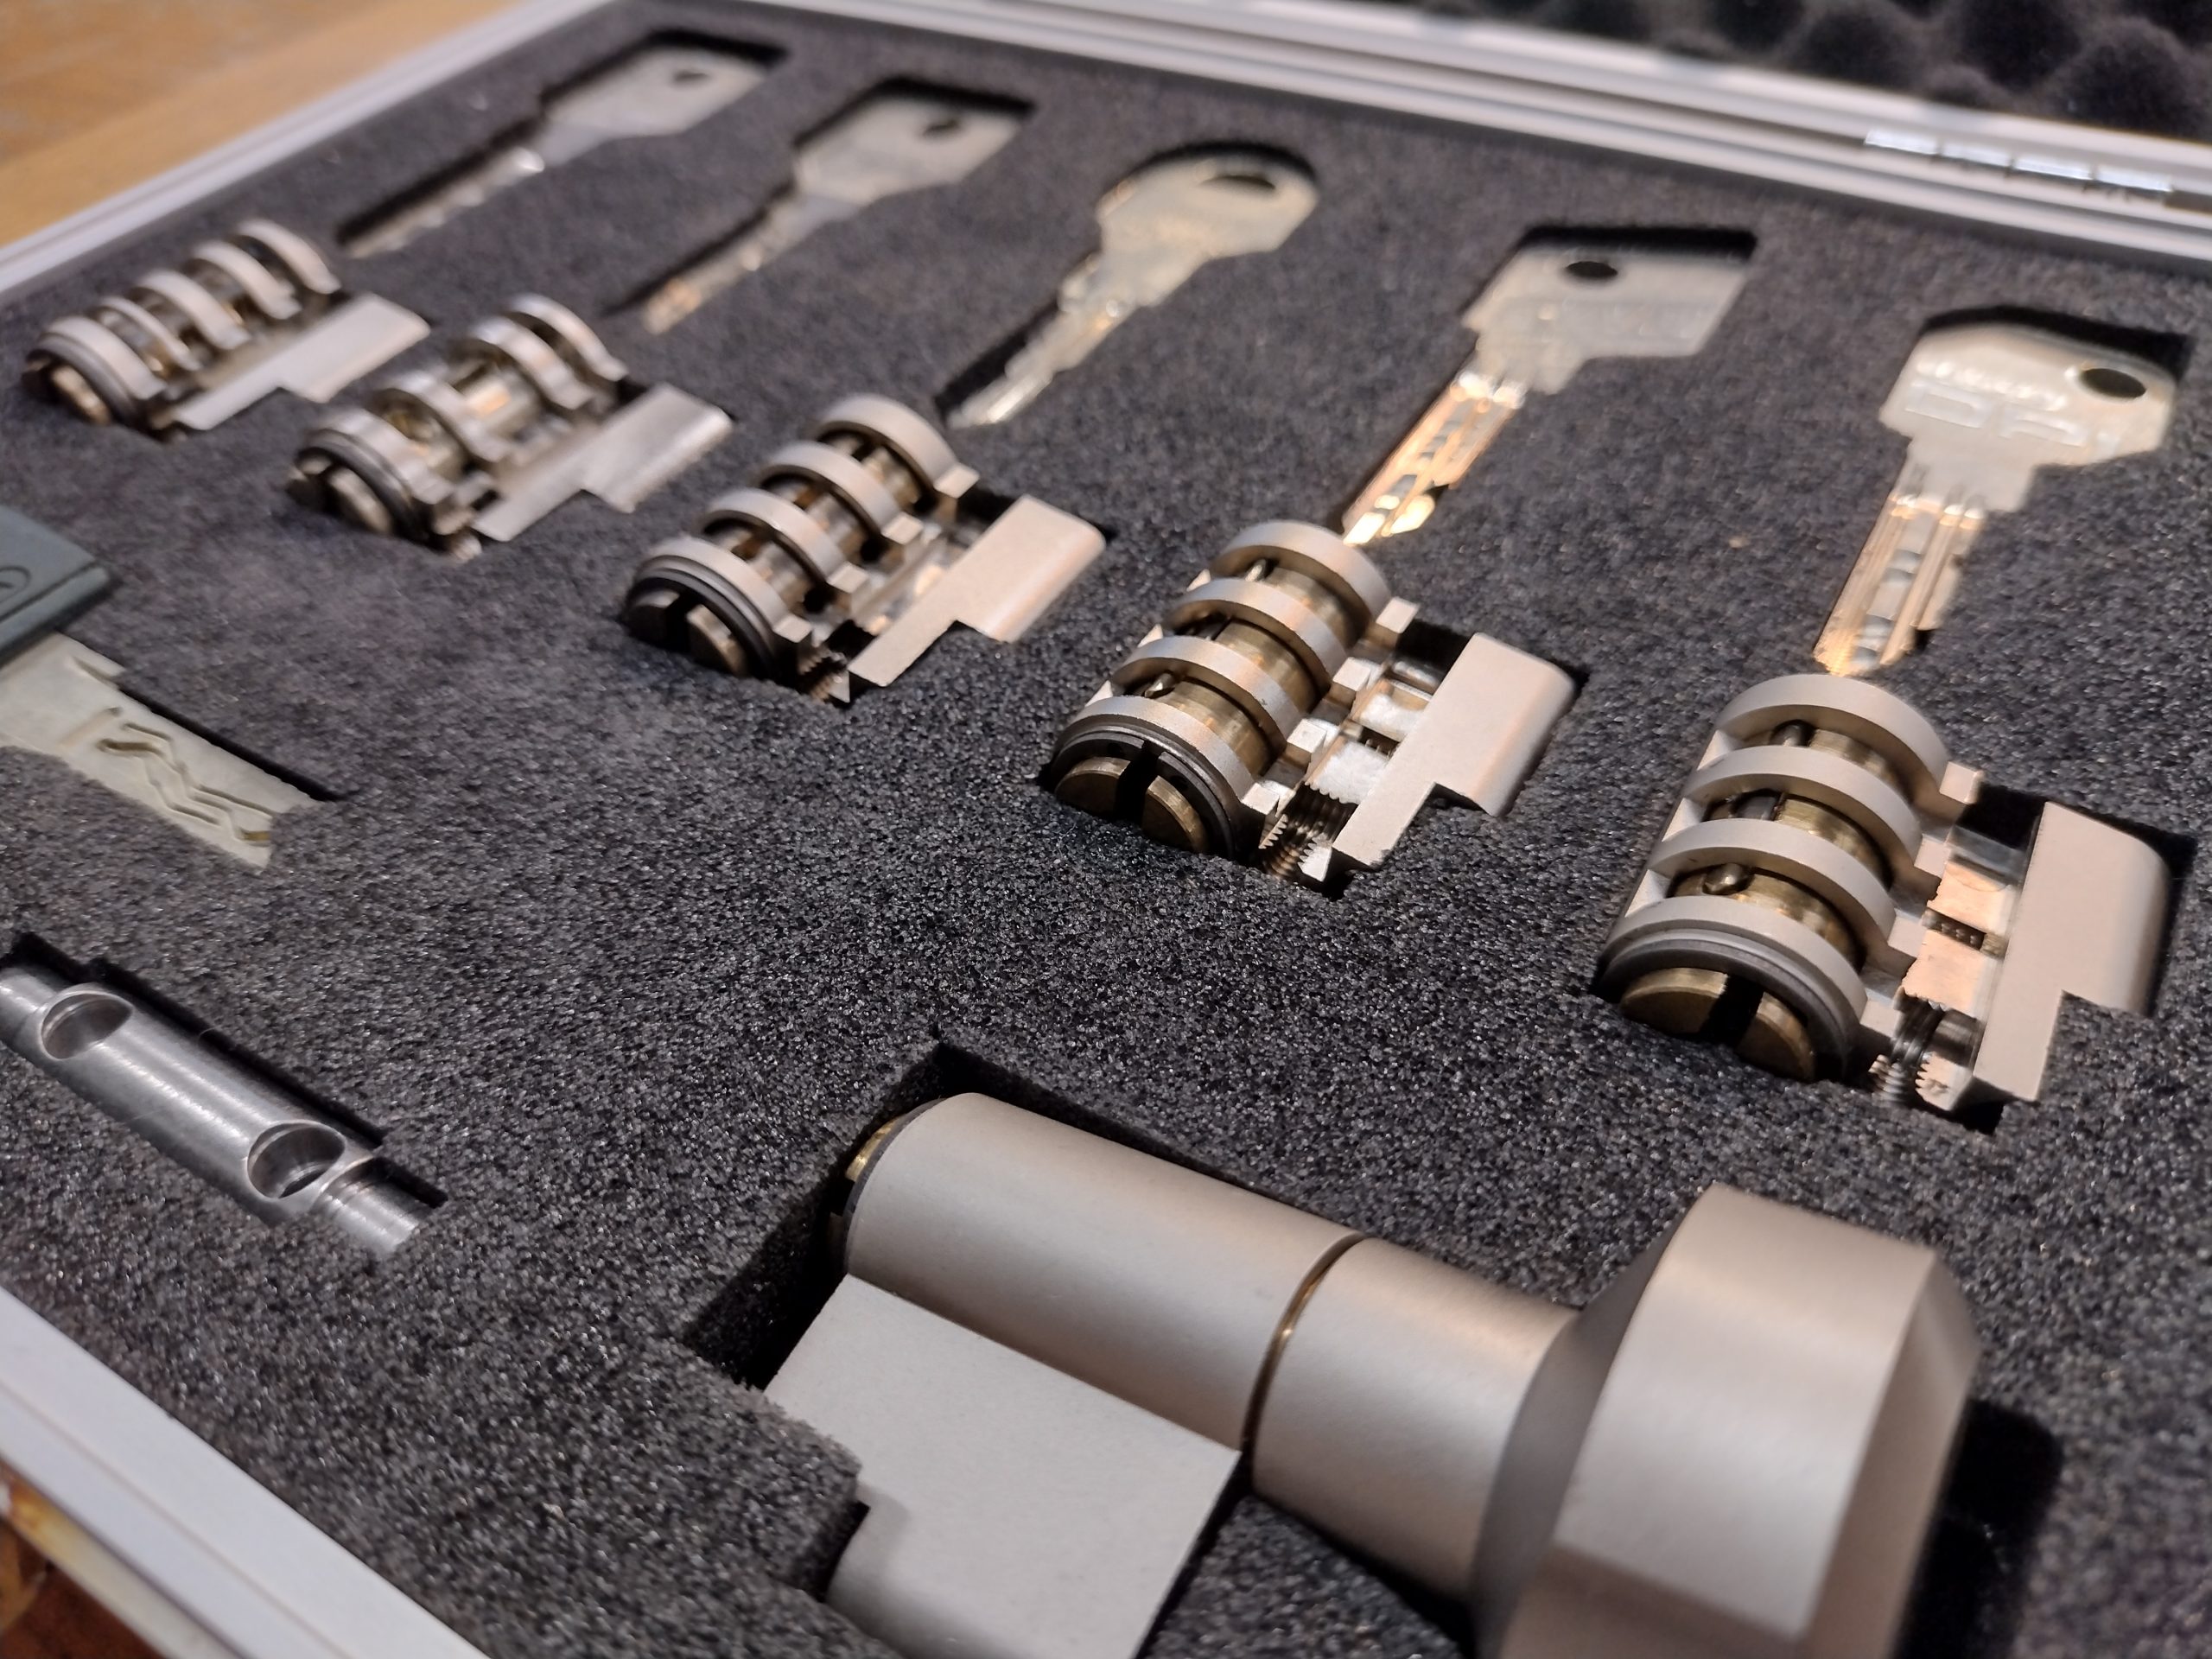
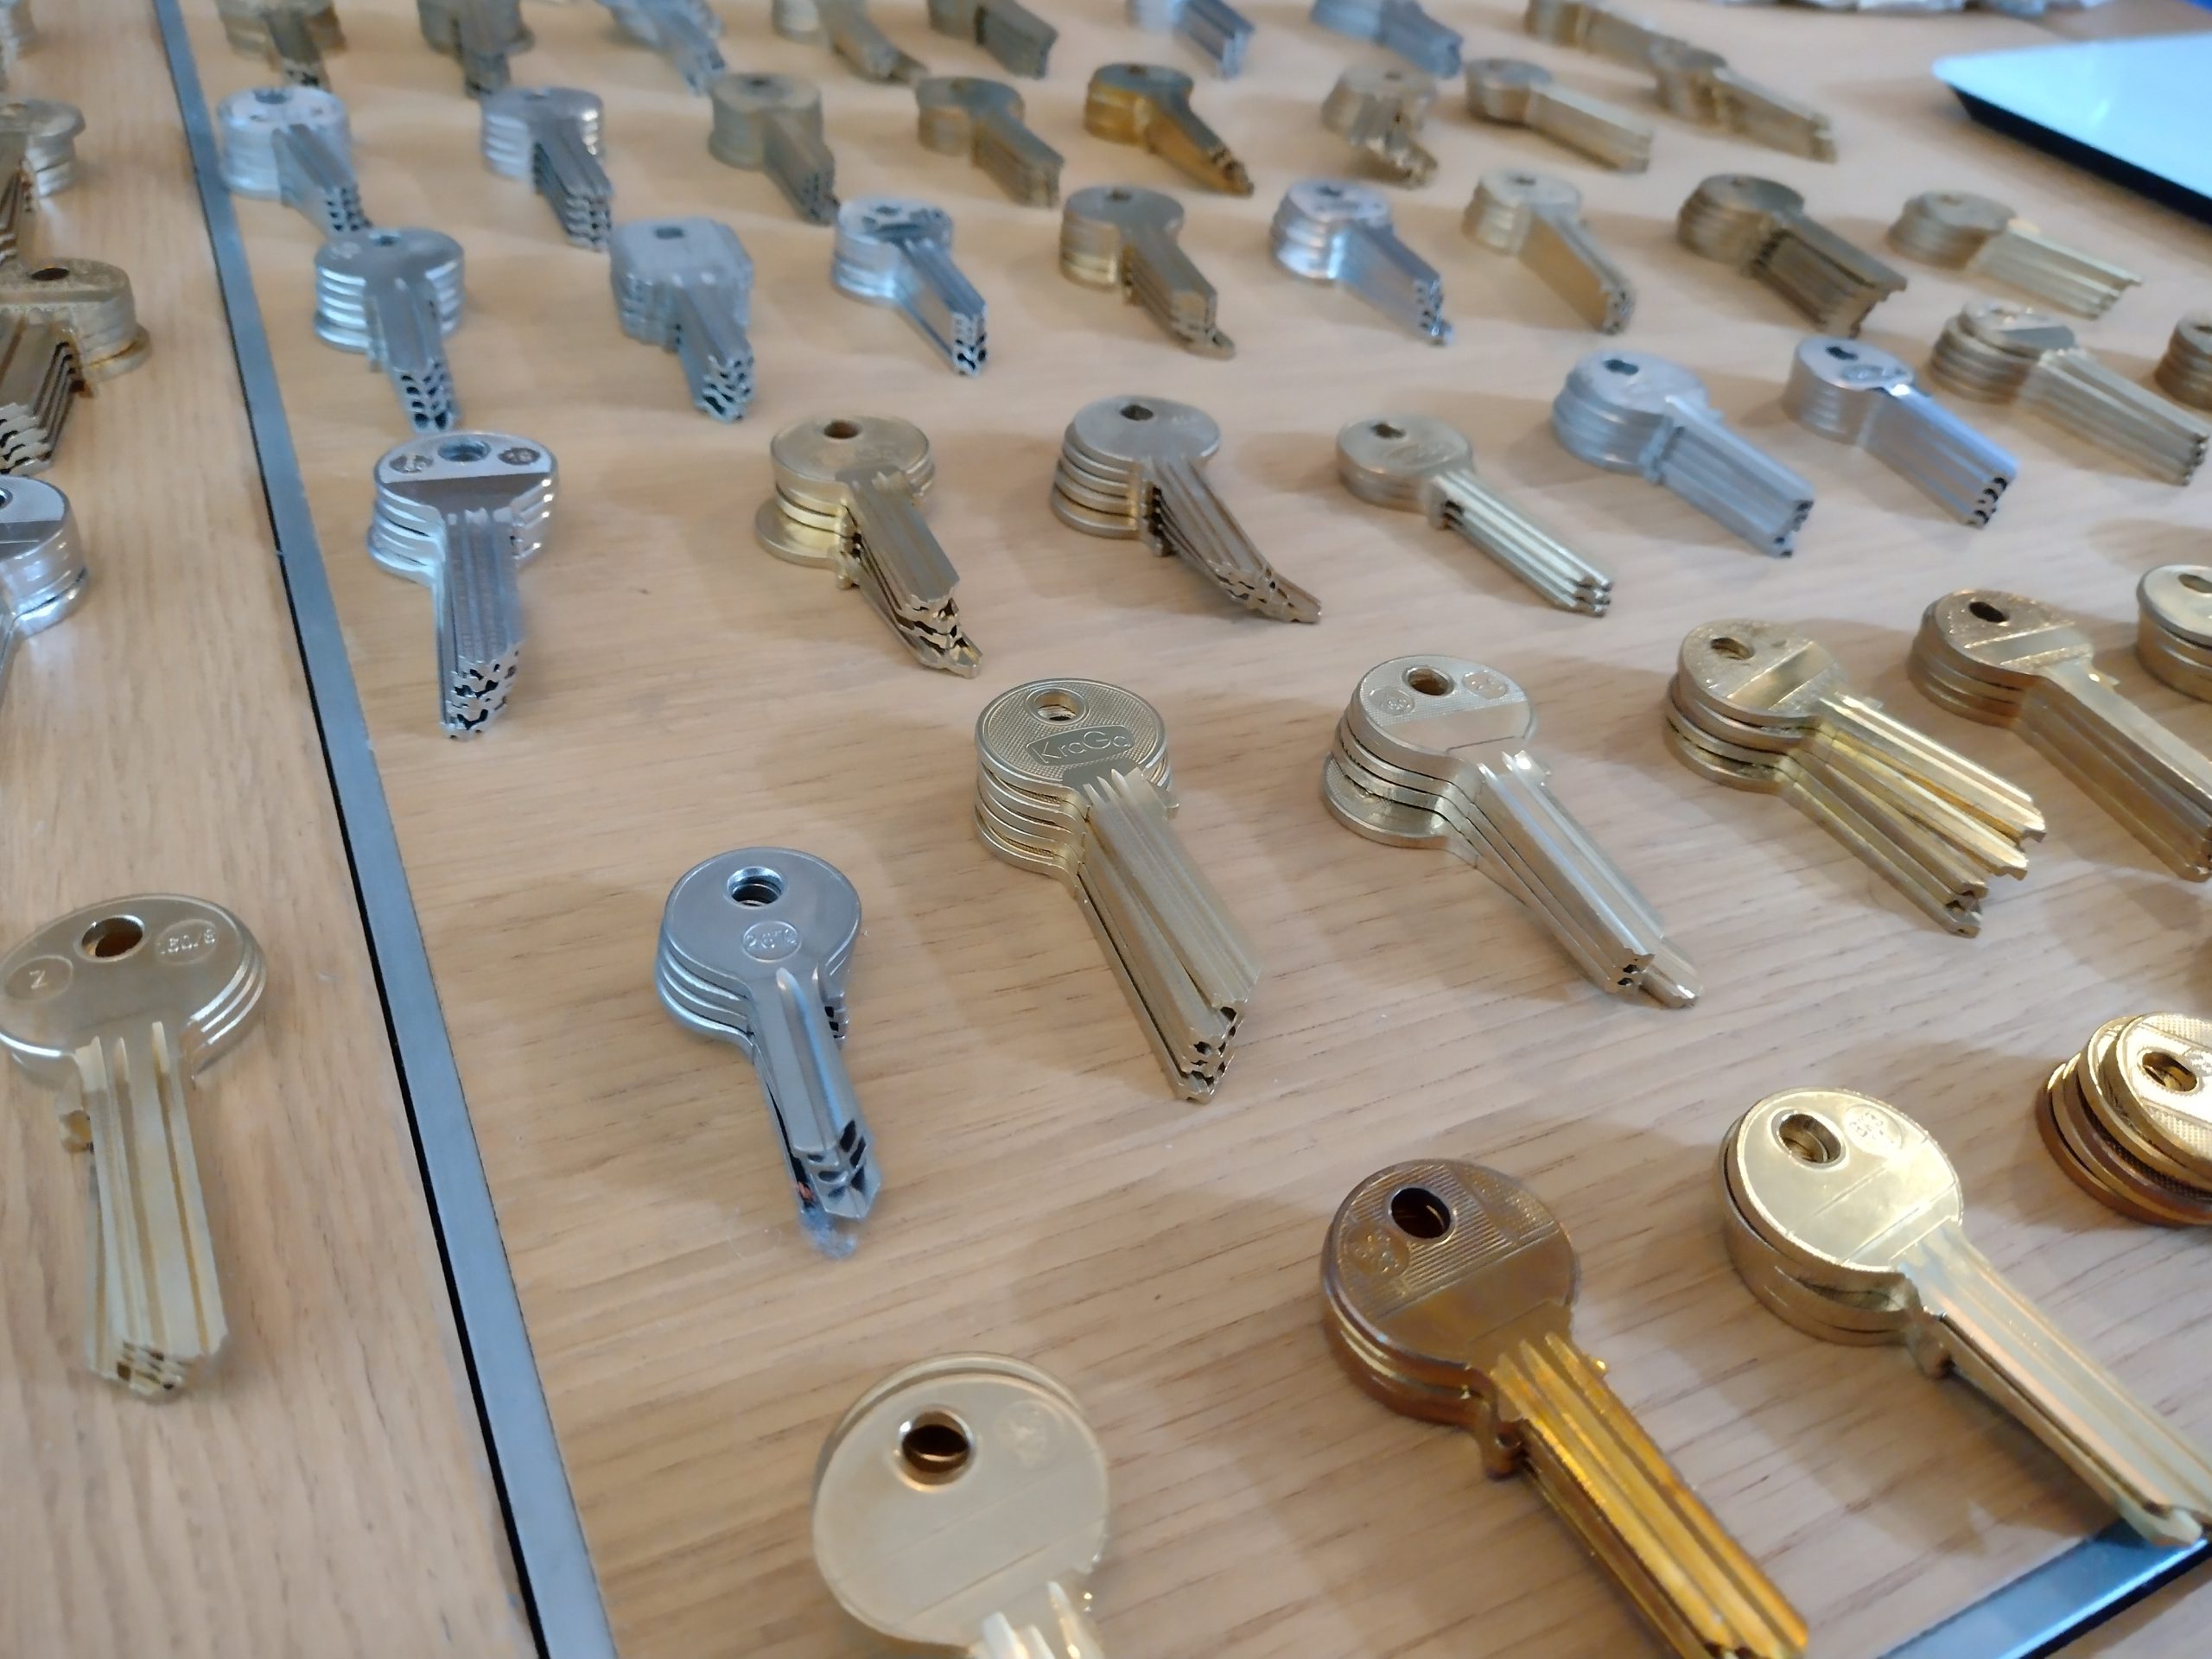
On an evening with impressioning, a member asked for some blanks to practice with. The call was answered by the keys below. Sadly, it’ll be very hard to find a corresponding lock for the key blanks, as in Europe we have thousands of unique keyways. Even though they all look a-like.
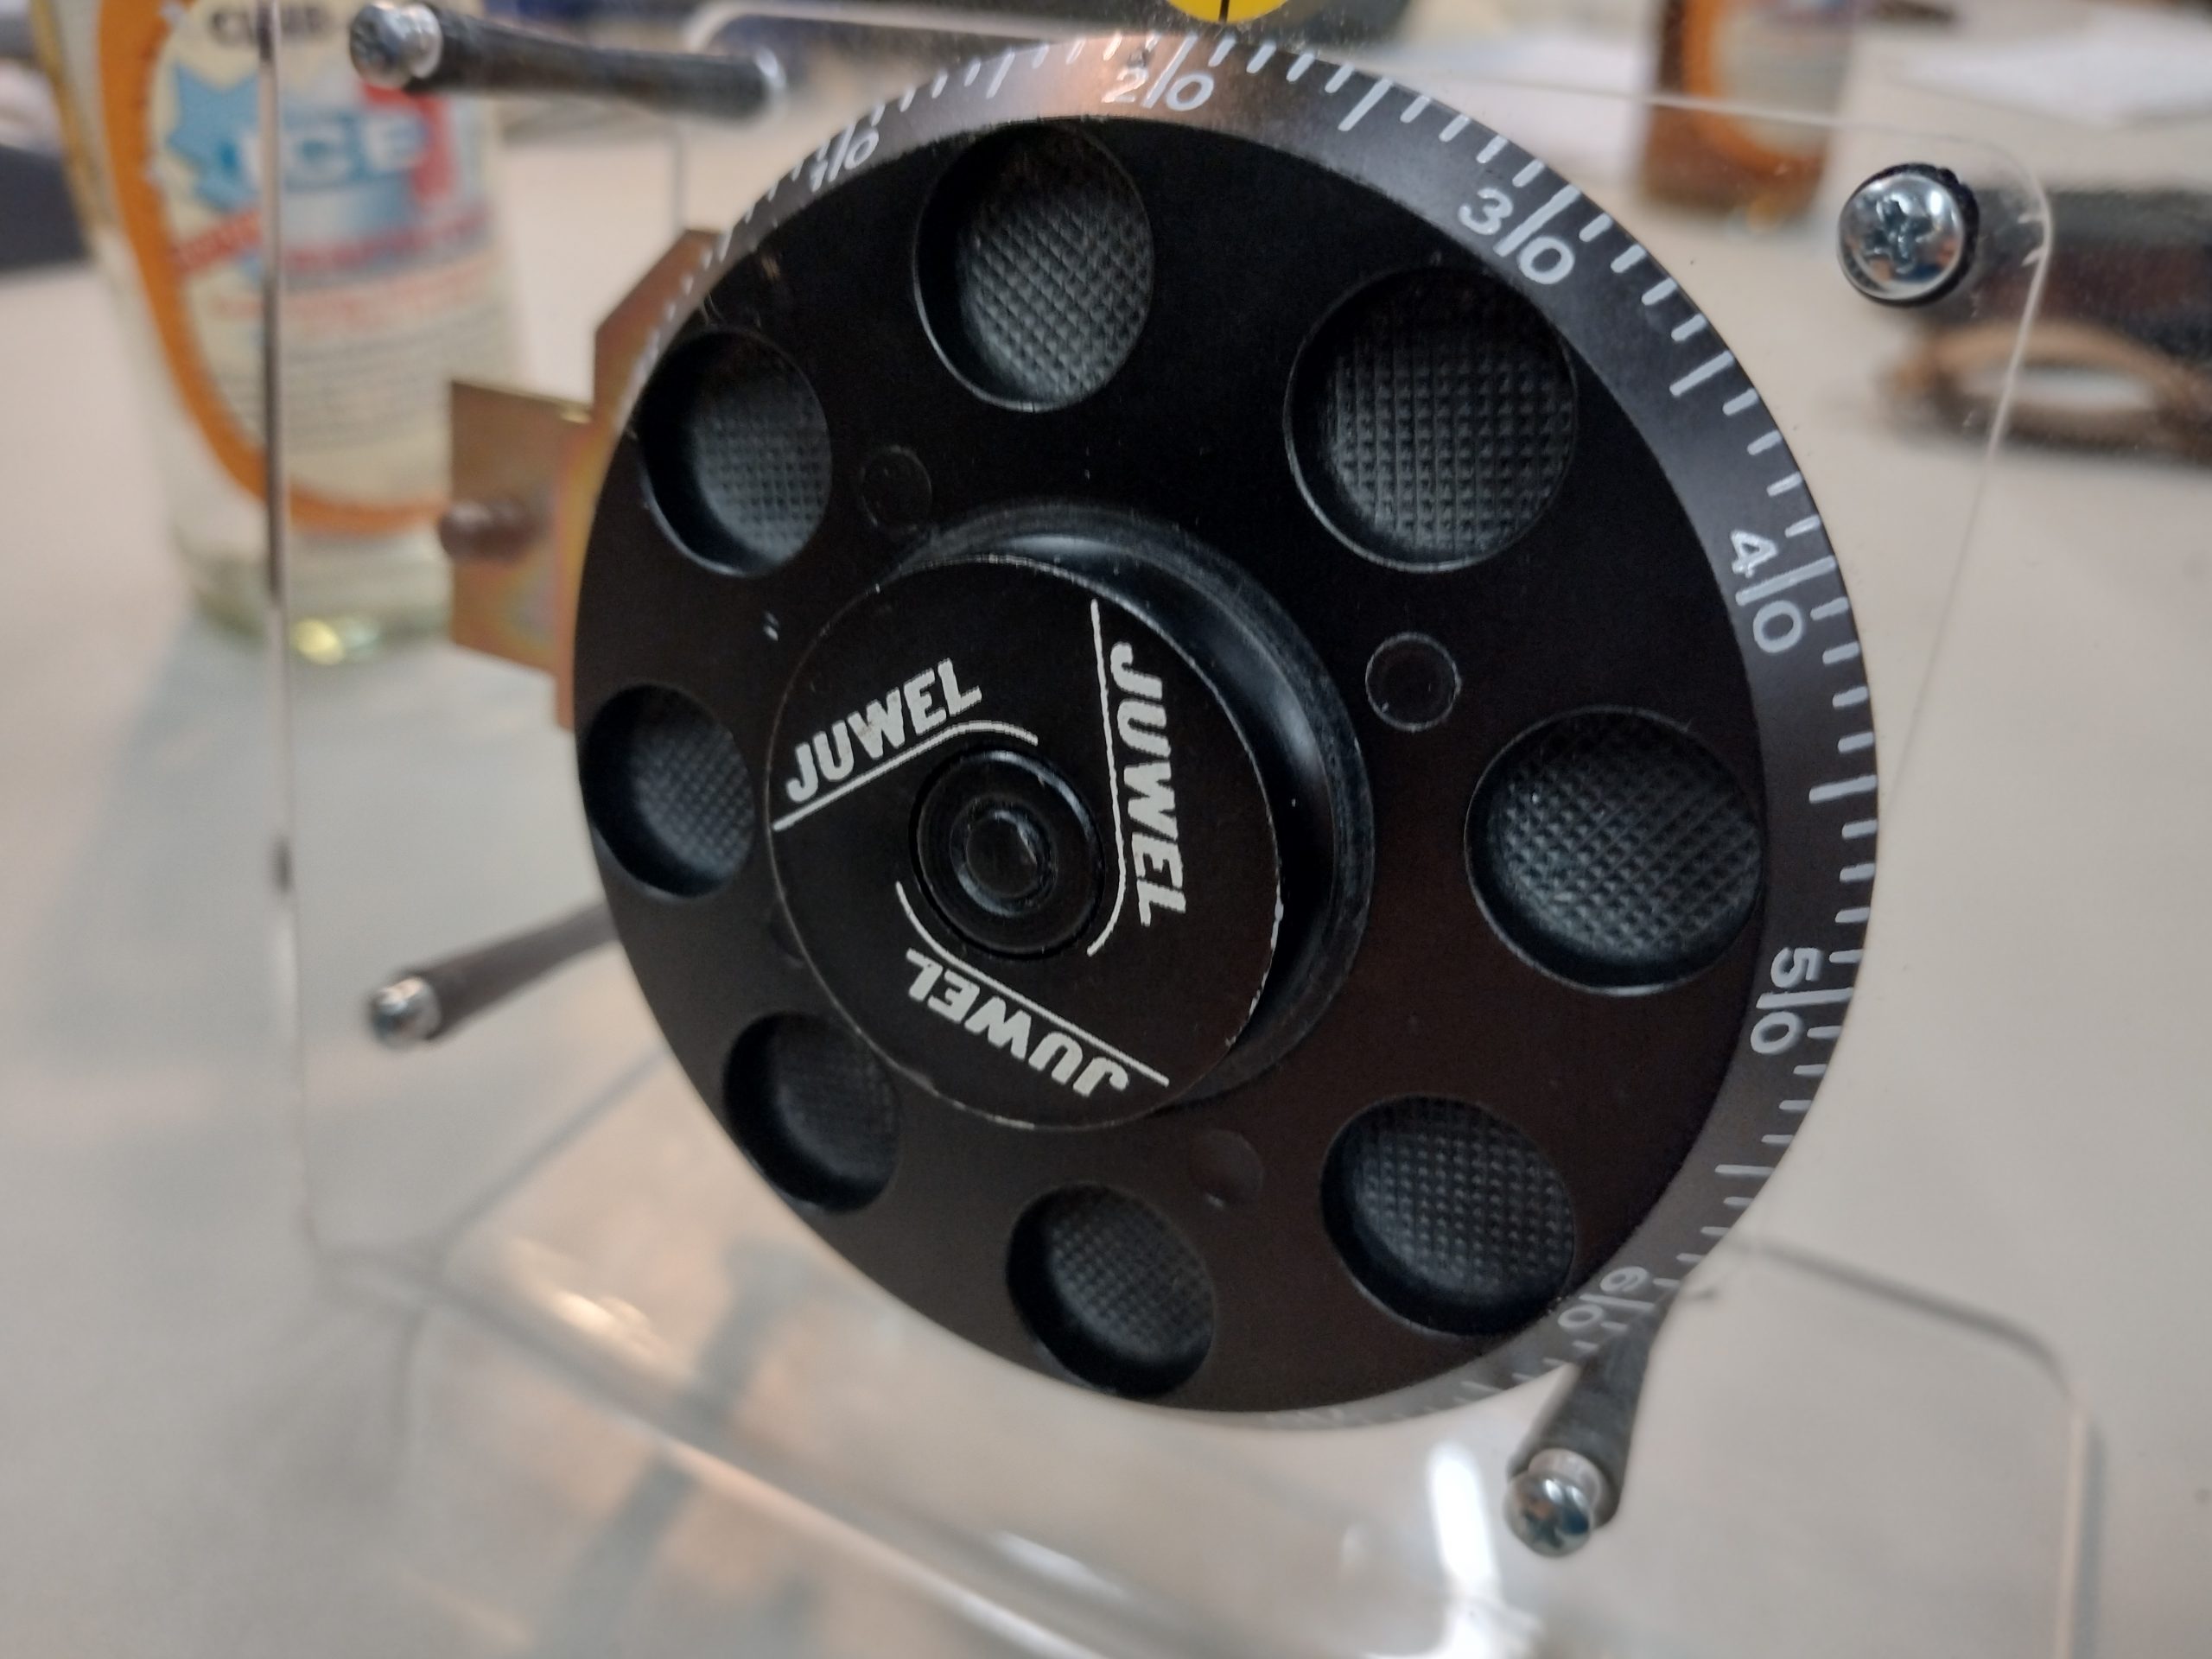
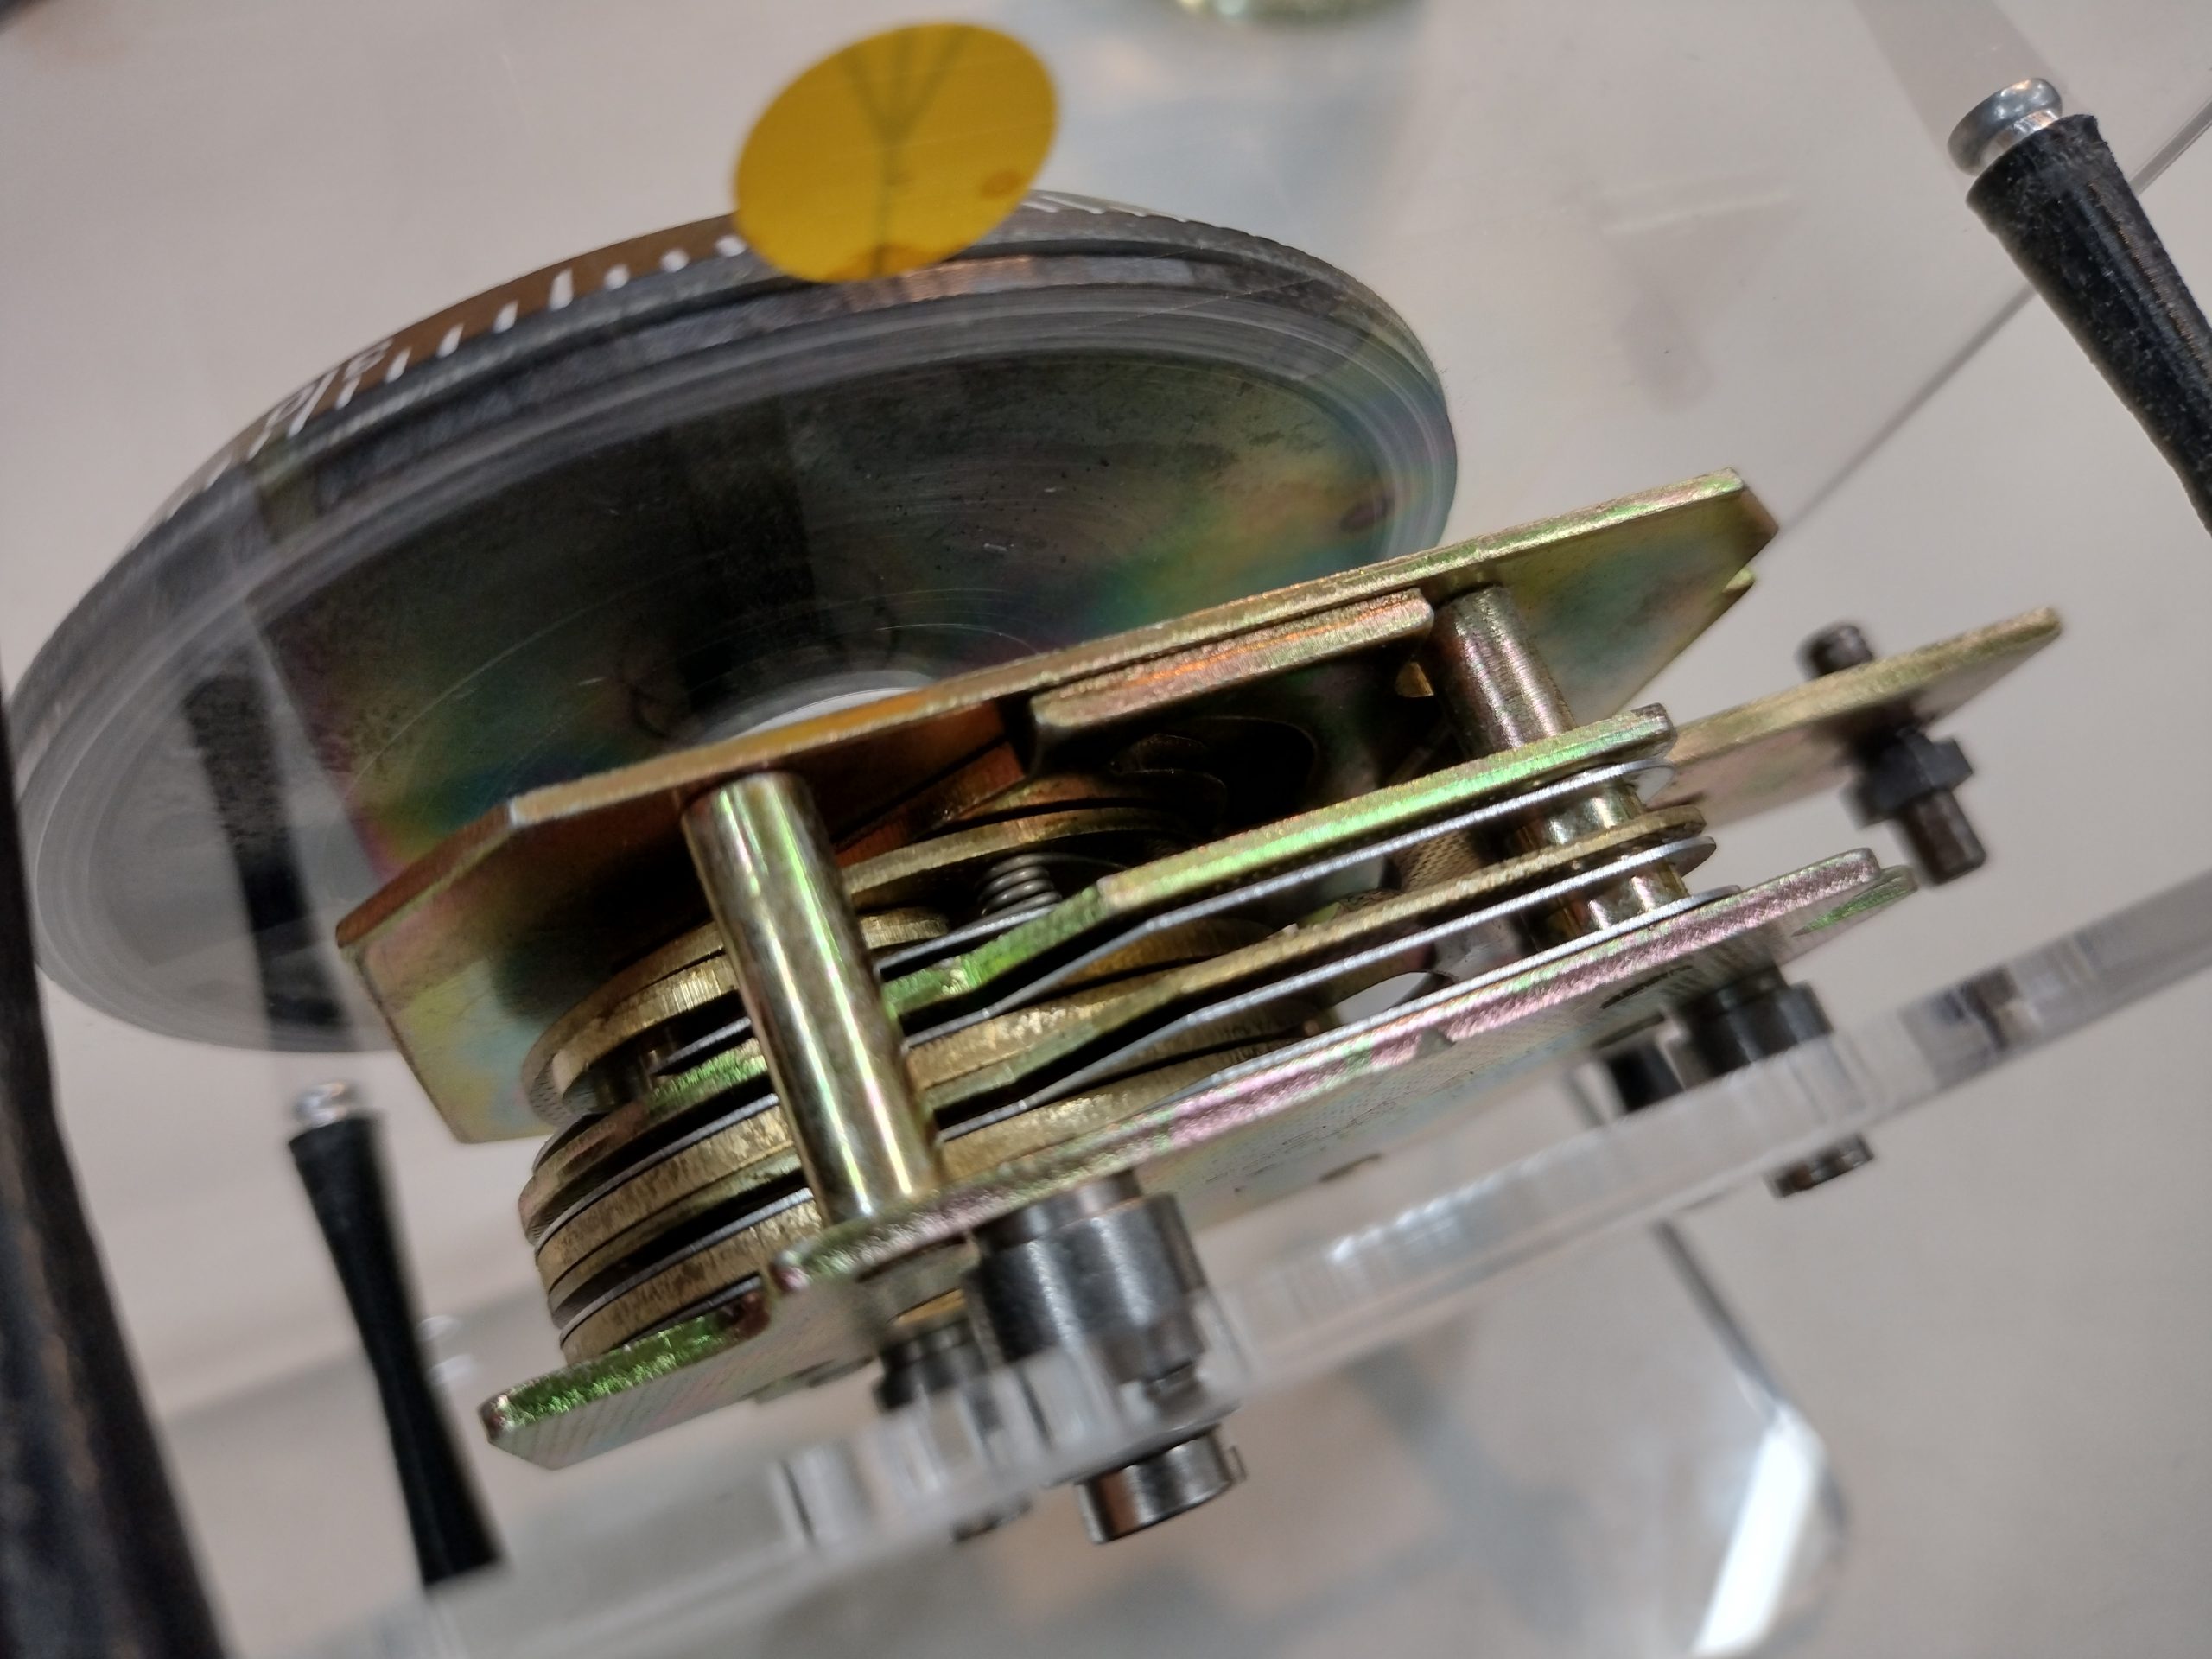
On another evening, we delved deep in lever locks, from your classic Chubb locks to high-end safes. A boroscope was brought as to try to decode some locks by belly reading the levers. E.g. to observe the scratches on the levers and determining the length of the butting making the scratches.
The WE30C also made its appearance, one night. The lock was used on pay phones, and is remarkably hard to lockpick due to the lever blocking system, shown in the top right. As torque is applied, the blocking system engages with the levers, making all levers bind up before the lever tests the gate.
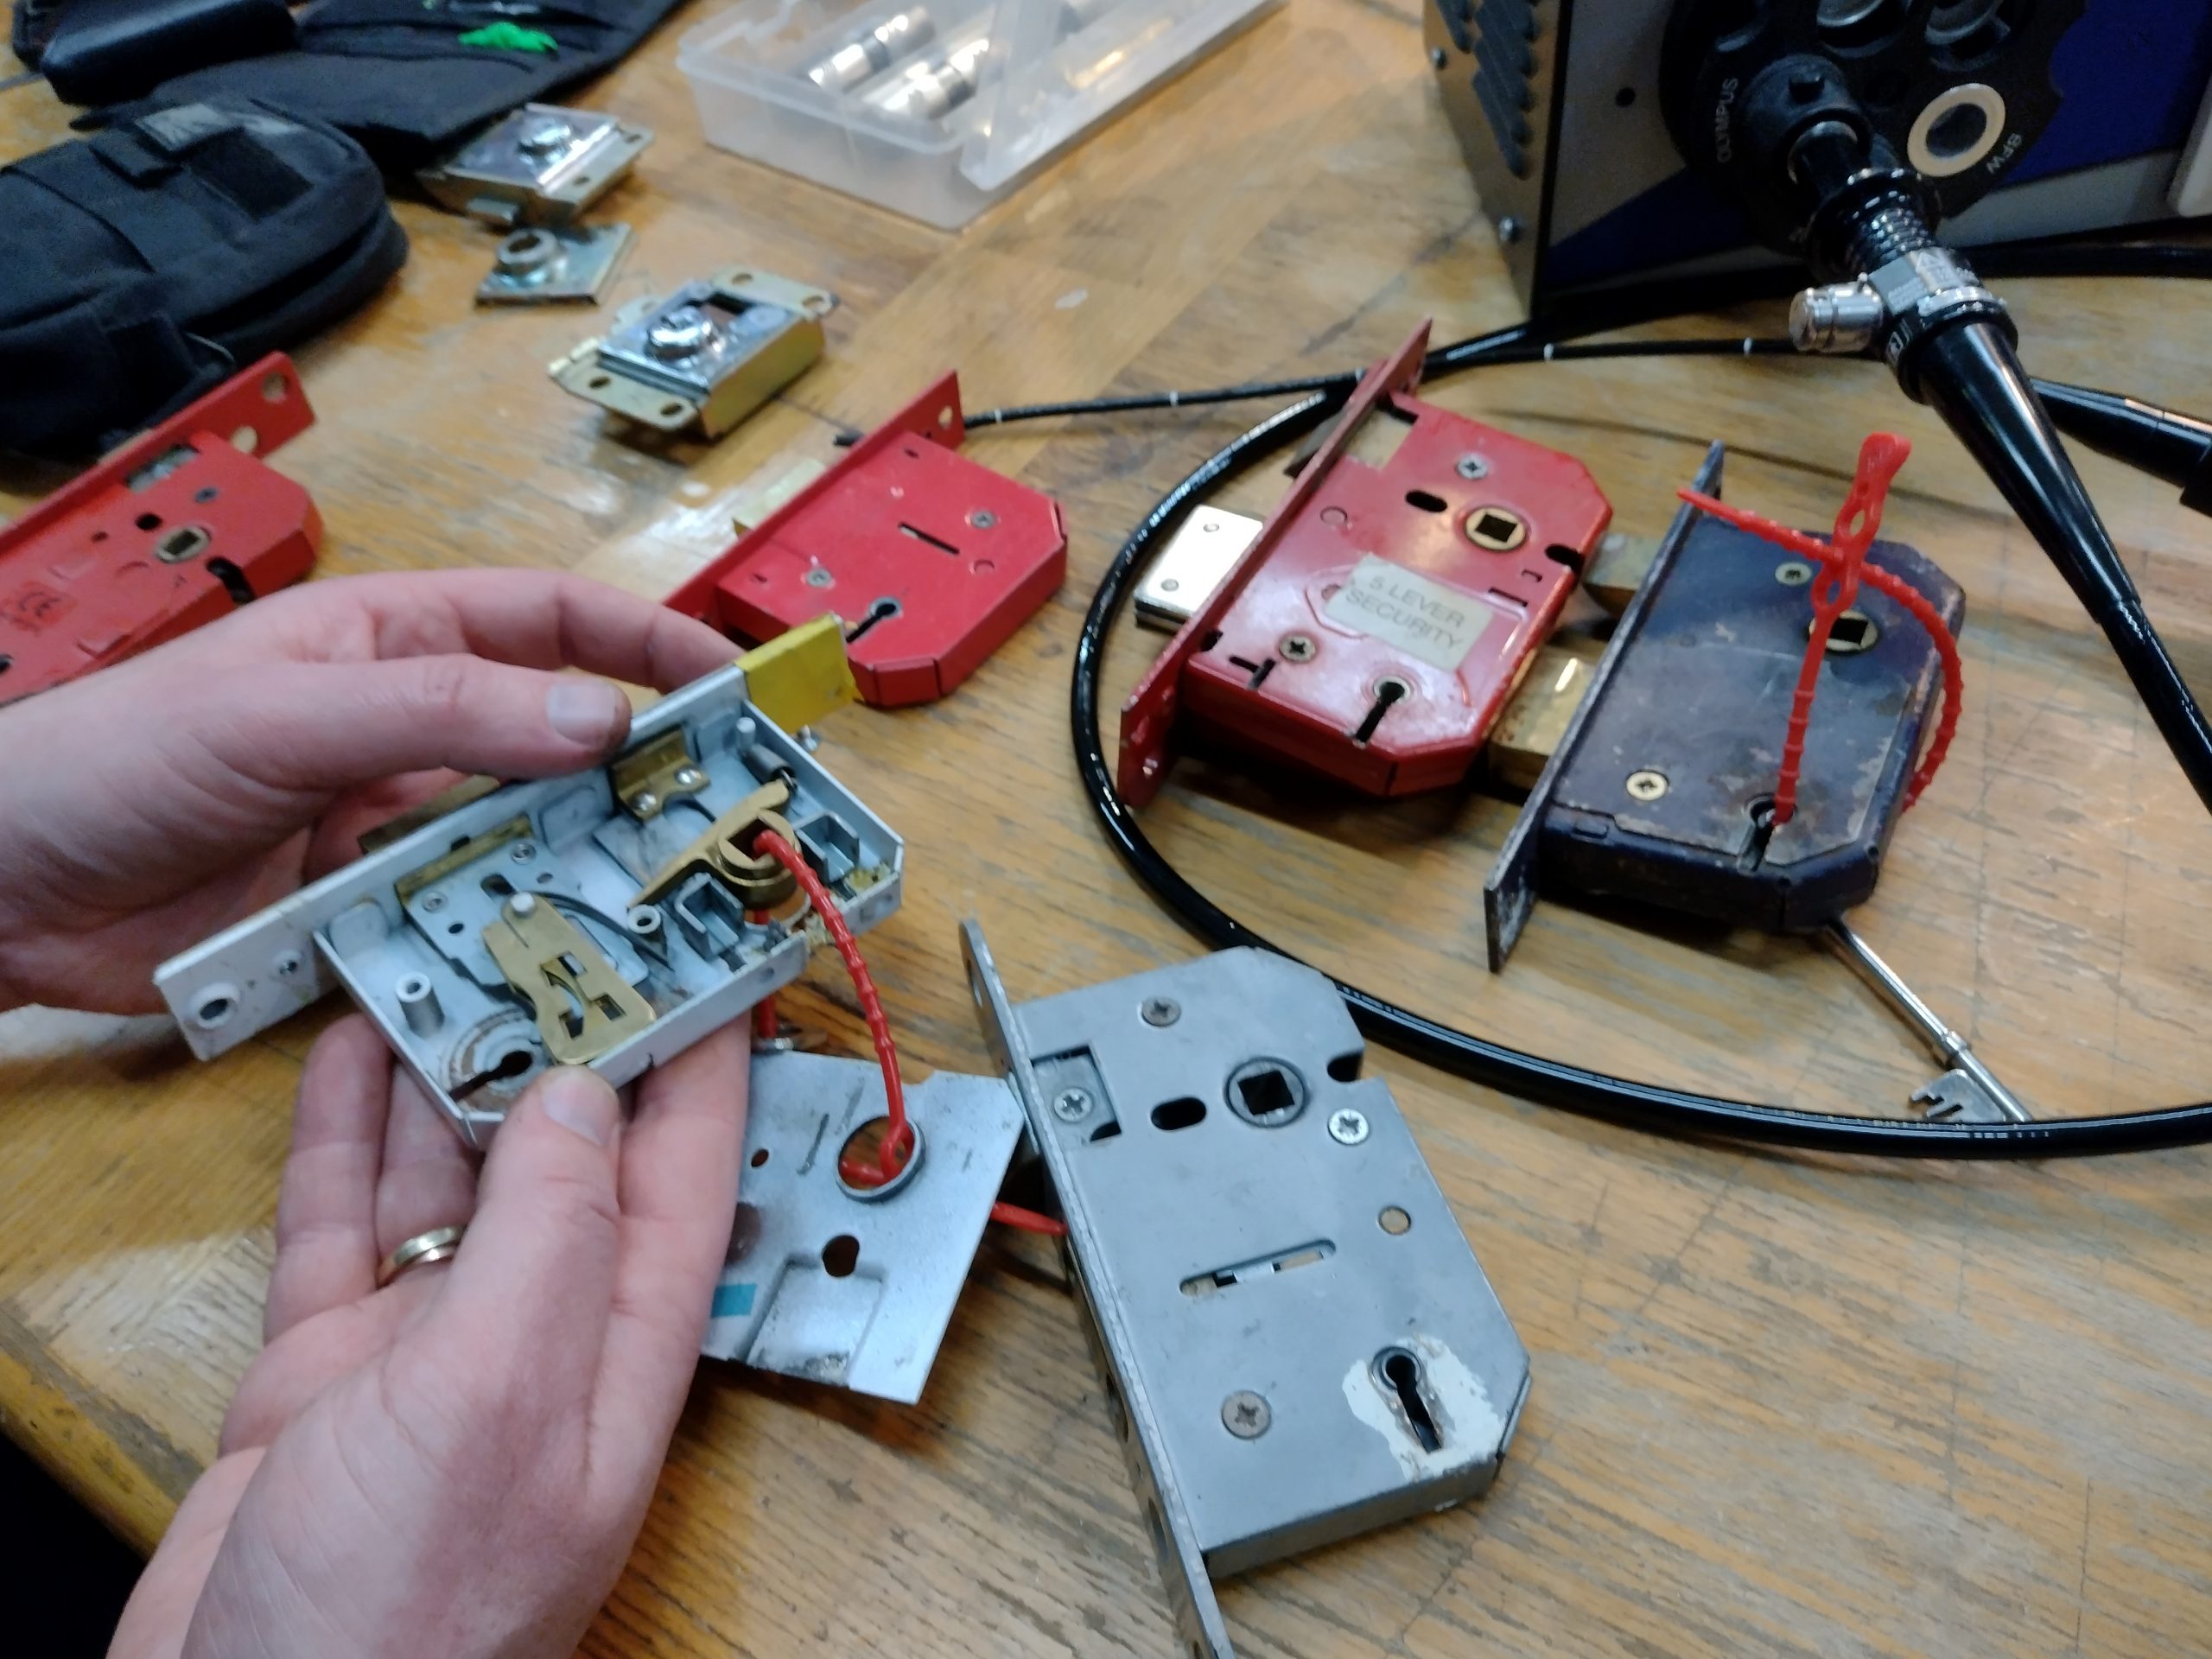
Locks don’t have to be hard to pick to be interesting, and a Lips lock Jos loaned me is a fine example of that.
Lately I’ve been drawn to picking lever locks, as they have that nice “Skyrim” vibe. You can get a long way with just some bent wires. Knowing that, Jos brought this nice Lips lock to a Toool meetup, and I got to play with it a little.
Picking it is pretty straightforward, as there are no false gates on the lever, and no curtain. The pin in the keyway does make navigation a bit awkward, but all in all it’s not hard to pick.
Things get more interesting when you take a closer look at the lock.
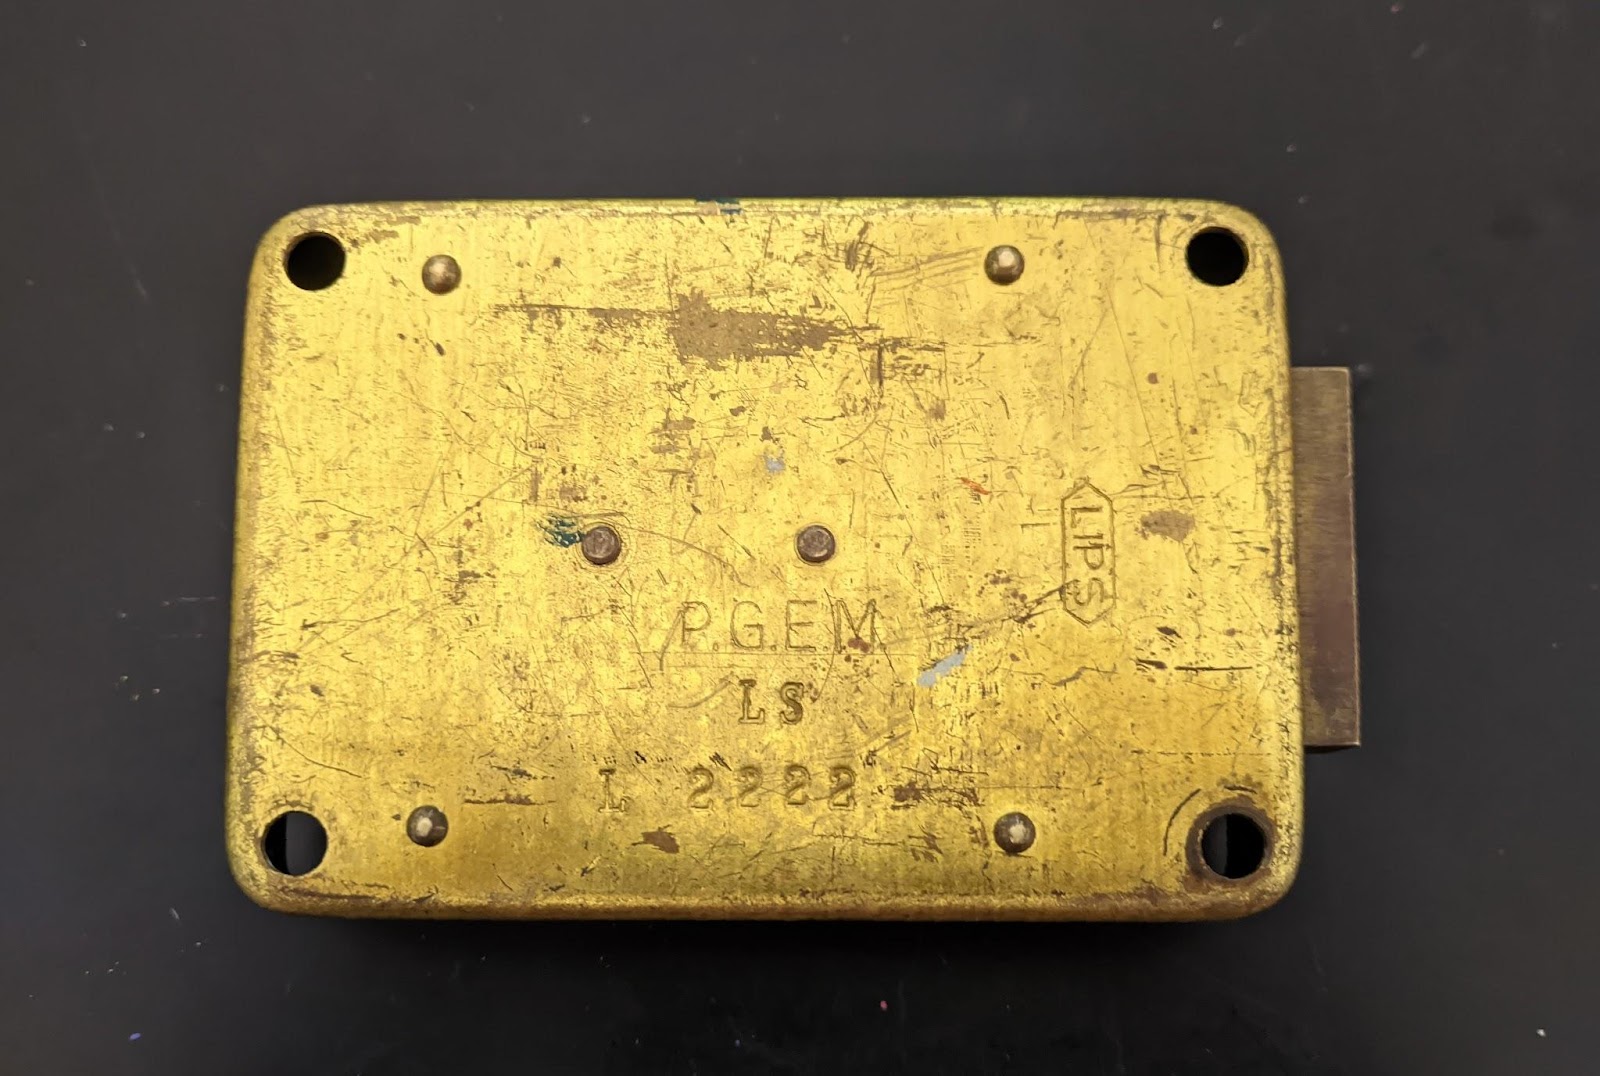
First of all, it’s a Lips lock. Lips is a Dutch lock manufacturer that was founded in Dordrecht in 1871 by Jacobus Lips. In 1971 it became part of Chubb, and since 2000 it’s part of the Assa Abloy group.
The second name on the lock is P.G.E.M. The P.G.E.M. (or Provinciale Gelderse Energie Maatschappij) was a utility company delivering electricity and gas to the whole province of Gelderland in The Netherlands. Every Dutch province used to have its own utility company. It was owned by the province, and the local municipalities.
In the 1990’s the Dutch government decided all the utility companies had to be privatized, and P.G.E.M. became part of Nuon (which is now a part of Vattenfall).
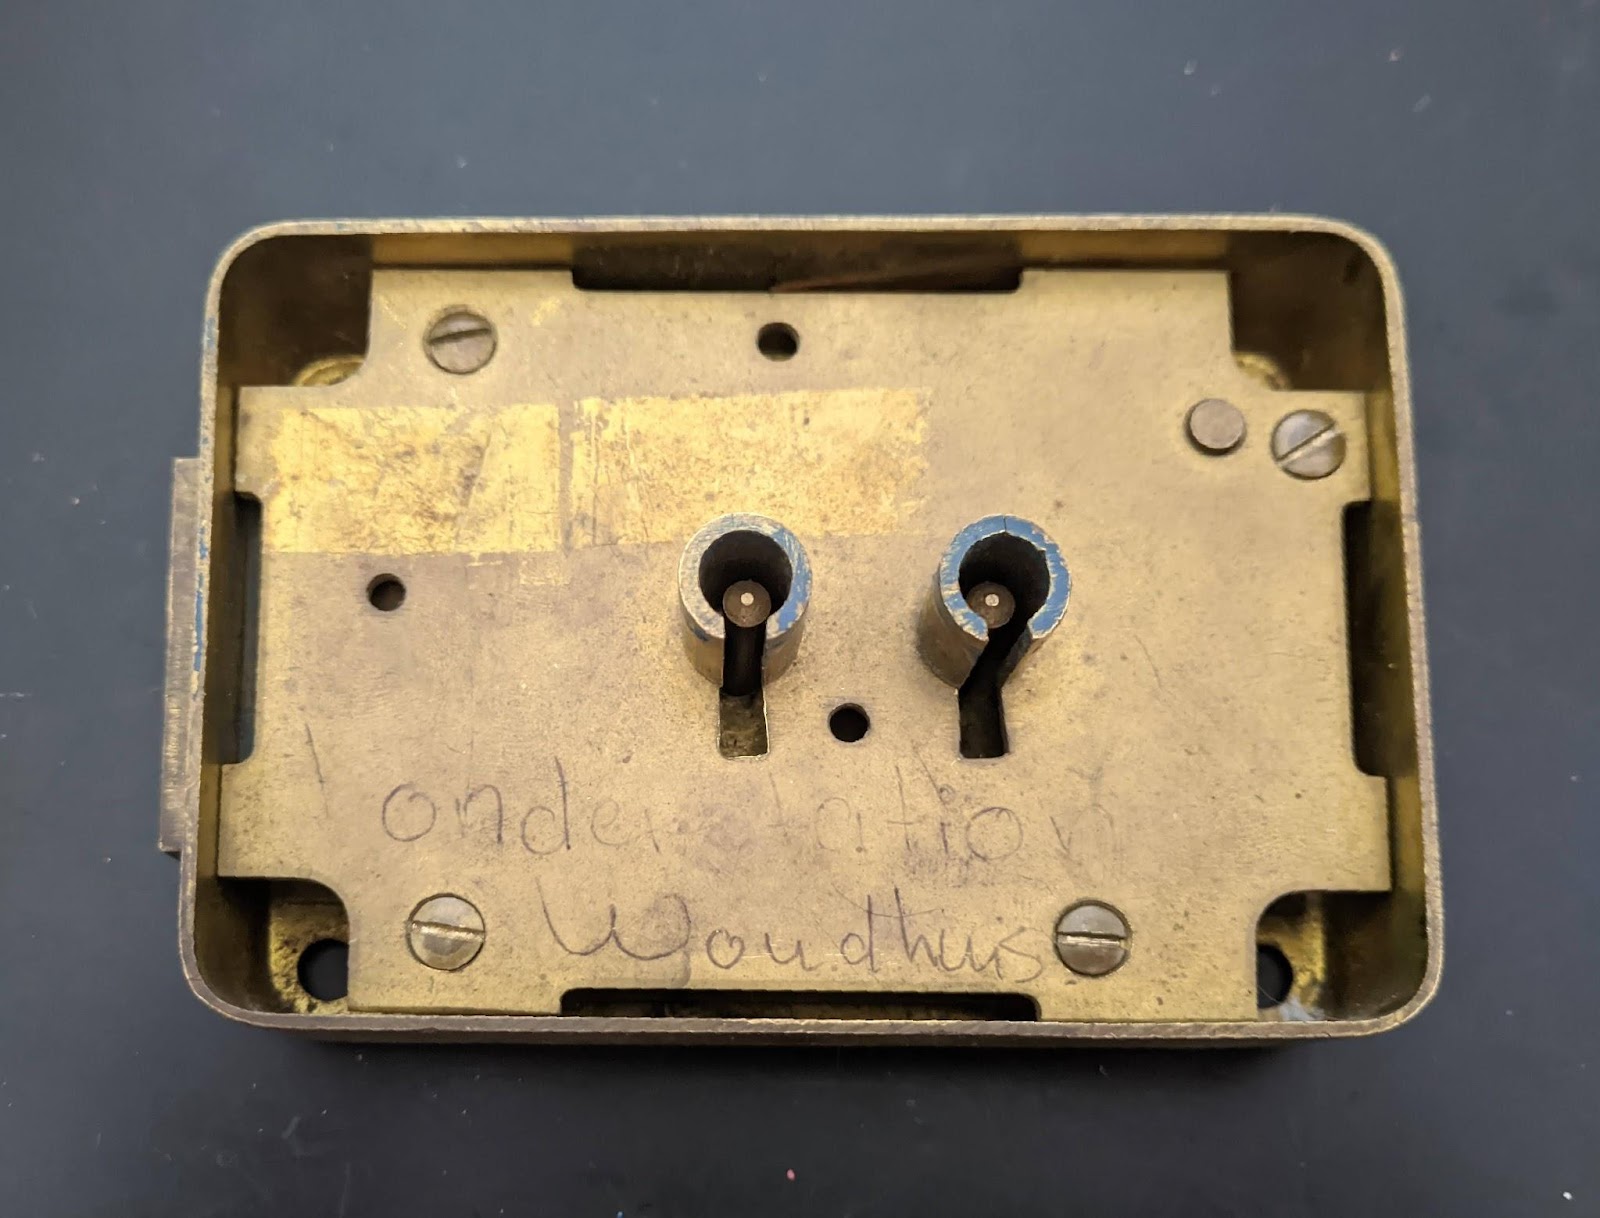
Below P.G.E.M. are the letters LS, that stand for Laagspanning or Low Voltage. PGEM used these locks to secure electrical substations, and LS indicates this particular lock was used on a low voltage substation. The other side of the lock tells us more about this.
Here we see “Onderstation Woudhuis” written in pencil. Onderstation Woudhuis is a substation located in the city of Apeldoorn.
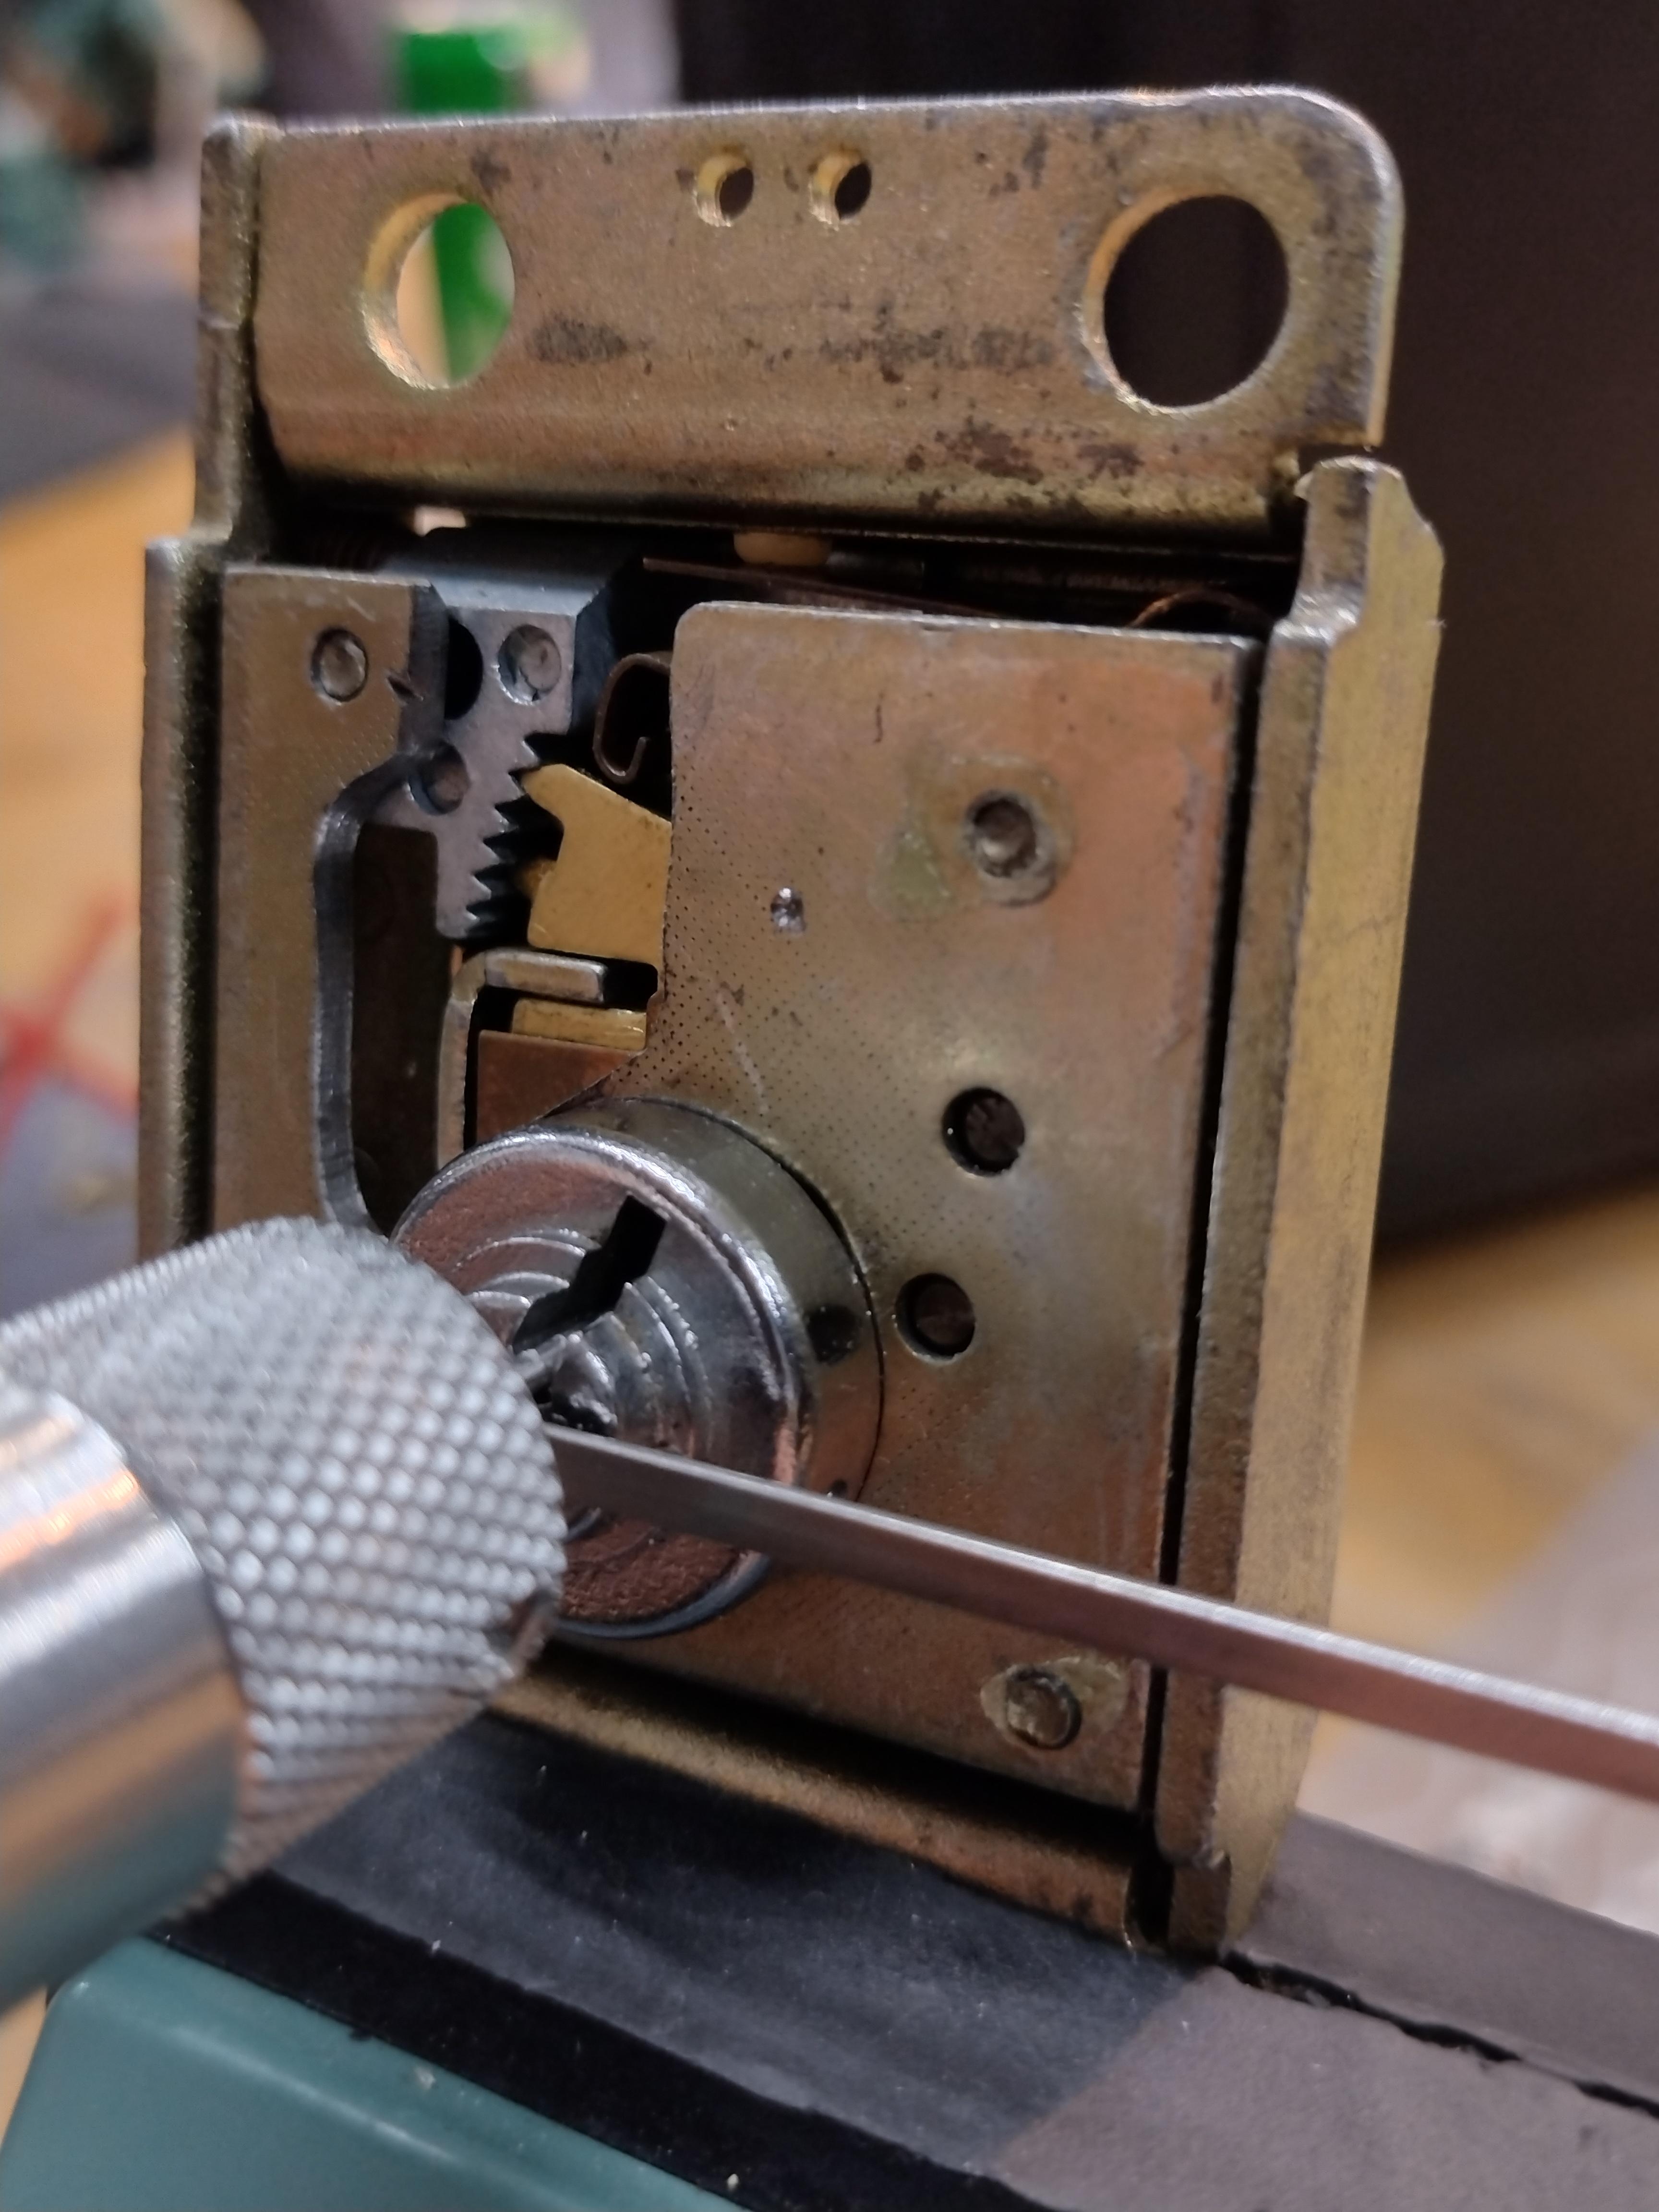
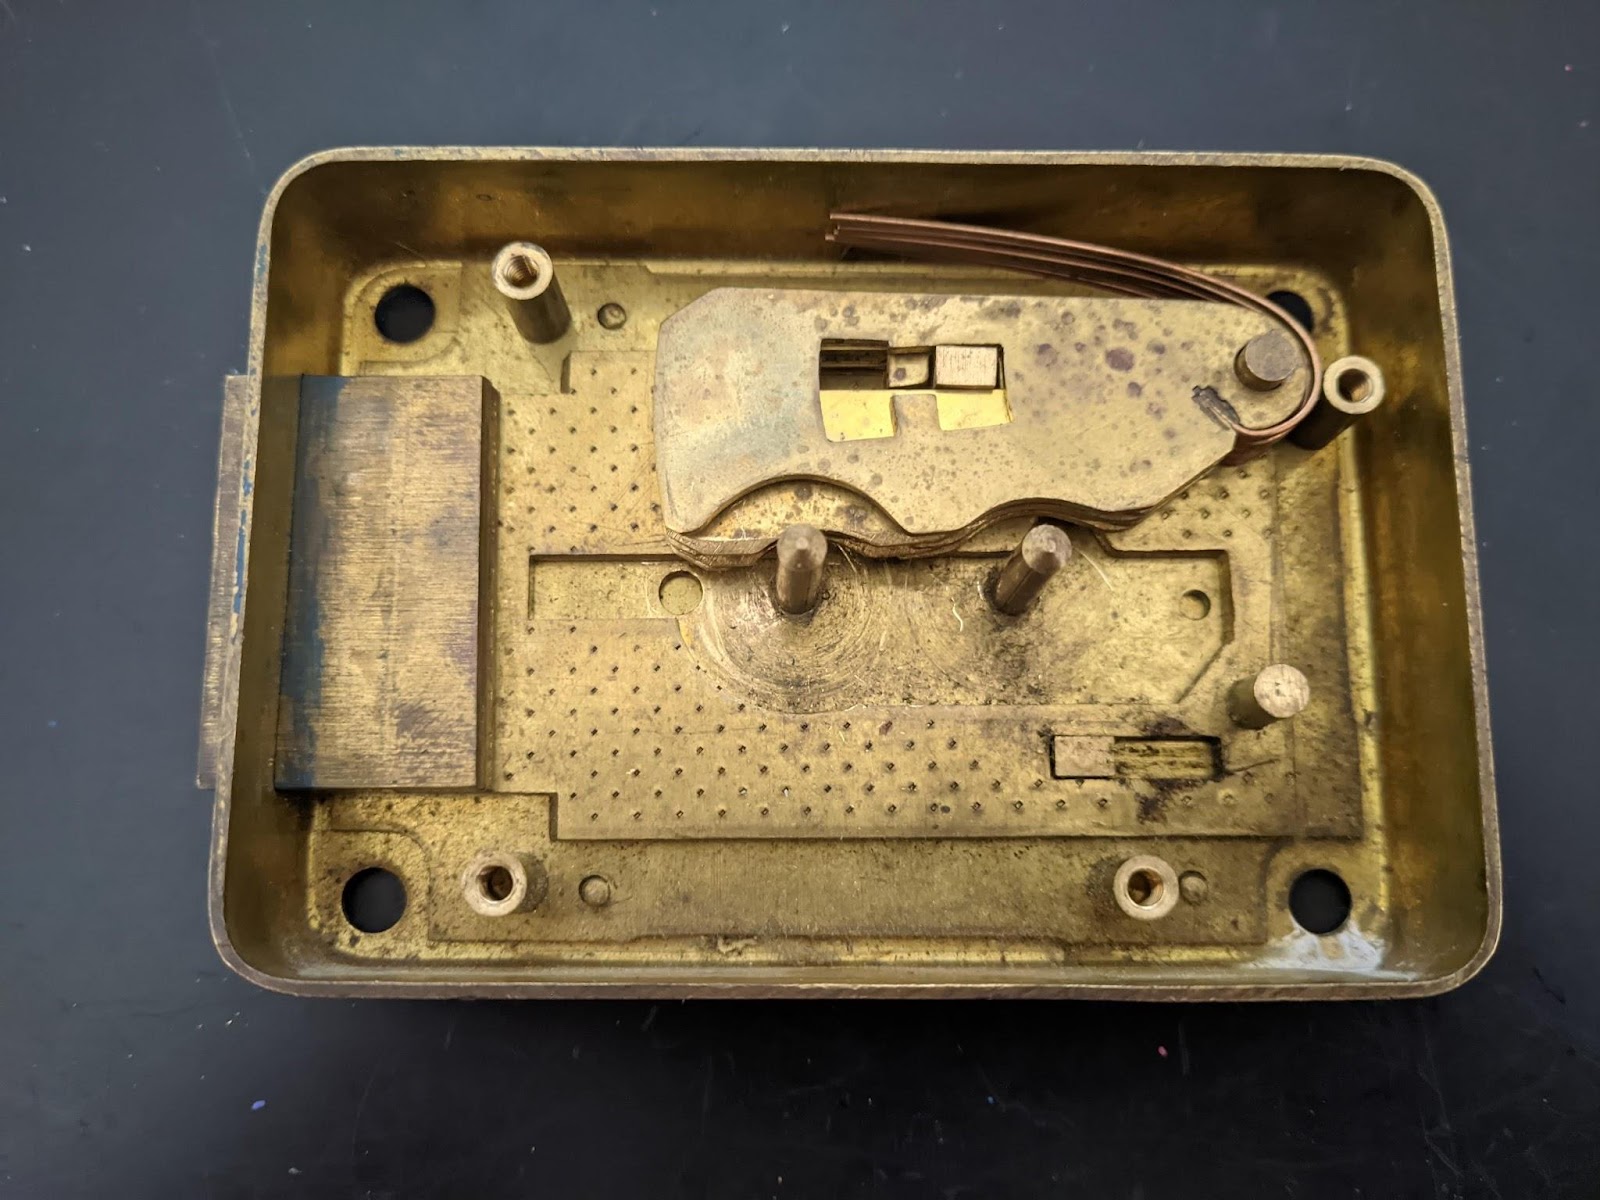
The double keyway is a striking feature which reminds of dual custody locks, only this isn’t that. It’s shared access, where only one of both keys is required to open the lock. This becomes clear when the faceplate is removed.
This seems to be a form of master keying without having to need to add extra gates to the levers, which would compromise the security of the lock.
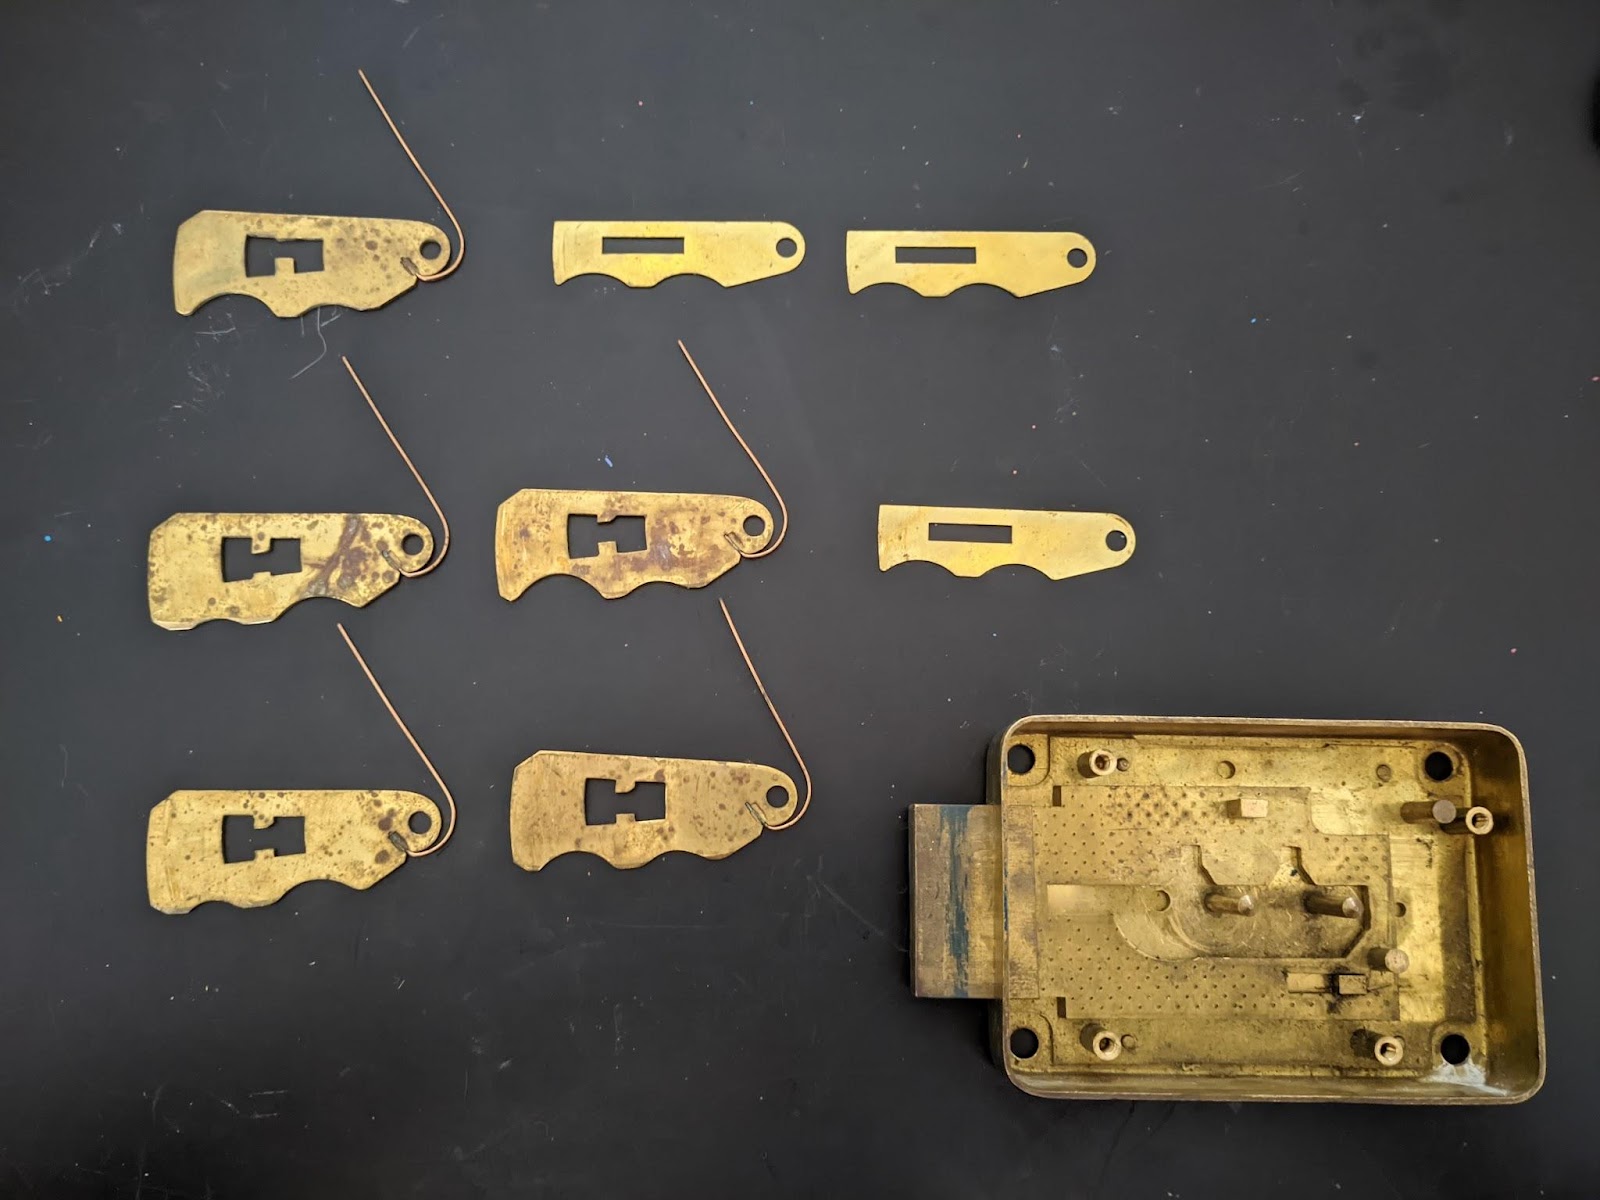
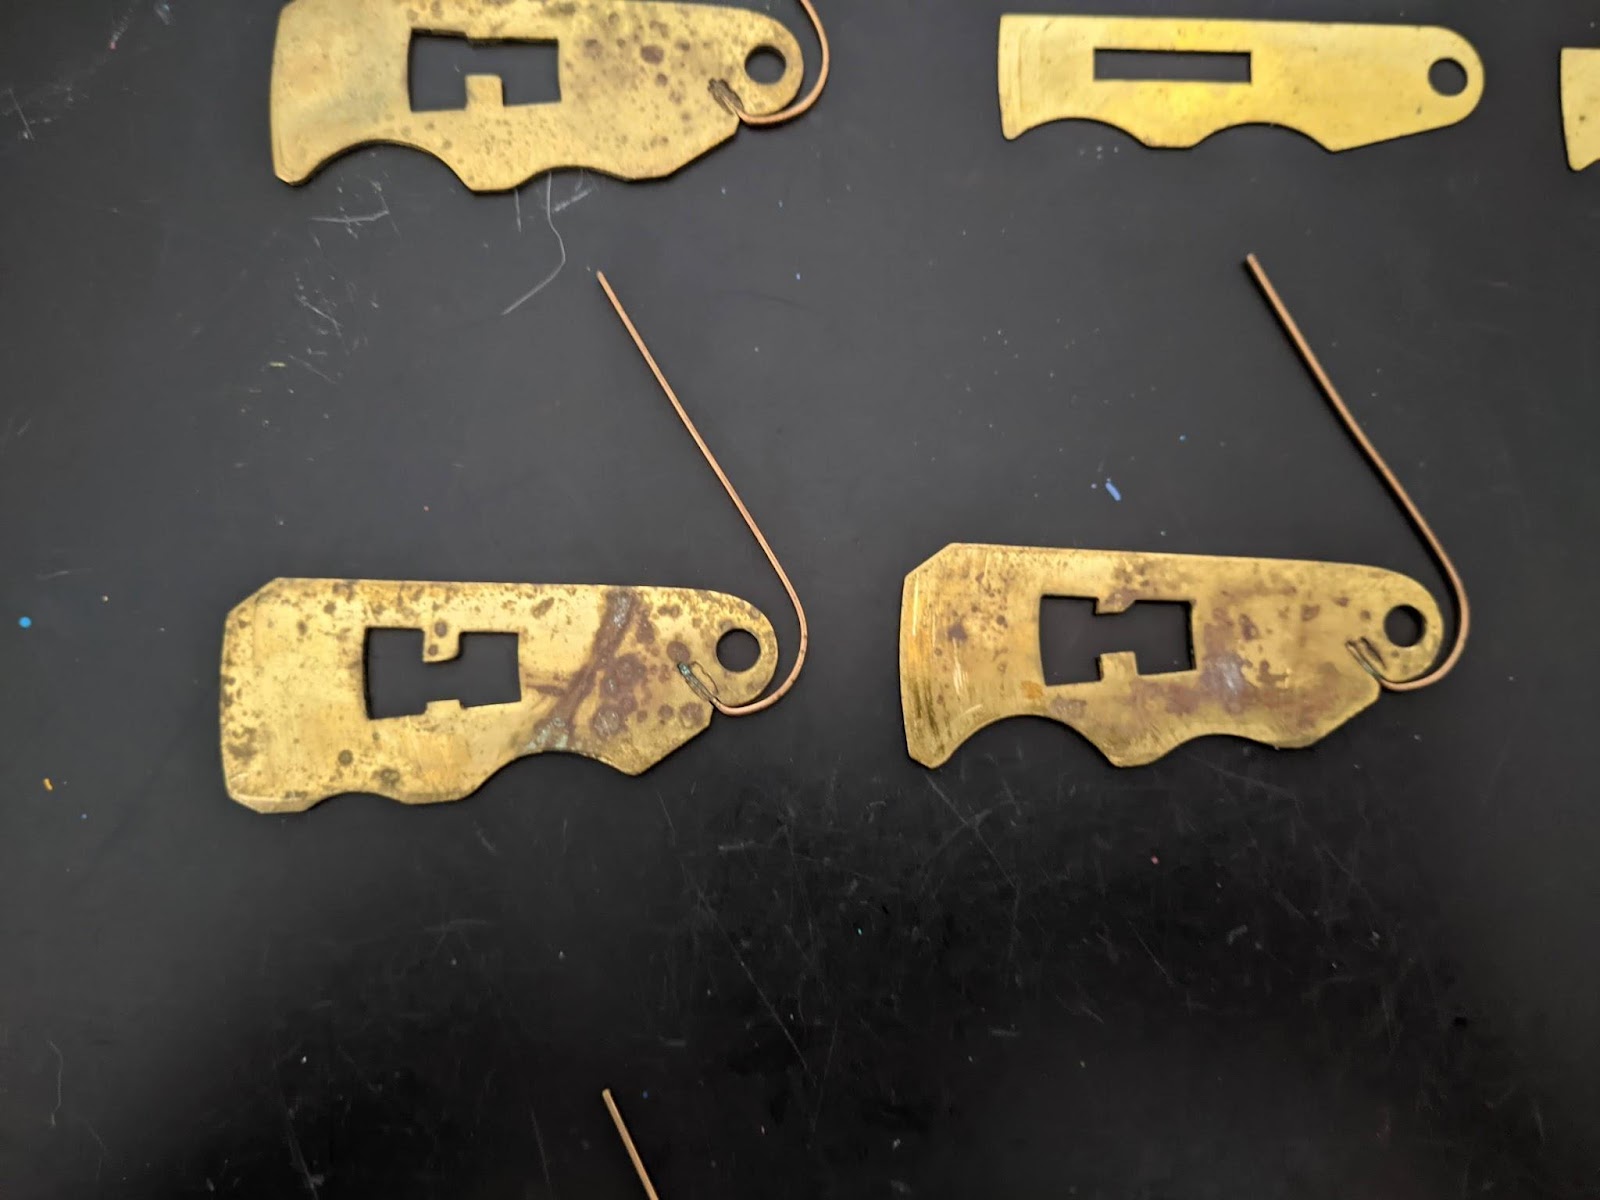
Every lever has two cuts at the bottom. A closer look at two of the levers shows how different cut heights make it possible to open the lock with two different keys.
Moral of the story: locks are fun in so many ways.
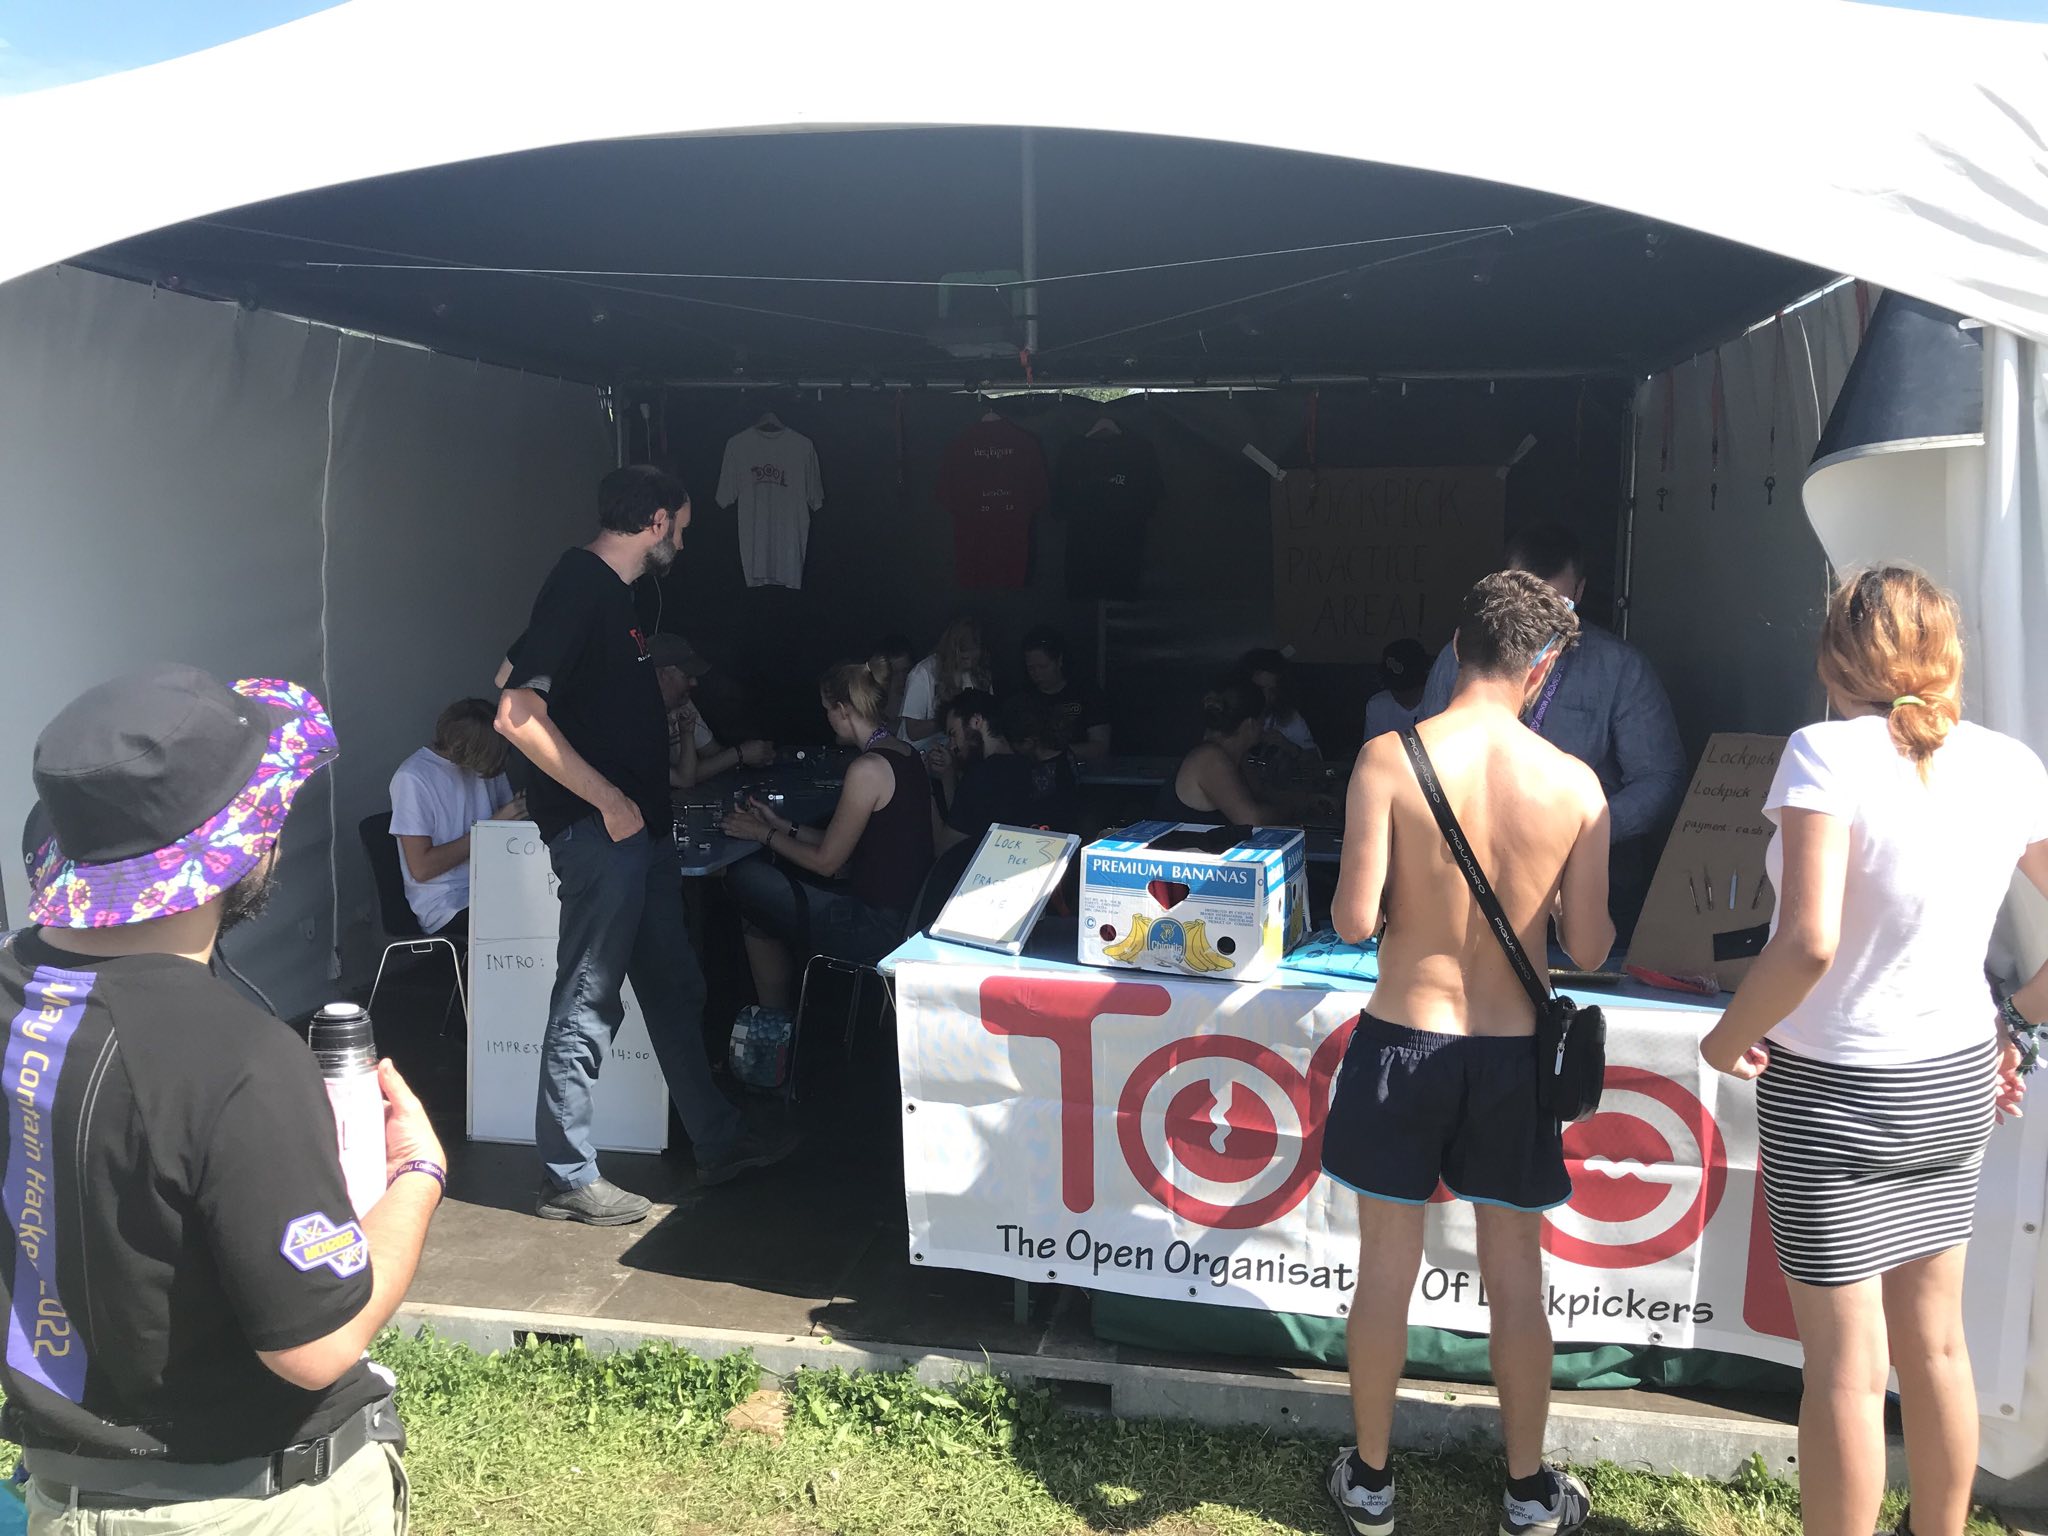
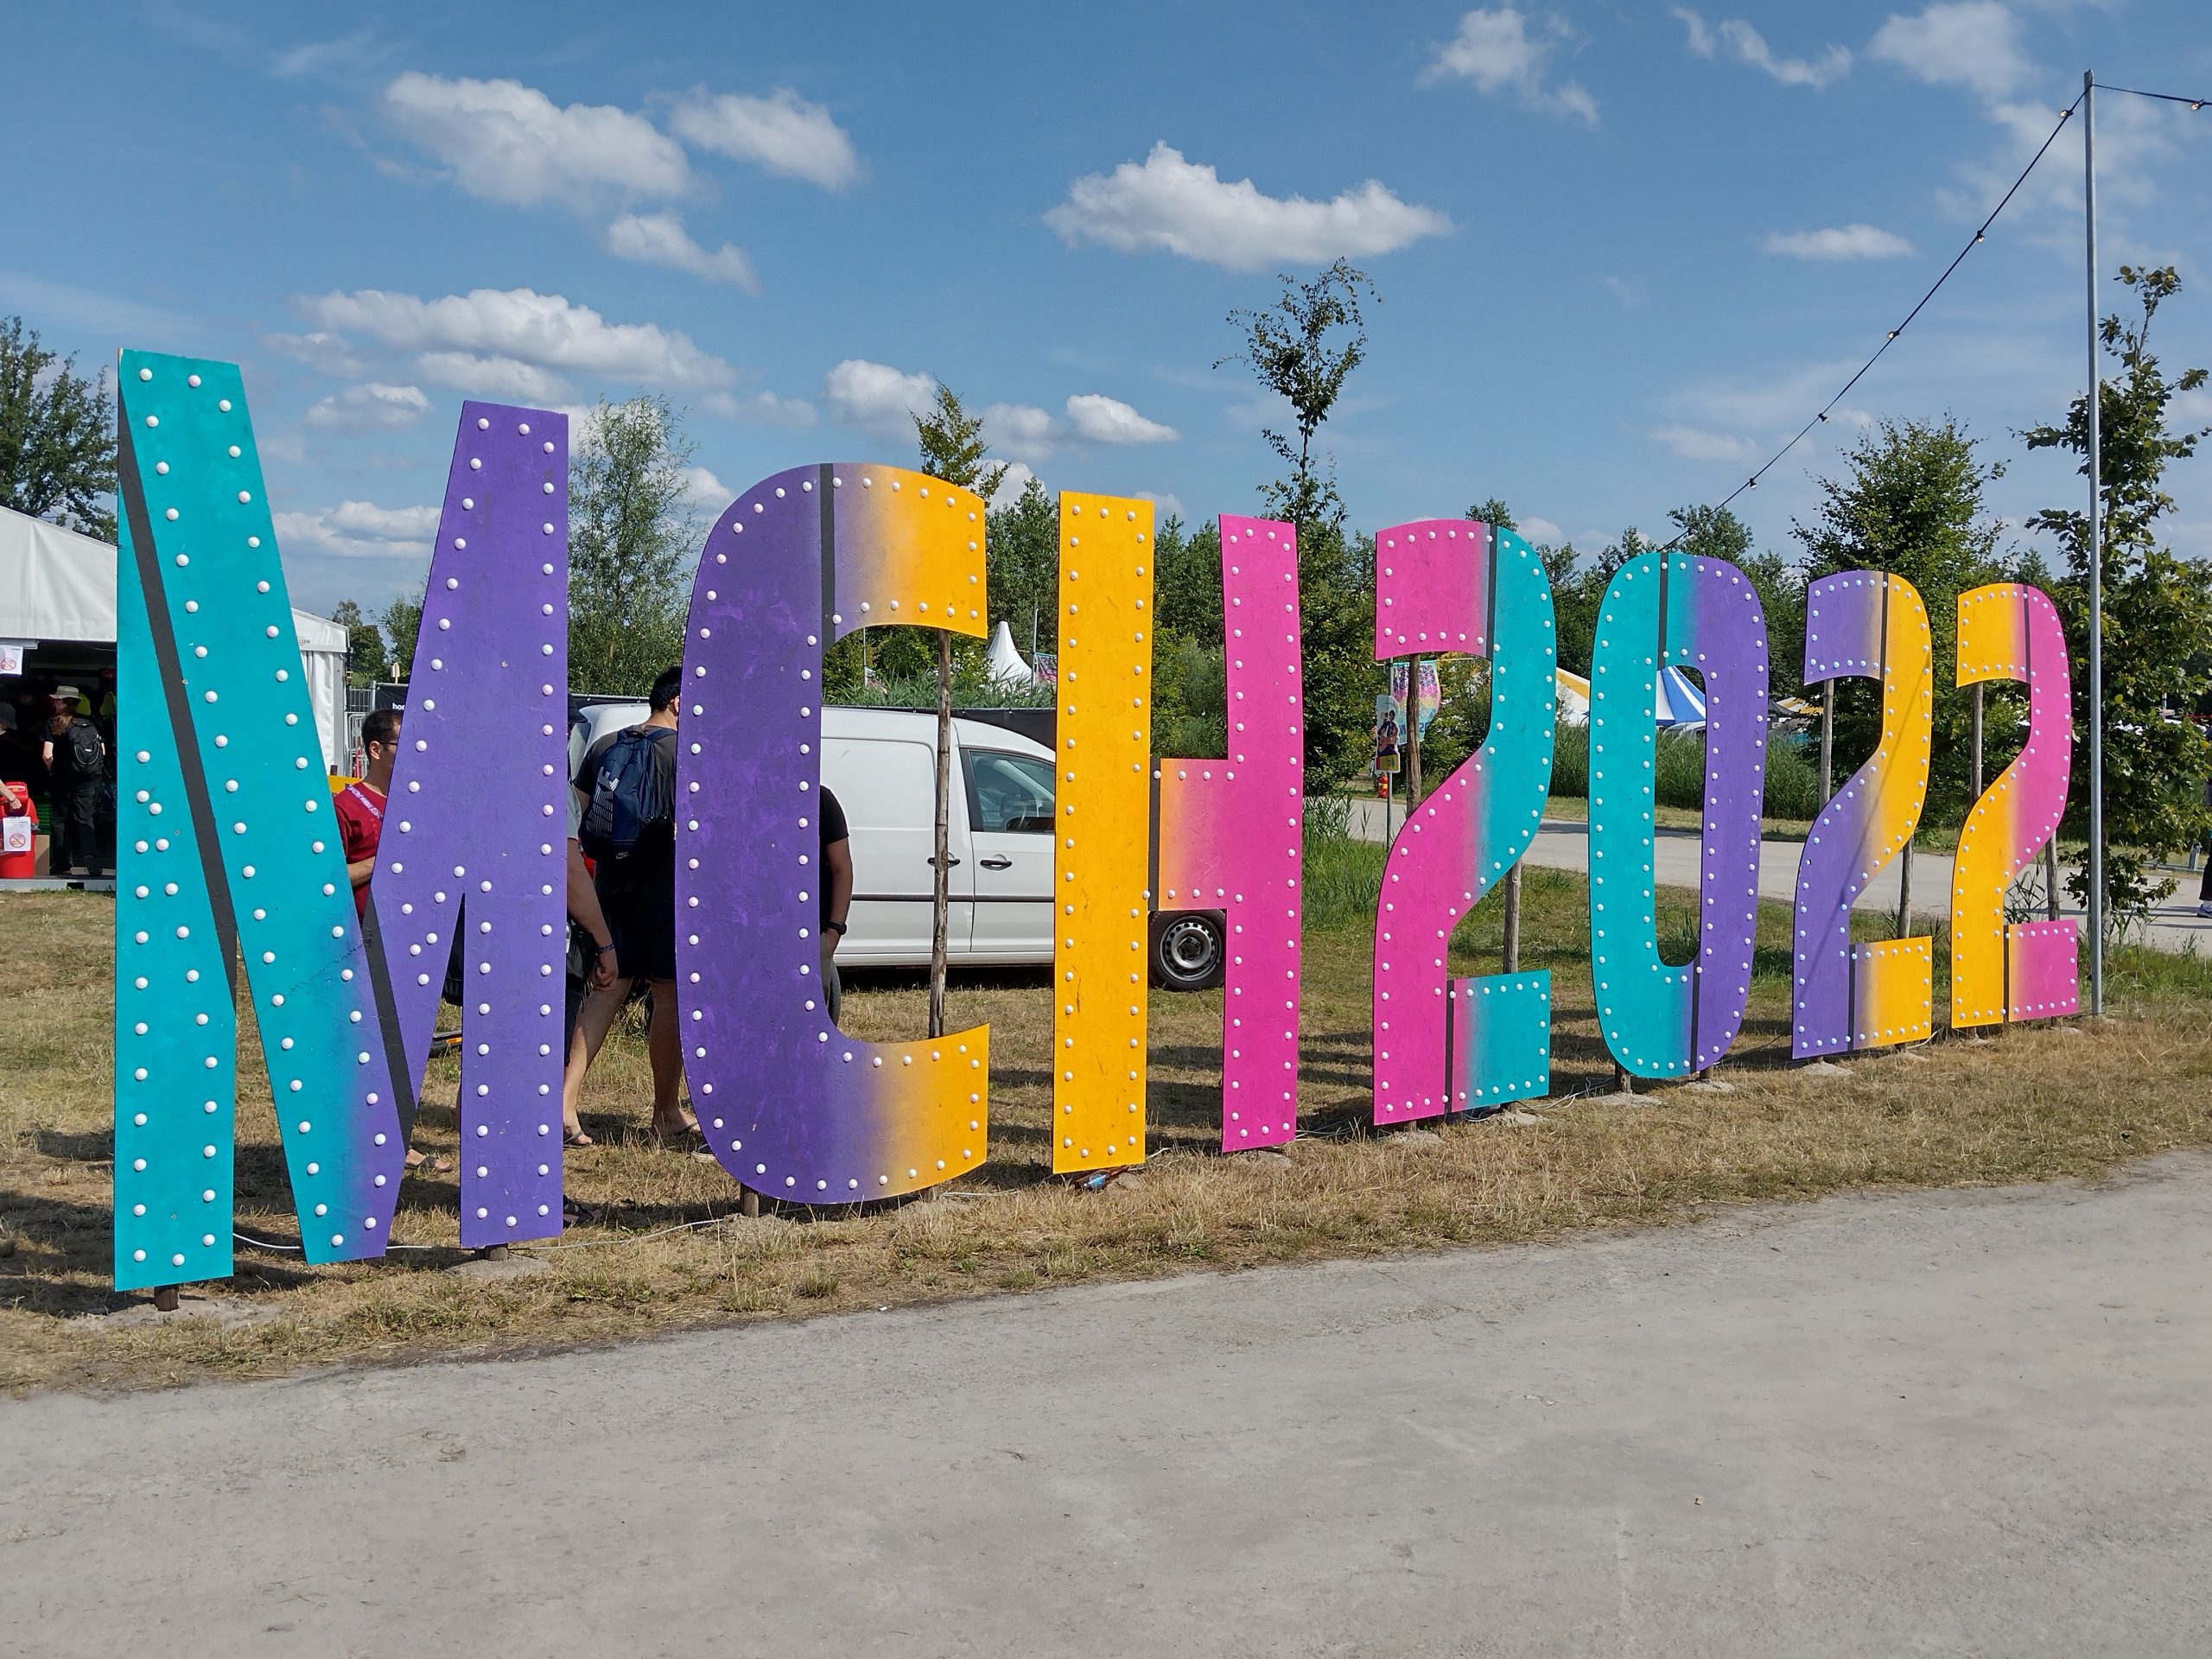
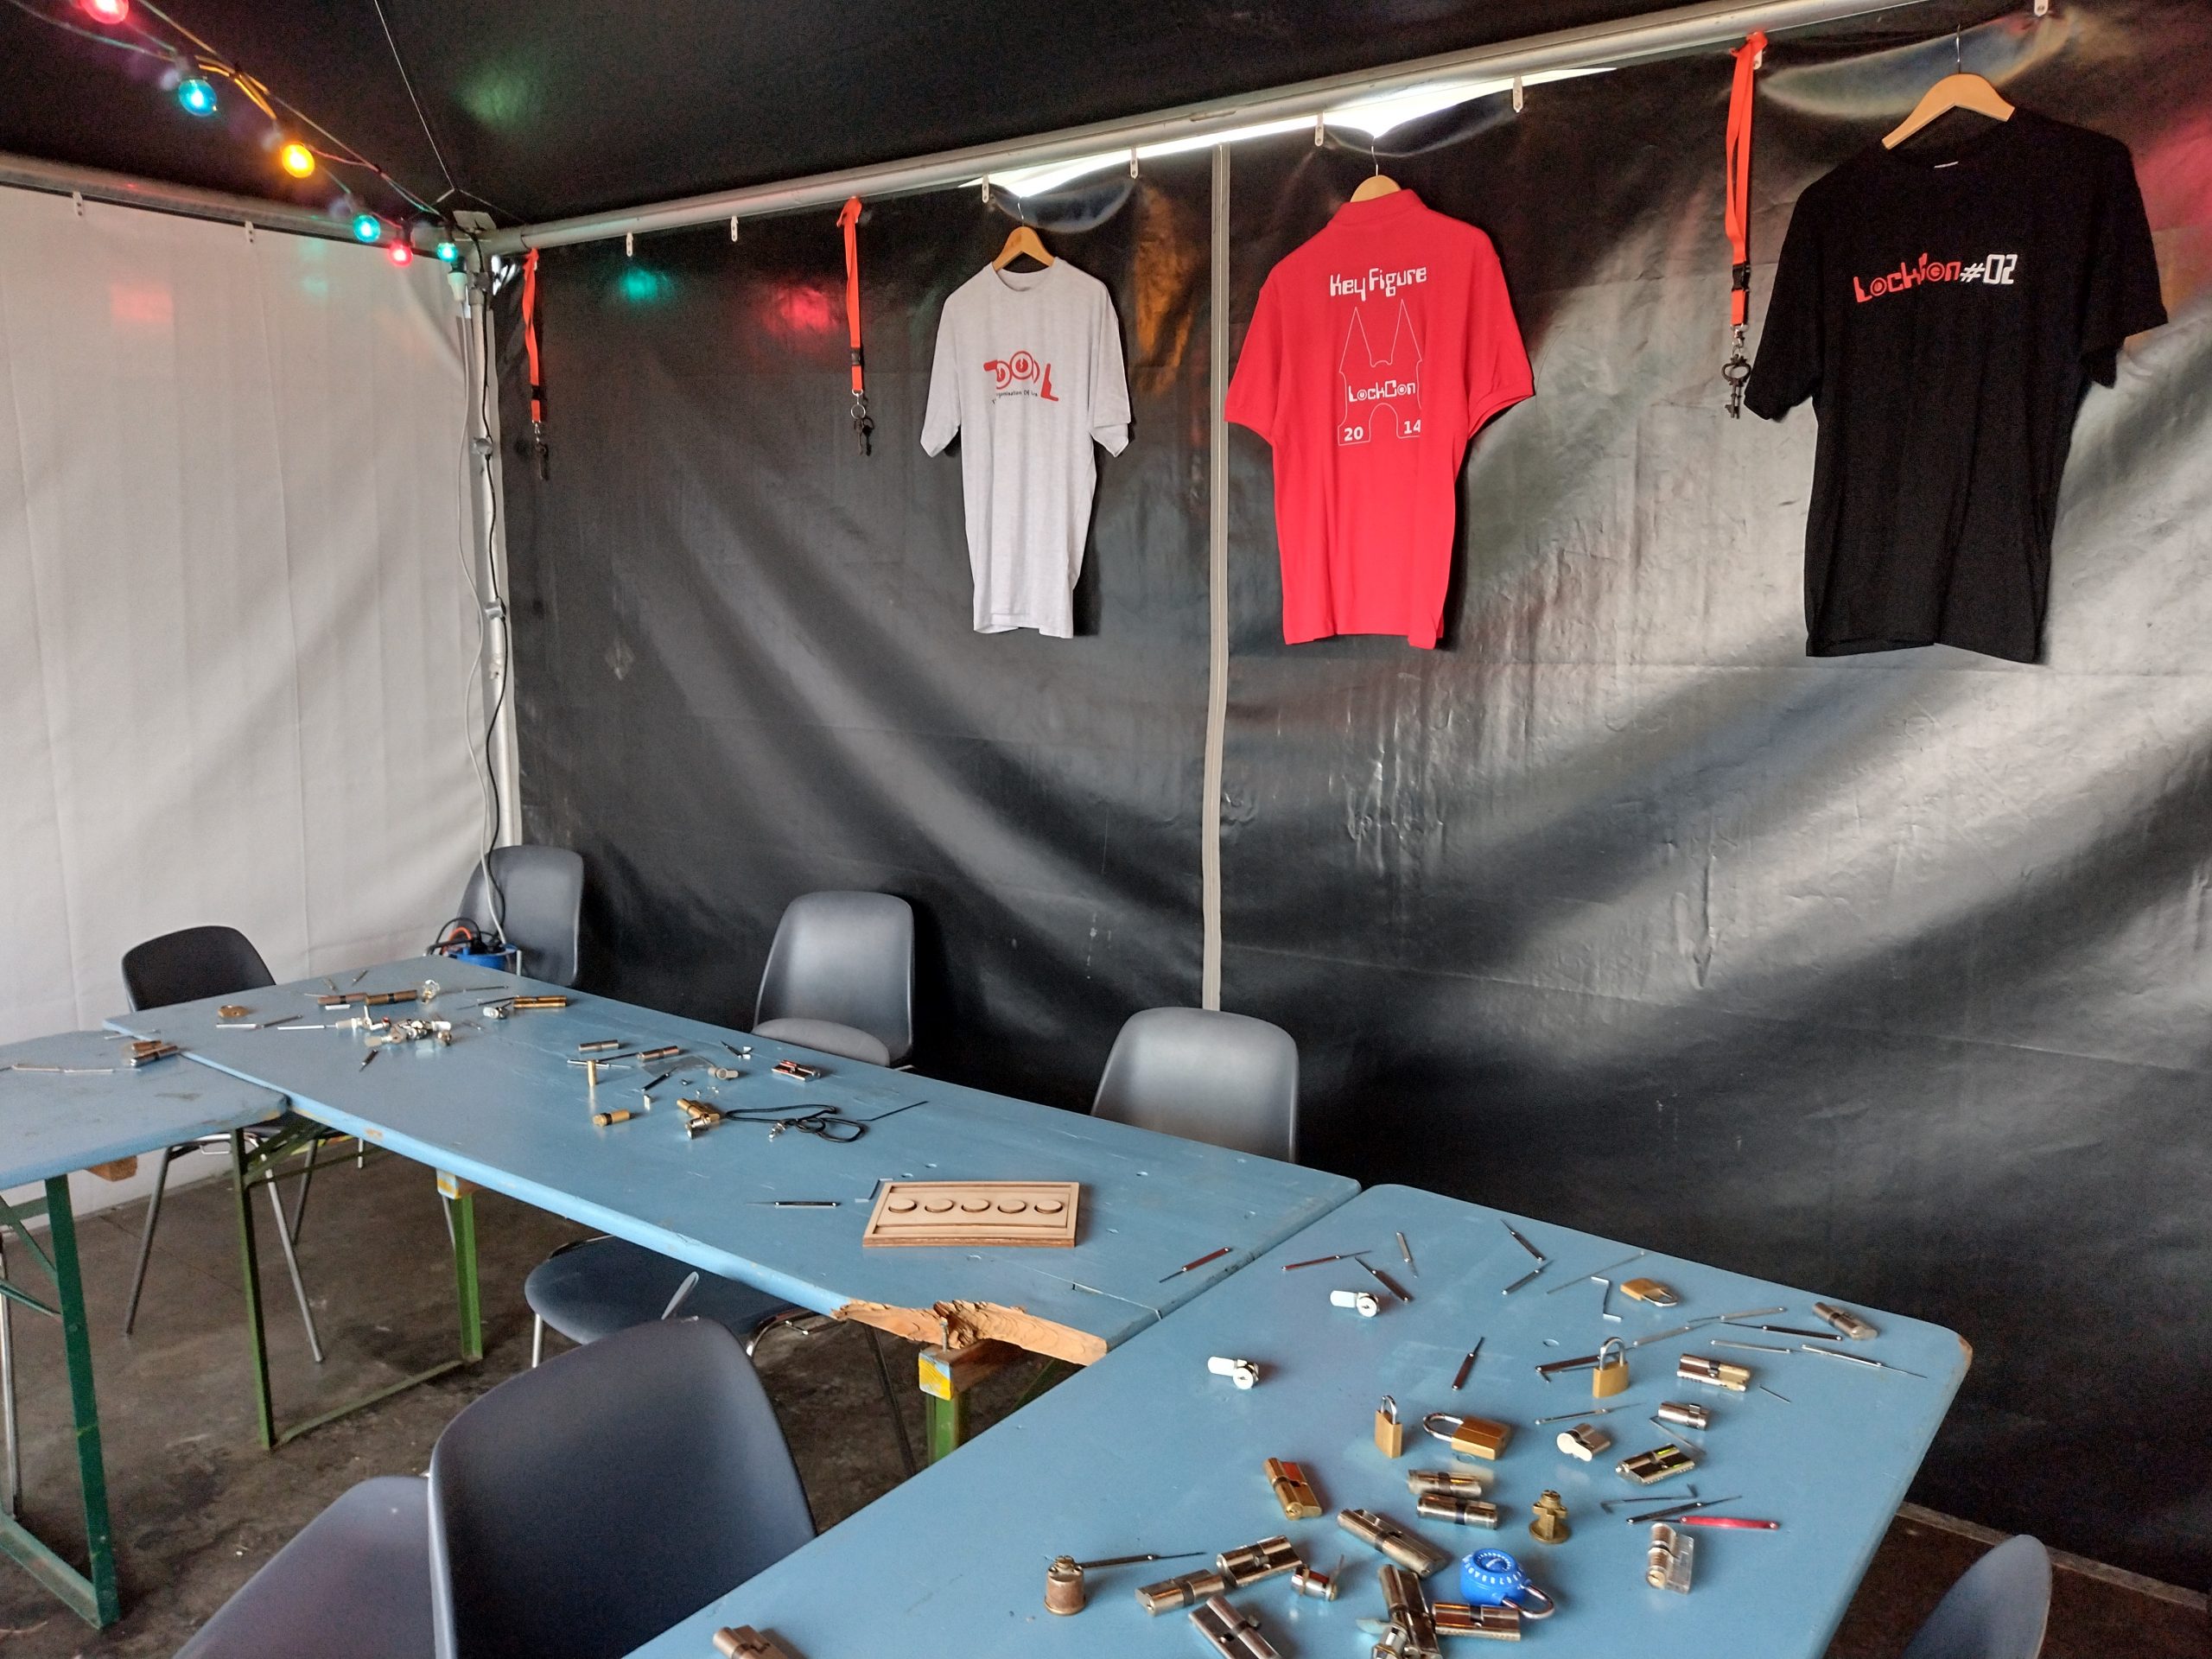
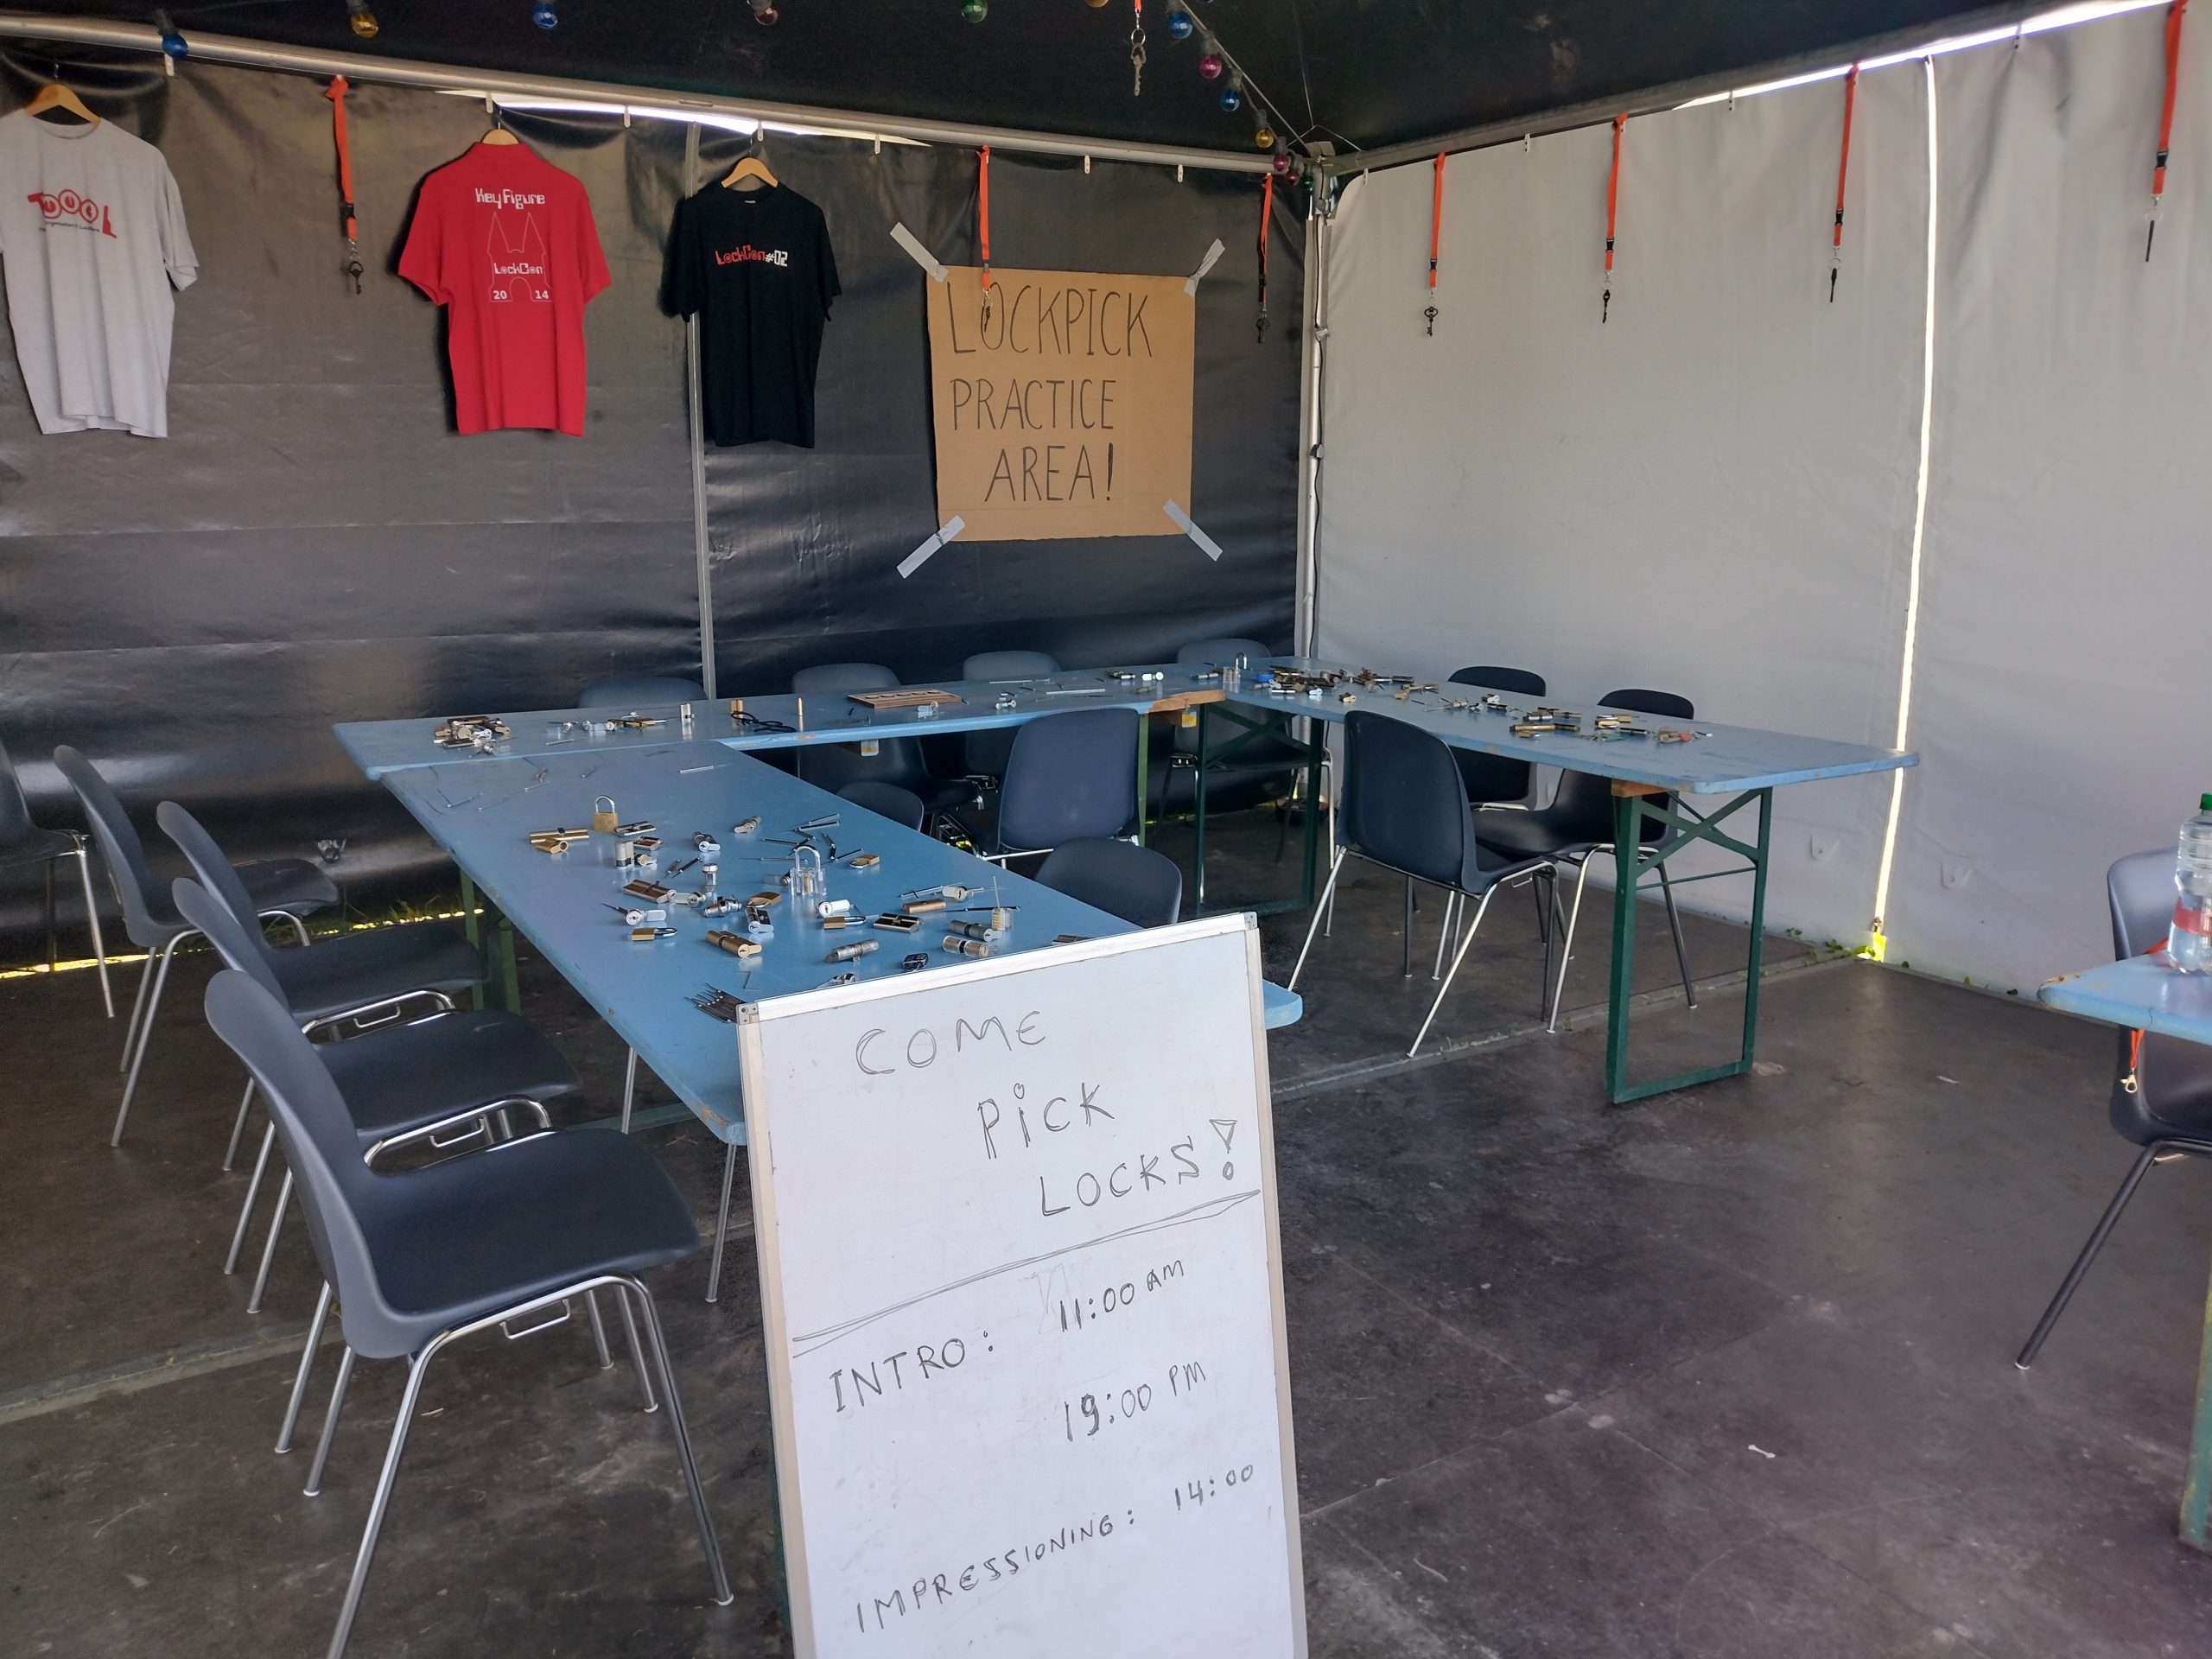
In the summer of 2022, the Dutch hacker community gathered at the May Contain Hackers conference. The conference was amazing, with over a dozen simultaneous tracks with topics ranging from electronics, privacy and internet security, to art and technology. The program is published at https://program.mch2022.org/ and the talks are published on https://media.ccc.de/c/MCH2022.
For Lockpicking content, Toool organized a lockpicking village, The MCH CTF included lockpicking challenges, and plenty of exciting talks are given. Including Introduction to lockpicking and safe cracking, Anker 3800 Magnetic lock, and bumping electronic locks! More on these after a photo impression of MCH.
Jan-Willem presented an introduction to lockpicking and safe lock manipulation.
Talk description from the MCH schedule: Most security implementations leak information, mechanical security is no different. It takes sharp eyes, a soft touch, and a good hearing to distinguish between information and noise. In this talk we will go in depth on how locks works, and how we can persuade them to disclose their secrets, and open them without damage.
The Open Organization of Lockpickers (Toool) is a group of nerds obsessed with mechanical security. We create, collect, take apart, discuss, and attempt to defeat locks. While we are known for lockpicking, there are many other techniques for opening locks without damage.
This talk will focus on the language of the locks, the side channels in mechanical security systems. We will start with binding order, the mechanism to isolate the locking elements, and exploit them one by one. Then we will discuss a wide variety of other methods of gathering information and opening locks. Most of these methods are not practical, but working them out gives us great joy, and we would like to share the highlights with you.
Walter presented his research of the Anker 3800 magnetic lock. It includes deriving master keyed systems, designing an electronic key/lock decoder, and 3D printing keys.
Talk description from the MCH schedule:The Anker 3800 is a mechanical lock that has both traditional pins as well as magnetic sliders. Can it be opened without the key? This talk discusses how the lock works in a master keyed system and how it can possibly be defeated. It will cover decoding, picking and key duplication.
The Anker 3800 is a mechanical lock that has both traditional pins as well as magnetic sliders. It was designed by Japanese company MIWA and is sold in the Netherlands under the Anker brand. It is a high security lock that is often used in large master keyed systems.
I wondered: can it be opened without the key? I will present my adventures with the lock, having opened it up to see how it works, and several things I have tried to copy the key, pick the lock, decode the lock and find out what the master key looks like. The talk will include successes and failures and I will discuss designing 3D models, C&C work, electronics, Arduino programming, PCB design, and more.
The talk is aimed at people with an interest in lockpicking. No prior knowledge is necessary.
mh shared his research on bumping electronic locks. As in, opening the electronic locks by using a percussion drill and custom attachment.
Talk description from the MCH schedule:Modern electronic locks are often optimized for cost, not security. Or their manufacturers don’t do security research. Or they ignore it. For whatever reason, many current electronic lock systems are susceptible to surprisingly simple attacks. We’ll look at some of them, and at the underlying basics, so that you can do your own research.
In this talk, we look at a number of modern electronic locks and their security flaws. Surprisingly many current systems are susceptible to very simple attacks, like the equivalent of using bump keys. Of course, there are electronic and/or SW-based attacks, too. We’ll look at some of them, and at the underlying basics, so that you can do your own research. Some of the problems have been fixed by manufacturers, but typically only for future production runs, so you will get some practical advice on how to test your own hardware for these critical flaws.
Jan-Willem presented a basic introduction to threat modeling and uses puzzles as an example.
Talk description from the MCH schedule:Mechanical locks are everywhere and come in all shapes and flavors. But choosing the right lock can be rather difficult. For example, what is better? A lock that is hard to pick, or a lock with hard to duplicate keys. This talk will not give you the answers, but it will help you understand the trade-offs. Furthermore, we will have fun threat modeling our locks.
Is lockpicking a threat you should be concerned about, or is the brick the tool you should care for? Jan-Willem, from The Open Organization of Lockpickers (Toool), will share his ideas on mechanical security and threat modeling. We will make it fun and use several case studies, starting with defining a lock, threat modeling mechanical puzzles, and use several case studies where the threat was overrated. Simply put, attacks against locks range from the trivial to mastery. I’ll share multiple failed attempts of attacks that should be trivial, but were not in practice, and we will analyze them together.
In a previous blog post, I’ve written about Qikom’s cutaways. Whereas, this post is a tangent on why we would like to see more cutaways made and the knowledge shared.
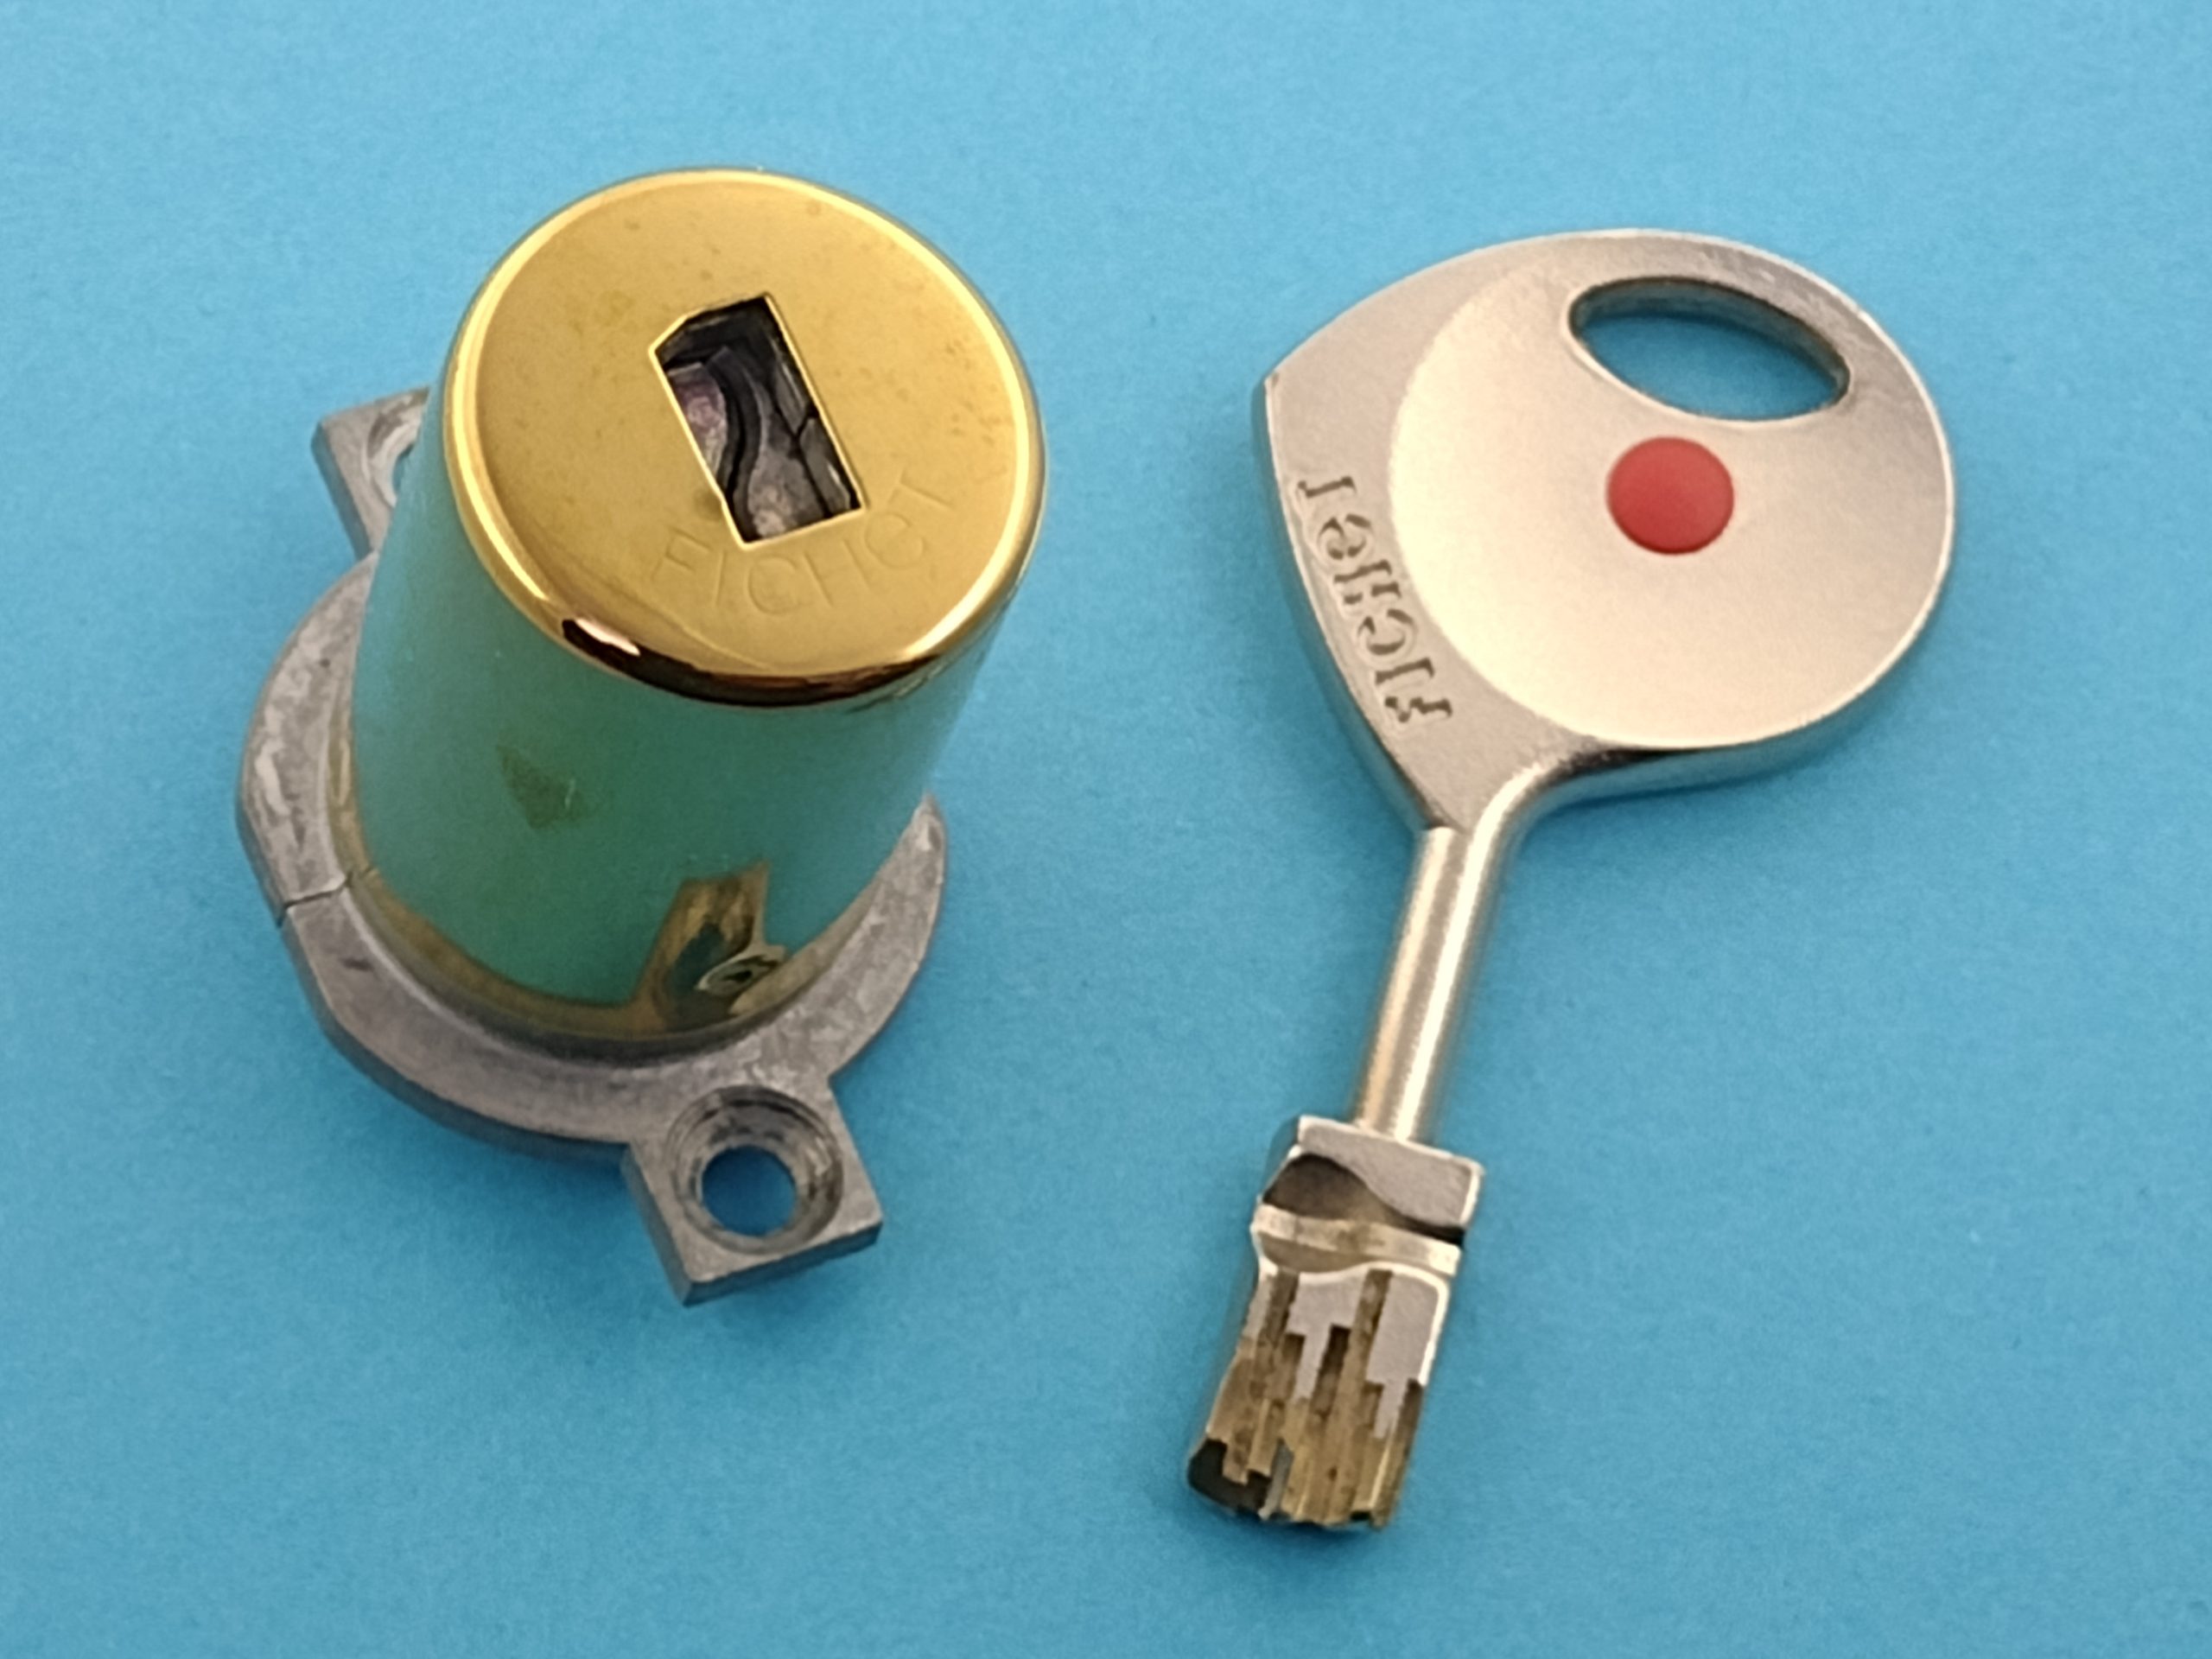
When we teach beginners, and show them a unique lock, often they can’t imagine what happens in the lock. As all they can see is the outside. To illustrate this, let’s play a short game with a Fichet 787. The key looks quite interesting, as it has half a dozen cutouts on each side. It’s not symmetrical, and can only be inserted in the keyway in one direction. You feel a spring pushing against the key, but at rotation it seems to be like any other lock.
If you haven’t seen this lock before, take a moment to imagine what the internals are like.
Fichet 787. CC-BY-4.0 Jan-Willem, Toool Blackbag
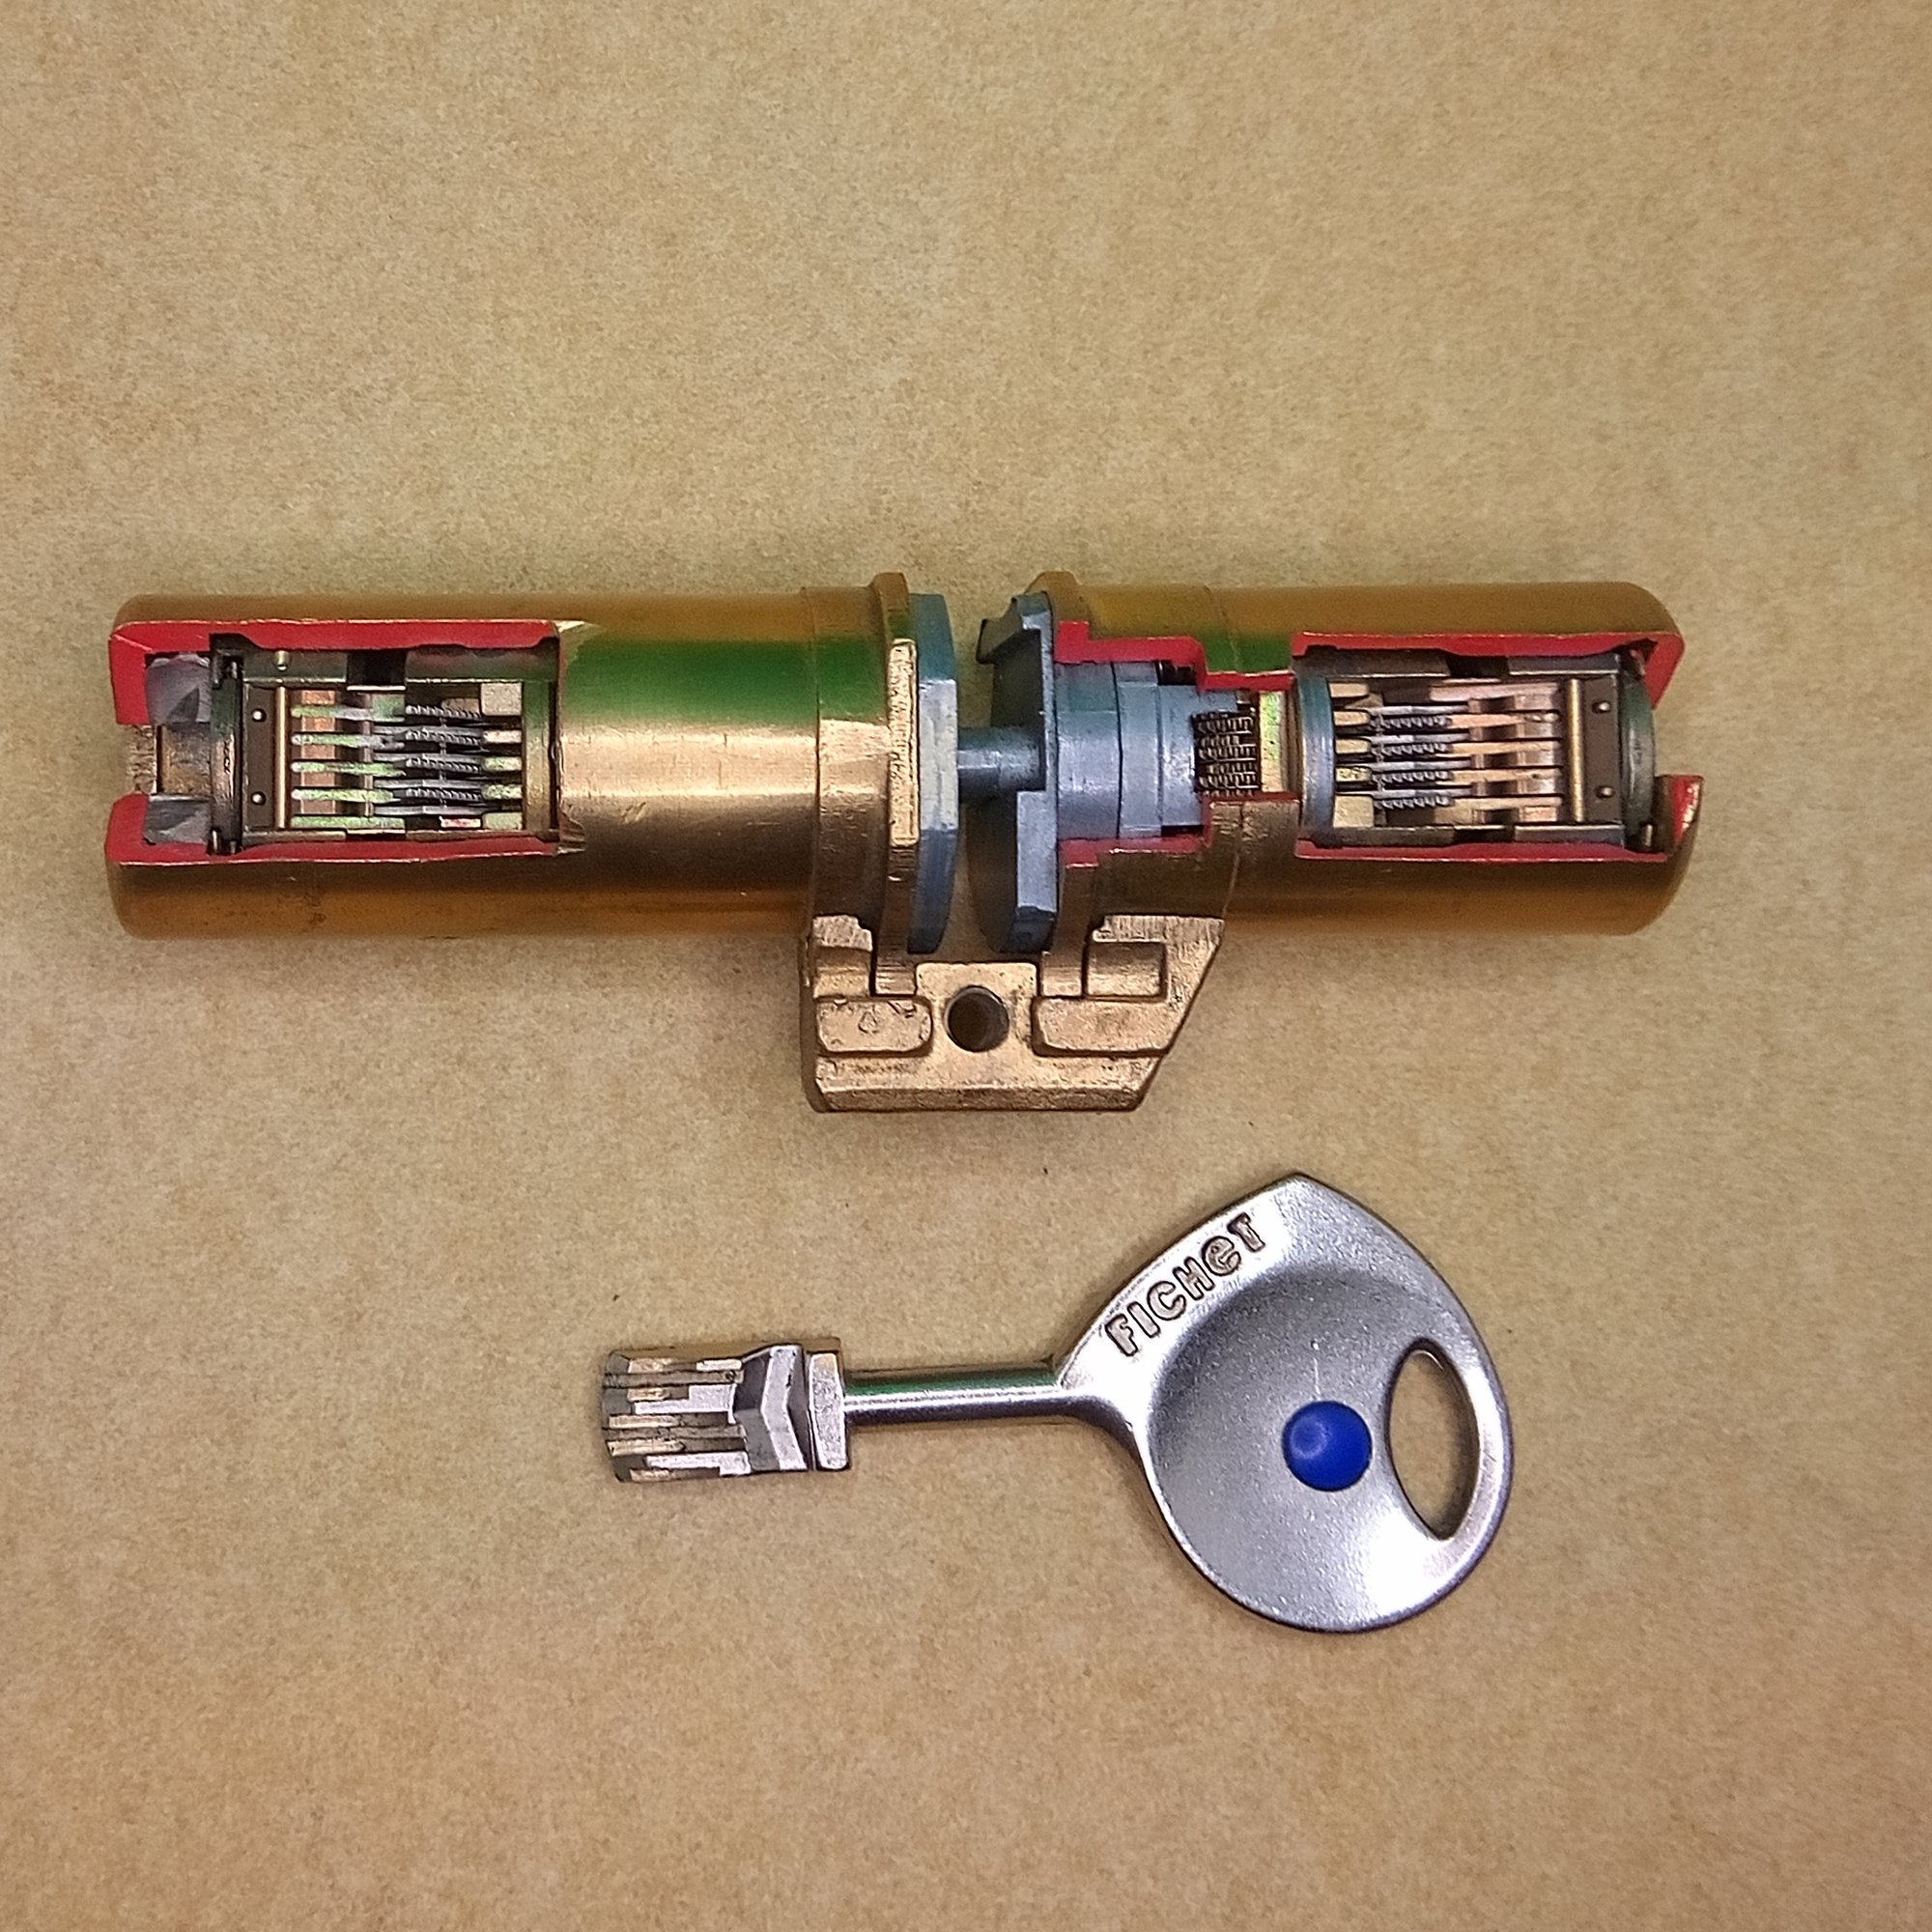
It’s quite obvious where I’m going with this. There can be almost anything inside the shiny cylinder. It will be very difficult to find the solution without taking it a part, or looking at a diagram. The cutaway, like the one from Qikom below, shows the internals from the lock. Reducing the guess work over a picture of the parts.
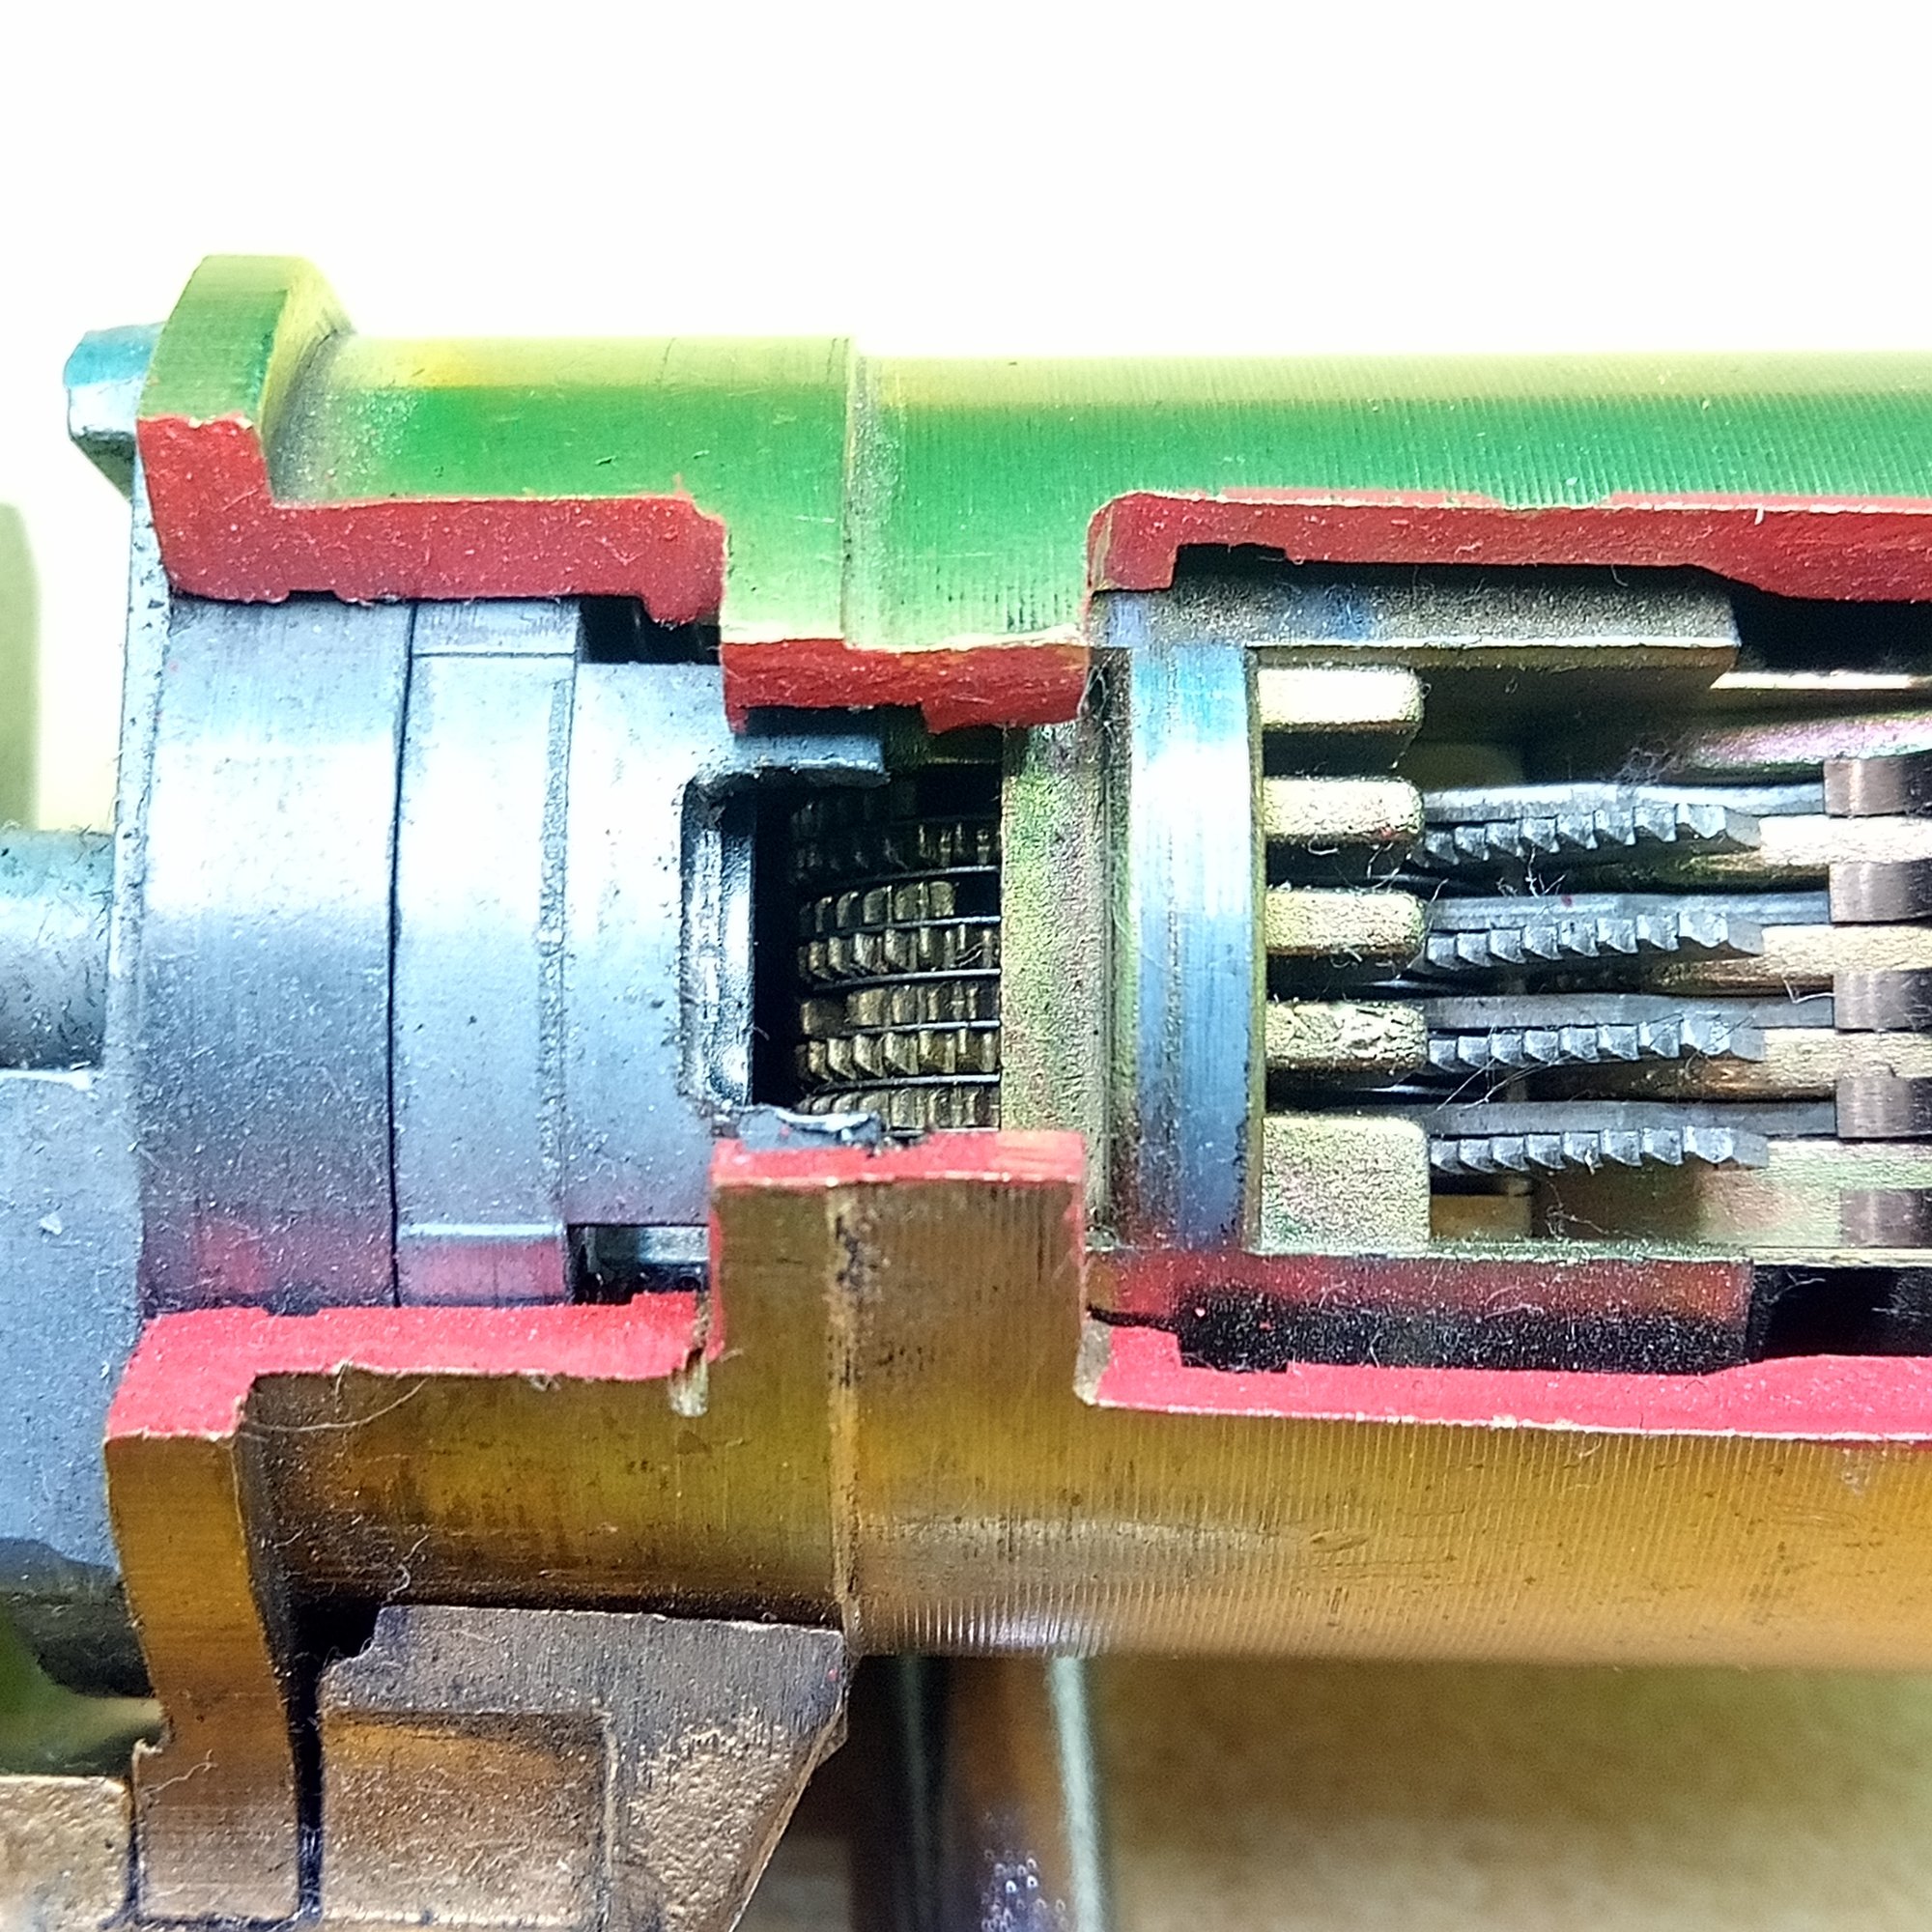
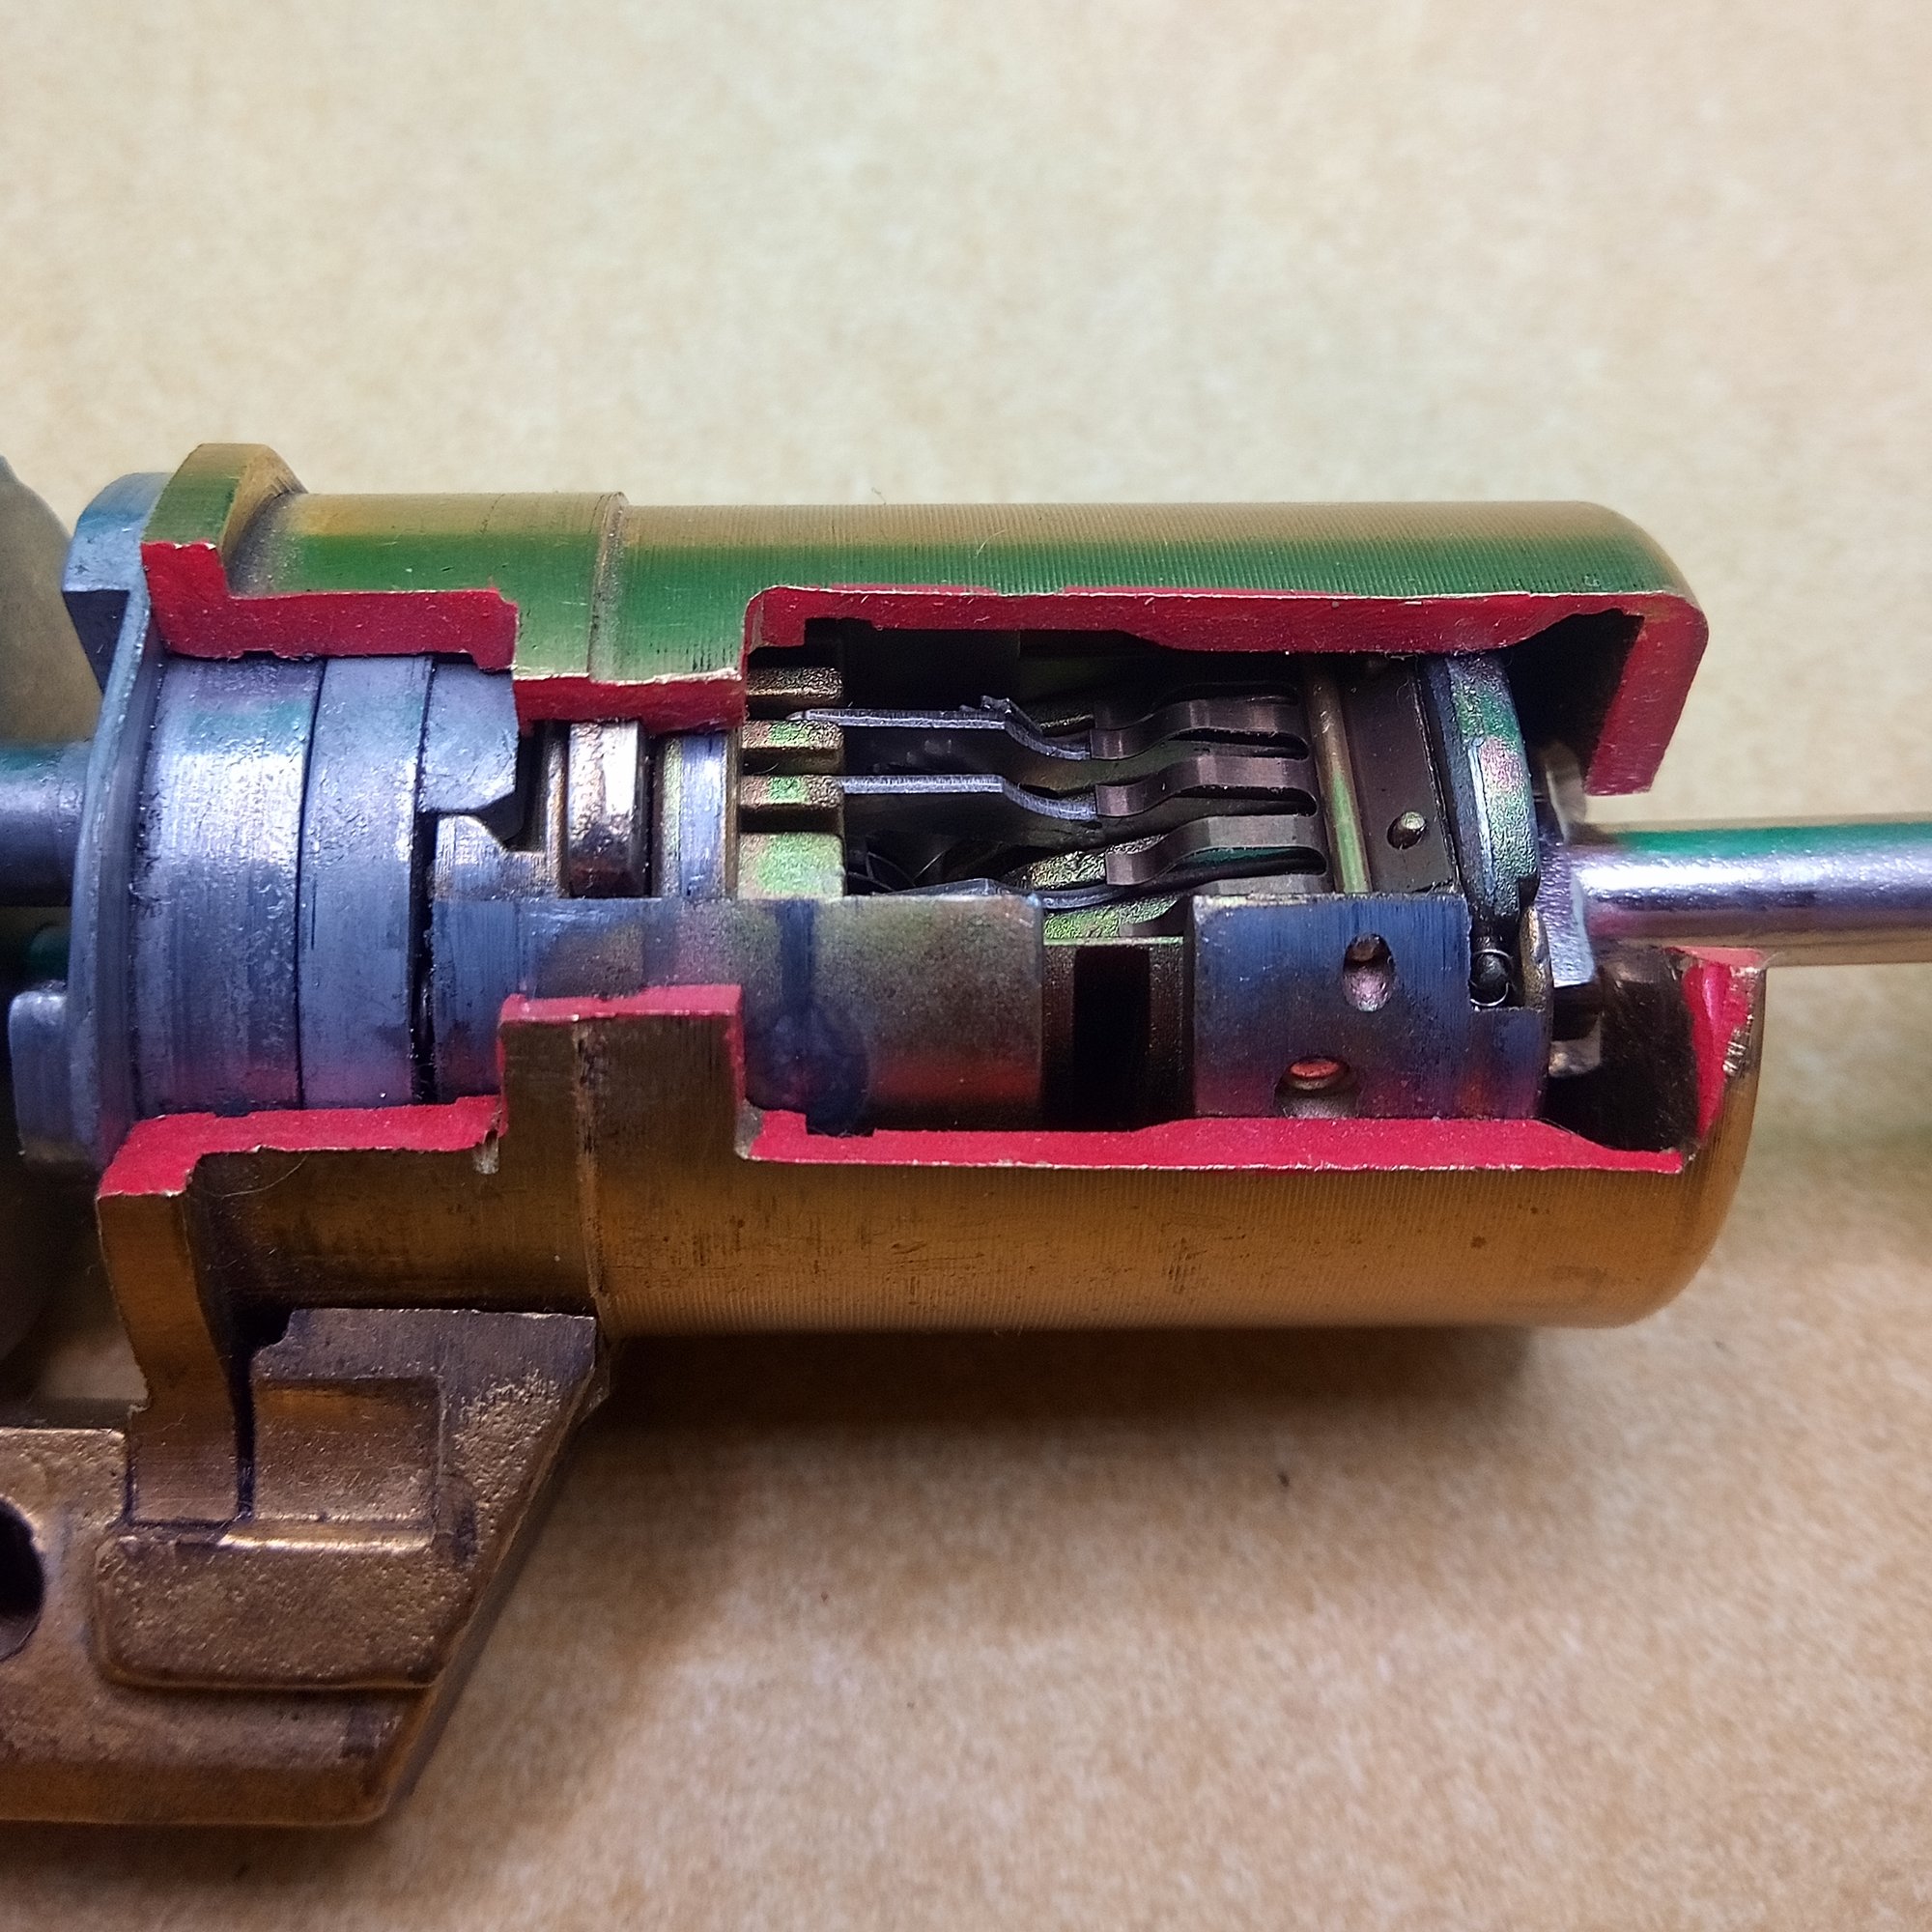
Qikom Fichet 787 Cutaway CC BY-NC-SA 4.0Qikom Fichet 787 Cutaway; The interaction between the lever pack and the gears. CC BY-NC-SA 4.0Qikom Fichet 787 Cutaway; The lock is open. CC BY-NC-SA 4.0
Is it anything like you imagined it to be?
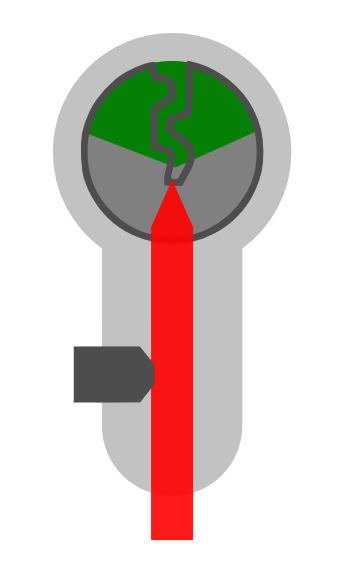
What does the 787 do? The Fichet 787, is a push lever lock. Where the push action allows the lateral movement of the levers to rotate a set of gears to the opening position. The sidebar is a passive element that checks if the gears are all aligned. With the correct key, the cylinder moves inwards, clears a blocking element, and is able to rotate. At the same time, the key is trapped by two half circle disks.
It is quite possible you have seen this lock before, as it has been around for decades. I’ve learned about the lock in 2018, and recently expanded the knowledge at the Association des Crocheteurs de France lock conference in December 2022. I’ve learned the dovetail, which connects the cam to the core, is a fairly recent addition that prevents a (partially) destructive attack, for example.
French locks are my favorite weird lock designs, where Fichet is king. The ingenuity is admirable, with many clever ways to solve the same problem…
Posted in Lockpicking, Locks, General | Comments Off on Cutaway locks, why put in the effort?
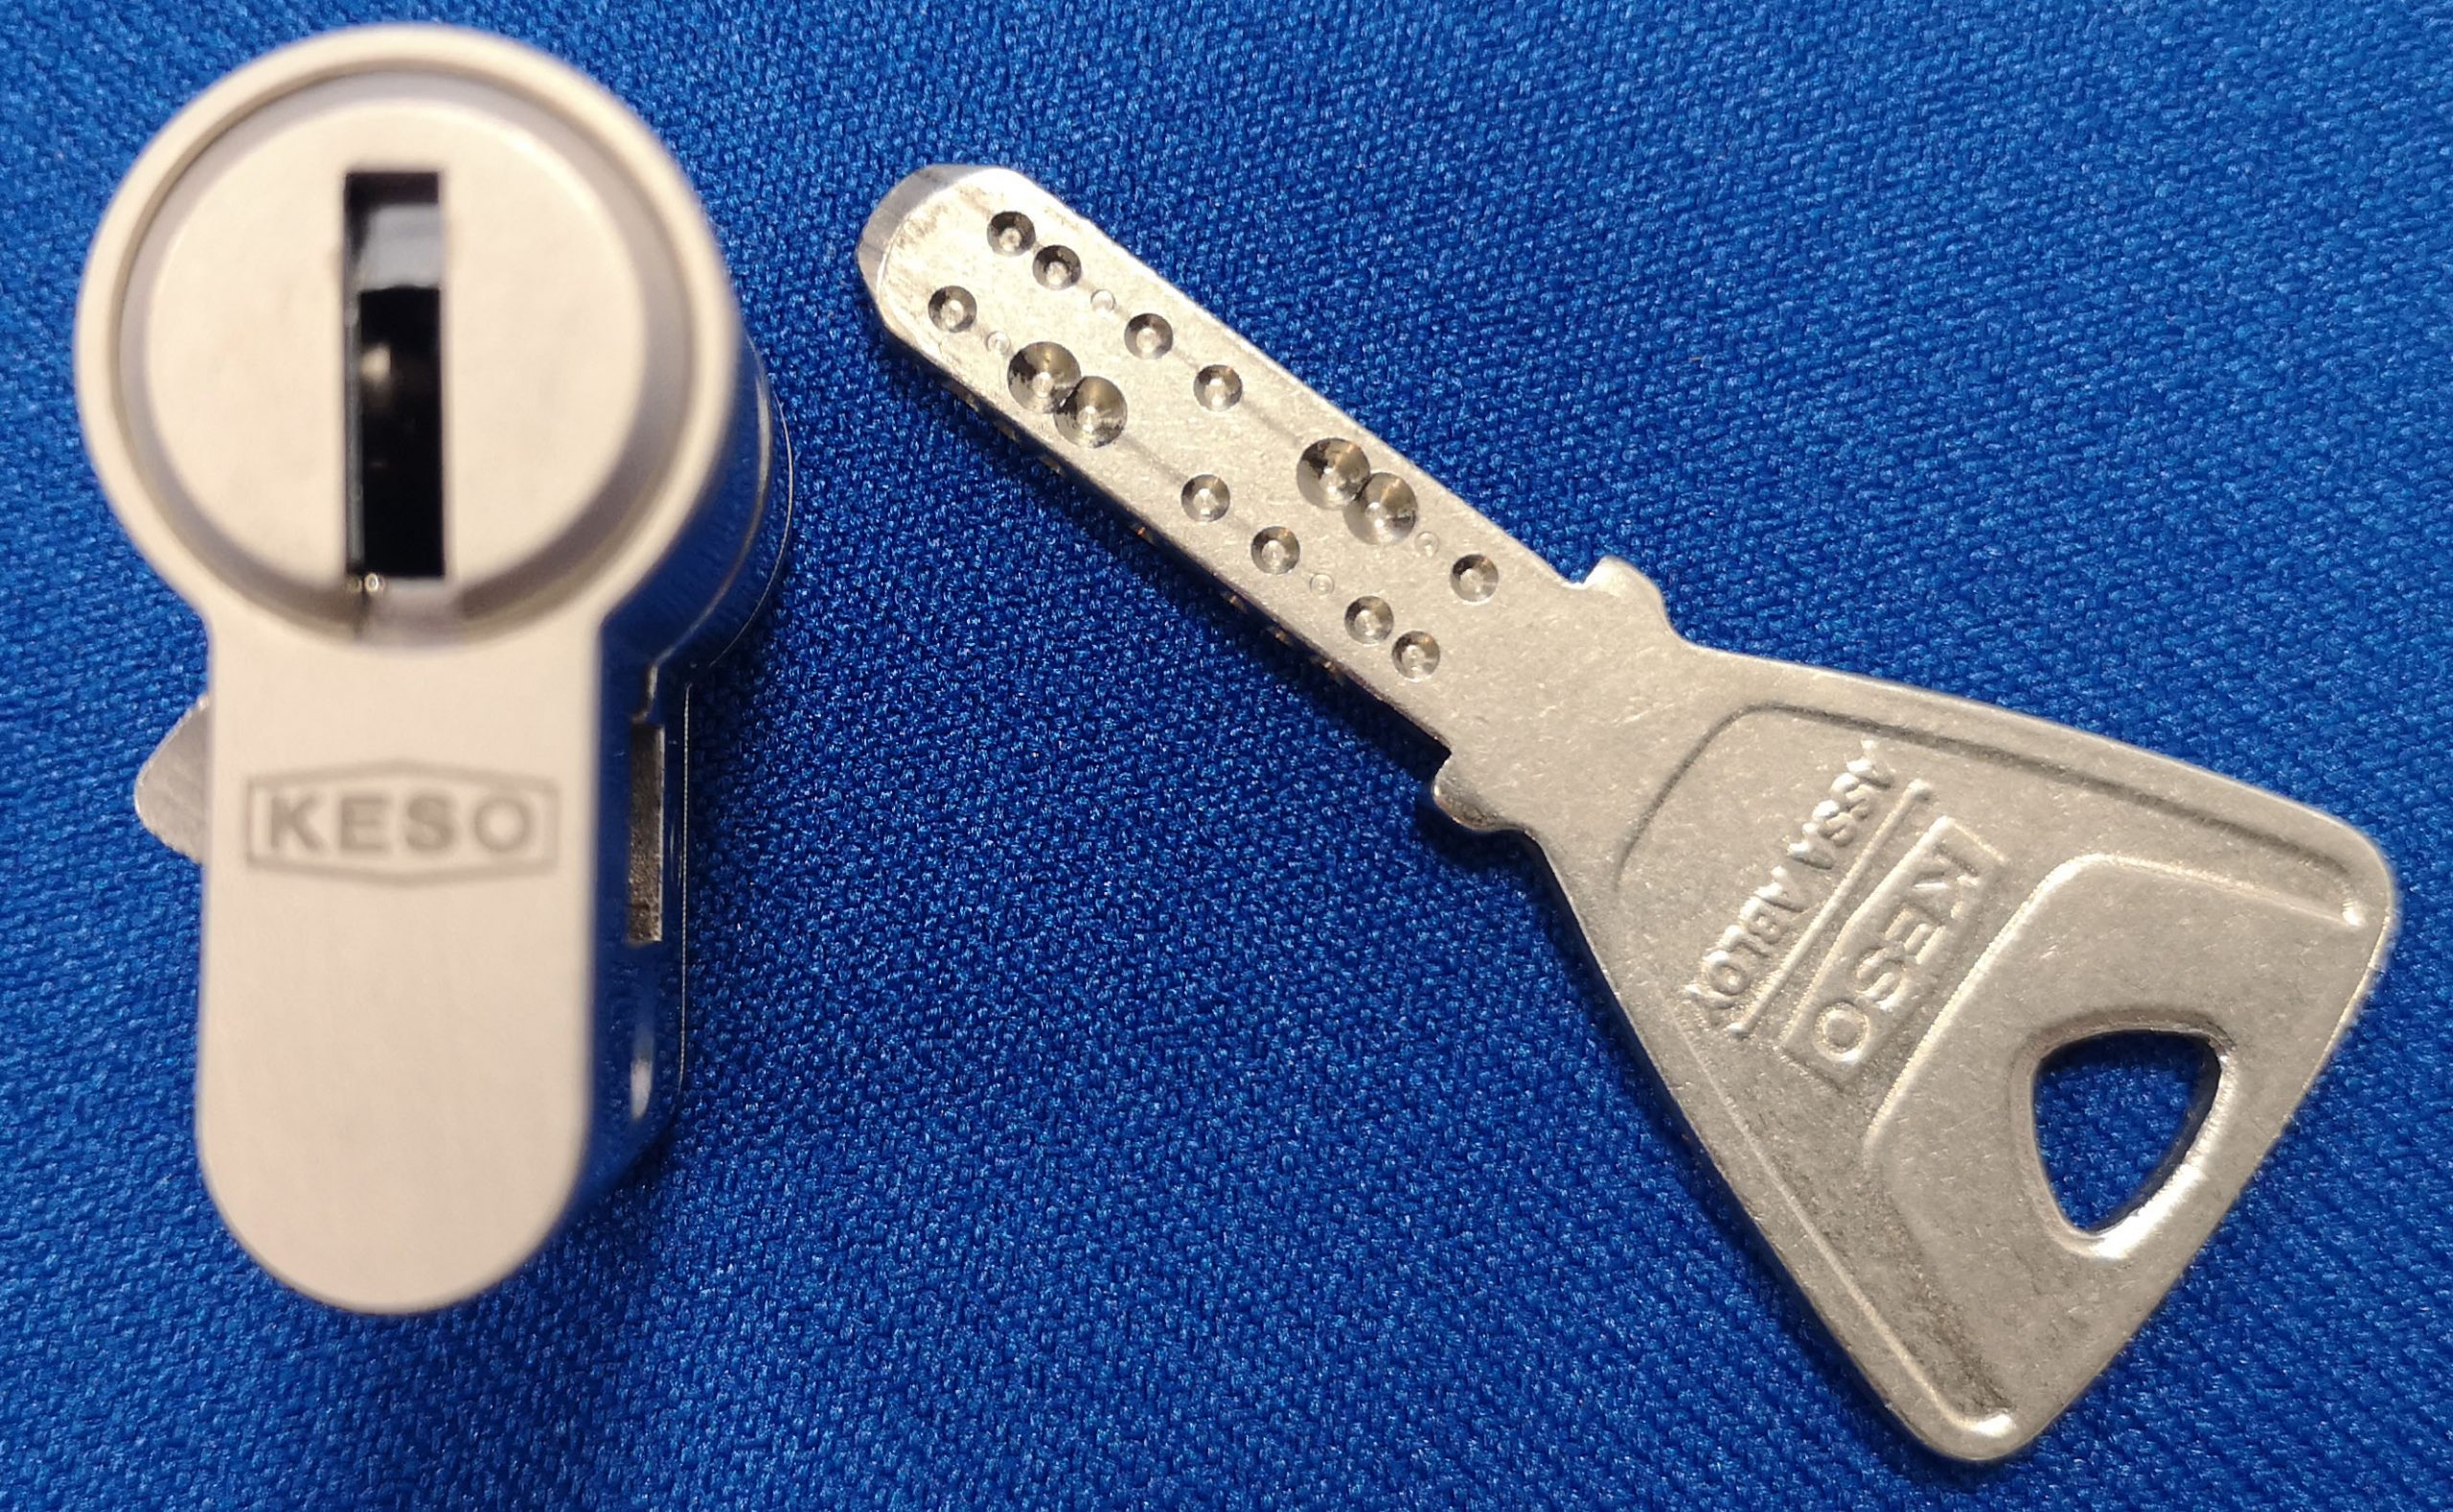
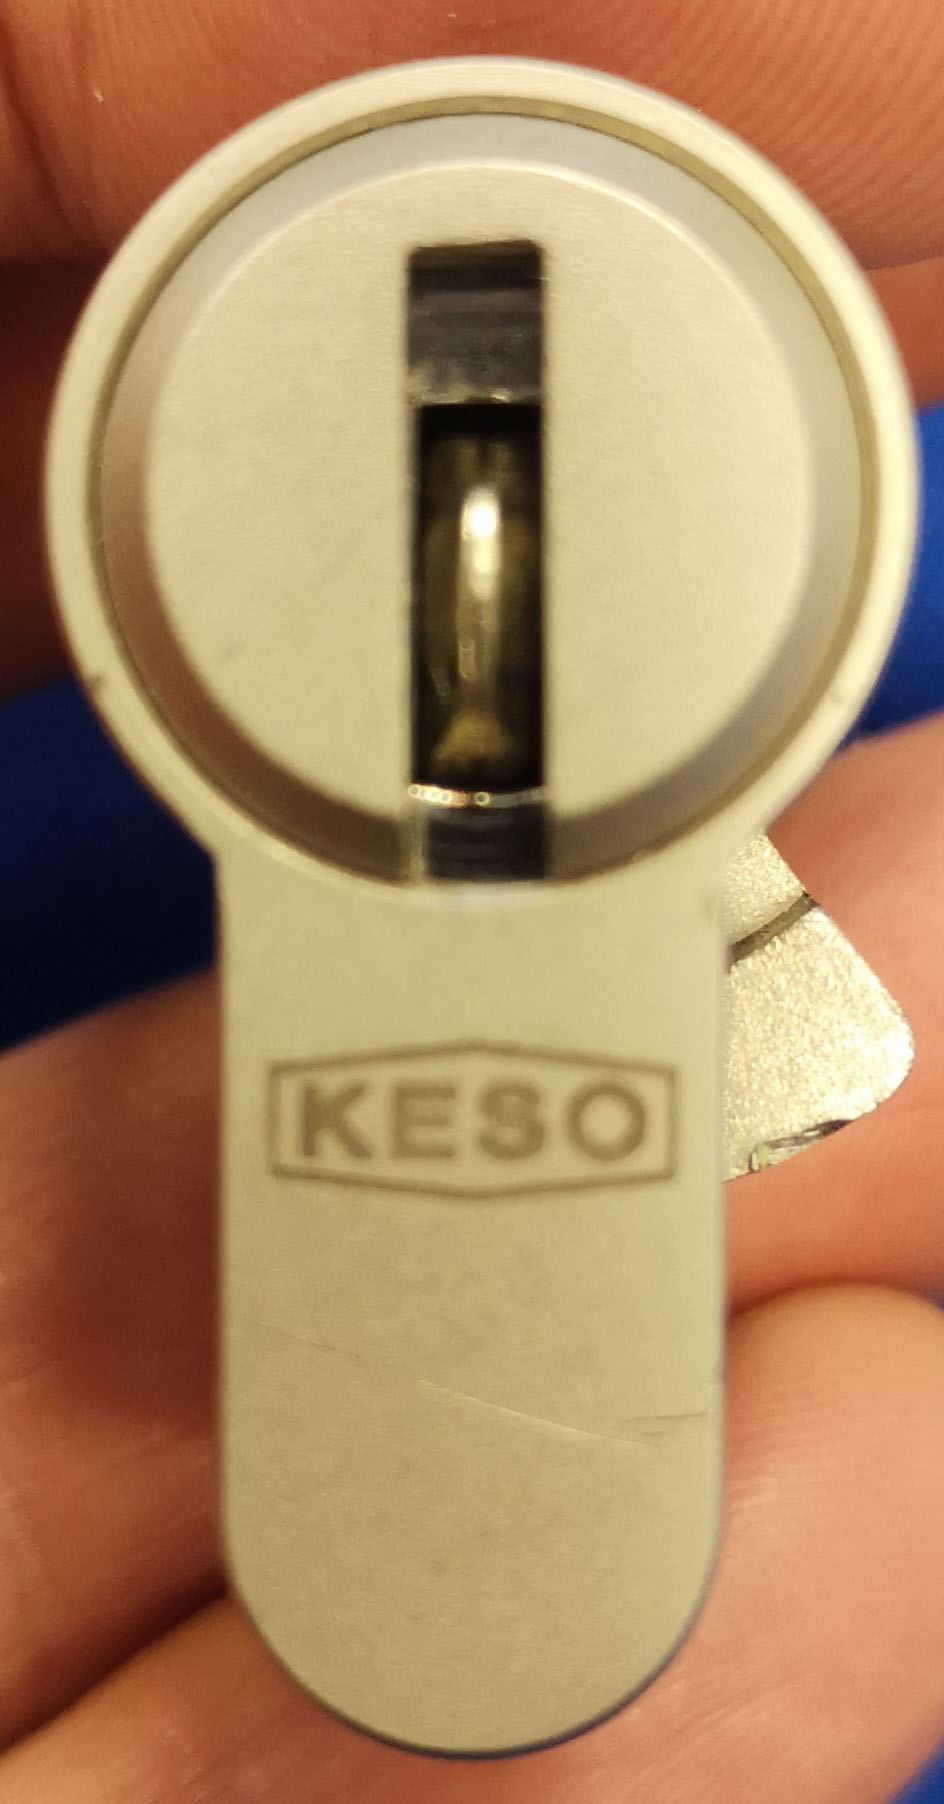
This weekend at the Wendt lockpicking event, I spoke with the gentle people from BESA specialty lock shop in Belgium. They brought with them a very intriguing cylinder. It’s a KESO Octro 4000S dimple cylinder, but what makes it special is its size: it is a 14/14 cylinder (total size 2.8 centimeters).
The key is a normal sized key. It goes all the way through the cylinder. That means that the bitting interacts with pins on both sides of the key, which in turn means that the key must be symmetric.
Indeed it is. When the key is inserted, you can see it while looking at the other side.
By looking at the key, there could be as many as 30 pins in there. Not bad for a 14/14 cylinder, especially when you compare it to the 20/20 cylinder that had just one pin I wrote about earlier (see https://blackbag.toool.nl/?p=3882)!
If you have one of these to spare or know where to get them, let me know.
Impressioning competition are all about opening the most locks in the least amount of time. Quite often, every second counts. As we have been playing the game for a couple of decades, it wouldn’t surprise you that the locks become harder, the times have been getting faster, and the openings more consistent.
Most of the players have reinvented their setup multiple times. I’ve seen 3D printed attributes for key marking, and often see the newest inventions. To keep it fair, however, you require sharing the idea before the competition, as to prevent an unfair advantage.
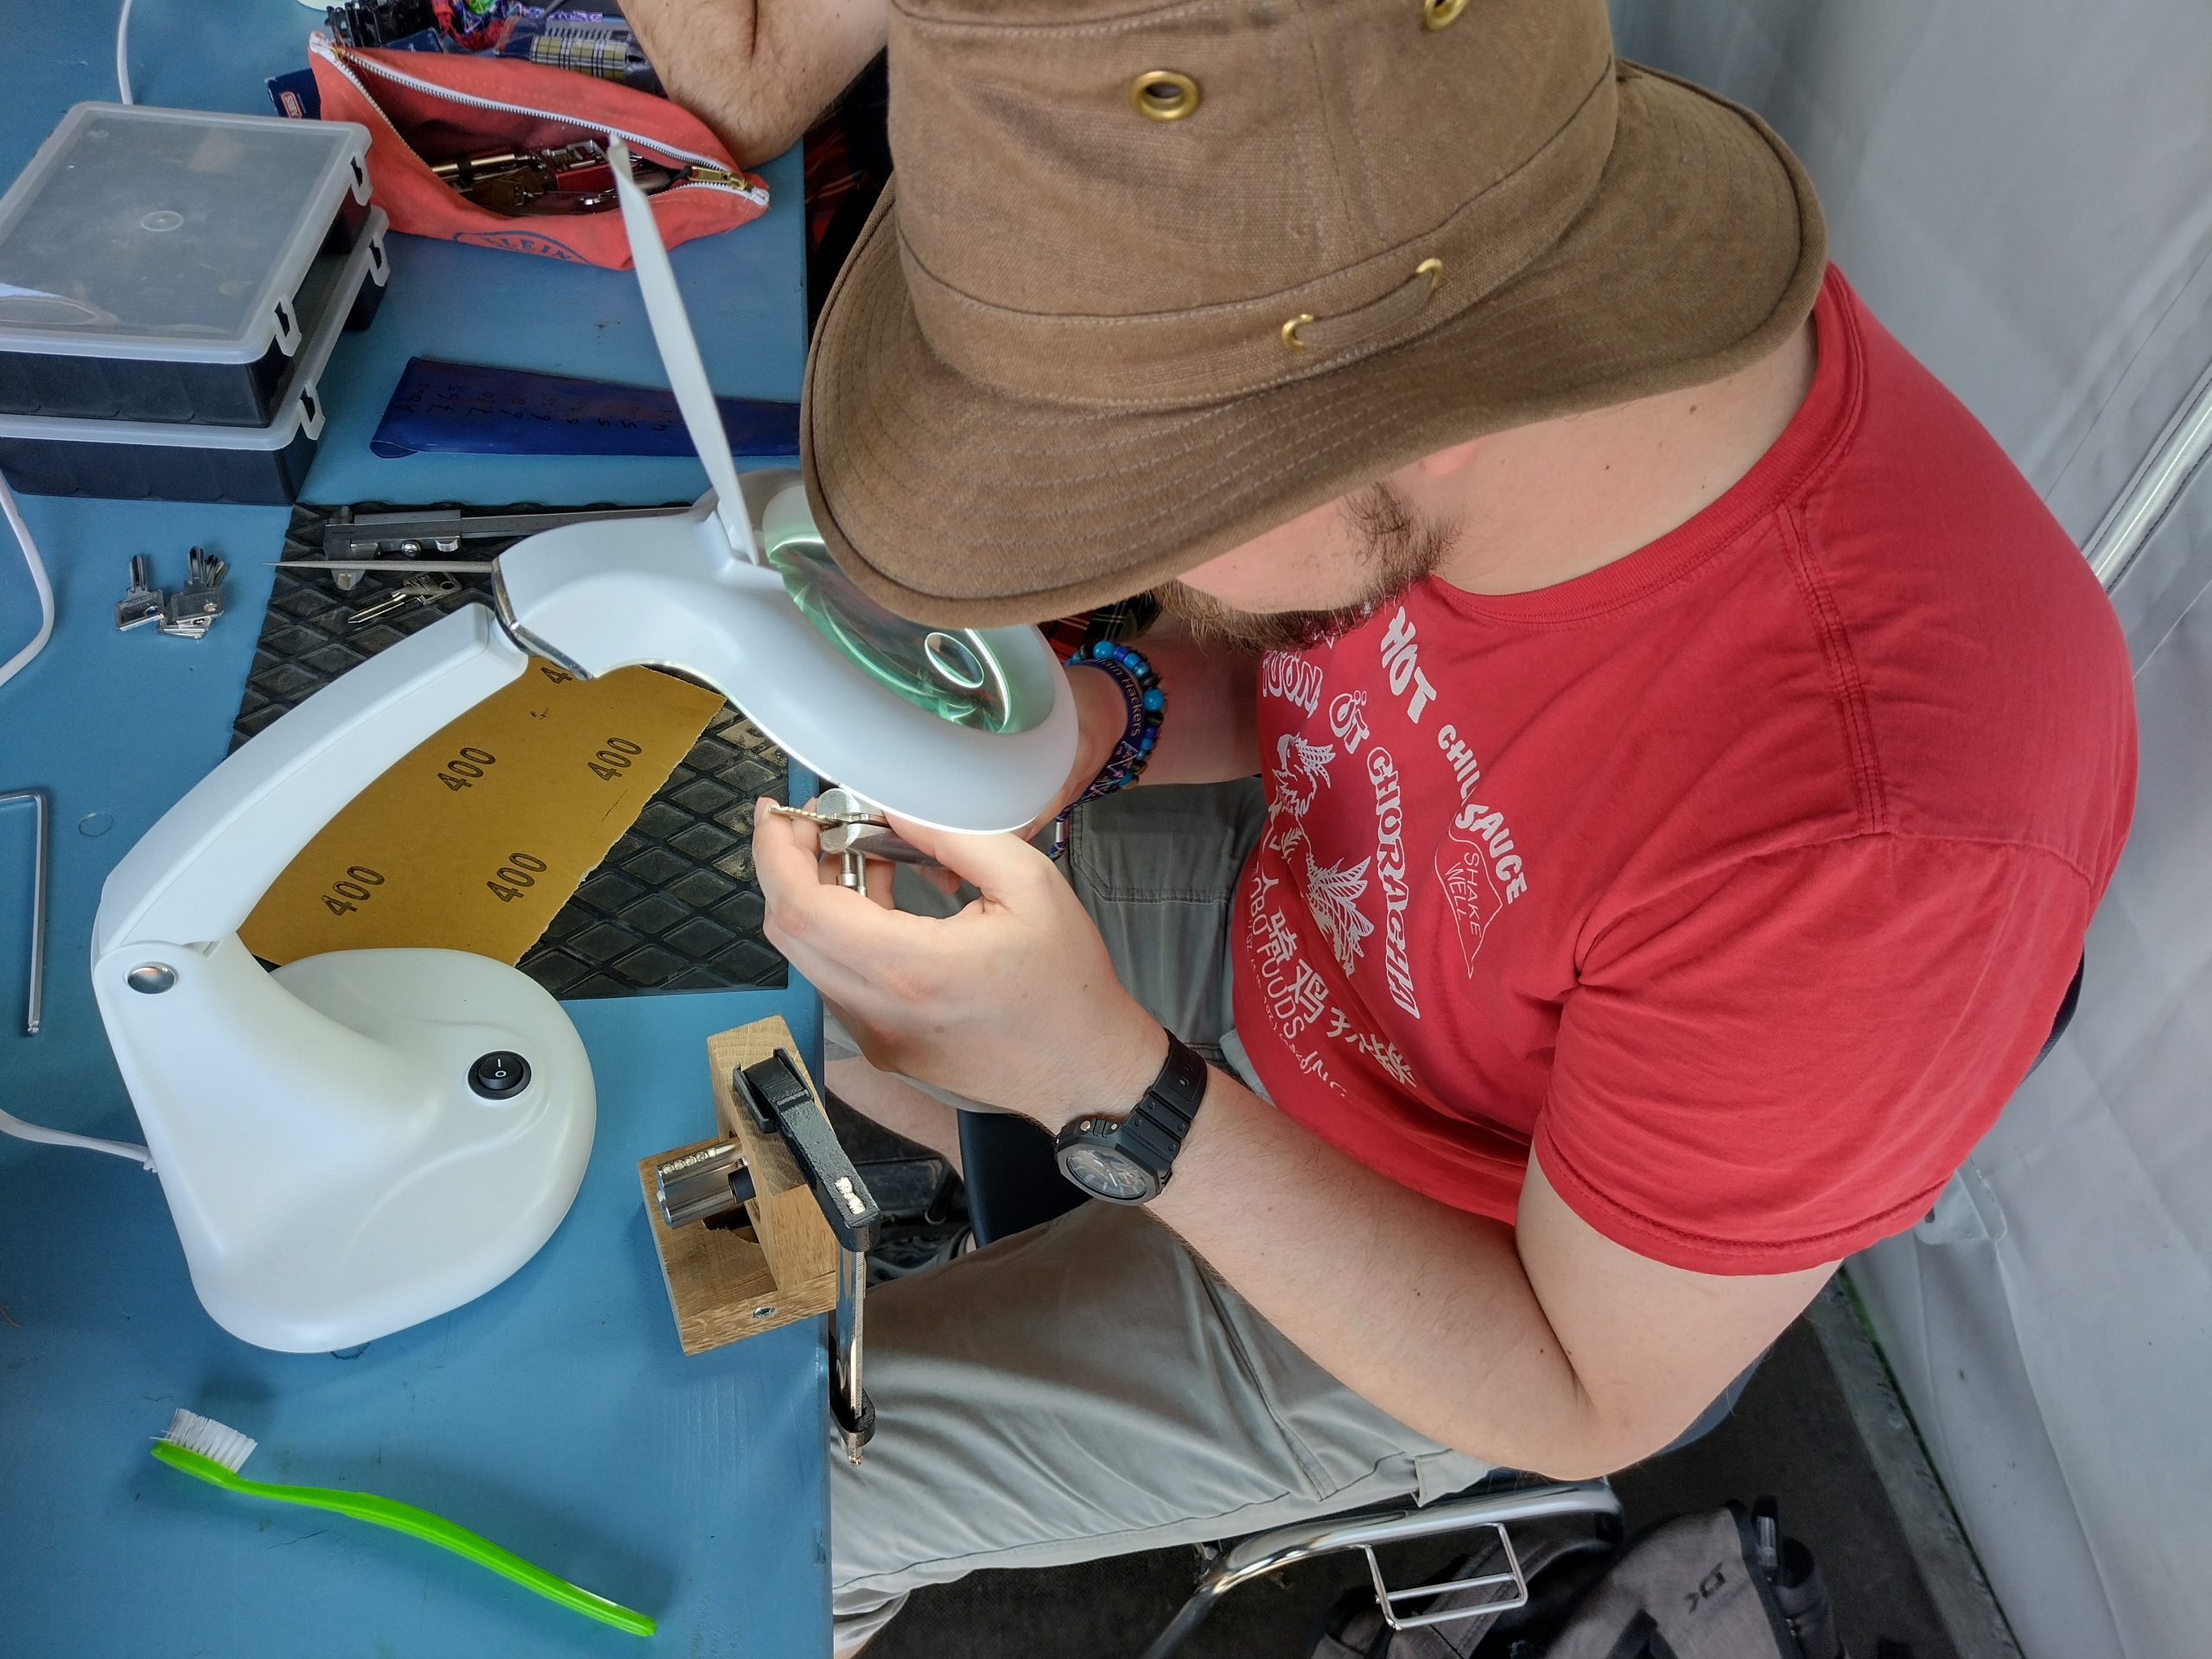
My first improvements have been to watch the masters work, and to copy what they do. Whereas my last improvements are much more subtle. I’ve, for example, reduced the distance between the lock, lamp, and table. And improved my handling process to save seconds here and there. I don’t believe we are done, either, as I’m trying to find a better way of placing my file when I’m not using it.
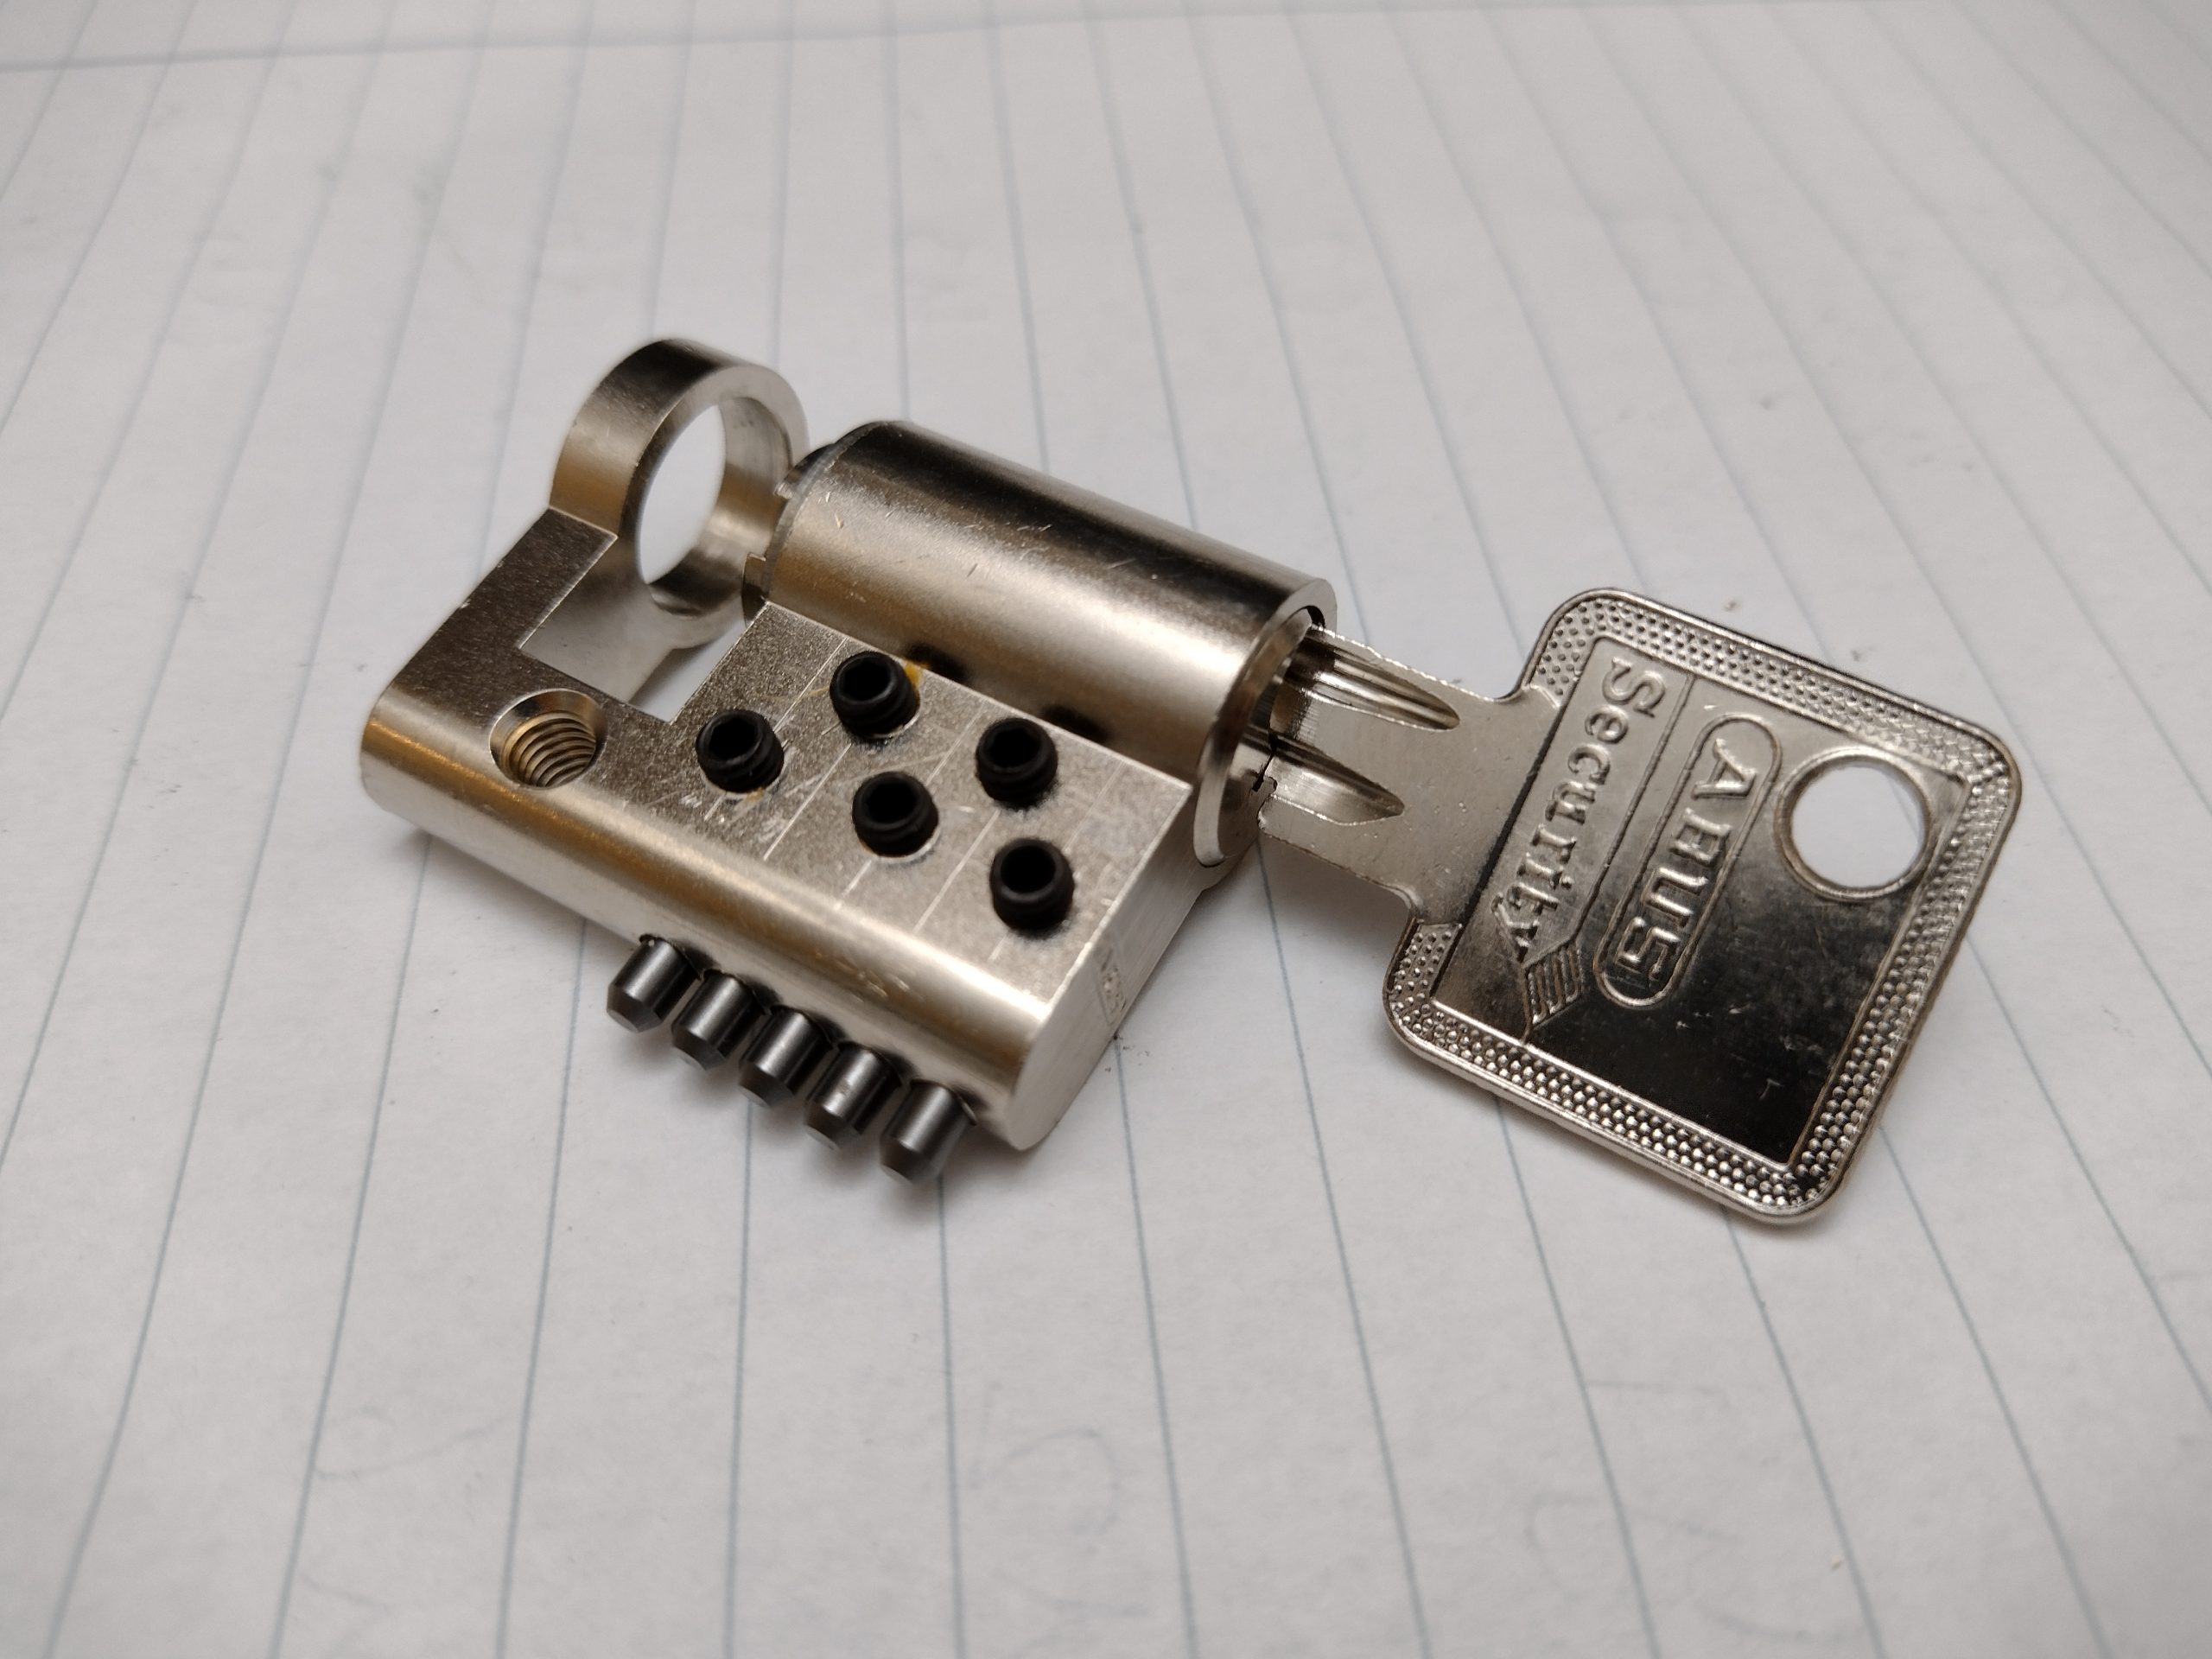
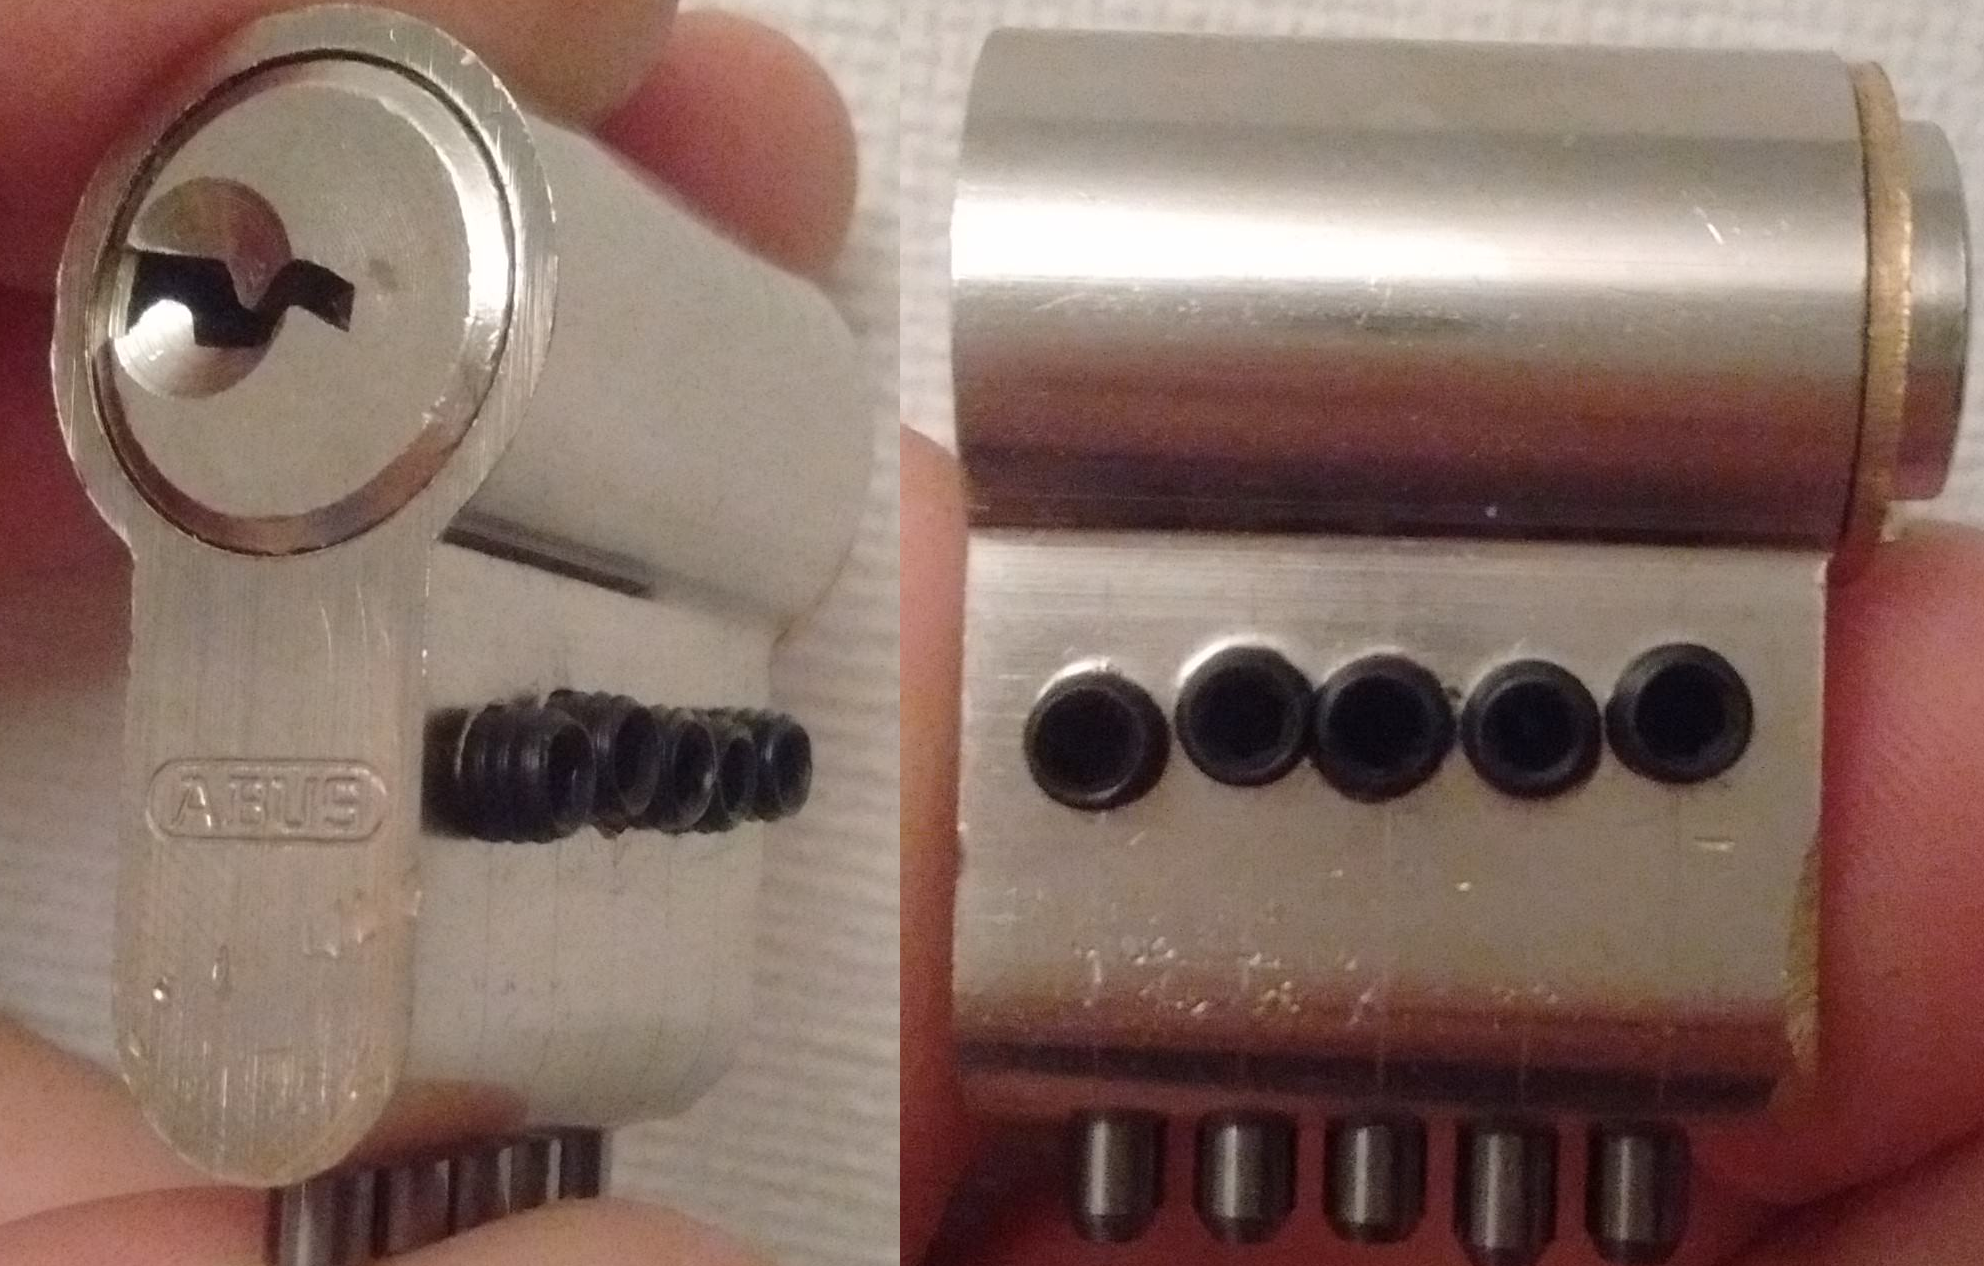
What is it? It’s a modified cylinder where the pins are replaced by sharp carbide rods. By pressing a key into the pins, the pin positions are marked on the key. Which, in turn, allows a key of all depths one to be made. The process takes a second, instead of preparing a blank with sand paper, a filling jig, or marking the positions one by one with a scribe. To be completely honest, it might not save me too much time, I just like it as a convenience tool.
I’ve built my first version after I impressioned my first lock, early 2018. It’s not the prettiest, but it worked for over a thousand keys. At that time, I impressioned a lock a day for every day in January. At UKlocksport forum, this is known as the January challenge. I’ve got some good stories about it, including a friend that just never stopped and has a streak in the thousands. (Please, Toni, remind me to write a blog about it.)
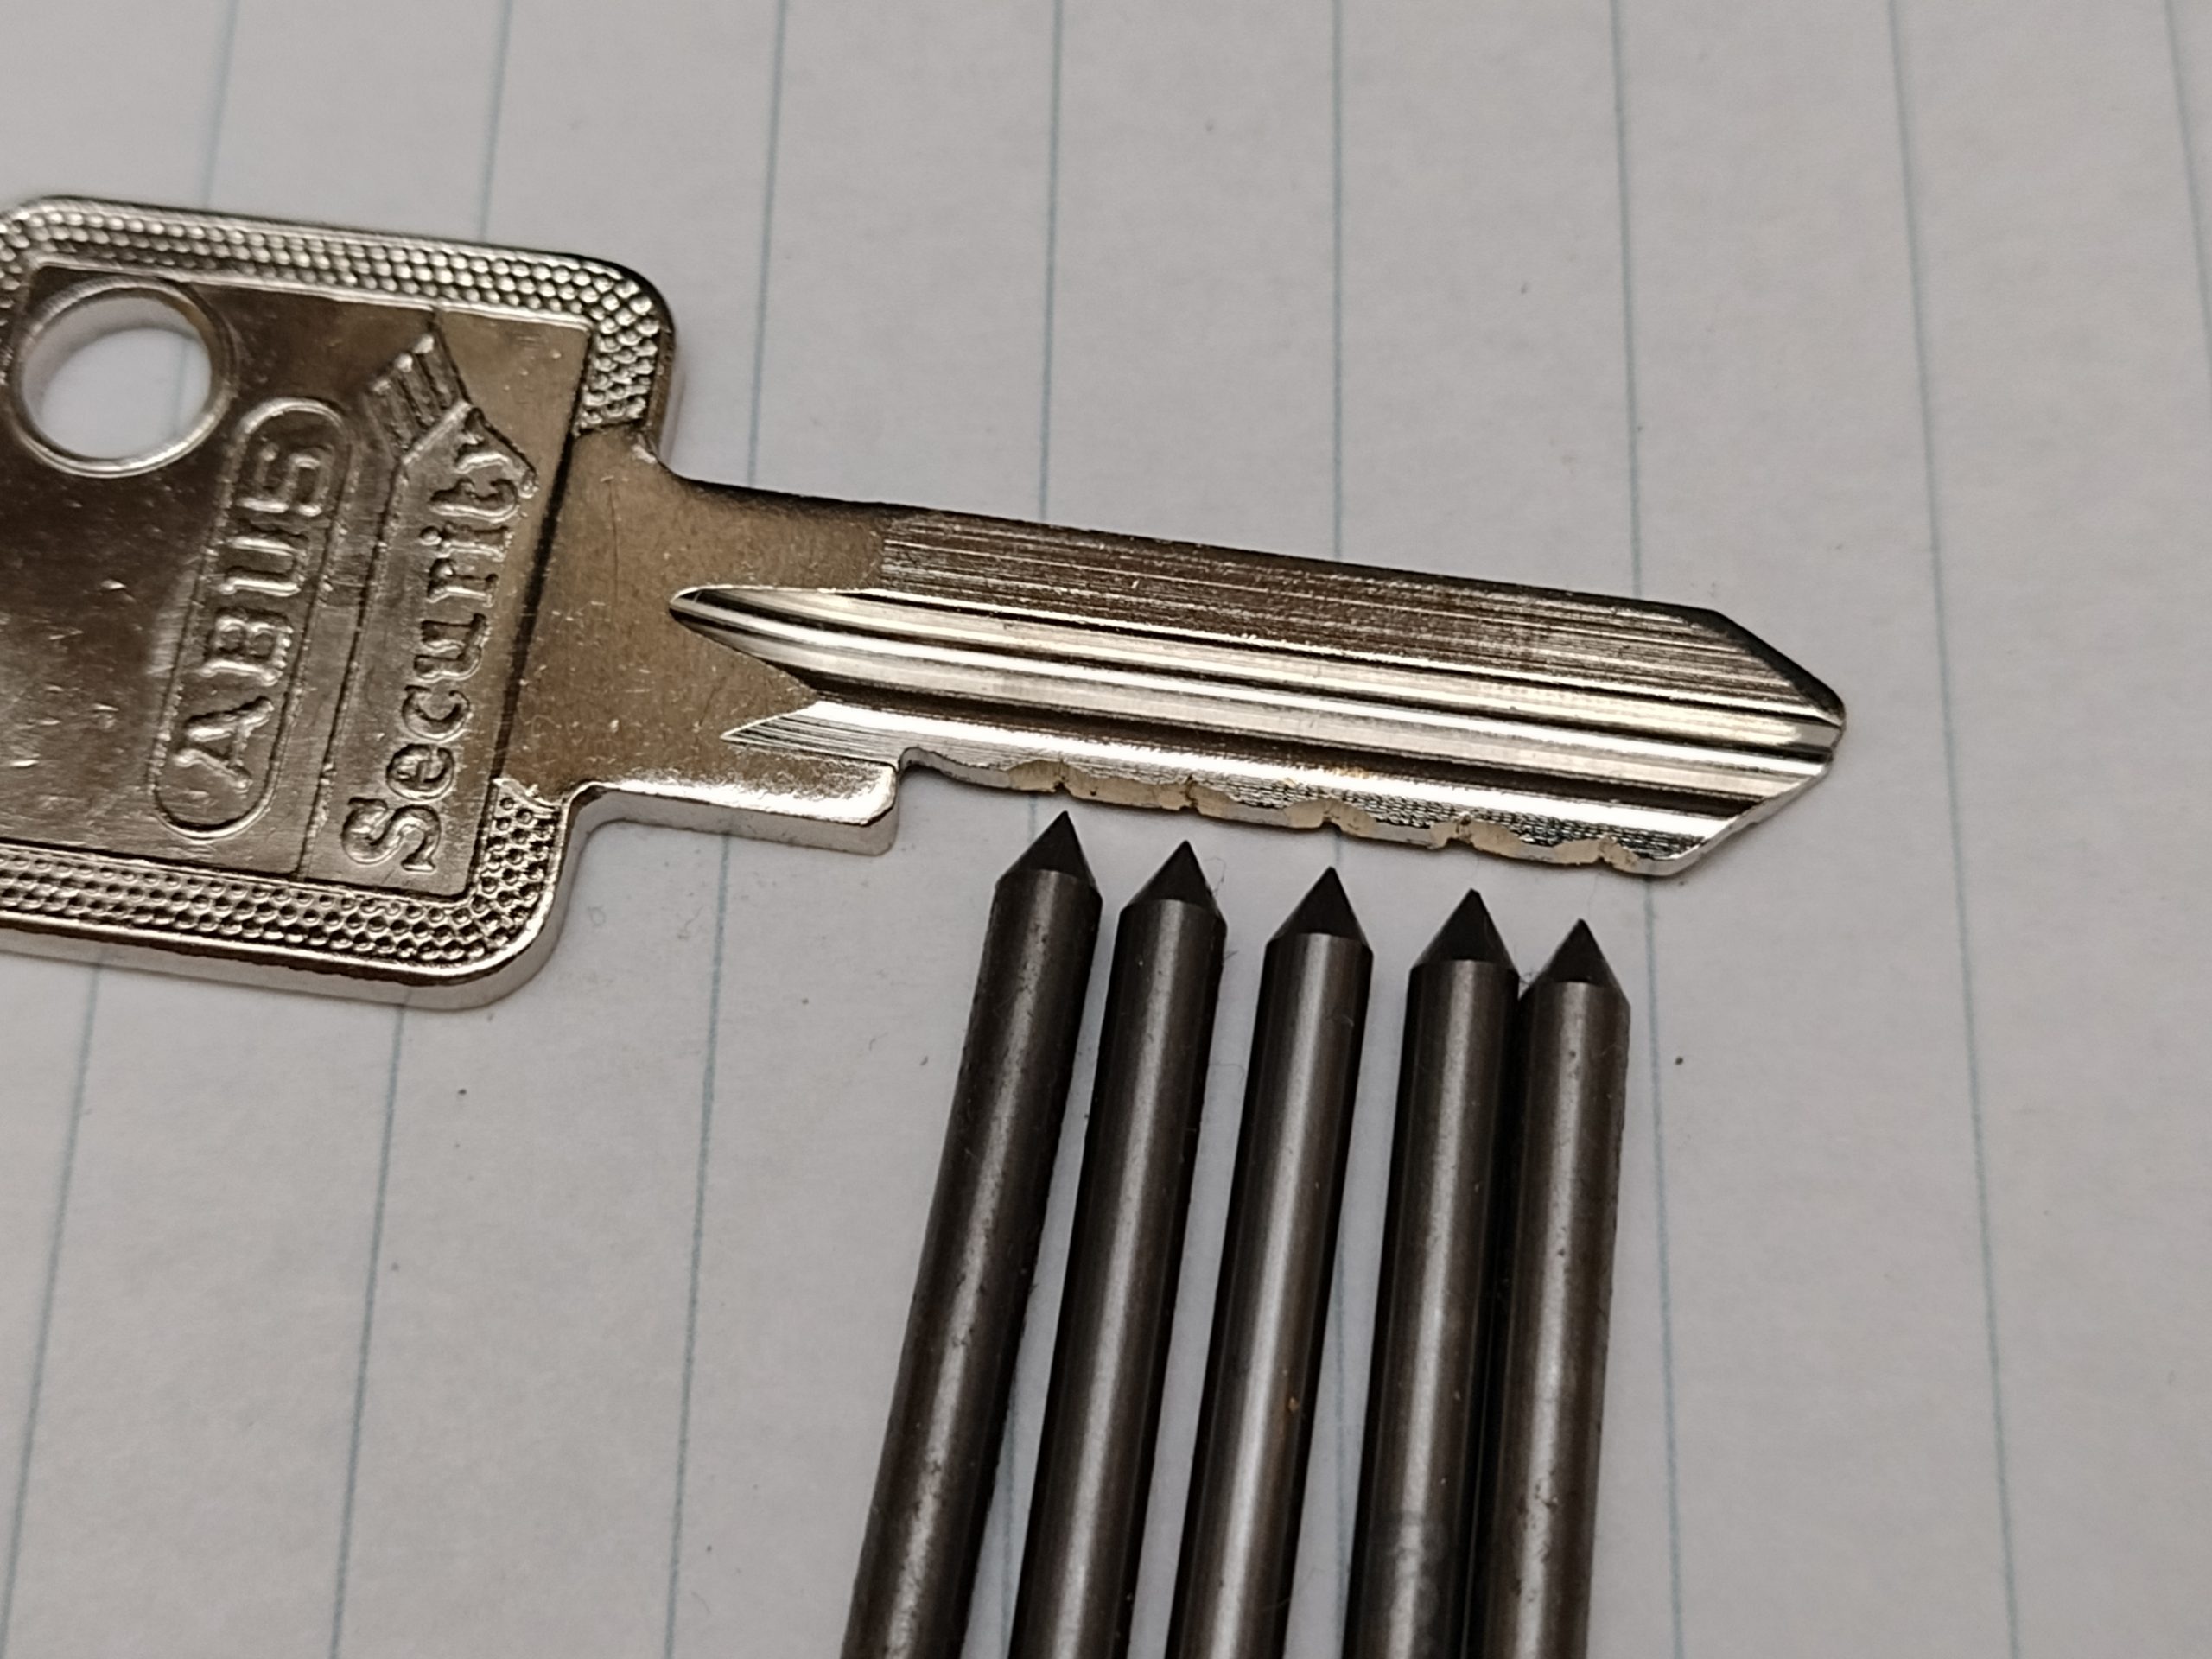
The key below shows the principle of operation. The scribe replacement tips scratch the surface of the key. For this one, the scratches are deeper than I like, but it shows the idea. You want a mark, but not too deep.
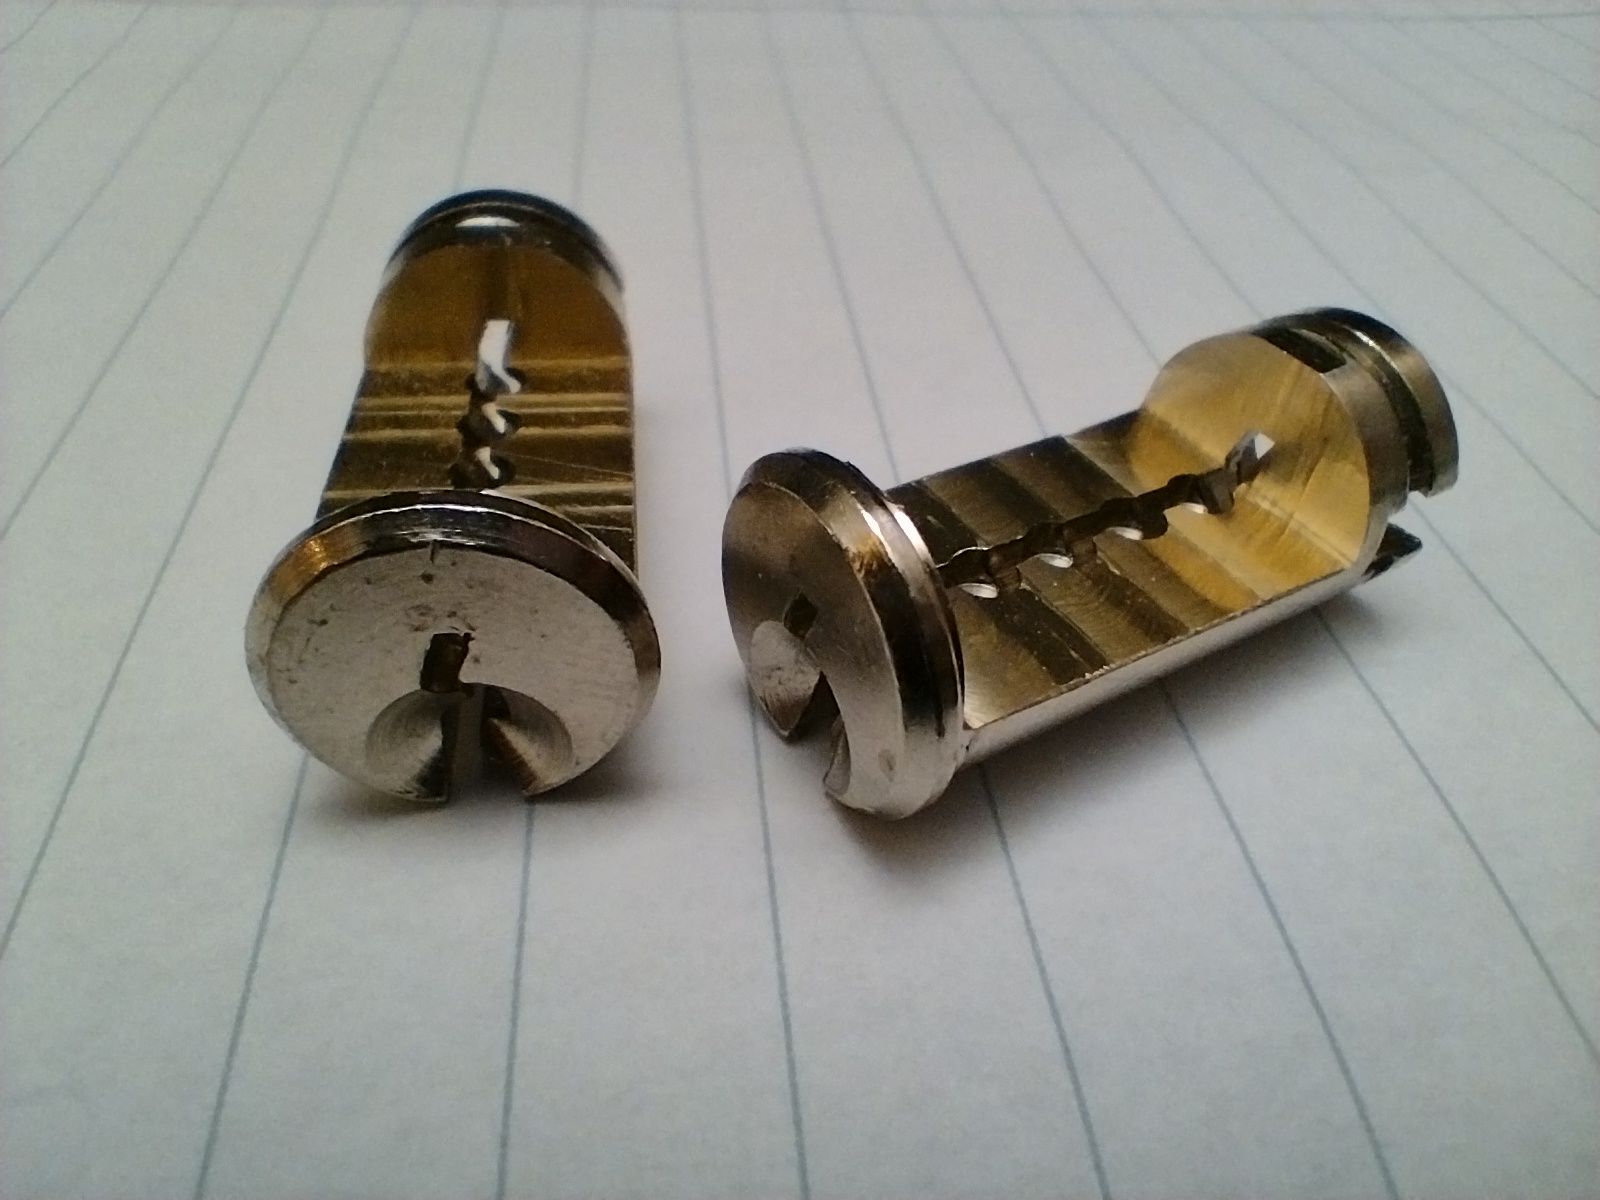
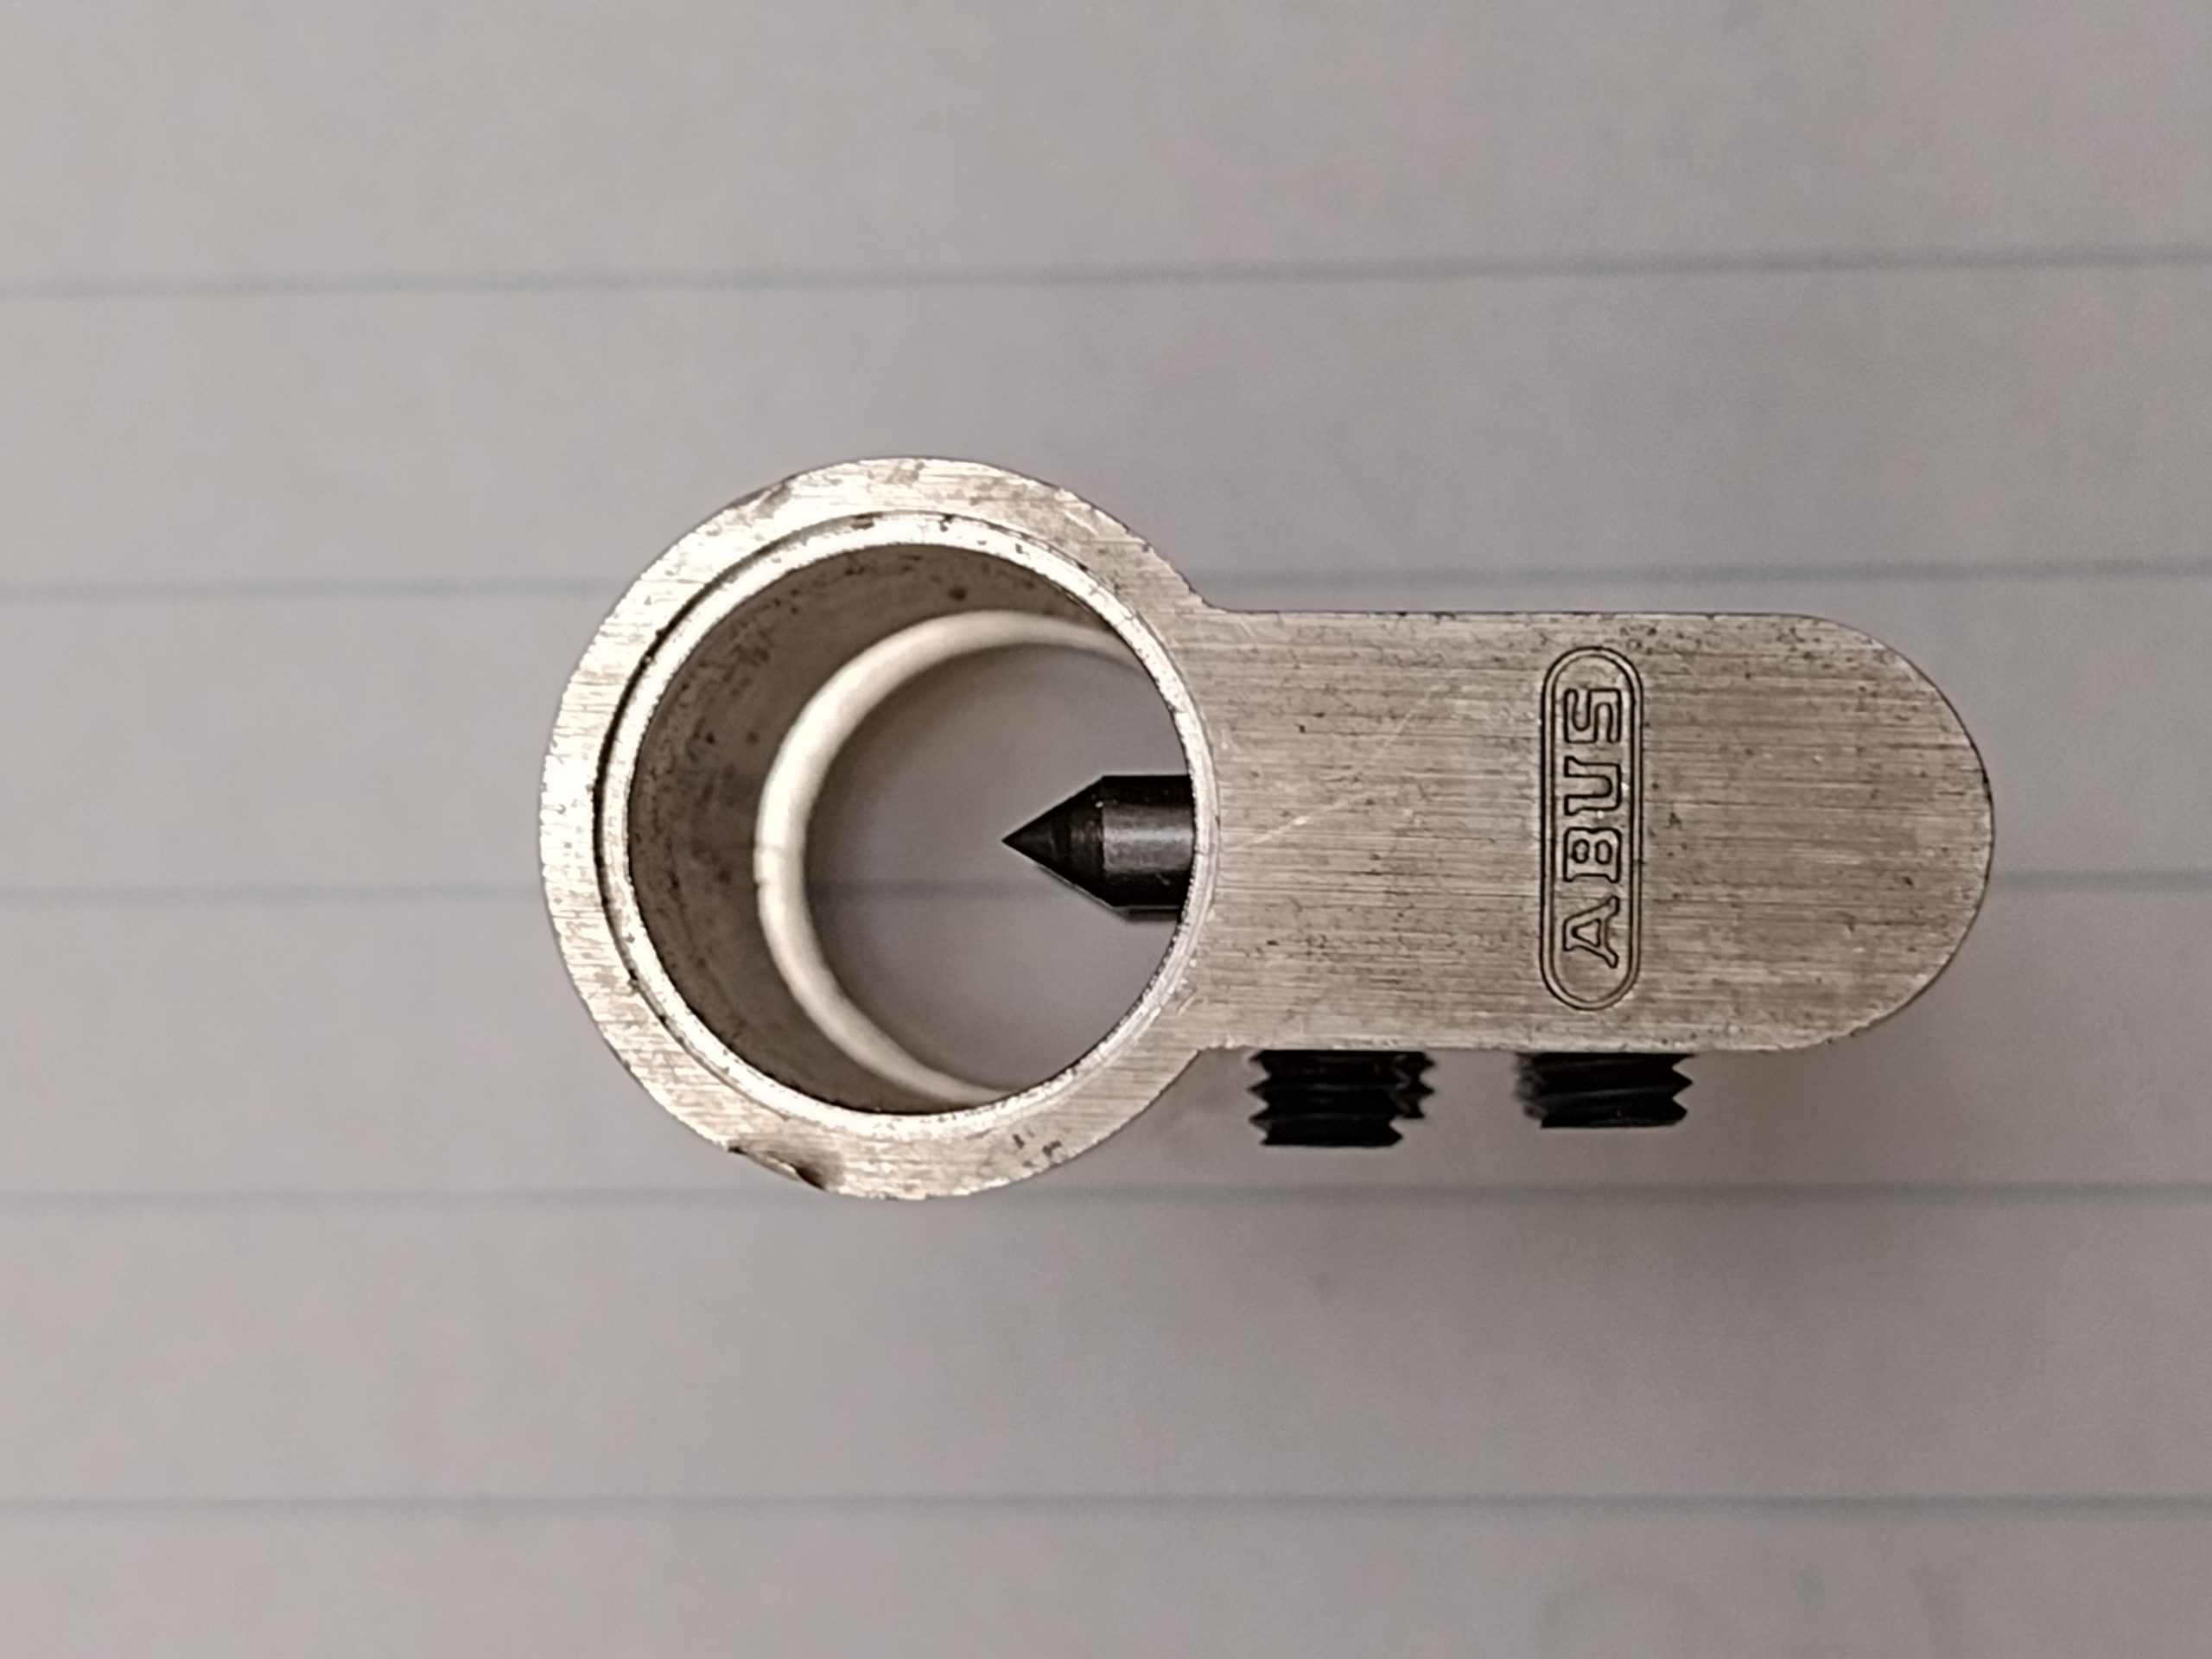
The current version, as shown in the pictures below, are from a small series production I’ve made for LockCon 2022. It was well received, and I’ve helped many of my friends with one of them. Making them commercially is very much not worth it. But if you want one, or the bits to make one, I might have some.
Please remember, even with all the impressioning gadgets, it’s not going to make a difference if you didn’t put in the hours. Consistency is key.
Pictures are copyright CCBY4.0 Jan-Willem Markus @ Blackbag.
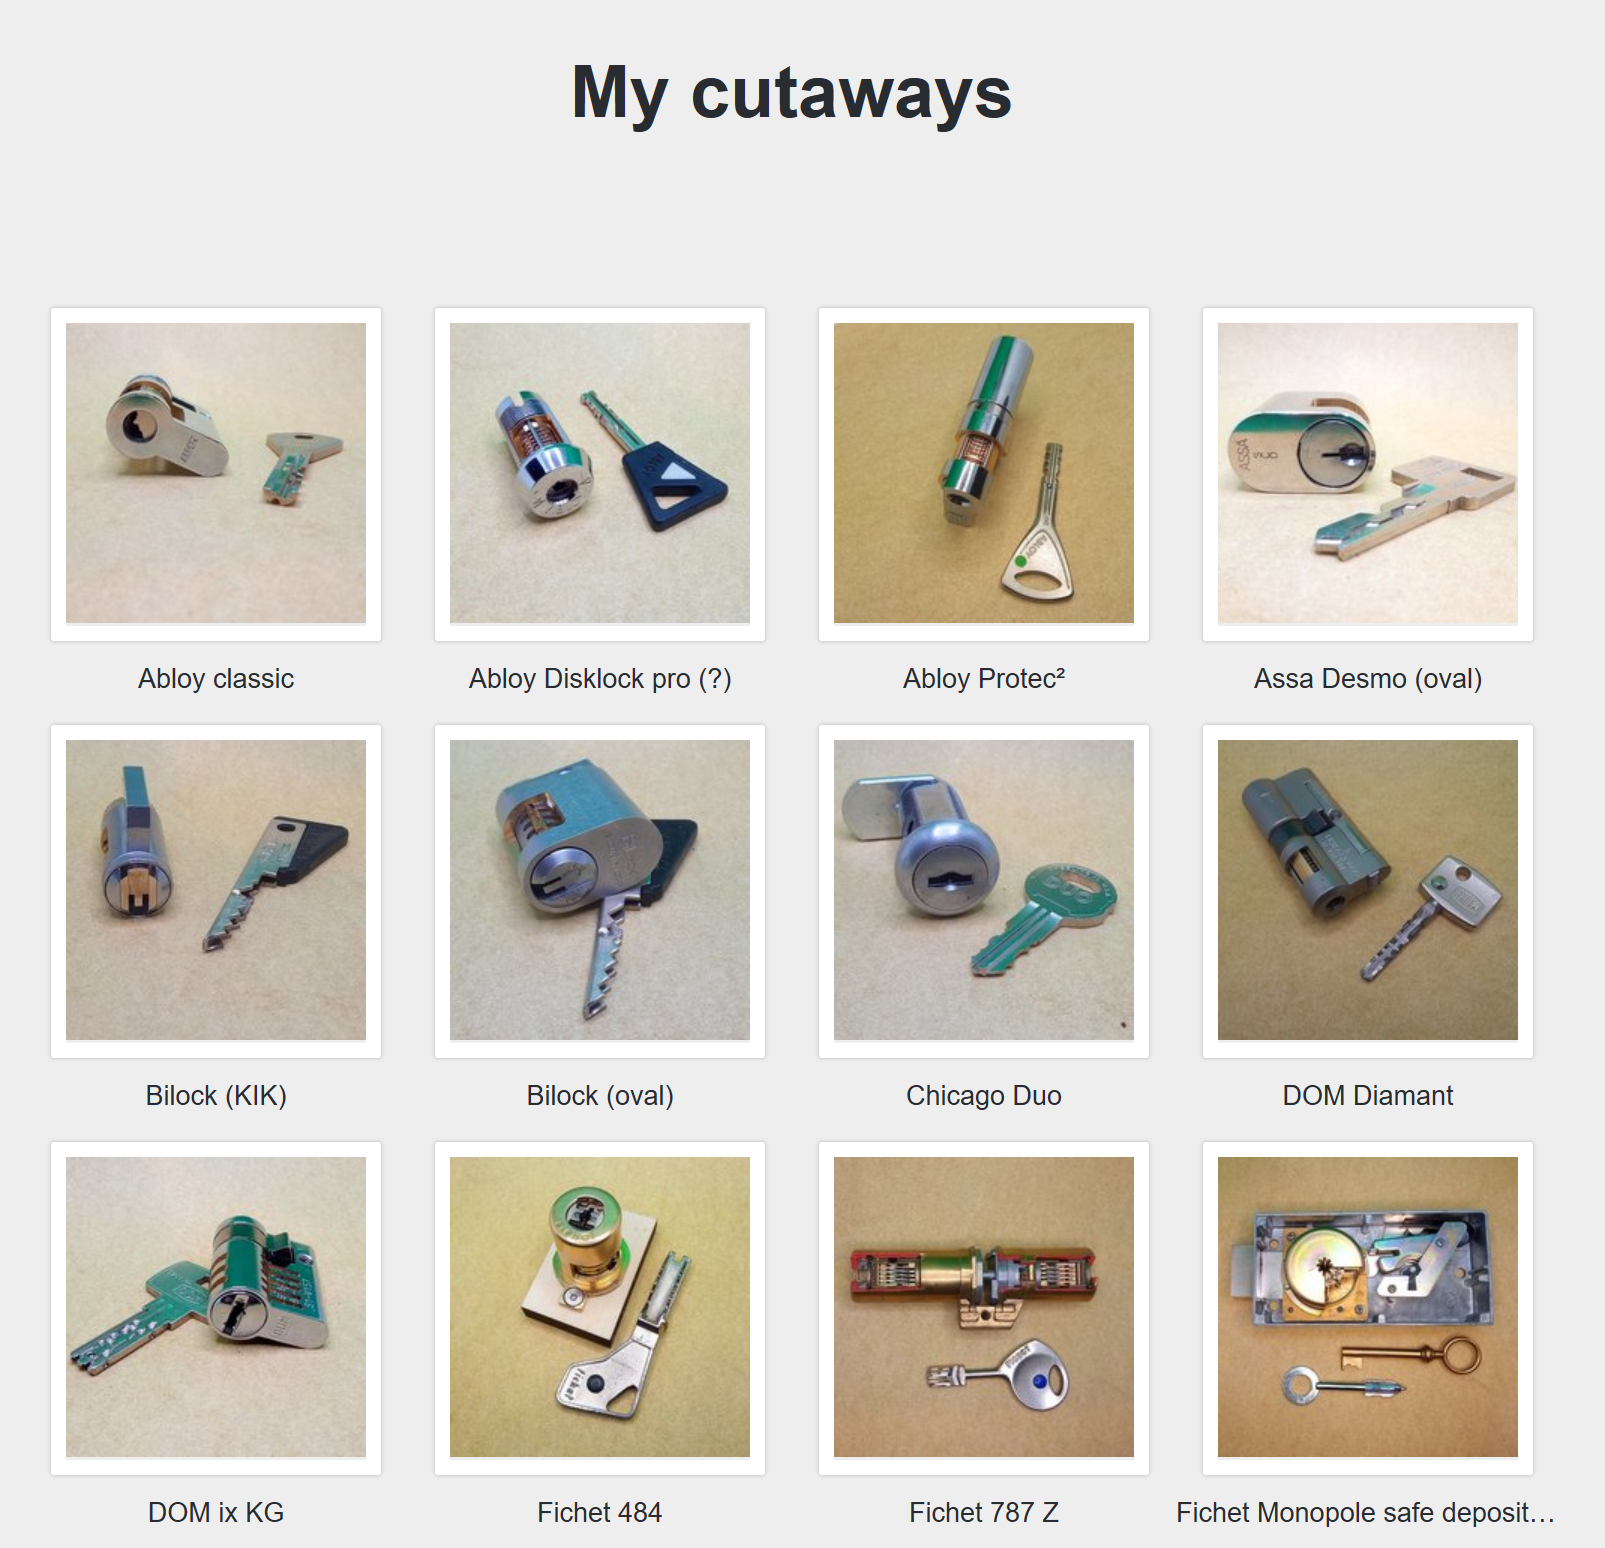
Qikom, lockpicker from France, created gorgeous locks cutaways and shared the images online. I believe cutaways to be very useful for understanding intricate lock designs. Where a good cutaway allows us to observe the elements of the lock while still functioning as normal.
Qikom is an associate professor in mathematics and computer science. Who got interesting in lock picking a little before 2000 after reading R. Feynman (the physicist) autobiography. Like many pickers, he is interested in the “puzzle” aspect of locks, and making a working cutaway is another kind of puzzle. Furthermore, he added, to spend more time making cutaways than picking locks!
Screenshot from Qikom’s website as of January 2023. http://qikom.free.fr/ CC BY-NC-SA 4.0
I’ve asked Qikom for tips on making great cutaways. He says about his cutaway strategy:
“I don’t have a well-defined strategy when planning a new cutaway. I know people start by making a 3D model of the lock to plan the cuts, but I don’t bother. In many of the locks I’ve cut, the cutting plan isn’t all that complex, and I try to set things up, so I can adjust things incrementally. One important thing I do, is to never cut a lock on the same day that I come up with the cutting plan, to get some time to think about it.
I usually try to have at least 2 identical locks to cut, and I consider one of them to be expendable. When everything works, I can sell / trade the second one, and if not, I get to correct any mistake on the second try. A couple of times, I badly failed twice, but could salvage enough parts to get the third attempt. But there are still some locks waiting because I wouldn’t want to mess them up.
I’ve made several embarrassing goofs along the way, but none of them would have been prevented by that! The graveyard includes several Robur, Rosengrens, Abloy, Fontaine, and Fichet… I’ve only attempted cutting an F3D when I got a couple of broken ones. This was a good idea, because the first 3 attempts were failures.
But there are still some locks waiting because I wouldn’t want to mess them up. Including the Emhart.”
Qikom often sells his cutaways online to partially fund the hobby. If you have interesting in these locks, or have a few spares that would work as a cutaway, consider contacting Qikom at qikom@free.fr
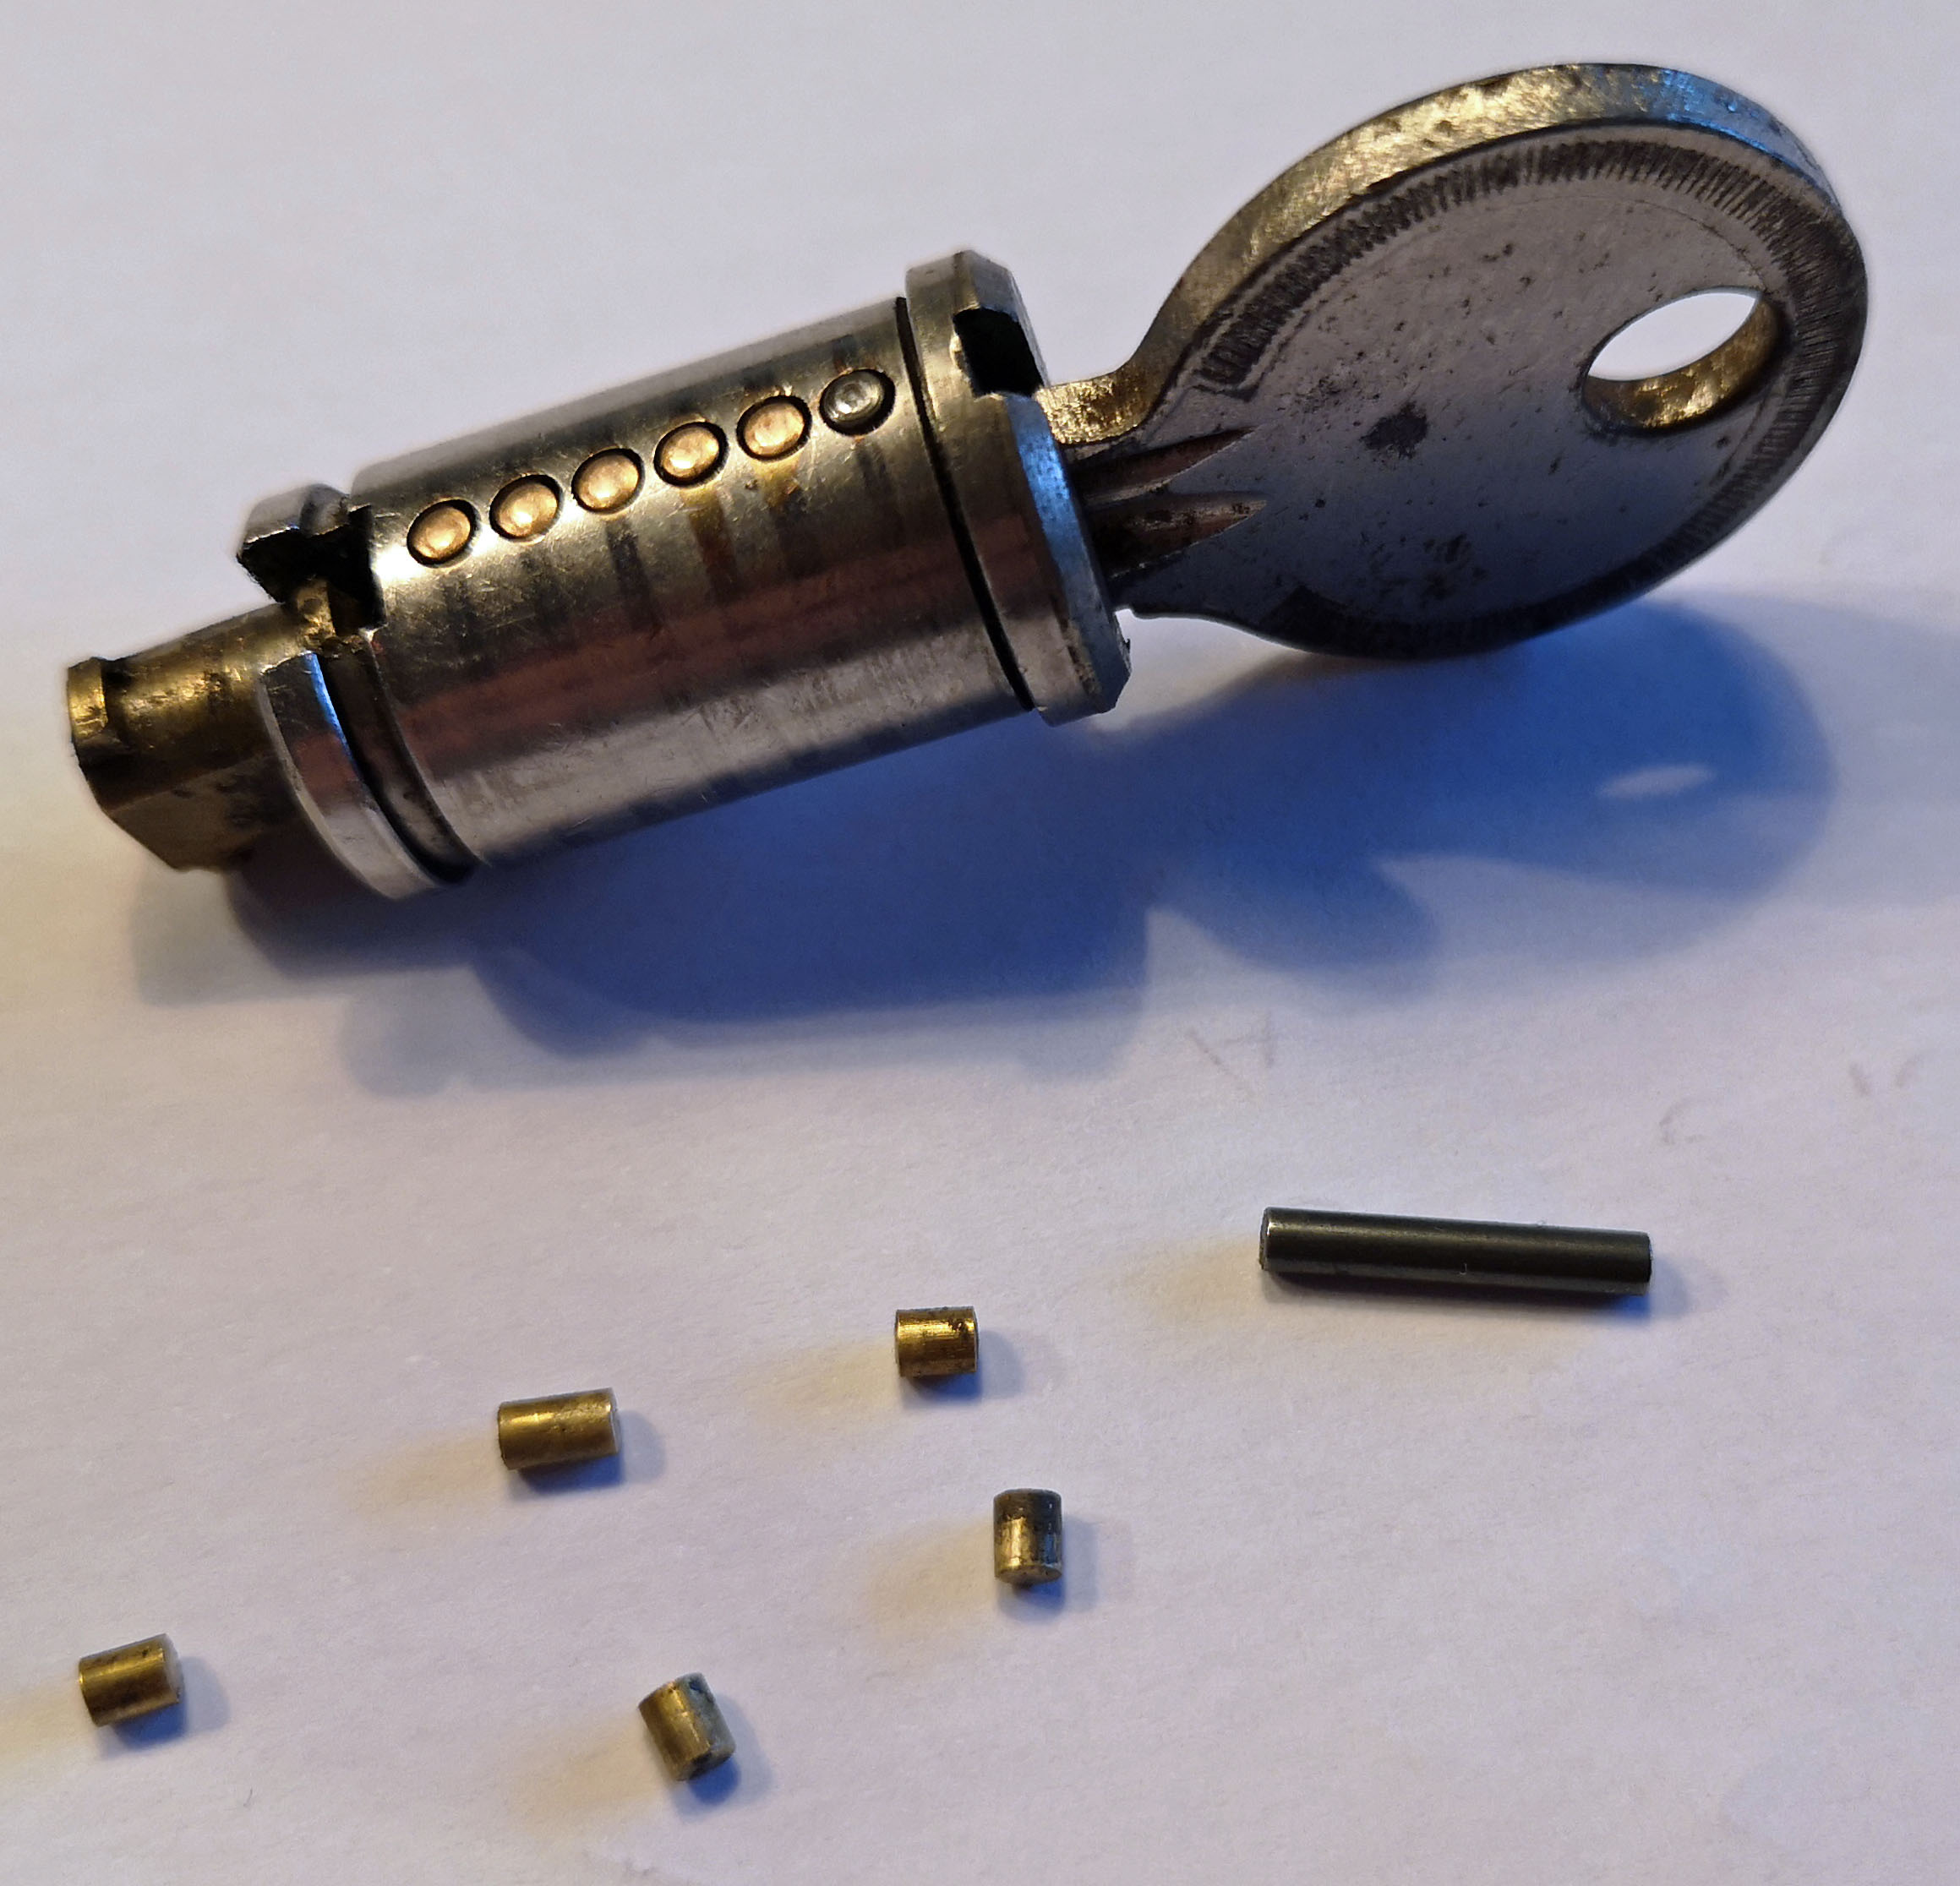
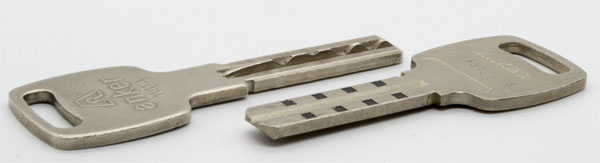
I got some new (old) cylinders. One was a small 25/25 cylinder with the key stuck in it. When I disassembled it, I was amazed to see six pins instead of the maybe three I was expecting.
The housing pins were tiny and also very short, except for one tall one, that has a double function as an anti-drill pin. The corresponding key pin is also made of hardened steel. There is one regular housing pin that is longer than the others. You would expect the key to have one cut that is deeper than the others, but that is not the case.
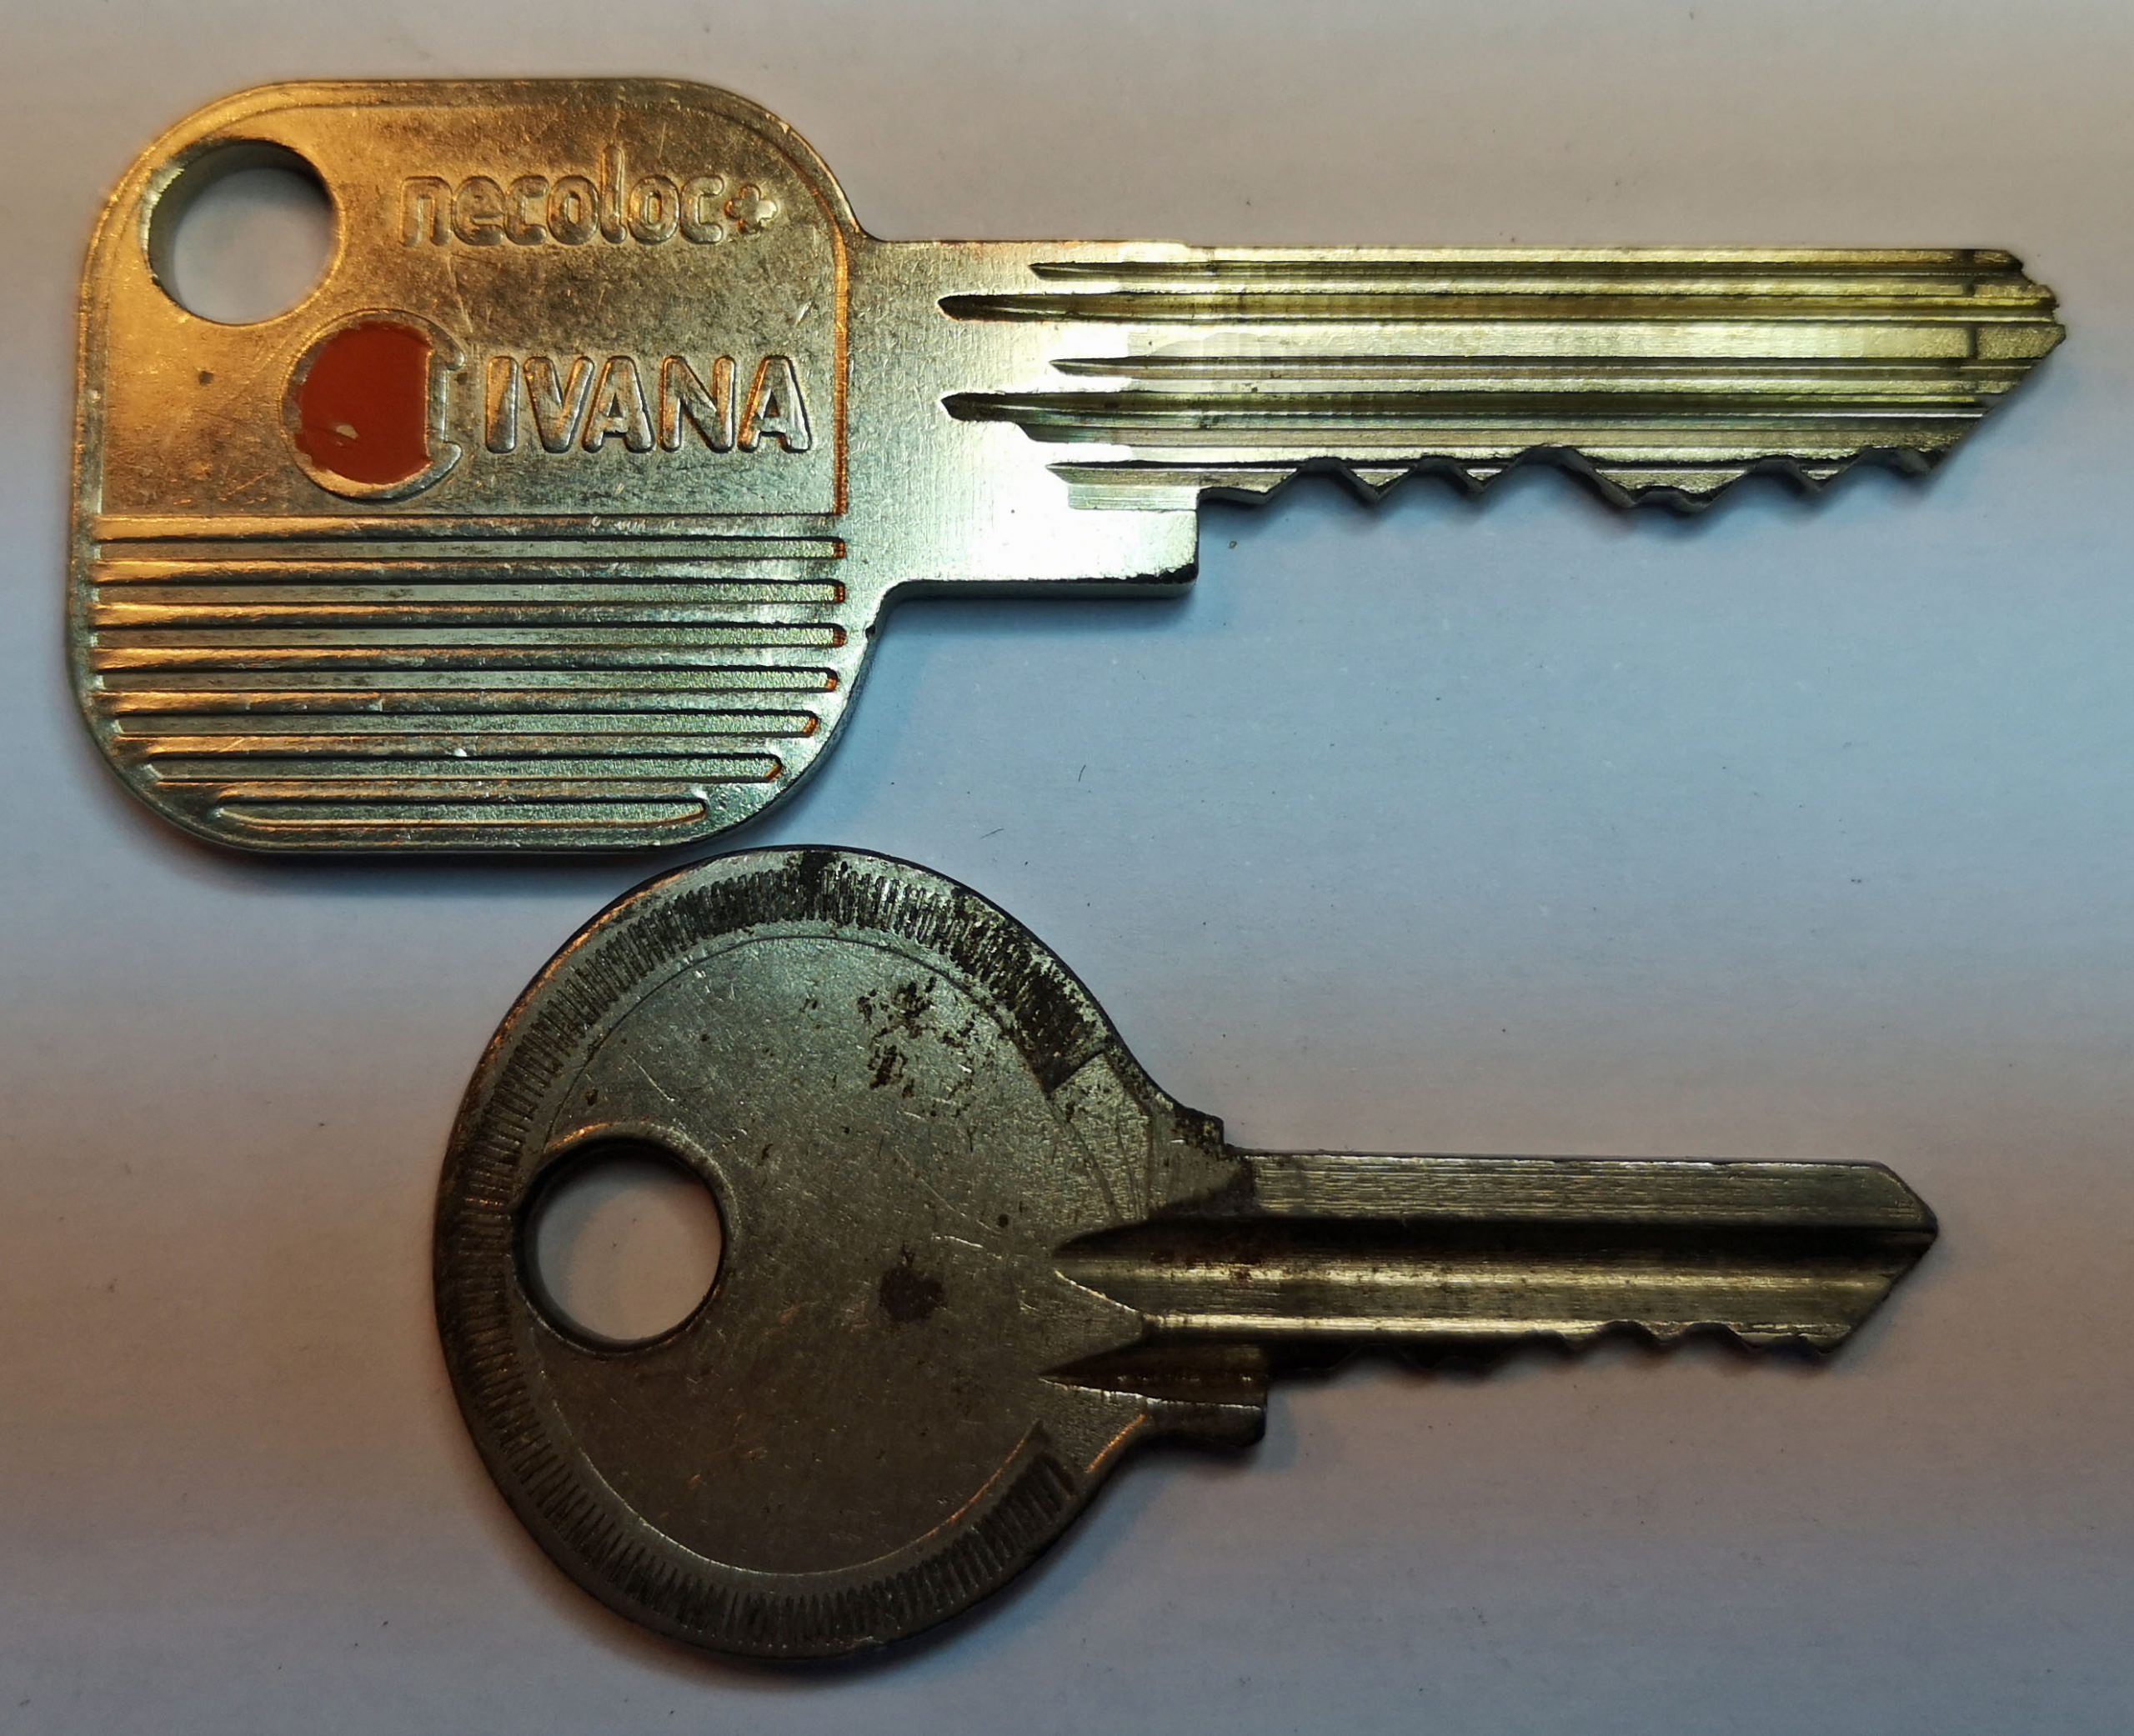
After reassembling, the cylinder worked fine again. Here’s a comparison of the key to this cylinder with one of a regular 6-pin cylinder:
Edit: it is a lock from the manufacturer DOM.
Photos CCBY4.0 Walter @ Toool Blackbag
Posted in Locks | Comments Off on 25/25 6-pin cylinder
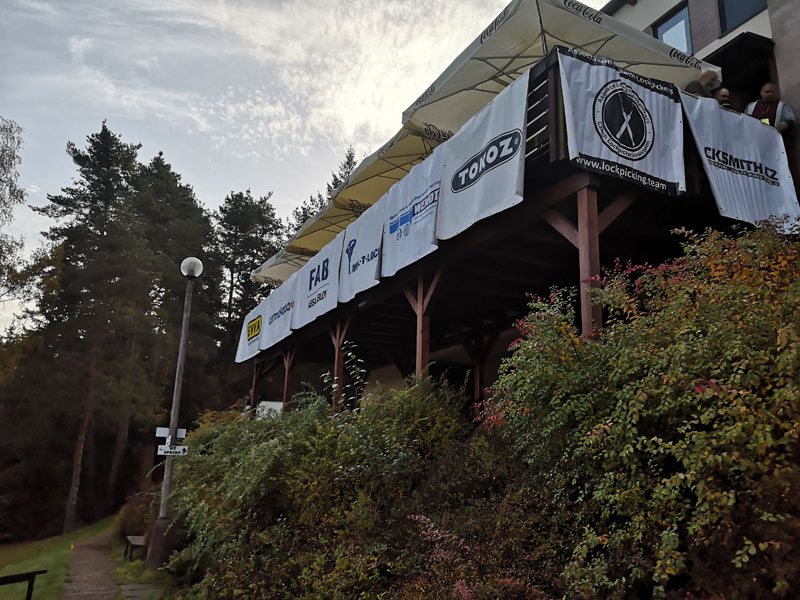
The Association of Czech Lockpickers held their yearly competition last weekend. Starting up after COVID, they offered a limited program without impressioning championships, but still included a padlock competition, blitz, cylinders and freestyle.
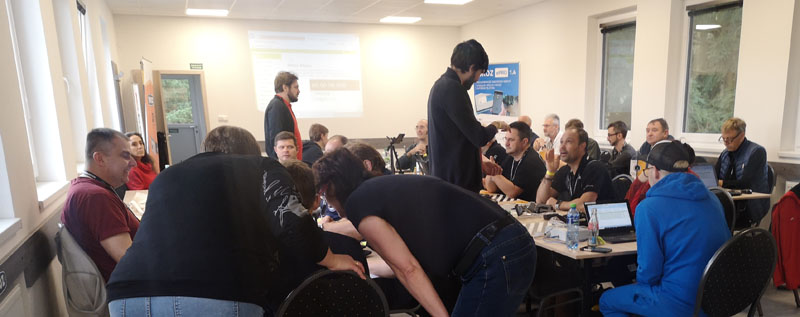
I (Walter) went over to participate. There were competitors from Czechia, Germany, Austria, Hungary and I was the representative for the Netherlands. The championships were held at a nice and cosy facility, giving ample room for socialising and catching up with old friends.
Some of the ‘usual suspects’ were absent due to work or for other reasons, but still there were plenty of people participating
Padlocks
First up was the padlock competition. The padlocks were provided and differed quite a lot in difficulty. You are allowed to test your tension wrench before the clock starts. For one particular lock, it was hard to test the tension wrench without accidentially already opening the lock.. on the other side of the spectrum, some of the Tokoz padlocks proven impossible to open in the allotted time.
I had a tool stuck in a lock which I why I didn’t make the A-finals. But all for the best, because in the B-final I then became second. There were 7 people in the A-final, 9 in the B-final.
Blitz
The blitz competition requires opening locks within a minute. Each participant brings their own lock. I was a bit confused here.. I’ve done such competitions before. I fondly remember the one held by SSDeV in 2003. People would give me the lock and tell me exactly how to open, because the goal here is not to bring a difficult lock, but to encourage beginning lockpickers to have success. It is a competition that should also show the audience that lockpicking is a sport that can be done by anyone. However, at this competition, there were very difficult locks, I even saw a Mul-T-Lock with the pin-in-pin system. It was no surprise that it take not long for most of the people to be out of the game, me included.
Cylinders
For me, the cylinder opening is the most interesting competition and I was looking forward to it, after the Blitz. For this competition, people take their own locks that they need to open within 5 minutes or they cannot participate. I took an Ivana Necoloc (rebranded Anker Infinity) that was used in the Toool championship finals (nobody opened it there in 15 minutes). For the first time, I prepared for a competition, because I practiced opening this lock within 5 minutes. I managed to do so here under stress as well (about 1’20) and could participate. The competition saw some very difficult locks, such as the EVVA ICS.
I made it to the A finals, even though I did not open the FAB lock. Later, I learned it has a very deep pin because of bump protection, which I somehow missed in the stress.
In the final, I openend a cheap lock (Legallais) and a Winkhaus, but left the EVVA ICS and Cisa SB (similar to Abus XP1) closed. The Cisa was almost completely picked until I made a mistake and had to start over. Jascha had the same happening to him. The last round I got Jascha’s Yale dimple lock which had dimples and sliders. I destroyed my lockpick on it, but opened it in 14’58! That, in the end, was enough for fourth place overall. I though my Ivana lock would be difficult enough to give me an advantage, but it turned out everybody in the A-finals opened it within the 15 minutes.
Freestyle
For the freestyle competition, the locks were once more provided. They needed to be opened within 5 minutes. I did not bring any electropicks or other ‘freestyle’ tools, so reverted to normal picking. I again made it to the A-finals. There, I opened 3 EVVA locks and 2 Euro Plus locks. Once I figured using the Bogoto was the way to go, I opened these in seconds, but unfortunately the first EVVA and Euro Plus took me 1’49 and 2’14. THere were 2 Mul-T-Lock interactive cylinders that “talked” to me but wouldn’ open in the end, a FAB 400 I had opened in the first round but wouldn’t open in the final and a Kaba Gemini that was only opened by the winner using an electropick (and a bit of luck). I think it was due to my time that I only became 7th here.
Overall it was a very nice competition with a good atmosphere. Thanks to the organisers!
I had spent quite some time on the Anker 3800 cylinder. This system was originally patented by the Japanese firm MIWA. It contains just 4 pins, each of them having 4 possible depths. But, there’s also 4 sliders that are magnetically operated by magnets in the key.
An Anker 3800 EurocylinderThe keys
This system was sold in the Netherlands by Dutch firm Ankerslot and is still used in many large, high security setups.
I made a magnetometer to decode the magnets in a key or in a cylinder, made a 3D model of the key to be able to print it and figured out how to get the master key of a system. My talk at Disobey is available online.
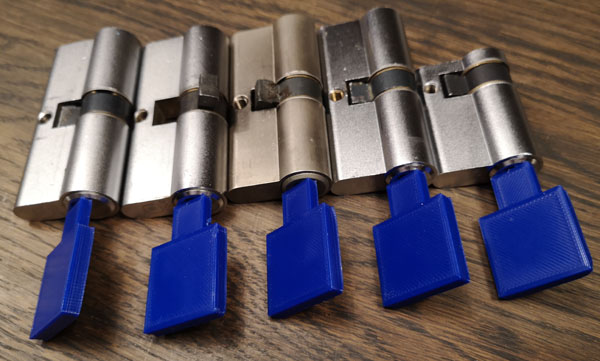
At LockCon, Han provided me with a set of five cylinders, all keyed differently but all part of the same masterkey system. No keys were provided.
I started by reading out all the magnets in the sliders. Each slider can have one or two magnets. If there are two, one is for the user key, one for the master key (we’ll ignore submasters for the moment). By knowing the magnets in the cylinder, it is possible to figure out which magnet should be in the key. For master keyed systems, there might be two possible magnets to operate the slider, where one will be in the master key, the other in the user key. With this information, I could determine the magnets in the master key and in the individual user keys (for each slider, there was only one possible magnet that would open all cylinders, so it was clear that that particular magnet should be present in the master key).
The correct bitting is another story. I had no key to start with. It is possible to create 256 keys and try them all to find all possible bittings. I was lucky however to have gotten one half cylinder.
What I did is create a bump key (so four times the deepest cut, which I will call a ‘4’), containing the correct magnets. With the bump key, I could open a cylinder and disassemble it. The half cylinder was my luck, as that can also be re-assembled. For this task, I used a 3D-printed plug follower.
This gave me all the correct bitting positions for this one cylinder (pin 1: 3 or 4, pin 2: 1 or 3, pin 3: 2 or 3, pin 4: 4). Since I did not have the original key, I did not know which depth belongs to the user key and which to the master key. The configuration allows for 2^3=8 possibilities. By creating 8 keys and trying them on the other cylinders, I could find out the master key bitting. With 3D printed keys, it is possible to print, say, a 3/1/2/4 key and if it doesn’t work, file a bit away to get a 4/1/2/4 key. That is exactly what I did and 4/1/2/4 worked on all cylinders, giving me the correct master key.
Next, I wanted to create the user keys. I could have created user keys by only using different magnets and keeping the bitting the same, but that would not give me the keys as they would originally be made for these cylinders. Since I now had a working master key, I could easily probe each pin position for all depths in sequence. I started with a 1/1/2/4 key, trying that on the 4 remaining cylinders and writing down the results, then filing it to a 2/1/2/4, trying again and then 3/1/2/4. With four keys to start with and 4*3=12 filing actions I was able to decode all the bittings.
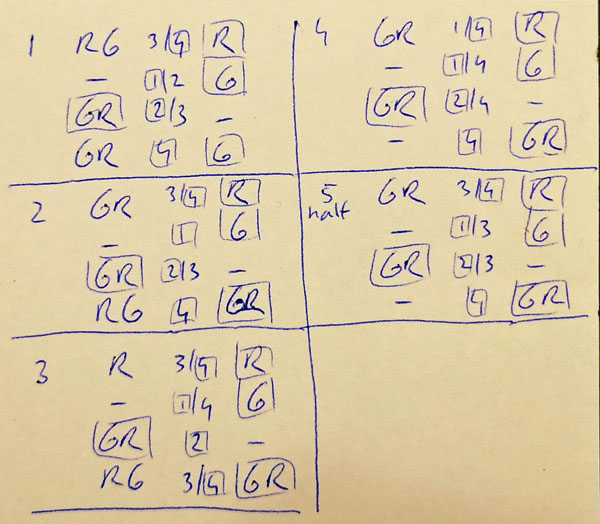
Decoded cylinders, ‘G’ and ‘R’ are north/south poles (my magnetometer uses green/red light as an indicator)
Here, I have put squares around the magnets and bittings of the master key. If there are other bittings or magnets, they must be in the user key. The first pin of cylinder 2 for instance has possibile depths 3 and 4, and the master key has depth 4, so the user key must have depth 3. Note that in this system (and in this instance), user keys can have a bitting that can be filed down to the master key, as long as the magnets are different. Cylinder 2 shares the middle two magnets with the master key, the outer two are different.
With that information, I knew all the individual keys and printed them.
The user keys only open one cylinder each
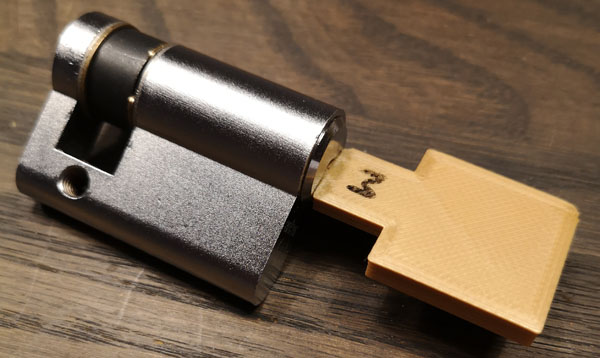
And I have the master key.
The master key is golden of course
In fact, with this collection of cylinders, it is now also possible to make submaster keys for certain subsets of cylinders, even if that was not intended originally.


 I’ve only attempted cutting an F3D when I got a couple of broken ones. This was a good idea, because the first 3 attempts were failures.