
In learning lockpicking try to get all advantage you can get. A good first step is to learn as much as possible about the lock. For example, You should disassemble and reassemble the lock a few times, but looking at pictures on the lpubelts or lockwiki are good options as well. The next step is to assemble the lock with fewer locking elements, pick it, and increase the difficulty after each success. This is a well understood practicing method for pin tumbler locks, call progressive pinning.
I’ve built several progressive locks for myself and for teaching lockpicking to others. Of some locks, I’ve got a keyed alike set. In this way, you can practice the locks without the (sometimes tedious) opening and reassembly of the locks. For the practice session, just work through the locks in the set.
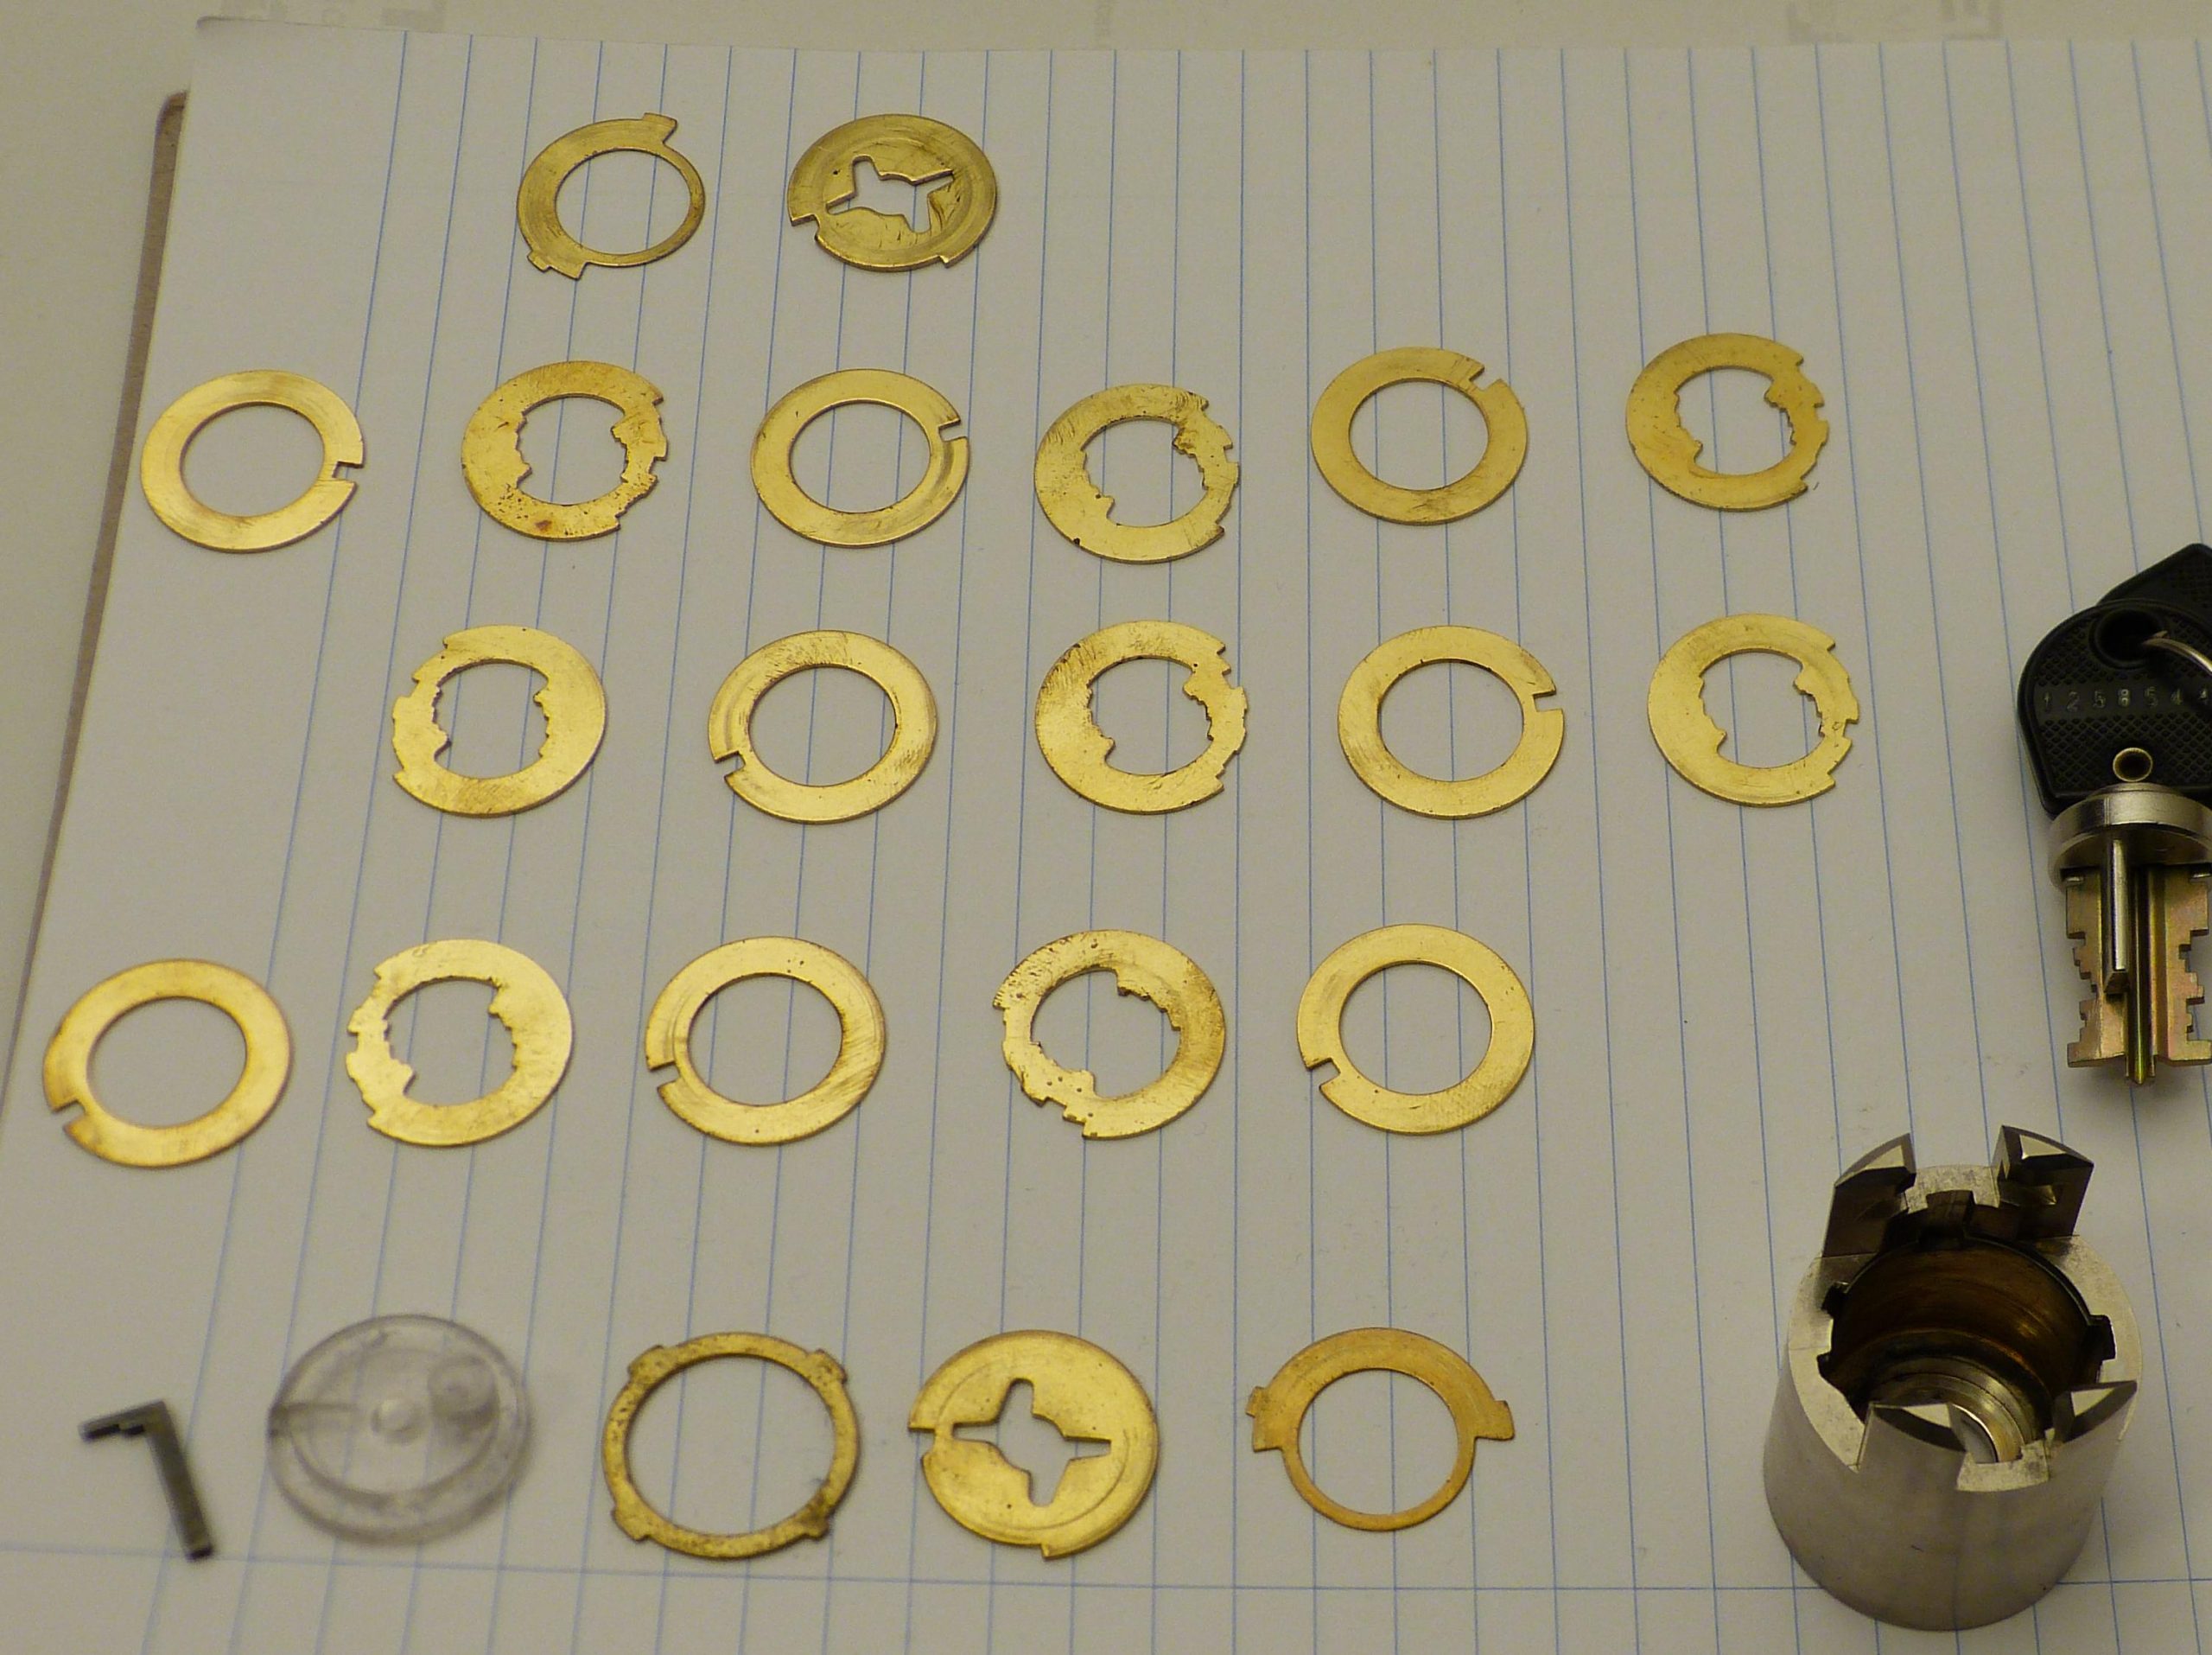
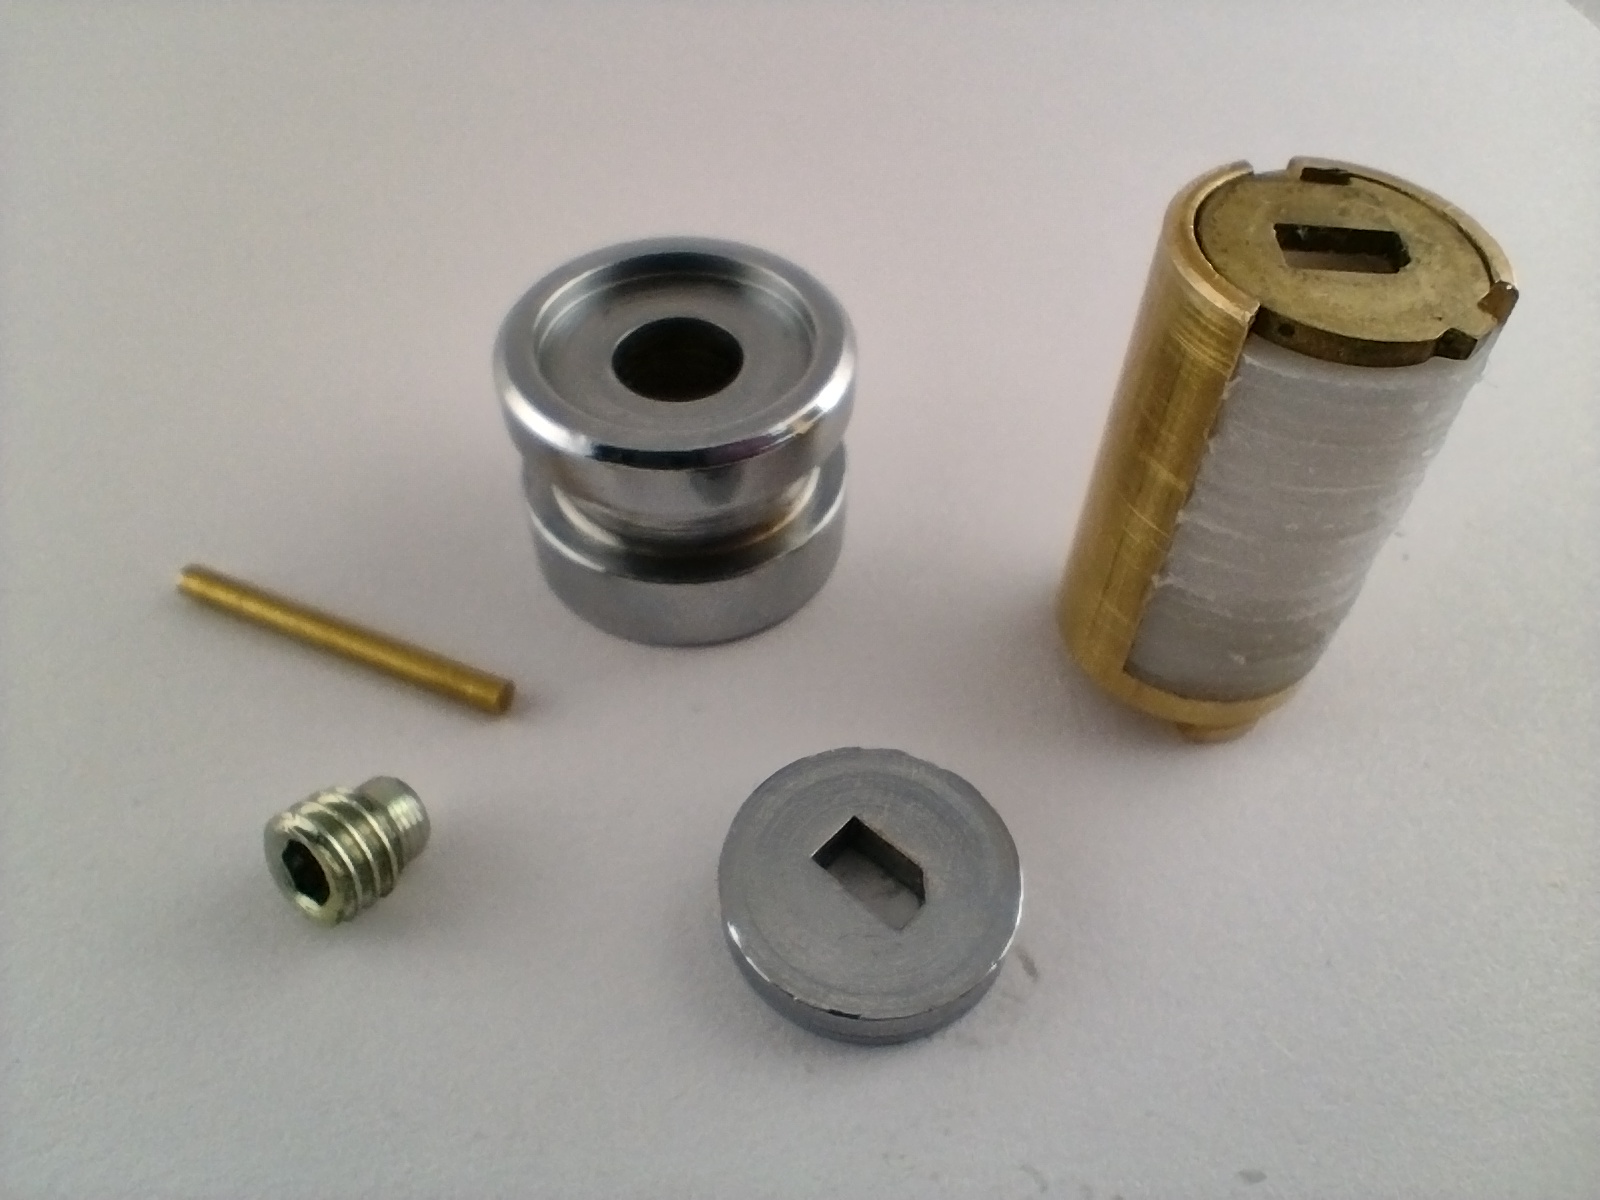
For disc detainer locks we aren’t lucky as the locks don’t function well without all the elements. The locks consist of a stack of code discs and spacers and all live in a partially cut hollow tube. If you have several of the same lock, you can use the spacers from one lock to fill the progressive lock. This technique worked well for an attempt to pick the Rosengrens 32A81 lock.
Dmac shows an clever alternative for regular disc detainers in this video. https://www.youtube.com/watch?v=ehHG-BhgdMs He is replacing part of the disc stack with a properly sized tube to take up the space of the missing discs. The tube allows the key to operate the lock and has enough movement to move freely and not impede the sidebar, but small enough so the sidebar doesn’t drop in the core. This is a clever trick which is certainly worth testing.
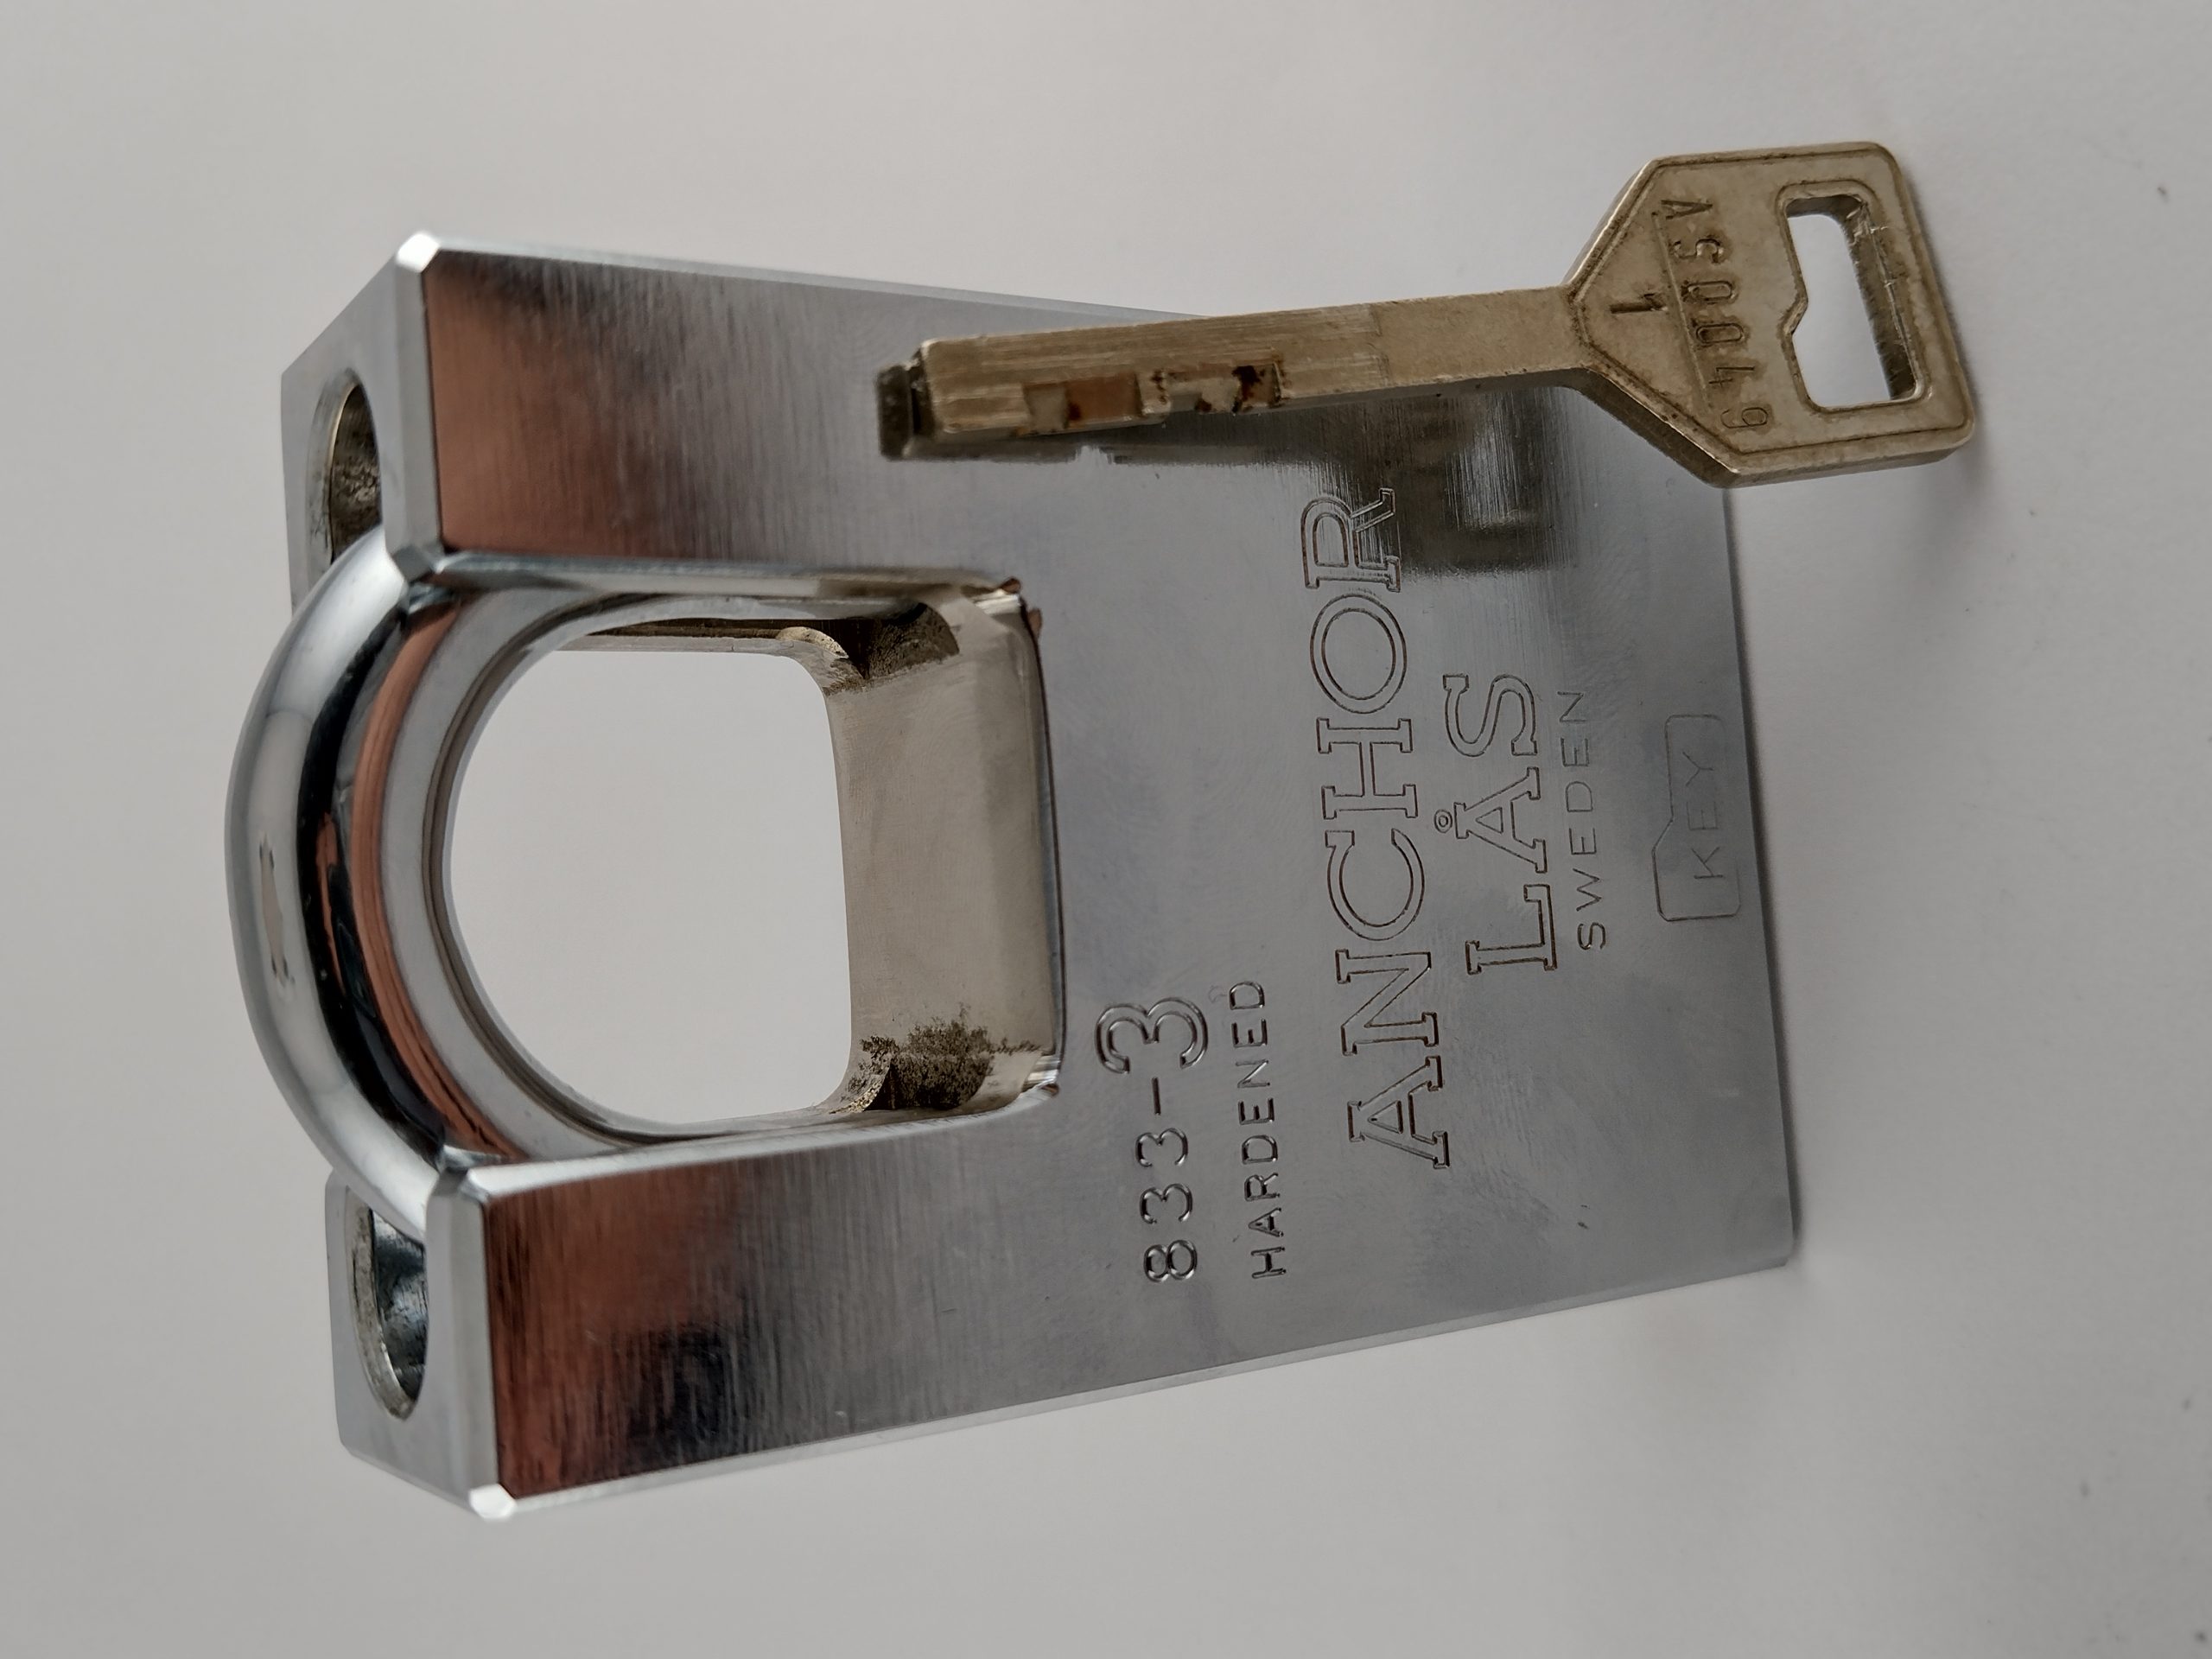
In this post, I propose an alternative solution which is more generic, and will most likely work for all disc detainer, lever, and wafer locks. I’ve designed a spacer to fill the lock. The spacer shape can often be reproduced from the original lock parts in most CAD packages within hours. As a proof of concept, I’ve designed the spacers for the Anchor Las and laser cut the parts at Hackerspace Bitlair in Amstersfoort.
My process is quite straight forward: Measure the part, design it in OpenCAD, determine the laser parameters, cut the part, test the part. Then adjust and repeat the steps until satisfied with the results. (Or when you run out of material/time/money, whatever comes first.) It is like CI/CD, but in hardware, with an iteration cycle of about five minutes.
In the table below, I’ve captured the measurements of the core from the Anchor Las 833-3 padlock.
| Item | Size |
| Disc pack | 20.51 mm |
| Disc | 1.395 mm |
| Spacer | 0.5 mm (calculated) |
| Core | 13.92 mm |
| Sidebar | 1.97 mm |
| Key width | 5.1mm |
| Spacers stack | 0.5 mm + 0.28 mm |
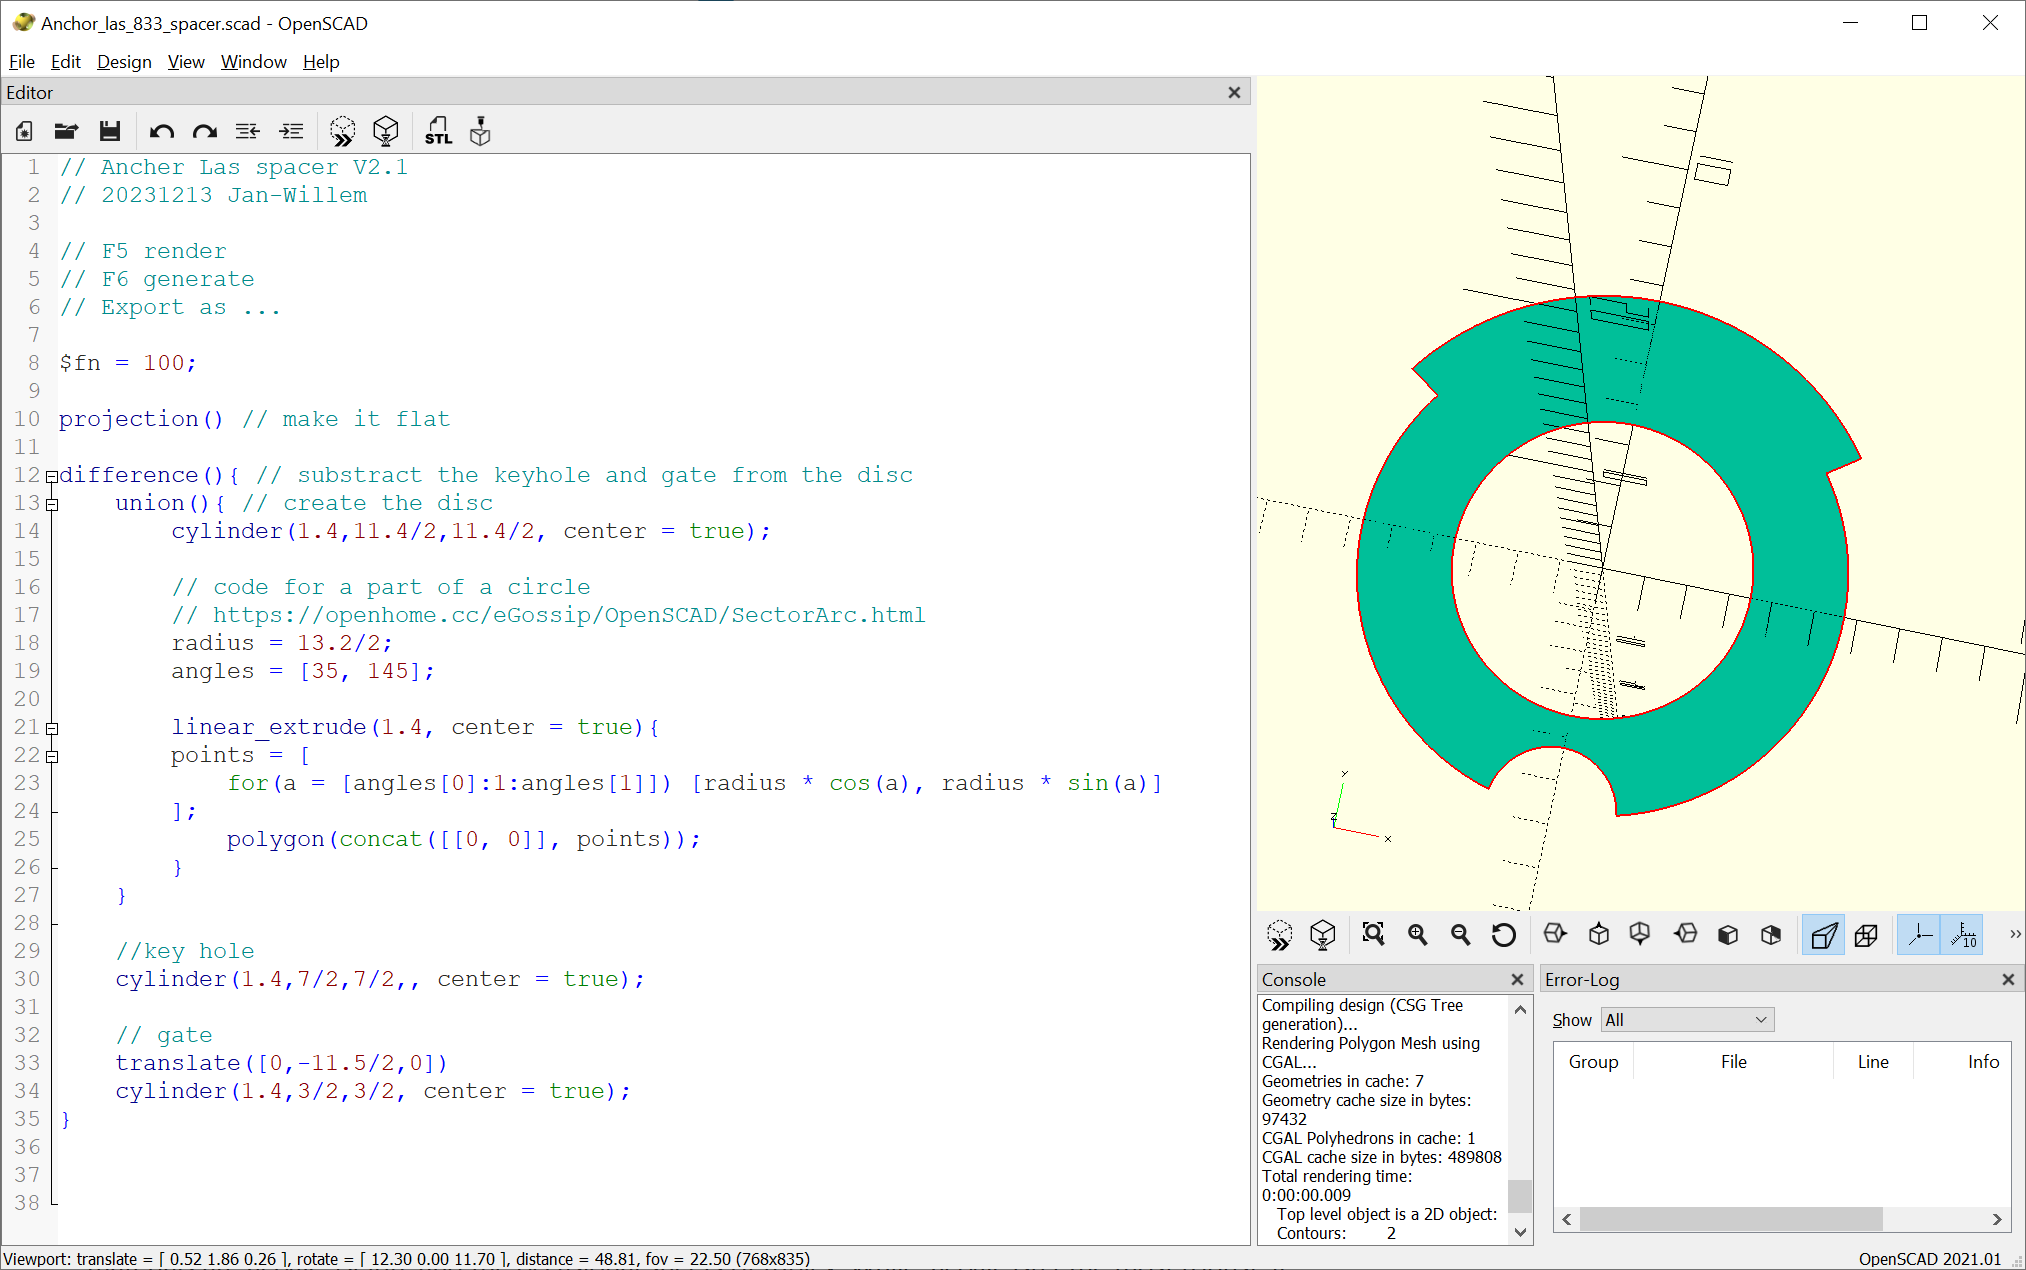
Getting the dimensions into OpenSCAD isn’t too difficult. I did however reuse someone else’s code for a partial circle, which isn’t trivial in this scripting language. (The code will be on the bottom of the page)
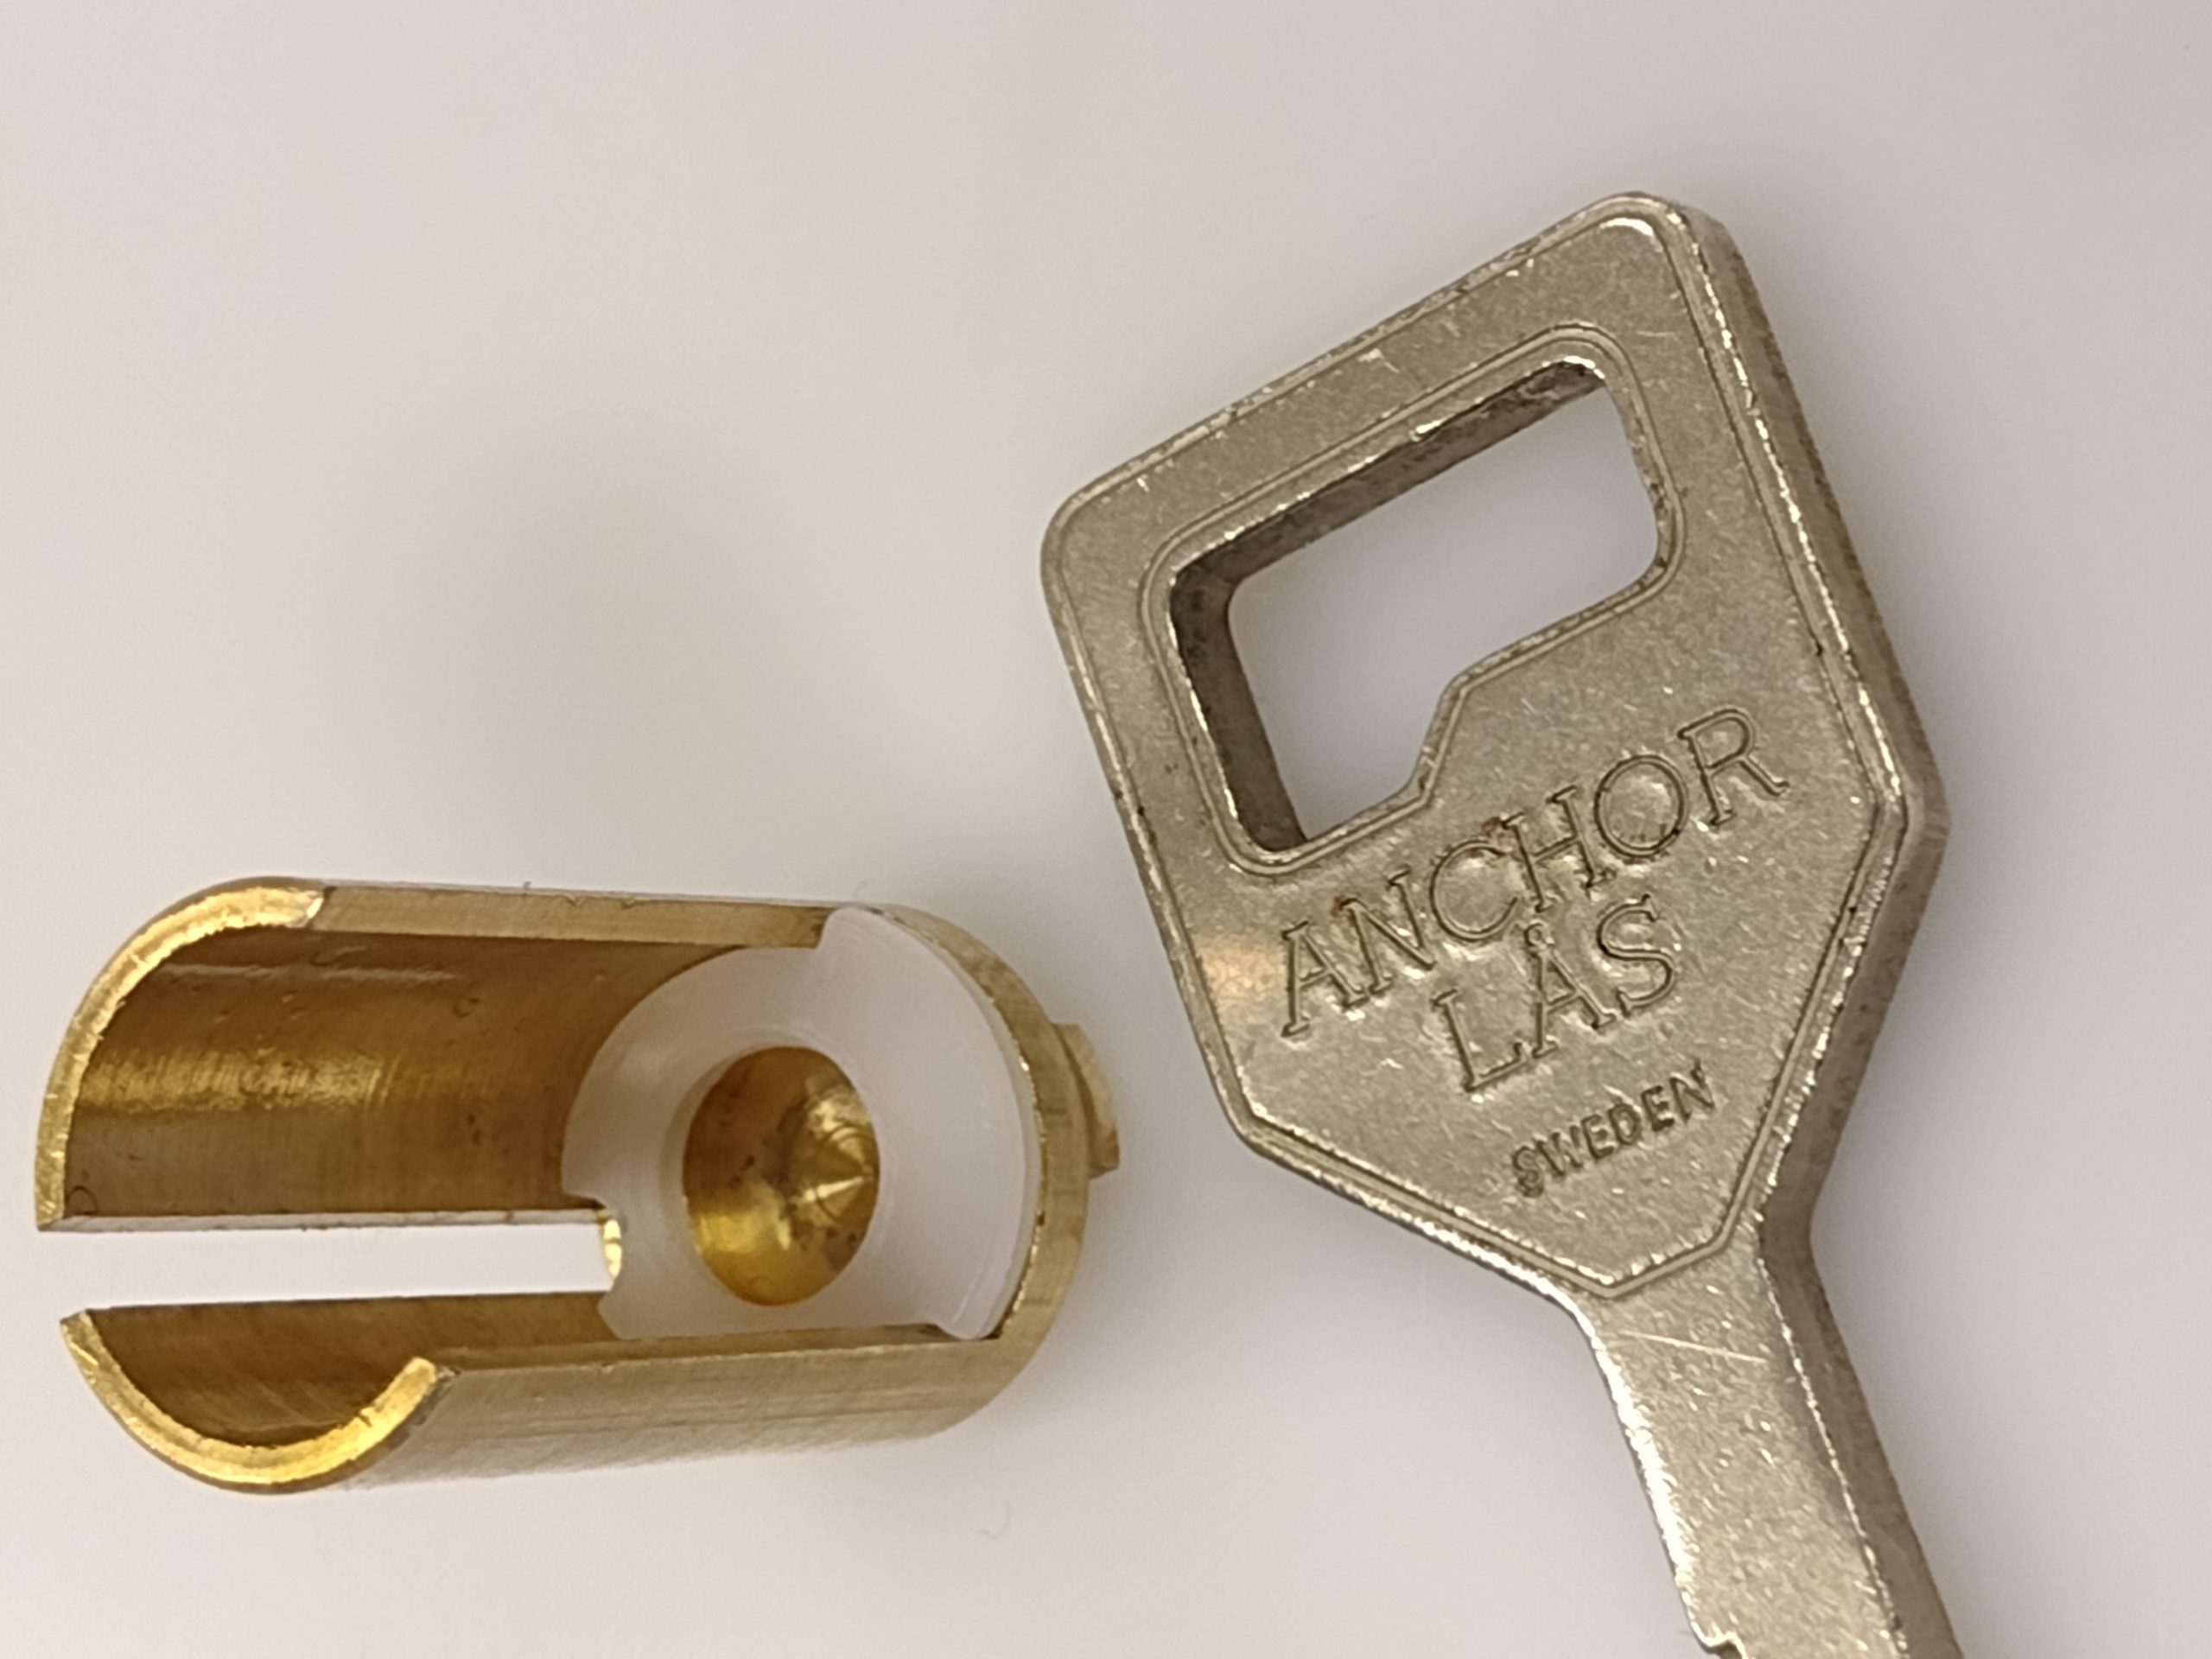
Laser cutters are amazing machines, and I’m always excited when finding a new use for the tool. My go-to materials are acrylic, Delrin, and the occasional sheets of triplex. While, acrylic isn’t the most robust, it makes for great visualizations. POM (Delrin and Acetal are the brandnames) is an engineering plastic great for key gauges and other locksport tools. It also so happens to work great for lock replacement parts.
To get the part the correct size, we need to compensate for the kerf (laser cut width). While it can be measured, I chose to do trial and error: change the kerf compensation in the Lightburn laser software and measure the parts with a micrometer. After I was satisfied, I ran a small batch of a hundred rings, just so there are enough to play with for me and other community members.
At the hackerspace, we actively share lessons learned. For this one, I’ve found putting a sacrificial material below the Delrin greatly improved the cut quality. Half the power and speed, with two passes also worked well. The laser parameters are saved to the Bitlair wiki for others to use in the future.
Back home, I’ve assembled the lock with the spacers and found them to be slightly too large. The sandpaper took off the difference quite easily. After reassembly, the lock works great with the key and it’s hard to distinguish from a lock with a complete disc pack. (I see options for a trick lock).
I’m looking forward to picking it, and will have others play with the lock as well to gather feedback on how the parts affects picking. As I expect the Delrin spacer have noticeably more friction than metal on metal, it will likely be beneficial to keep code discs in between original spacers. Furthermore, the lock works fine without a shackle and won’t brick on you without one.
I’ve picked the lock a few times with six random code discs. This is nine spacers of 1mm thick, and six of each code disc and metal spacer. After which, I quickly progressed through the other configuration, and picked the unmodified lock an hour later. As the spacers are thinner than discs, I’ve used the remaining metal spacers to fill out the remaining space.
At the moment we do not have a repository of lock parts, but we will likely create one soon.
In the meantime, the script for OpenSCAD is attached below. When you create your own discs, please share them around.
// Ancher Las spacer V2.1
// 20231213 Jan-Willem CCBY4.0
// OpenSCAD 2021

// F5 render
// F6 generate
// Export as ...

$fn = 100;

projection() // make it flat
difference(){ // substract the keyhole and gate from the disc
    union(){ // create the disc
        cylinder(1.4,11.4/2,11.4/2, center = true);

        // code for a part of a circle
        // https://openhome.cc/eGossip/OpenSCAD/SectorArc.html
        radius = 13.2/2;
        angles = [35, 145];

        linear_extrude(1.4, center = true){
        points = [
            for(a = [angles[0]:1:angles[1]]) [radius * cos(a), radius * sin(a)]
        ];
            polygon(concat([[0, 0]], points));
        }
    }

    //key hole
    cylinder(1.4,7/2,7/2,, center = true);

    // gate
    translate([0,-11.5/2,0])
    cylinder(1.4,3/2,3/2, center = true);
}Copyright CCBY4.0 Jan-Willem Markus, Toool NL