
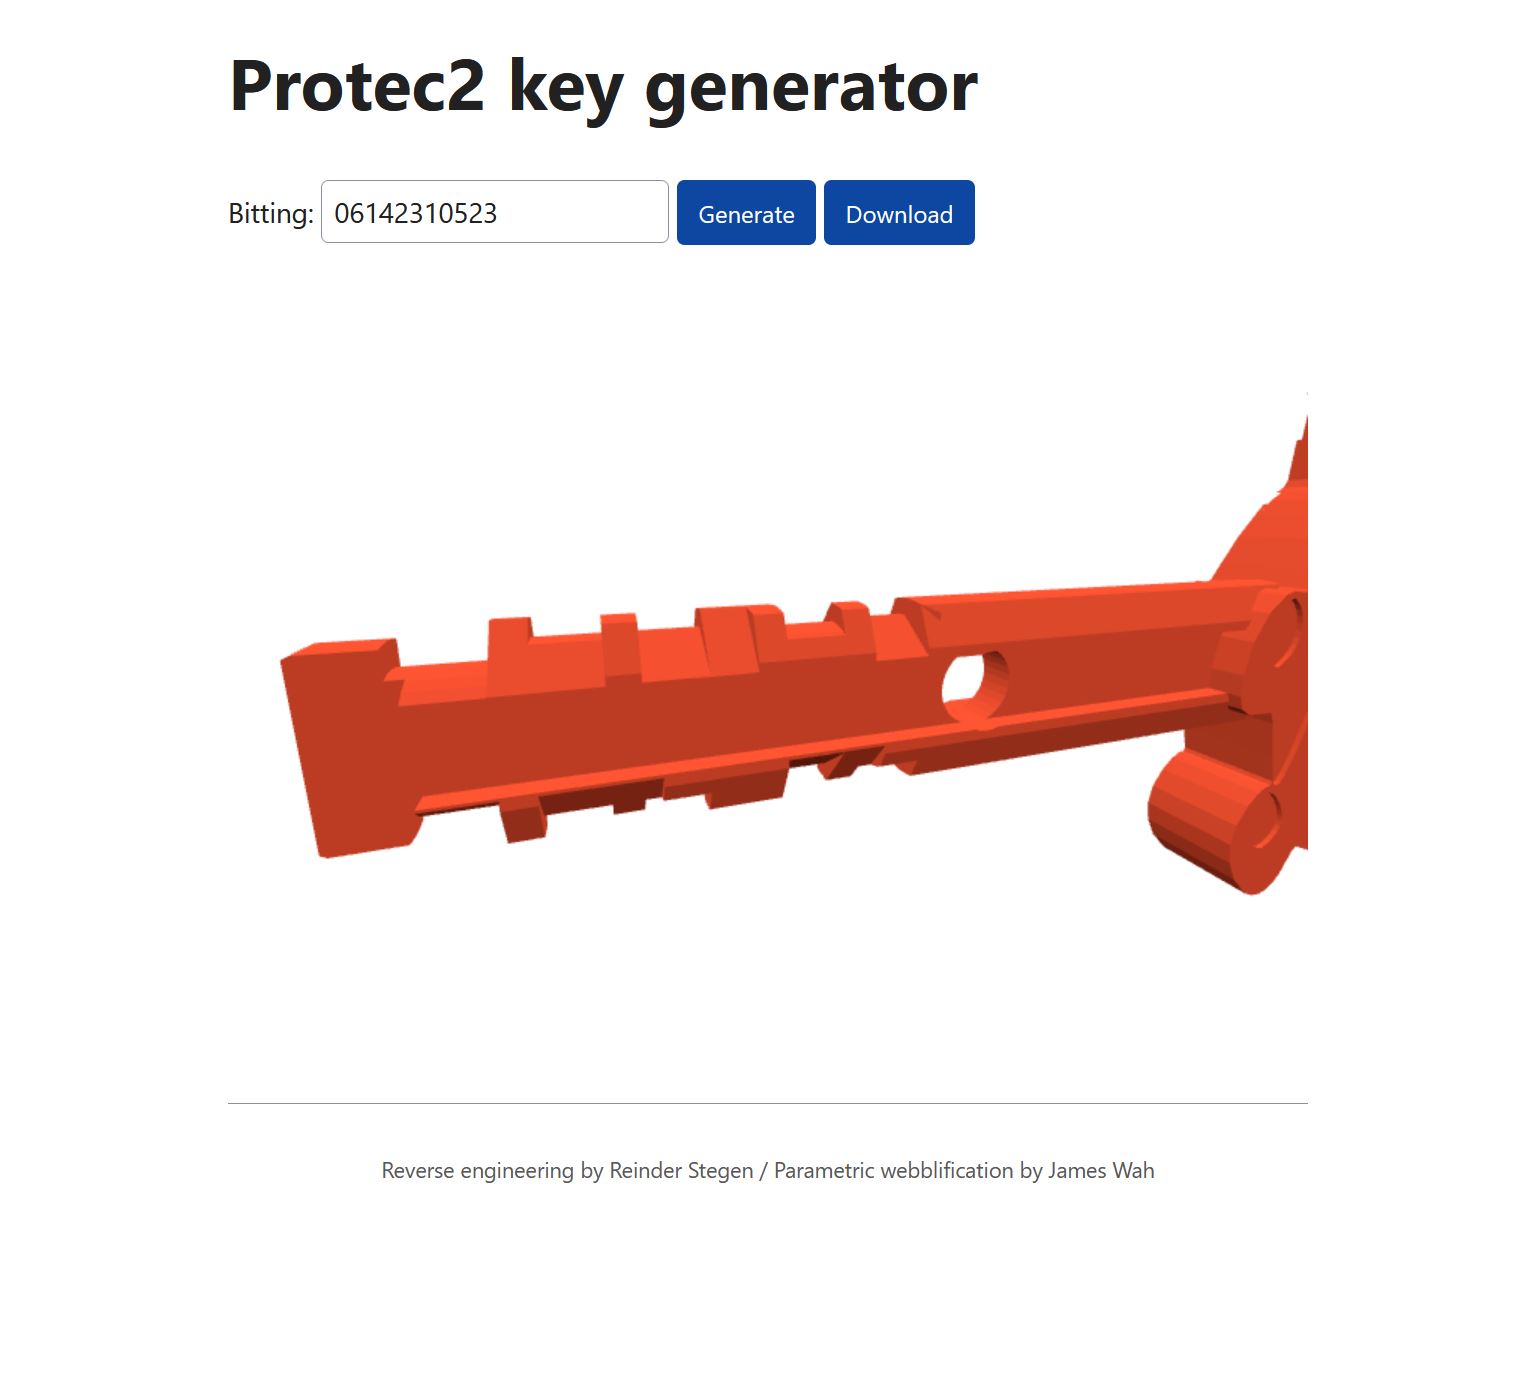
This story is based on the work from Reinder Stegen, in which the Protec2 was reverse engineered and scripts for parametric key generation are written. Reinder worked with James Wah for the parametric webblification. As in, a free to use online webgenerator for all your Protec2 key needs. To get the keys to the real world, one just needs a good 3D printer.
3D printing keys has been around for at least a decade, from 3D printing scrips like AutoKey3D by Christian Holler to printing many high security keys. Modeling and printing keys gives unique understanding of the underlying principles of the locking mechanisms. I, myself, wouldn’t have understood Kromer protector, Bowley Rorasera, and Fichet F3D as well without modeling the keys.
While 3D printing keys can be a strong attack, the bitting of the key needs to become known to an attacker beforehand. If this attack is within your threat model, please invest into key control. I.e. to keep track of the locks and keys in your system.
The challenge
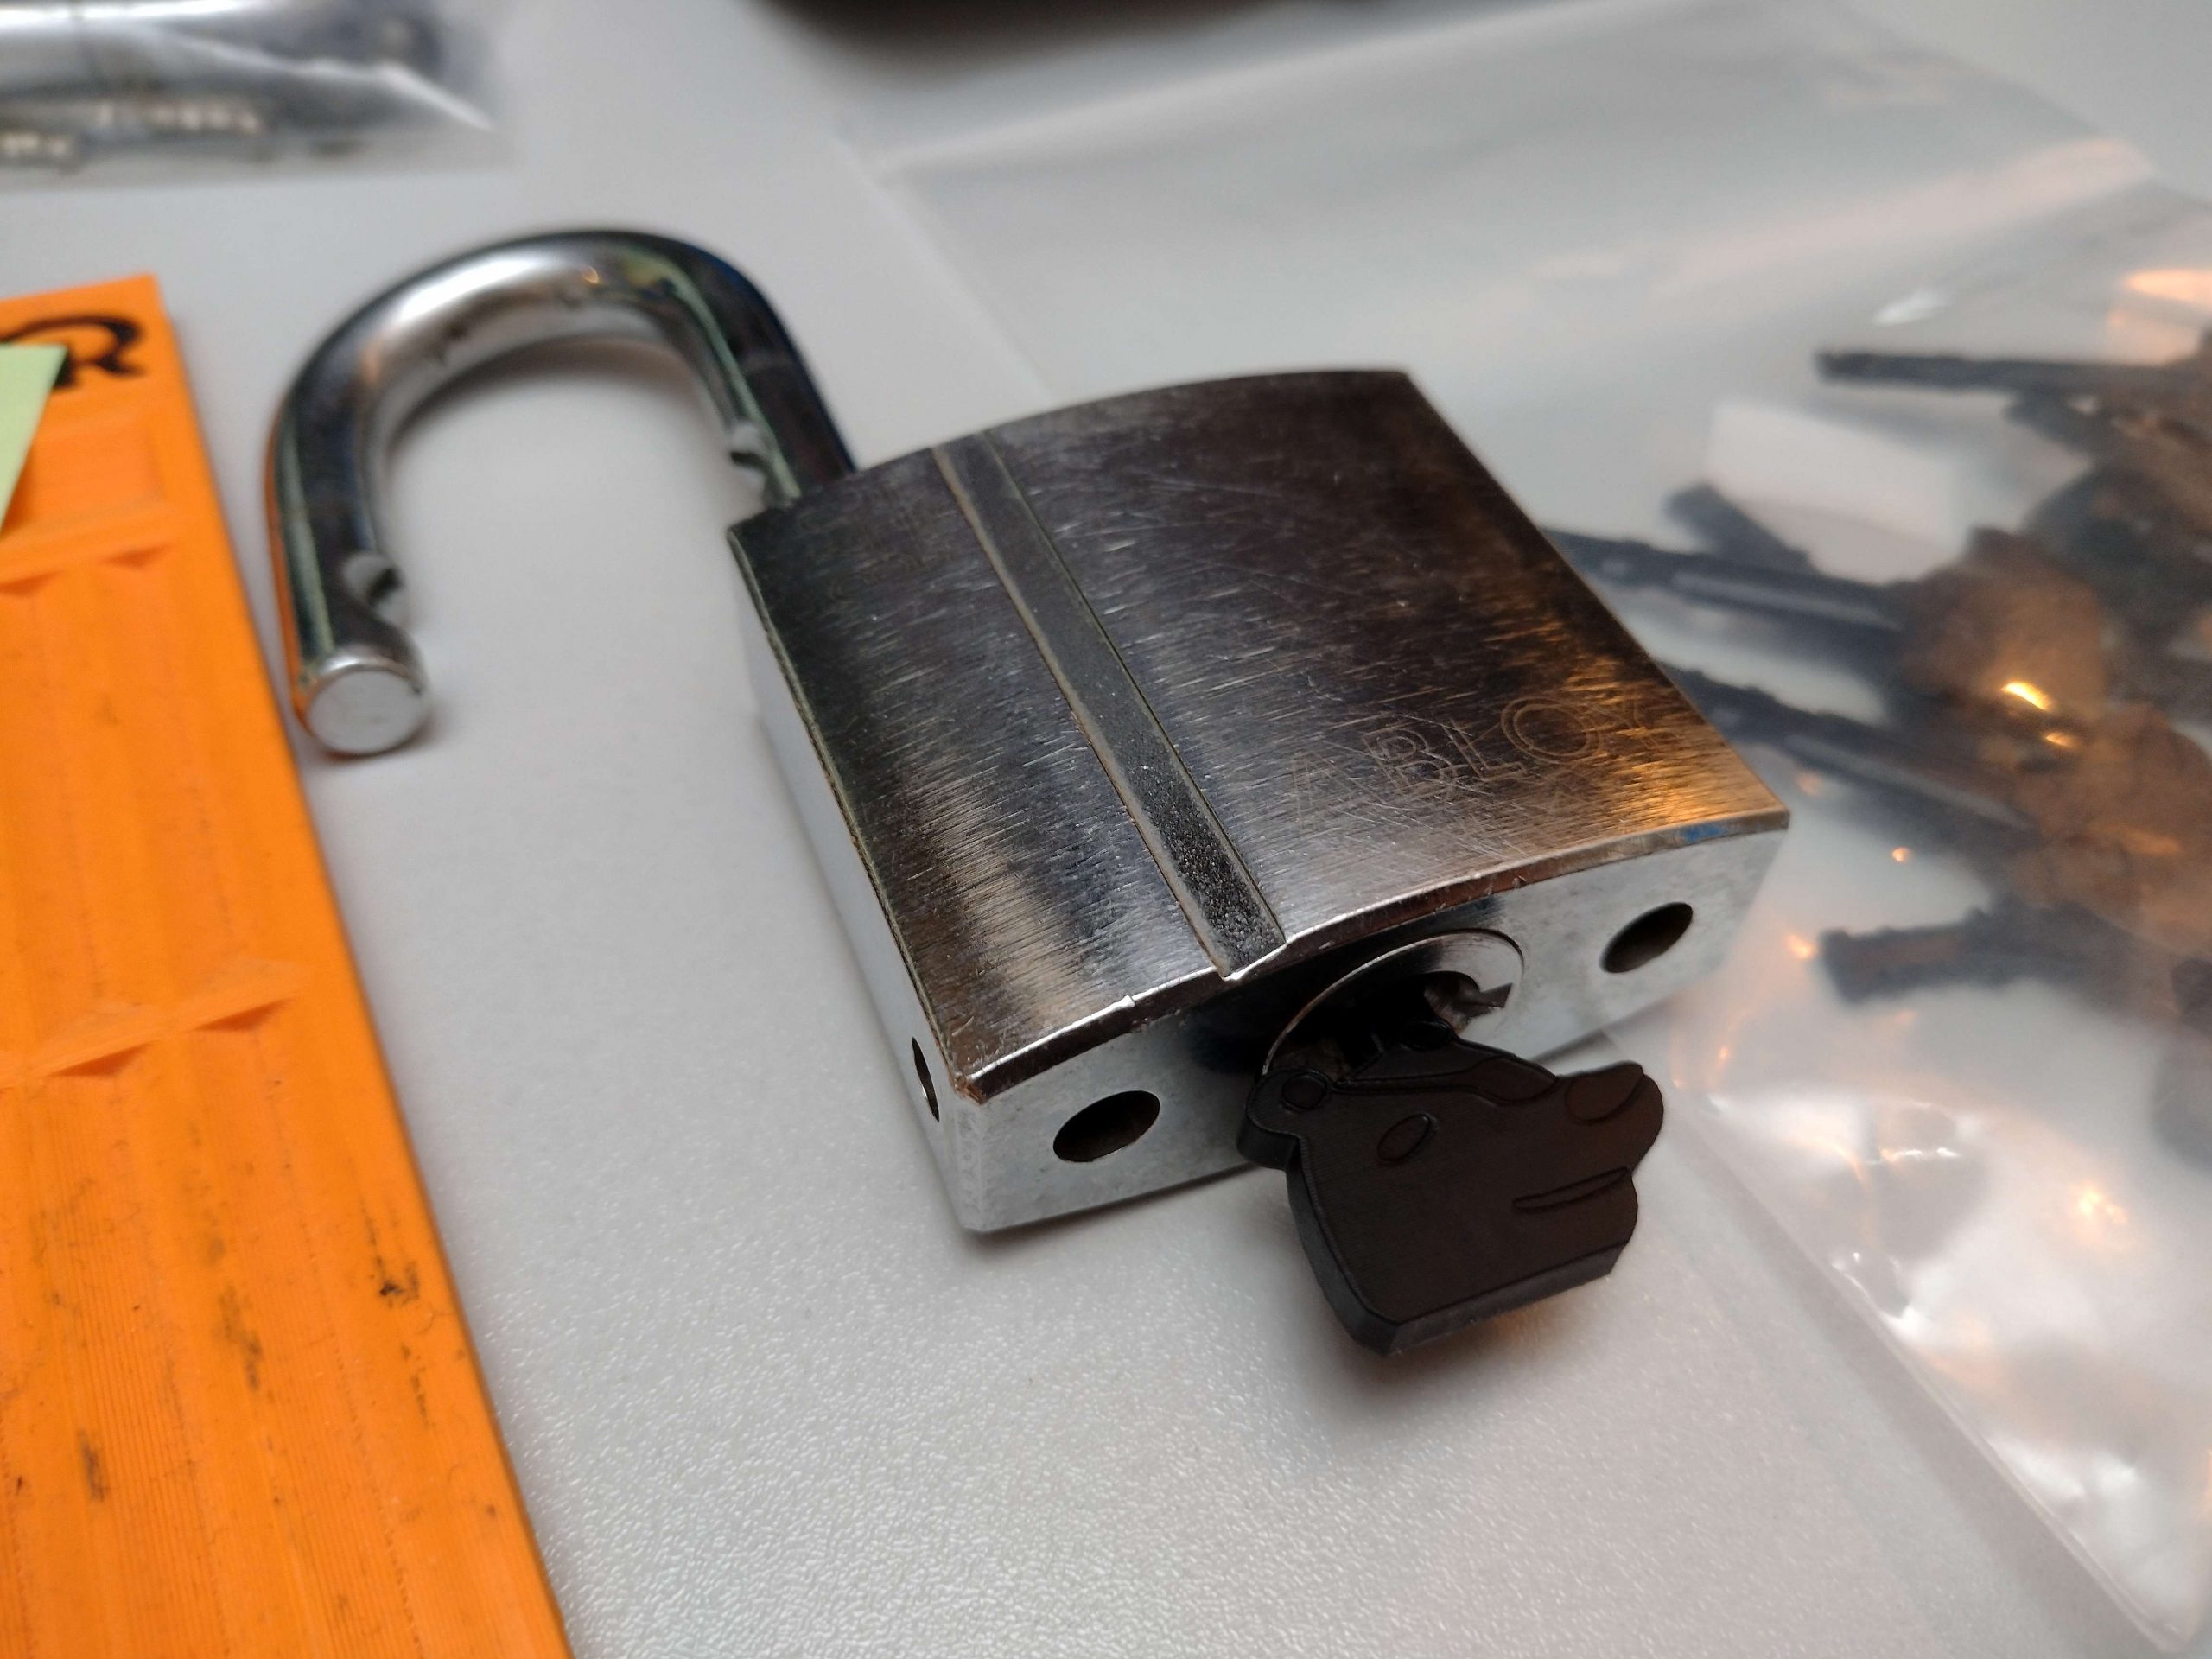
A set of nine Abloy PL340 locks caught my attention as it was sold as a lockpicking challenge. As in, the seller didn’t have the correct keys, but included keys from the same series. Where the challenge is to open the locks. I chose to work with Reinder to decode one, and 3D print the keys for the rest of the set.
The PL340 are beefy padlocks of around 55*50*25mm, very much excess for any normal consumer applications. While we like them for securing Peli cases, they’ll work fine on your motorcycle or shipping container as well.
The key making process started by decoding the several non-working keys in the package keys. While five cuts were shared between the keys, it wasn’t enough to determine what the keys should be. One lock was disassembled and the disks were decoded according to the pictures in the Protec2 white paper by Han Fey. (Reinder has published a better chart on 22nd of September 2023)
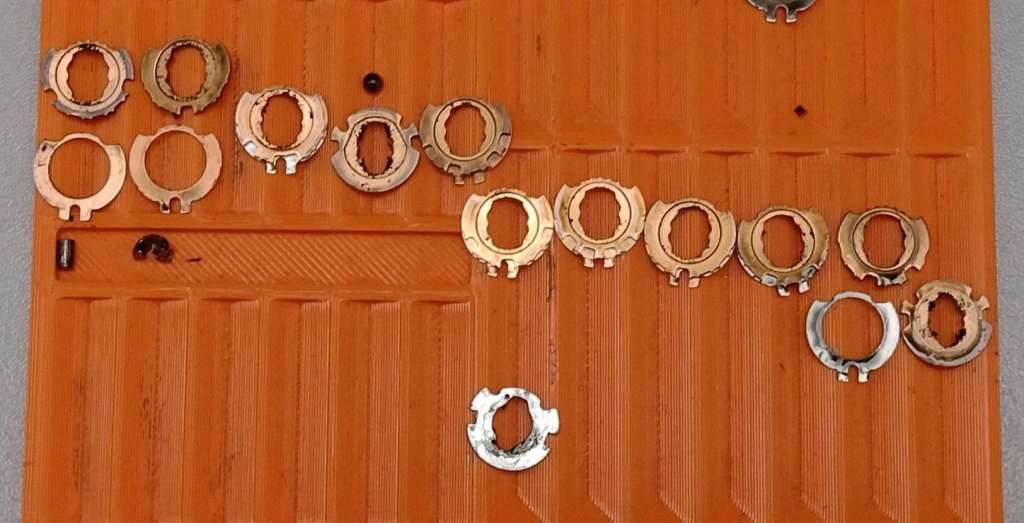
The Protec2 has eleven disks, of which the fourth and eleven are zero disks. All code disks have two true gates, except for a six with one true gate. We see four disks with more than two true gates, which means they are mastered and accept a key with either cuts on it.
I’ve opted to use Python to create a list of all possible keys in this system instead of using pen and paper. After I had a working solution with many nested loops, I found the function product in the itertools package to generate a list of solutions in fewer lines of code. The code below generates and prints the valid keys from a list of lists with possible bittings.
# bitting_mks.py
# Quick script to get all possible keys from a single master keyed lock.
# 20230730 Jan-Willem CCBY4.0 Toool NL

import itertools

# The key codes is a list of list of ascii characters.
key_code = [['0'],['5'],['4'],['6'],['3','5'],['1','6'],['1','3'],['0'],['5','6'],['6'],['1']]
keys = list(itertools.product(*key_code))

for key in keys:
	print("".join(key))
This script should work for most key systems. For me, it generated the sixteen valid keys of this master keyed system. With Reinder’s online generator, I’ve generated the files. As I lack a printer capable of printing these, I used the 3D printing service from JLCPCB. Reinder had good experience with Imagine Black, so that was my starting point as well.
Reinder’s tool for generating the keys isn’t widely shared, yet. He has shared a video in which several more 3D printed keys are showcased, including a few which work better than the online generated keys. Several other scripts (By NVX, and bgrydon) are available online, but they don’t work as well as this work.
Uploading the models it to the service was quite tedious. Not only does the material, finish, and customs description need to be filled in for each print, QA was quite picky, and rejected the files several times. After some touch ups in Meshmixer, the keys are ordered. 3D printing keys was very affordable.
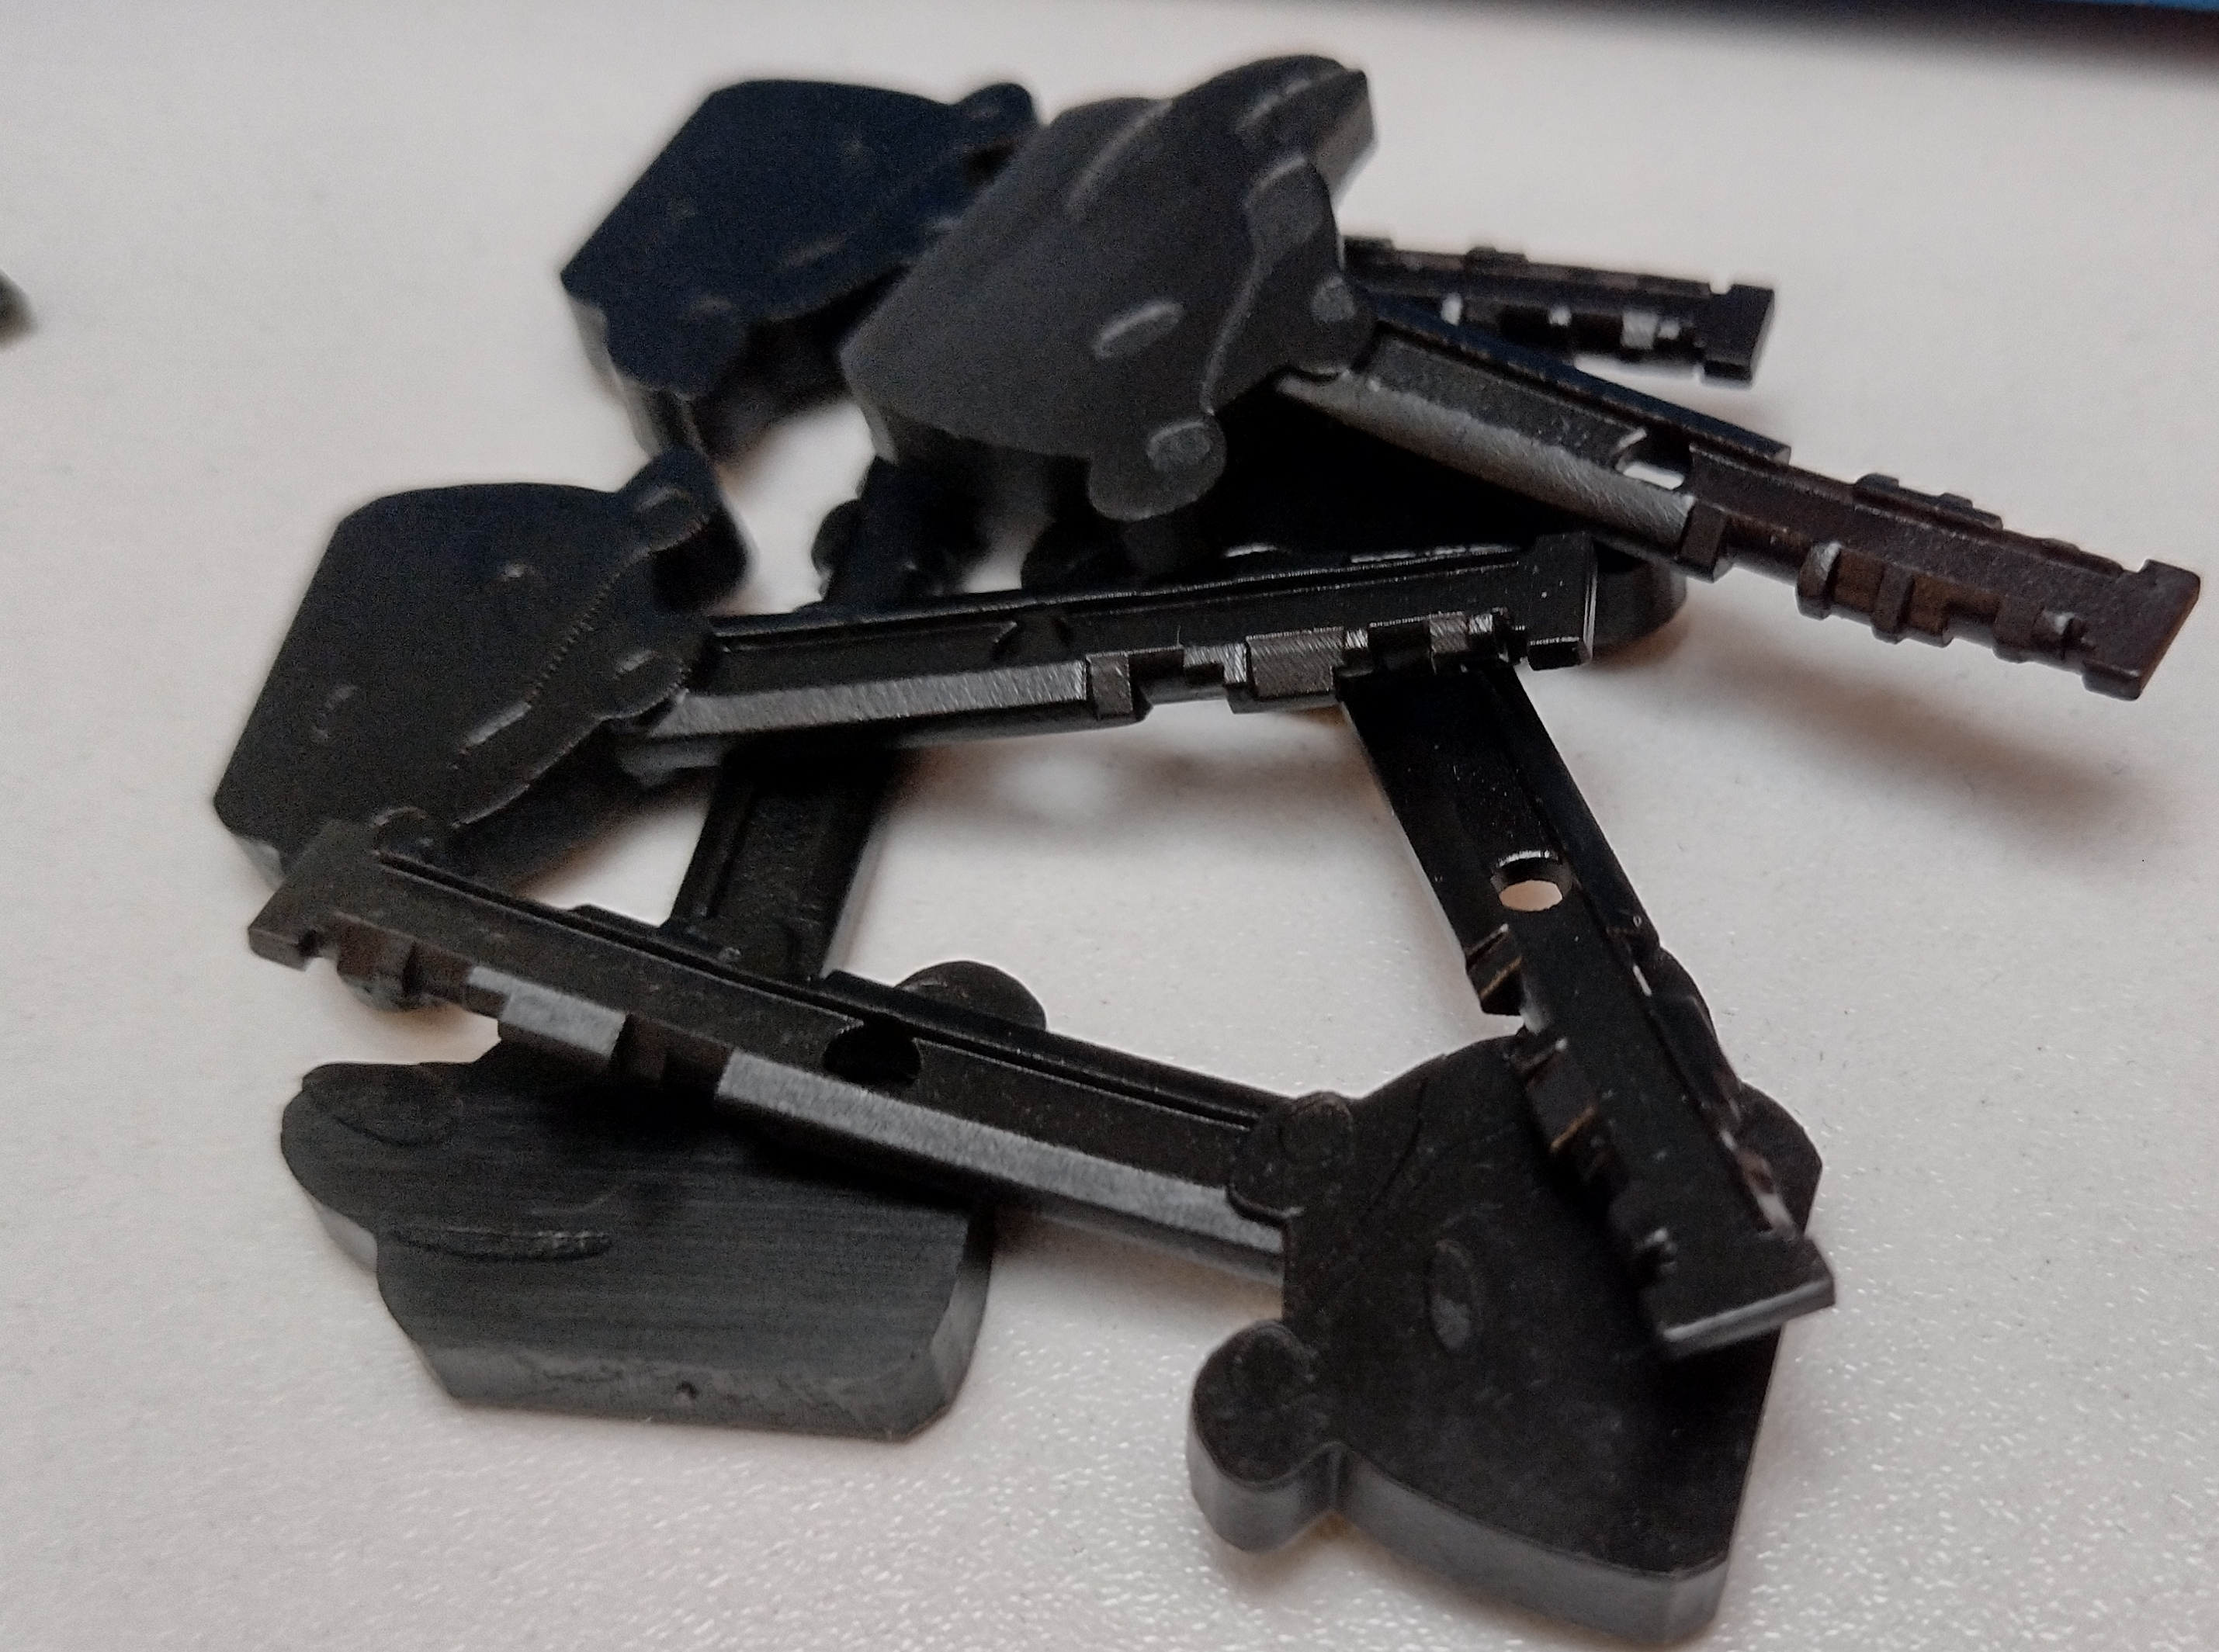
The prints came in after a couple of weeks and look great. As the print doesn’t have a captive ball bearing, I’ve removed one from a non-functioning key. Sadly, none of the keys worked of the first print run. After double-checking the data, I’ve found a translation mistake. One disk was flipped in the picture, where a disk five becomes a three.
After going through the process a second time, the keys opened the lock I decoded. Possibly a bit more surprising, two keys worked on all other locks as well. So these are the master keys of a system bigger than these nine locks.
While it’s a great success, and defeating this system with 3D printing, I think we can do much more with this locking system. I’ll likely revisit the work of Matt Smith, to attempt to pick it, or at least try to find a better way of decoding the locks.
To settle one curiosity, I’ve commissioned new prints generated by Reinder in several materials. These have a captive ball. From left to right, we have: Imagine black, 9000R Resin, 8228 Resin, 8001 Resin, 3201PA-F Nylon, 316L Stainless.
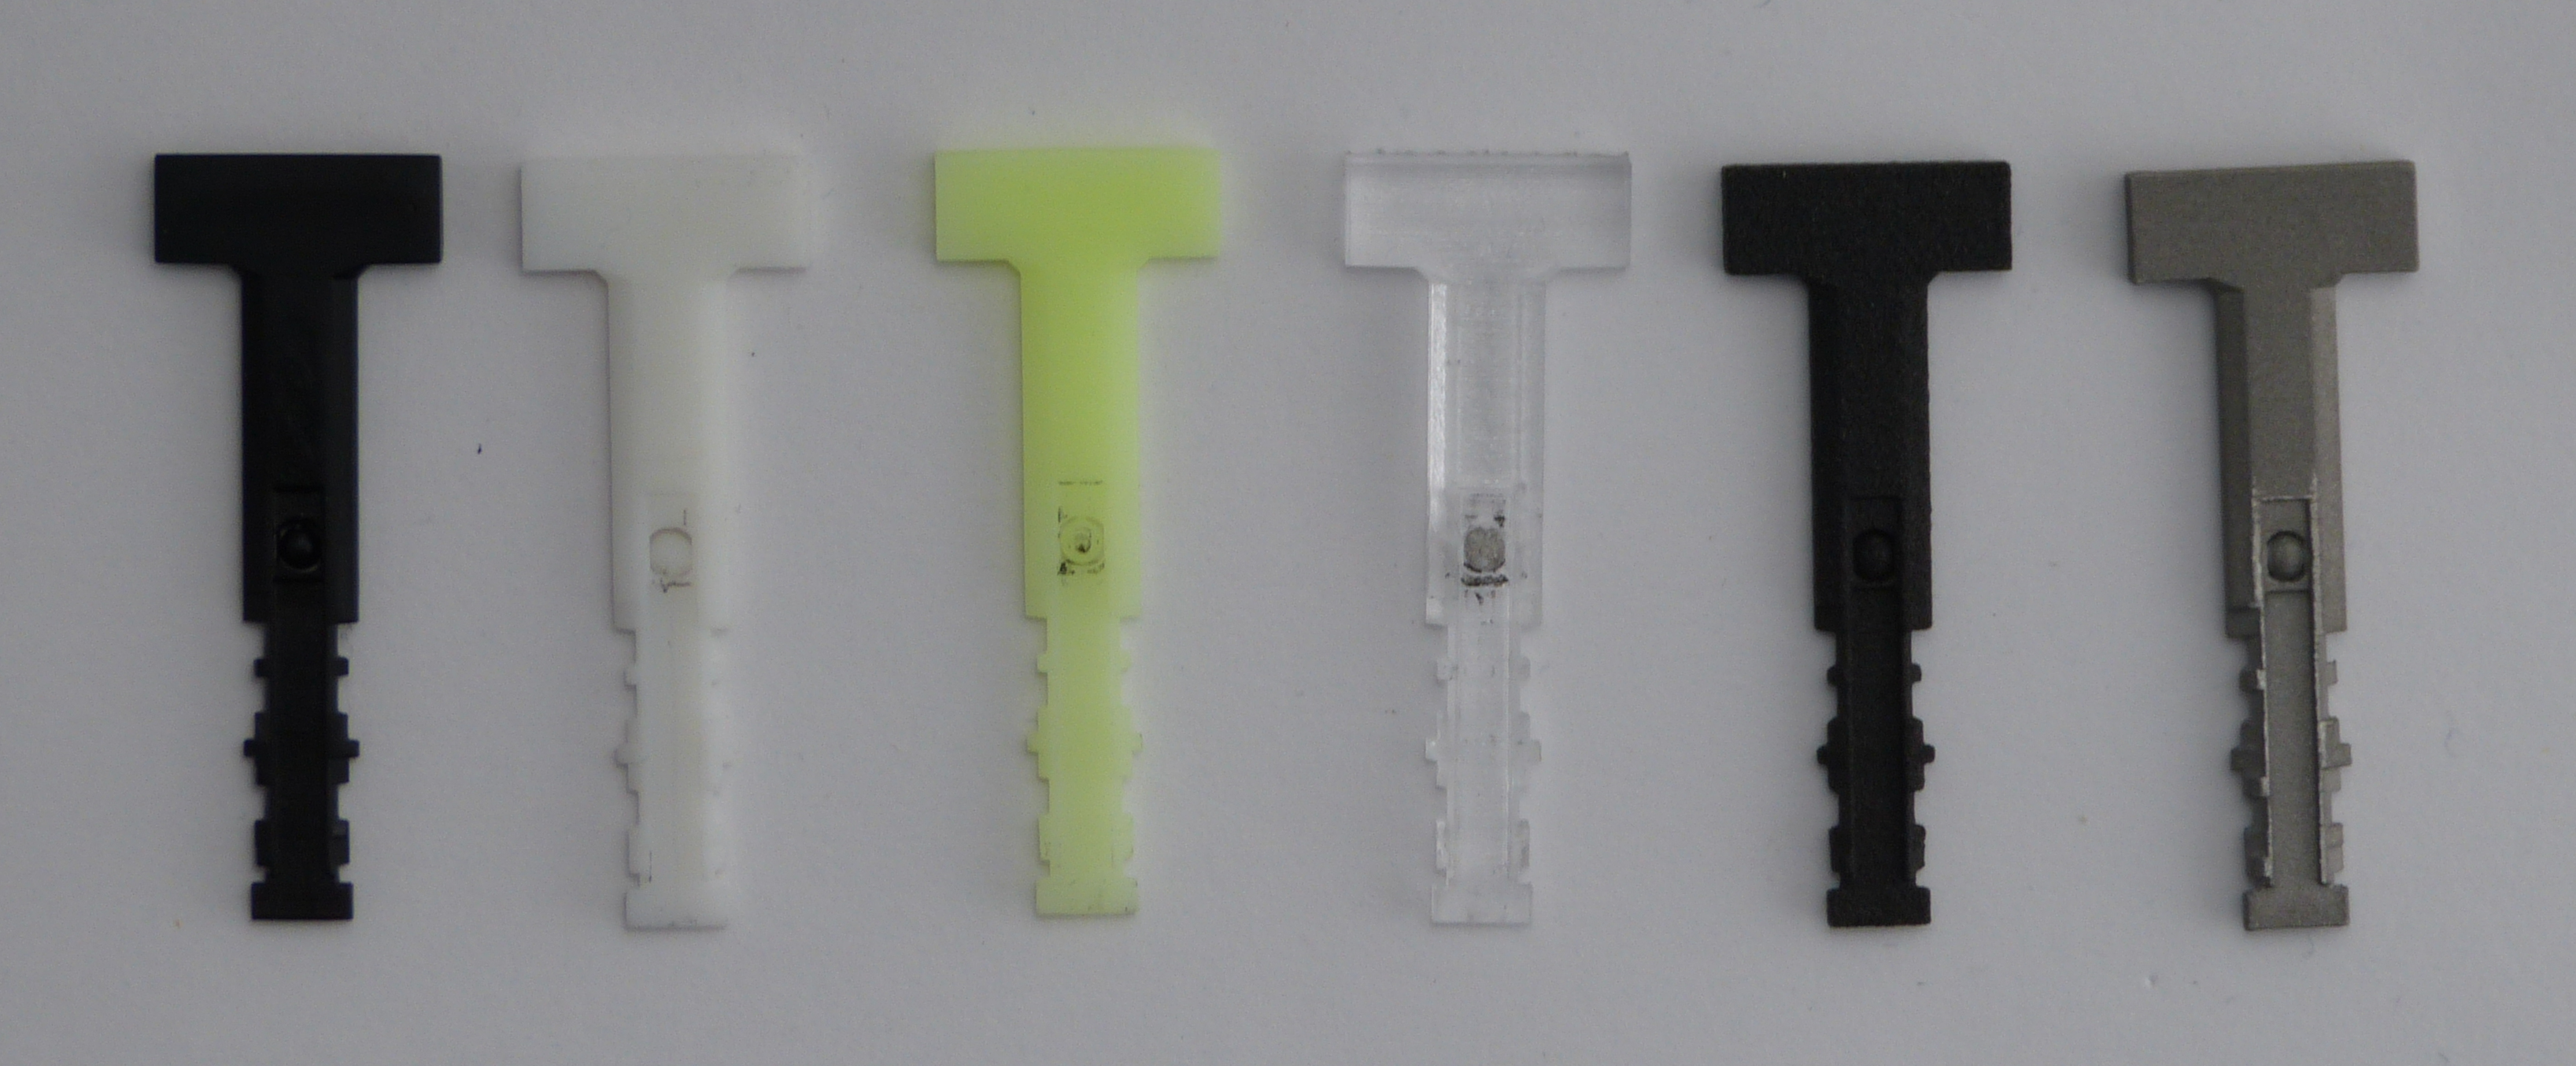
All the plastic keys were dimensionally correct and opened the lock. Of course, the engineering resins work much smoother and are generally stronger. The 8228 seems to be very good, except for the ugly color 🙂
So, what about the metal key? While it is amazing we can have these parts fabricated for €8 per key, the dimensions aren’t there yet. The key is slightly oversized and doesn’t fit the keyway. Of course, you can order keys with several different scaling factors, but it’ll be expensive, whereas the resin prints work well and are relatively cheap. In the end the resin keys are around €2 each, and I’ve spent about €200 on the whole project.
While it’s exciting to ‘defeat’ Protec2 locks with this attack, it’s more a showcase of skill and dedication of people in the locksport community. Thanks, Reinder and James, for allowing me to use this work.
This text and the pictures are CCBY4.0 Jan-Willem Markus, Toool Blackbag.
The copyright of the key generator is with Reinder Stegen and James Wah.